Sort by Category
- May 2026
- March 2026
- December 2025
- November 2025
- October 2025
- September 2025
- August 2025
- June 2025
- August 2024
- July 2024
- June 2024
- May 2024
- February 2024
- January 2024
- December 2023
- November 2023
- October 2023
- September 2023
- August 2023
- July 2023
- March 2023
- February 2023
- January 2023
- December 2022
- November 2022
- October 2022
- September 2022
- August 2022
- June 2022
- May 2022
- April 2022
- March 2022
- February 2022
- January 2022
- December 2021
- November 2021
- October 2021
- September 2021
- August 2021
- July 2021
- June 2021
- May 2021
- April 2021
- March 2021
- February 2021
- January 2021
- December 2020
- November 2020
- October 2020
- September 2020
- August 2020
- July 2020
- June 2020
- May 2020
- April 2020
- March 2020
- February 2020
- January 2020
- December 2019
- November 2019
- October 2019
- September 2019
- August 2019
- July 2019
- June 2019
- May 2019
- April 2019
- March 2019
- February 2019
- January 2019
- December 2018
- November 2018
- October 2018
- September 2018
- August 2018
- July 2018
- June 2018
- May 2018
- April 2018
- March 2018
- February 2018
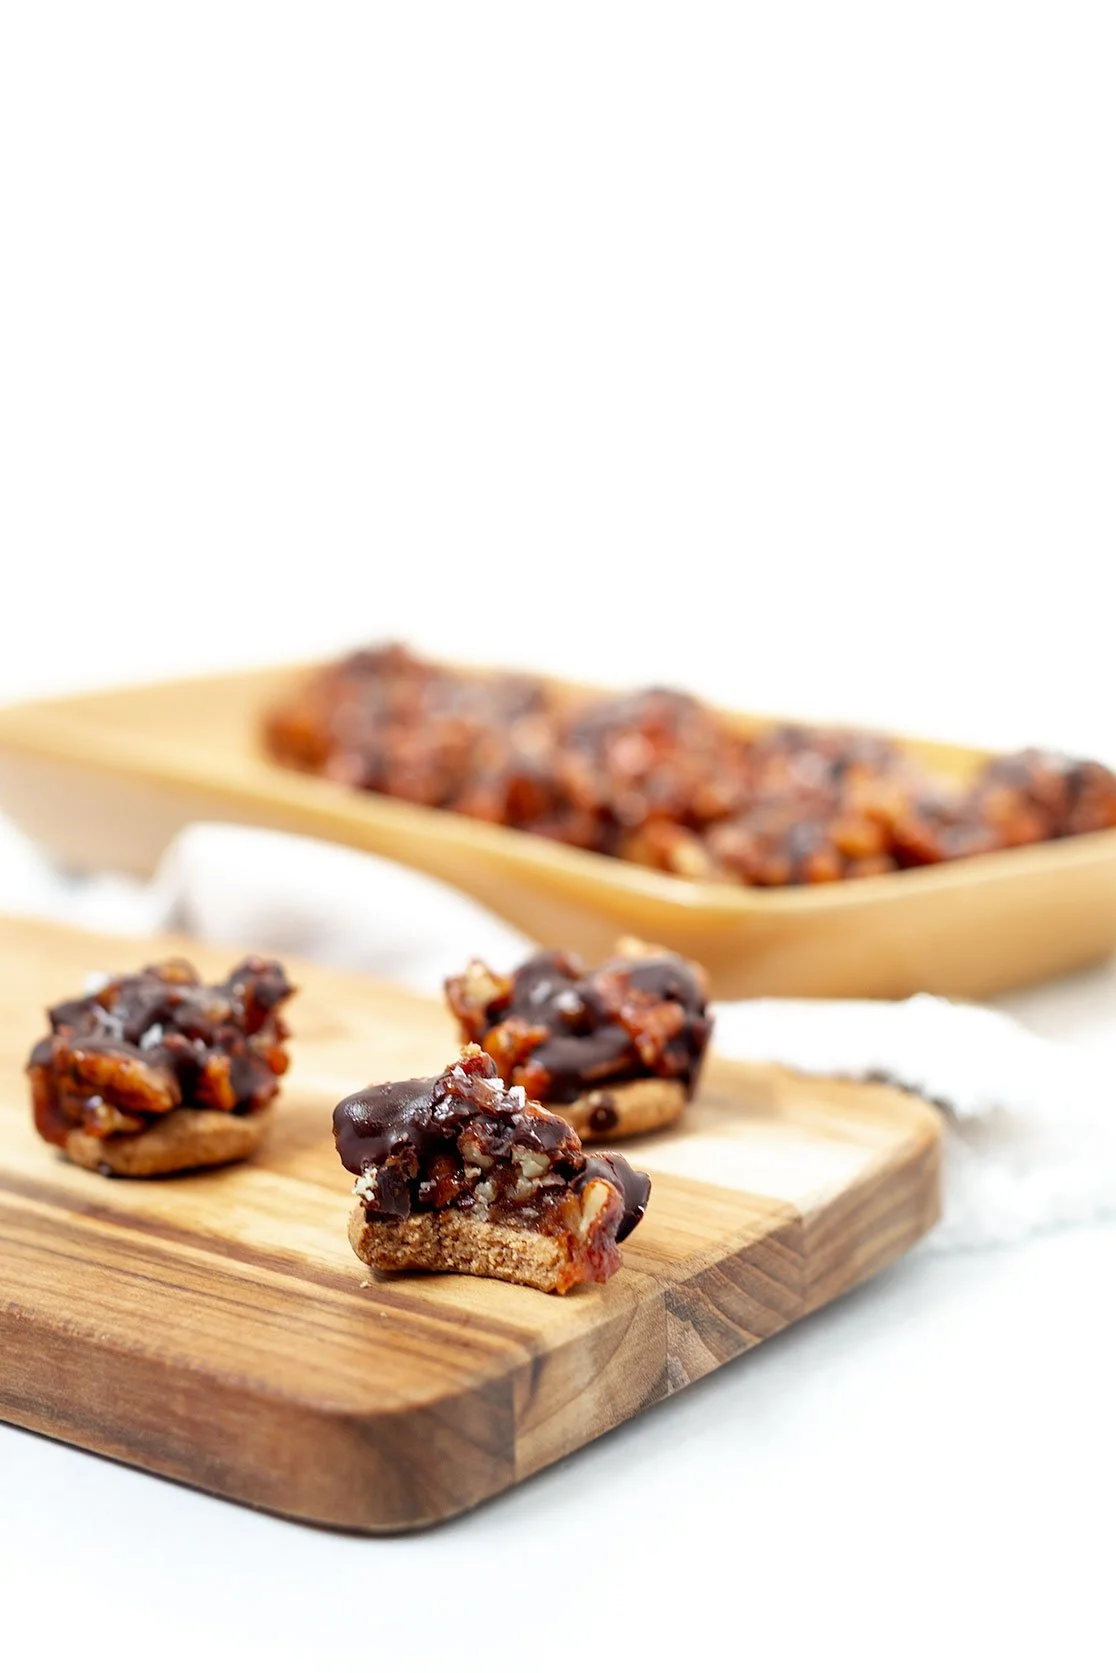
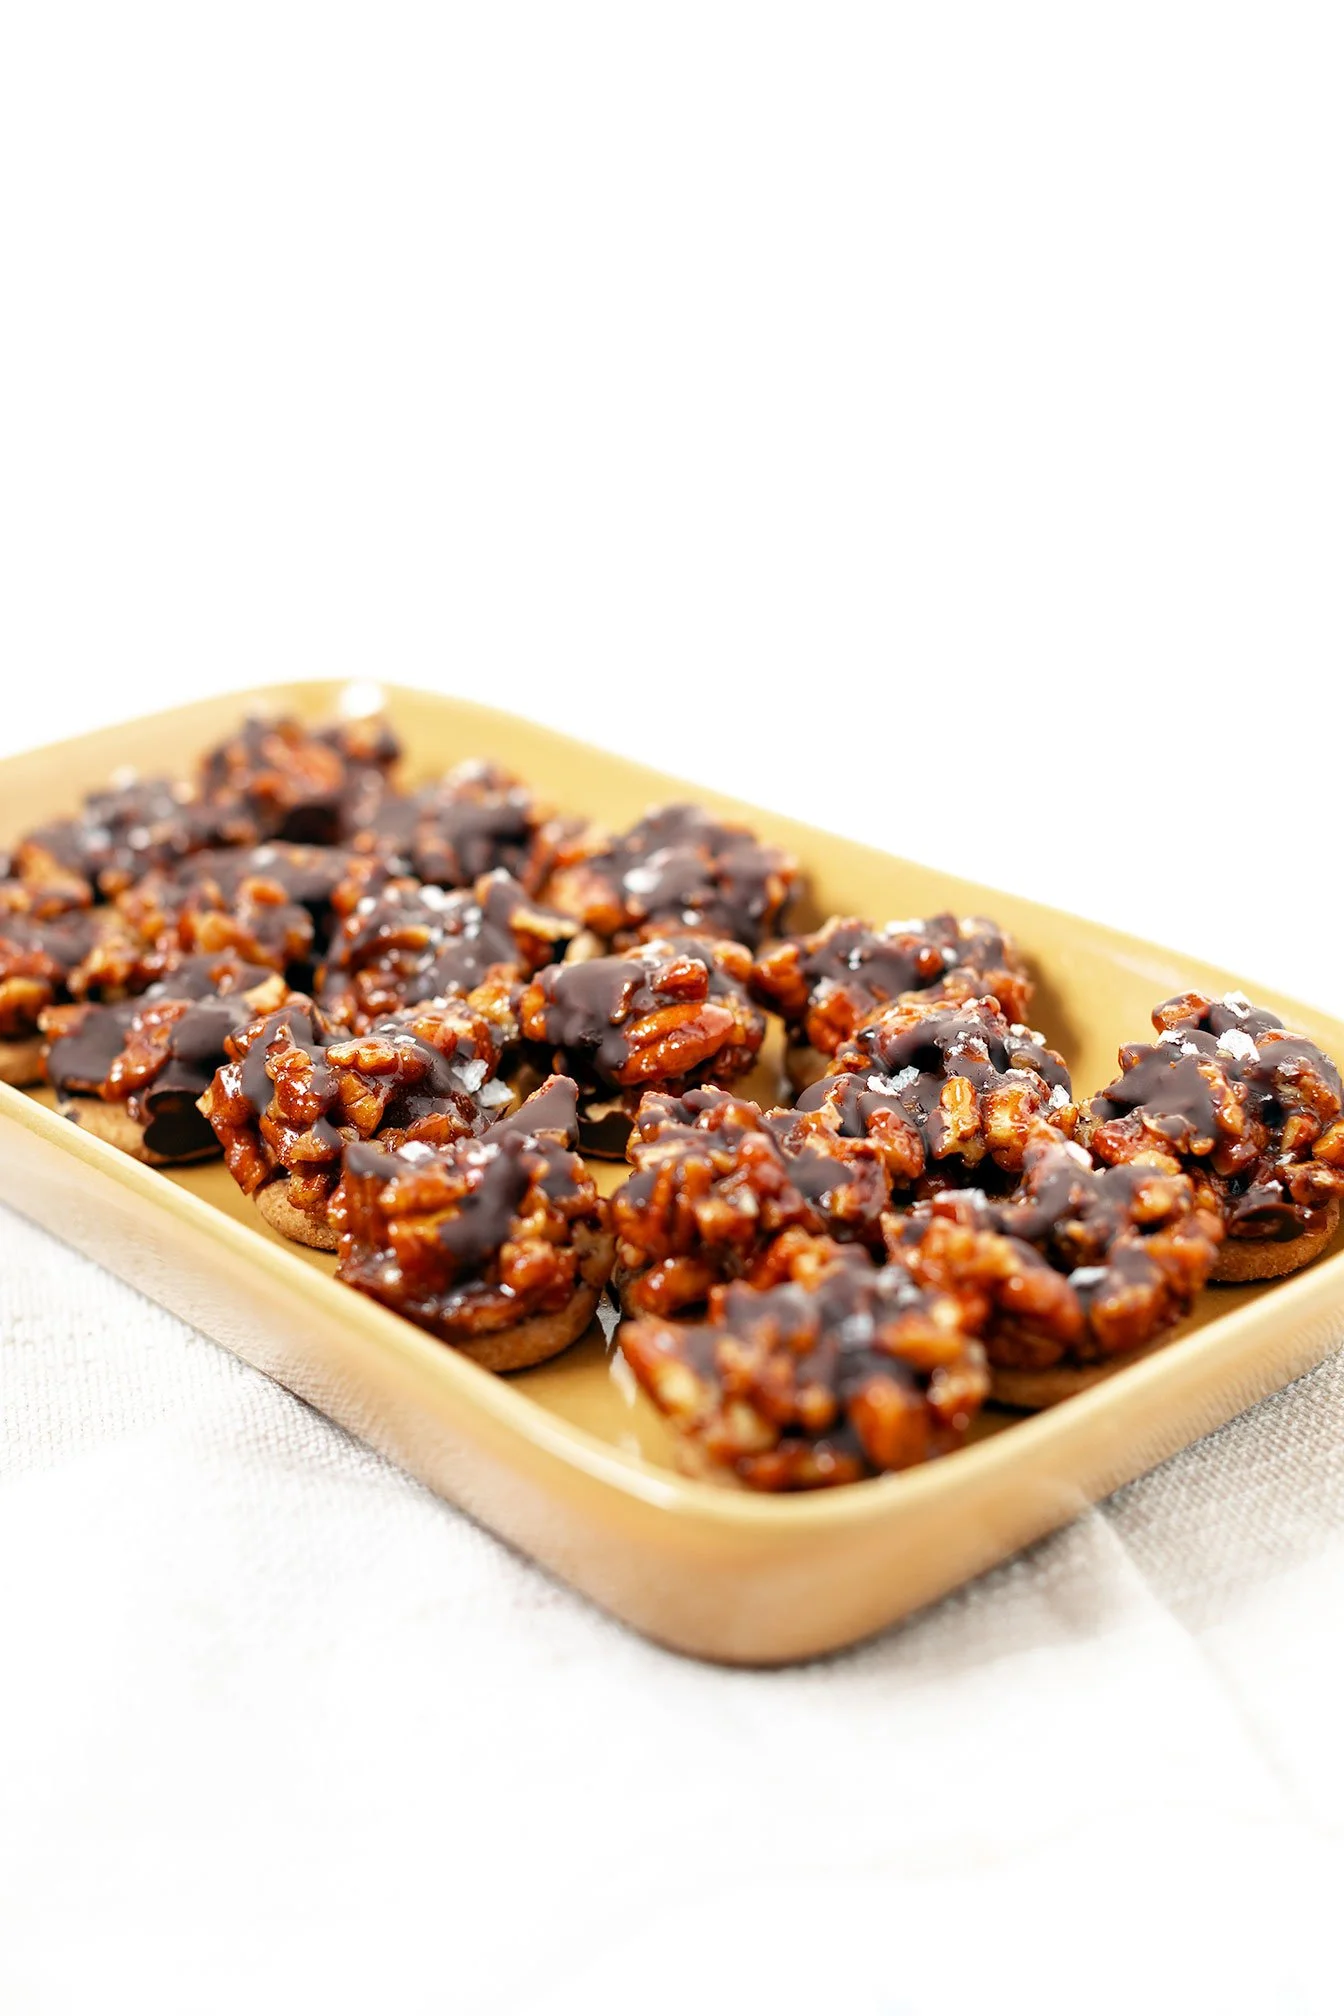
No-Bake Mini Pecan Pie Bites
These no-bake mini pecan pie cups are gluten-free, refined sugar-free, and made with Siete cookies. Quick, healthy-ish, and perfect for holiday desserts!
These no-bake mini pecan pie cups are gluten-free, refined sugar-free, and made with Siete cookies. Quick, healthy-ish, and perfect for holiday desserts!

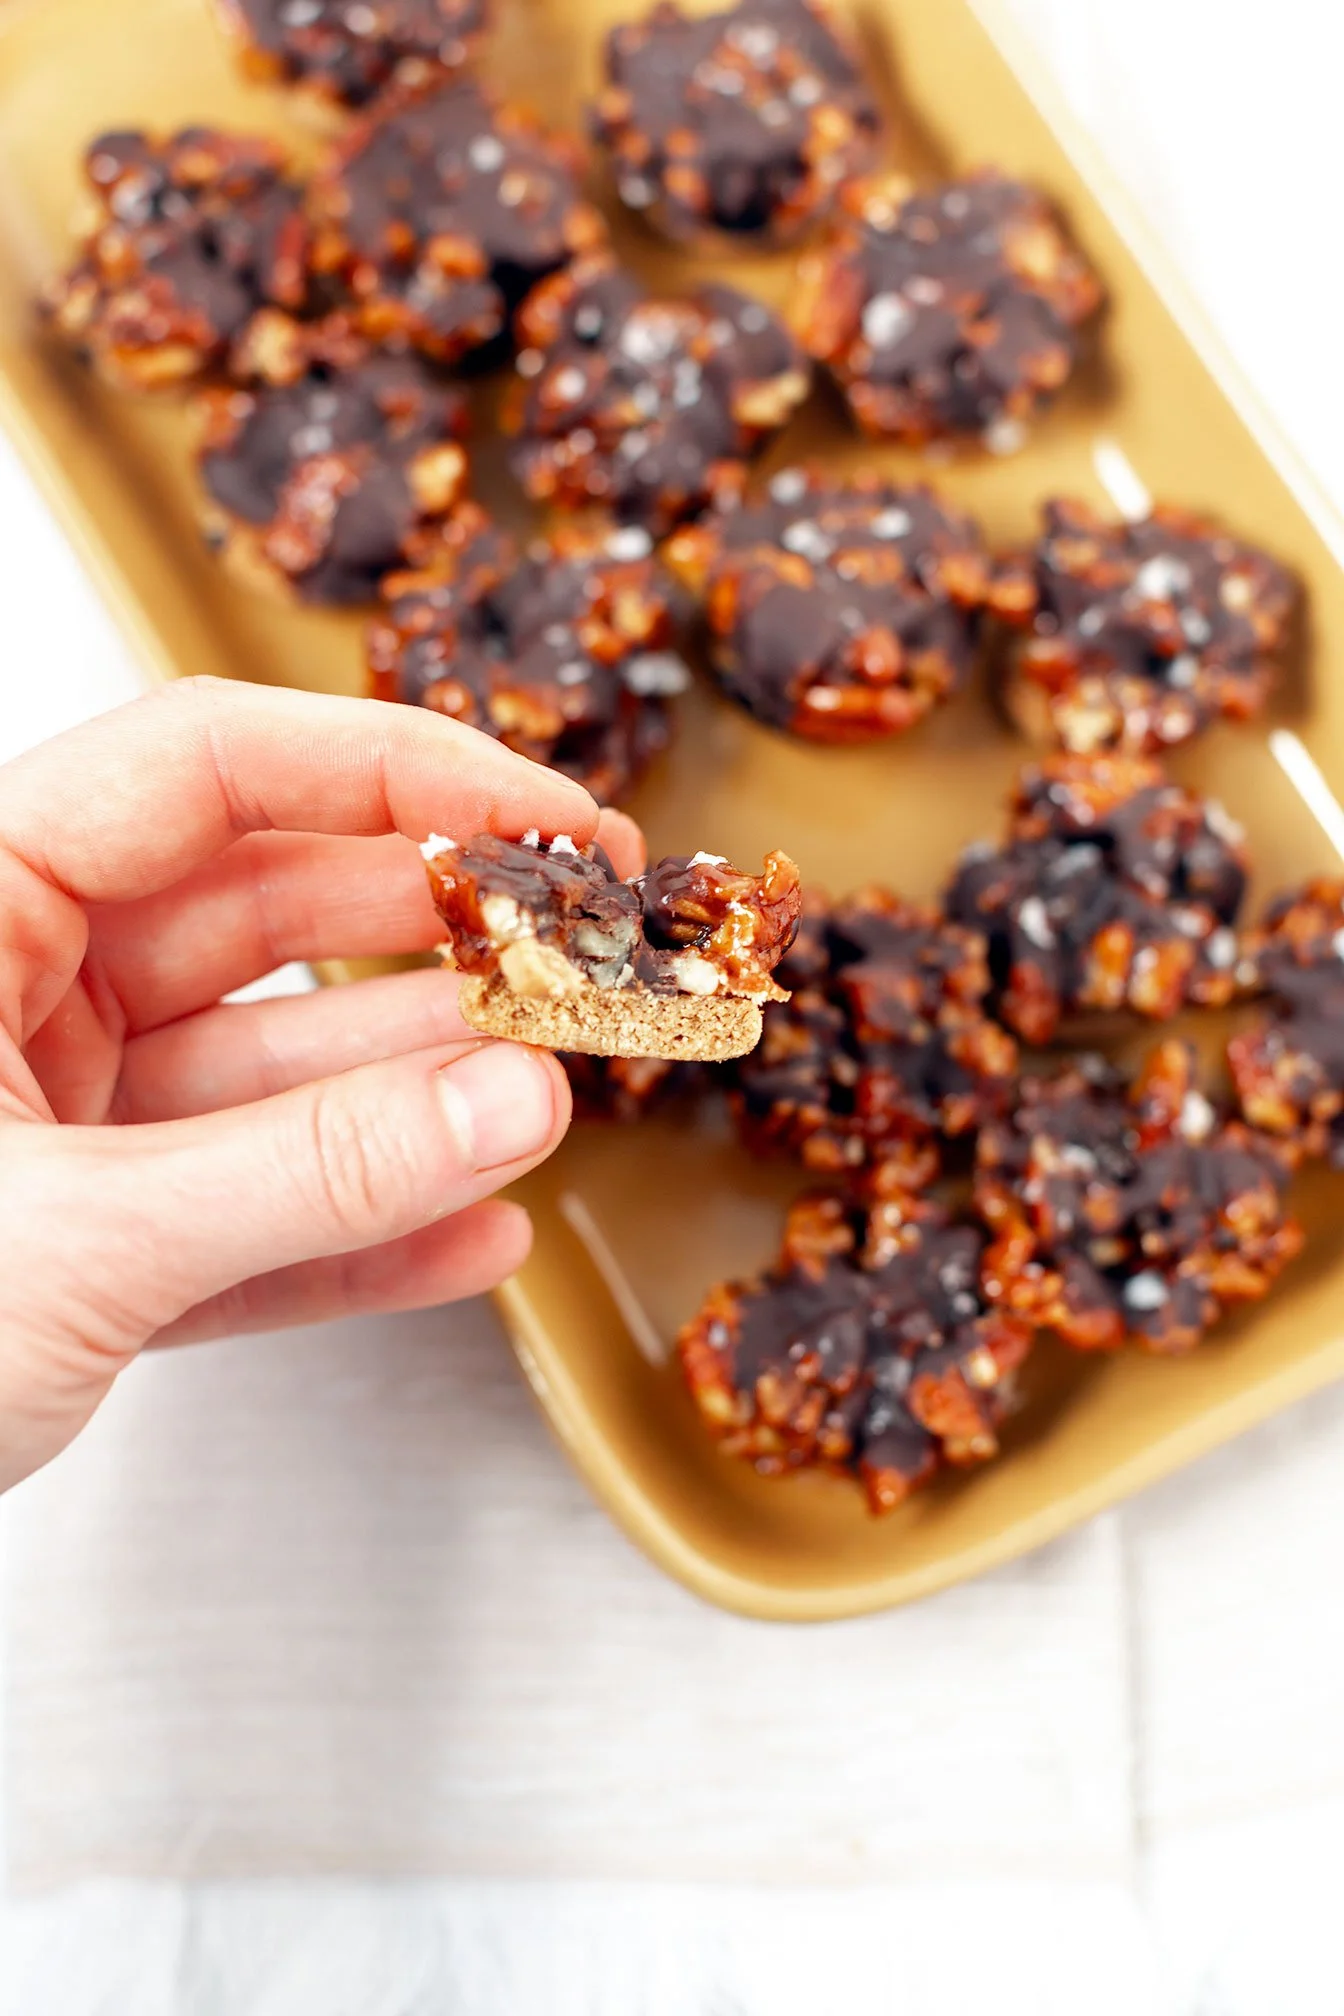
If you love pecan pie but don’t love baking crust, rolling dough, or turning your kitchen into chaos… these No-Bake Mini Pecan Pie Cups are about to become your new obsession.
They’re:
✔ gluten-free
✔ refined sugar-free (sweetened with maple + date sugar)
✔ made in under 15 minutes
✔ no crust, no oven, no fuss
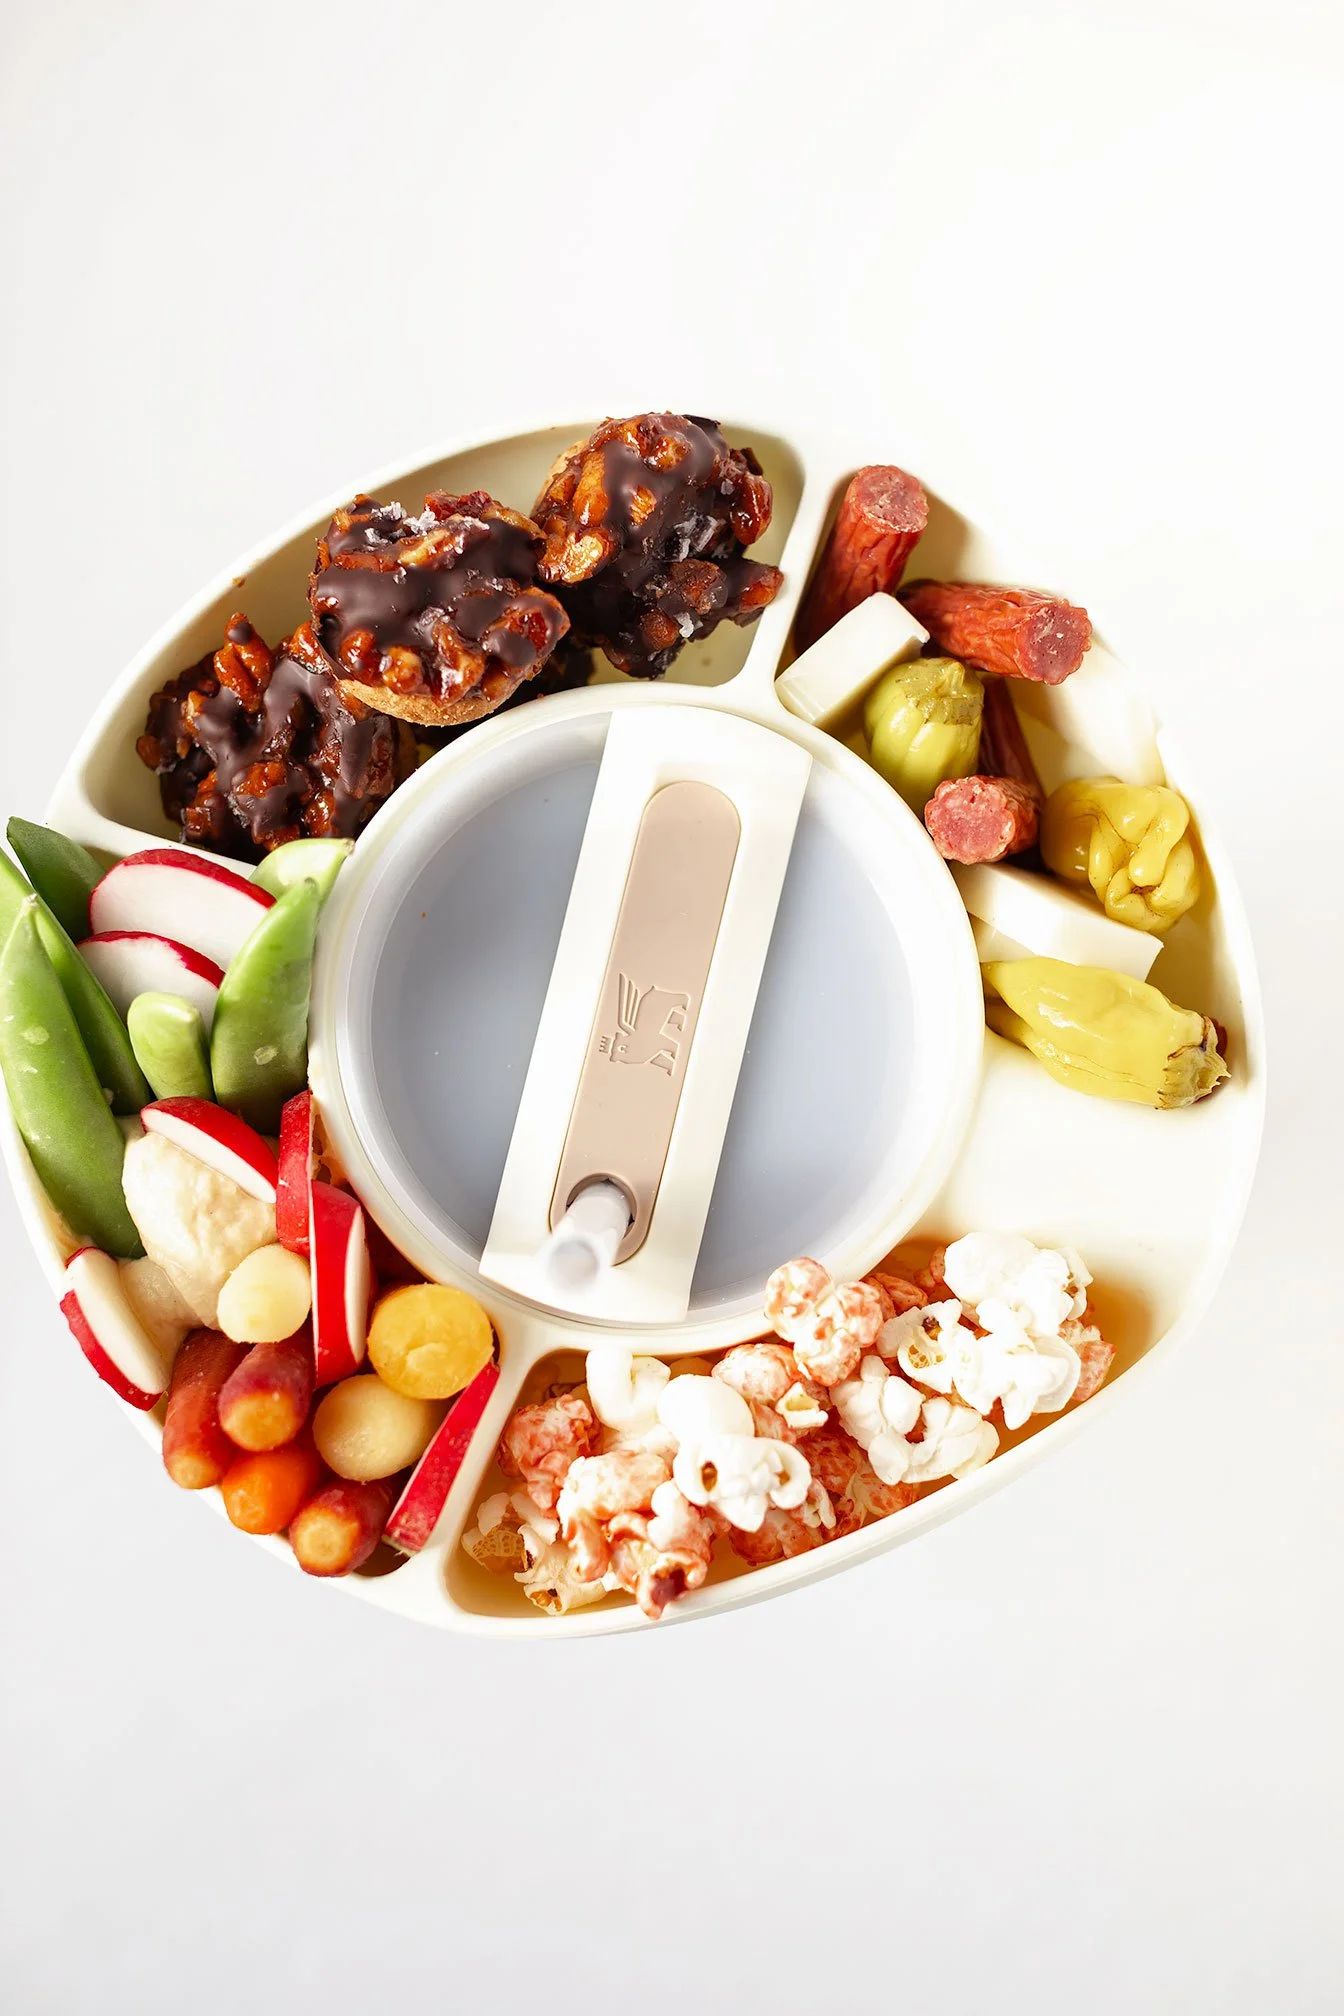
✔ perfectly sweet + salty + crunchy


Instead of a traditional crust, these mini pies use Siete Mexican Shortbread Cookies as the base — which makes them buttery, crumbly, and naturally gluten-free without any extra work from you. Top them with a drizzle of chocolate and flaky sea salt and they taste like a gourmet holiday dessert with zero effort.

⬇️ 🎥 A YouTube video tutorial below if you want to watch the full step-by-step!
Storage Instructions (Food Safety-Friendly)
Refrigerator:
Store in an airtight container for up to 7 days. Because the filling contains butter and nuts, keeping them chilled preserves freshness and prevents oil separation.
Freezer:
Freeze in a sealed container for up to 3 months.
Let thaw at room temperature for 10–15 minutes before enjoying.
Recipe Notes + Brand Recommendations
Cookies: Siete Mexican Shortbread Cookies make the perfect gluten-free base. You can use my code ROOTS15 15% off.
Salt: I use flaky salt from Redmond Real Salt — code ROOTS15 works here too.
Chocolate: Hu Kitchen Sea Salt Dark Chocolate gives the best flavor for drizzling.
✨ If you try this recipe, make sure to tag me in your socials so I can cheer you on in the kitchen! Or leave feedback in the comments!
No-Bake Mini Pecan Pie Bites (Gluten-Free, Healthy-ish + SO Easy)
These no-bake mini pecan pie cups are gluten-free, refined sugar-free, and made with Siete cookies. Quick, healthy-ish, and perfect for holiday desserts!
Servings: 22 mini pies Prep: 10 MIN chill time: 20 MIN
Ingredients
Base
22 Siete Mexican Shortbread Cookies (1 per muffin cup; sometimes bags contain 20–22)
Pecan Pie Filling
2–4 Tbsp butter (use 4 tbsp for richer filling; 2 tbsp works if you prefer lighter)
½ cup maple syrup
⅔ cup date sugar
1 tsp vanilla extract
Generous pinch of cinnamon
Generous pinch of sea salt
1½ cups chopped pecans
Optional Chocolate Drizzle
½ bar Hu Kitchen Sea Salt Dark Chocolate
1–2 tsp coconut oil
Flaky sea salt (I use Redmond Real Salt)
Directions
Prepare the muffin tin.
Lightly spray a 24-count mini muffin tin with avocado oil. This helps the mini pies release easily, especially if adding chocolate.Add the cookie base.
Place one Siete Mexican Shortbread Cookie into each muffin cup. You should get 20–22 cookies per bag — either amount works.Toast pecans in butter.
In a medium skillet over medium-high heat, melt the butter. Add the chopped pecans and stir until they are fully coated and lightly toasted (1–2 minutes).Create the filling mixture.
Add the maple syrup and date sugar. Stir quickly and continuously to prevent burning. Once the mixture becomes glossy and sticky, immediately remove the skillet from heat.Add flavor.
Stir in vanilla, cinnamon, and a pinch of salt. Mix until everything is evenly combined.Fill the cups.
Using a 1 tablespoon scoop, spoon the warm pecan filling over each cookie. Work quickly before the mixture thickens.(Optional) Add chocolate drizzle.
Melt chocolate with coconut oil (microwave or double boiler). Drizzle over the top of each pecan pie cup and finish with flaky sea salt.Chill + remove.
Transfer the muffin tin to the fridge for 15–20 minutes to set.
Once firm, slide a thin knife around the edges to release (most should pop out easily, especially with the oil spray).Serve or store.
Enjoy immediately or store chilled — see storage notes above.
Note:
Date sugar is less refined and does not dissolve like traditional sugar. If you prefer a smoother, less grainy texture, you can reduce the date sugar to ⅓ cup. Using the full ⅔ cup creates a richer, more traditional sweetness with a slightly more textured filling. Adjust based on taste and texture preference.

Halloween Munch Dark Chocolate Bark
Halloween bark recipe is as simple as they come! Using only 3-ingredients to make the bark, and topped with your favorite go-to halloween candy products or venturing out into the healthier but still spookier side!
Halloween munch dark chocolate bark is a fun and creative way of using healthier Halloween candy products!

For October’s virtual cooking class, I wanted to create a fun, festive and kid friendly dessert using healthier candy products. It’s so easy to switch out sugar and overly processed-filled Halloween candy products with healthier brands like Yum Earth, That’s It, Hu Kitchen and so much more (product recommendations for this recipe at the bottom!)


Halloween bark recipe is as simple as they come! Using only 3-ingredients to make the bark, and topped with your favorite go-to halloween candy products or venturing out into the healthier but still spookier side!

FAQs and tips on making dark chocolate bark:
After the chocolate has cooled, it is hard to spread or for toppings to stick so work quickly while your chocolate is still warm!
Storage? If the chocolate bark is set out at room temperature for too long, it will start to melt so best to store in the fridge for about a week or the freezer for 2 months. Don’t expect it to last that long in your house, though!
A spatula or back of a spoon are the best tools to spread the chocolate across a parchment paper lined baking sheet.
You can obviously use a double broiler to melt your chocolate but the fastest and easiest method is simply using a microwave! Microwave in 30 second increments while stirring until melted.


Other great Halloween recipes: spookylicious green smoothie
If you try this recipe, let us know! Leave a comment, rate it, and don’t forget to tag a photo to #fromtherootsblog on Instagram. We love seeing what you come up with!
Halloween munch dark chocolate bark is a fun and creative way of using healthier Halloween candy products!
SERVINGS: 6-8 | PREP TIME: 5 MIN | COOK TIME: N/A
Ingredients
2 cups dark chocolate chips (about 12 oz)
1/3 cup white chocolate chips
1 Tbsp+ 1 tsp coconut oil
1/4 cup candy corn
1/4 cup gummy worms
1/4 cup popcorn
Halloween sprinkles
Directions
Line a medium/large baking sheet with parchment paper or aluminum foil leaving overhang on at least two sides.
Add the chocolate chips and 1 Tbsp coconut oil to a microwave-safe bowl and microwave for 30 sec. Stir with a spoon and continue to warm in 30 sec increments until melted.
Spread the melted chocolate across the prepared baking sheet and use a rubber or offset spatula to smooth into an even layer.
Melt the white chocolate and 1 tsp oil in a separate bowl for 30 sec increments until smooth.
Drizzle the white chocolate in a “spiderweb or mummy style” across the baking sheet of melted dark chocolate.
Place candies, popcorn, and sprinkles on top of the bark while melted then place the baking sheet in the fridge or freezer for 1 hr to harden. Once hard, use a knife to cut into pieces of bark and enjoy!
Notes
Keep bark in an airtight container in the fridge or freezer until ready to eat!
SHOP OUR FAVORITE INGREDIENTS FOR THIS RECIPE!


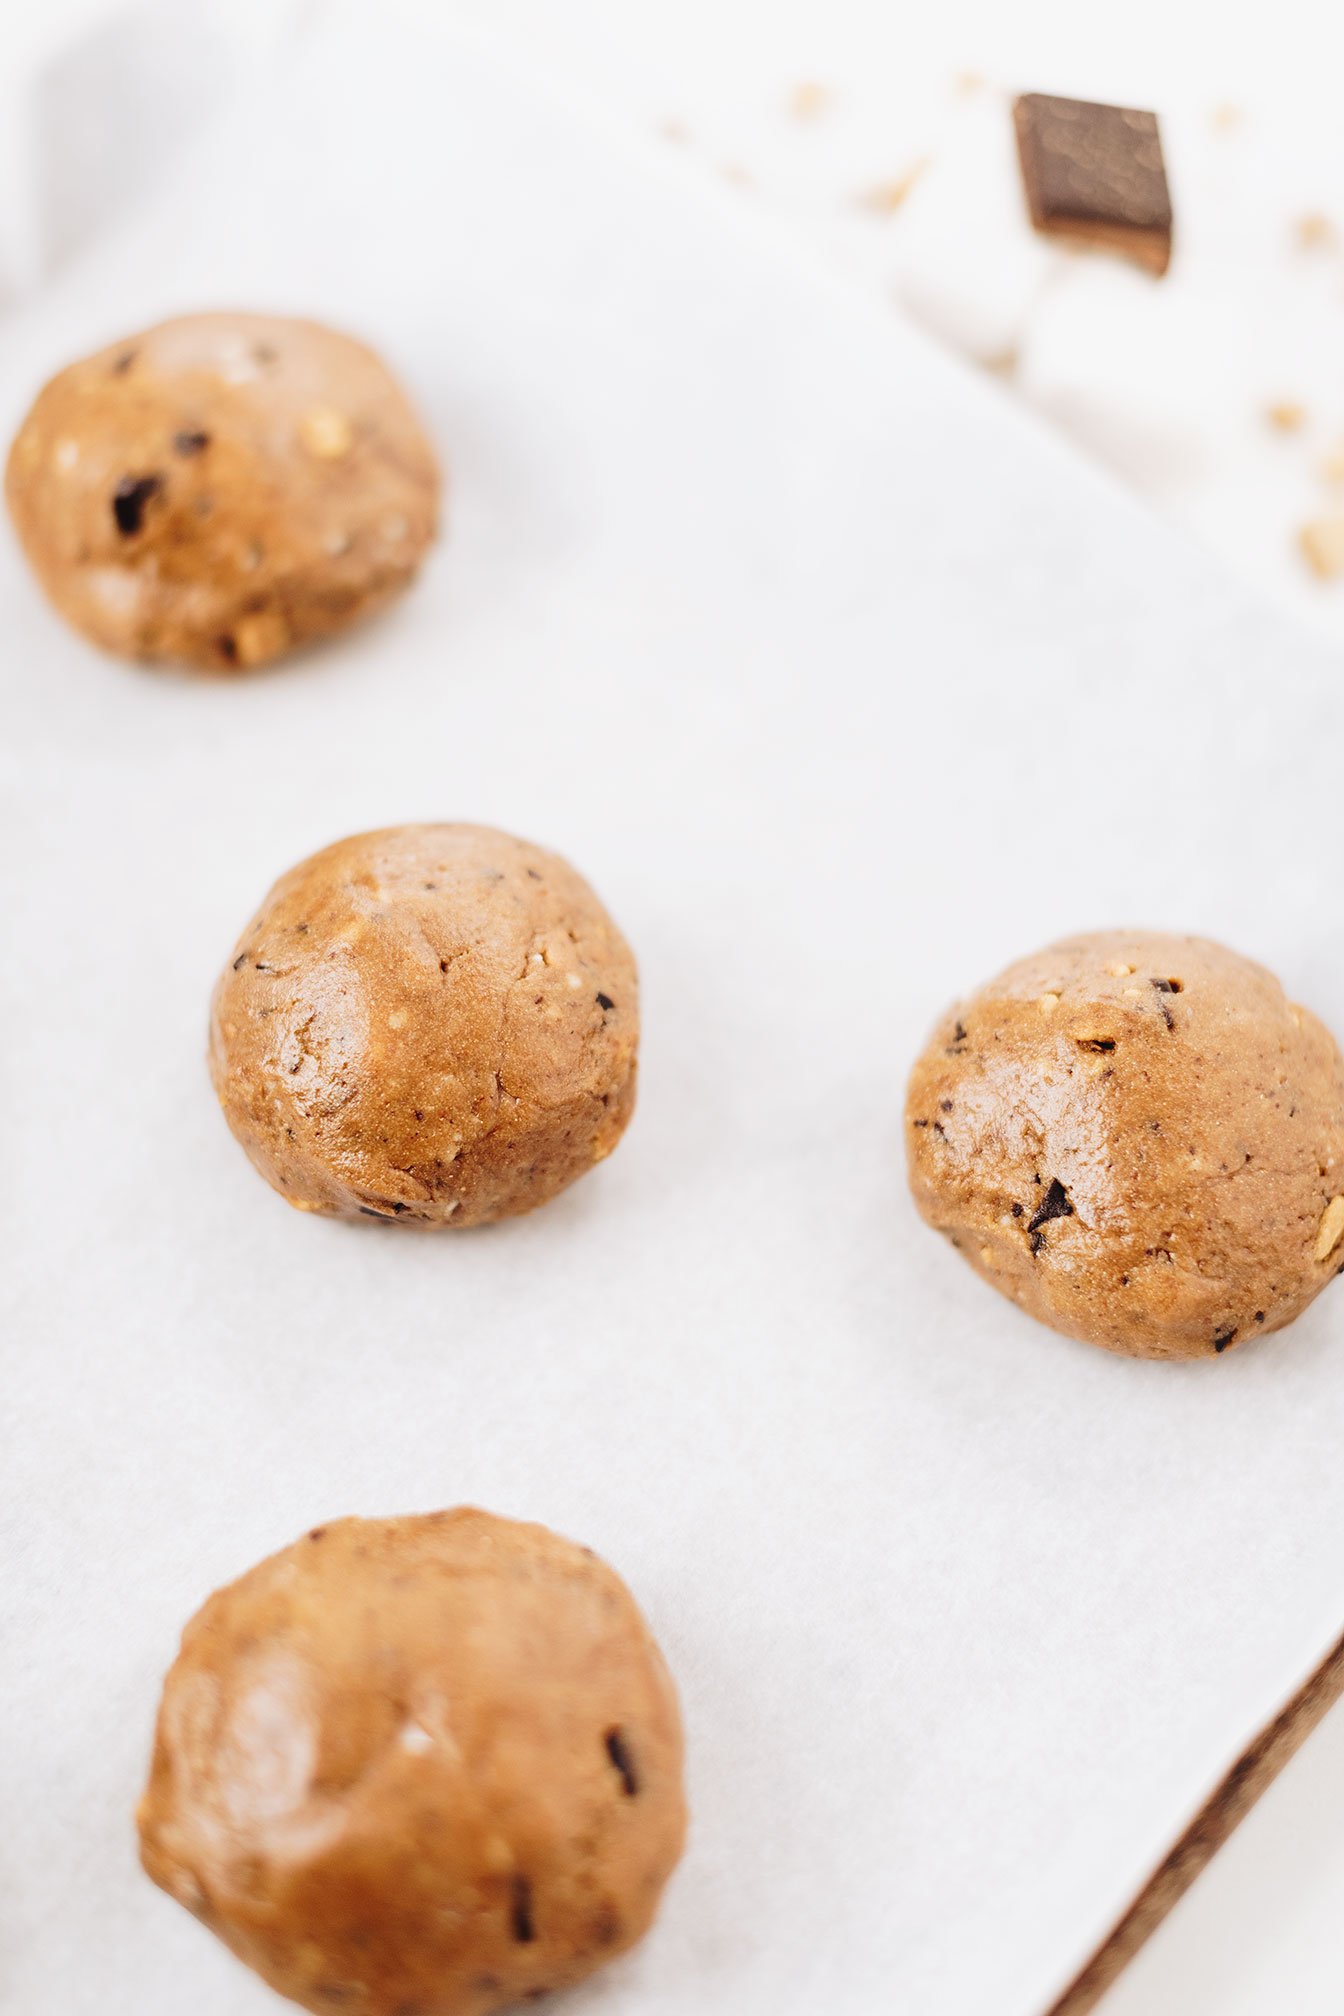
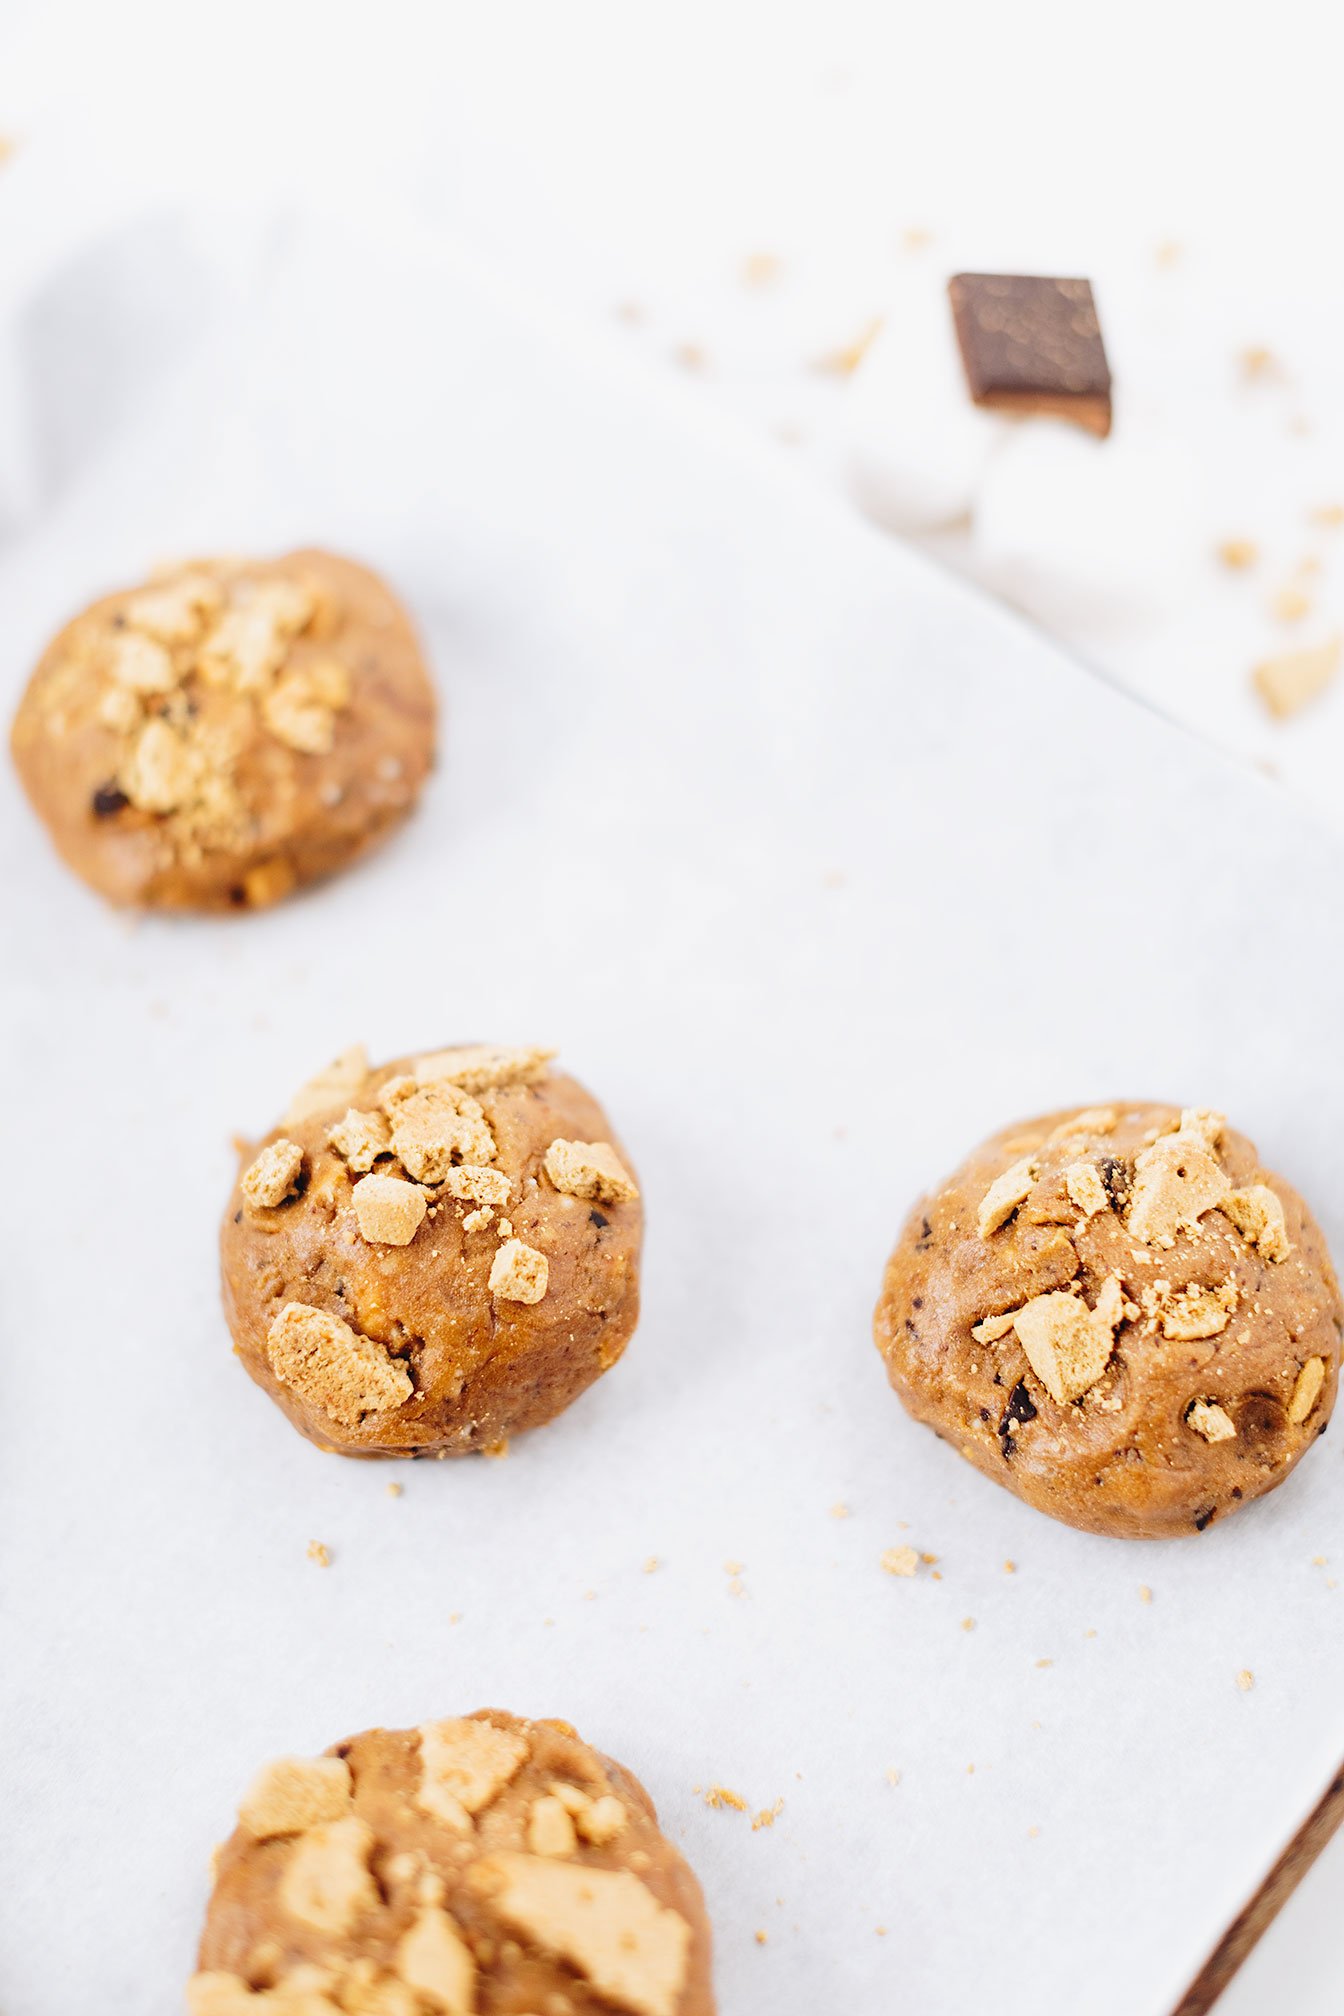
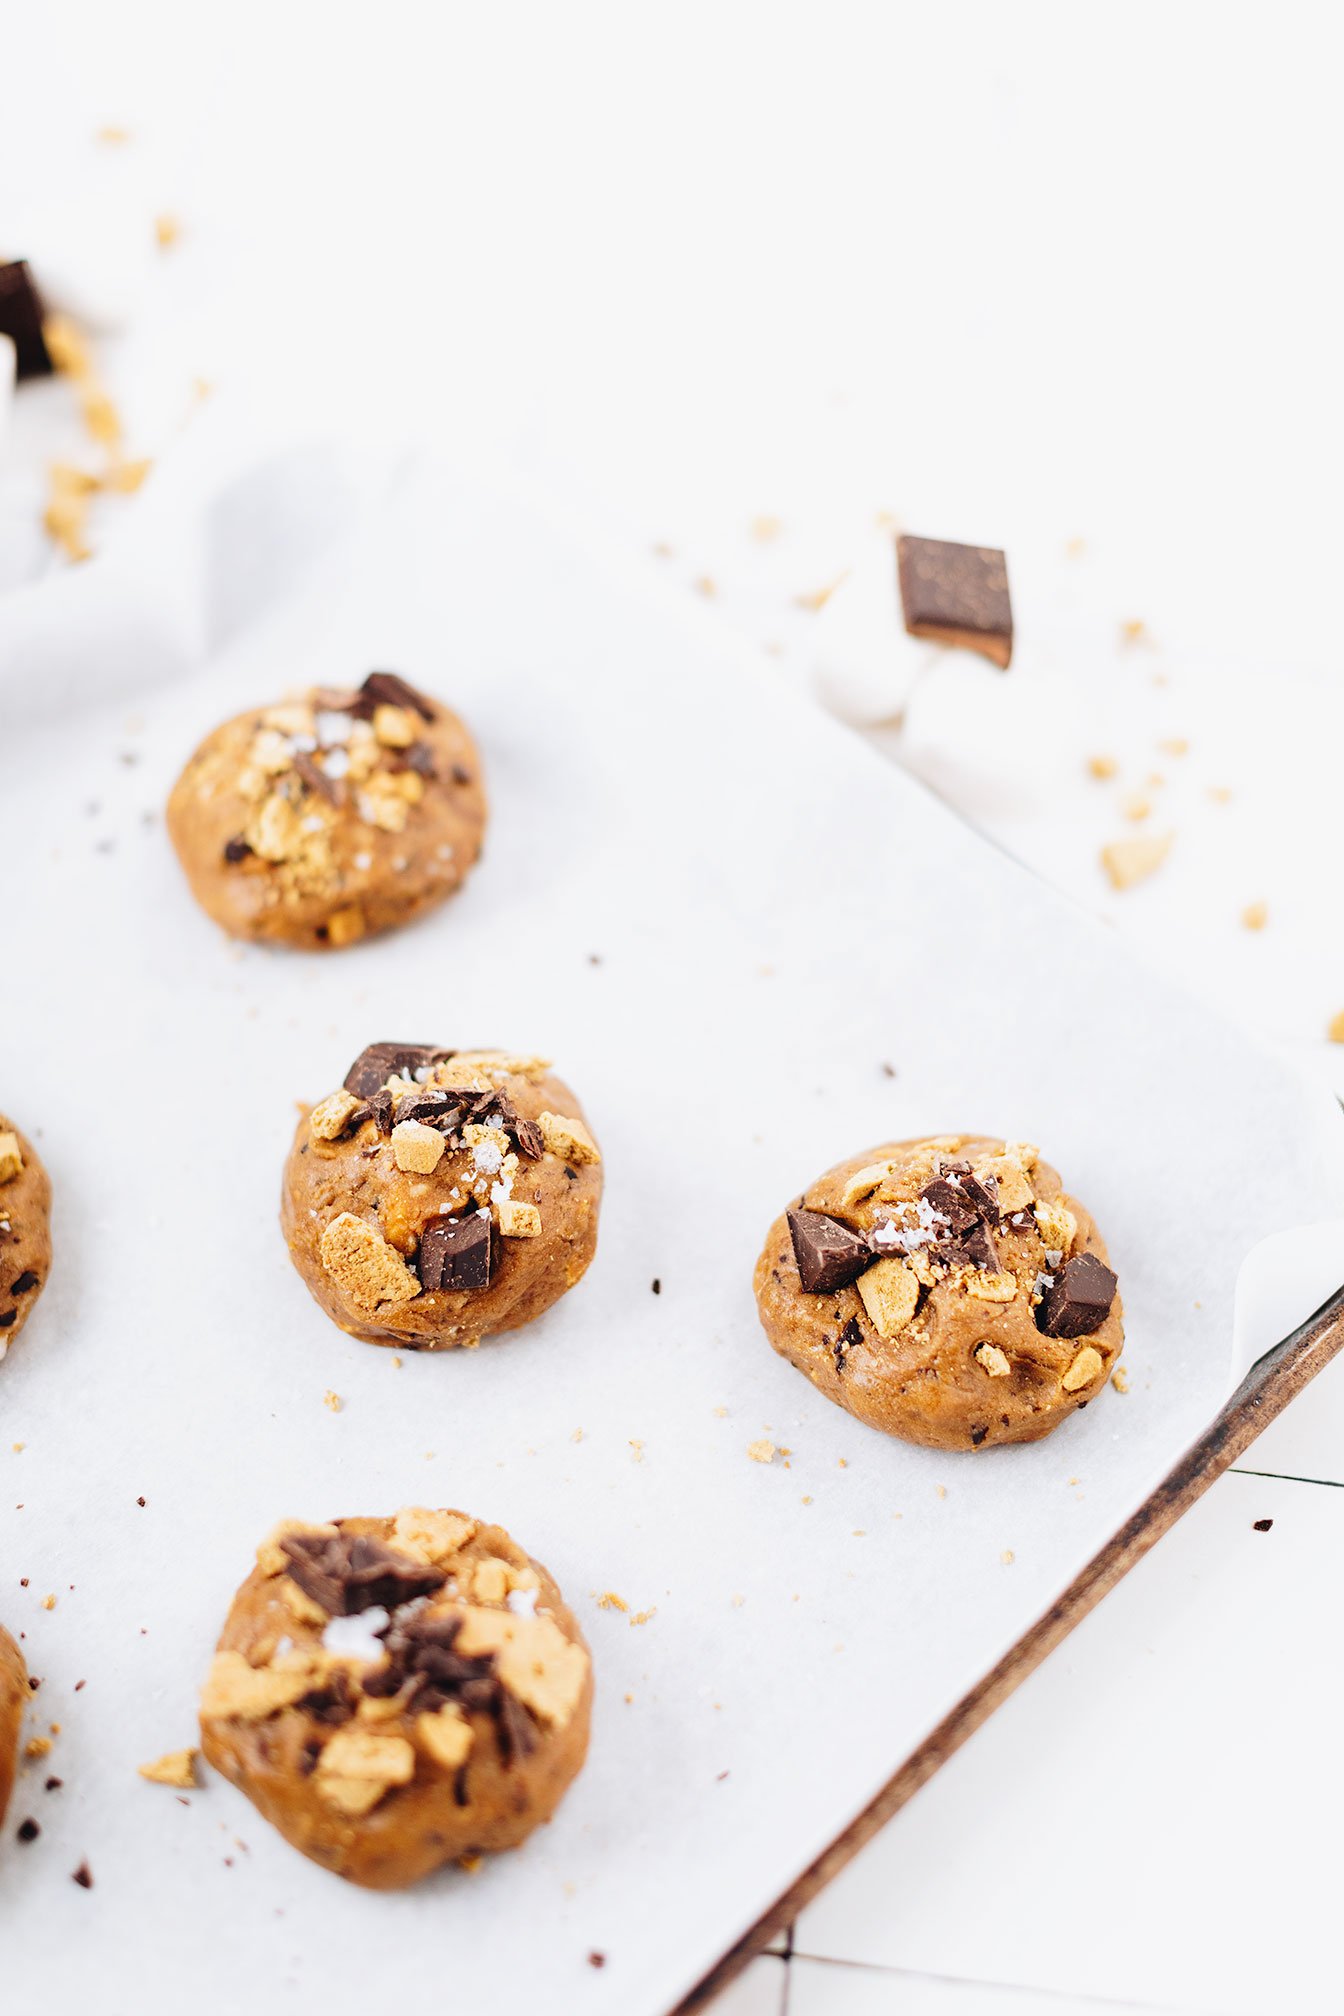
S'mores Cookies
Fun fact about me that not many people know is that I am a pyro! Maybe that is why I am a volunteer firefighter but I just absolutely love fires - campfires, bonfires, having a fake fire scene playing in the background, the sound of fire food crackling … I’m obsessed!
S’mores cookie with a surprise marshmallow filling you cannot resist. Gluten-free, dairy-free friendly, refined sugar-free and no campfire needed!

Fun fact about me that not many people know is that I am a pyro! Maybe that is why I am a volunteer firefighter but I just absolutely love fires - campfires, bonfires, having a fake fire scene playing in the background, the sound of fire food crackling … I’m obsessed!


And now that I have niece and nephews close by, I take full advantage of spoiling them with campfire treats - s’mores being #1!
So when we had Thanksgiving this past week, I wanted to surprise them with a dessert that I knew they were going to love. Because why try to give them traditional desserts like pumpkin pie when we know they aren’t going to like it or try it? Why not just make them something fun and that they will actually enjoy!


And that is why I created this s’mores cookie recipe! They couldn’t believe that a cookie was also a s’more! And to top off the mindblown effect, when I ripped the cookie apart - they couldn’t believe that there was a gooey, melted marshmallow inside and that I didn’t have a fire to produce that sort of effect!
All this to say, that if you are wanting major Aunt brownie points - you should make these cookies! And selfishly for yourself - that is why they are gluten-free, dairy-free, and naturally sweetened. They will not know the difference!


And if you are unfamiliar with gluten-free or plant based s’more products to look for - I have added the products I used at the bottom of the recipe for reference. I will say that the Hu Kitchen stuffed dark chocolate bars just really elevate this recipe - especially if you are team peanut butter cup in your s’more stack!

If you try this recipe, let us know! Leave a comment, rate it, and don’t forget to tag a photo to #fromtherootsblog on Instagram. We love seeing what you come up with!
S’mores cookie with a surprise marshmallow filling you cannot resist. Gluten-free, dairy-free friendly, refined sugar-free and no campfire needed!
Serving: 2 Tbsp scoop = 8 large cookies, 1 Tbsp scoop = 16 regular cookies | Prep Time: 5 min | Cook Time: 10 min
Ingredients
1 ½ cup gluten-free 1 to 1 flour
¾ cup coconut sugar
½ cup dark chocolate chips or bar, chopped
½ cup mini marshmallows or 8 large marshmallows
½ cup graham crackers, crushed/chopped
1 egg, room temperature
3 Tbsp milk of choice, I used coconut milk
3 Tbsp coconut oil, melted
1 tsp pure vanilla extract
½ tsp baking soda
½ tsp baking powder
½ tsp pink himalayan sea salt
Directions
Preheat the oven to 350 degrees F and line a baking sheet with parchment paper.
In a large bowl, combine flour, baking soda and powder, and salt. In a medium bowl, combine egg, coconut sugar, milk, oil, and vanilla.
Stir the dry ingredients into the wet. Gently stir in the chocolate chips, graham crackers and marshmallows if you are doing mini.
Using a cookie scoop or 1 Tbsp, scoop out 2 Tbsp worth and flatten dough out to place a large marshmallow in and fold the rest of the dough over the marshmallow until fully covered. If you added mini marshmallows, scoop out 1 Tbsp, and place dough onto a greased or parchment lined baking sheet. Add a few extra chocolate chips, graham crackers and kosher salt flakes on top to make the cookies look pretty.
Bake for 10 minutes until golden brown.
Let them cool for at least 15 minutes so that the cookies can firm up. Transfer to a wire wreck to cool completely and enjoy!
SHOP OUR FAVORITE INGREDIENTS FOR THIS RECIPE!


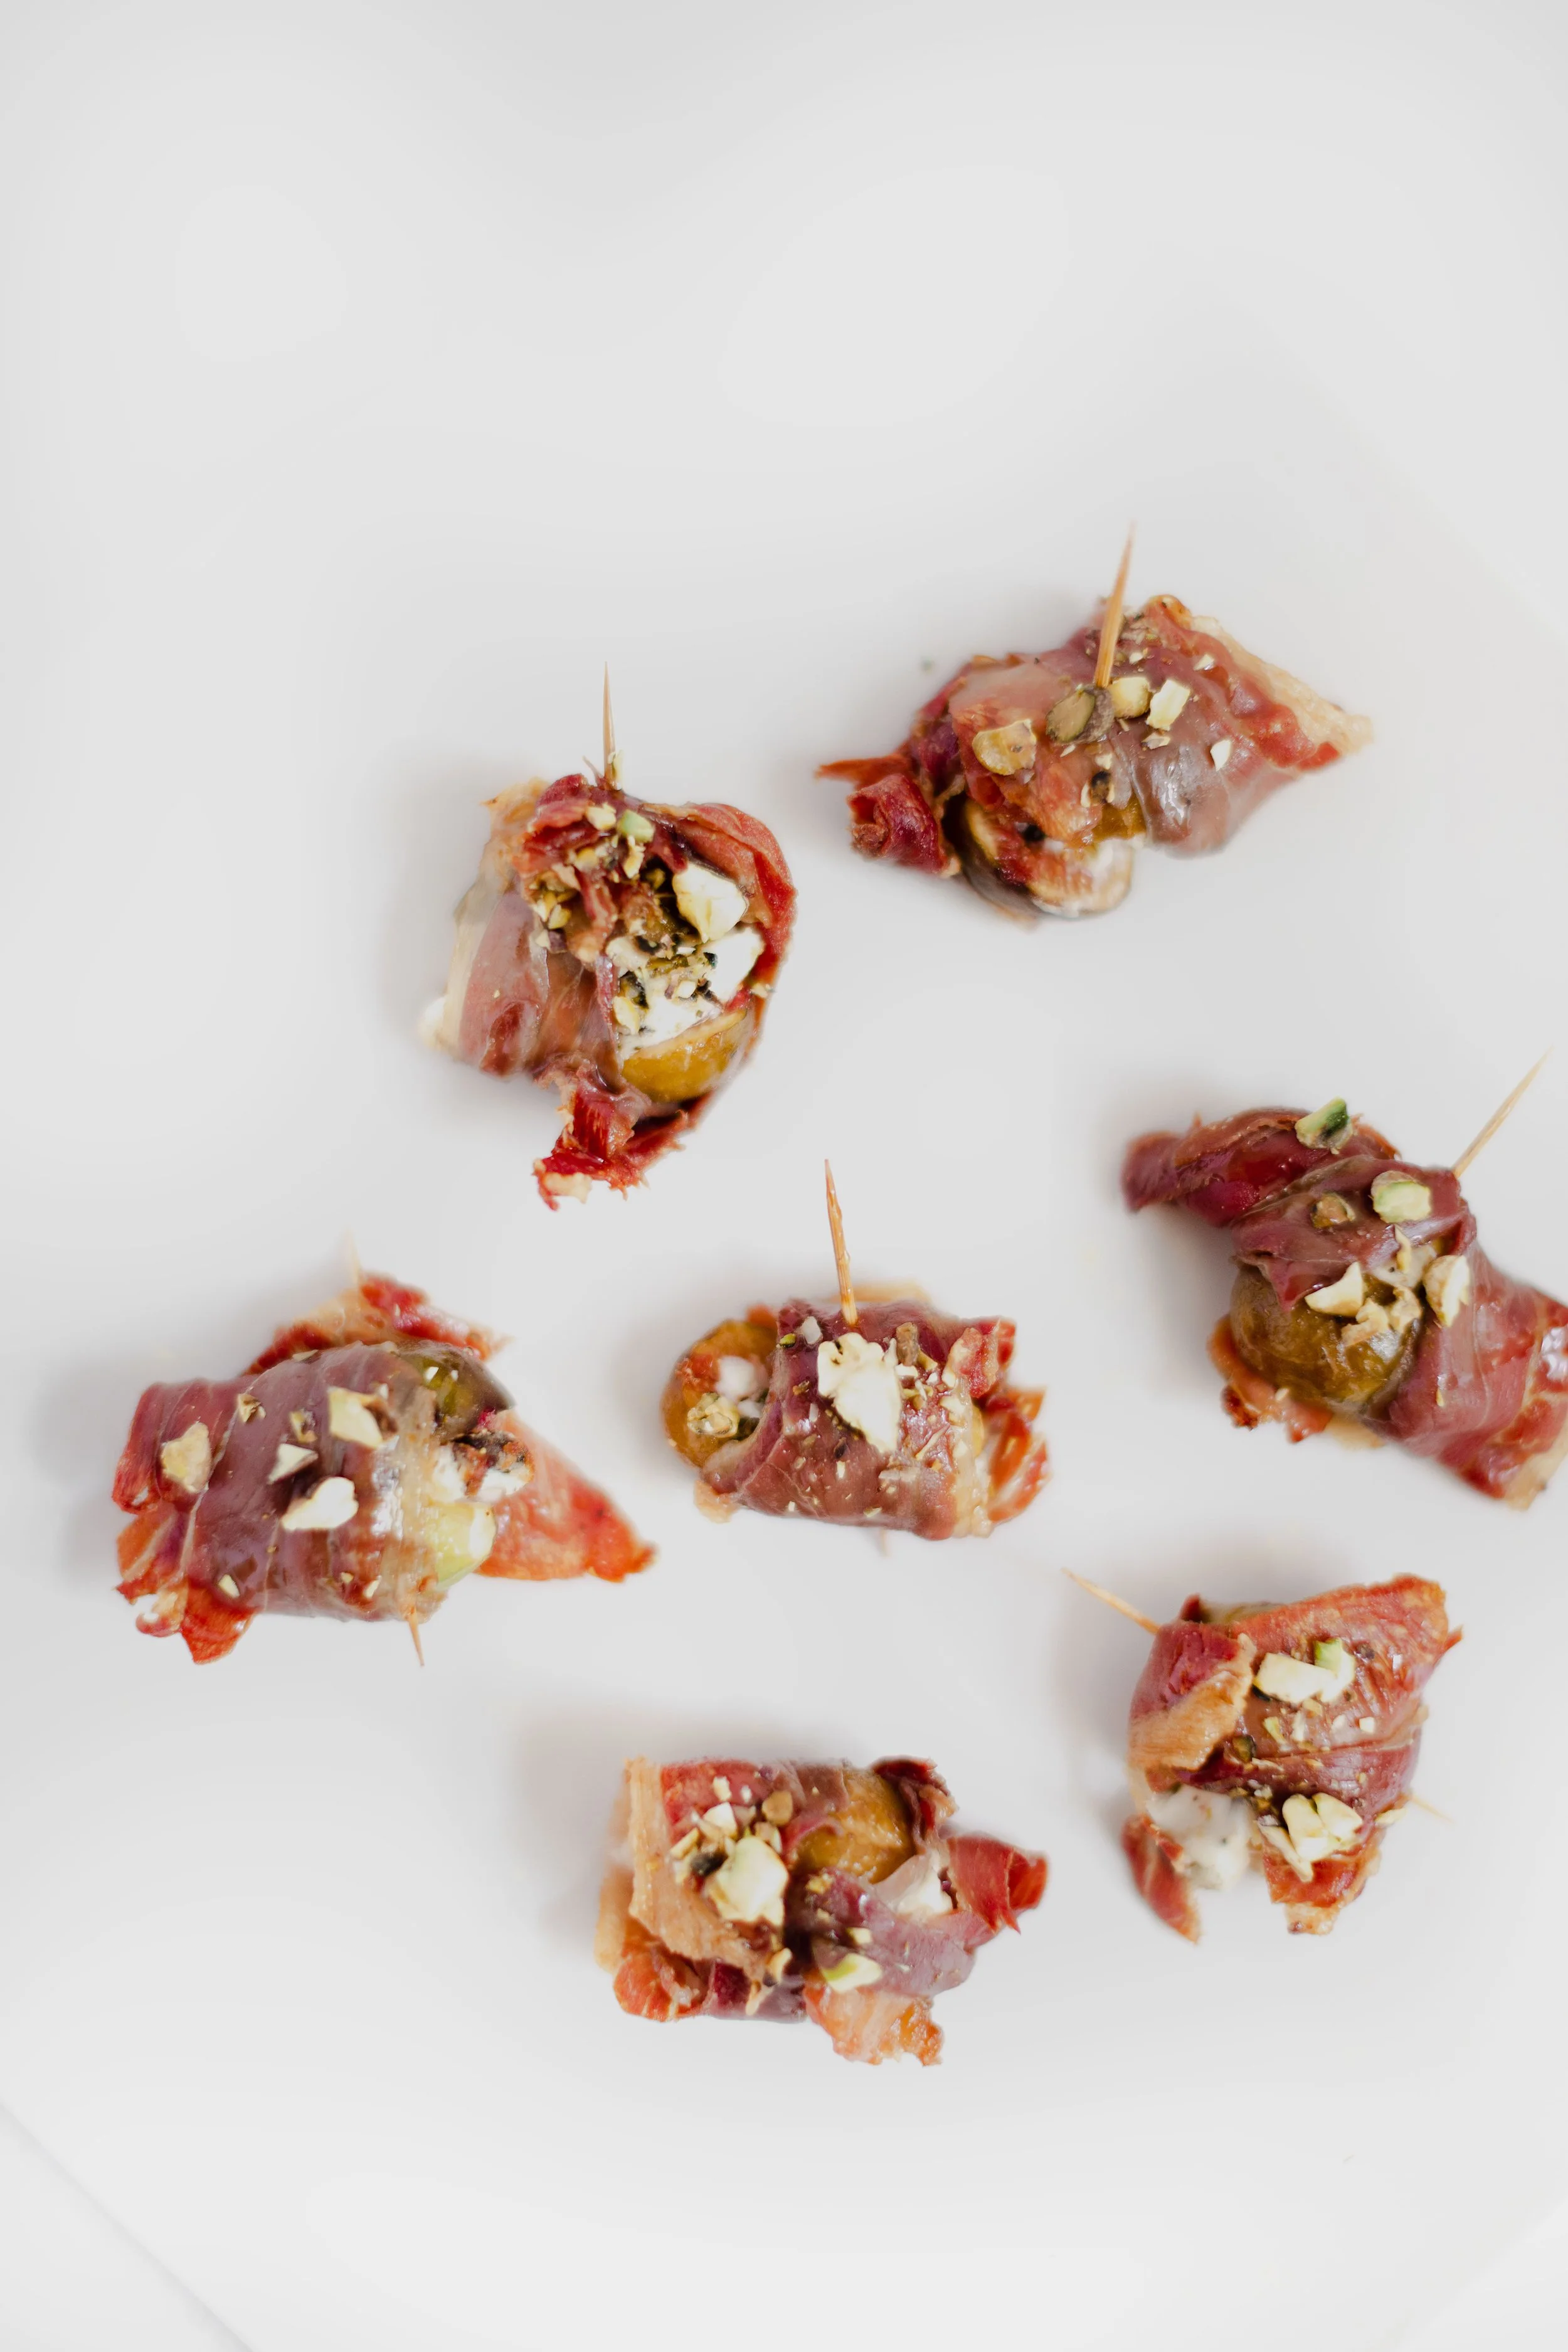
Prosciutto Wrapped Figs
Confession time: I don’t like figs, there I said it! Dried figs, sure. Fig newtons as a kid when that was the only snack you could find in the pantry, you bet. But fresh - you can forget it!
So when my personal training client handed me a bag of freshly picked figs, I had no idea what to do. But she entrusted me to create a recipe using them and I didn’t want to let her down! So not only does this recipe goes out to my client … you know who you are ;) This fig recipe also goes out to my newfound fresh fig taste buds!
The secret to enjoying fresh figs is wrapping them in prosciutto and roasting or air frying them. Having the addition of goat cheese and pistachio for added creaminess and texture doesn’t hurt either. And to take it to an even magical level, enhance the complexity in sweet, salty, and acid flavors with a drizzle of honey.
A sweet, salty and acidic appetizer or snack delight that features figs stuffed with goat cheese and pistachios, wrapped with prosciutto, and air fried or baked to tender goodness.

Confession time: I don’t like figs, there I said it! Dried figs, sure. Fig newtons as a kid when that was the only snack you could find in the pantry, you bet. But fresh - you can forget it!
So when my personal training client handed me a bag of freshly picked figs, I had no idea what to do. But she entrusted me to create a recipe using them and I didn’t want to let her down! So not only does this recipe goes out to my client … you know who you are ;) This fig recipe also goes out to my newfound fresh fig taste buds!
The secret to enjoying fresh figs is wrapping them in prosciutto and roasting or air frying them. Having the addition of goat cheese and pistachio for added creaminess and texture doesn’t hurt either. And to take it to an even magical level, enhance the complexity in sweet, salty, and acid flavors with a drizzle of honey.

It quite literally cannot get any better than this!
So if you are looking for a summer appetizer, macro balanced snack, or trying to figure out ways to use figs, then this is your recipe ladies and gentleman!


And feel free to switch out ingredients: figs for dates, goat cheese for blue cheese, pistachio for almonds, honey for balsamic glaze, prosciutto for bacon, air frying for baking…you get my drift ;)

If you try this recipe, let us know! Leave a comment, rate it, and don’t forget to tag a photo to #fromtherootsblog on Instagram. We love seeing what you come up with!
A sweet, salty and acidic appetizer or snack delight that features figs stuffed with goat cheese and pistachios, wrapped with prosciutto, and air fried or baked to tender goodness.
Servings: 4 | Prep Time: 4 min | Cook 5 min
Ingredients
8 figs
⅓ cup goat or blue cheese, softened
8 prosciutto slices
2 Tbsp raw pistachios, chopped
Garnish
Local honey and chopped pistachios
Directions
Cut the figs in half and set aside.
In a small bowl, mix softened goat cheese and chopped pistachios until well combined. Dollop a small amount on one fig half and place the other fig half on top like a sandwich. Repeat with the remainder of figs where you should have 8 fig sandwiches.
Wrap the prosciutto around each fig sandwich. The ends of the prosciutto should overlap. Place a wet toothpick through prosciutto wrapped fig so that it doesn’t fall apart.
If using an air fryer: preheat the air fryer to 400 degrees and cook for 5-7 minutes flipping halfway until prosciutto is crispy.
If using the oven: preheat oven to 400 degrees and line a baking sheet with parchment paper. Place in the oven on the top rack and roast for 8-10 minutes.
Garnish with honey drizzle and leftover chopped pistachios and enjoy!
SHOP OUR FAVORITE TOOLS + INGREDIENTS FOR THIS RECIPE!


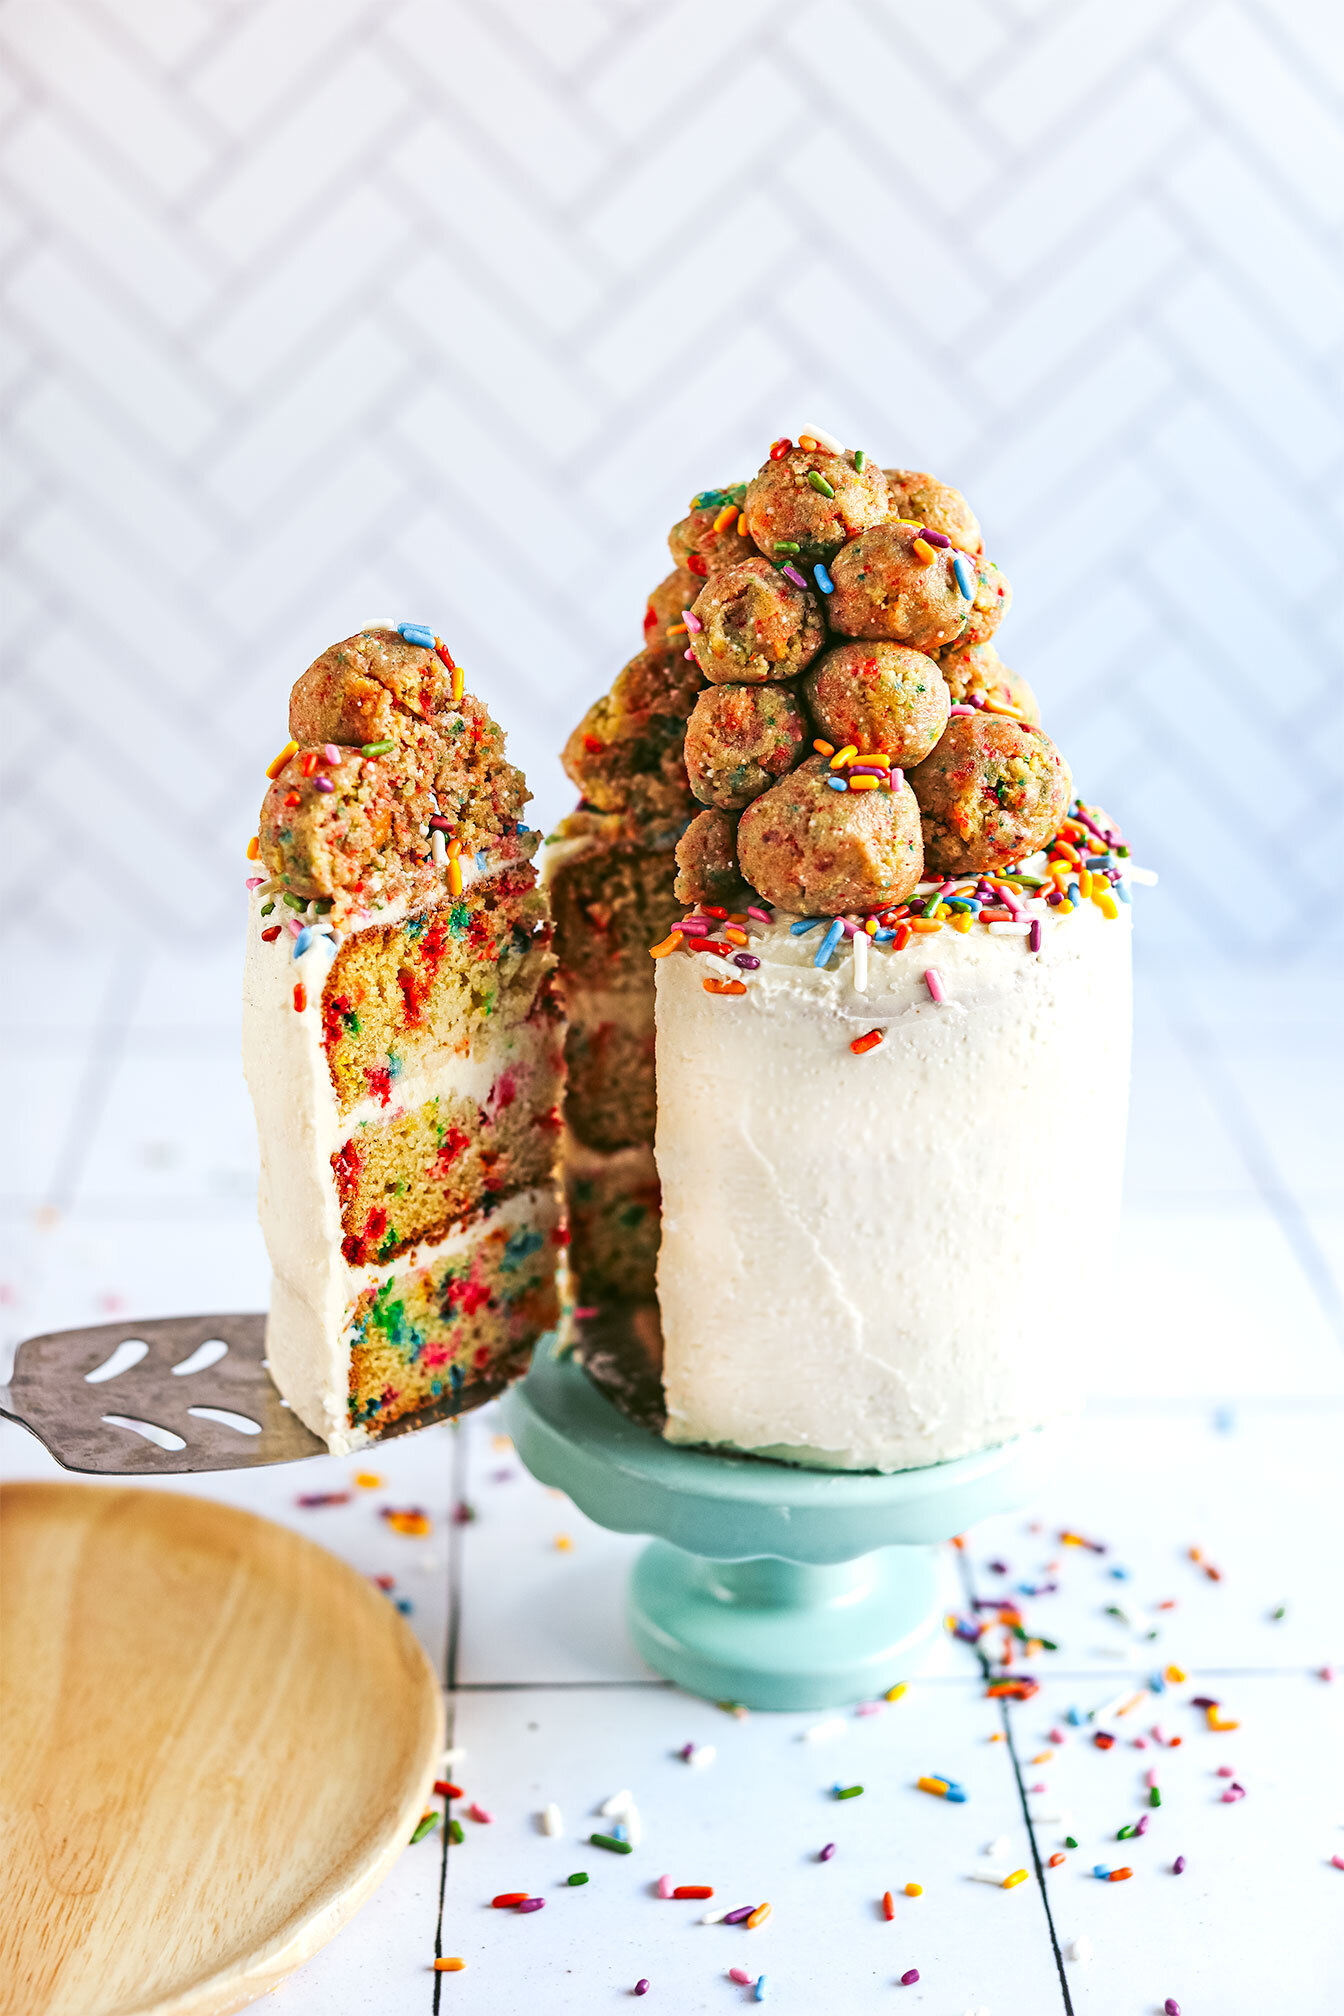
The Best Gluten Free Confetti Cake
The Best Gluten Free Funfetti Cake - Fluffy, tender gluten free cake that reuses layered tops as cake ball garnishes! Includes baking techniques to create that perfect “just came from the bakery funfetti cake.”
I turned the big dirty thirty a couple weeks back (pisces in the house!?) and it feels so good! Ever since I was a kid, I dreamt of this day. For some reason, in my childhood brain, 30 meant that I was going to be a woman. That I would have it all together. That I was going to be successful. And in most ways, it feels that way or at least leading to that prediction.
For so many years, I would let my stomach succumb to a laundry list of ingredients that made me feel like crap for the sake of pleasing coworkers who rarely knew me or family members that “forgot” that I had a gluten and dairy sensitivity. But not this year! This year, I am making my own damn cake! And the cake will have ingredients that I can fully digest and not feel like crap after! Haha
The Best Gluten Free Funfetti Cake - Fluffy, tender gluten free cake that reuses layered tops as cake ball garnishes! Includes baking techniques to create that perfect “just came from the bakery funfetti cake.”
I turned the big dirty thirty a couple weeks back (pisces in the house!?) and it feels so good! Ever since I was a kid, I dreamt of this day. For some reason, in my childhood brain, 30 meant that I was going to be a woman. That I would have it all together. That I was going to be successful. And in most ways, it feels that way or at least leading to that prediction.

For so many years, I would let my stomach succumb to a laundry list of birthday cake ingredients that made me feel like crap for the sake of pleasing coworkers who barely knew me or family members that “forgot” that I had a gluten and dairy sensitivity. But not this year! This year, I am making my own damn cake! And the cake will have ingredients that I can fully digest and not feel like crap after! Haha


So if you feel the same way, you are making a cake for someone with these sensitivities, or just want a really good funfetti cake then look no further!

I’ve been watching a lot of baking shows during COVID: Great British Baking Show Nailed It, you name it! So this cake was inspired by all those late nights drooling over all the glutenous and sugary-laden desserts! Haha!
With that said, even though these recipes are traditional, I learned the techniques that can be applied to gluten and dairy-free baking! With cooking in general, it’s all about learning and finding ways where cooking can work for you! So the techniques used for this cake will, in the end, produce a damn good gluten-free cake.


Directions in the recipe below, provide the techniques used but if you need more information regarding how to: reverse creaming, flat tops for even layering, milk soaking layers, build supported cake layers, frost your cake or leaving it naked, tools needed for a layered cake, and so much more -- check out Erin McDowell’s video on How to Make Layered Cakes and Claire Saffitz Makes Confetti Cake.


If you try this recipe, let us know! Leave a comment, rate it, and don’t forget to tag a photo to #fromtherootsblog on Instagram. We love seeing what you come up with!
The Best Gluten Free Funfetti Cake - Fluffy, tender gluten free cake that reuses layered tops as cake ball garnishes! Includes baking techniques to create that perfect “just came from the bakery funfetti cake.”
Ingredients
1 ½ cups gluten free 1-to-1 baking flour
½ cup organic granulated cane sugar
1 tsp baking powder
½ tsp baking soda
¼ tsp salt
½ cup goat milk + ¼ cup or plant-based milk
1 tsp lemon juice + zest of one lemon
1 egg + 3 Tbsp egg whites (whisked + room temperature)
½ stick grass-fed butter (room temperature)
½ tsp almond extract
⅓ cup (1.75 oz) sprinkles
Frosting
Coconut whipped frosting (homemade or store-bought) or frosting of choice
Toppings
Sprinkles and cake balls (from leftover cake tops + frosting)
Directions
Preheat the oven to 350 degrees F and spray 3 - 4-inch springform pans with cooking spray and line the bottoms with parchment paper. Set aside.
Make your “buttermilk” by adding lemon juice and zest to your goat milk. Let sit for at least 10-15 min. Set aside. *The zest just adds brightness to the cake, not necessarily creating the buttermilk mixture.
Place the flour, sugar, baking powder, baking soda, and salt into the bowl of your stand mixer with the paddle attachment.
Turn the mixer on the slowest speed. Slowly add chunks of your softened butter until everything is mixed and looks like coarse sand.
Add your buttermilk mixture and bump up the speed to 4. Mix for one minute and scrape the bowl. Slowly add the whisked egg mixture, and almond extract and continue mixing for one minute. Stop halfway to scrape the bowl one more time. Mix until combined. Your batter should be thick but creamy and pourable.
Take off the paddle attachment and fold the sprinkles into the batter.
Divide the batter into your greased pans and fill ¾ of the way full. I like to evenly distribute batter by weighing each pan or use a cookie/ice cream scooper to make sure each pan has the right amount of batter.
Bake for 25-30 minutes or until golden brown and a toothpick when inserted, comes out clean.
Remove the cakes from the oven and let them cool for 10 minutes, then gently remove the pan and allow them to cool completely on a wire rack.
Let layers cool completely before stacking and frosting. I like to place my layers in the fridge for about 20-30 min to firm up the cakes for easier stacking.
Before we start stacking, it’s time to start slicing! In order to have even layers for a tall and flat layered cake, we need to make sure each layer is even. Bonus: Slicing the tops off our cakes will make our cake balls for garnish!
Use a knife to score the entire outside edge of the cake - right where the cake stops cooking in the pan (you will see a distinct edge right as it starts to dome up). Go slowly, not too deep, and make sure you are getting down to eye-level.
Take a serrated knife and cut through the cake along the indentation made with the knife marker. The best way of doing this without breaking the layers putting each cake layer on a decorating turntable. That way, you're slowly moving the serrated knife as the cake is turning. Eventually, you will end up in the middle and the top layer should come right off without any buckling or crumbling.
Set the domed top part of each layer to the side in a medium bowl to make cake balls for later.
To assemble:
Spread a bit of frosting onto the middle of the cake board, serving plate, or decorating turntable. (I like to cut out a piece of 4” round cardboard as a base for my cake so that it’s easier to transfer to a serving plate without messing with the finished product) If you are using this method, place the cardboard piece on frosting so that it stays. Dab another bit of frosting on that and then center your first layer on it.
Use a pastry brush or small spoon and dab leftover goat milk onto each cake. Don’t overdo it as you don’t want a soggy cake. Sprinkle extra lemon zest - optional but so good!
Stack the layers on top of one another, using an offset spatula to spread about half-inch frosting between each layer. Repeat each layer with milk dab, zest, and frosting. The last layer, turn the layer upside down so that the cake bottom is on top. *Makes for a clean flat top!
Crumb coat by covering the whole cake in a very thin layer of frosting. You can also pipe in between layers where there are visible holes.
Chill the cake in the fridge until the frosting has firmed up; about 20 minutes.
Apply the final coating of frosting.
To make the cake balls: Crumble domed cake tops in a small bowl with leftover frosting. Combine until you can make a ball without it crumbling. Create different size cake balls and set them aside.
To garnish, sprinkle the cake top with sprinkles or however you would like to decorate and stack cake balls in the center. Let set in the fridge so that everything is firm. Slice and enjoy!
Notes:
Simple Mills vanilla frosting, Sprinkles, cake pans, cake decorating starter kit
Even though goat milk has lactose, I have found that my body tolerates it better than cow’s milk. If you don’t know if you can tolerate goat milk then do plant-based milk instead!