Sort by Category
- May 2026
- March 2026
- December 2025
- November 2025
- October 2025
- September 2025
- August 2025
- June 2025
- August 2024
- July 2024
- June 2024
- May 2024
- February 2024
- January 2024
- December 2023
- November 2023
- October 2023
- September 2023
- August 2023
- July 2023
- March 2023
- February 2023
- January 2023
- December 2022
- November 2022
- October 2022
- September 2022
- August 2022
- June 2022
- May 2022
- April 2022
- March 2022
- February 2022
- January 2022
- December 2021
- November 2021
- October 2021
- September 2021
- August 2021
- July 2021
- June 2021
- May 2021
- April 2021
- March 2021
- February 2021
- January 2021
- December 2020
- November 2020
- October 2020
- September 2020
- August 2020
- July 2020
- June 2020
- May 2020
- April 2020
- March 2020
- February 2020
- January 2020
- December 2019
- November 2019
- October 2019
- September 2019
- August 2019
- July 2019
- June 2019
- May 2019
- April 2019
- March 2019
- February 2019
- January 2019
- December 2018
- November 2018
- October 2018
- September 2018
- August 2018
- July 2018
- June 2018
- May 2018
- April 2018
- March 2018
- February 2018
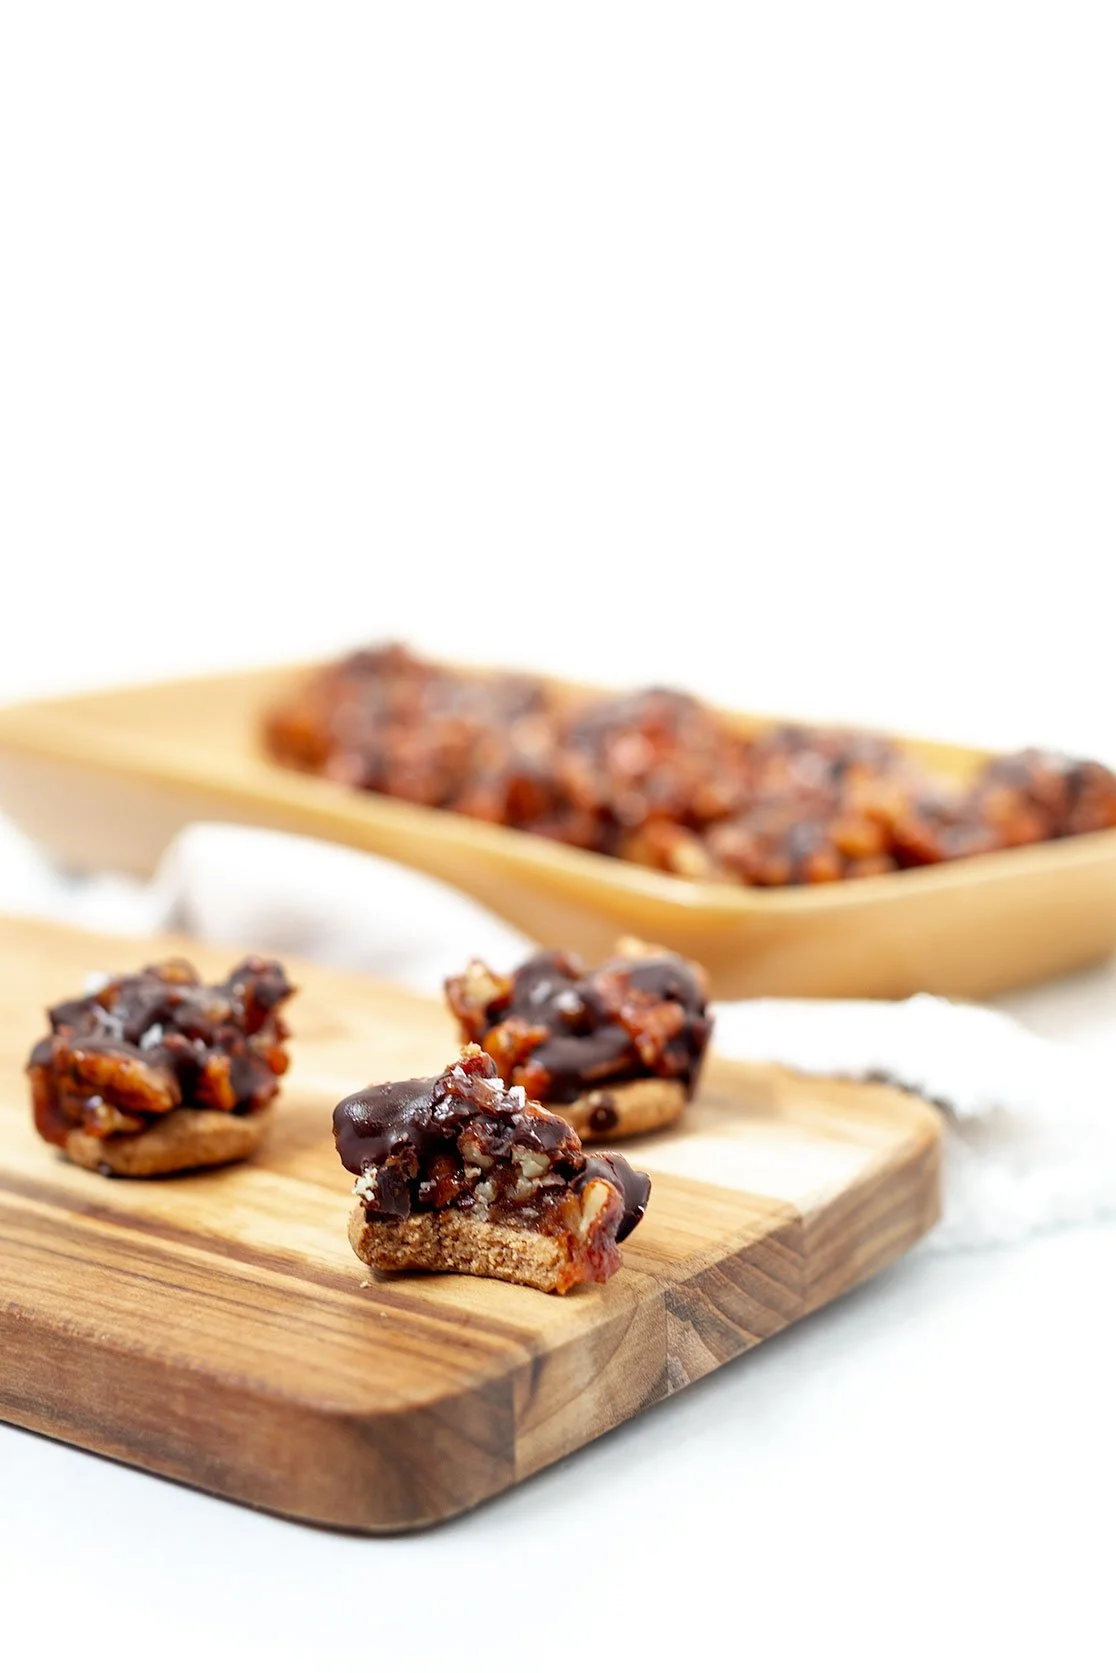
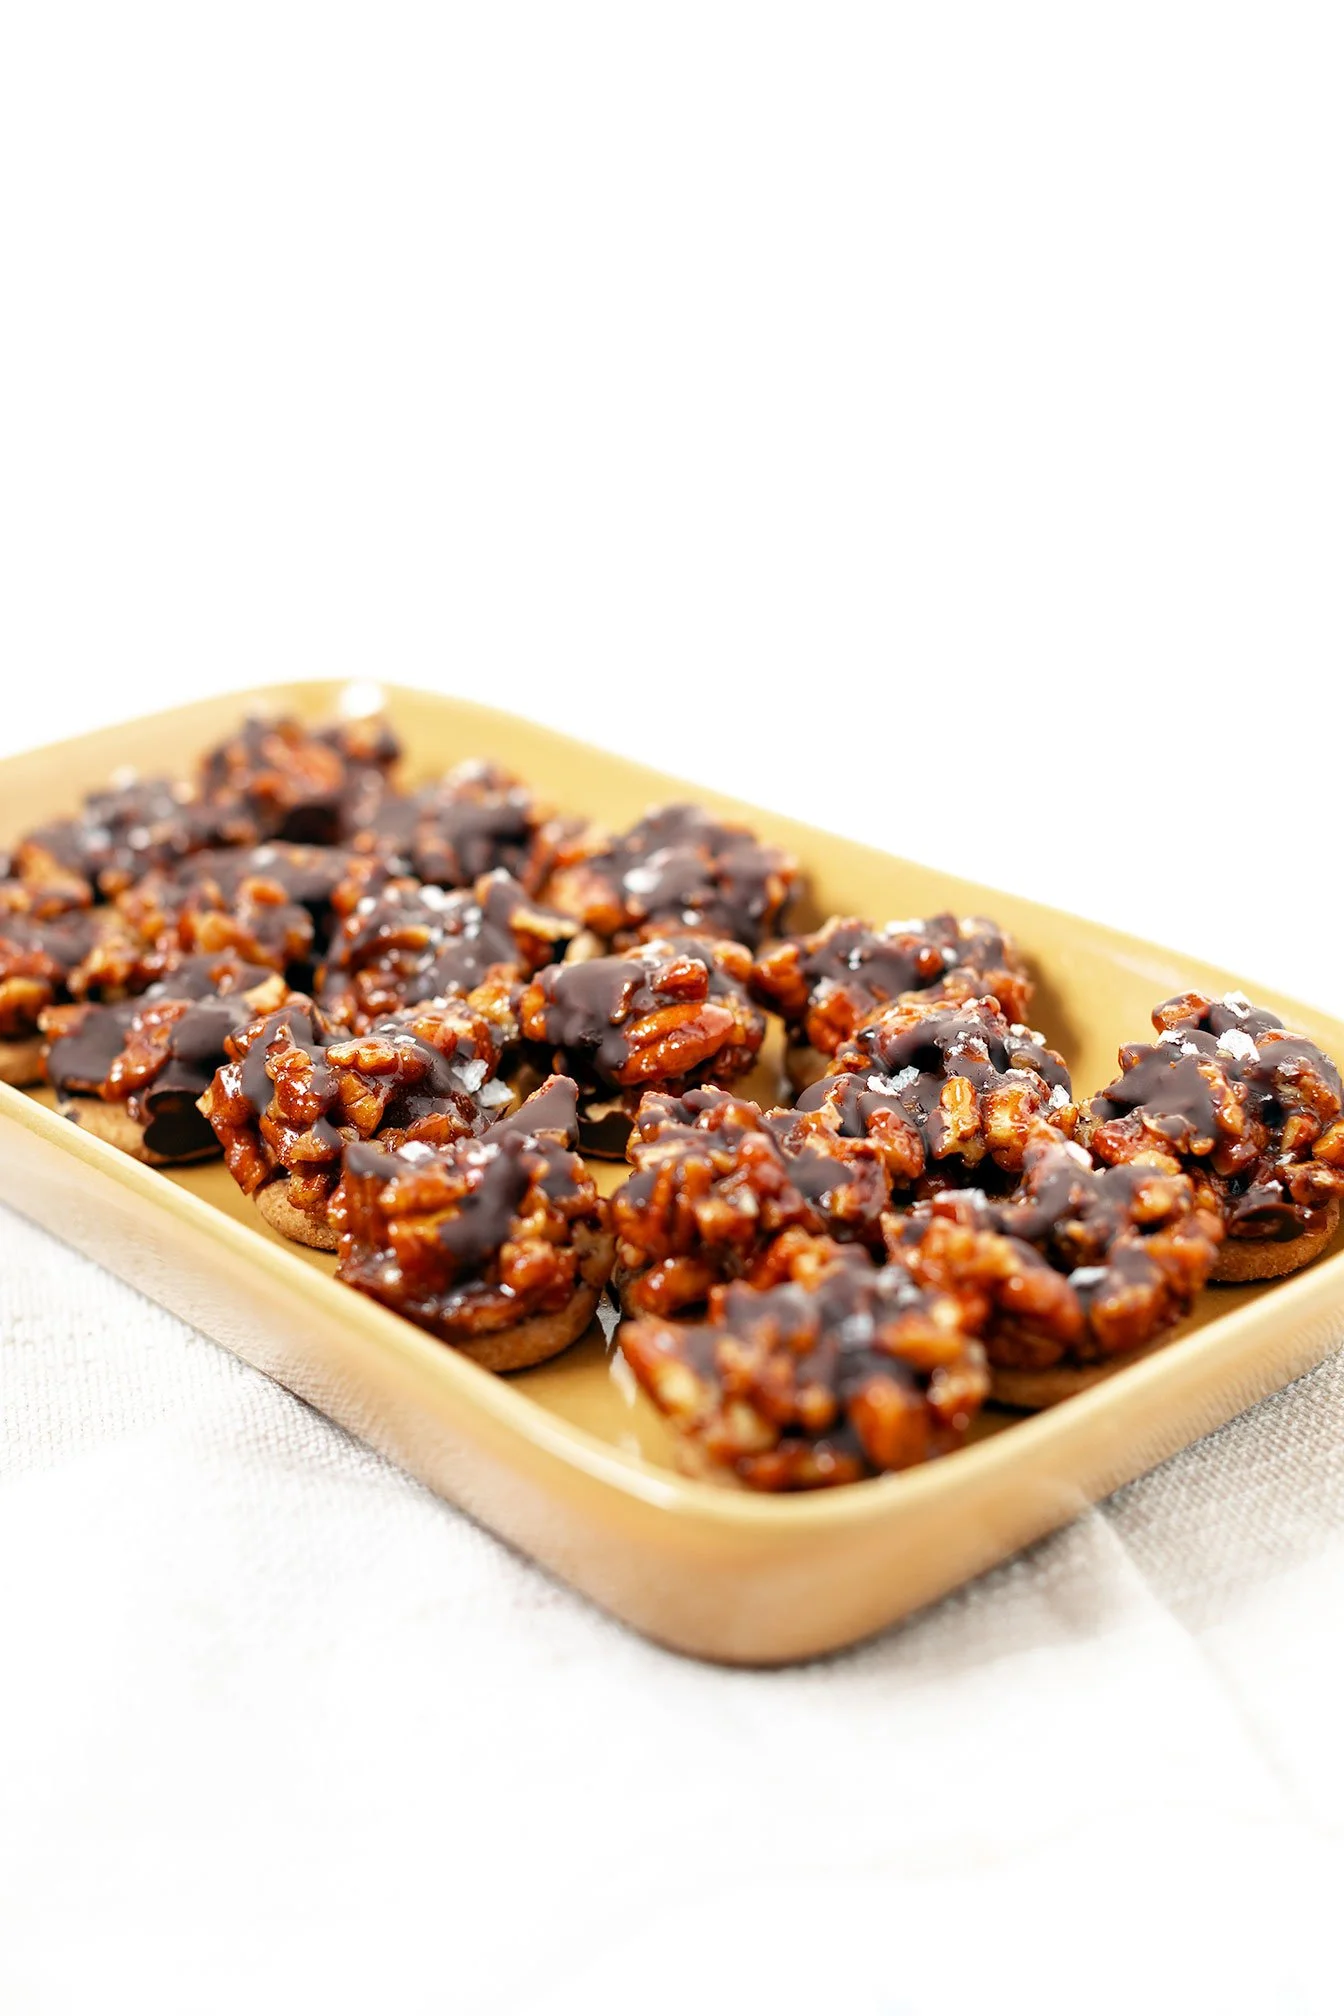
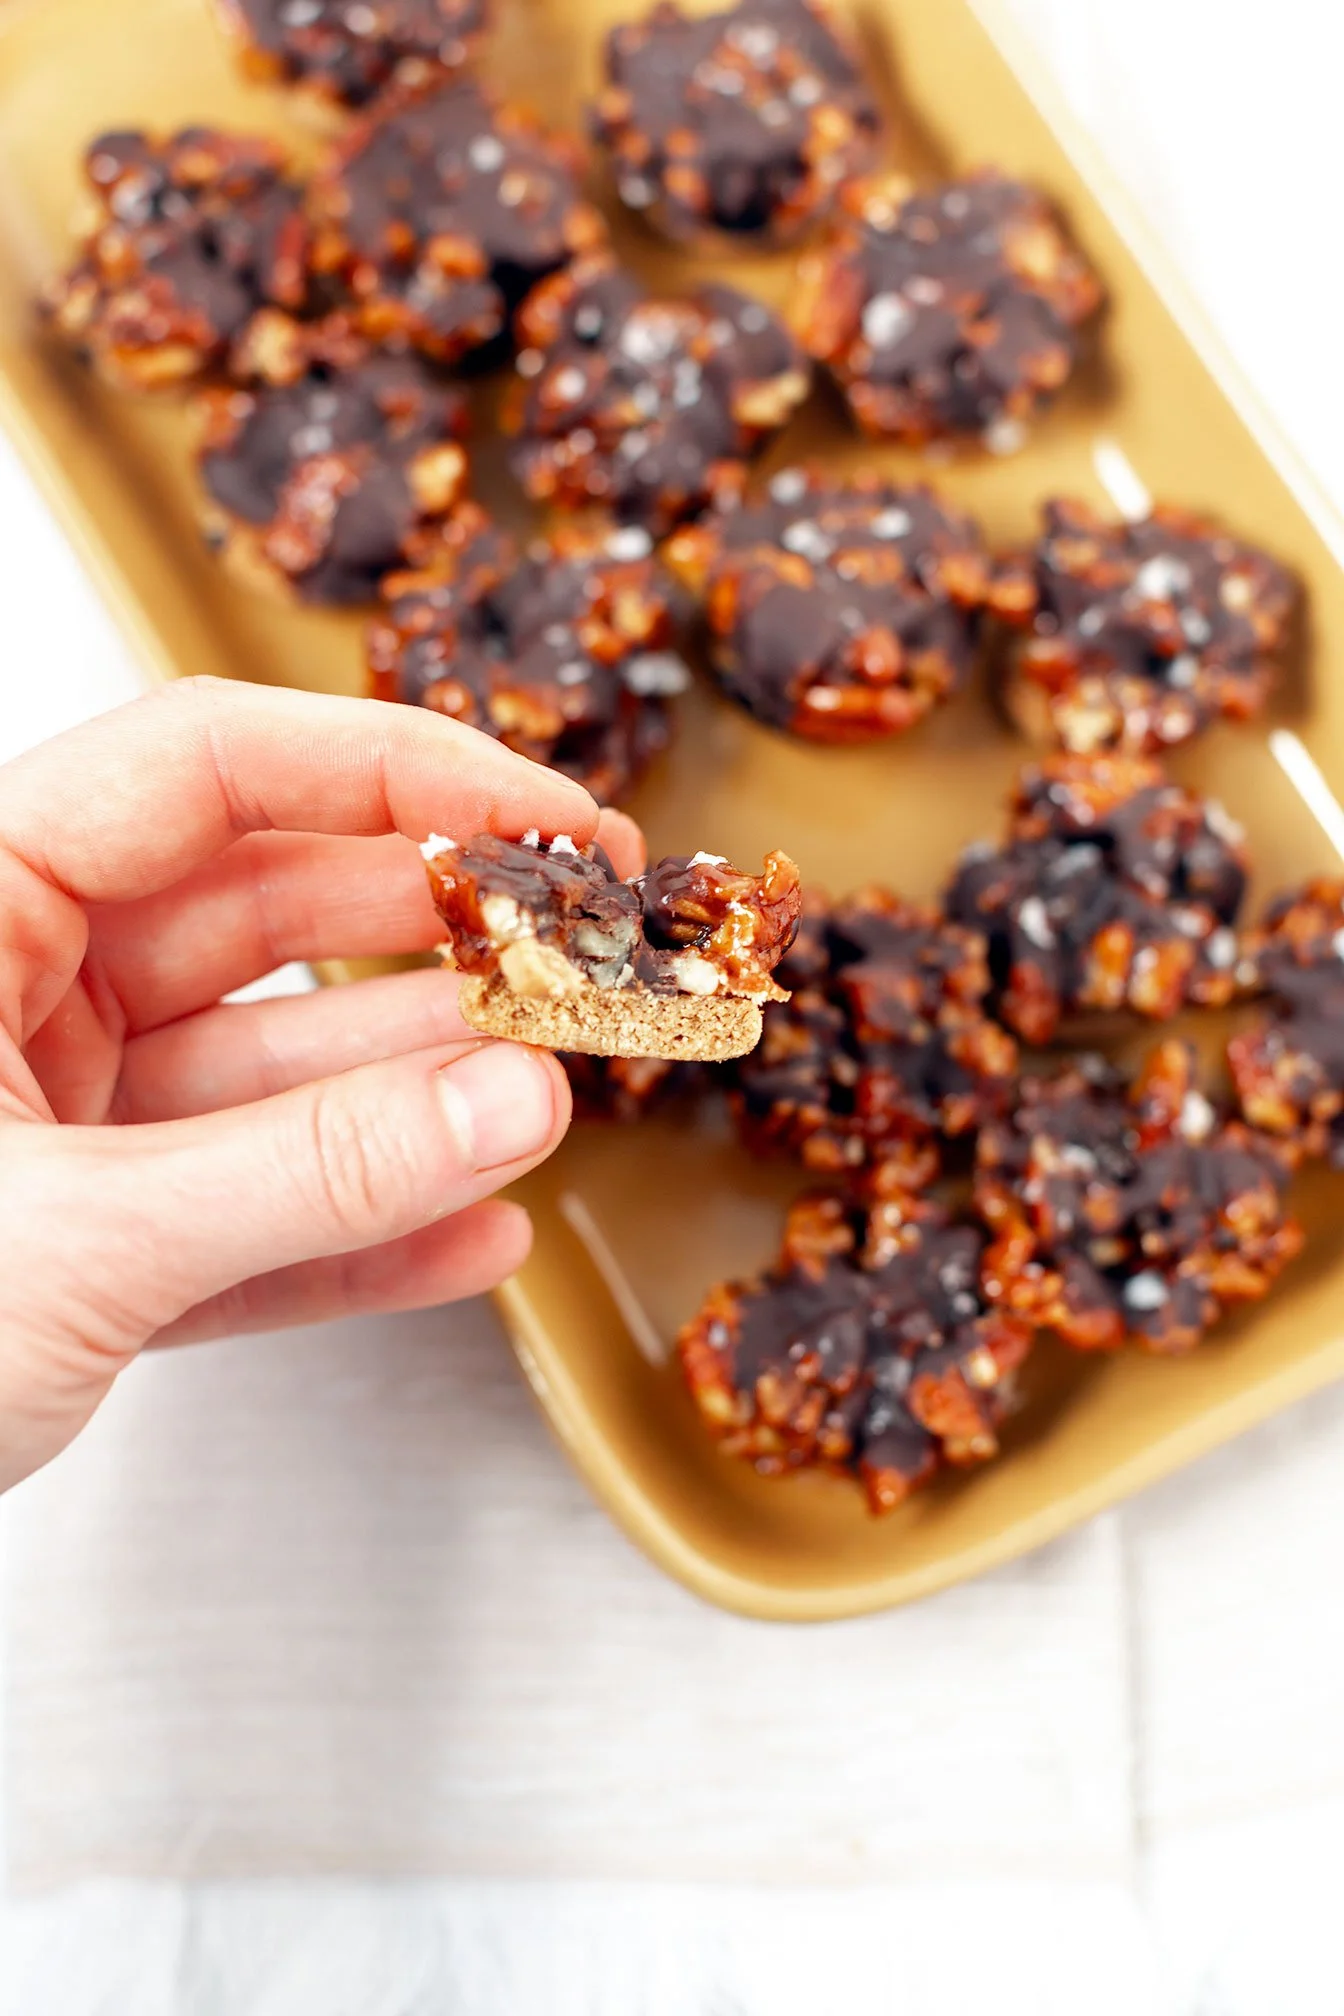
No-Bake Mini Pecan Pie Bites
These no-bake mini pecan pie cups are gluten-free, refined sugar-free, and made with Siete cookies. Quick, healthy-ish, and perfect for holiday desserts!
These no-bake mini pecan pie cups are gluten-free, refined sugar-free, and made with Siete cookies. Quick, healthy-ish, and perfect for holiday desserts!

If you love pecan pie but don’t love baking crust, rolling dough, or turning your kitchen into chaos… these No-Bake Mini Pecan Pie Cups are about to become your new obsession.
They’re:
✔ gluten-free
✔ refined sugar-free (sweetened with maple + date sugar)
✔ made in under 15 minutes
✔ no crust, no oven, no fuss
✔ perfectly sweet + salty + crunchy


Instead of a traditional crust, these mini pies use Siete Mexican Shortbread Cookies as the base — which makes them buttery, crumbly, and naturally gluten-free without any extra work from you. Top them with a drizzle of chocolate and flaky sea salt and they taste like a gourmet holiday dessert with zero effort.

⬇️ 🎥 A YouTube video tutorial below if you want to watch the full step-by-step!
Storage Instructions (Food Safety-Friendly)
Refrigerator:
Store in an airtight container for up to 7 days. Because the filling contains butter and nuts, keeping them chilled preserves freshness and prevents oil separation.
Freezer:
Freeze in a sealed container for up to 3 months.
Let thaw at room temperature for 10–15 minutes before enjoying.
Recipe Notes + Brand Recommendations
Cookies: Siete Mexican Shortbread Cookies make the perfect gluten-free base. You can use my code ROOTS15 15% off.
Salt: I use flaky salt from Redmond Real Salt — code ROOTS15 works here too.
Chocolate: Hu Kitchen Sea Salt Dark Chocolate gives the best flavor for drizzling.
✨ If you try this recipe, make sure to tag me in your socials so I can cheer you on in the kitchen! Or leave feedback in the comments!
No-Bake Mini Pecan Pie Bites (Gluten-Free, Healthy-ish + SO Easy)
These no-bake mini pecan pie cups are gluten-free, refined sugar-free, and made with Siete cookies. Quick, healthy-ish, and perfect for holiday desserts!
Servings: 22 mini pies Prep: 10 MIN chill time: 20 MIN
Ingredients
Base
22 Siete Mexican Shortbread Cookies (1 per muffin cup; sometimes bags contain 20–22)
Pecan Pie Filling
2–4 Tbsp butter (use 4 tbsp for richer filling; 2 tbsp works if you prefer lighter)
½ cup maple syrup
⅔ cup date sugar
1 tsp vanilla extract
Generous pinch of cinnamon
Generous pinch of sea salt
1½ cups chopped pecans
Optional Chocolate Drizzle
½ bar Hu Kitchen Sea Salt Dark Chocolate
1–2 tsp coconut oil
Flaky sea salt (I use Redmond Real Salt)
Directions
Prepare the muffin tin.
Lightly spray a 24-count mini muffin tin with avocado oil. This helps the mini pies release easily, especially if adding chocolate.Add the cookie base.
Place one Siete Mexican Shortbread Cookie into each muffin cup. You should get 20–22 cookies per bag — either amount works.Toast pecans in butter.
In a medium skillet over medium-high heat, melt the butter. Add the chopped pecans and stir until they are fully coated and lightly toasted (1–2 minutes).Create the filling mixture.
Add the maple syrup and date sugar. Stir quickly and continuously to prevent burning. Once the mixture becomes glossy and sticky, immediately remove the skillet from heat.Add flavor.
Stir in vanilla, cinnamon, and a pinch of salt. Mix until everything is evenly combined.Fill the cups.
Using a 1 tablespoon scoop, spoon the warm pecan filling over each cookie. Work quickly before the mixture thickens.(Optional) Add chocolate drizzle.
Melt chocolate with coconut oil (microwave or double boiler). Drizzle over the top of each pecan pie cup and finish with flaky sea salt.Chill + remove.
Transfer the muffin tin to the fridge for 15–20 minutes to set.
Once firm, slide a thin knife around the edges to release (most should pop out easily, especially with the oil spray).Serve or store.
Enjoy immediately or store chilled — see storage notes above.
Note:
Date sugar is less refined and does not dissolve like traditional sugar. If you prefer a smoother, less grainy texture, you can reduce the date sugar to ⅓ cup. Using the full ⅔ cup creates a richer, more traditional sweetness with a slightly more textured filling. Adjust based on taste and texture preference.

Harvest Stuffed Acorn Squash
Harvest stuffed acorn squash is an ideal autumn comfort dish that is rich in protein, features seasonal ingredients, and requires minimal kitchen tools!
Harvest stuffed acorn squash is an ideal autumn comfort dish that is rich in protein, features seasonal ingredients, and requires minimal kitchen tools!


Servings: 4 Prep: 15 MIN Cook time: 55 MIN
Ingredients
For the squash:
2 acorn squash
4 tsp olive oil or olive/avocado spray
S+P
For the filling:
1 lb Italian sausage or chicken sausage
4 oz mushrooms (finely chopped)
1/2 small yellow onion (finely diced)
1 medium honeycrisp apple (finely diced) or 1/4 cup dried cranberries
1/2 tsp salt
1/4 tsp black pepper
1/4 tsp cinnamon
1/8 tsp allspice (optional)
2 cloves minced garlic (or 1 tsp garlic powder)
1 Tbsp fresh sage (chopped)
1/2 cup shredded parmesan cheese, divided
Directions
Preheat oven to 400 degrees and line a baking sheet with parchment paper.
To a medium skillet, heat oil over medium heat and sauté onion and peppers for about 5 minutes. Move sauté veggies to the side and add turkey sausage to the center, crumbling the meat. Let cook, stirring and crumbling meat until meat is completely browned, for about 10 minutes. Turn heat off and let mixture to cool.
In a large mixing bowl, whisk together eggs and yogurt. Add in turkey mixture and incorporate. Add in the rest of the dry ingredients: almond and coconut flour, nutritional yeast, baking powder, and seasonings using a spatula until combined.
Using ¼ - ½ cup or large cookie scoop, make 12 evenly sized balls and place them on the sheet pan. Place in the oven for 12-16 minutes until slightly browned all over.
Remove from the oven and let cool completely before storing in an airtight container in the fridge for up to 5 days.

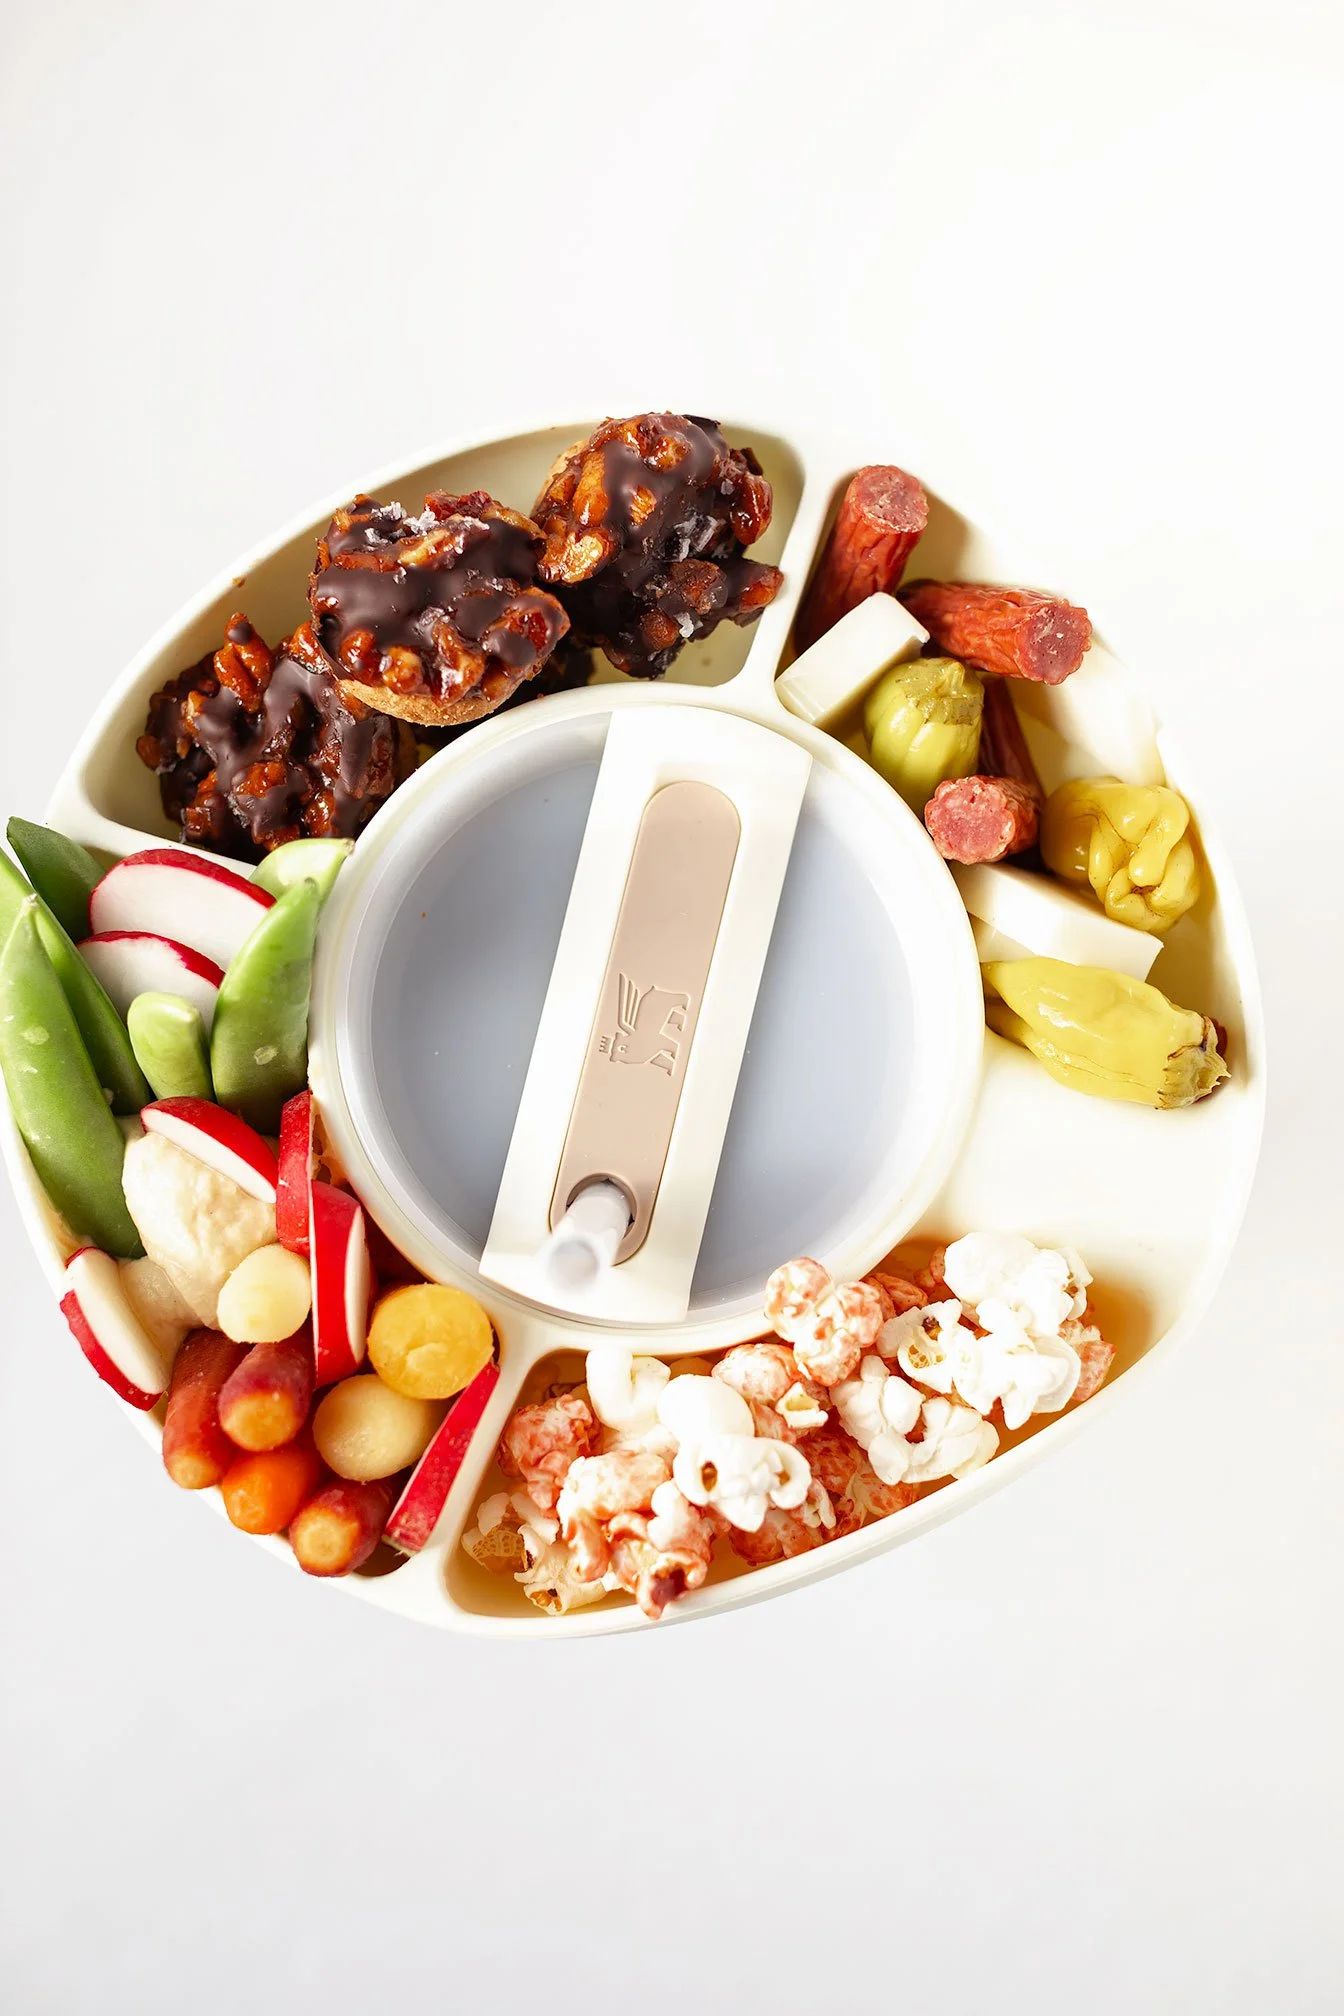
Halloween Munch Dark Chocolate Bark
Halloween bark recipe is as simple as they come! Using only 3-ingredients to make the bark, and topped with your favorite go-to halloween candy products or venturing out into the healthier but still spookier side!
Halloween munch dark chocolate bark is a fun and creative way of using healthier Halloween candy products!

For October’s virtual cooking class, I wanted to create a fun, festive and kid friendly dessert using healthier candy products. It’s so easy to switch out sugar and overly processed-filled Halloween candy products with healthier brands like Yum Earth, That’s It, Hu Kitchen and so much more (product recommendations for this recipe at the bottom!)


Halloween bark recipe is as simple as they come! Using only 3-ingredients to make the bark, and topped with your favorite go-to halloween candy products or venturing out into the healthier but still spookier side!

FAQs and tips on making dark chocolate bark:
After the chocolate has cooled, it is hard to spread or for toppings to stick so work quickly while your chocolate is still warm!
Storage? If the chocolate bark is set out at room temperature for too long, it will start to melt so best to store in the fridge for about a week or the freezer for 2 months. Don’t expect it to last that long in your house, though!
A spatula or back of a spoon are the best tools to spread the chocolate across a parchment paper lined baking sheet.
You can obviously use a double broiler to melt your chocolate but the fastest and easiest method is simply using a microwave! Microwave in 30 second increments while stirring until melted.


Other great Halloween recipes: spookylicious green smoothie
If you try this recipe, let us know! Leave a comment, rate it, and don’t forget to tag a photo to #fromtherootsblog on Instagram. We love seeing what you come up with!
Halloween munch dark chocolate bark is a fun and creative way of using healthier Halloween candy products!
SERVINGS: 6-8 | PREP TIME: 5 MIN | COOK TIME: N/A
Ingredients
2 cups dark chocolate chips (about 12 oz)
1/3 cup white chocolate chips
1 Tbsp+ 1 tsp coconut oil
1/4 cup candy corn
1/4 cup gummy worms
1/4 cup popcorn
Halloween sprinkles
Directions
Line a medium/large baking sheet with parchment paper or aluminum foil leaving overhang on at least two sides.
Add the chocolate chips and 1 Tbsp coconut oil to a microwave-safe bowl and microwave for 30 sec. Stir with a spoon and continue to warm in 30 sec increments until melted.
Spread the melted chocolate across the prepared baking sheet and use a rubber or offset spatula to smooth into an even layer.
Melt the white chocolate and 1 tsp oil in a separate bowl for 30 sec increments until smooth.
Drizzle the white chocolate in a “spiderweb or mummy style” across the baking sheet of melted dark chocolate.
Place candies, popcorn, and sprinkles on top of the bark while melted then place the baking sheet in the fridge or freezer for 1 hr to harden. Once hard, use a knife to cut into pieces of bark and enjoy!
Notes
Keep bark in an airtight container in the fridge or freezer until ready to eat!
SHOP OUR FAVORITE INGREDIENTS FOR THIS RECIPE!


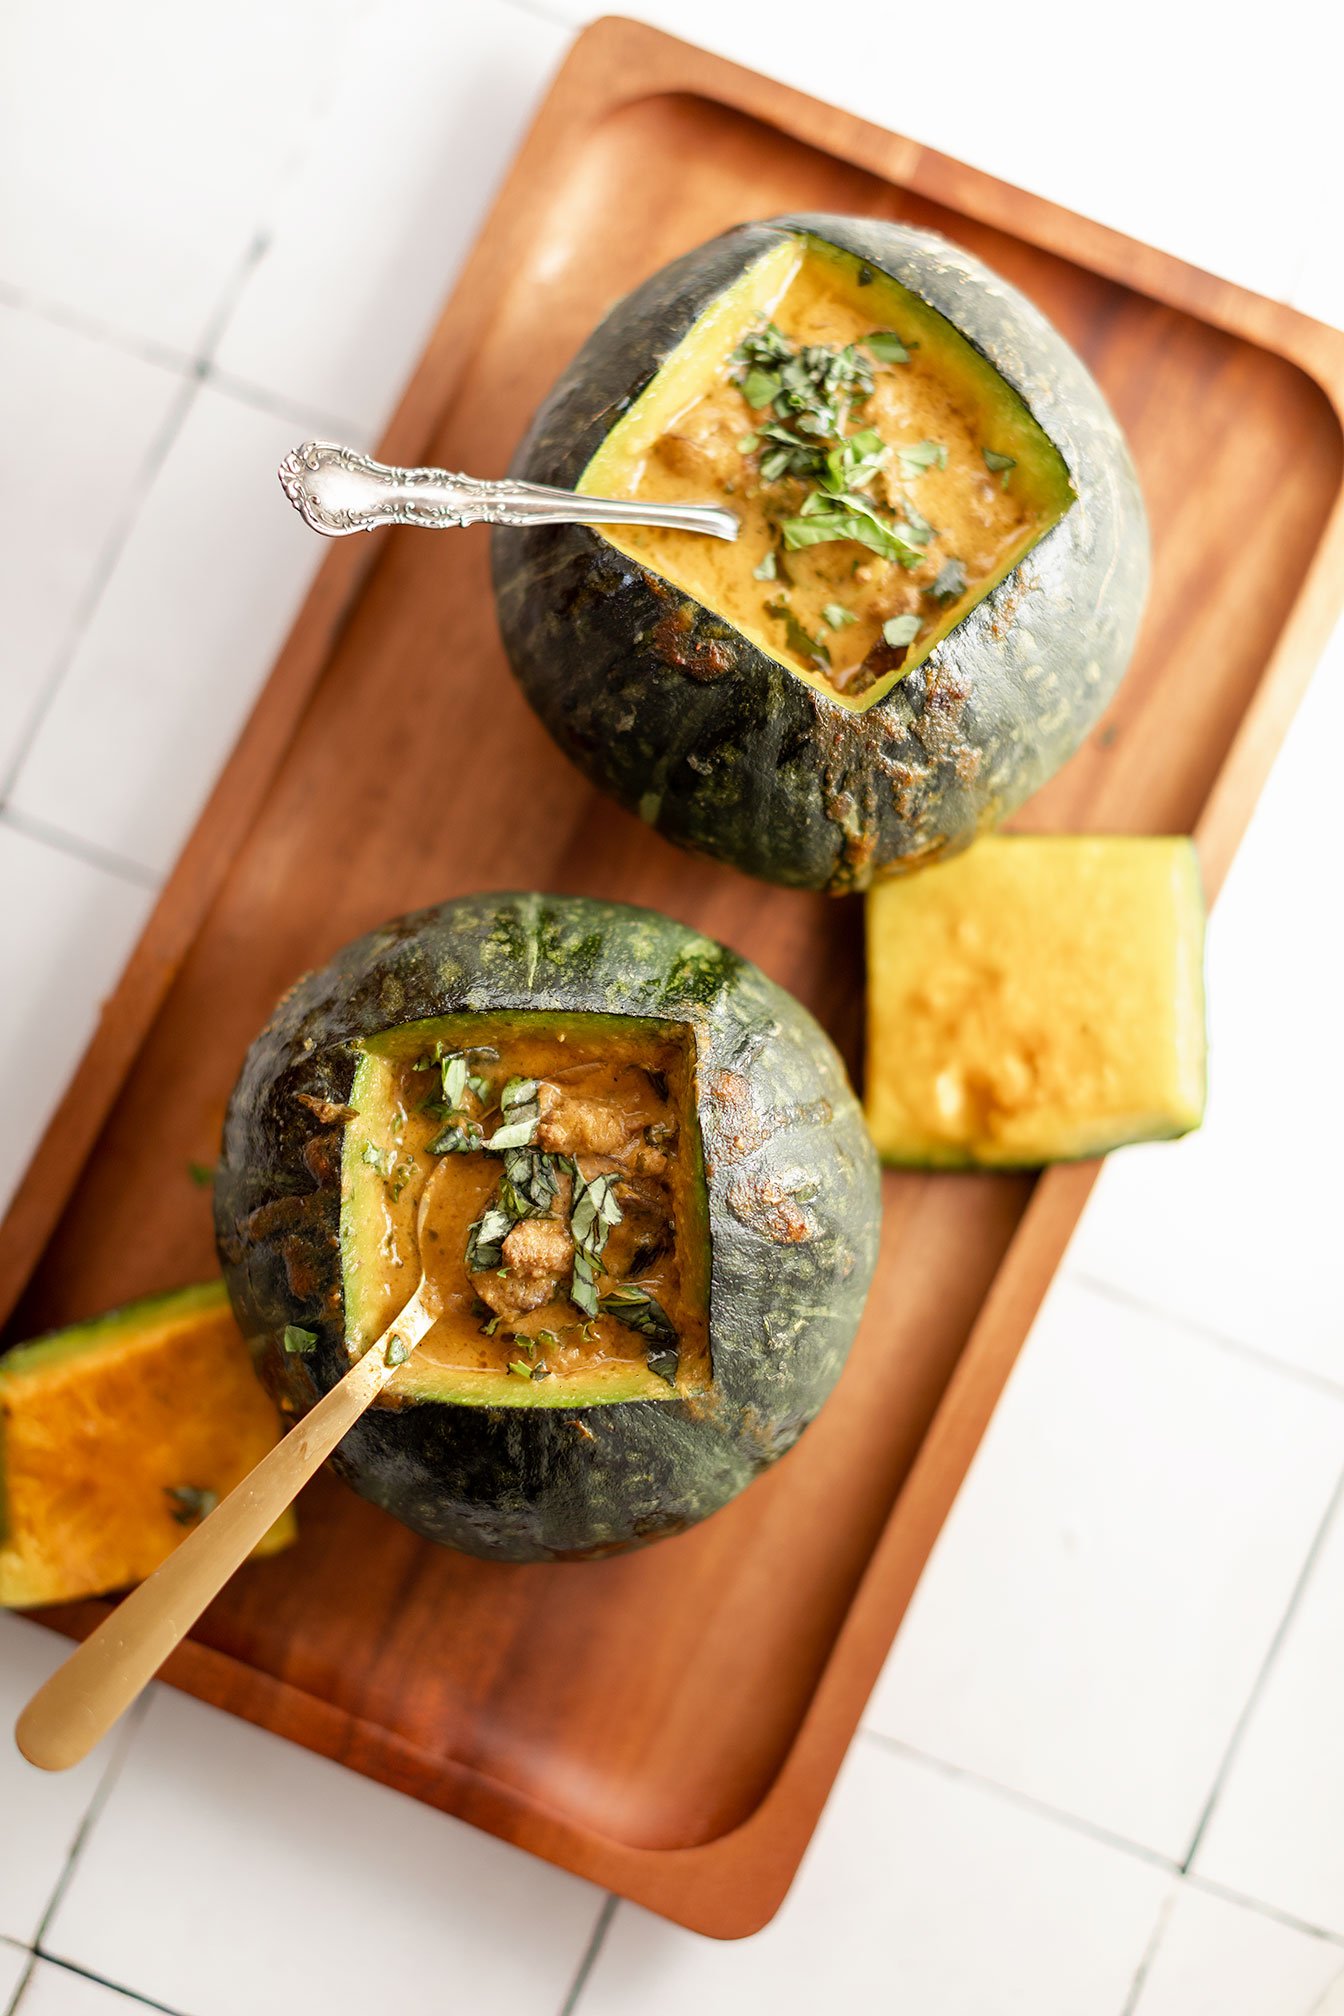
Lamb Stew Squash Bowl
that can also be served with a side of rice.
Lamb stew squash bowl has got to be the epitome of winter comfort. There is nothing like spending an hour or two in the kitchen creating a comfort dish and sharing it with your loved ones. Especially when you are using seasonal ingredients that are not only nourishing for the body, but for the soul.
For this recipe, I used kabocha squash as they are the perfect “bowl” size for this dish but you can also use: pumpkin, acorn, butternut, delicata, or even zucchini. Random thought but if you have a large family or fun gathering, using a large pumpkin for this dish would definitely be the star on the table as well as a crowd pleaser!
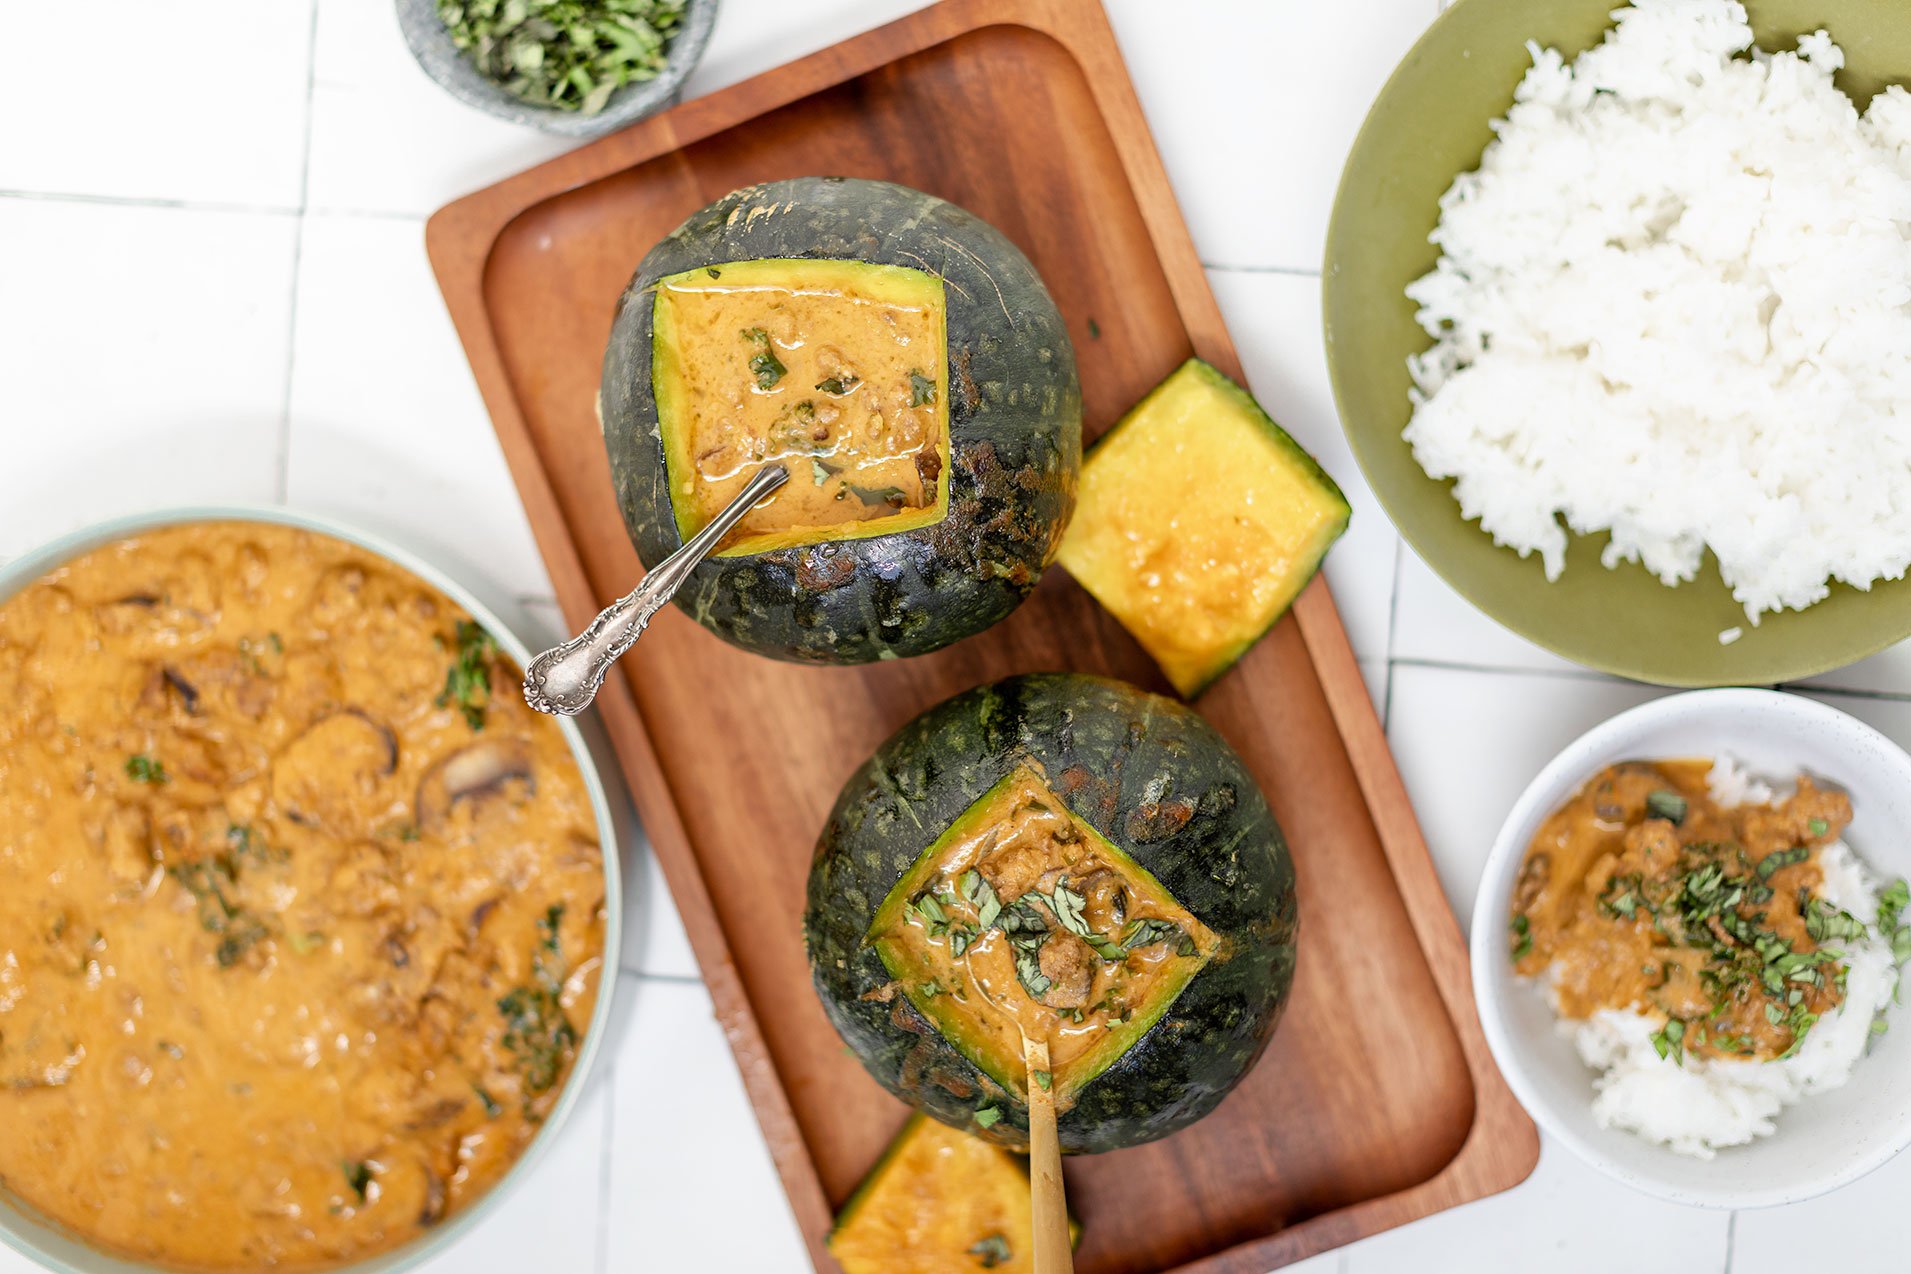
Nourishing and hearty lamb stew squash bowl that can also be served with a side of rice.
Lamb stew squash bowl has got to be the epitome of winter comfort. There is nothing like spending an hour or two in the kitchen creating a comfort dish and sharing it with your loved ones. Especially when you are using seasonal ingredients that are not only nourishing for the body, but for the soul.


For this recipe, I used kabocha squash as they are the perfect “bowl” size for this dish but you can also use: pumpkin, acorn, butternut, delicata, or even zucchini. Random thought but if you have a large family or fun gathering, using a large pumpkin for this dish would definitely be the star on the table as well as a crowd pleaser!

Squash not accessible or not keen on squash? Feel free to prepare a side of rice, quinoa or roasted sweet potatoes to go with the stew!
Now that we are on the stew topic, I could literally drink this smooth, creamy flavor bomb of a stew just on its own! I’m telling you, there is nothing like roasting your veggies prior to blending into a cream sauce. Just saying!

If you try this recipe, let us know! Leave a comment, rate it, and don’t forget to tag a photo to #fromtherootsblog on Instagram. We love seeing what you come up with!
Nourishing and hearty lamb stew squash bowl that can also be served with a side of rice.
Servings: 4-6 | Prep Time: 20 min | Cook Time: 1 hour
Ingredients
1 lb ground lamb or meat of choice
2 small kabocha squash or squash / pumpkin of choice
1 8 oz container baby bella mushrooms, sliced
2 cups kale or collard greens, shredded
1 can coconut milk, unsweetened
1 onion
2 large tomatoes
6 cloves garlic
1 .5 oz organic fresh basil (small container)
1 Tbsp favorite go-to seasoning
1-2 Tbsp grass-fed butter
Kosher salt and pepper
Directions
Preheat the oven to 400 degrees.
Clean out both squash and line the inside and lid with butter, set aside.
Slice tomatoes and onion in half, and place on a cookie sheet with crushed cloves of garlic. Drizzle oil and kosher salt and cook in the oven for 25 minutes.
While the tomato mixture is cooking, crumble ground meat in a large skillet over medium heat. Add the seasoning and saute until the lamb meat is fully cooked. Set aside but keep rendered fat in the skillet.
After the roasted veggies have cooled down, remove the outer skin from the onion and transfer everything to a blender. Add in the coconut milk and basil and blend until smooth. Taste test and add additional salt if needed.
Add mushrooms and kale to the skillet with reserved lamb fat and set over medium heat. Saute for about 5 minutes and pour in the blended cream mixture and cooked lamb meat. Remove from heat and transfer the mixture into your buttered squashes.
Place filled squash bowls on a cookie sheet with the lids on top and cook in the oven for 25 minutes.
At this time, if you have leftover lamb stew, feel free to make a side of steamed rice.
Remove from the oven and garnish with basil chiffonade and enjoy! Don’t forget to scrape the inside of your squash as you eat!

Apple Butter
So before the fall season comes to an end, it’s time to take all the apples from orchard picking or local farmer’s market visits to make a big batch of homemade apple butter!
For this recipe, I visited Mercier Orchards in Blue Ridge, Georgia and chose a combination of Crimson Crisp and Pink Lady for this recipe. If you don’t have an orchard to visit or not sure what type of apple works well for apple butter, you want to look for something sweet, not tart like: gala, jonagold, Mcintosh, honeycrisp, fuji or evercrisp.
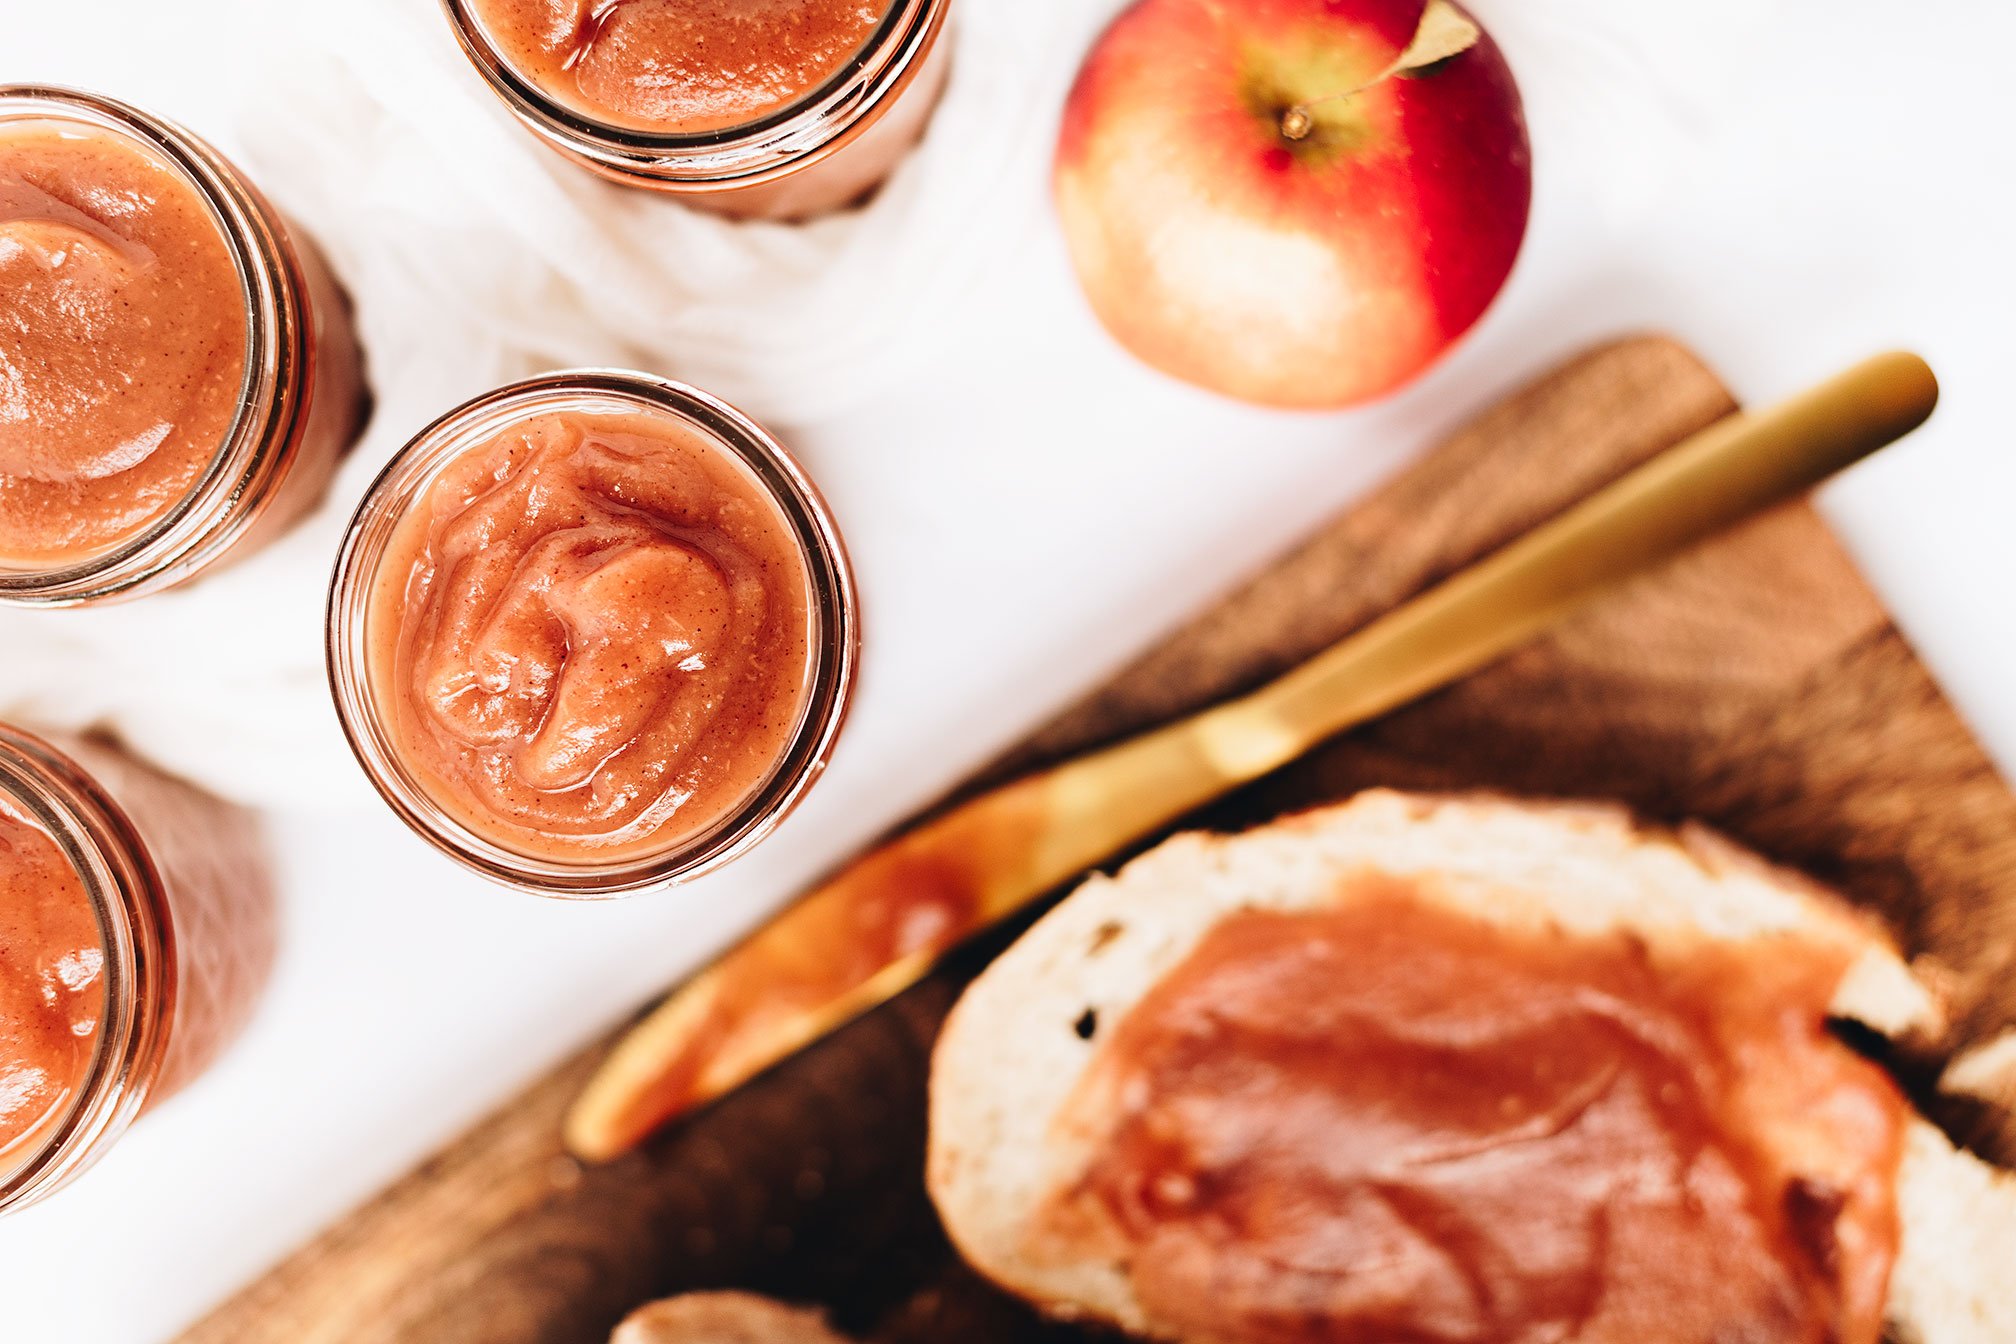
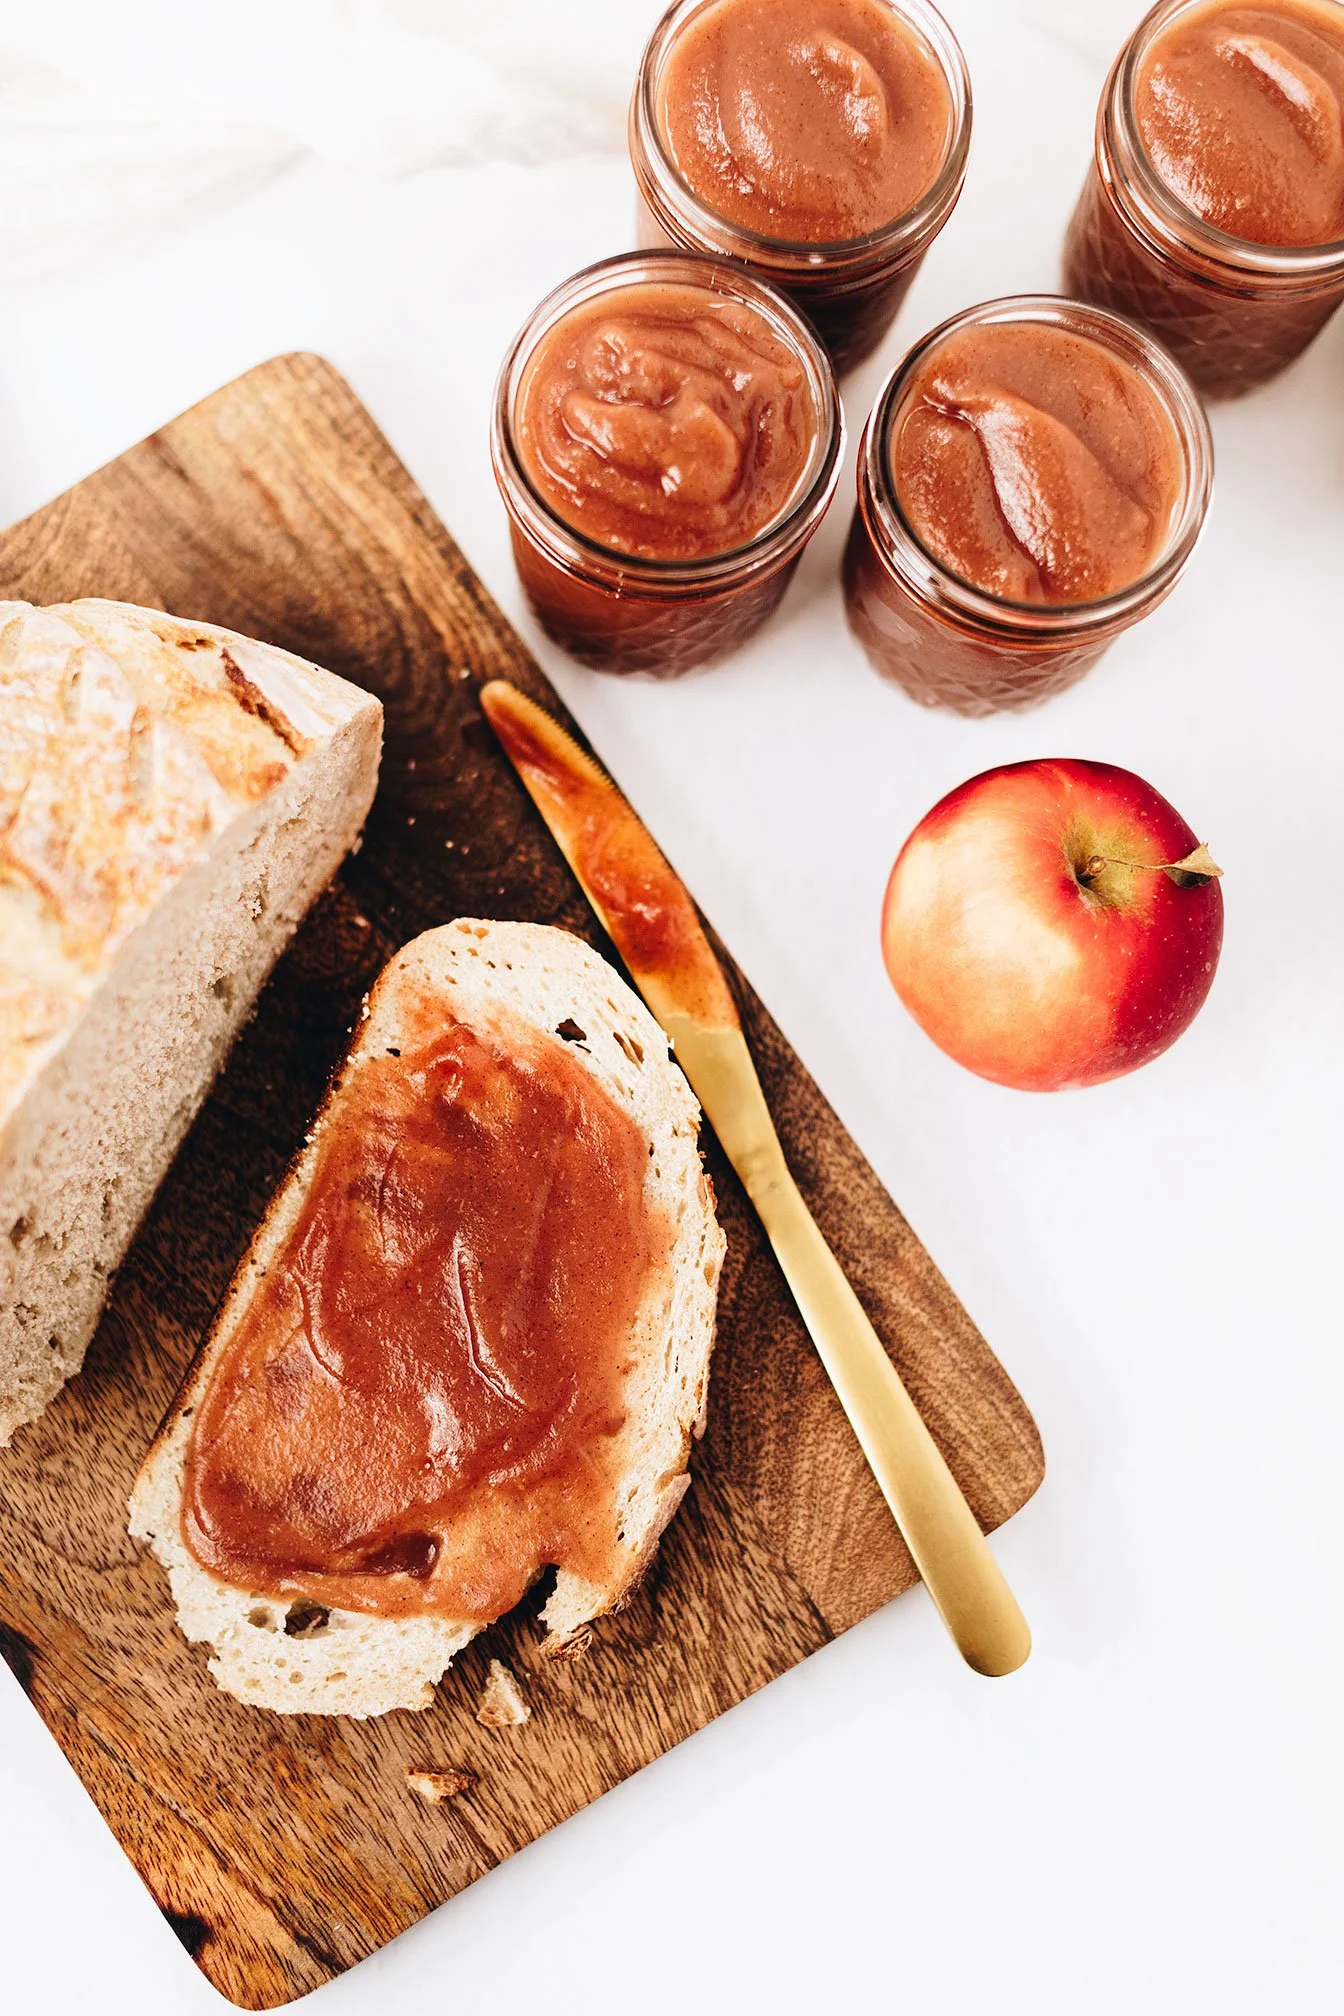
Get all the fall feels with this homemade Instant Pot Apple Butter Recipe!
If you can’t already tell by the amount of apple recipes on the blog or through my social media, I am mildly obsessed with apples! There is nothing like biting into a honeycrisp after a workout or eating homemade chicken salad and getting a sweet apple crunch in every bite!

So before the fall season comes to an end, it’s time to take all the apples from orchard picking or local farmer’s market visits to make a big batch of homemade apple butter!
For this recipe, I visited Mercier Orchards in Blue Ridge, Georgia and chose a combination of Crimson Crisp and Pink Lady for this recipe. If you don’t have an orchard to visit or not sure what type of apple works well for apple butter, you want to look for something sweet, not tart like: gala, jonagold, Mcintosh, honeycrisp, fuji or evercrisp.


If you are wanting naturally sweet apple butter, then your best option is to choose these apple options within season as they are pretty sweet on their own and pack a major flavor! But in this recipe, I have added a natural sweetener like pure maple syrup in case you would like a tad bit more sweetness.
I love spreading my apple butter on homemade sourdough bread, cornbread muffins, waffles, pancakes, or even meats like pork chops. You can add it to your yogurt, kefir, smoothie, oatmeal - just about anything and everything!

I’m all about efficiency so I made this recipe using an Instant Pot. But if you don’t have an Instant Pot, crockpot or stove top will do just fine! You just want to make sure that the apples cook down enough until most of the liquid has evaporated. The process of cooking past the apple sauce stage, creates the smooth jam or butter like consistency, rather than applesauce.
If you try this recipe, let us know! Leave a comment, rate it, and don’t forget to tag a photo to #fromtherootsblog on Instagram. We love seeing what you come up with!
Get all the fall feels with this homemade Instant Pot Apple Butter Recipe!
Cook Time: 1.5-2 hrs | Prep Time: 10 min | Serving: 4 pints apple butter
Ingredients
4.5 - 5 lb apples, cored and diced (not peeled!)
1 Tbsp apple pie seasoning
1-2 tsp ground cinnamon
¼ cup pure maple syrup (depending on sweetness level)
Juice of 1 lemon
1 tsp vanilla extract
½ cup filtered water
Directions
In a large bowl, place sliced and cored apples, seasonings, sweetener, lemon juice, vanilla extract and water and stir until well combined.
Transfer to your Instant Pot and secure the lid, seal the valve. Cook for 20 minutes on high pressure, then allow a full natural release. Remove the lid.
Using an immersion blender (or transfer batches in a regular blender), blend the contents until smooth. Taste test for desired sweetness/tart level. (i.e. want more tartness, add 1 tsp increments lemon juice, sweetness - 1 Tbsp increments of sweetener, spice - 1 tsp increments seasonings). Add the contents back into Instant Pot and press Saute. Allow to cook for 30-60 minutes while stirring frequently until the apple butter has thickened and darkened to desired consistency.
Press Cancel on the Instant Pot, then allow the apple butter to cool completely before transferring to large mason jars. Store in the refrigerator for up to 3 weeks. Freeze for up to 6 months. (Make sure you sharpie today’s date on the jar!)
SHOP OUR FAVORITE TOOLS + INGREDIENTS FOR THIS RECIPE!