Sort by Category
- May 2026
- March 2026
- December 2025
- November 2025
- October 2025
- September 2025
- August 2025
- June 2025
- August 2024
- July 2024
- June 2024
- May 2024
- February 2024
- January 2024
- December 2023
- November 2023
- October 2023
- September 2023
- August 2023
- July 2023
- March 2023
- February 2023
- January 2023
- December 2022
- November 2022
- October 2022
- September 2022
- August 2022
- June 2022
- May 2022
- April 2022
- March 2022
- February 2022
- January 2022
- December 2021
- November 2021
- October 2021
- September 2021
- August 2021
- July 2021
- June 2021
- May 2021
- April 2021
- March 2021
- February 2021
- January 2021
- December 2020
- November 2020
- October 2020
- September 2020
- August 2020
- July 2020
- June 2020
- May 2020
- April 2020
- March 2020
- February 2020
- January 2020
- December 2019
- November 2019
- October 2019
- September 2019
- August 2019
- July 2019
- June 2019
- May 2019
- April 2019
- March 2019
- February 2019
- January 2019
- December 2018
- November 2018
- October 2018
- September 2018
- August 2018
- July 2018
- June 2018
- May 2018
- April 2018
- March 2018
- February 2018

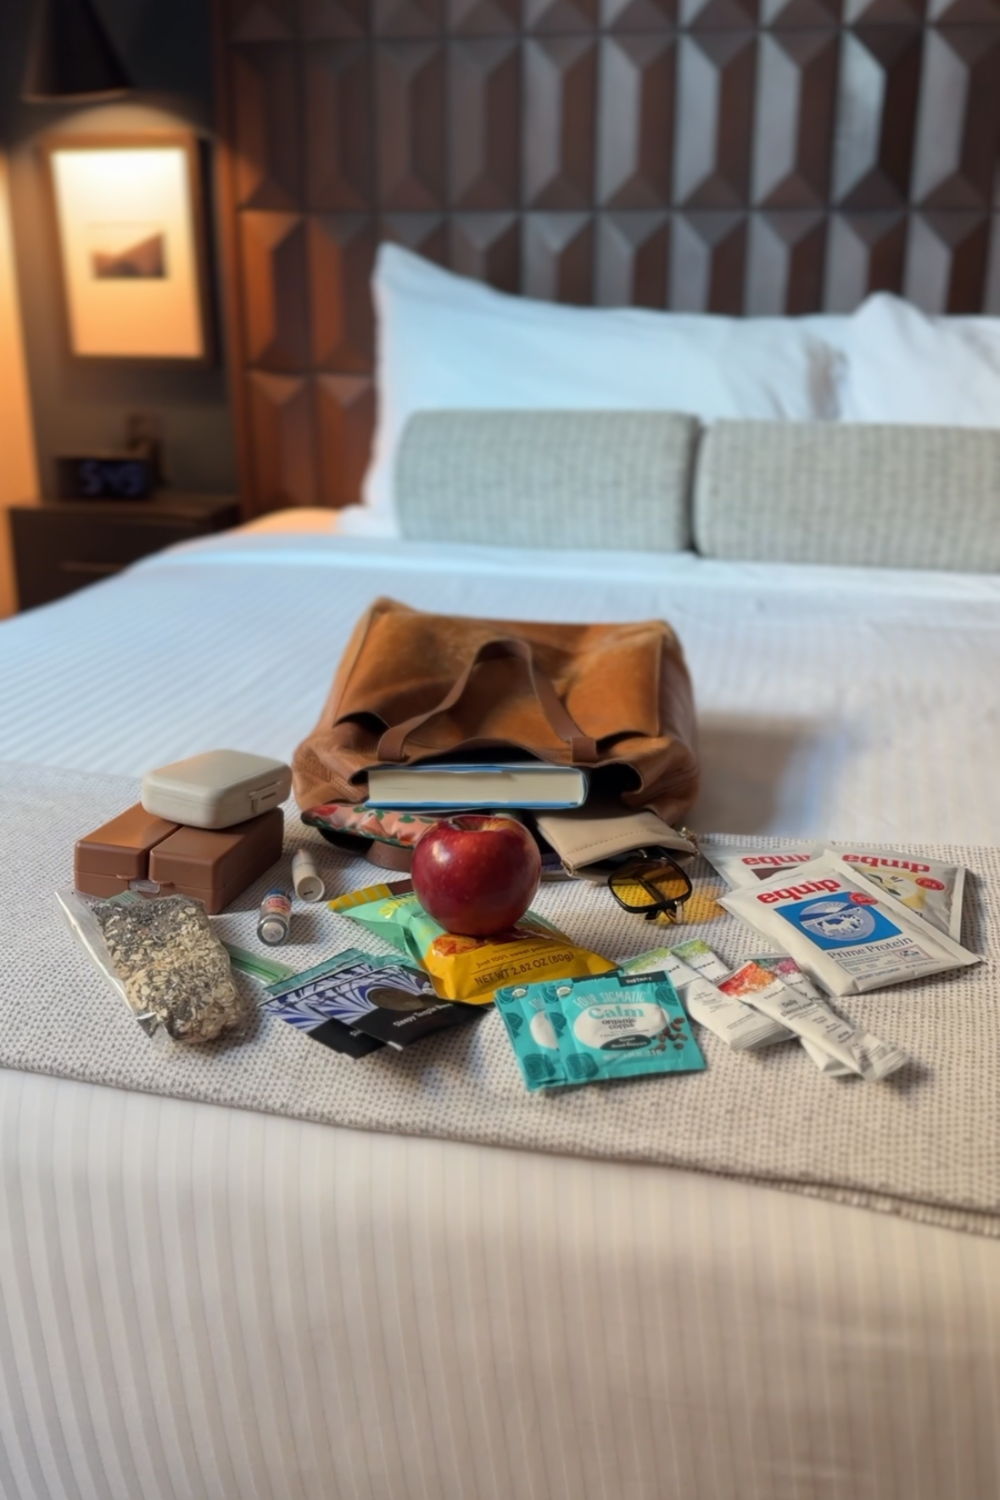
What’s In My Travel Bag: Wellness Essentials I Never Leave Home Without
A realistic look inside my travel bag and the wellness essentials I never skip while traveling. From protein packs and electrolytes to snacks, supplements, and travel-friendly routines that help me stay consistent without overcomplicating things.
If you’ve ever felt like traveling completely throws off your routine, you are not alone. Between airport food, long car rides, changing schedules, and forgetting half the things you actually use daily, it can feel impossible to stay consistent.
But honestly, I’ve realized that staying healthy while traveling is less about being perfect and more about making things easy.
The easier I make it to support my body while I’m away from home, the better I feel. Better digestion, better energy, less bloating, fewer cravings, and way less of that “I need a reset after vacation” feeling.
So if you’ve been wondering what functional nutrition and wellness girlies are actually packing right now, here’s a peek inside my travel bag and the things I refuse to skip even while traveling.
Why Your Travel Bag Matters for Wellness
One of the biggest reasons people struggle with consistency while traveling is because they rely on motivation instead of preparation.
When you already have your supplements, protein, hydration support, snacks, and essentials packed and ready, it removes the decision fatigue.
You are way more likely to stay on track when the healthy option is already in your bag.
This is exactly why I always say wellness should support your life, not control it.
If you want more travel wellness tips, definitely check out these posts too:
Supplement Organizers
First things first. Supplement organizers.
If I’m being realistic, I am not carrying ten full supplement bottles in my carry-on.
I use compact travel organizers so I can pre-pack exactly what I need for the trip. It keeps everything organized, saves space, and honestly makes it so much easier to stay consistent.
This is especially important if you are actively working on gut health, mineral balance, hormone support, energy, or digestion support because skipping your routine for several days can absolutely make you feel it.
I also go more in depth about this in my post:
How to Stay Consistent with Your Supplements While Traveling
Shop My Travel Wellness Essentials
Especially during summer travel or beach days.
My favorite for hydration support while flying or being out in the heat all day.

Perfect for flights, busy mornings, or when travel food options are lacking protein.
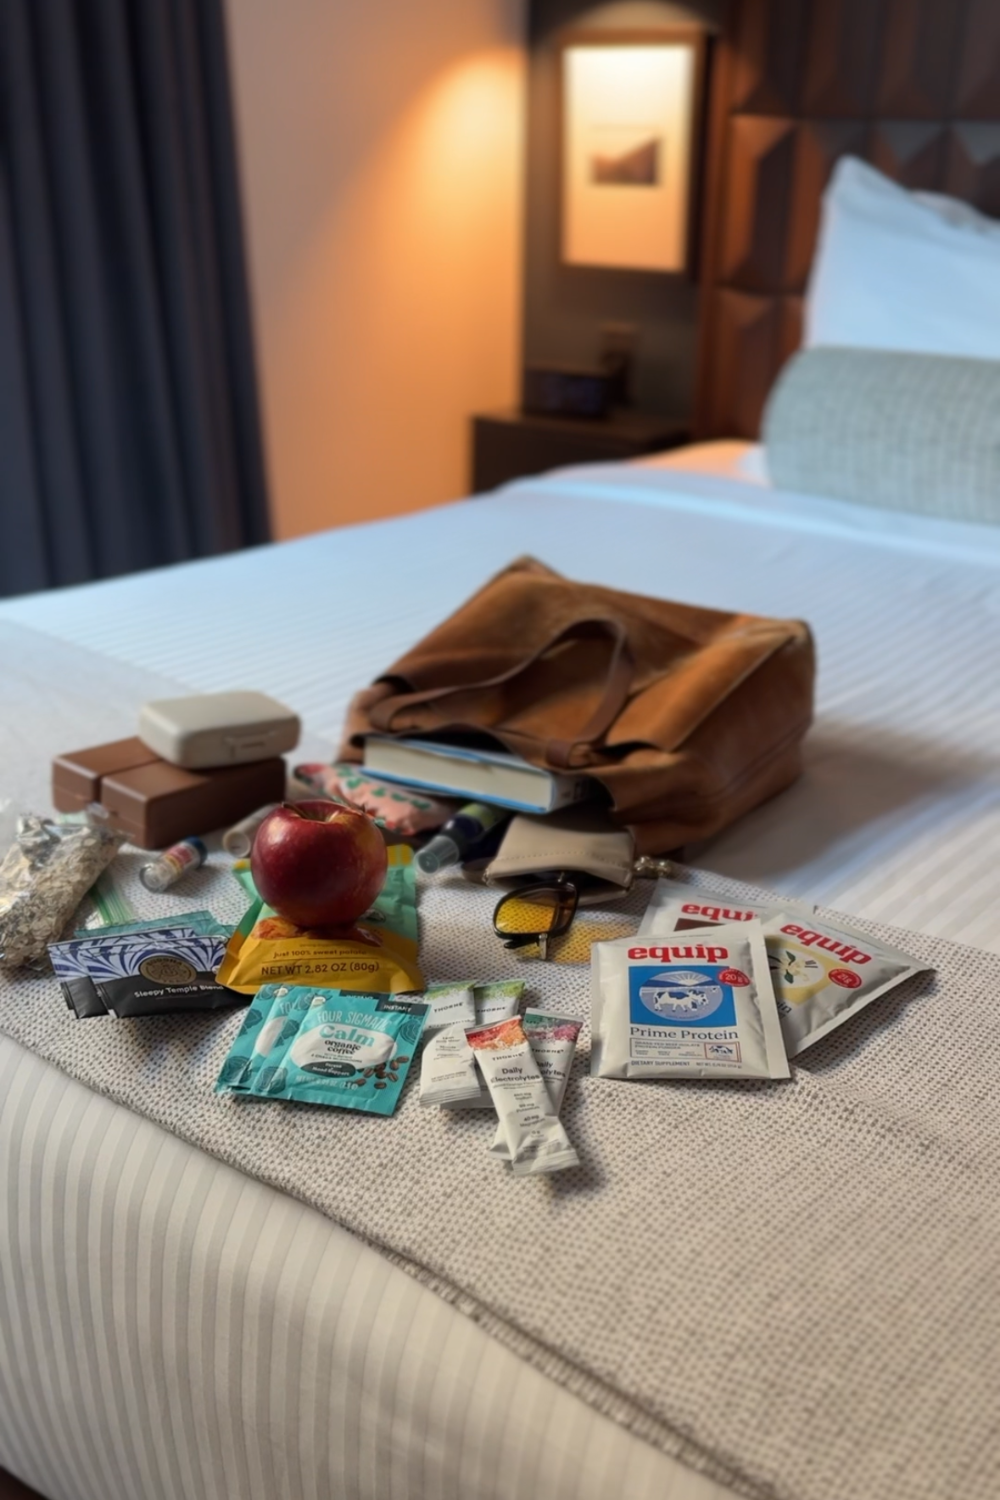
Protein Travel Packs
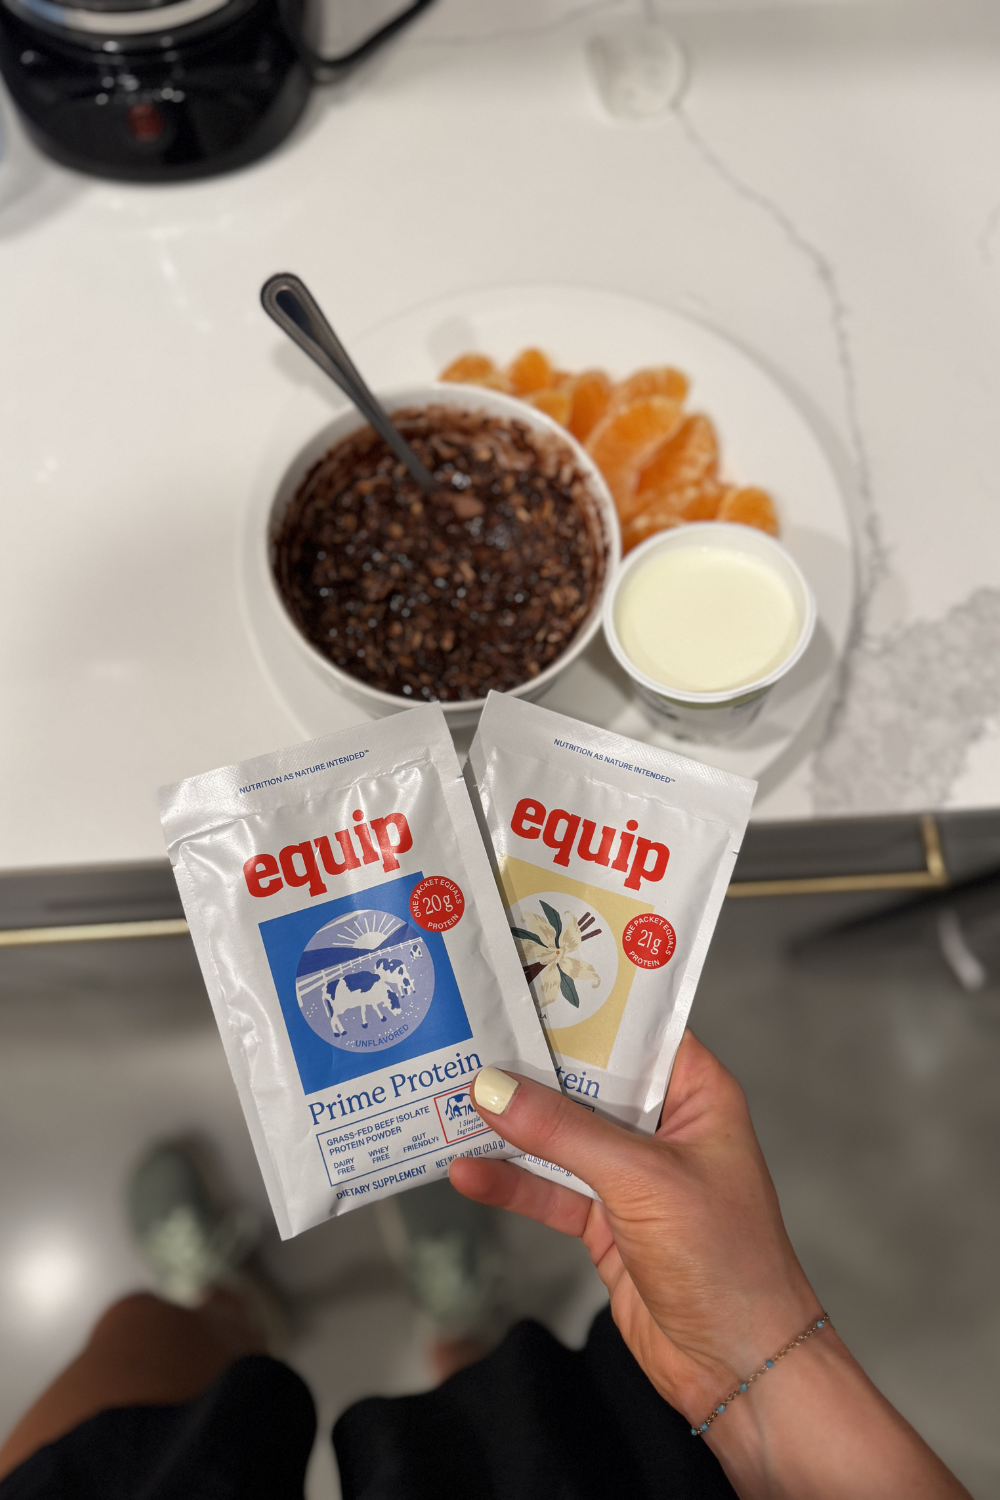
Protein is probably one of the hardest things to prioritize while traveling.
Most airport or gas station options are either super processed, loaded with sugar, or leave you hungry an hour later.
That’s why protein travel packs are always in my bag.
Right now I’ve been loving Equip Foods because the ingredients are super simple and it actually keeps me full.
You can use code ROOTS for 15% off.
These are perfect for:
Flights
Road trips
Busy travel days
Hotel breakfasts that barely have protein
Post-workout travel days
Sometimes I’ll even throw a packet into coffee or mix it with oats when I need something quick.
Electrolytes and Creatine
I truly think hydration is one of the most overlooked parts of feeling good while traveling.
Flying, heat, walking more than usual, eating out more often, and changes in routine can all leave you feeling depleted.
So yes, electrolytes are coming with me everywhere.
My current favorites are:
Jigsaw Pickleball Electrolytes
Minerals & Chill
Thorne
You can use code ROOTS15 for 15% off.
I also pack creatine because it’s one of the supplements I personally use daily and don’t want to stop just because I’m away from home.
Travel is already stressful enough on the body. I want to support muscle recovery, energy, hydration, and routine as much as possible.
A quick little reminder because I know someone needs to hear it:
You do not need to “start over” every time you travel.
Small daily habits still matter.
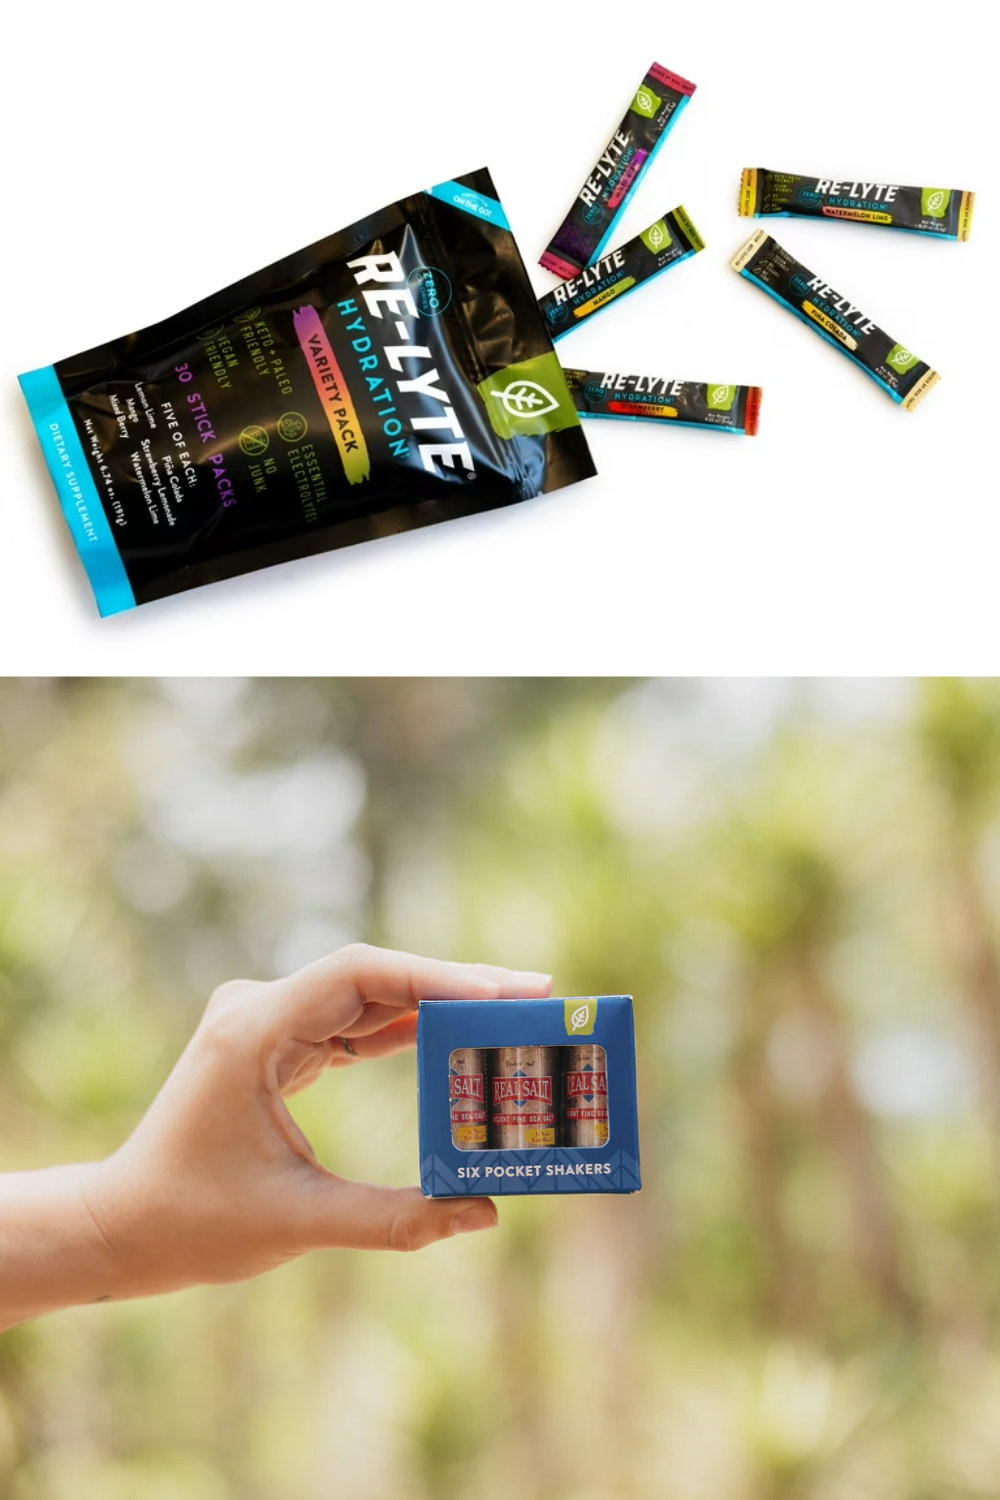
My Mini Salt Shaker Because I Salt Everything
Okay maybe this is niche but if you know, you know.
I carry a mini Redmond’s sea salt shaker in my bag because I genuinely want salt on everything.
And I’m sorry but wet restaurant table salt just does not compare.
Adding quality mineral salt to meals while traveling is honestly one of my favorite little wellness habits.
Especially when you are traveling in the heat, sweating more, flying, or simply feeling depleted.
Also it’s cute and tiny which automatically makes me more likely to use it.
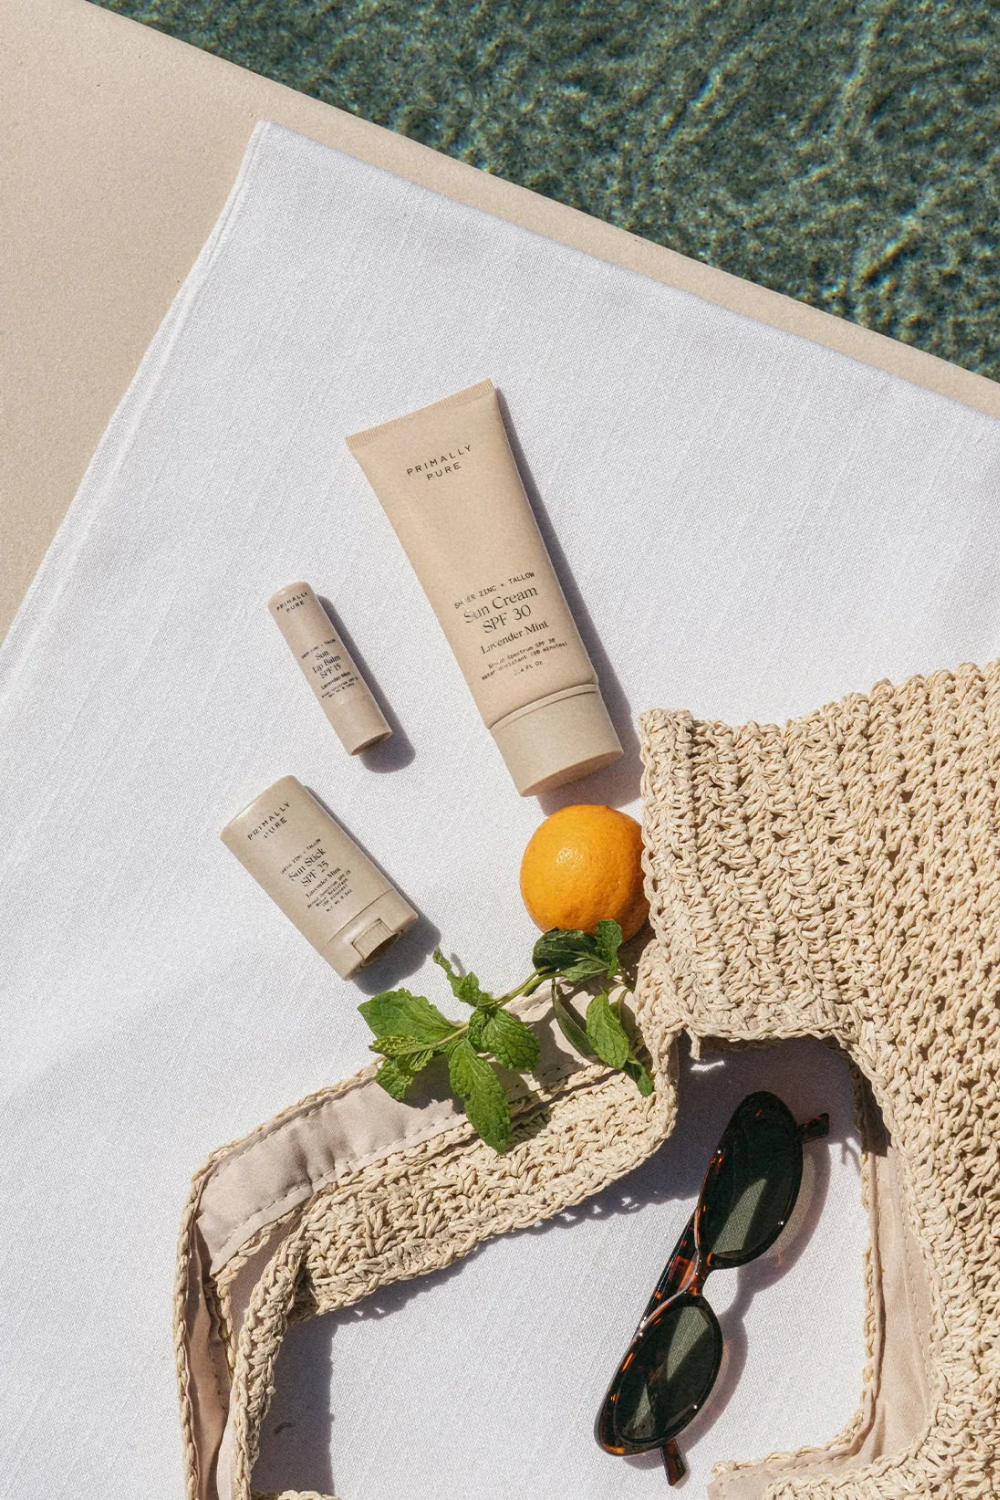
Lip Balm and Sunscreen
If it’s summer or I know I’m going to be outside a lot, my Primally Pure lip balm and sunscreen are non-negotiable.
Travel plus sun exposure plus dehydration can make your skin feel rough fast.
I keep both in an easy-access pouch so I’m actually reapplying throughout the day.
You can use code ROOTS for 15% off.
Come Travel With Me ✈️
Snacks That Keep Me Sane

Never underestimate the power of having snacks on hand.
Because the moment you get overly hungry while traveling, every food decision suddenly becomes harder.
I usually pack things like:
Beef sticks
Fruit
Trail mix
Protein bars with cleaner ingredients
Dark chocolate
Roasted nuts
Jerky
Dried fruit
If you want more ideas, definitely check out my post:
50 Healthy Travel Snacks and Recipes
Water Bottle, Book, and Sunnies
Not everything in my travel bag has to be “wellness” in the traditional sense.
Some things simply make traveling feel less stressful.
I always carry:
A large water bottle
Sunglasses
A good book
Having these basics with me helps me stay grounded and feel more like myself while traveling.
And honestly, wellness is also about reducing stress and supporting your nervous system, not just supplements and protein.
Staying Consistent While Traveling Doesn’t Have to Be Complicated
I think social media sometimes makes wellness feel all or nothing.
But realistically, the routines that actually stick are the ones that are simple, flexible, and easy to maintain even during busy seasons.
Packing a few supportive essentials helps me feel better physically, mentally, and emotionally while traveling.
And no, it’s not about being “perfect” on vacation.
It’s about giving your body support so you can actually enjoy the trip.
Related Wellness Travel Posts
If you loved this post, here are a few more you’ll probably enjoy:

How to Stay Consistent with Your Supplements While Traveling
Learn how to stay consistent with your supplement routine while traveling. Simple packing tips, travel hacks, and a free reel example inside!
One of the number one questions I get from clients when they’re on a supplement protocol is:
“How do I stay consistent when I’m traveling?”
It’s a great question—because staying on track with your supplements while on the road can feel overwhelming, especially if you’re on a structured protocol that shifts at certain points. After many trips (and a few trial-and-error moments), I’ve found a handful of strategies that make things much smoother. Here are my best tips for keeping your supplement routine simple and stress-free while traveling.
1. Print Out or Write Out Your Schedule
When you’re following a protocol—especially one that changes partway through—it’s easy to lose track. Printing or writing out your supplement schedule helps you know exactly what to take and when. Think of it as your travel checklist for supplements.
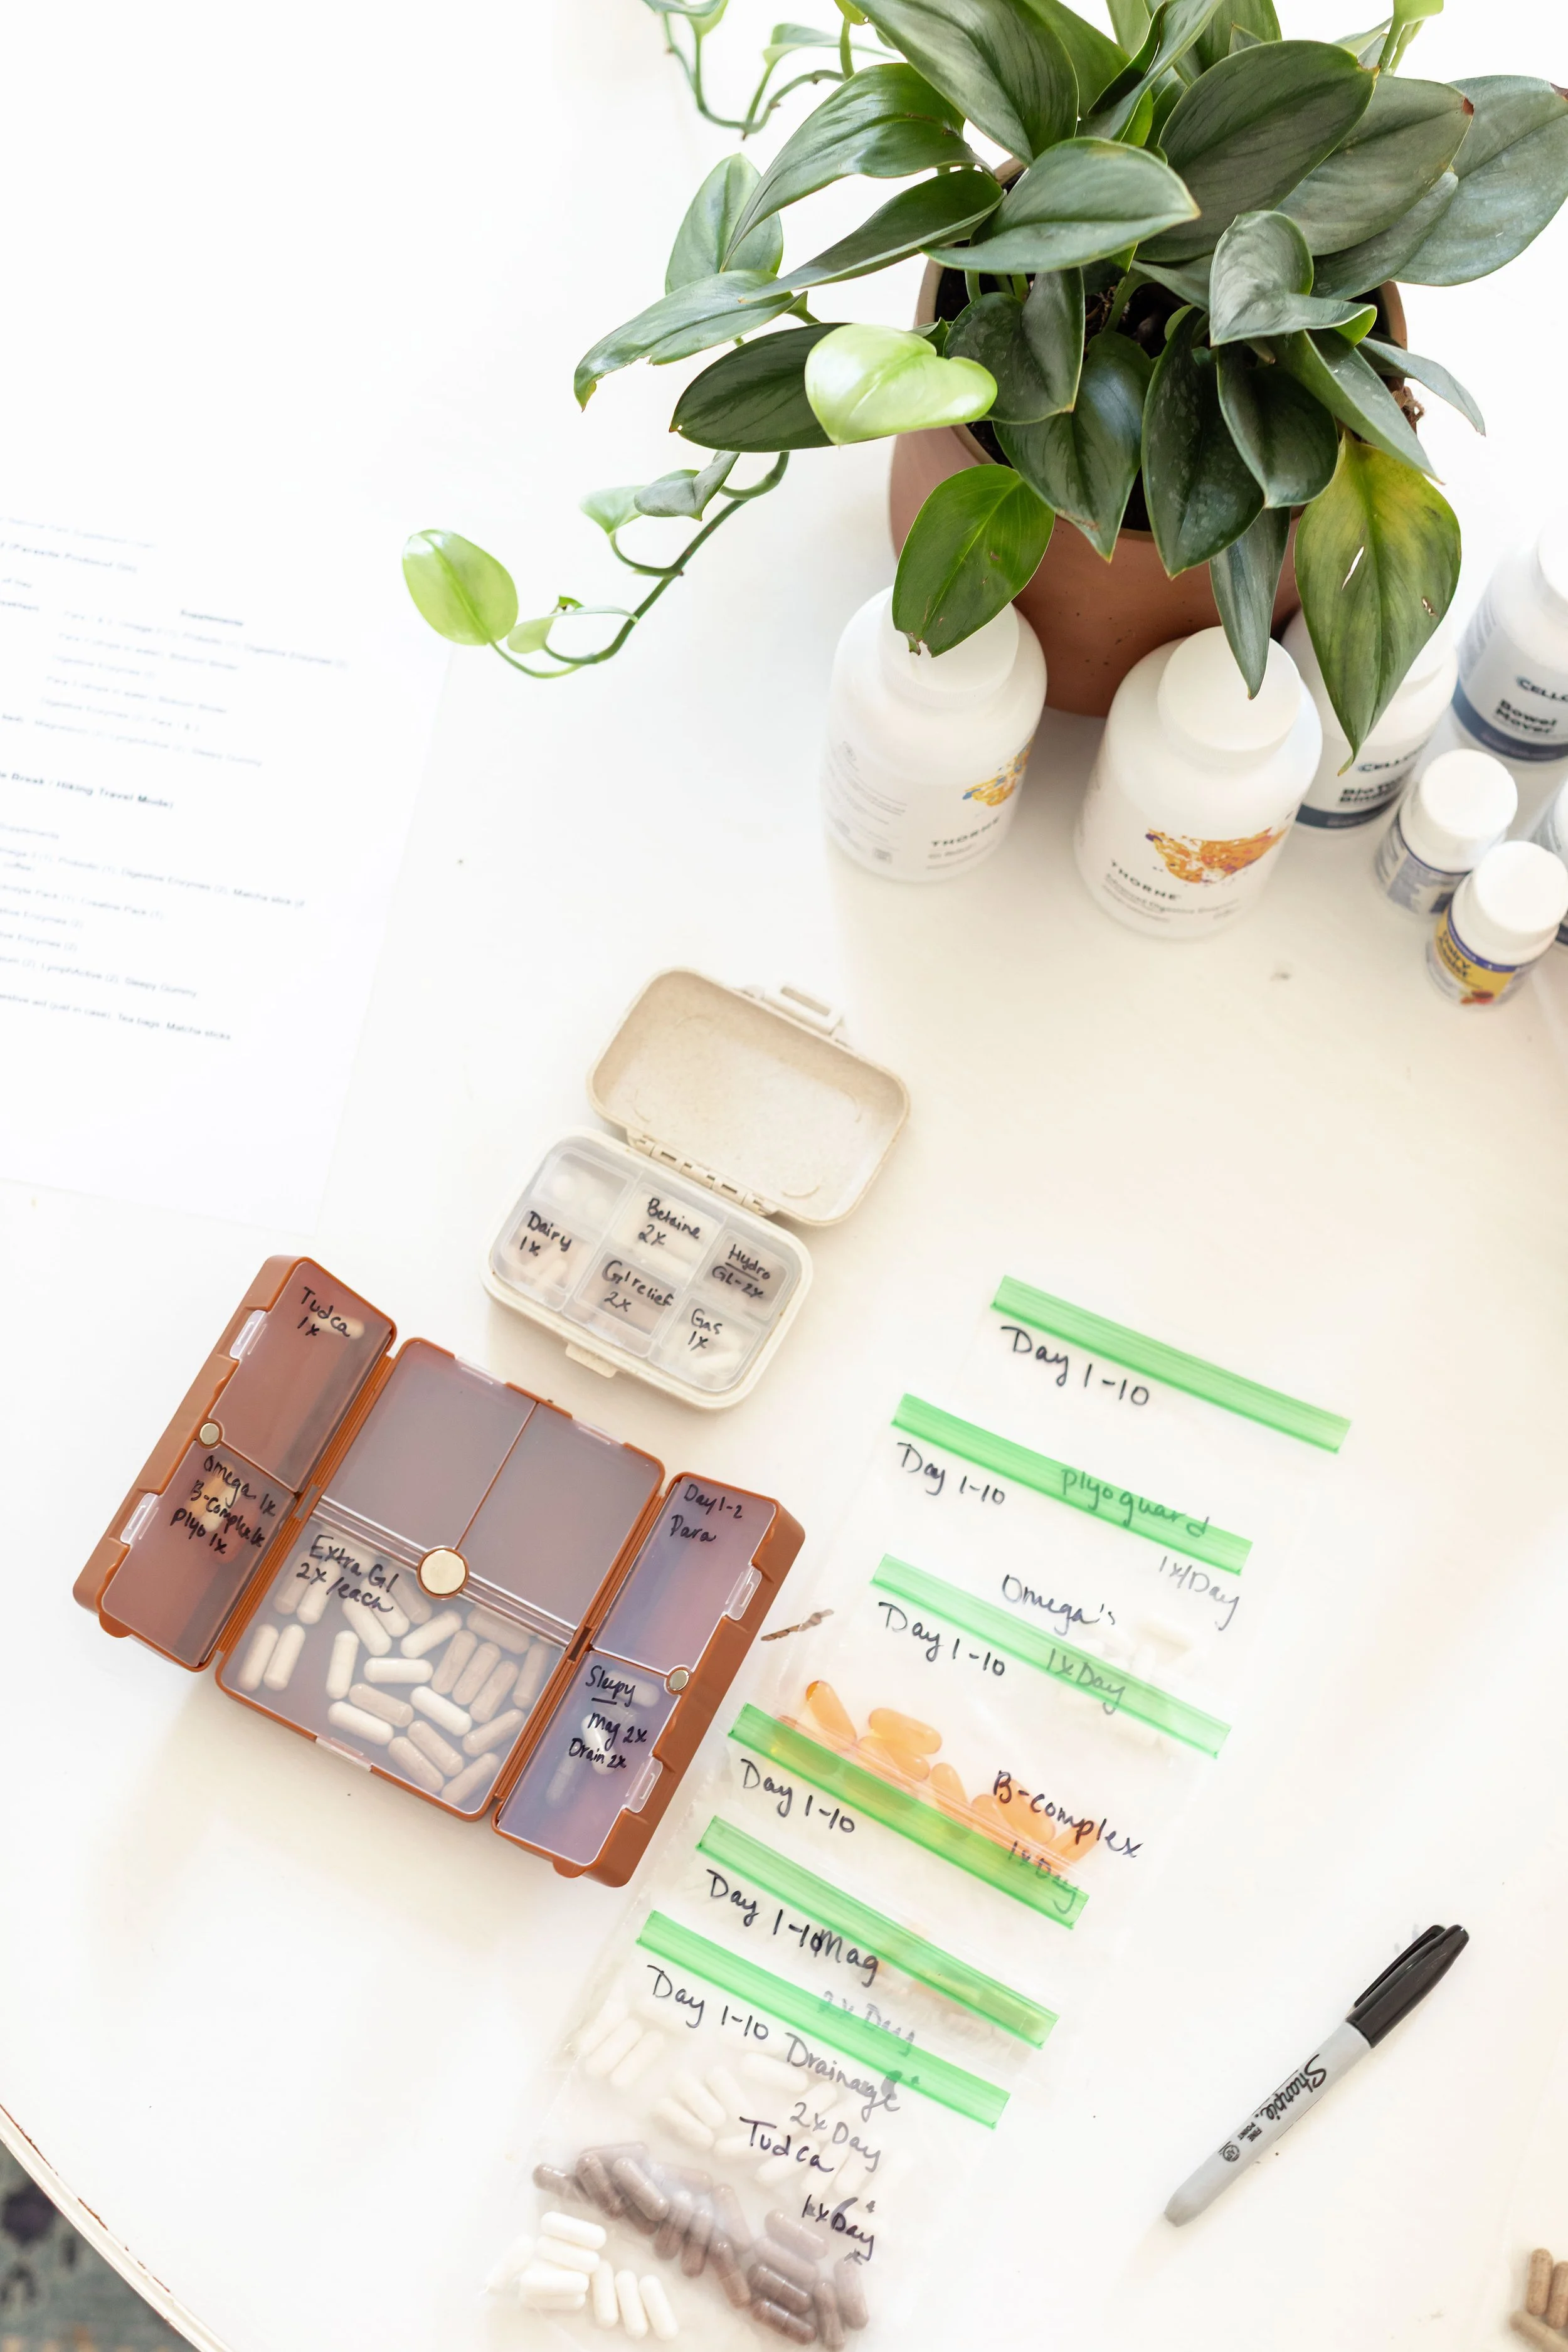
2. Use Sandwich Bags or a Pill Box
Pre-packing is key. I like to use small sandwich bags for each day with the dosage labeled, or a pill organizer box with clear labels. Both methods work—it just depends on your style.
👉 I even made a quick video summarizing how I do both.
3. Keep Digestive Support Separate
Digestive support is non-negotiable for me while traveling. I carry mine in a smaller pill box that easily slips into my bag. This way, I can pull it out at restaurants or on the go. If you need to, leave a few squares open for supplements or medications that must be taken with meals.
4. Bonus: Travel Packs & Extras
Travel-friendly packs make life so much easier. I love keeping electrolyte packets, teas, matcha sticks, and any other powders in one small organizer bag in my carry-on. It saves space and ensures I don’t forget the essentials that help me feel grounded on the road.
5. Don’t Forget Water + Reminders
The simplest habits are sometimes the easiest to forget. I always keep a reusable water bottle with me so I don’t miss a dose just because I don’t have water nearby. You can also set reminders or alarms on your phone to stay consistent with your supplement timing while you’re traveling.
Want to See My System in Action?
If you’d like to see a visual example of how I planned out my supplements for a trip to Glacier National Park, check out this reel here.
Let’s Work Together
Consistency looks different for everyone. If you’ve ever worked with me on nutrition services, or ordered through my Fullscript practitioner dispensary, you know I love creating simple, sustainable systems that actually work in real life.
If you’re curious about what supplement schedule might be best for your body, I’d love to connect with you. You can schedule a discovery call with me to talk through your unique needs and goals.

Nutrition Disclaimer
I am a Nutritional Therapy Practitioner. I do not diagnose, treat, or cure disease. The information shared here is for educational purposes only and is not a substitute for medical advice. Please consult your healthcare provider before beginning any new supplement or nutrition protocol.
Here are some other healthy travel related posts:

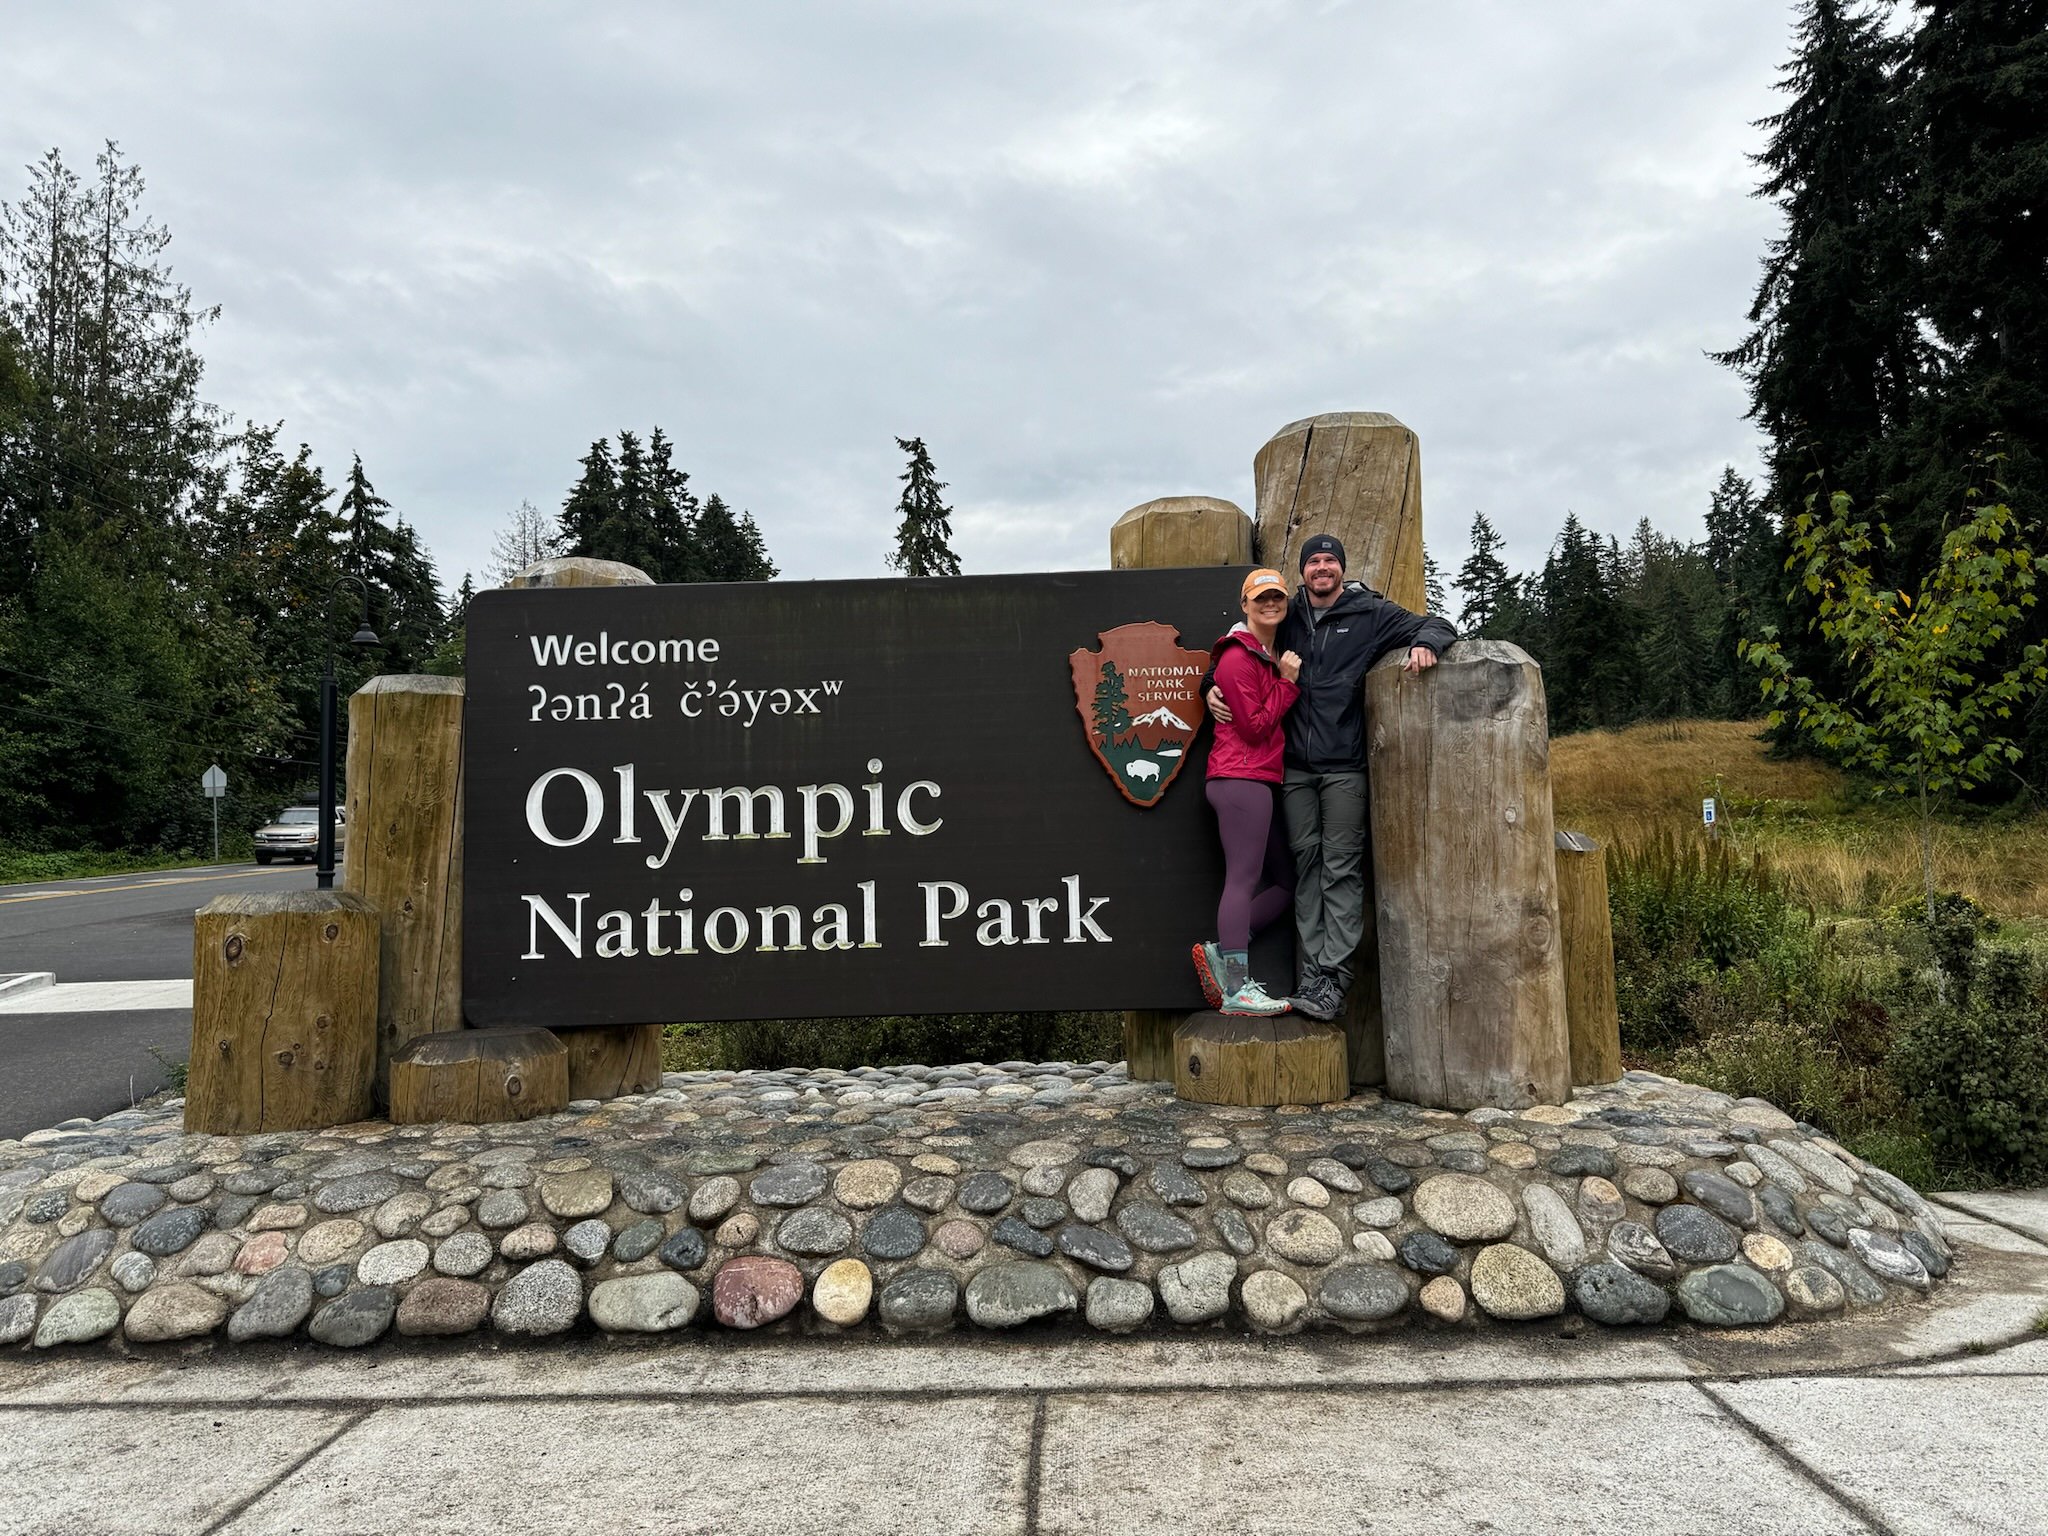
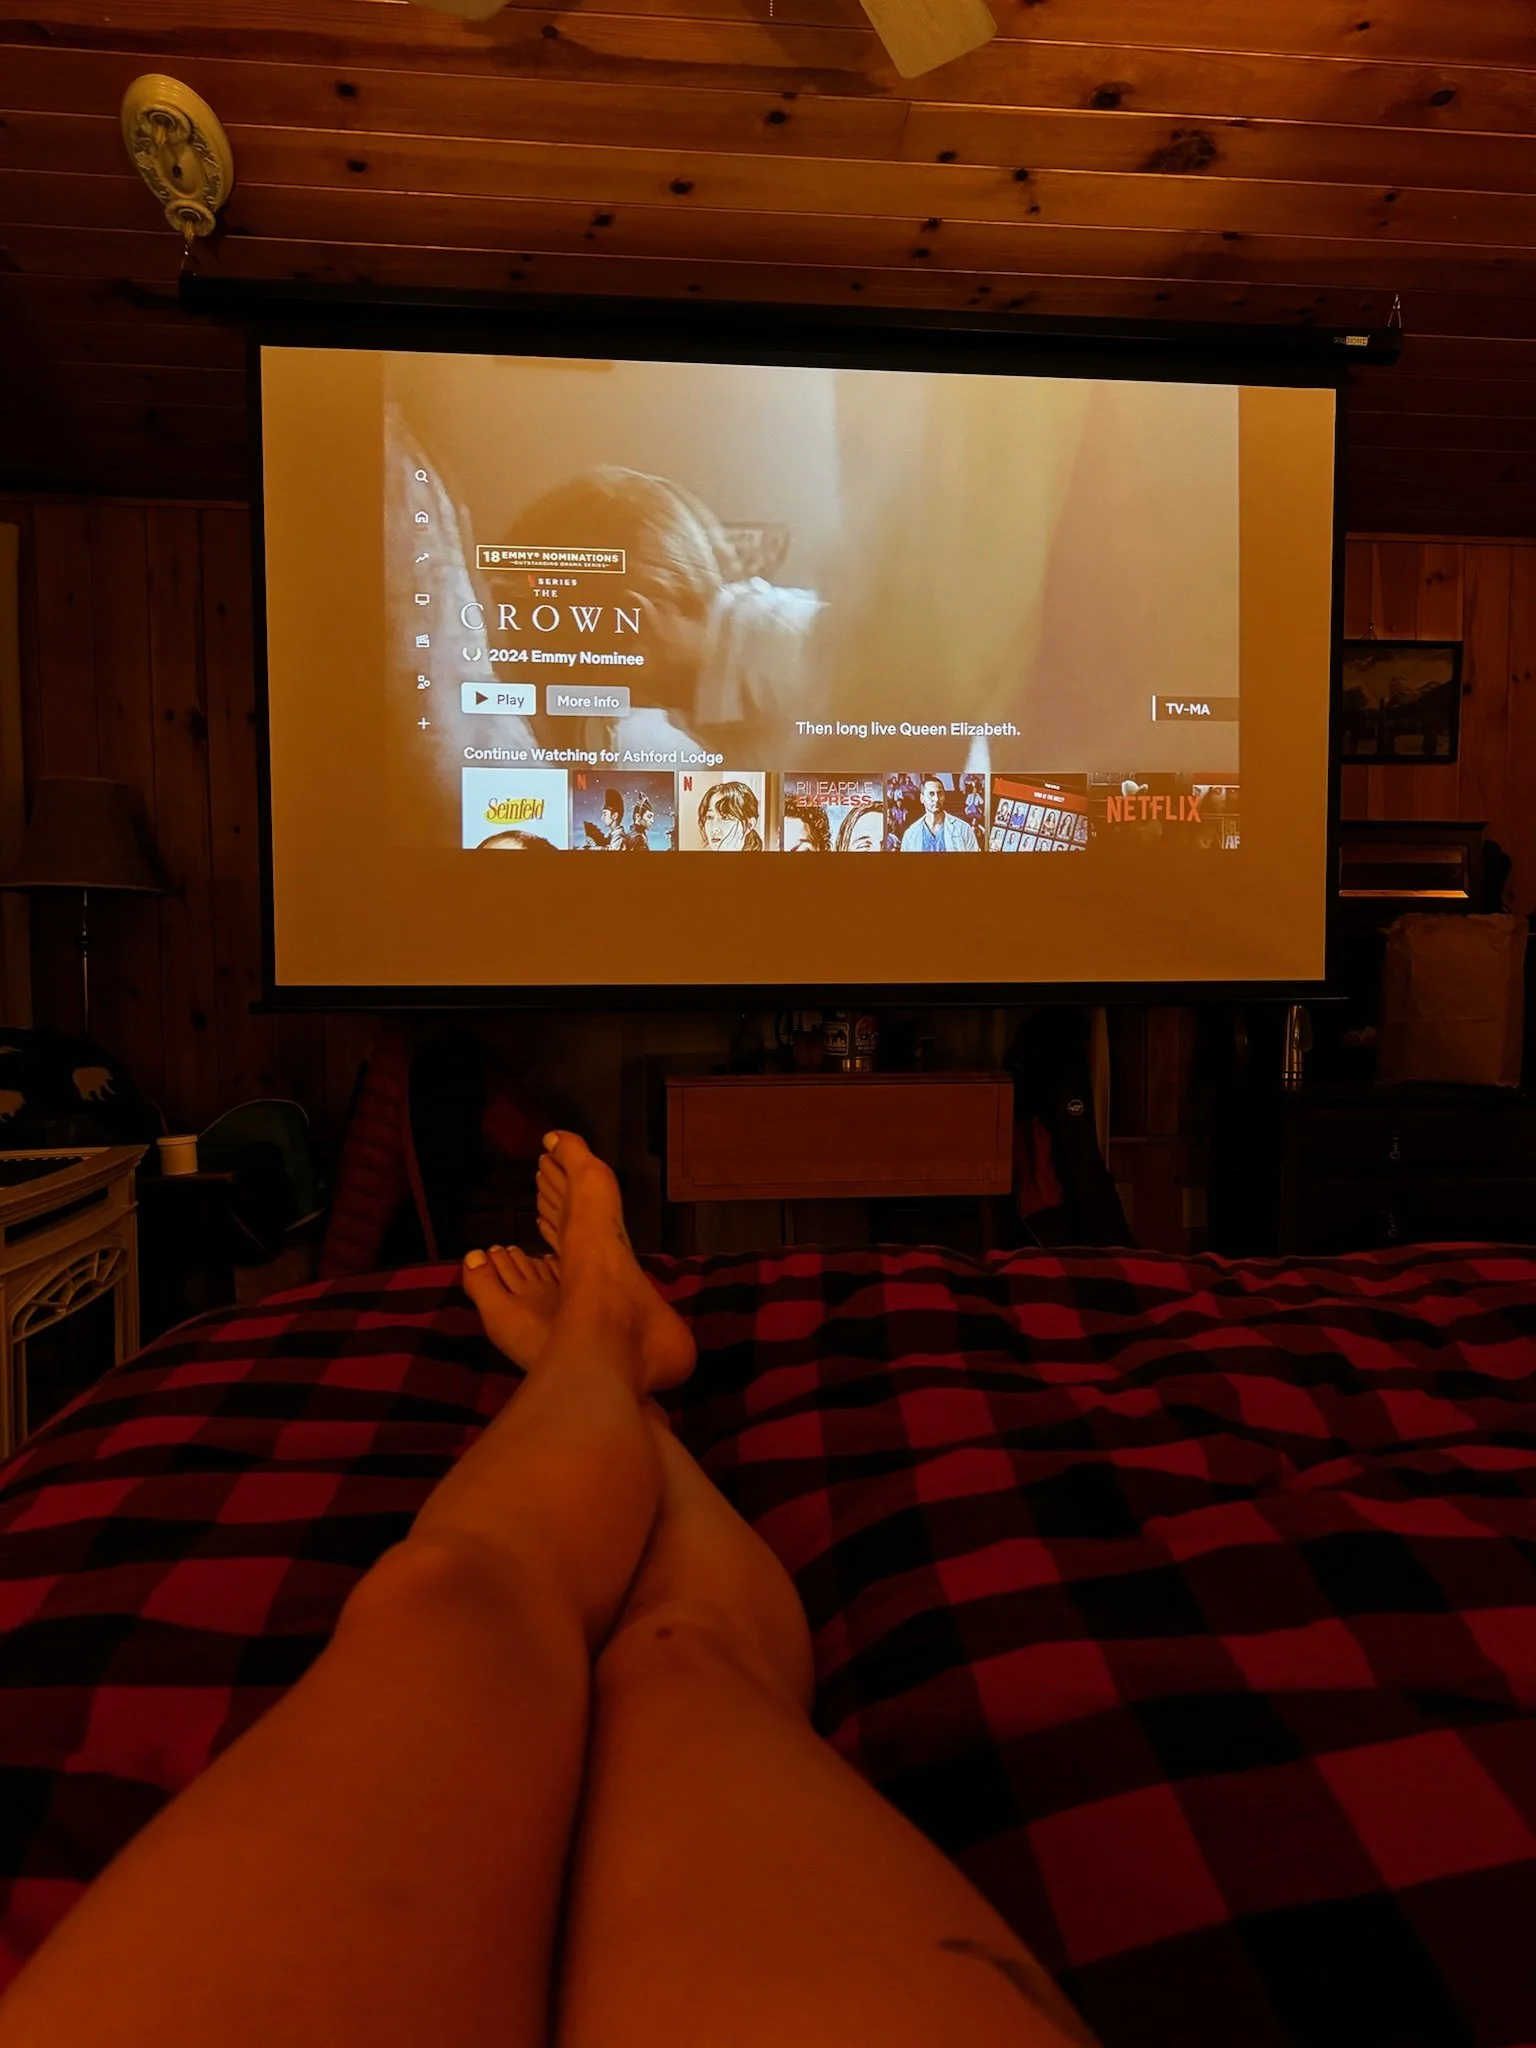
9-Day Adventure Through Mount Rainier, Olympic, and North Cascades National Parks in Washington
You’ll receive tips and healthy food suggestions for planning a 9-day journey dedicated exclusively to Washington's national parks—Mount Rainier, Olympic, and North Cascades.

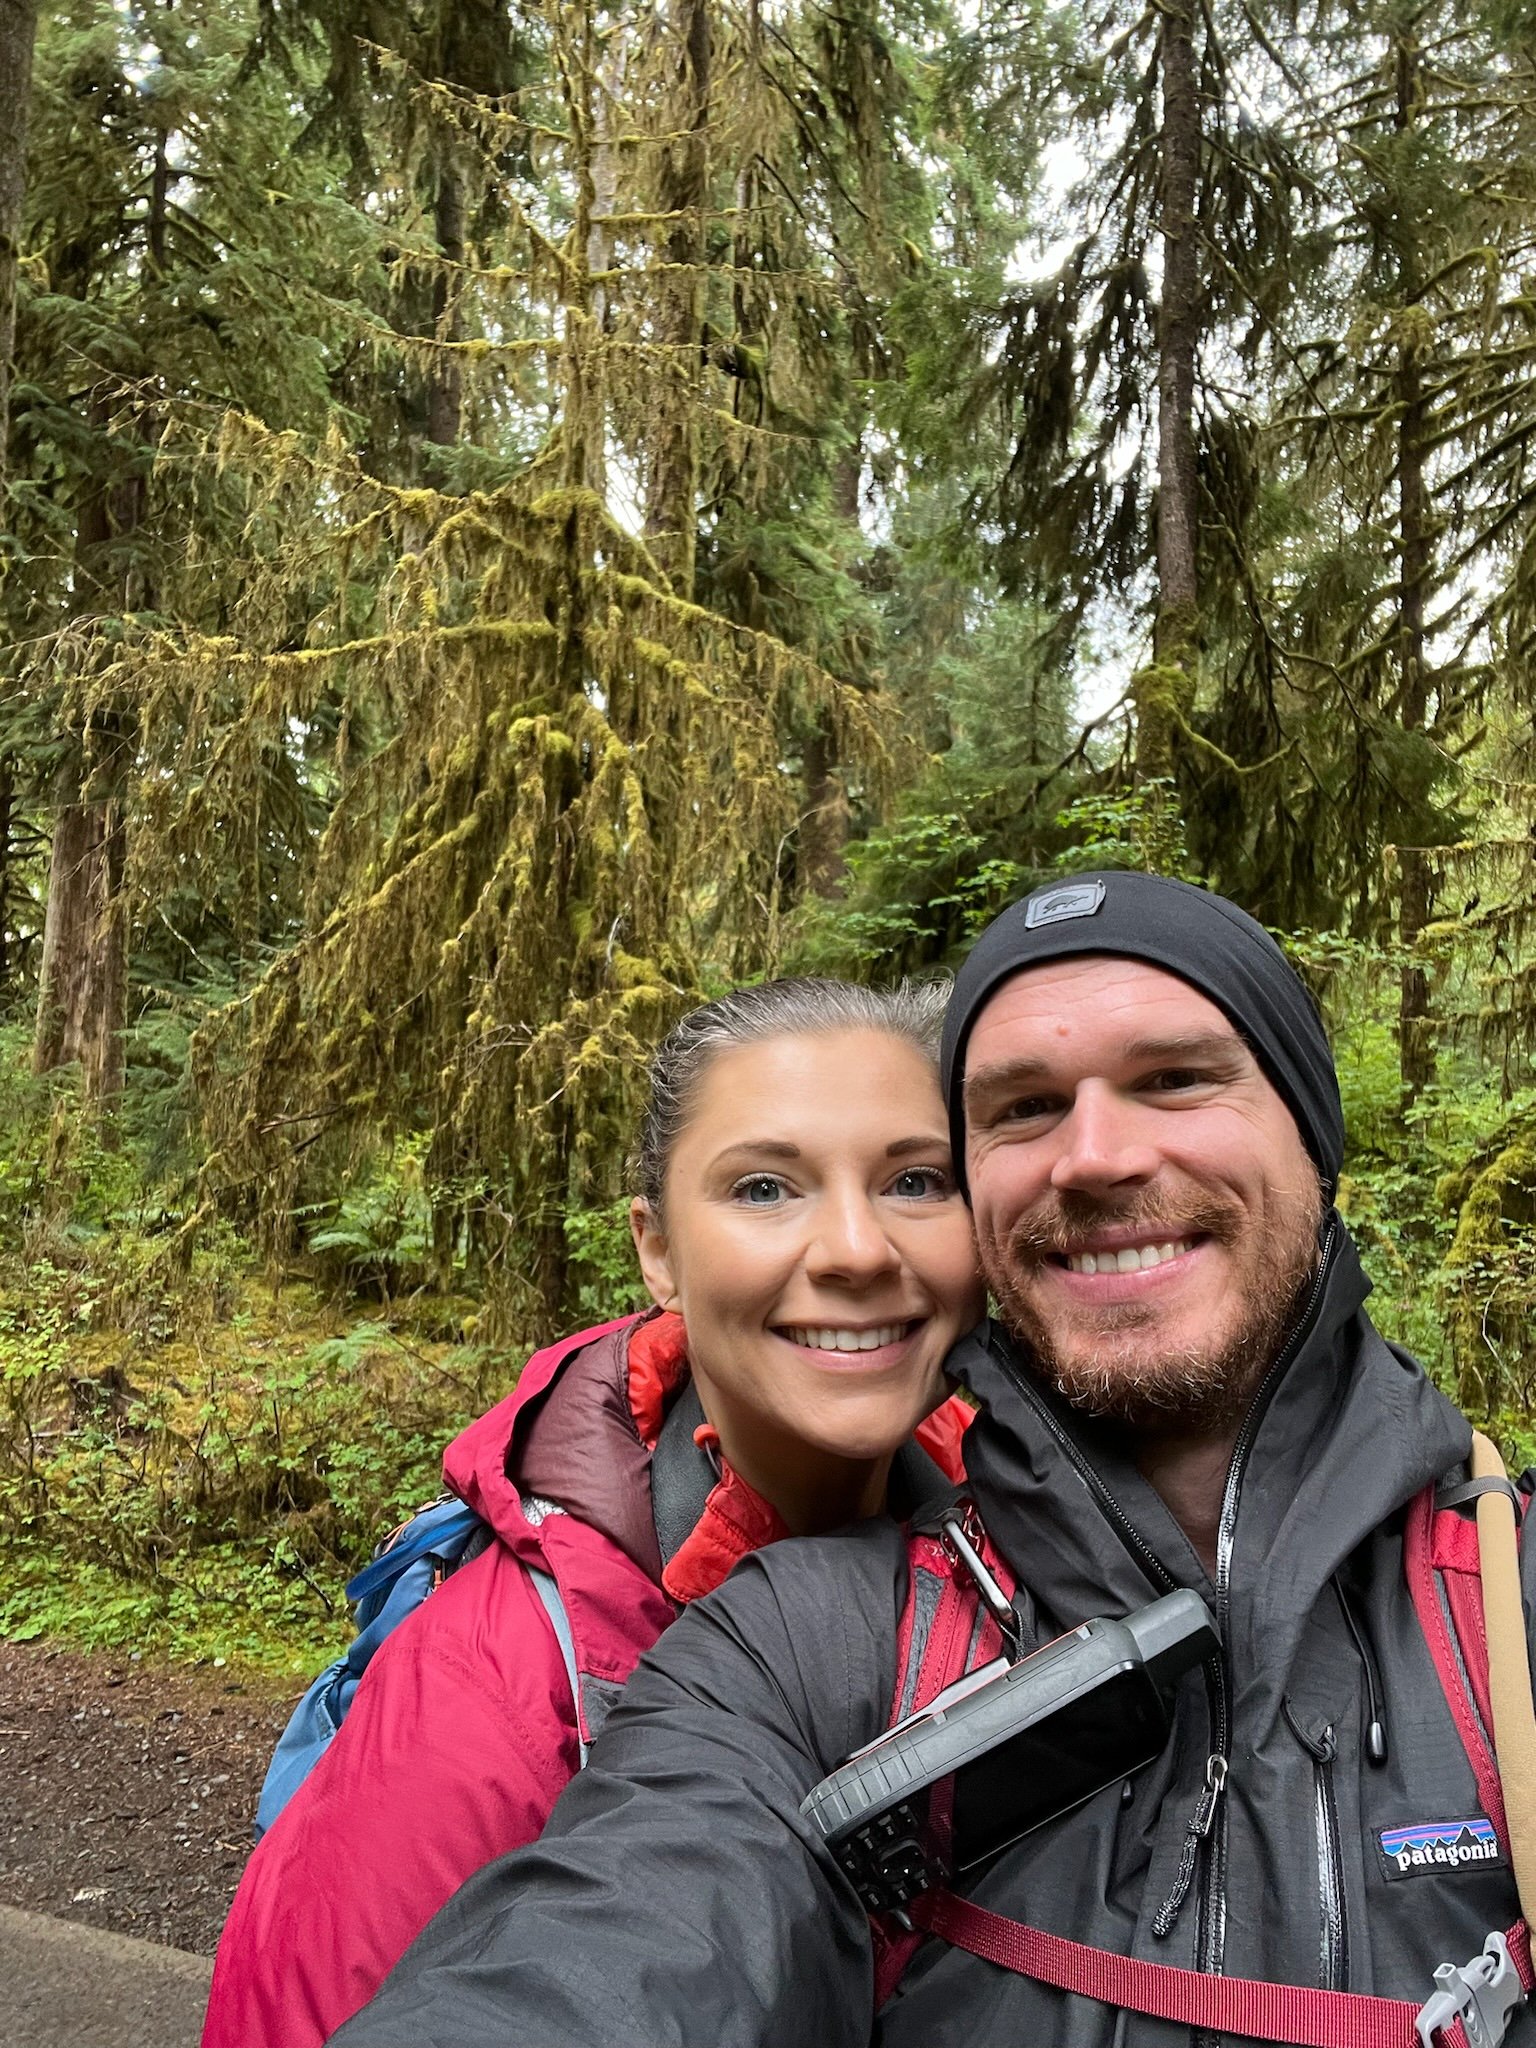
If you've been following my journey for a while, you might remember my travel posts about my visit to one of Washington's stunning national parks—Mount Rainier. That trip took place a few years ago in a camper van, making this travel blog a fresh experience!
For starters, my previous adventure was with my ex-husband, while this new journey is alongside my current partner. Planning this trip has brought a sense of novelty and excitement as we aim to explore different sights, including attractions he hasn't yet experienced. Fortunately, this gives you the opportunity to explore fresh perspectives beyond the camper van experience. You’ll also receive tips and healthy food suggestions for planning a 9-day journey dedicated exclusively to Washington's national parks—Mount Rainier, Olympic, and North Cascades. Let’s get started!
DAY 1: TRAVEL DAY
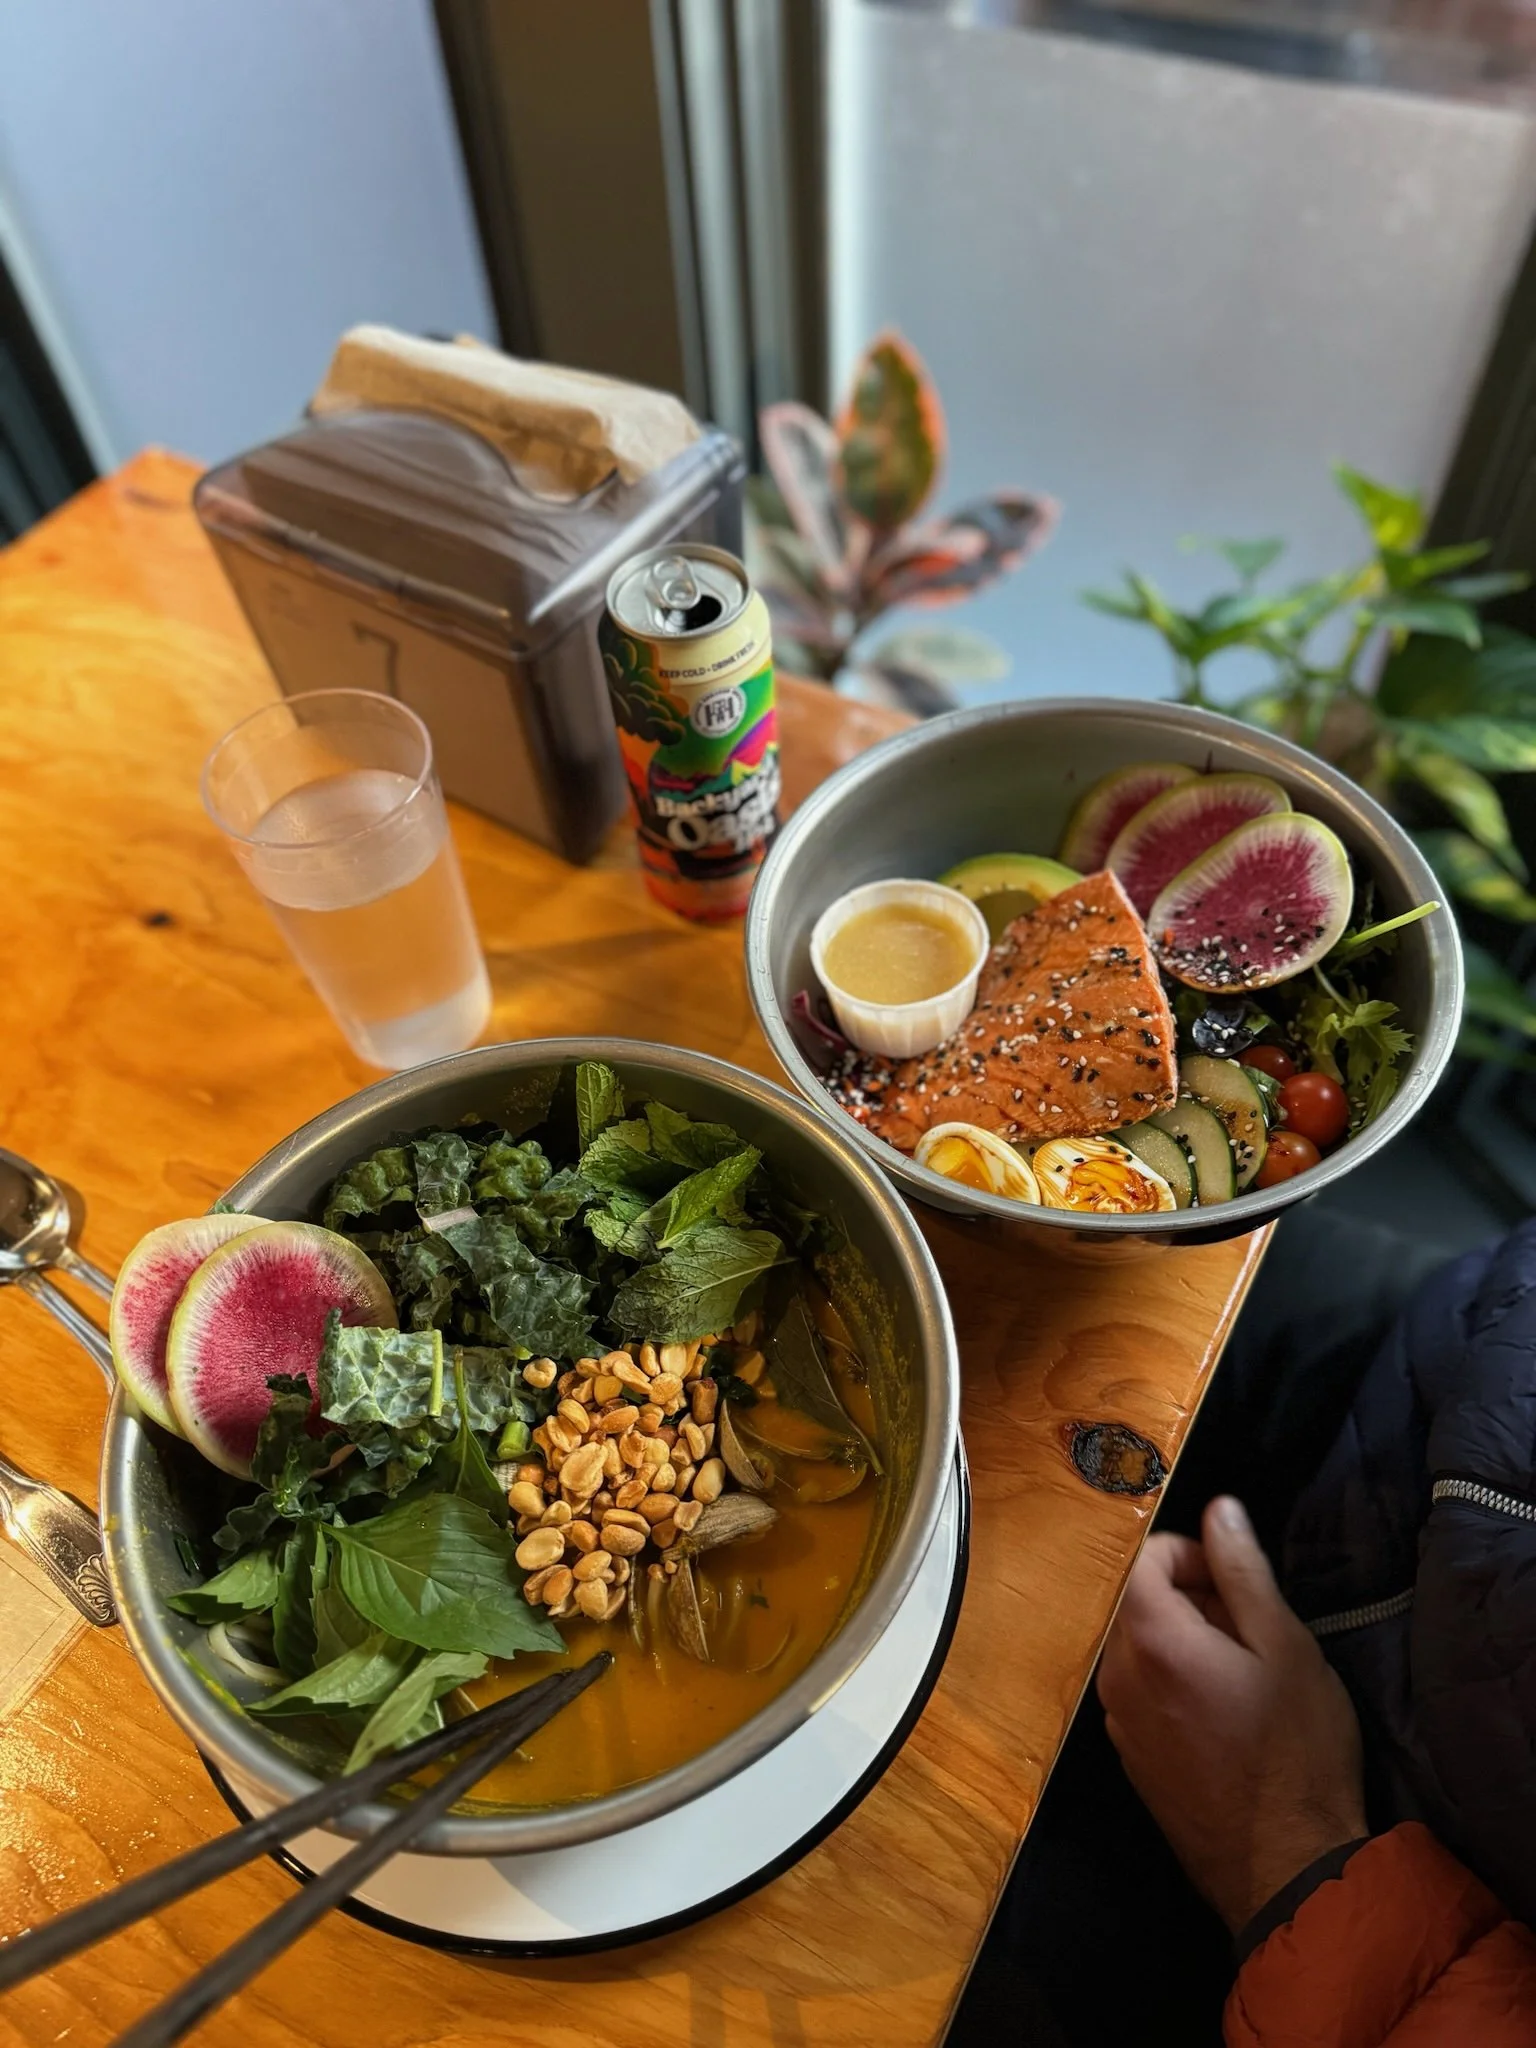
We arrived at Seattle Tacoma International Airport (SEA) to kick off our adventure! After picking up our rental car—essential for reaching all three national parks—we headed straight toward the Mount Olympic area, which is about a 2-3 hour drive from Seattle. Along the way, we stopped for dinner at a fantastic healthy restaurant Yodelin and then settled into our cozy Airbnb.
🚙 For your journey, you can choose to drive the whole way or take the Bainbridge ferry, which I highly recommend as it’s much quicker!
🏠 Our Airbnb was located on the west side of the peninsula (Forks area), making it a convenient base for exploring the Olympic Peninsula. We absolutely loved our stay; it was super affordable!

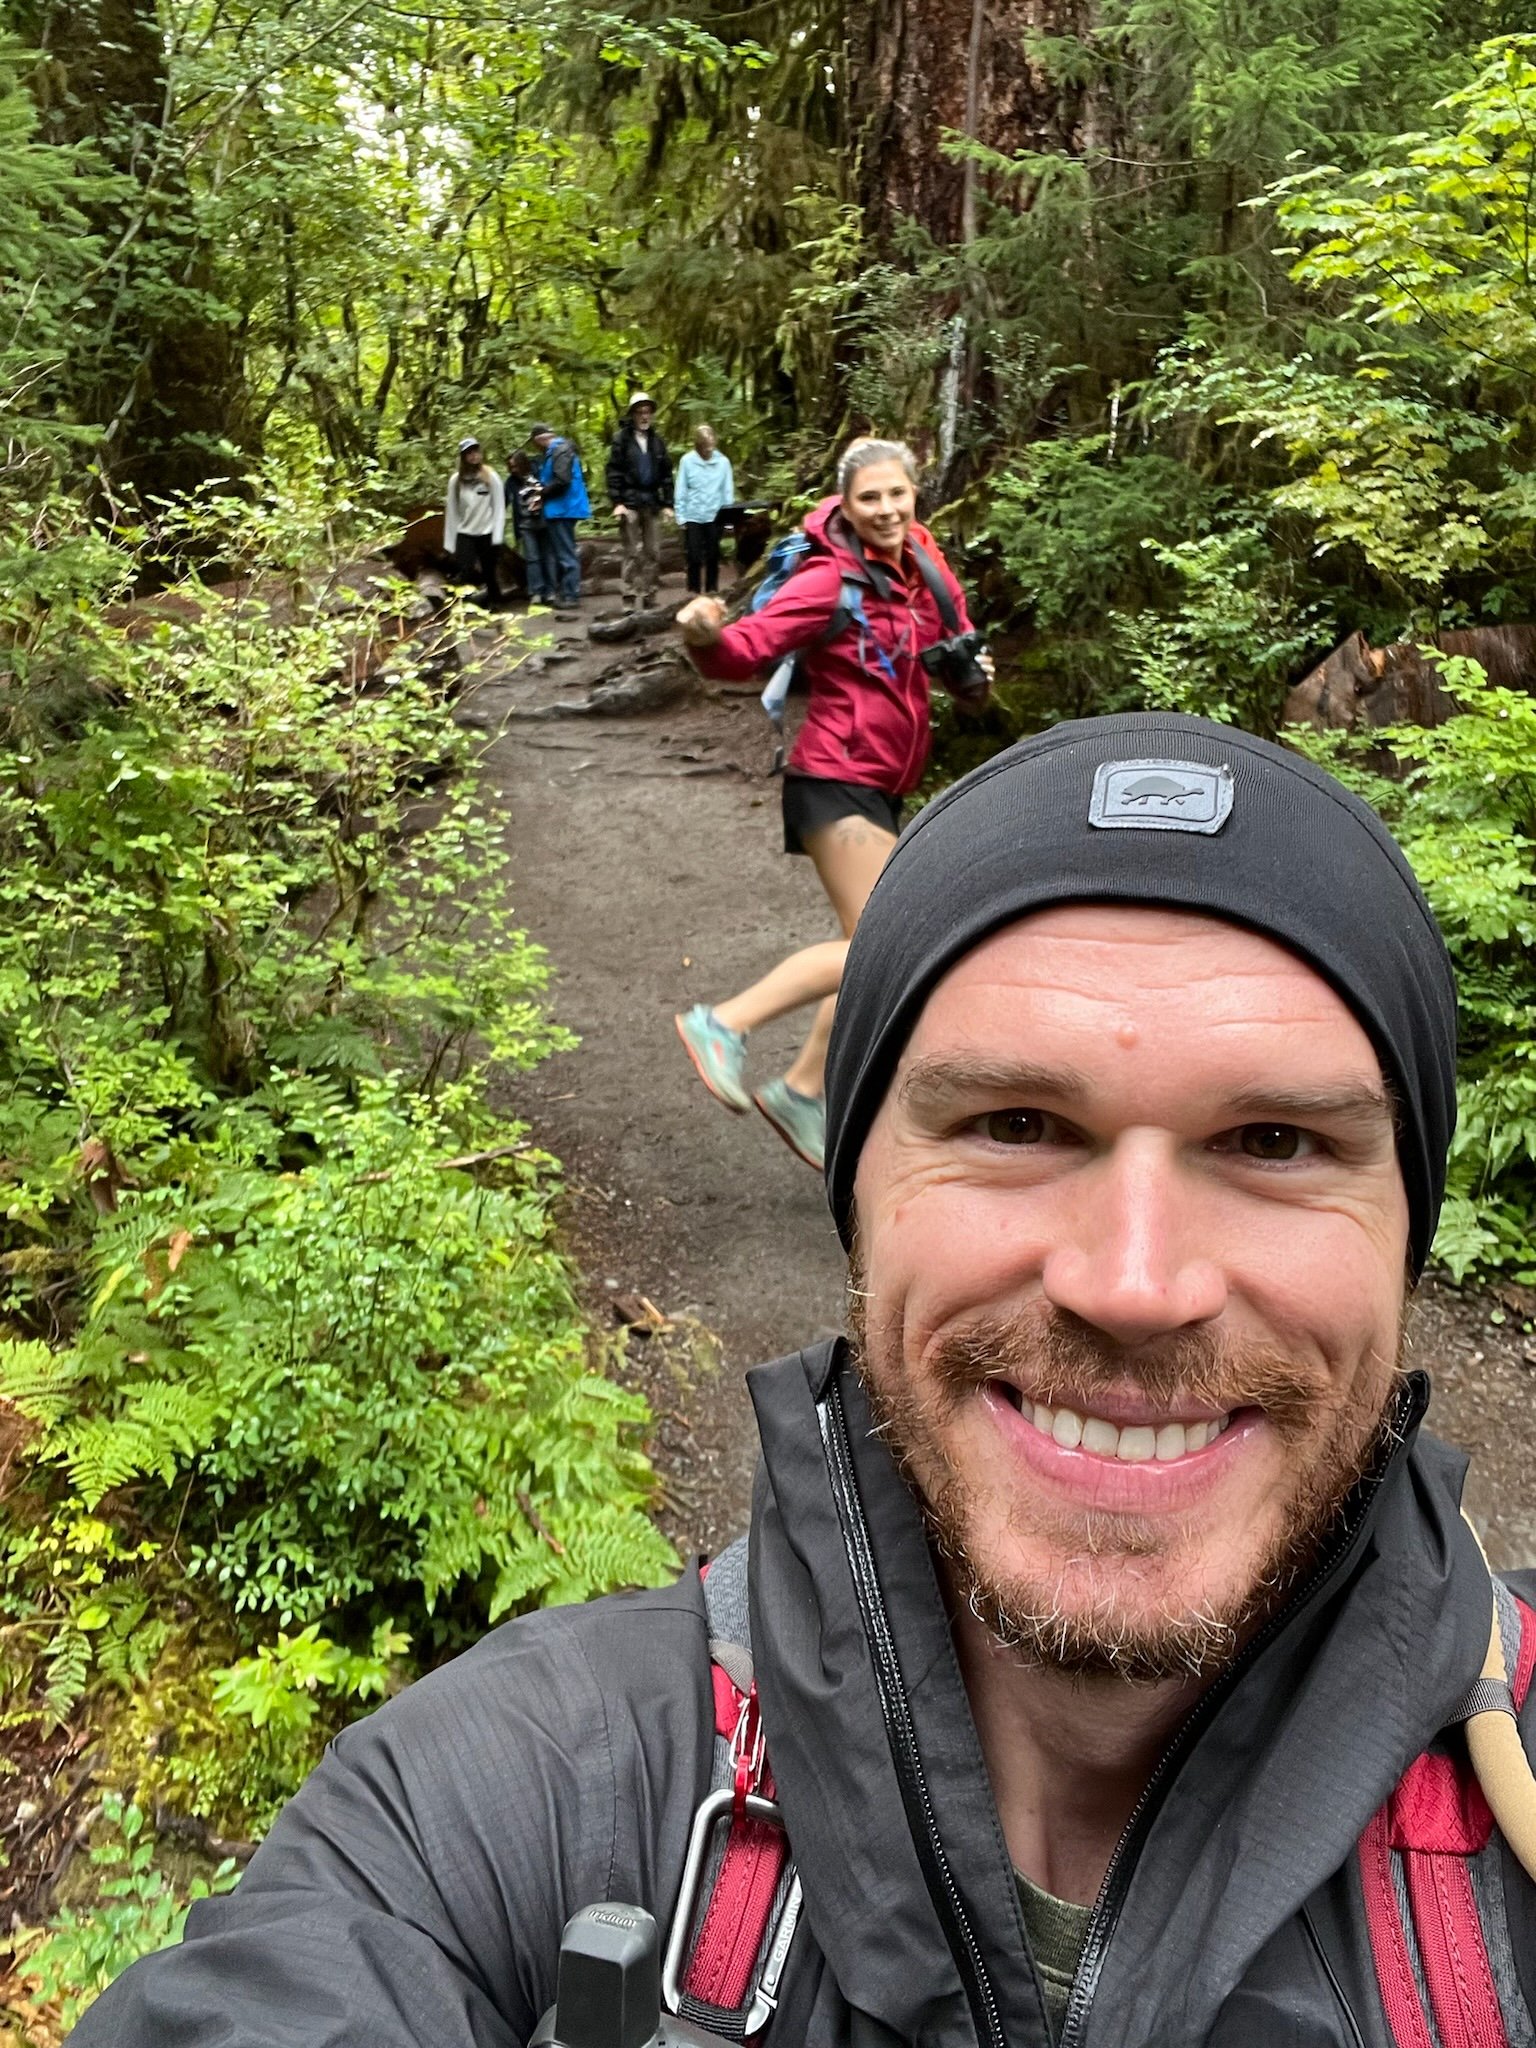
DAY 2: Hoh Rainforest + Rialto Beach
Located about an hour from our Airbnb, the Hoh Rainforest was our destination for the morning and early afternoon. You can easily spend 1-2 hours exploring, as there are several short hiking trails available, such as the Hall of Mosses Trail (0.8 miles round trip) and the Spruce Nature Trail (1.2 miles).


Despite the persistent rain during our entire stay on the Olympic Peninsula, this enchanting place is a must-visit, even if you only have a few hours. The Hoh Rainforest is one of the largest temperate rainforests in the United States, where you’ll feel as if you’ve stepped into a fairy tale, surrounded by trees draped in vibrant green moss alongside the river.
After enjoying lunch at the renowned Sully’s Drive-In in Forks, WA, we headed out to Rialto Beach.
🍔 If you’re gluten-free, their gluten-free burger bun is absolutely the best! I was honestly amazed!


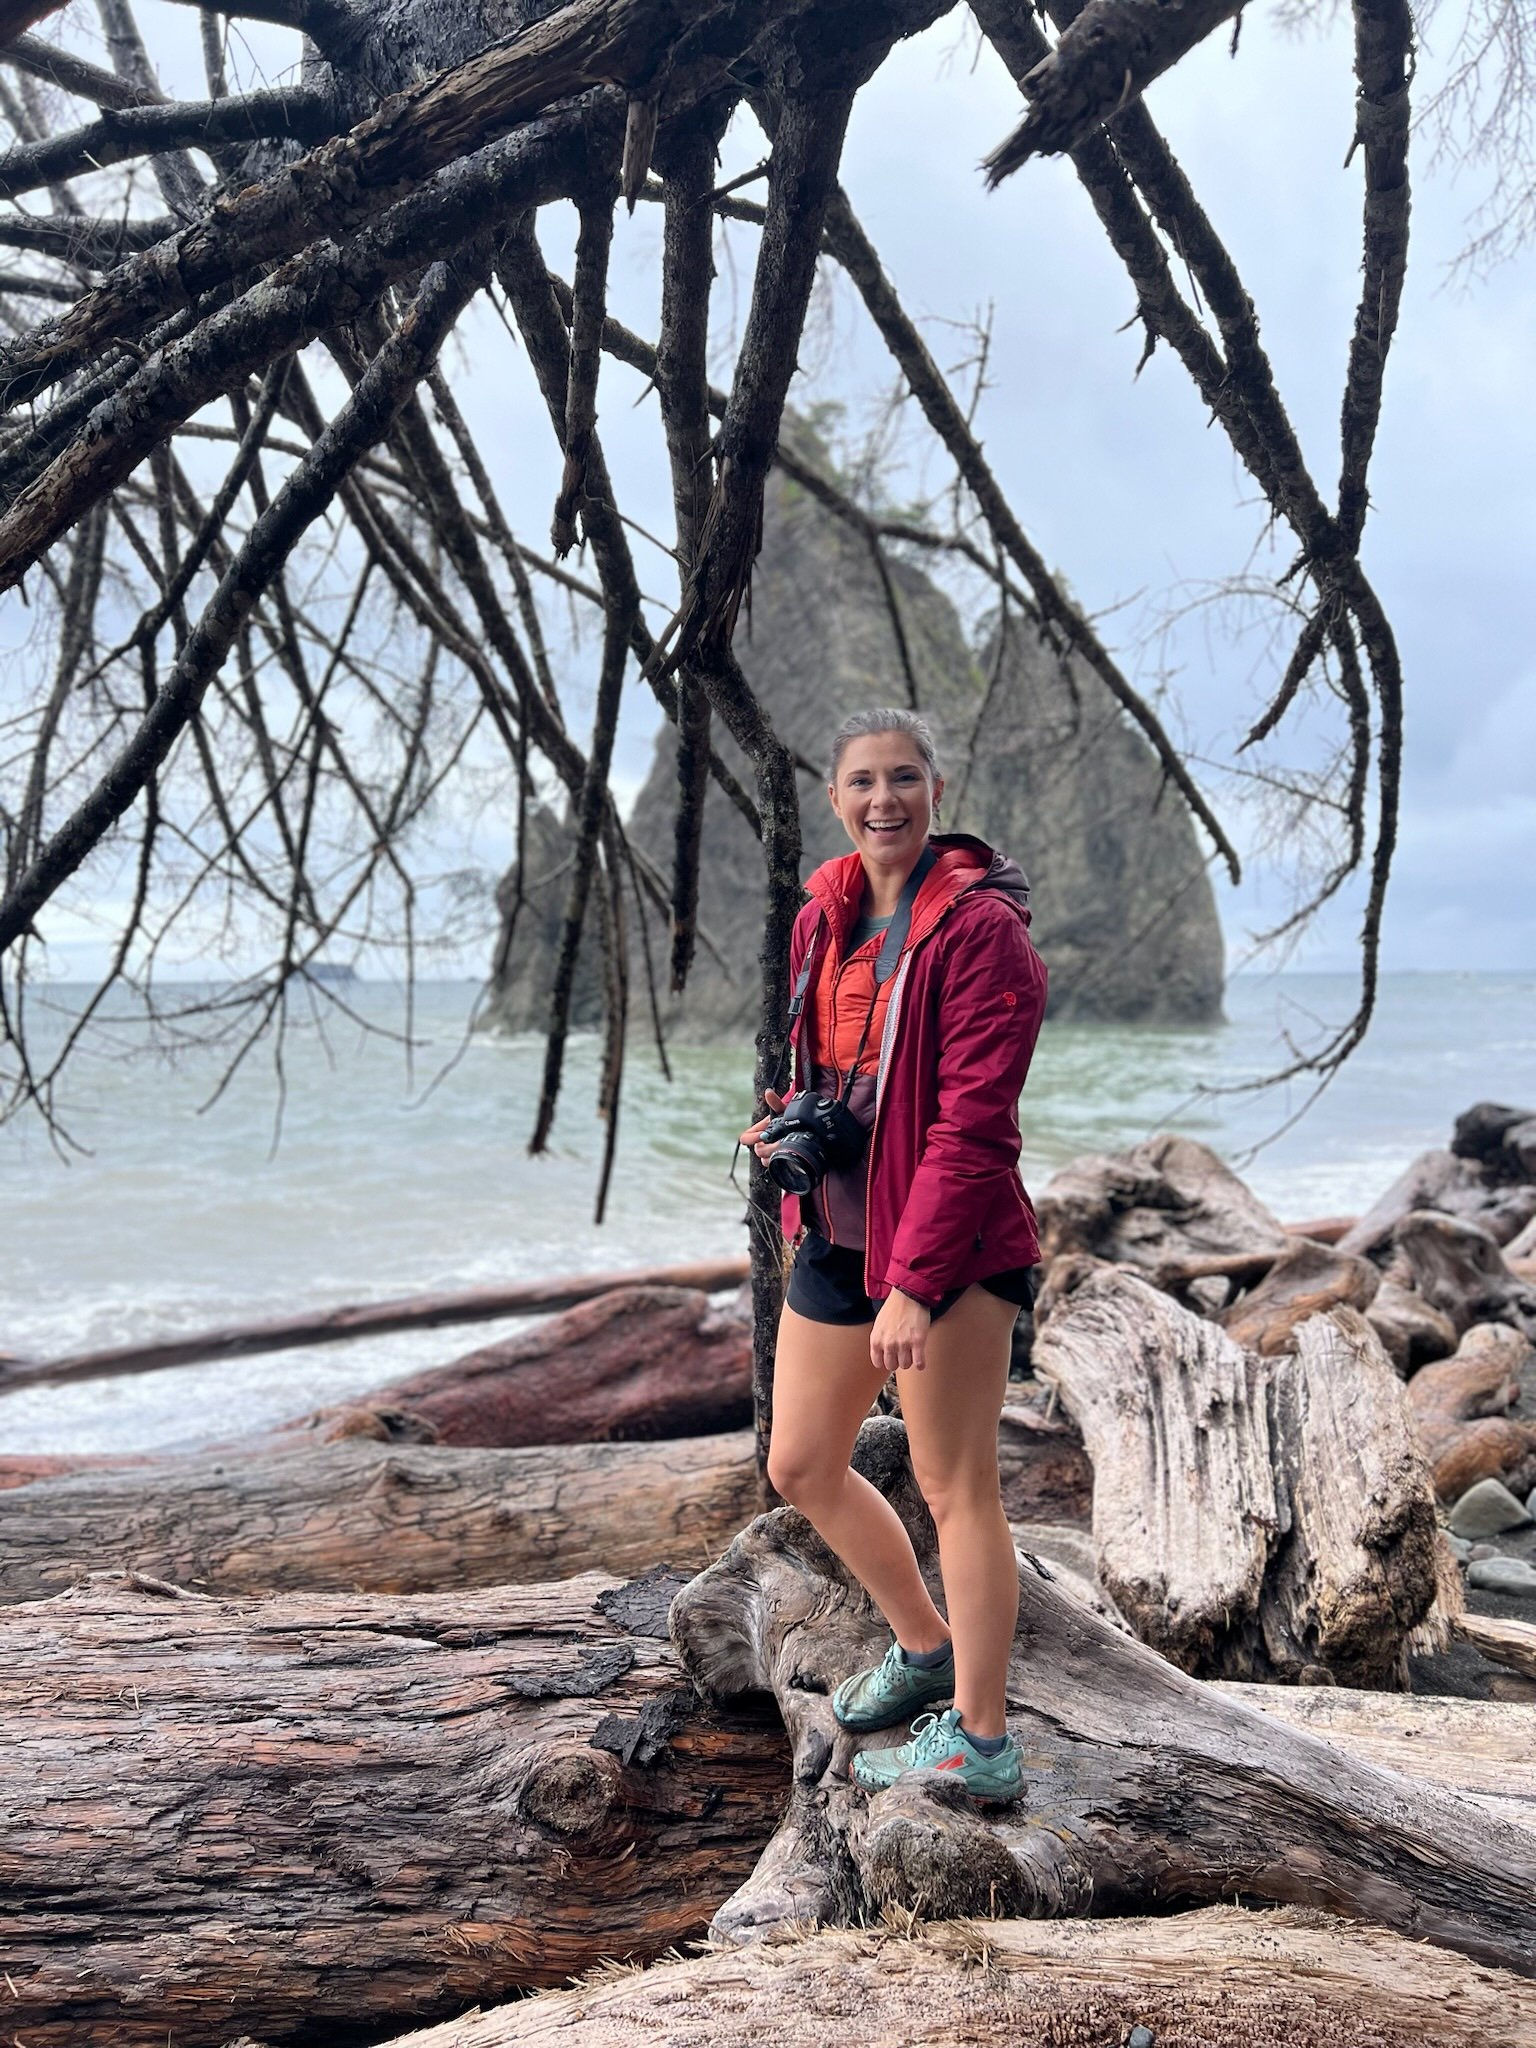
Before visiting Rialto Beach, be sure to go during low tide (low tide resource). If you're planning to walk to the Hole in the Wall and back, timing is key, as you can only do this during low tide, so plan accordingly! Since my partner had never visited the PNW beaches before, it was a wonderful opportunity for us to share this experience together! If you're short on time or can't make it at low tide, Second Beach is a great alternative. We aimed to enjoy the sunset hour, as we had heard it was the ideal spot, but sadly, it rained and stayed chilly for the rest of the afternoon into the evening!


DAY 3: Sol Duc Falls , Mount Storm King, Lake Crescent Lodge + Devil’s Punchbowl
As you can tell from the description, it was a LONG day! Haha! But we’re committed to making the most of every moment, so let’s dive in. Beginning our adventure at the stunning Sol Duc Falls, we enjoyed an easy 1.6-mile roundtrip hike with just a 200-foot elevation gain. We were genuinely amazed by the breathtaking beauty of this waterfall!


Once we crossed this must-see off our list, we headed up toward the Lake Crescent area, where we took on the challenge of Mount Storm King. A quick heads-up: this hike is quite challenging, covering 4.7 miles round trip with an elevation gain of about 2,106 ft. During our summer visit, we hoped for clear skies, but unfortunately, that wasn’t the case! We missed out on the stunning views depicted in photos, but the challenge made for an excellent bonding experience for us. Haha!
🪨 Be cautious of narrow sections with drop-offs where ropes are needed for assistance, and keep an eye on the weather if you're not accustomed to this type of terrain.
🐦⬛ We enjoyed our packed lunches at the mountain's summit, where we had to fend off hungry birds trying to snatch our food! So be sure to keep your meals secure up there!


Afterwards, we embarked on shorter hikes that led us to the Lake Crescent Lodge Restaurant, where we treated ourselves to refreshing cocktails – a well-deserved break before heading down to the Devil’s Punchbowl! We accessed the Devil’s Punchbowl via the Spruce Railroad Trail, which was an easy out-and-back journey of 2.4 miles with just a 137 ft elevation gain.


👙 If you plan to take a dip, remember to bring your swimsuit! I jumped in wearing my hiking clothes, and my partner leaped off both the bridge and the cliff into the water! (Check out the reel for his jumps!) This was the perfect way to wrap up a long but rewarding day!
DAY 4: Morning coffee at Lake Crescent Lodge, Hurricane Ridge + driving back to Seattle
We enjoyed our time at Lake Crescent Lodge so much that we stopped by for coffee, hoping to rent a kayak for a morning ride. Sadly, the waves were too rough and the wind too strong, so instead we strolled around the area with our coffee. After that, we headed straight to Hurricane Ridge. However, if you've been following our weather luck, you know it was still cold, rainy, and windy, which meant we missed out on the most popular hike known for its stunning views of the Olympic Mountain range. Haha! This hike ended up being my least favorite, purely because of the weather! But if the skies are clear, I definitely recommend it!


💲It costs $30 per car to reach the top of Hurricane Ridge, but it's FREE with the America the Beautiful Pass.

From there, we made our way directly to downtown Seattle, taking the ferry right into the heart of the city! We stayed at a lovely hotel - Kimpton near Pike Place Market, making it easy to visit the next morning. For dinner, we had reservations at Elliott’s Oyster House to celebrate our one-year anniversary! Once again, we hoped for better weather, as we had planned to ride The Seattle Great Wheel, but unfortunately, it was still dreary. Instead, we wandered around the pier before returning to our hotel to wind down for the night.
Candids


DAY 5: Exploring Seattle's Attractions and Journeying Towards the North Cascades Region
Since my partner had never visited the Pike Place Market area, we made it our first stop for coffee and breakfast. As we were heading to our new Airbnb, we decided to pick up some fresh salmon, produce, and other supplies at the market. If you want to learn more about Seattle, be sure to check out my camper van blog post here. After strolling around and enjoying more coffee and matcha, I couldn't resist stopping by my favorite spot, Frankie & Jo’s in Capitol Hill, where I indulged in a scoop each of Salty Caramel Ash and Supercookies & Cream on a gluten-free waffle cone. It truly is the best ice cream, even if you’re not dairy or gluten-free!


In the afternoon, we arrived at our Airbnb, where we made a quick grocery stop before grilling our fish and other provisions. It was absolutely delicious!
DAY 6: North Cascades Visitor Center, Lake Ann + Heather-Maple Pass Loop

During our time in the Seattle area, some locals cautioned us about potential fire closures. To be on the safe side, we visited the North Cascades Visitor Center for the latest updates. We're glad we did; there were several hikes we couldn't do, such as the Sourdough Mountain trail, so we had to revise our plans. Fortunately, the Heather-Maple Pass Loop was open, and we decided to explore that for the day.
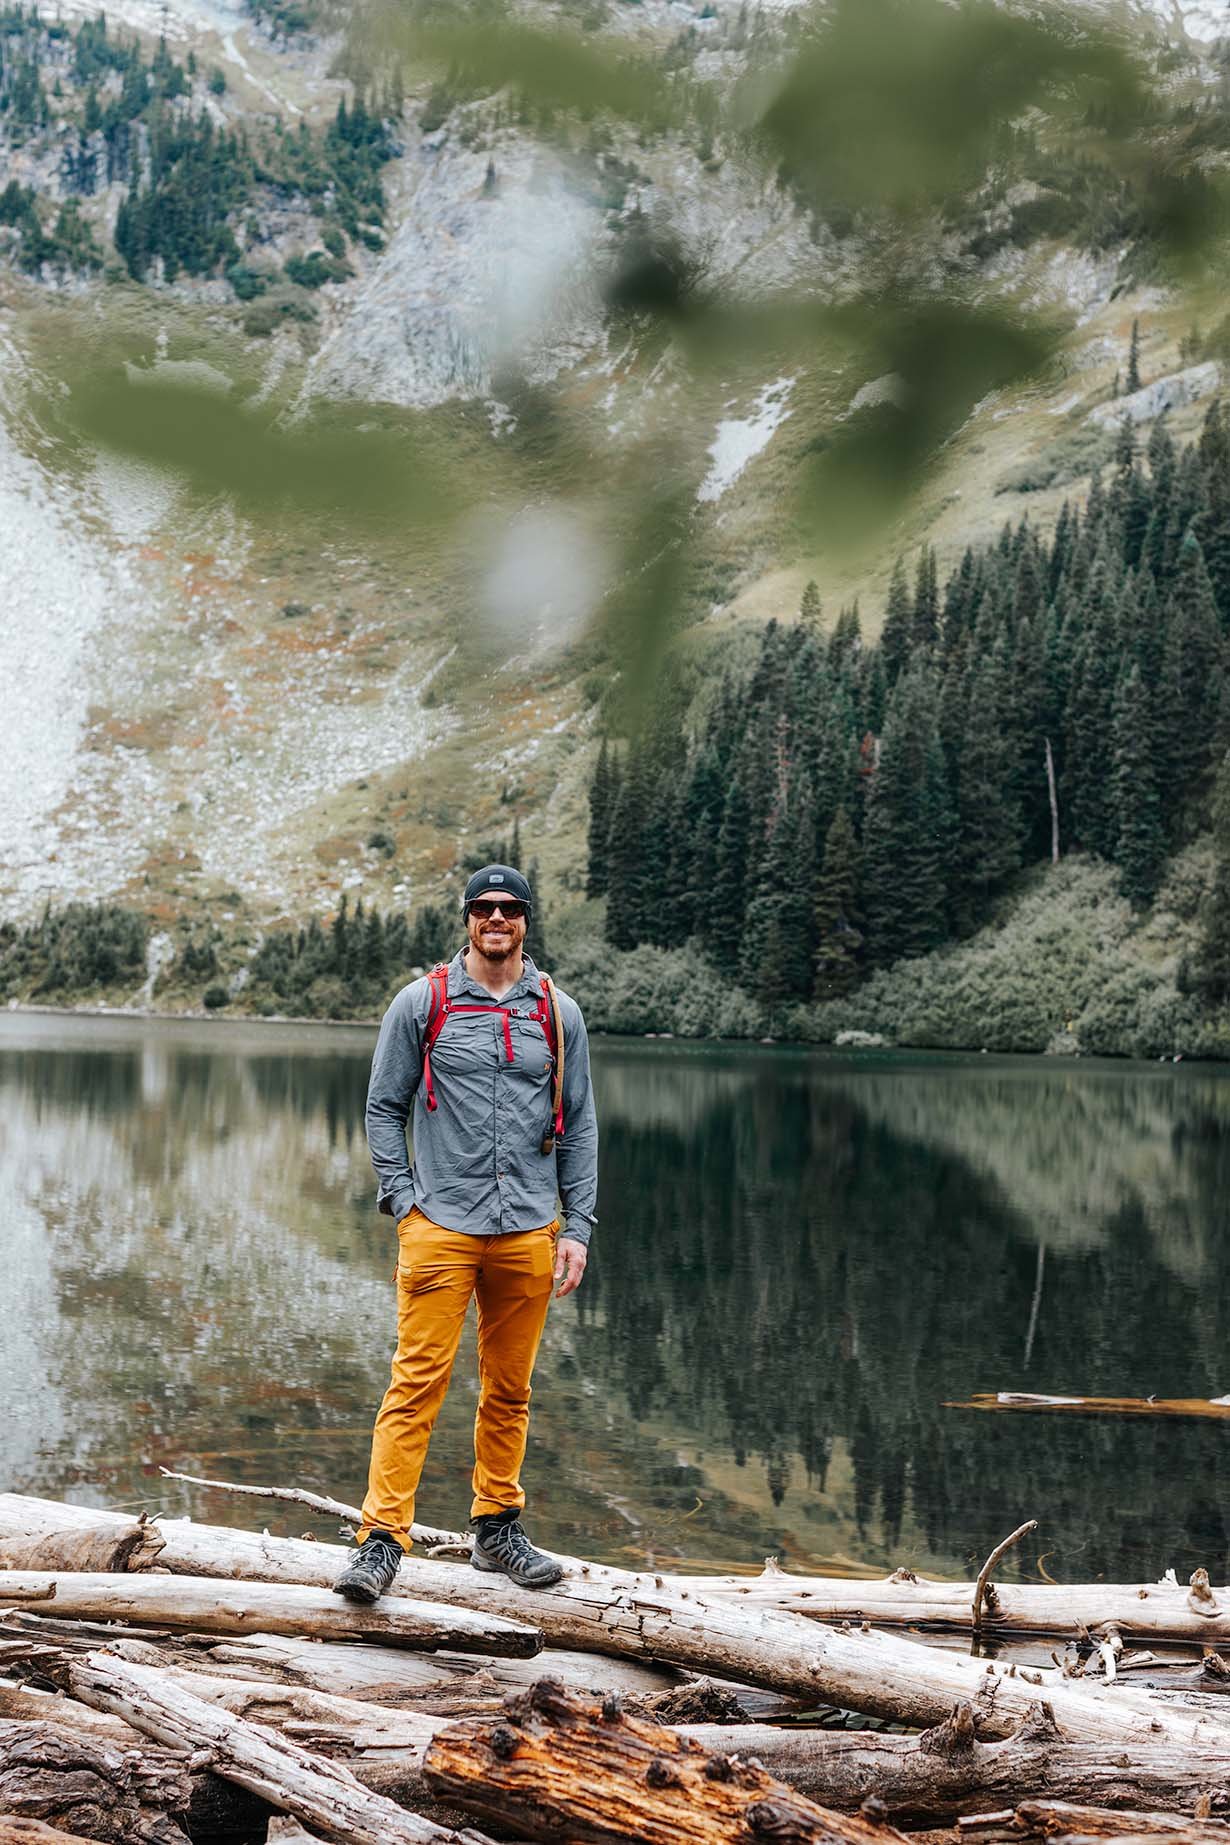


About 1.25 miles into the Heather-Maple Pass Loop, a trail veers left towards Lake Ann, a beautiful gem nestled within a talus bowl. This charming detour is a relatively flat 0.6 miles round trip. Stopping by the shores of Lake Ann provides a stunning view of the pass you’re headed to! Continuing on the main trail, this hike totals approximately 7.2 miles round trip with an elevation gain of 2,000 feet. It definitely ranks among our top hikes in Washington! The vista from the summit is breathtaking, showcasing endless mountain peaks and the lake below.


⛰️ If you hike clockwise, you can tackle the steep section of the trail early in the day, allowing for a more gradual descent later on. Conversely, a counter-clockwise hike offers increasingly dramatic views of Black Peak and North Cascades National Park as you ascend to the pass. Regardless of your choice, you will be in awe of the scenery.
To wrap up our day, we treated ourselves to dinner and drinks at Upriver Grill & Taproom, which offers gluten-free and dairy-free options!
DAY 7: Diablo Lake Trail + driving to Mount Rainer
The day before, we visited Diablo Lake Vista Point and instantly decided that would be our destination for the following day! Bright and early, we set off on the Diablo Lake Trail. This moderate trail spans 7.6 miles roundtrip with an elevation gain of 1,300 feet. Navigating it can be a bit tricky, so here are a few tips: Look for signs along SR 20 that lead to the road crossing the top of Diablo Dam. Cross the dam and follow the access road to the parking area near the trailhead. We hoped to time our hike to catch a ride on the Diablo Lake Ferry, but we missed it. If you're aiming for that, try to arrive a few minutes before 9 AM or 3:30 PM.


After our hike, we drove through the park, stopping at various overlooks and lakes before heading down to Mount Rainier!


candids


DAY 8: Paradise (South Side) - Skyline Trail Loop, Narada Falls + Pinnacle Peak Trail
☑️ Starting in 2024, timed entry reservations will be mandatory during peak seasons. From May 24th to September 2nd at select locations and peak times, a reservation will be required. Make sure to secure your reservations and find out more before your visit.
We kicked off our first day at Mount Rainier by exploring one of the park's most popular trails - The Skyline Trail. This 6-mile round trip offers an elevation gain of 1,794 feet. Numerous trails branch off from the Skyline Trail, making this area perfect for a full or half-day adventure! Unfortunately, the weather wasn't in our favor; however, on a sunny day, you can expect breathtaking views of majestic mountains and Paradise Valley.


After our hike, we enjoyed lunch at the Paradise Guest Service station located in the parking area, which offers cafeteria-style meals. *Gluten-free and dairy-free options are available!
Known for its stunning waterfalls, we made a stop at Narada Falls, where we were treated to a beautiful rainbow. To get there, drive 14 miles from the Nisqually Entrance to a designated viewpoint and parking area. Follow the short trail for amazing views!
Eager to fit in one last hike before heading to our Airbnb, we tackled the Pinnacle Peak Saddle Trail, which is a 2.4-mile round trip with a 1,056-foot elevation gain. It’s a good workout, but the views at the top – including Mount Rainier, Mount Adams, the Nisqually River Valley, and Reflection Lake – make it all worthwhile!


For dinner, we stumbled upon a charming and somewhat unexpected Ukrainian restaurant, where I had the pleasure of trying borscht for the first time!
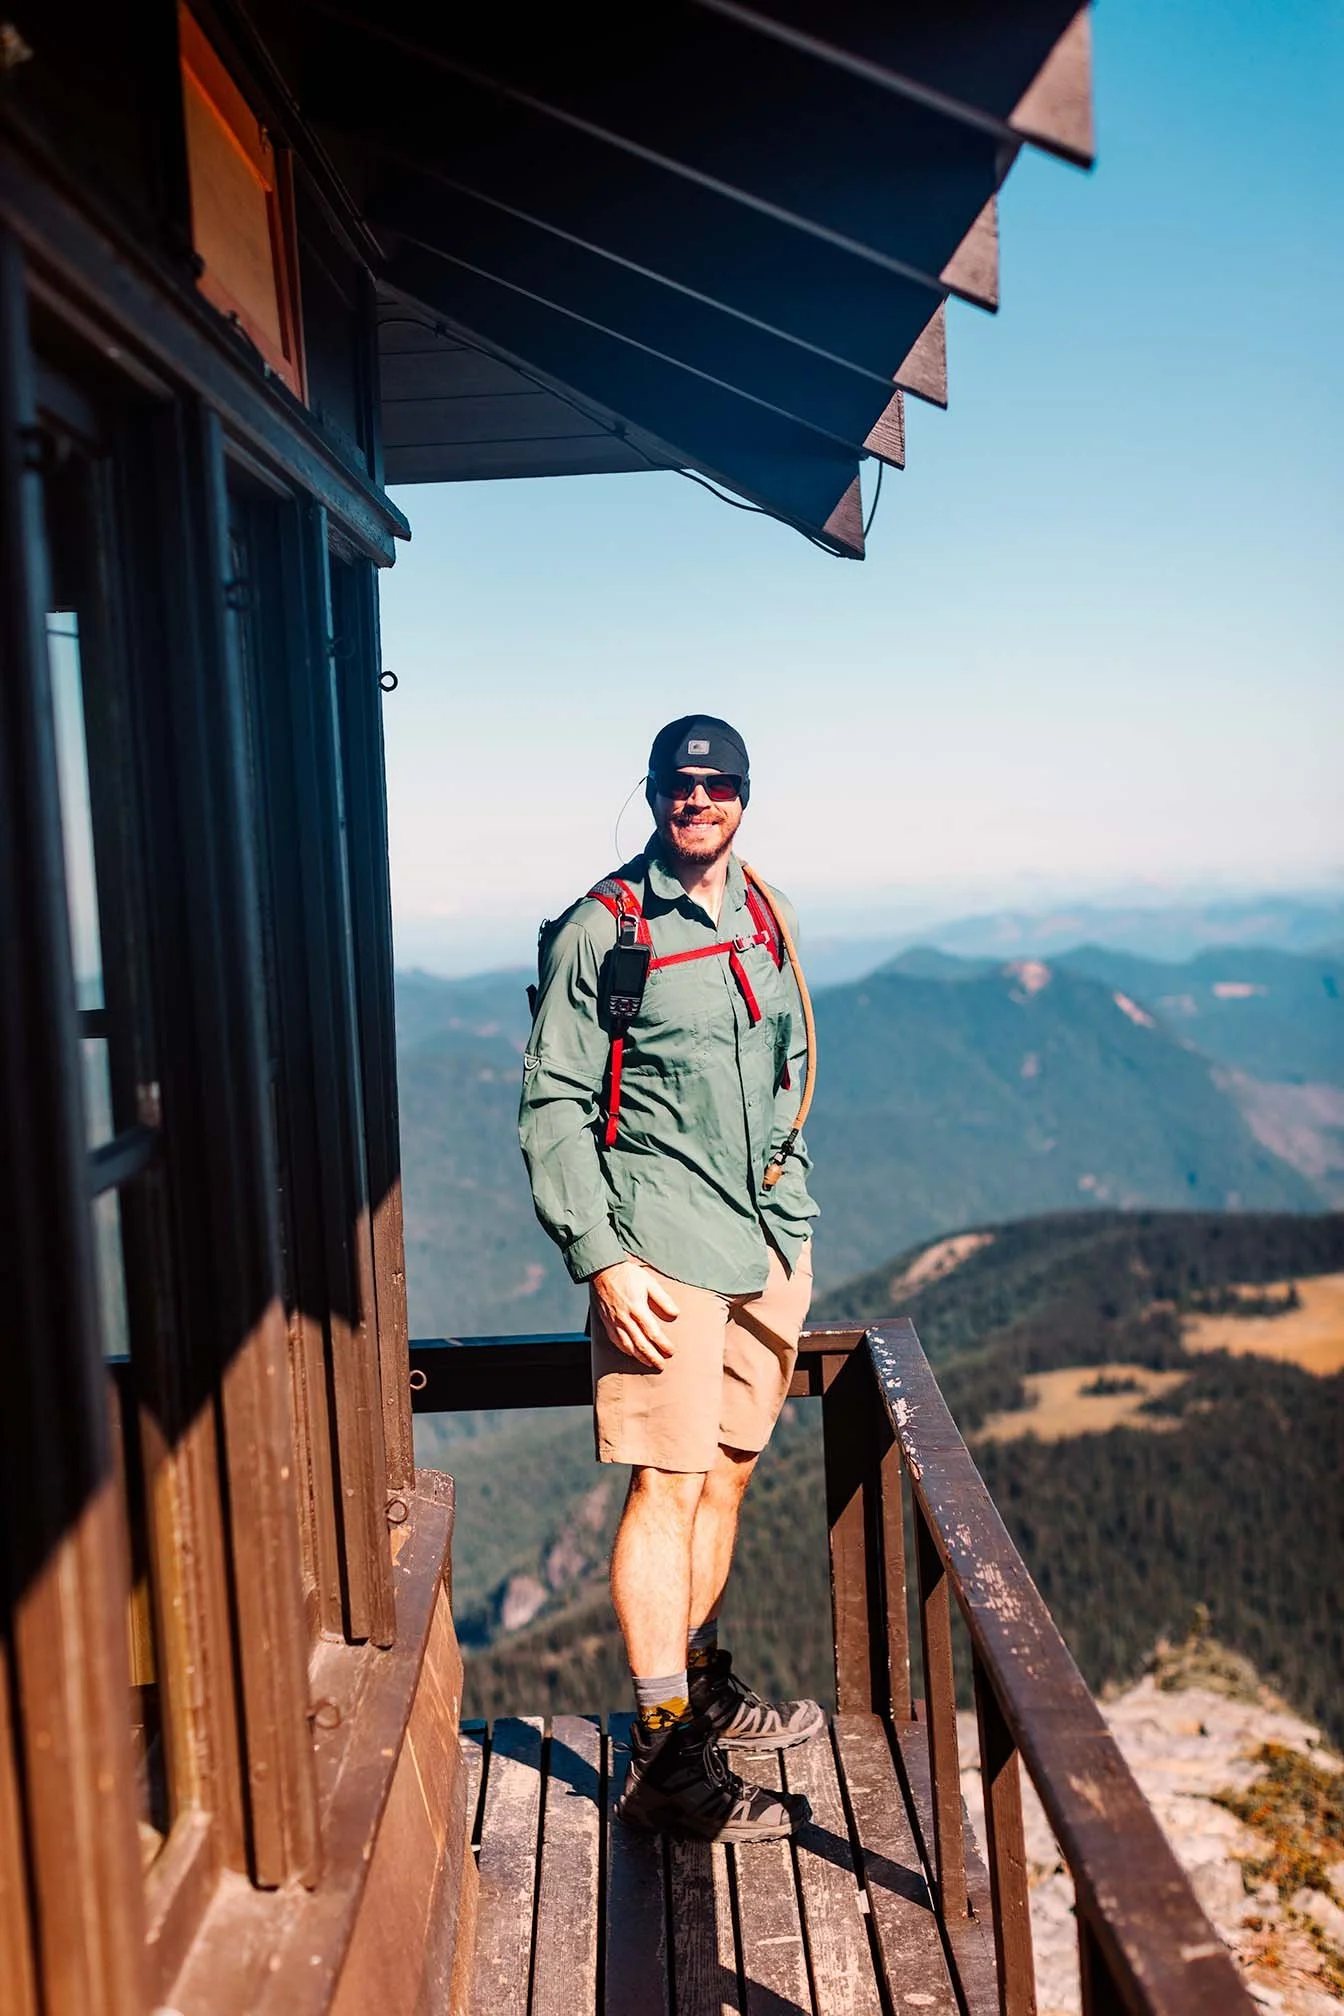
DAY 9: (Sunrise area) - Mount Fremont Fire Lookout, Burroughs Mountain Trail + Sunrise Rim Trail + (Paradise area) Skyline Trail Loop redo + Reflection Lake
This day was another long one, but since it was our last full day, we had to make it memorable! As a former firefighter, I couldn't miss the chance to conquer the Mount Fremont Lookout! Spanning 5.7 miles with an elevation gain of 1,151 feet, this hike quickly became a personal favorite. It begins on the Sourdough Ridge Trail and branches off to the Mount Fremont Trail, just beyond Frozen Lake. We took some time to explore the Mount Fremont Lookout, built in 1934 to monitor the forest for wildfires.


Since this hike shares the Burroughs Mountain Loop Trail, we decided to merge the two with just an additional 2.6 miles of hiking. The Burroughs Mountain trail itself is 9.4 miles long, featuring a 2,562-foot elevation gain. At the third Burroughs, we paused for a snack break and were delighted by the company of chipmunks. We then made our way back towards the Sunrise Rim Trail, which led us directly to the Sunrise Parking Lot.


As you can imagine, after covering roughly 15 miles before 1 PM, we were both exhausted and hungry! Unfortunately, the visitor center at the Sunrise parking area offered only concession-style food, so we headed back to the Paradise area for a proper meal. This worked out perfectly, as my partner wanted to tackle the Skyline Trail Loop again with the clear skies, while I ventured toward Reflection Lake to “reflect” on our trip! We both concluded our day with stunning views, enjoying the ideal hikes that suited us as individuals to wrap up our adventure!


candids


Our Best Tips from Visiting Washington's National Parks
Plan in Advance
Each park has its own set of rules, pricing, and reservation processes, so it’s essential to plan ahead! For example, since Mount Rainier is the most popular of the three parks, I realized we would need reservations. Be sure to visit each National Park's website for the latest information and resources!
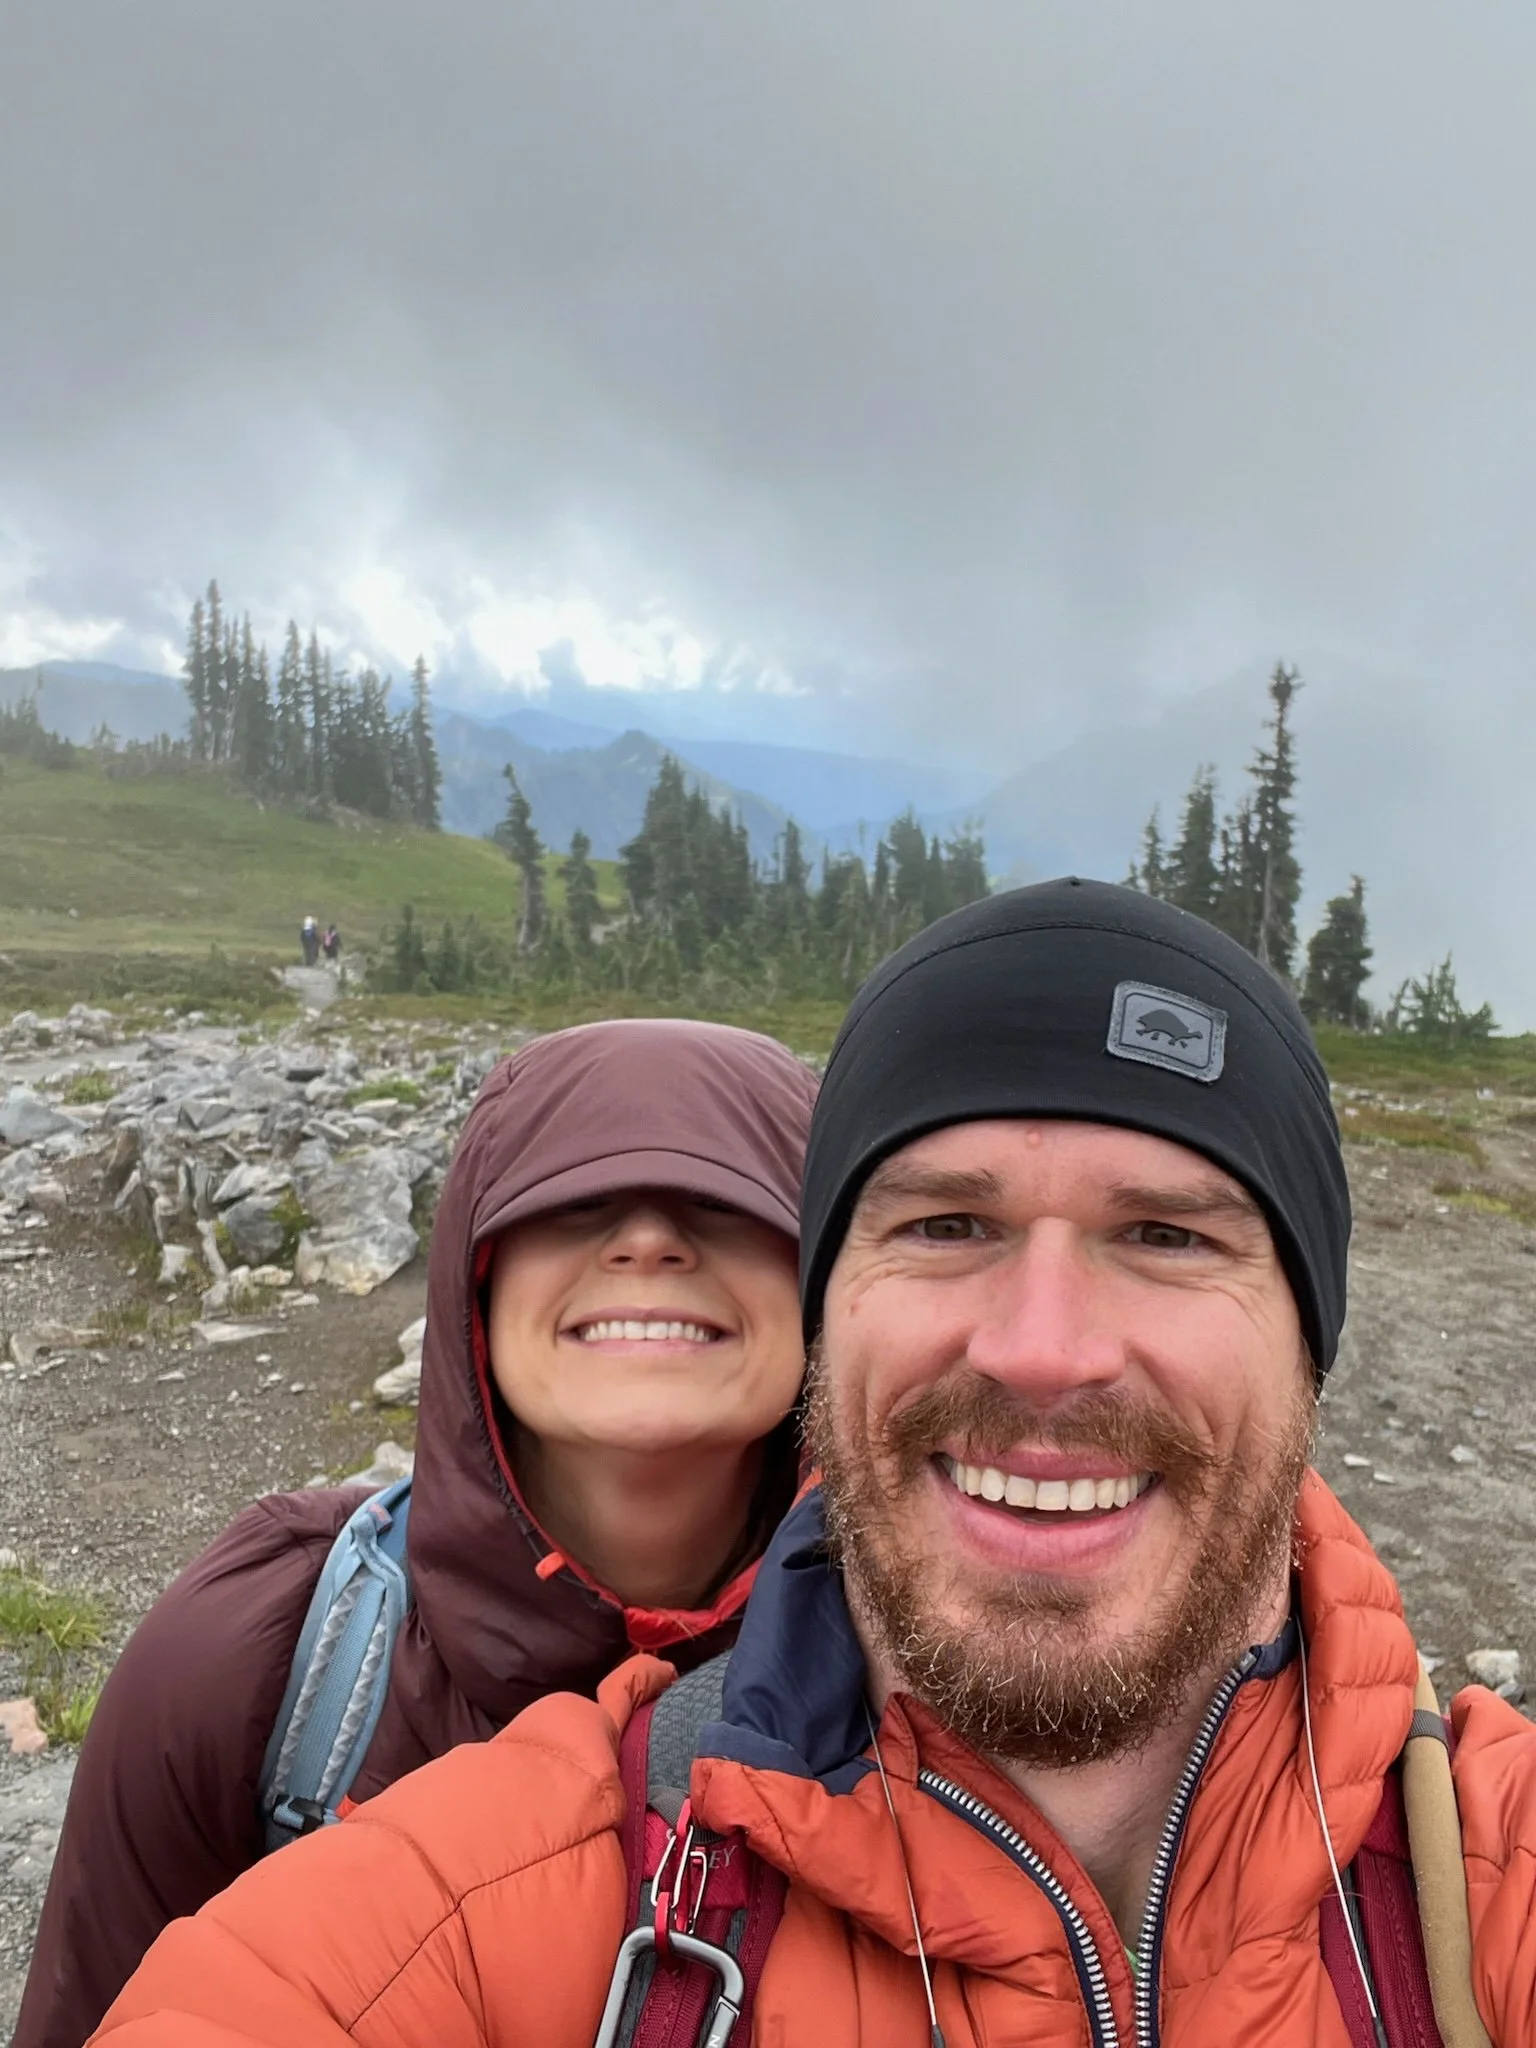
Check Weather Conditions
Before heading to the Pacific Northwest, it’s wise to manage your expectations regarding rain and cloudy days. During our ten-day trip (the last day was for travel), we enjoyed perfect weather on about three days, even though we visited at the peak summer season. While summer months offer the best opportunities to see stunning viewpoints, remember that the weather is unpredictable. Be sure to plan for it by packing appropriate rain and winter gear, even in summer! Learn from my experience and avoid making a last-minute stop at REI in Seattle for better rain gear!
Provisions
Always ensure you have plenty of food, snacks, and water. As someone who is gluten and dairy-free, I encountered few issues finding suitable options, except around Mount Rainier. However, to be prepared, I always brought extra provisions in case we found ourselves in areas without accessible food. Staying in Airbnbs at all three national parks was incredibly beneficial; we usually enjoyed breakfast there and packed lunches and snacks for our hikes throughout the day.
Note: Feel free to visit my Amazon storefront for all your hiking gear and food needs!
Download Offline Maps
While we didn't encounter significant issues without offline maps, having them would have simplified our experience. Additionally, it's worth mentioning that we used a Garmin device, which proved to be invaluable since many parks and the roads leading to them have limited cell reception.
💬 I hope you found this guide on a 9-Day Adventure Through Mount Rainier, Olympic, and North Cascades National Parks in Washington to be helpful! Feel free to share your thoughts, tips, or experiences at these parks in the comments section below!

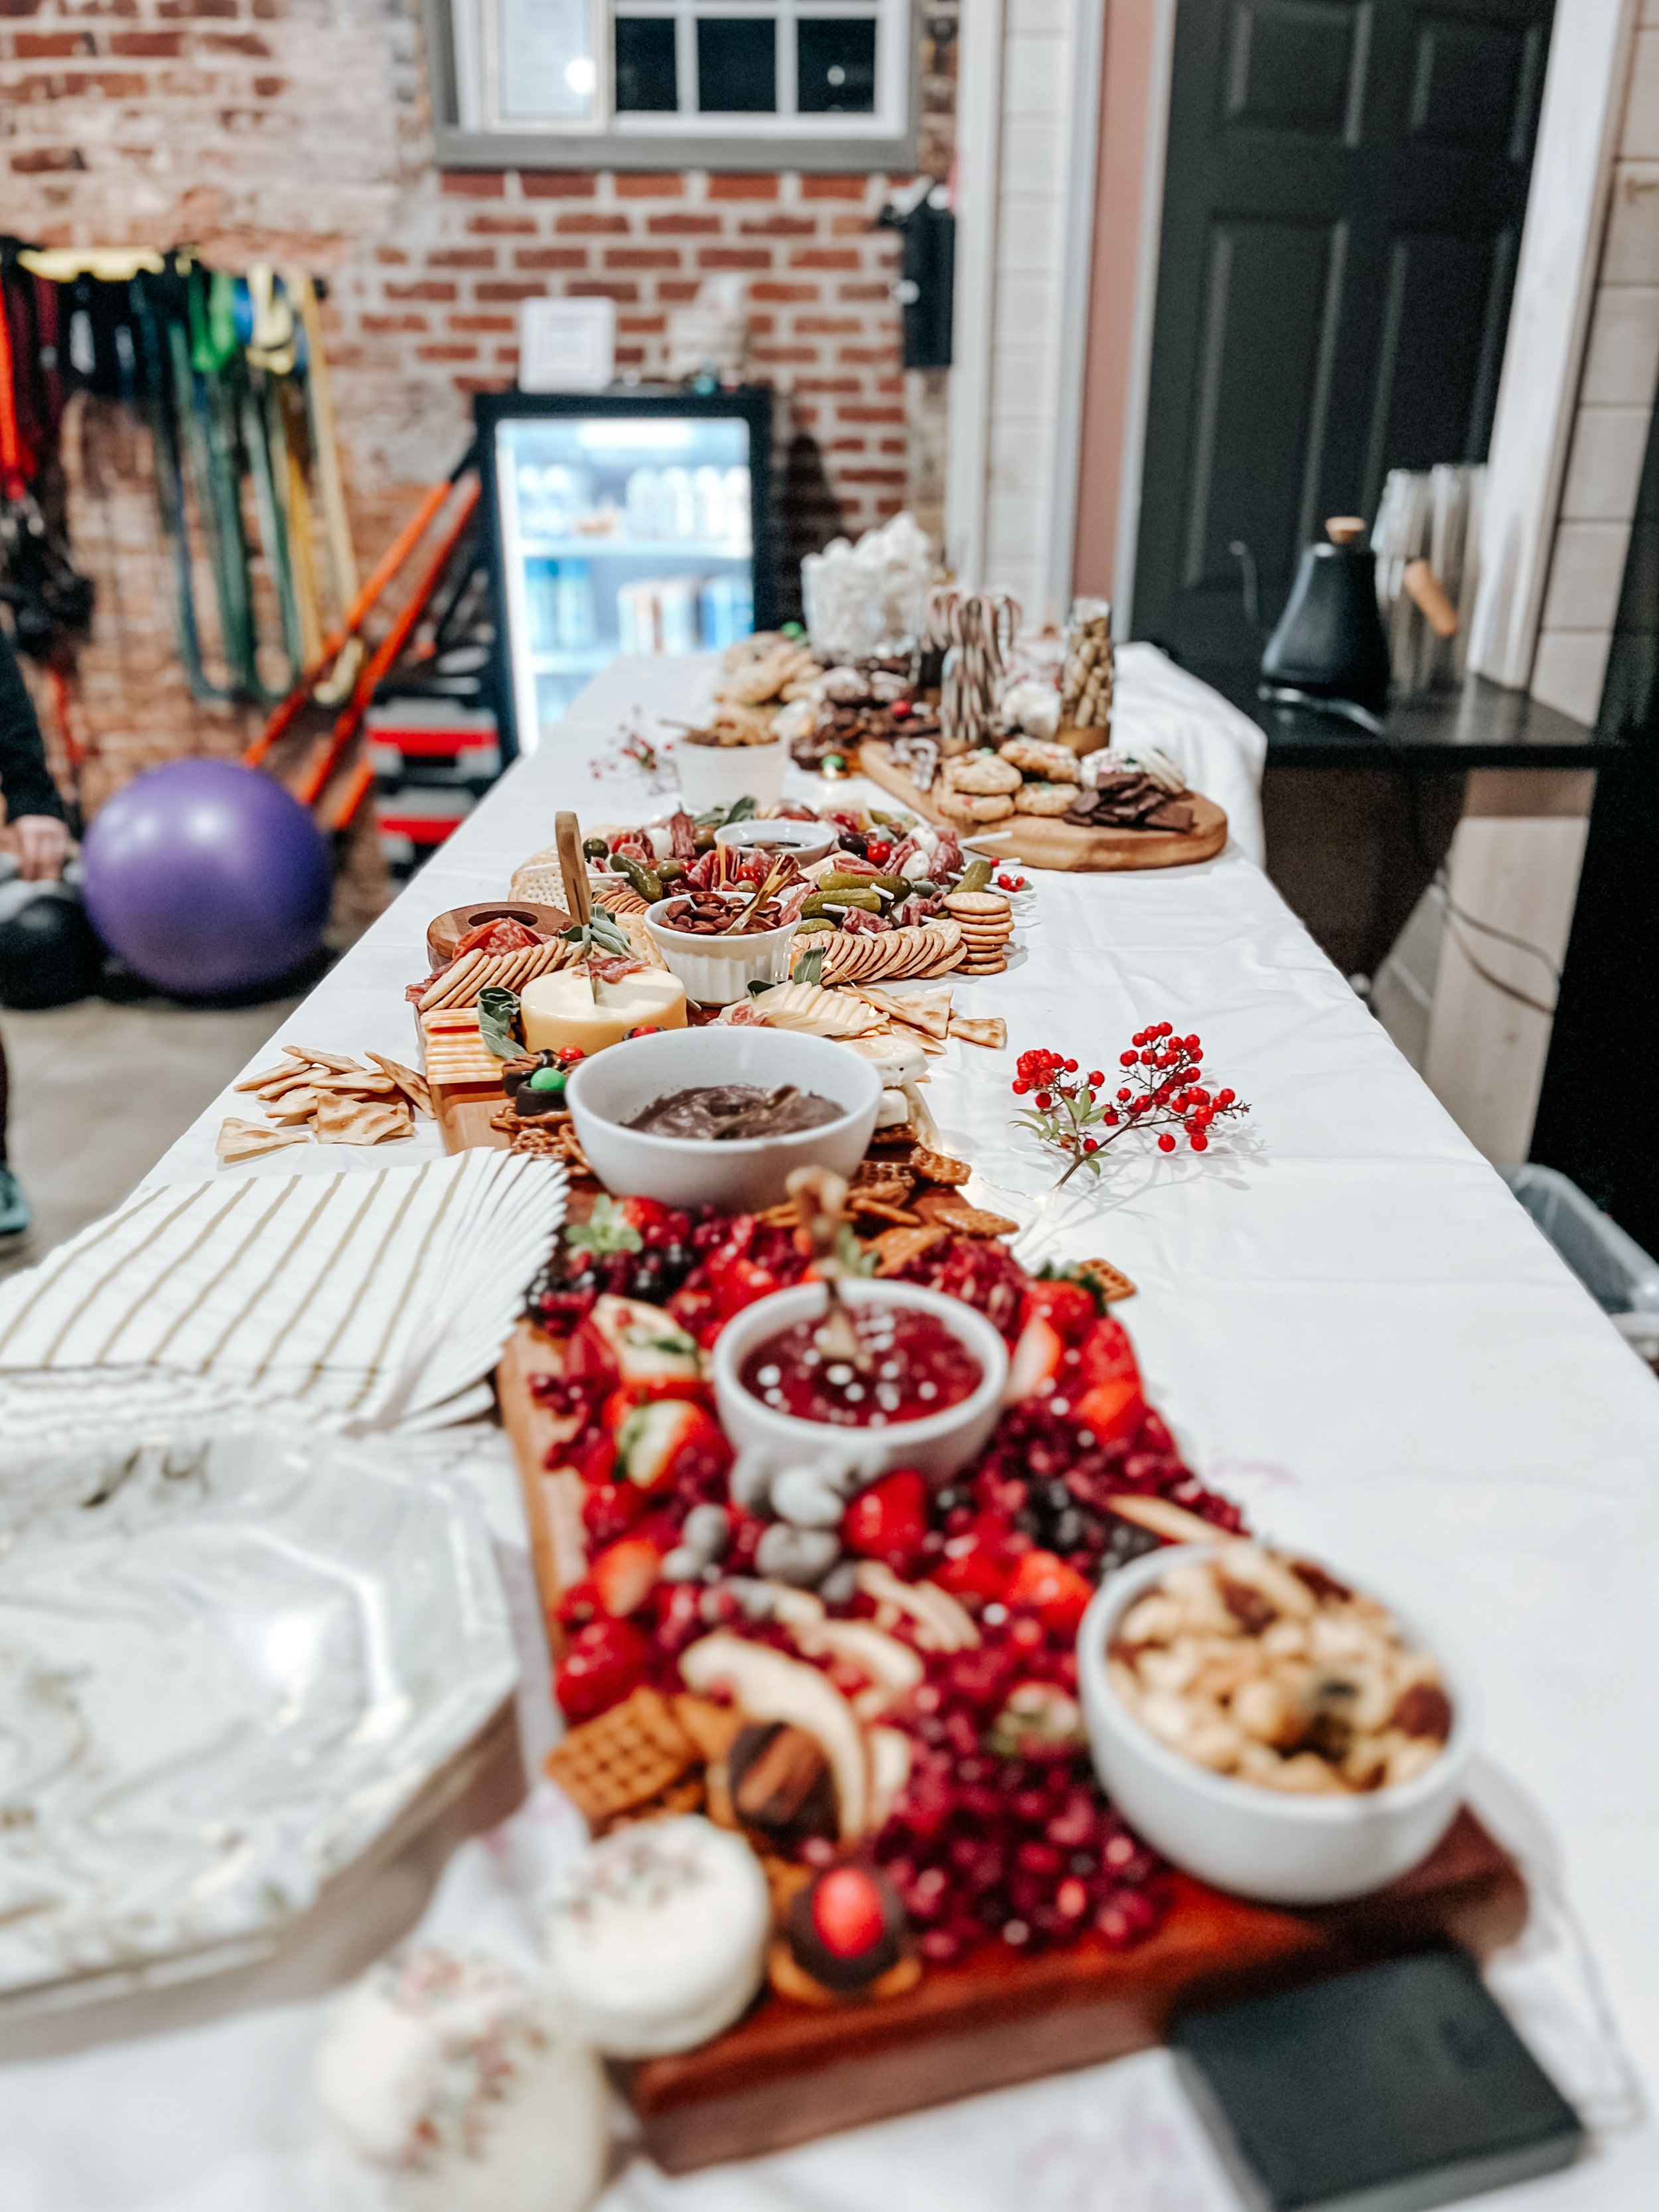
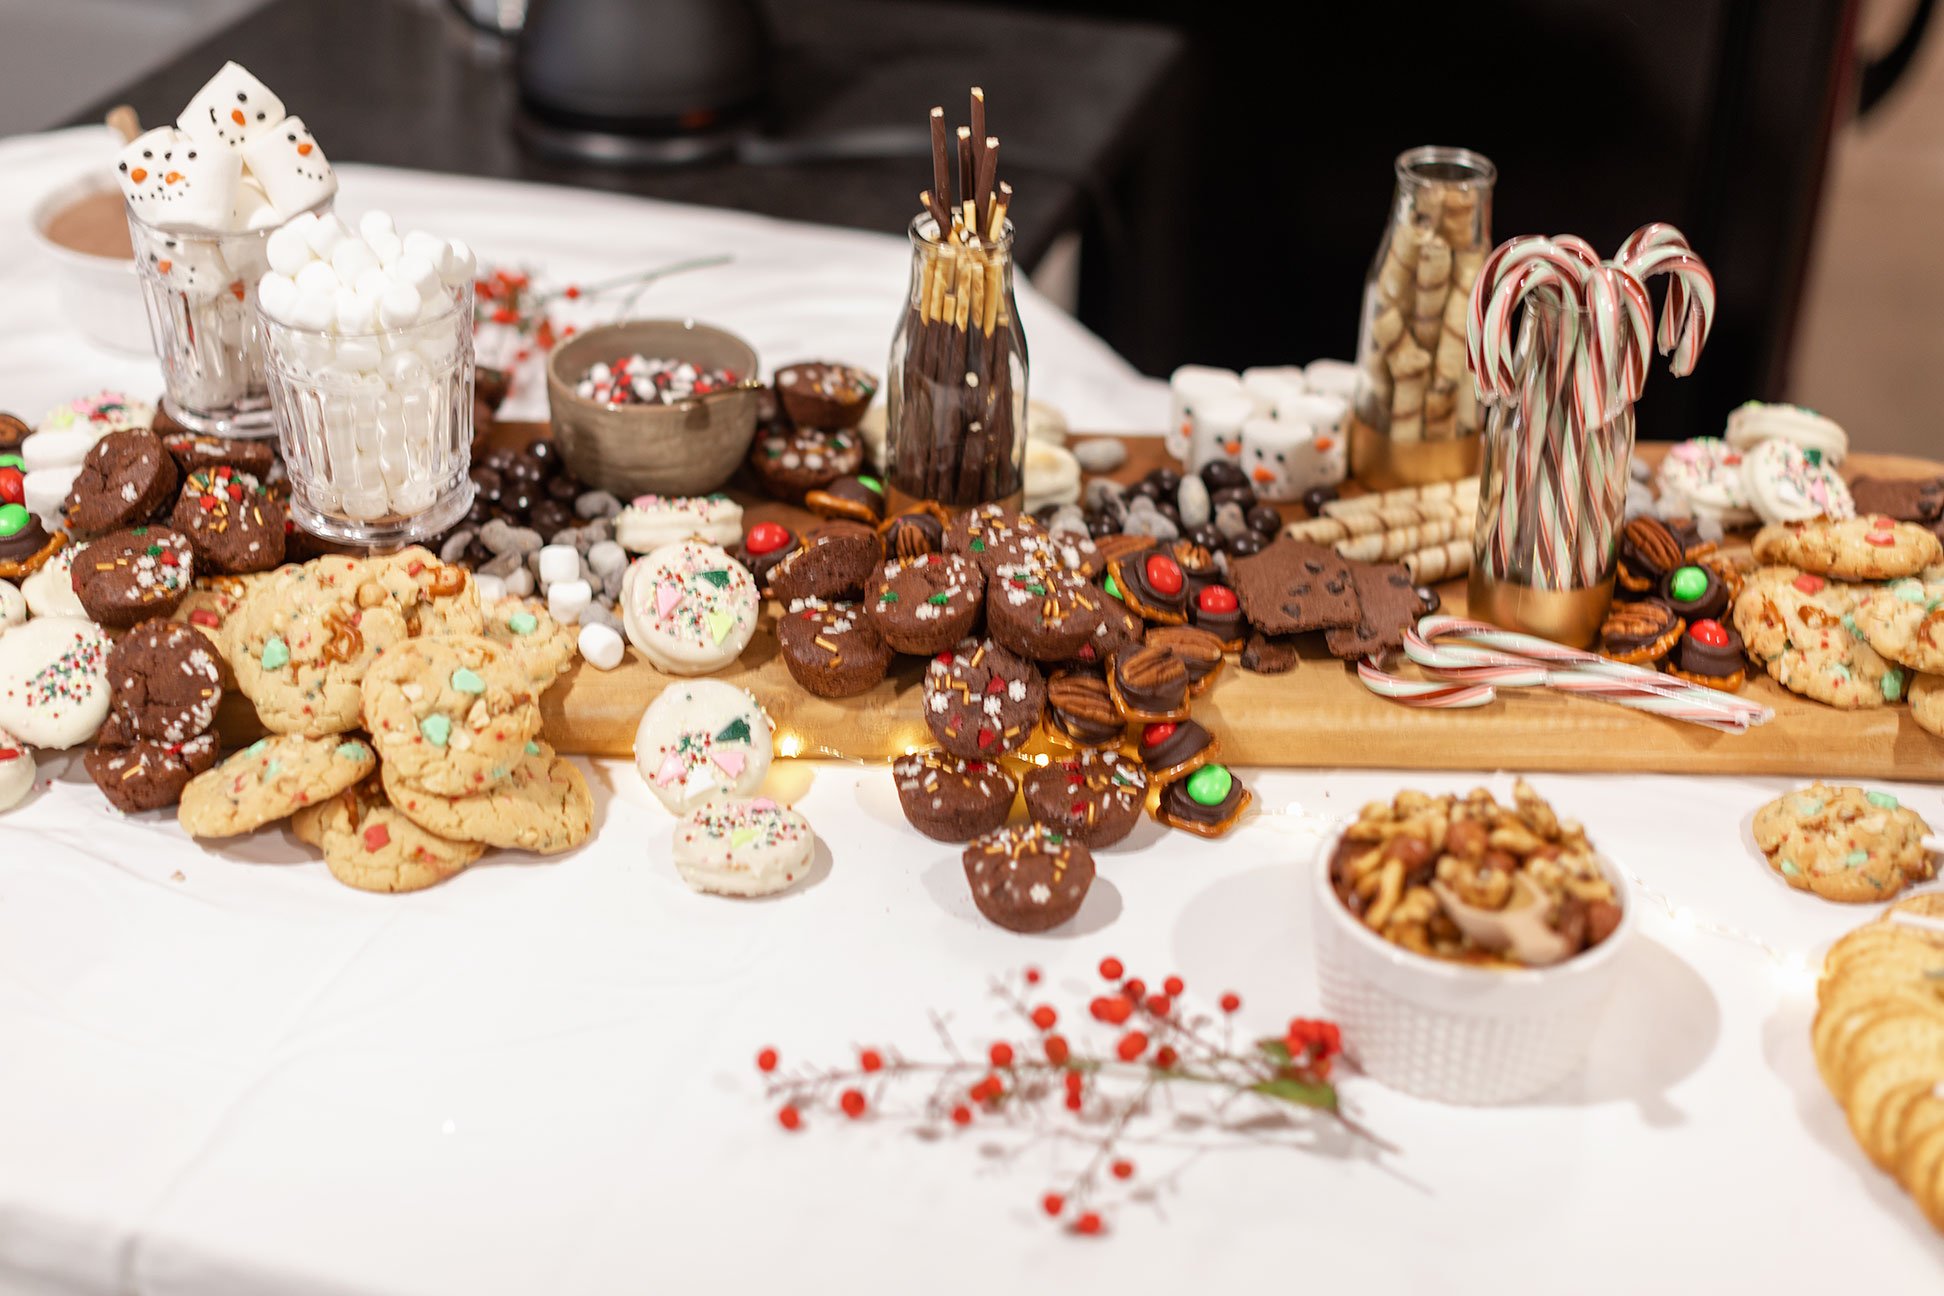
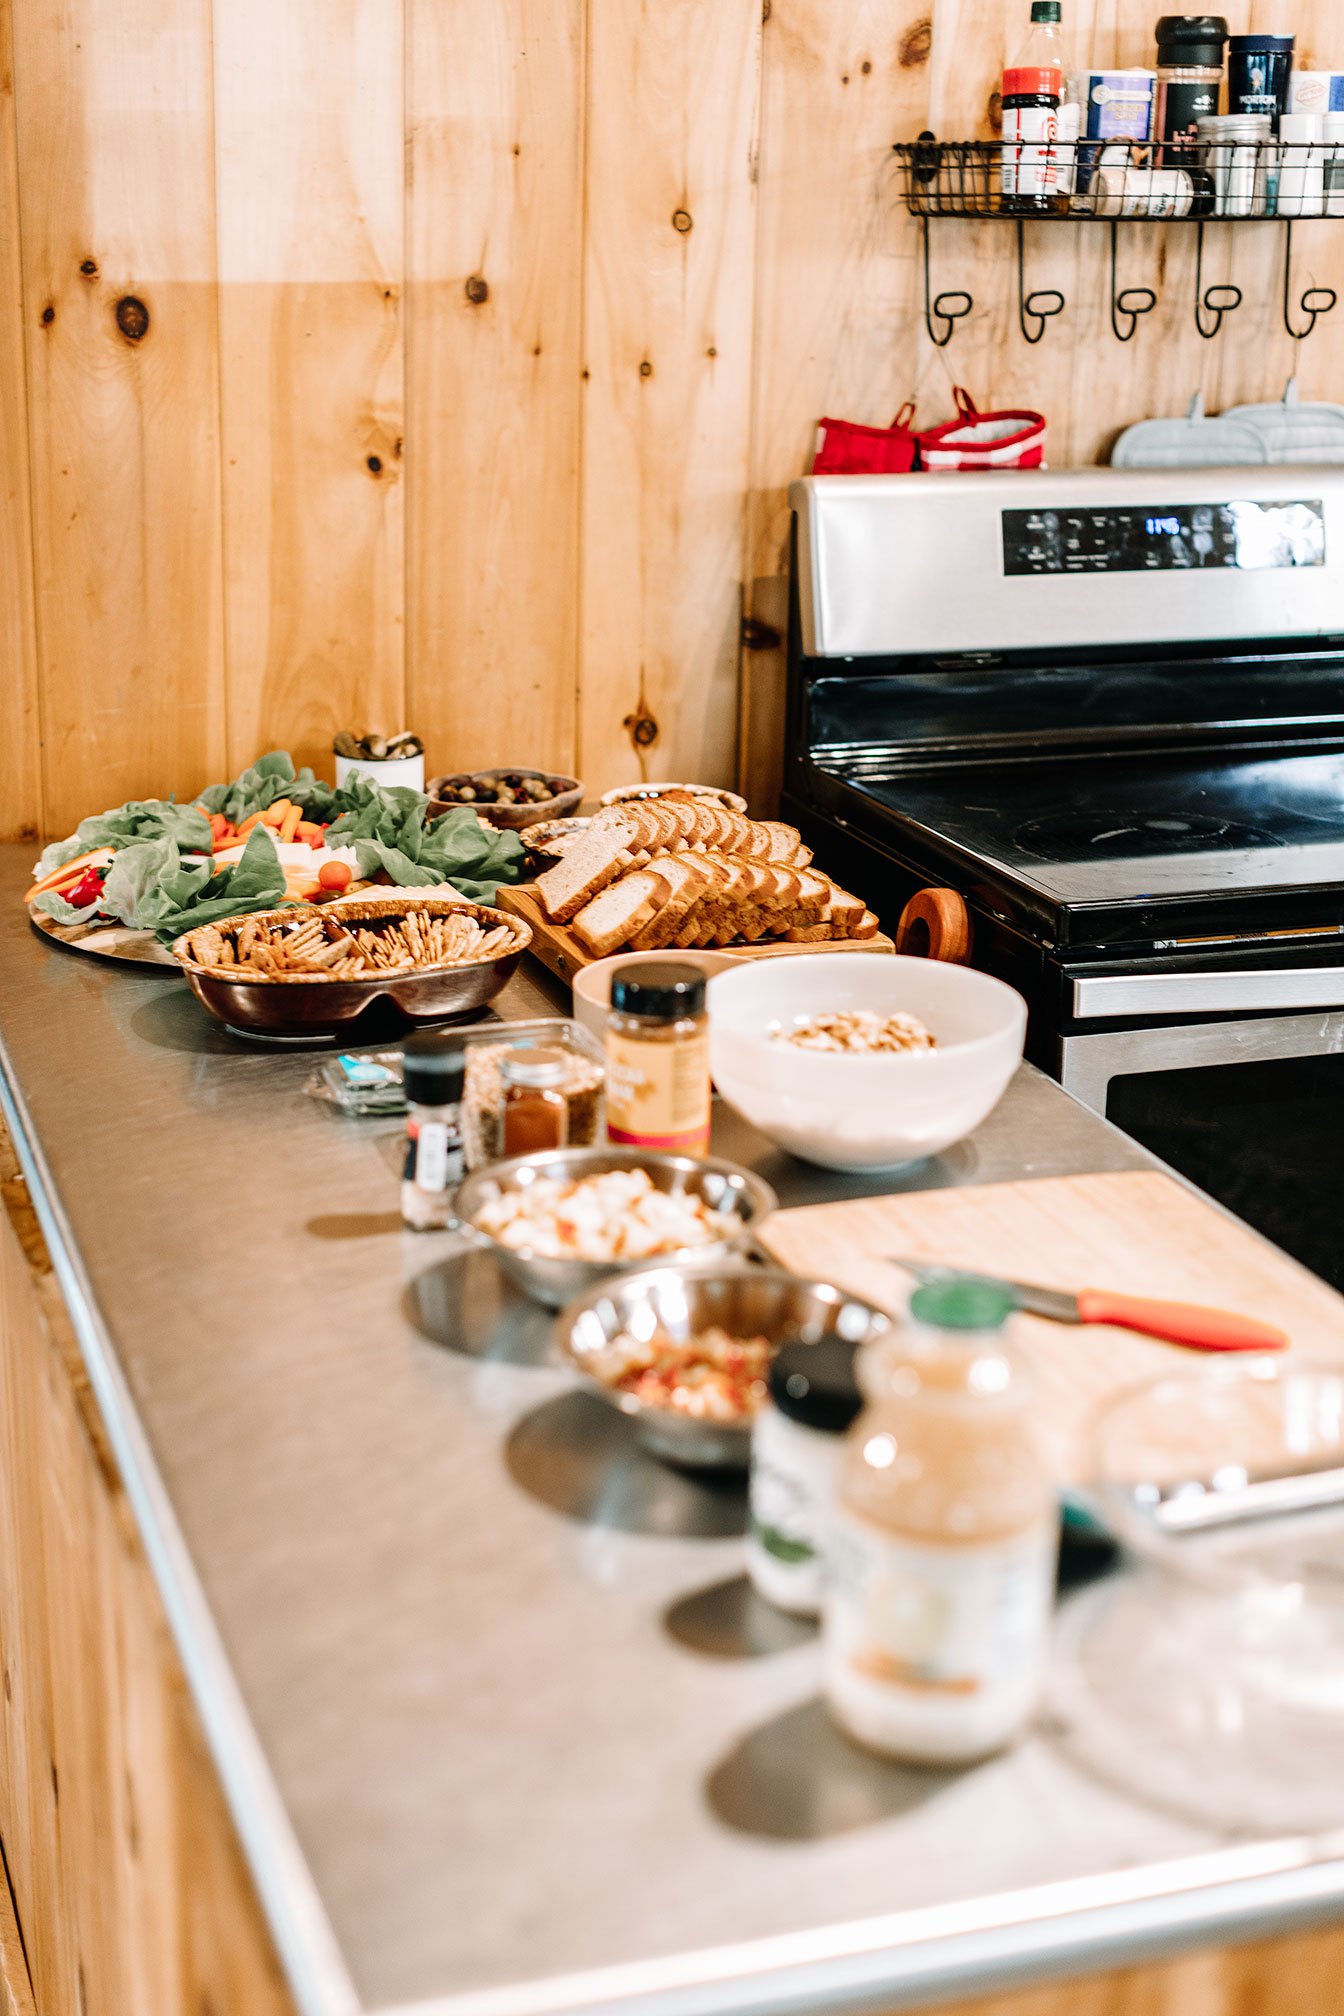
Creating Delicious Food Boards for Any Occasion
As we approach the end of the holiday season, it's the perfect time to indulge in some festive treats. A well-stocked charcuterie or food board is a fantastic way to bring loved ones together. Get inspired with these fantastic food board ideas that are sure to impress at your next event, whether it's a BBQ, retreat, girl’s night or even just a family dinner!
Our recipes and individual ingredients are naturally gluten-free and dairy-free friendly, and include healthy substitutes for traditional packaged products.
Plus, you'll find my favorite serving tools, tips, tricks, and packaged clean food products to help you put together any themed board in no time!
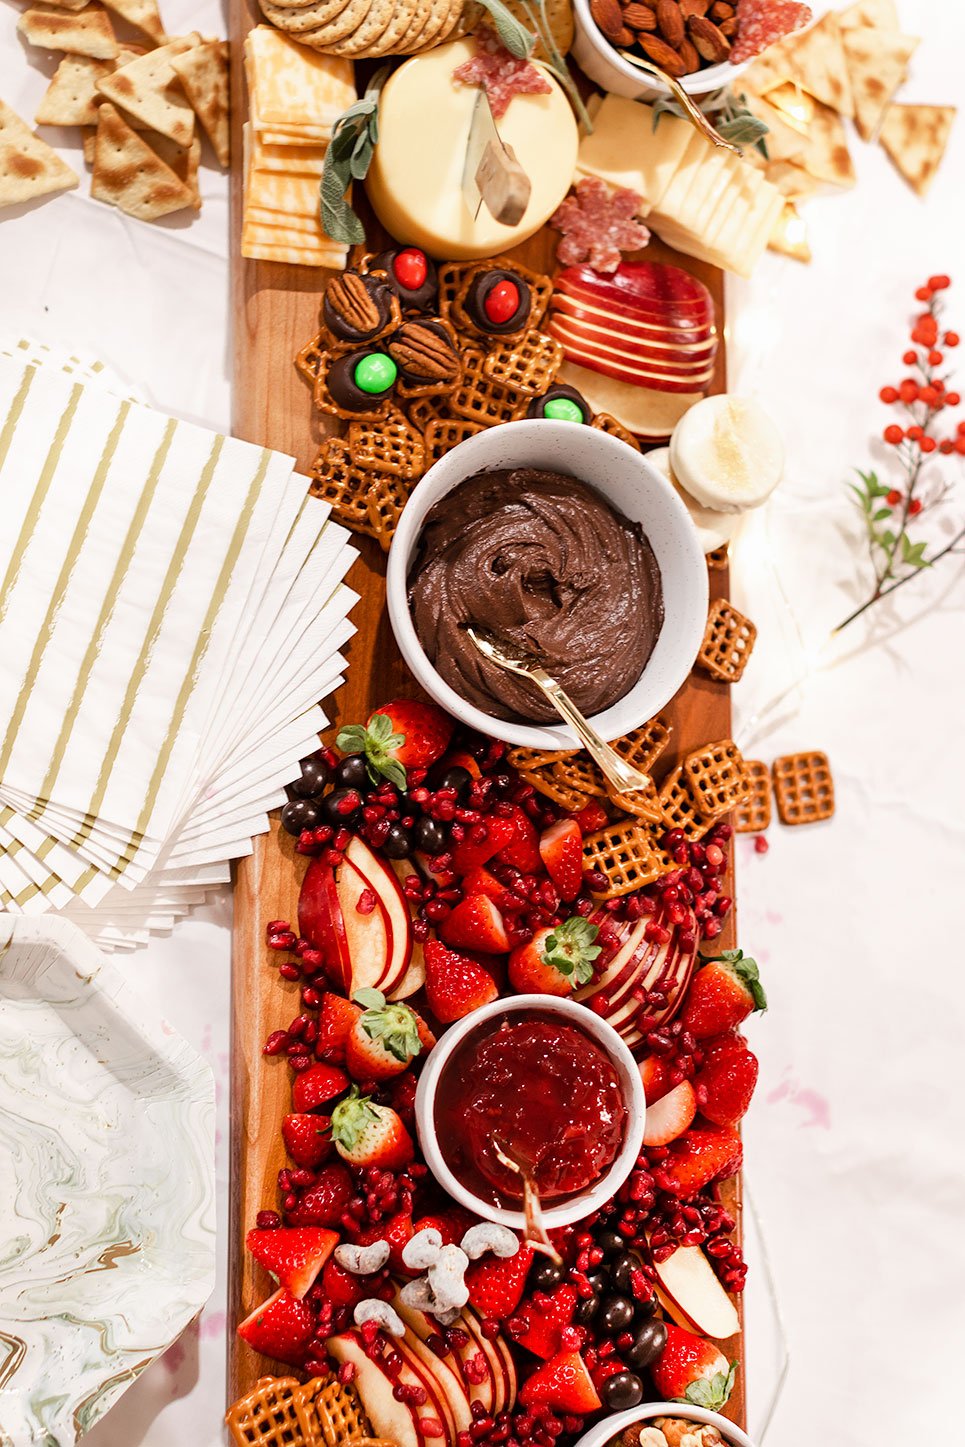
Holiday Sweets Themed Board:
Dairy
Brie cheese wheel with your favorite red colored jam (strawberry)
Goat cheese log with cranberry cinnamon or blueberry vanilla
Produce
Red + green colored fruits like pomegranate arils, strawberries, apples, kiwi, grapes, etc.
Pastries
Your favorite go-to gluten-free crackers and thin cookies (Brands: Simple Mills, Mary’s Gone Crackers)
Clean store-bought brownie, cookie, and cupcake mix (Brands: Simple Mills)
Homemade raspberry almond thumbprint cookies, superfood dark chocolate bark or favorite go-to holiday desserts.
Dessert hummus like chocolate hummus
Extras
Dark chocolate covered nuts or dried fruits (Brands: SkinnyDipped Almonds, Barnana)
Dried fruits like apricots, figs, cherries, or cranberries
Mixed roasted nuts
Candy canes (Brands: YumEarth Organic)
Hot chocolate bar!


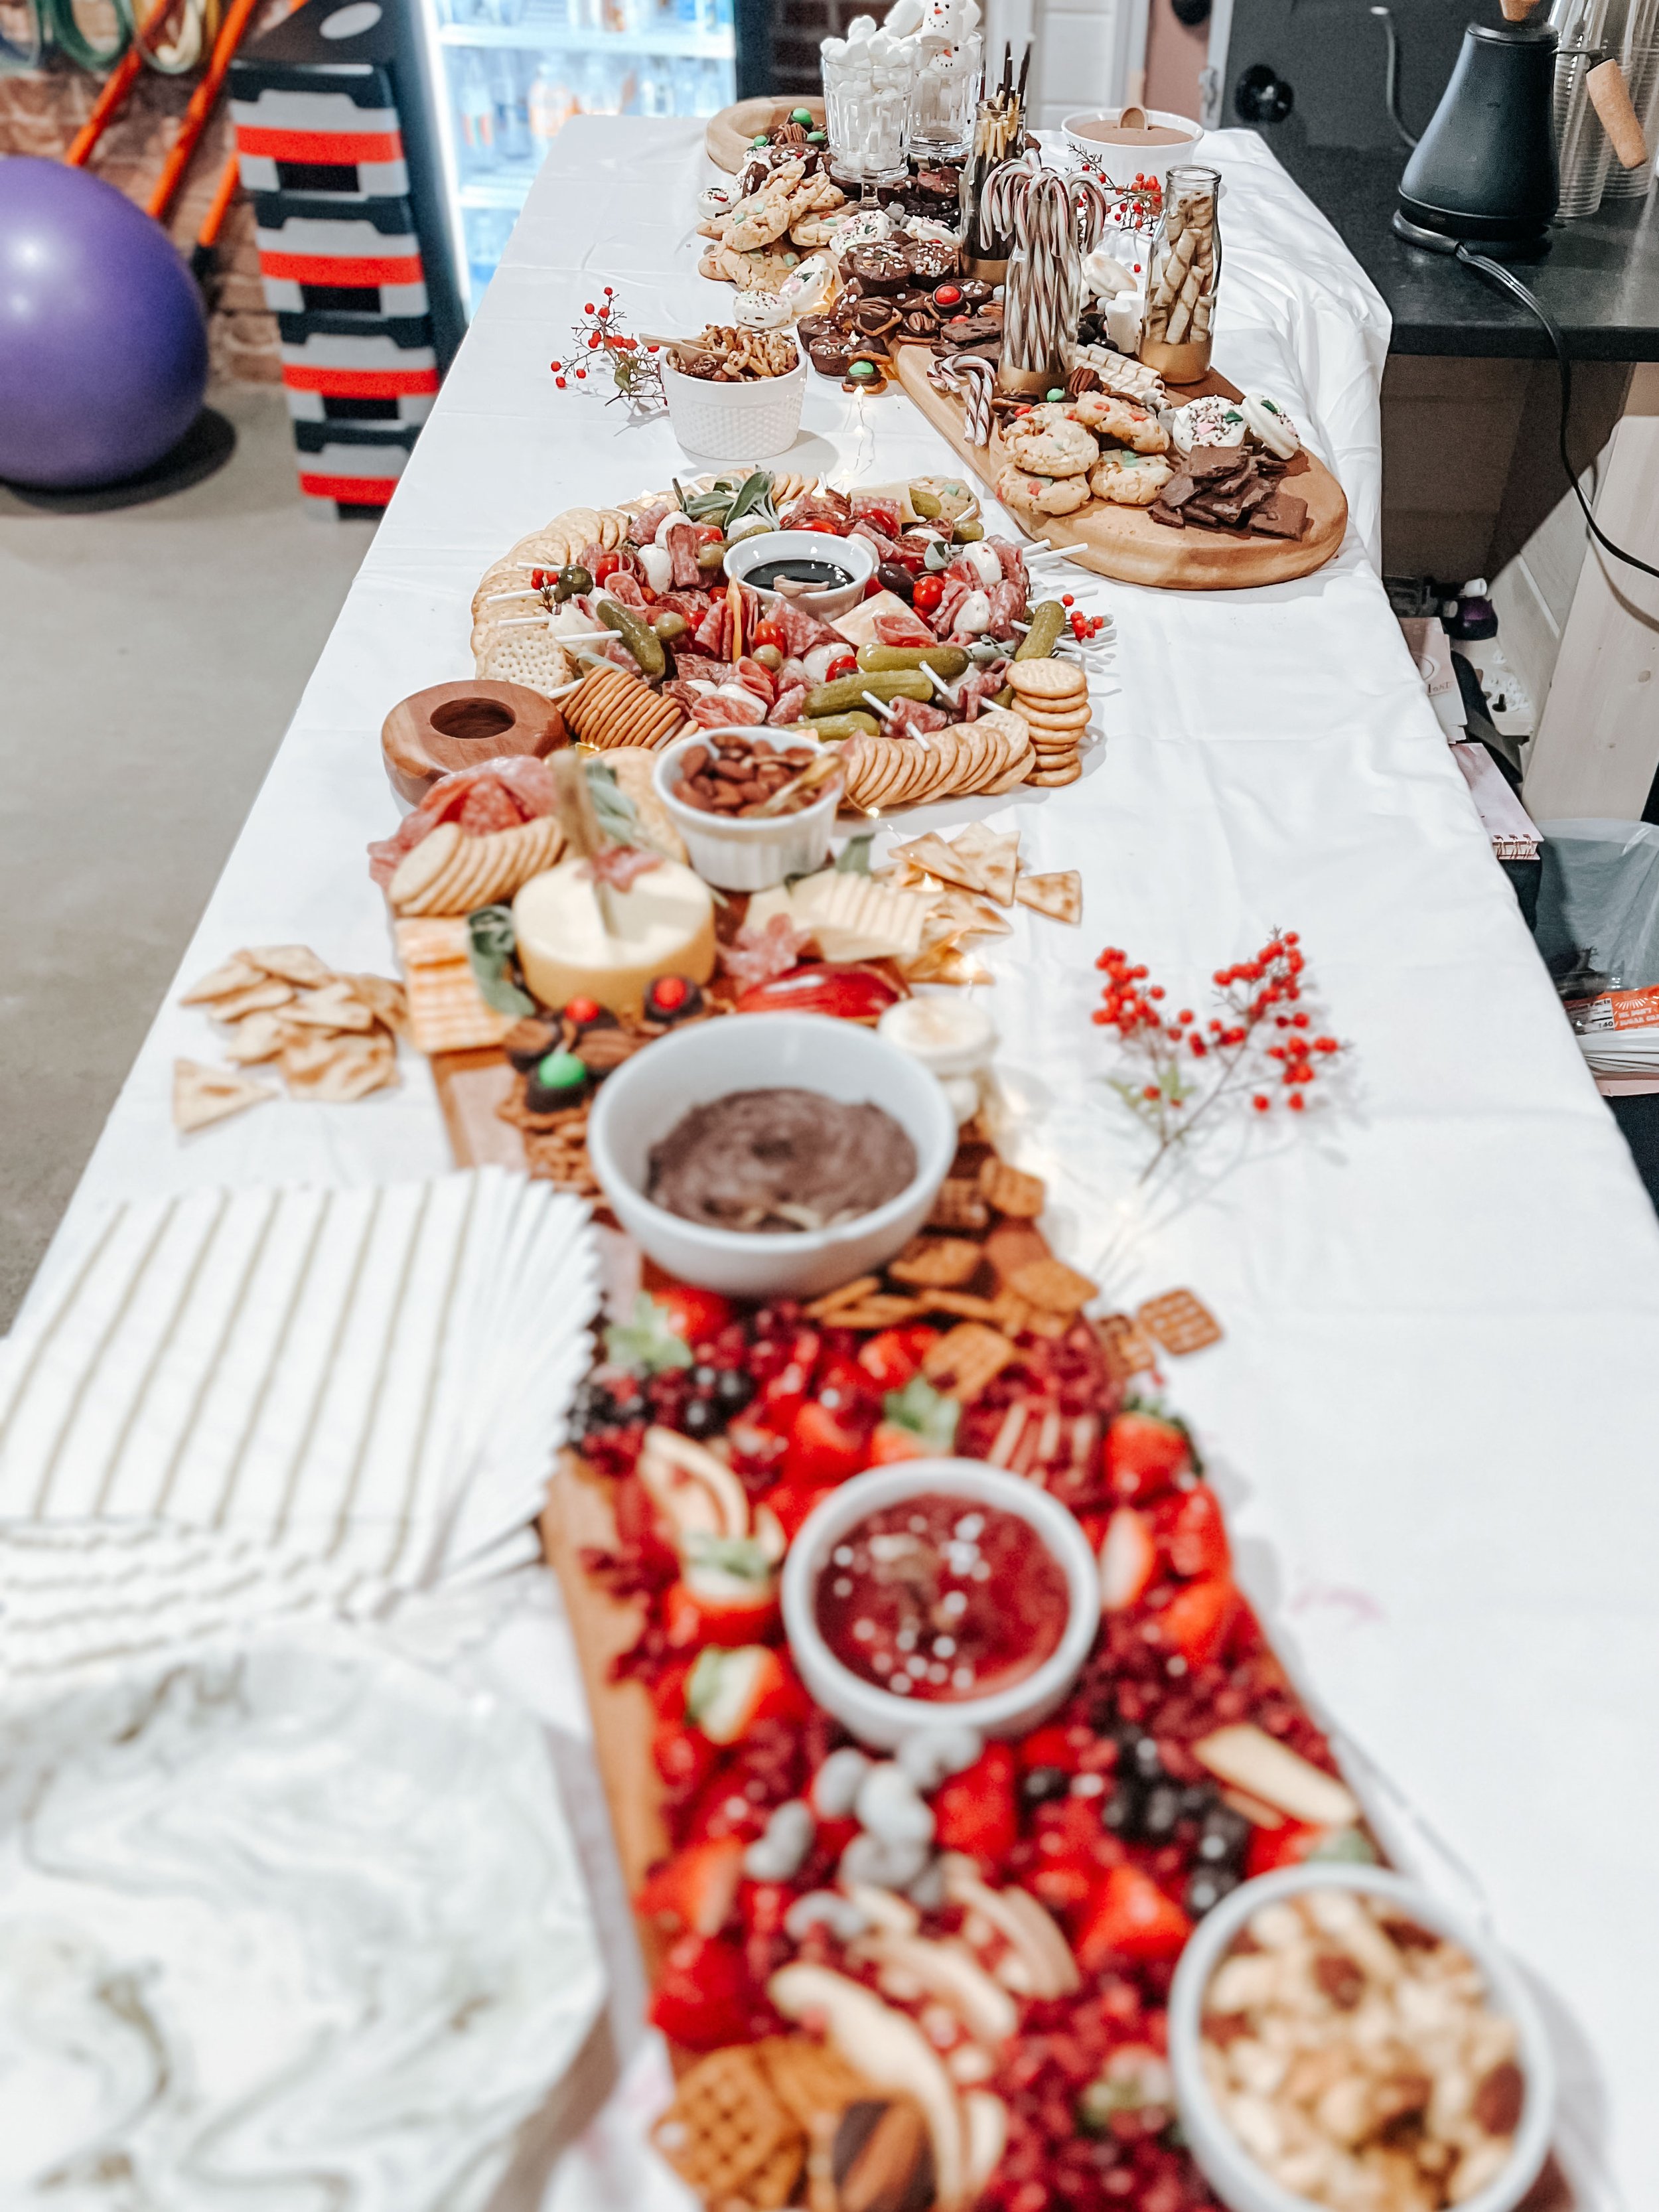
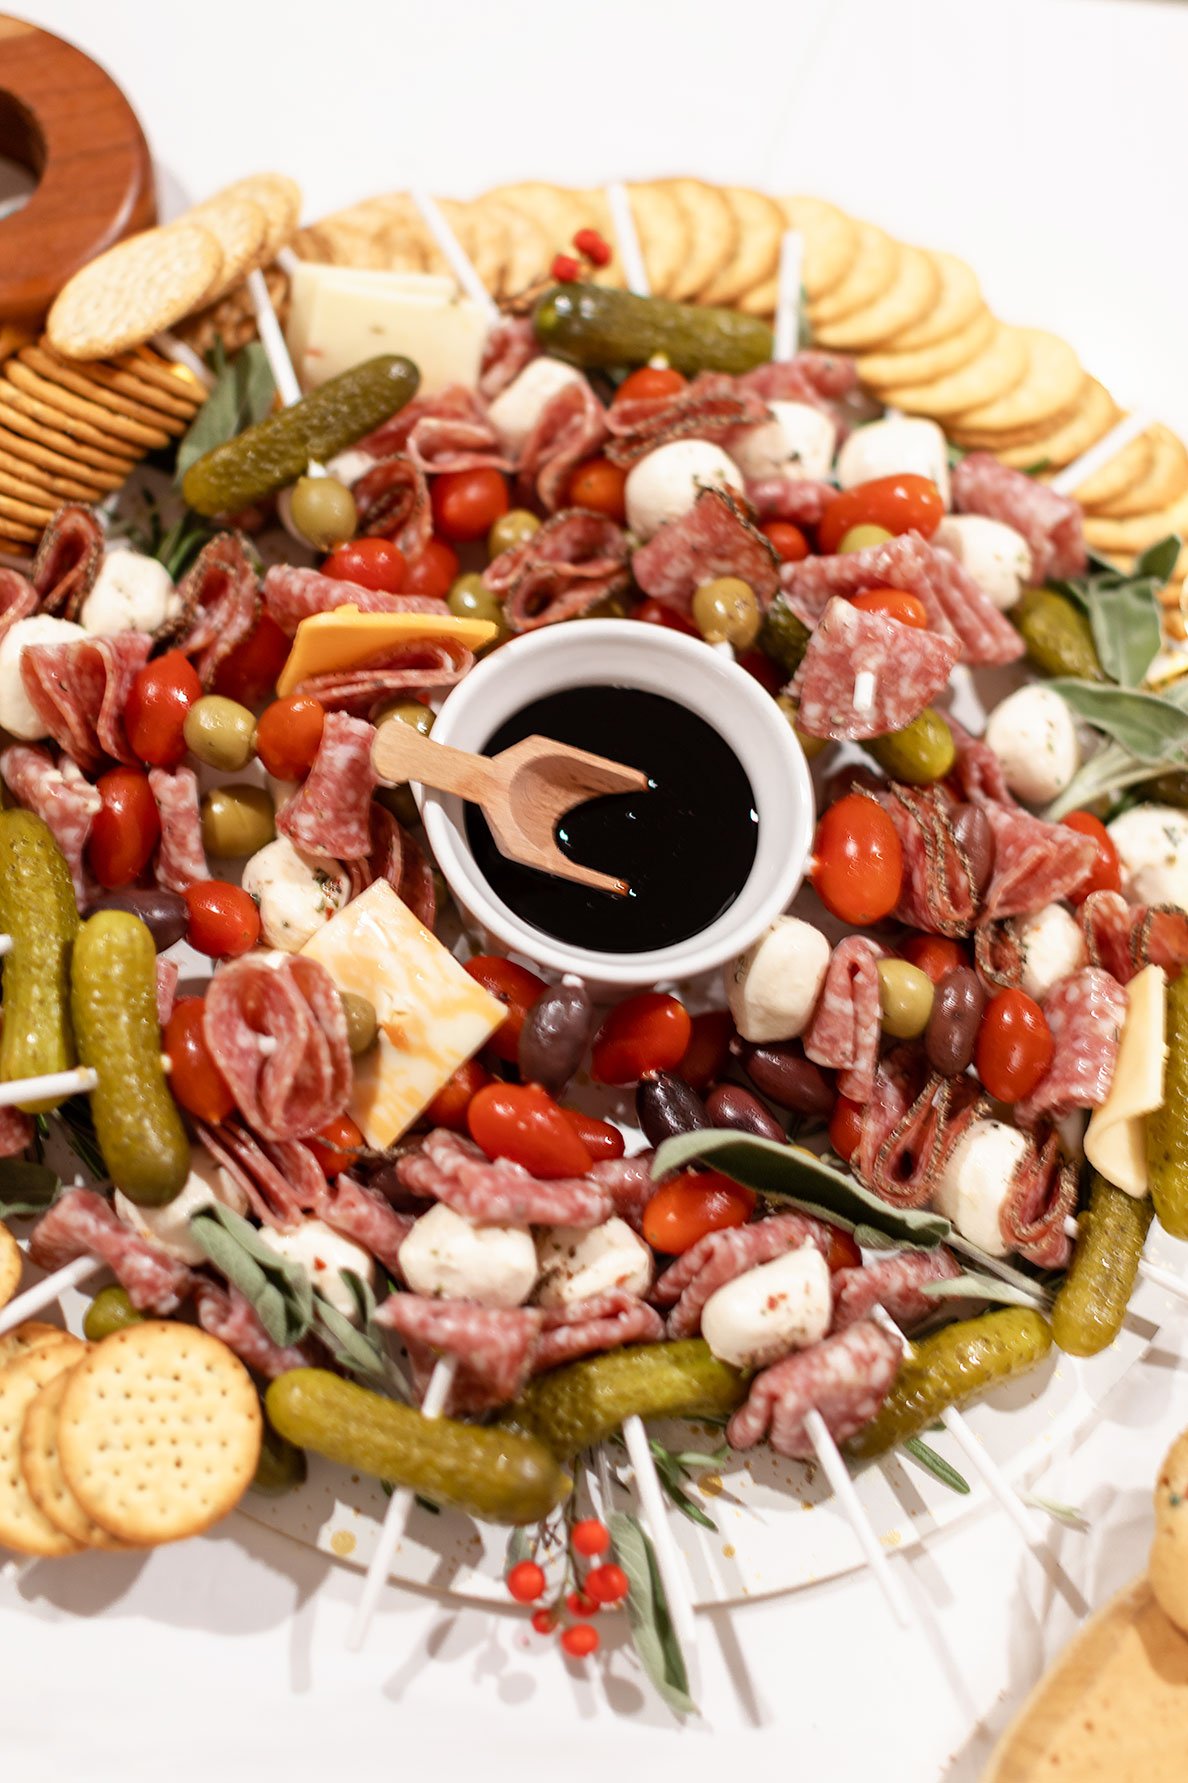
Christmas Wreath Themed Board:
Protein
Salami, summer sausage, thinly sliced prosciutto, soppressata (Brands: Applegate)
Dairy
Marinated mozzarella balls, cheddar, colby, and/or pepper jack cheese cubes / slices (Brands: Organic Valley)
Produce
Cocktail pickles, black and green olives, cherry tomatoes, marinated artichoke hearts
Carbs
Assorted crackers variety (Brands: Simple Mills, Mary’s Gone Crackers)
Garnish
Fresh sage, thyme, and rosemary sprigs
Serve with
Balsamic glaze
Holiday mule cocktails
Directions
Gather your antipasto ingredients. Prep any that require chopping, slicing or cubing.
Skewer ingredients onto large toothpicks or skewers. Arrange in a wreath shape on a large round platter or serving board. Tuck rosemary, sage and thyme sprigs evenly around wreath and place a small bowl in the center with balsamic glaze.
Transfer to refrigerator. When ready to serve, consider adding a touch of variety by lining the outer edge with an assortment of crackers or placing a bowl of them beside the wreath.

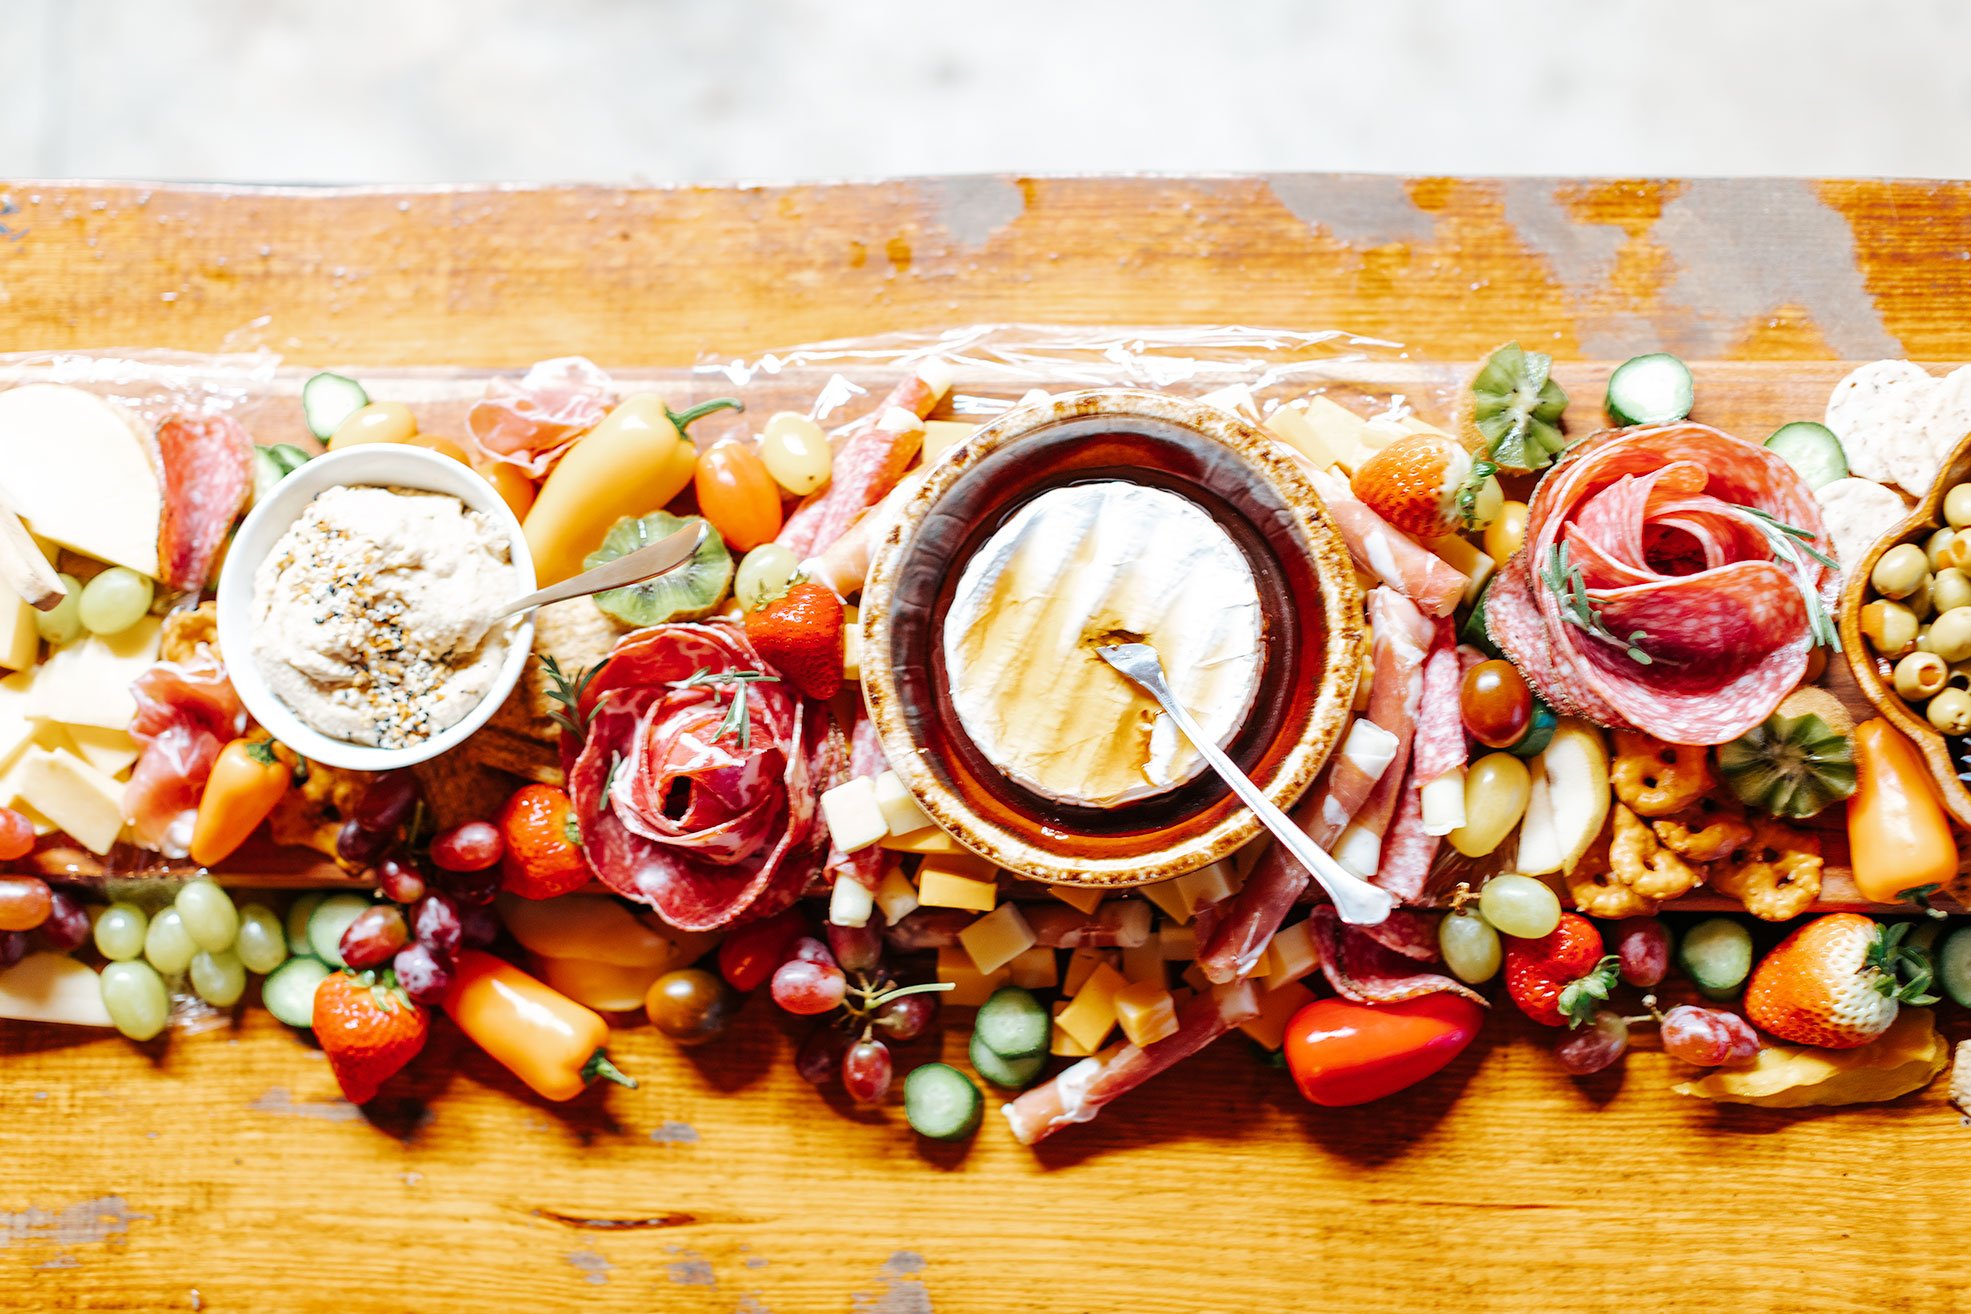

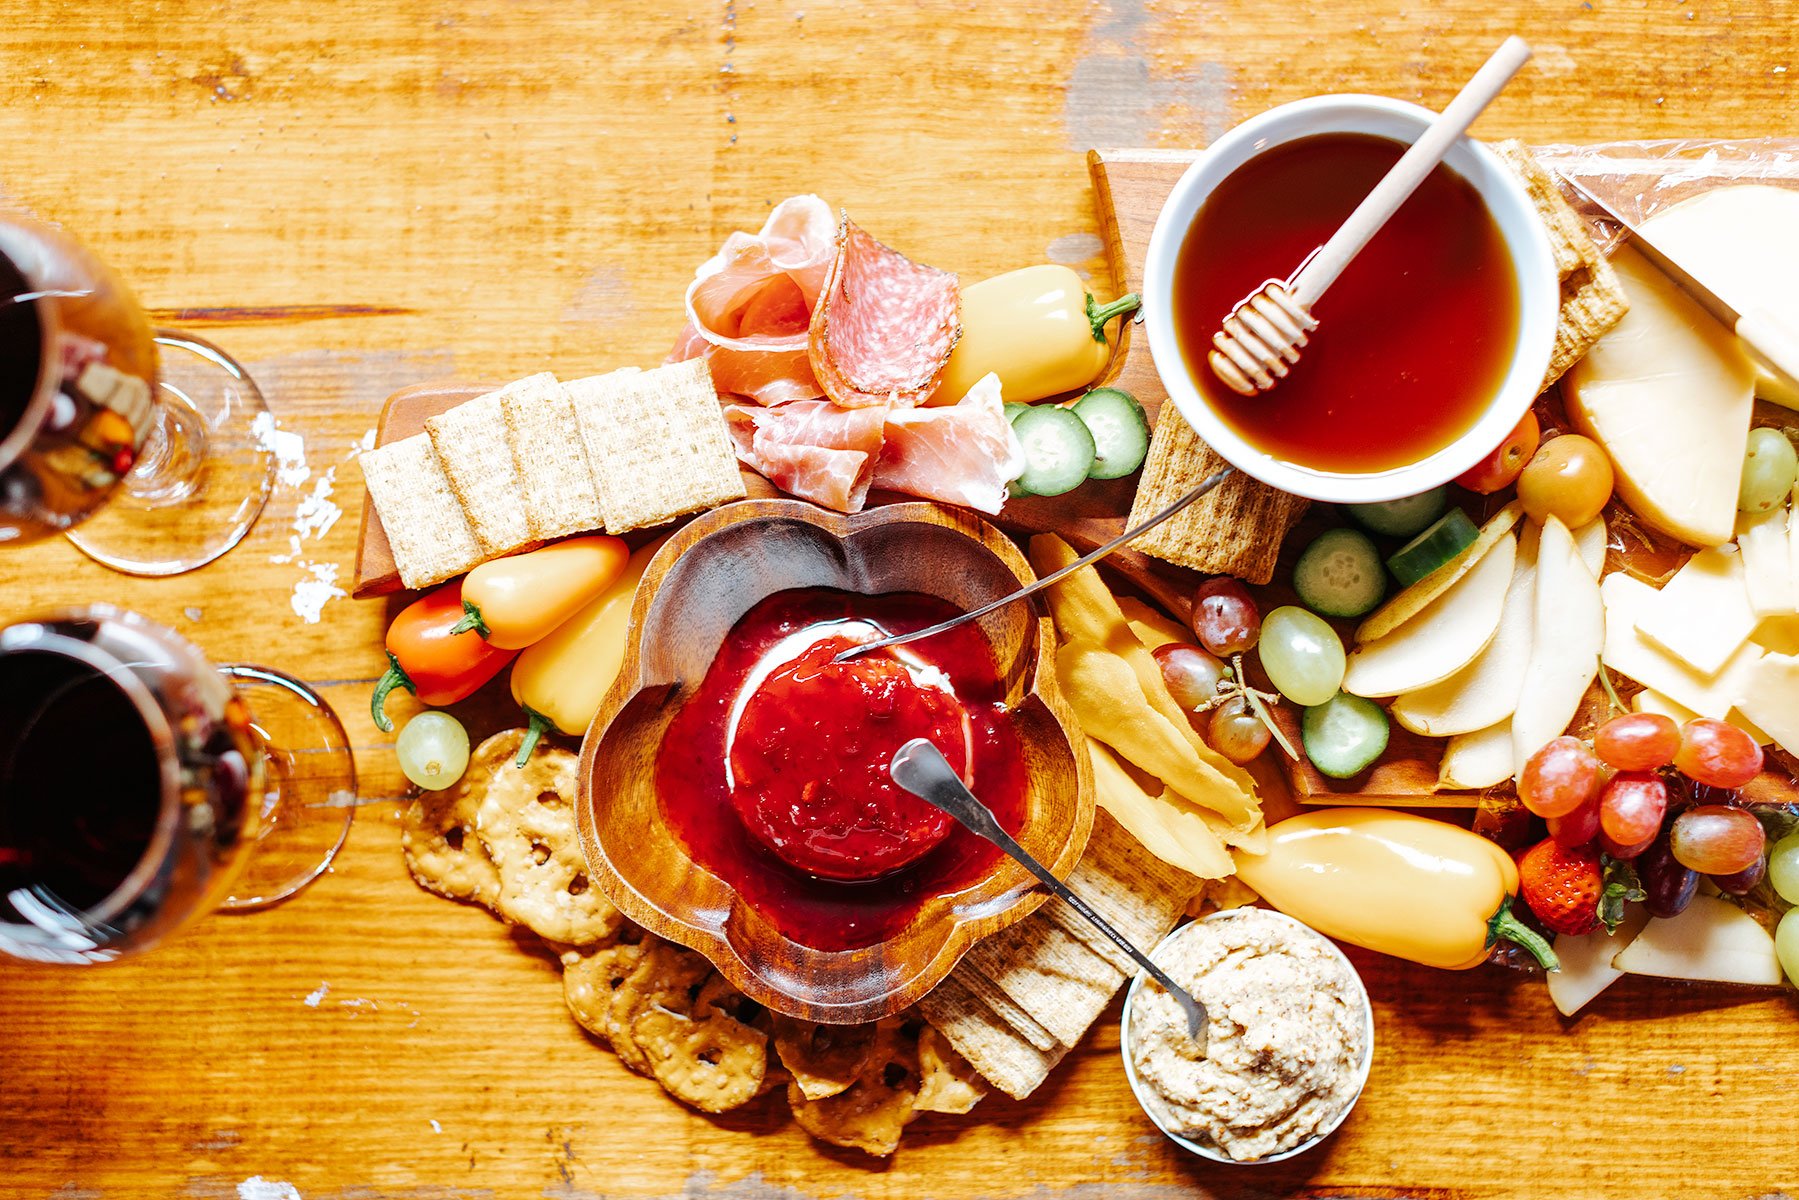
Classic Themed Board:
Protein
Salami, summer sausage, thinly sliced prosciutto, soppressata, pastrami
Dairy
Gouda, gruyere, cheddar, Colby jack, havarti, burrata, gorgonzola, feta, goat cheese
Produce
Fresh fruits like grapes, berries, apples, orange slices, kiwi, pomegranate arils
Dried fruits like figs, dates, apricots, berries, mango
Veggies like mini sweet peppers, cucumber slices, cherry tomatoes, carrot sticks
Carbs
Your favorite crackers, chips, breads and pretzels
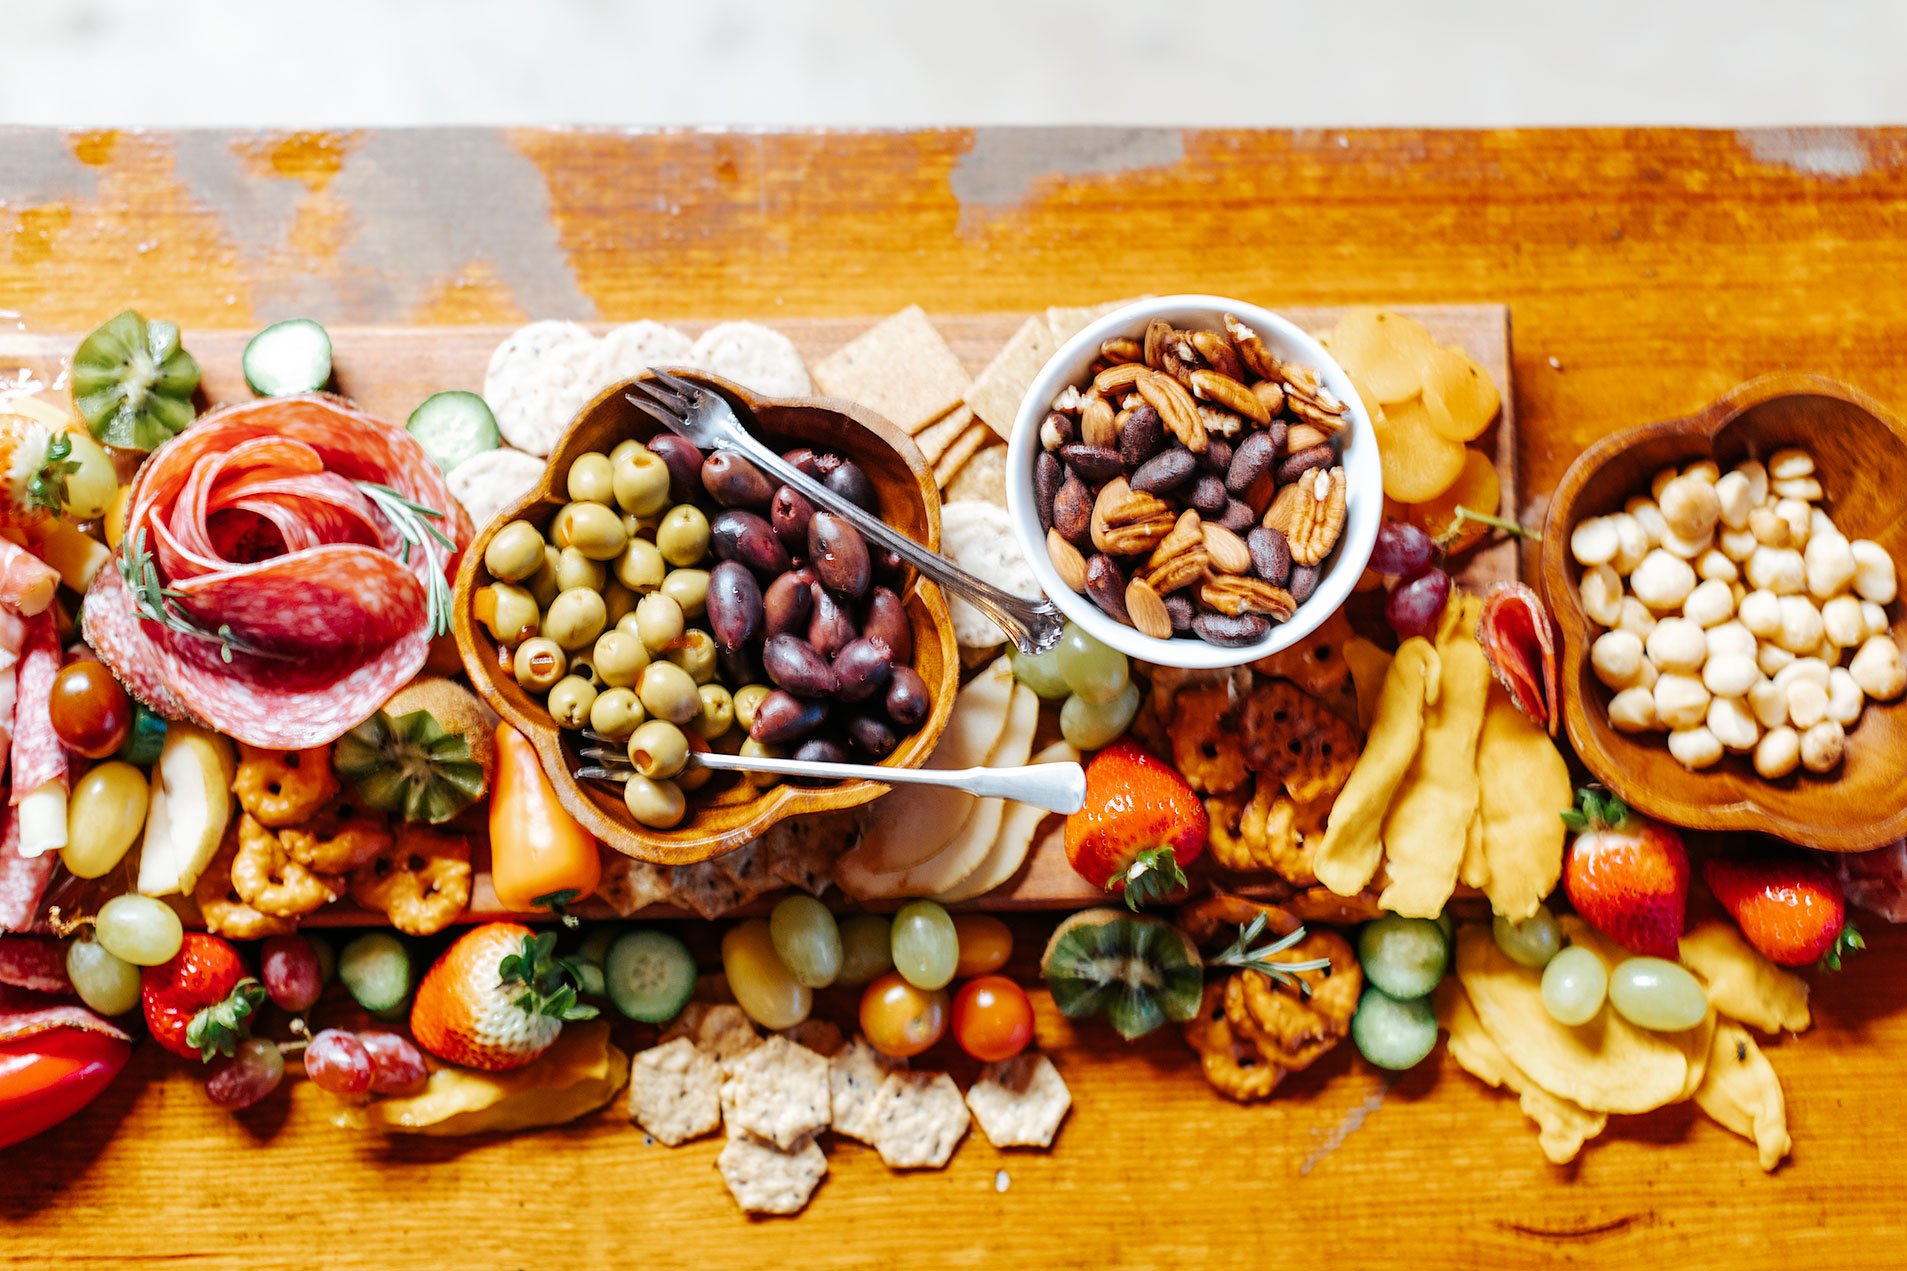
Extras
Olives, pickles, banana peppers, mixed nuts and seeds
Guacamole
Olive tapenade
Dipping sauces like honey, balsamic glaze, jams
Garnish
Fresh herbs
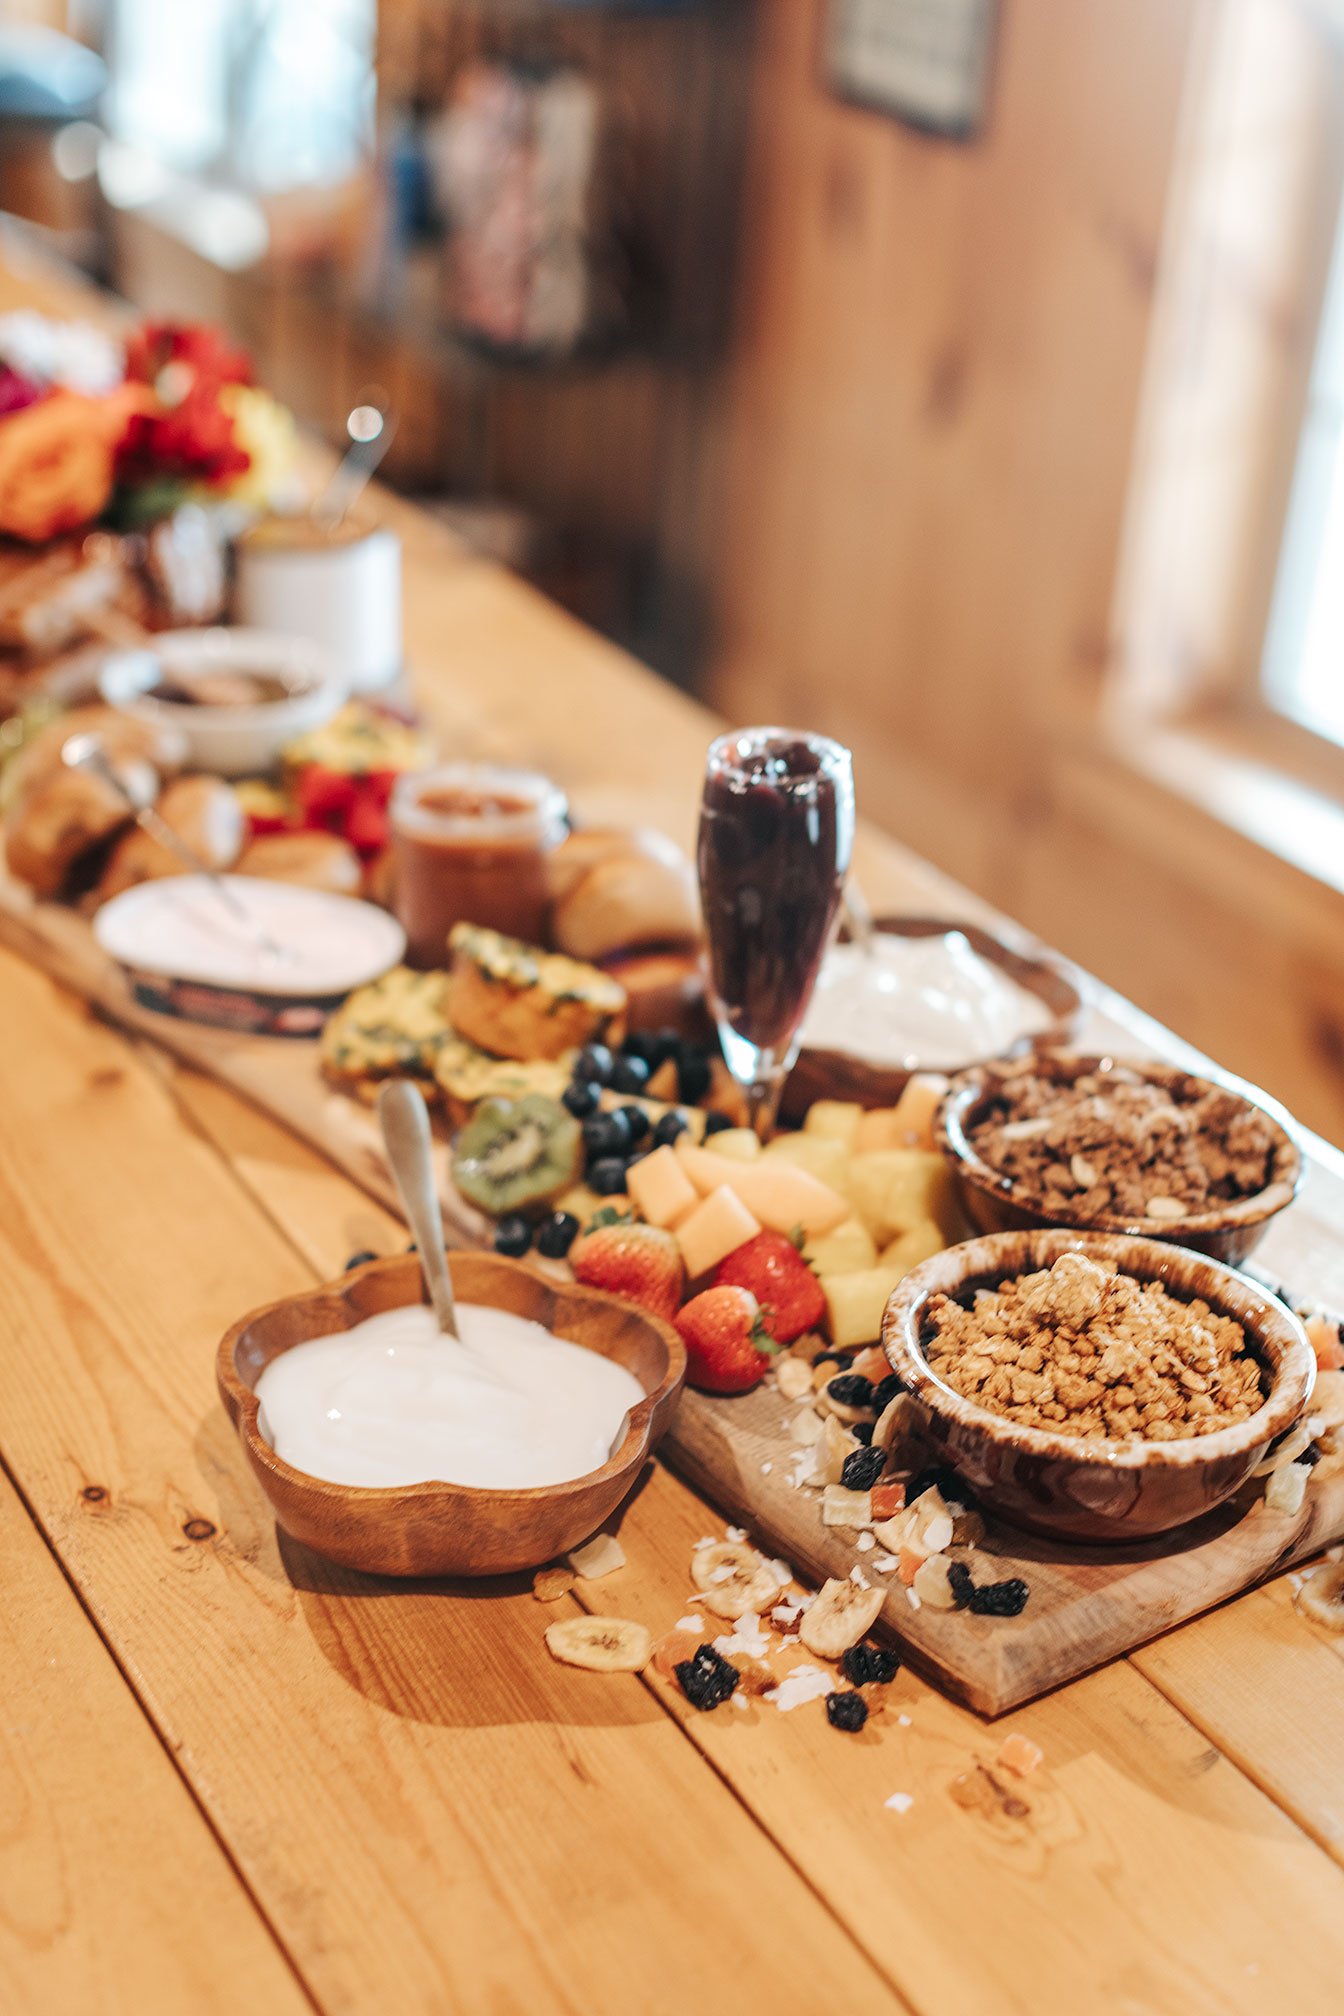
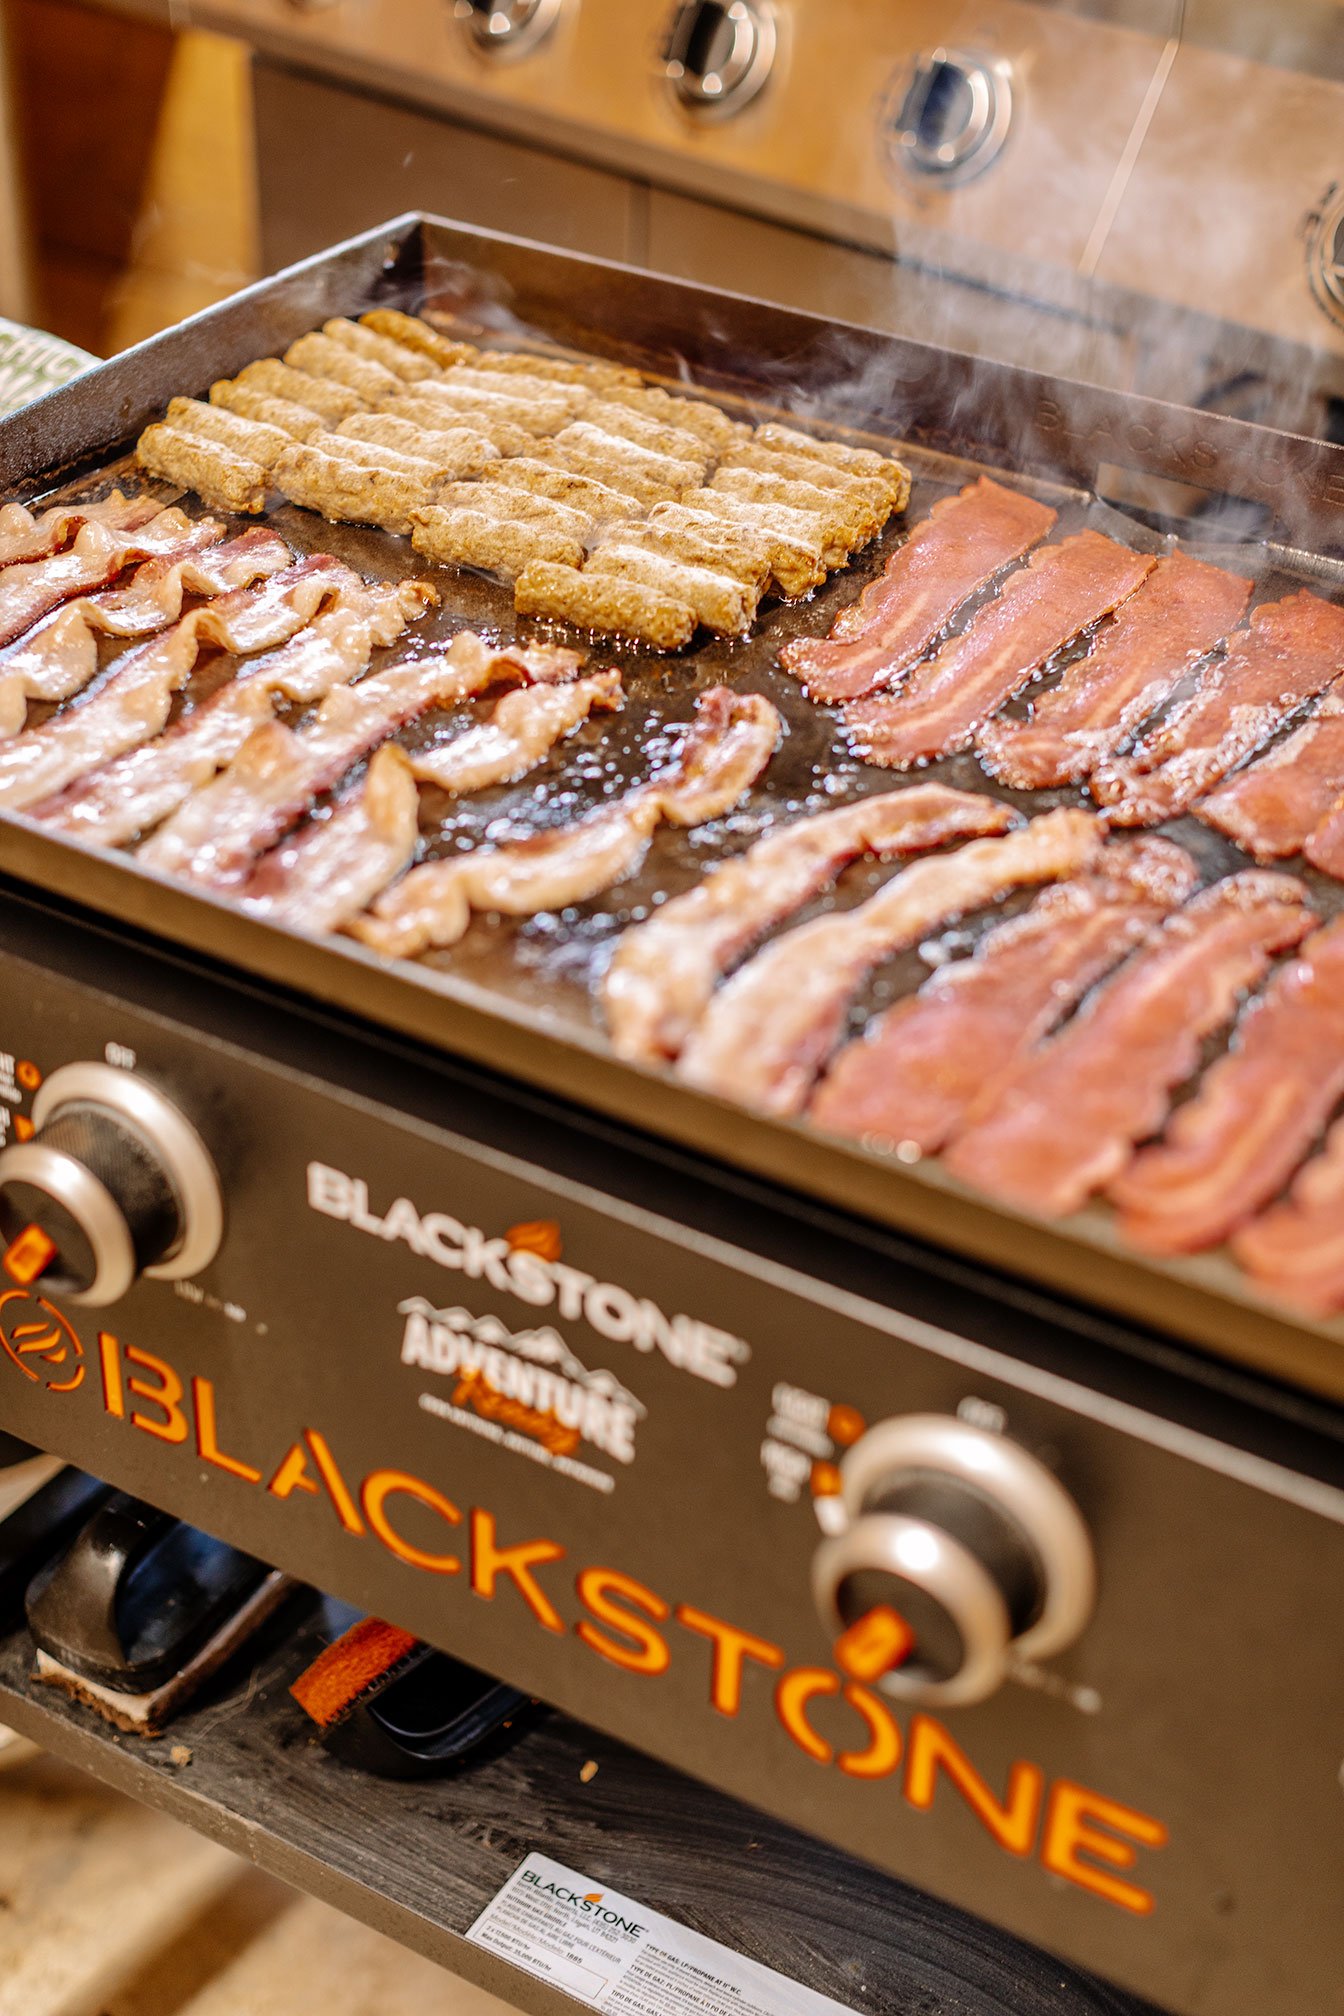
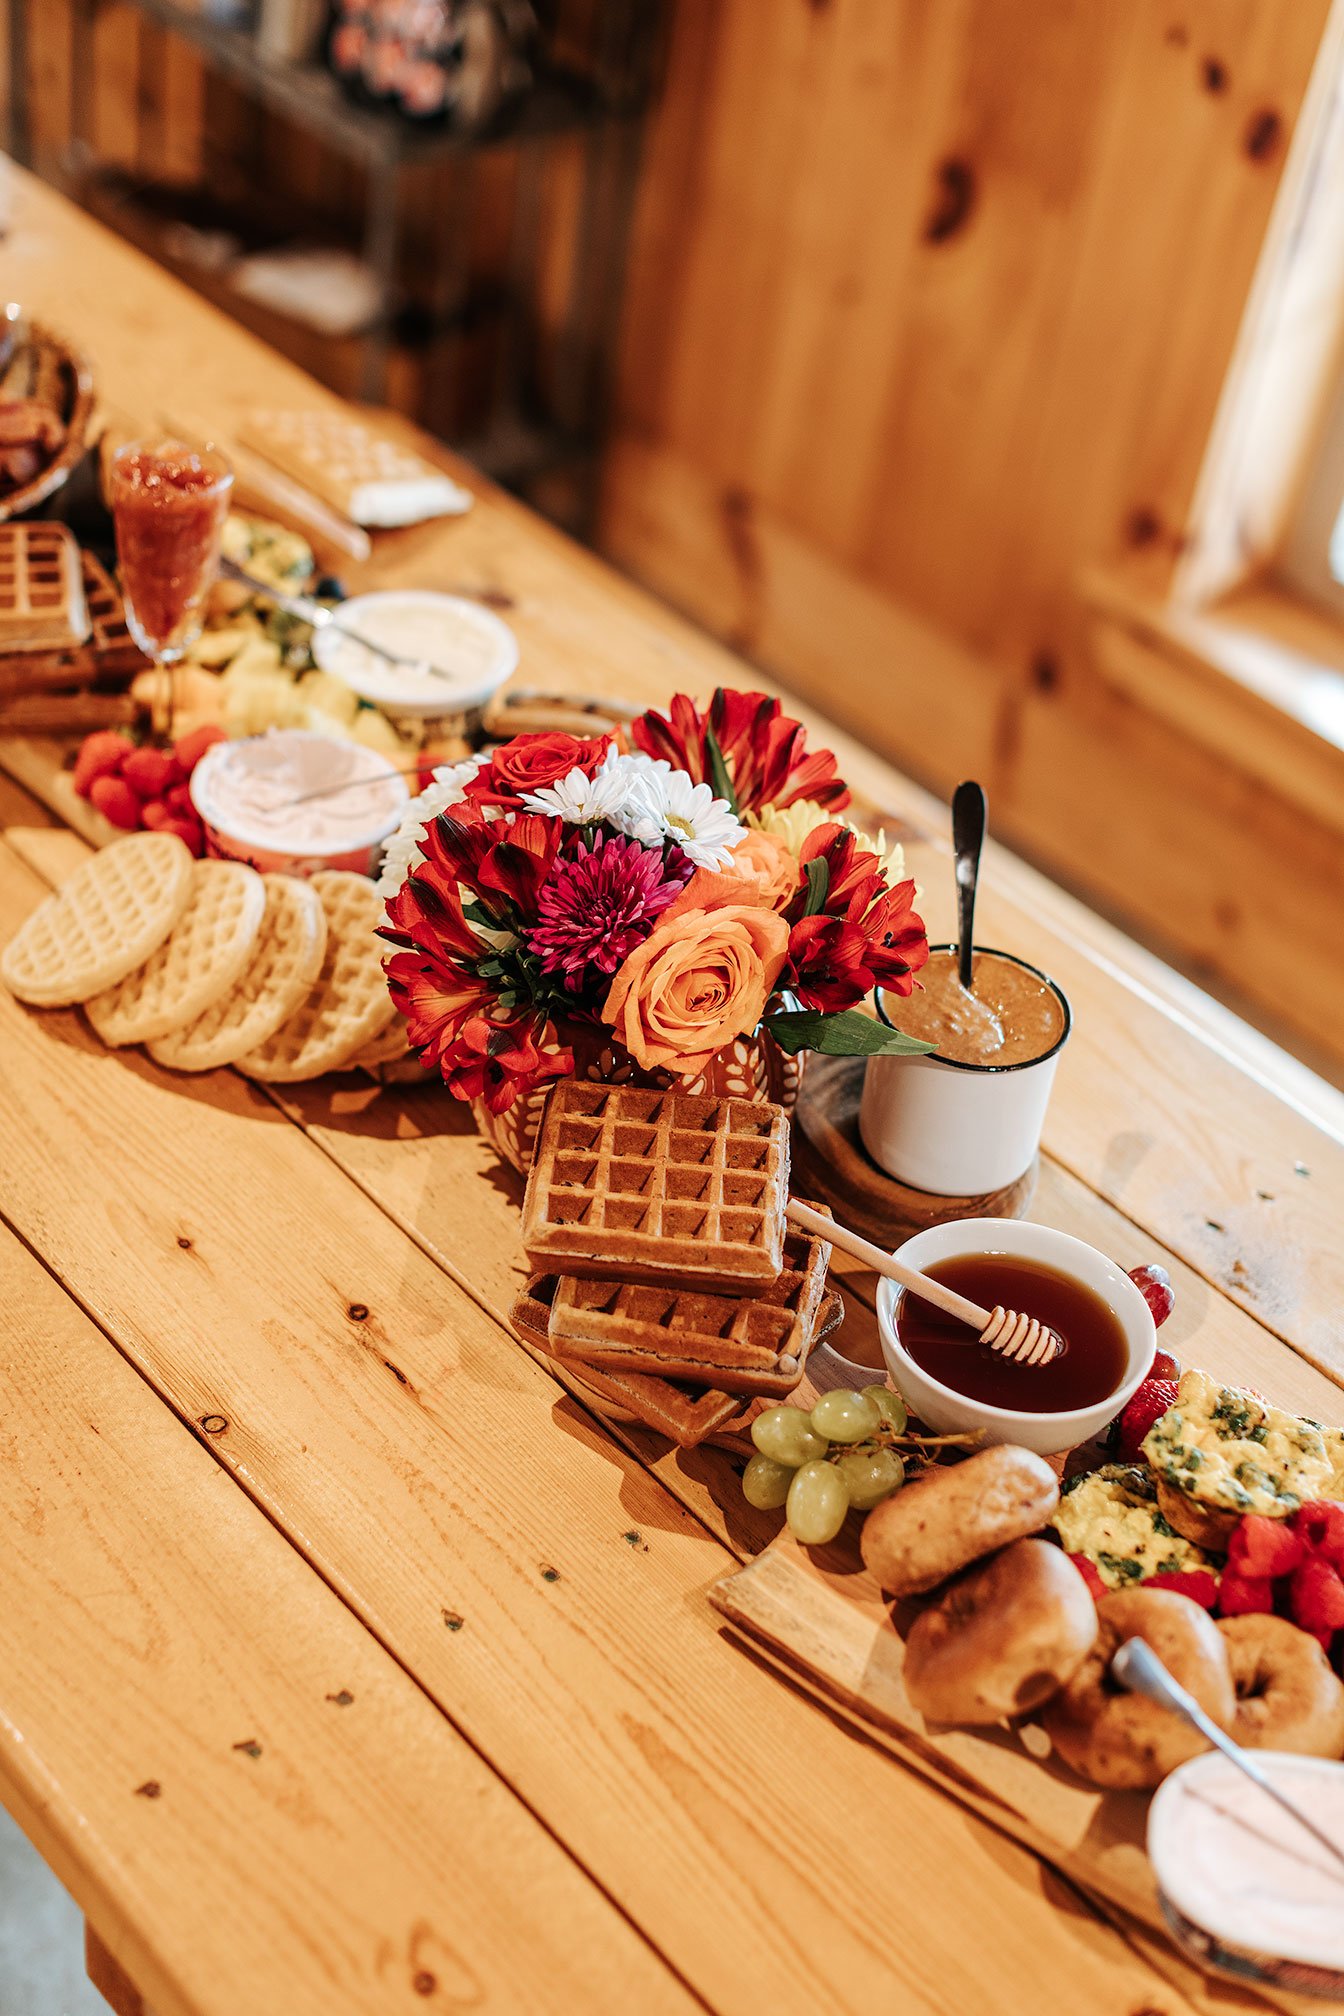
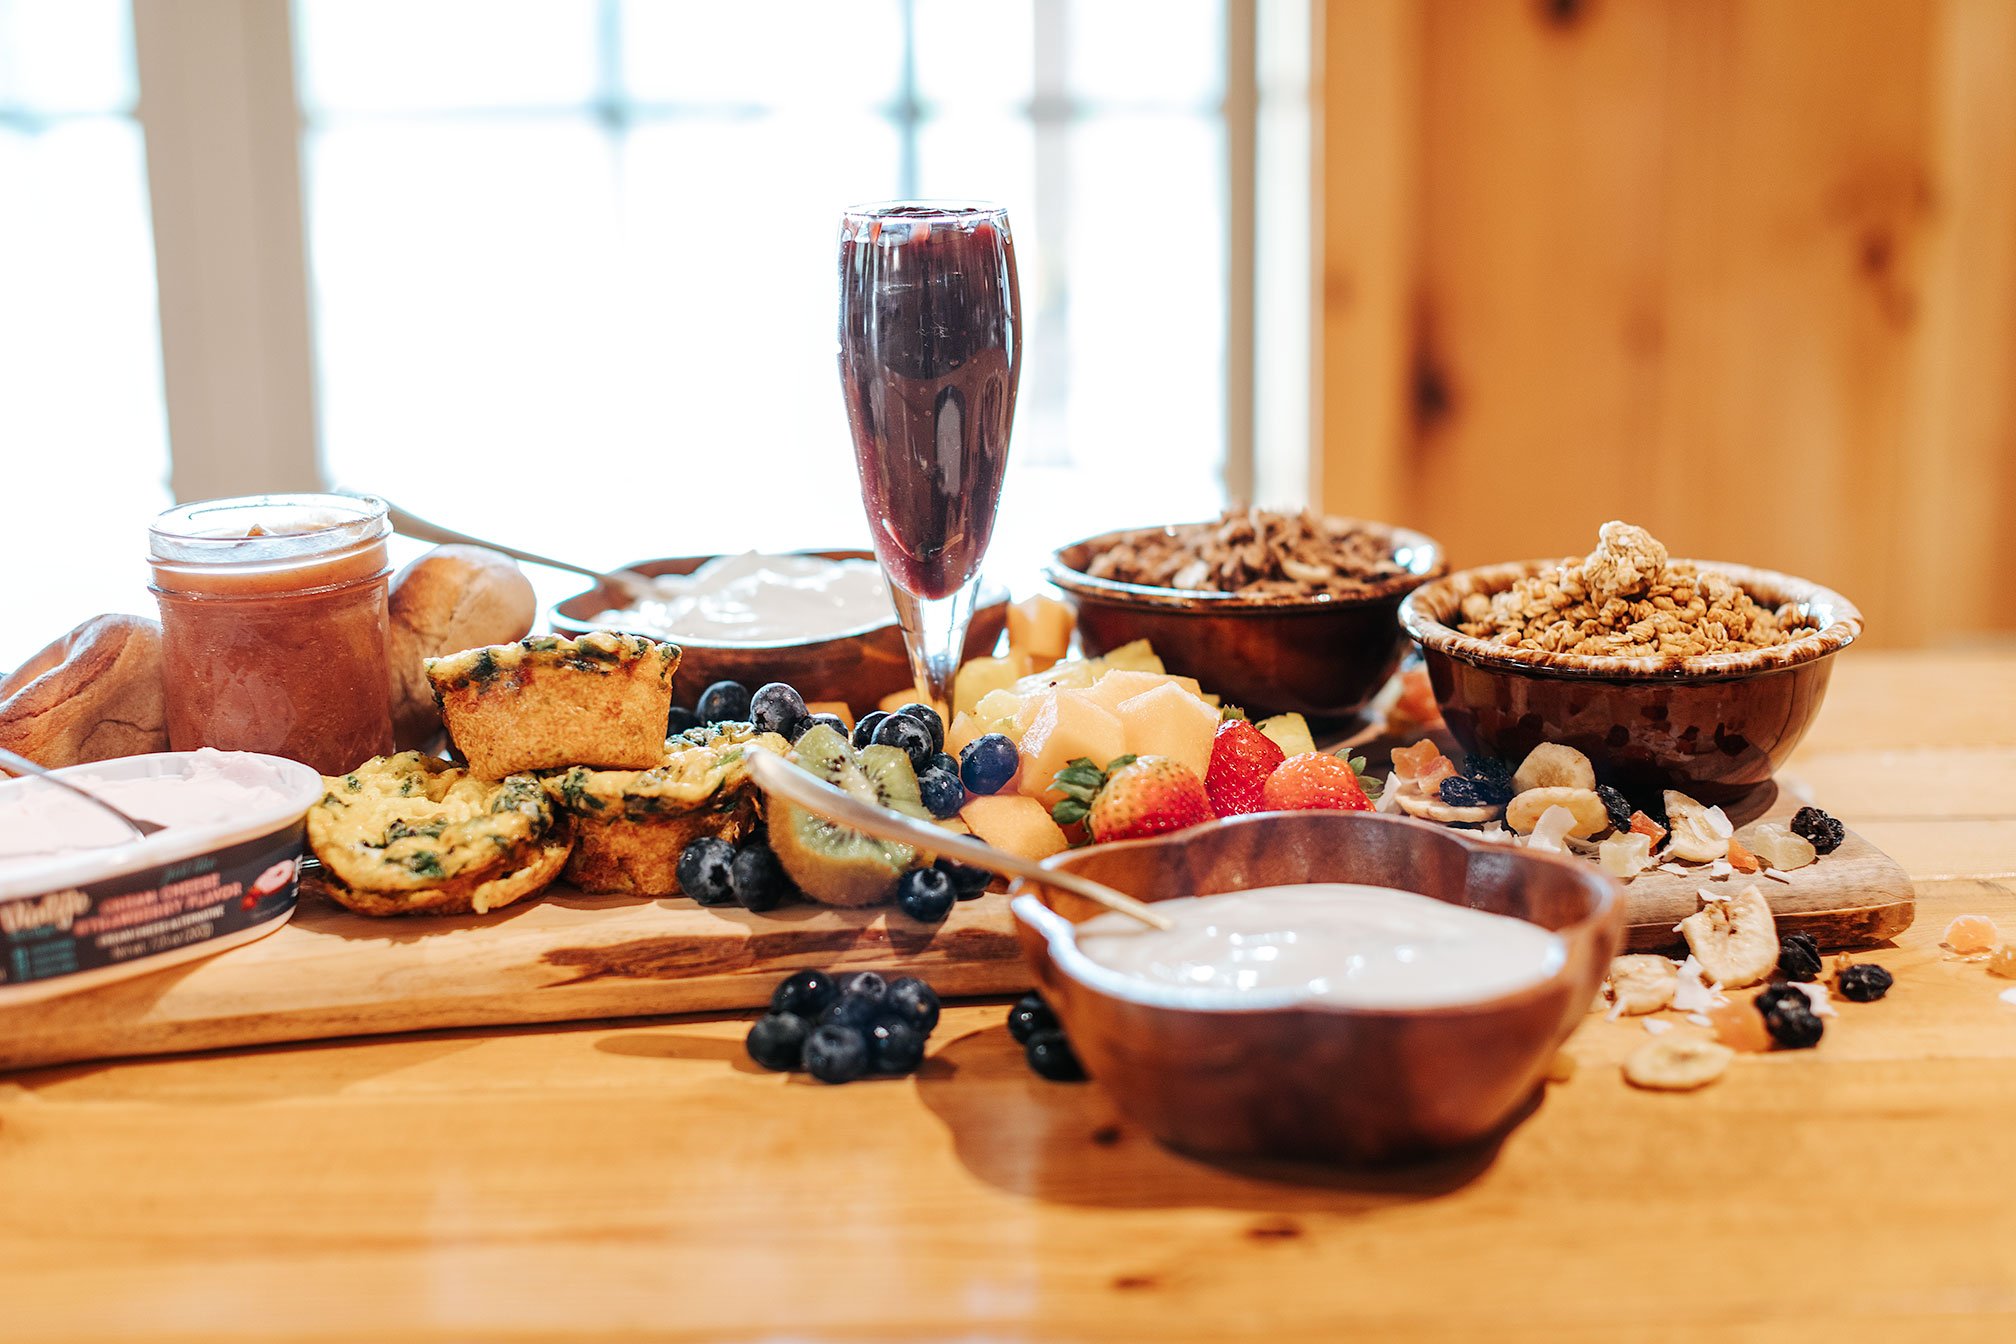

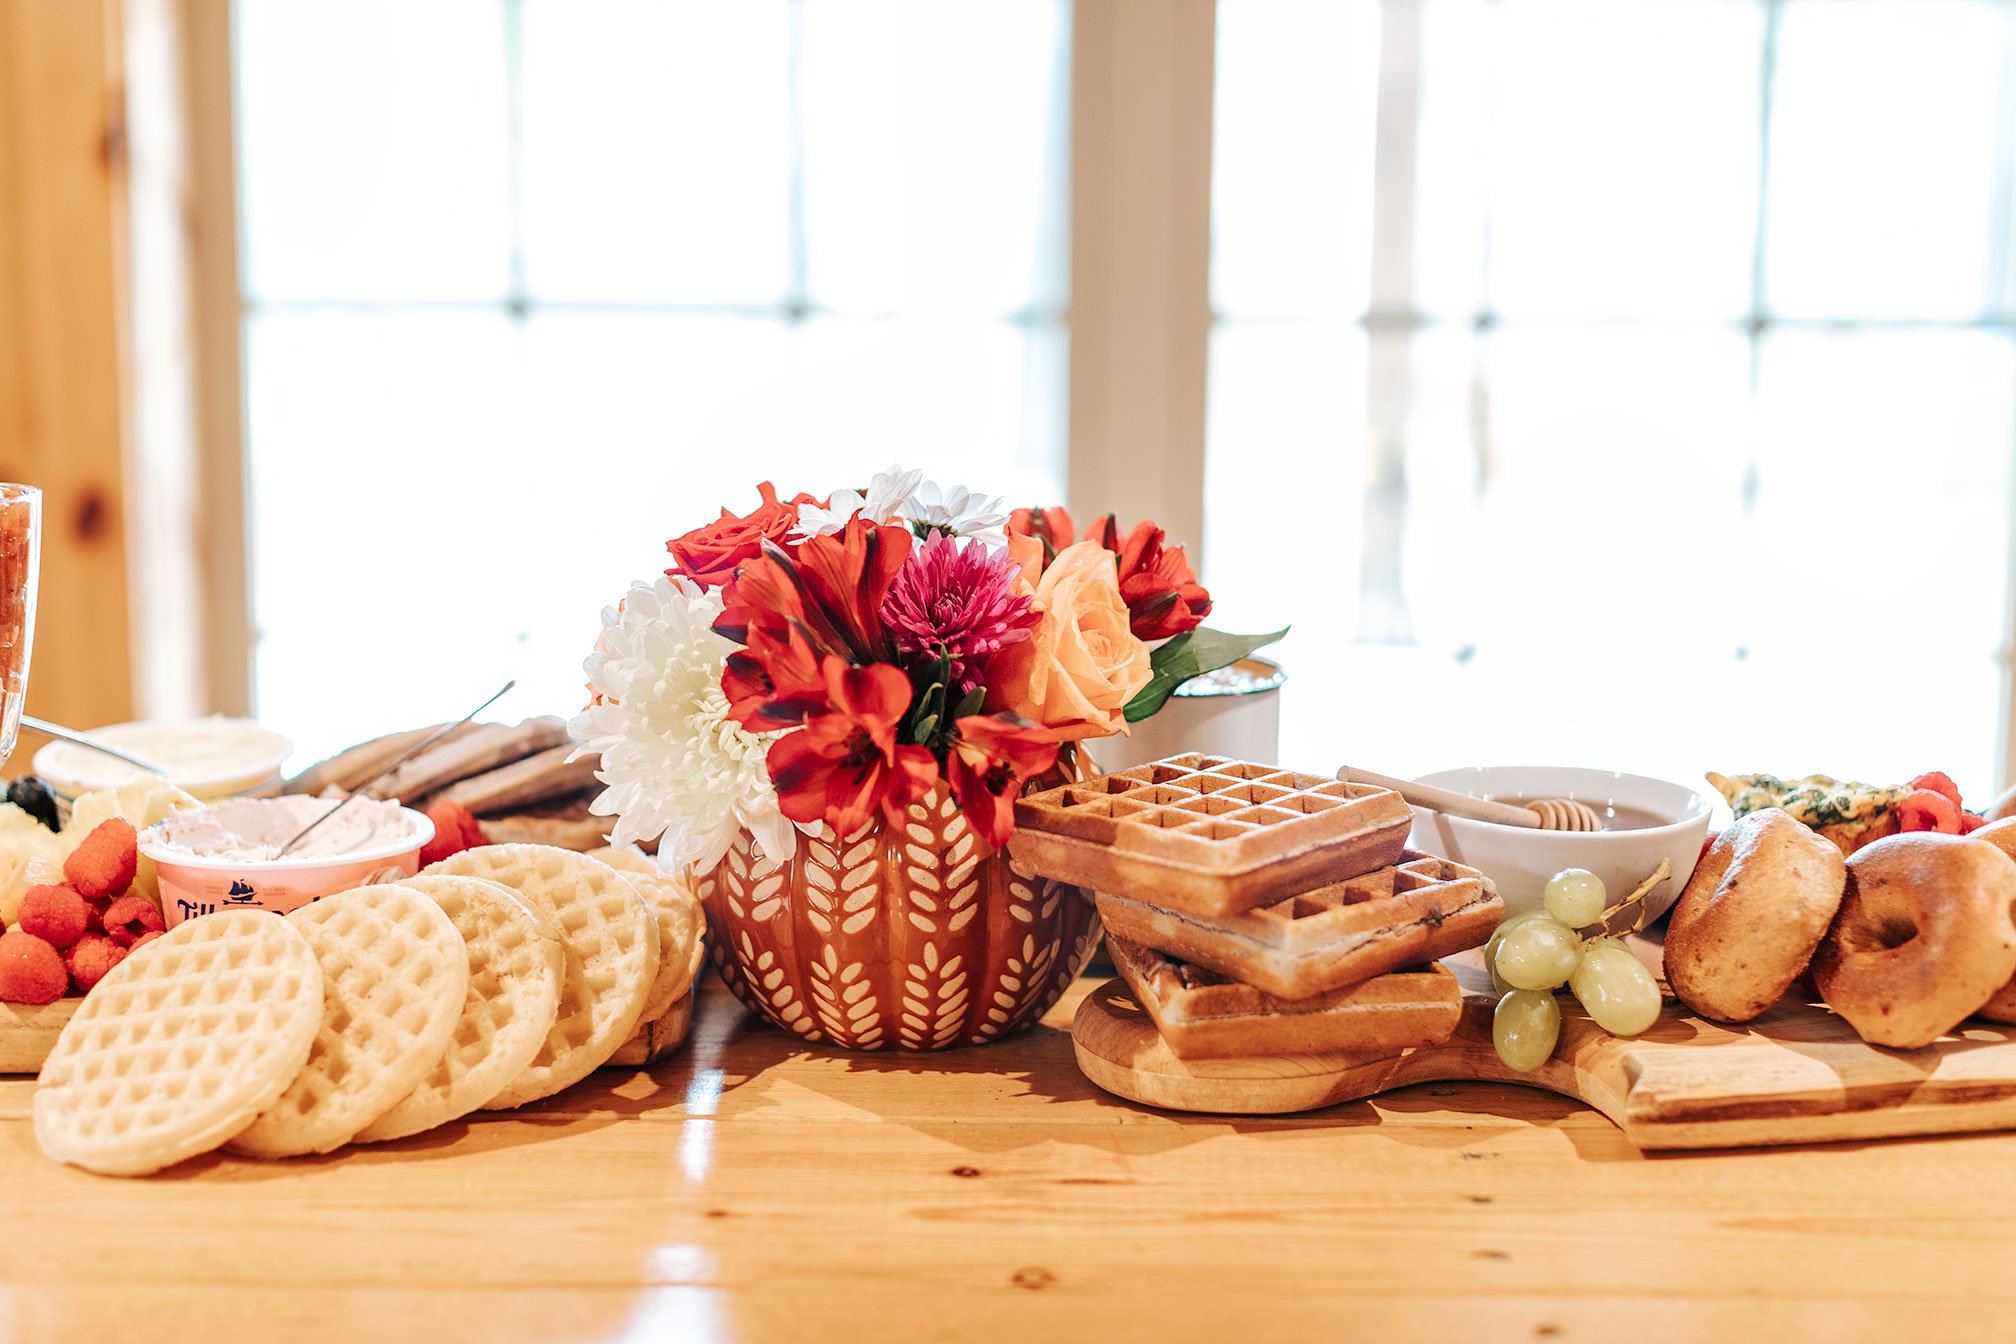
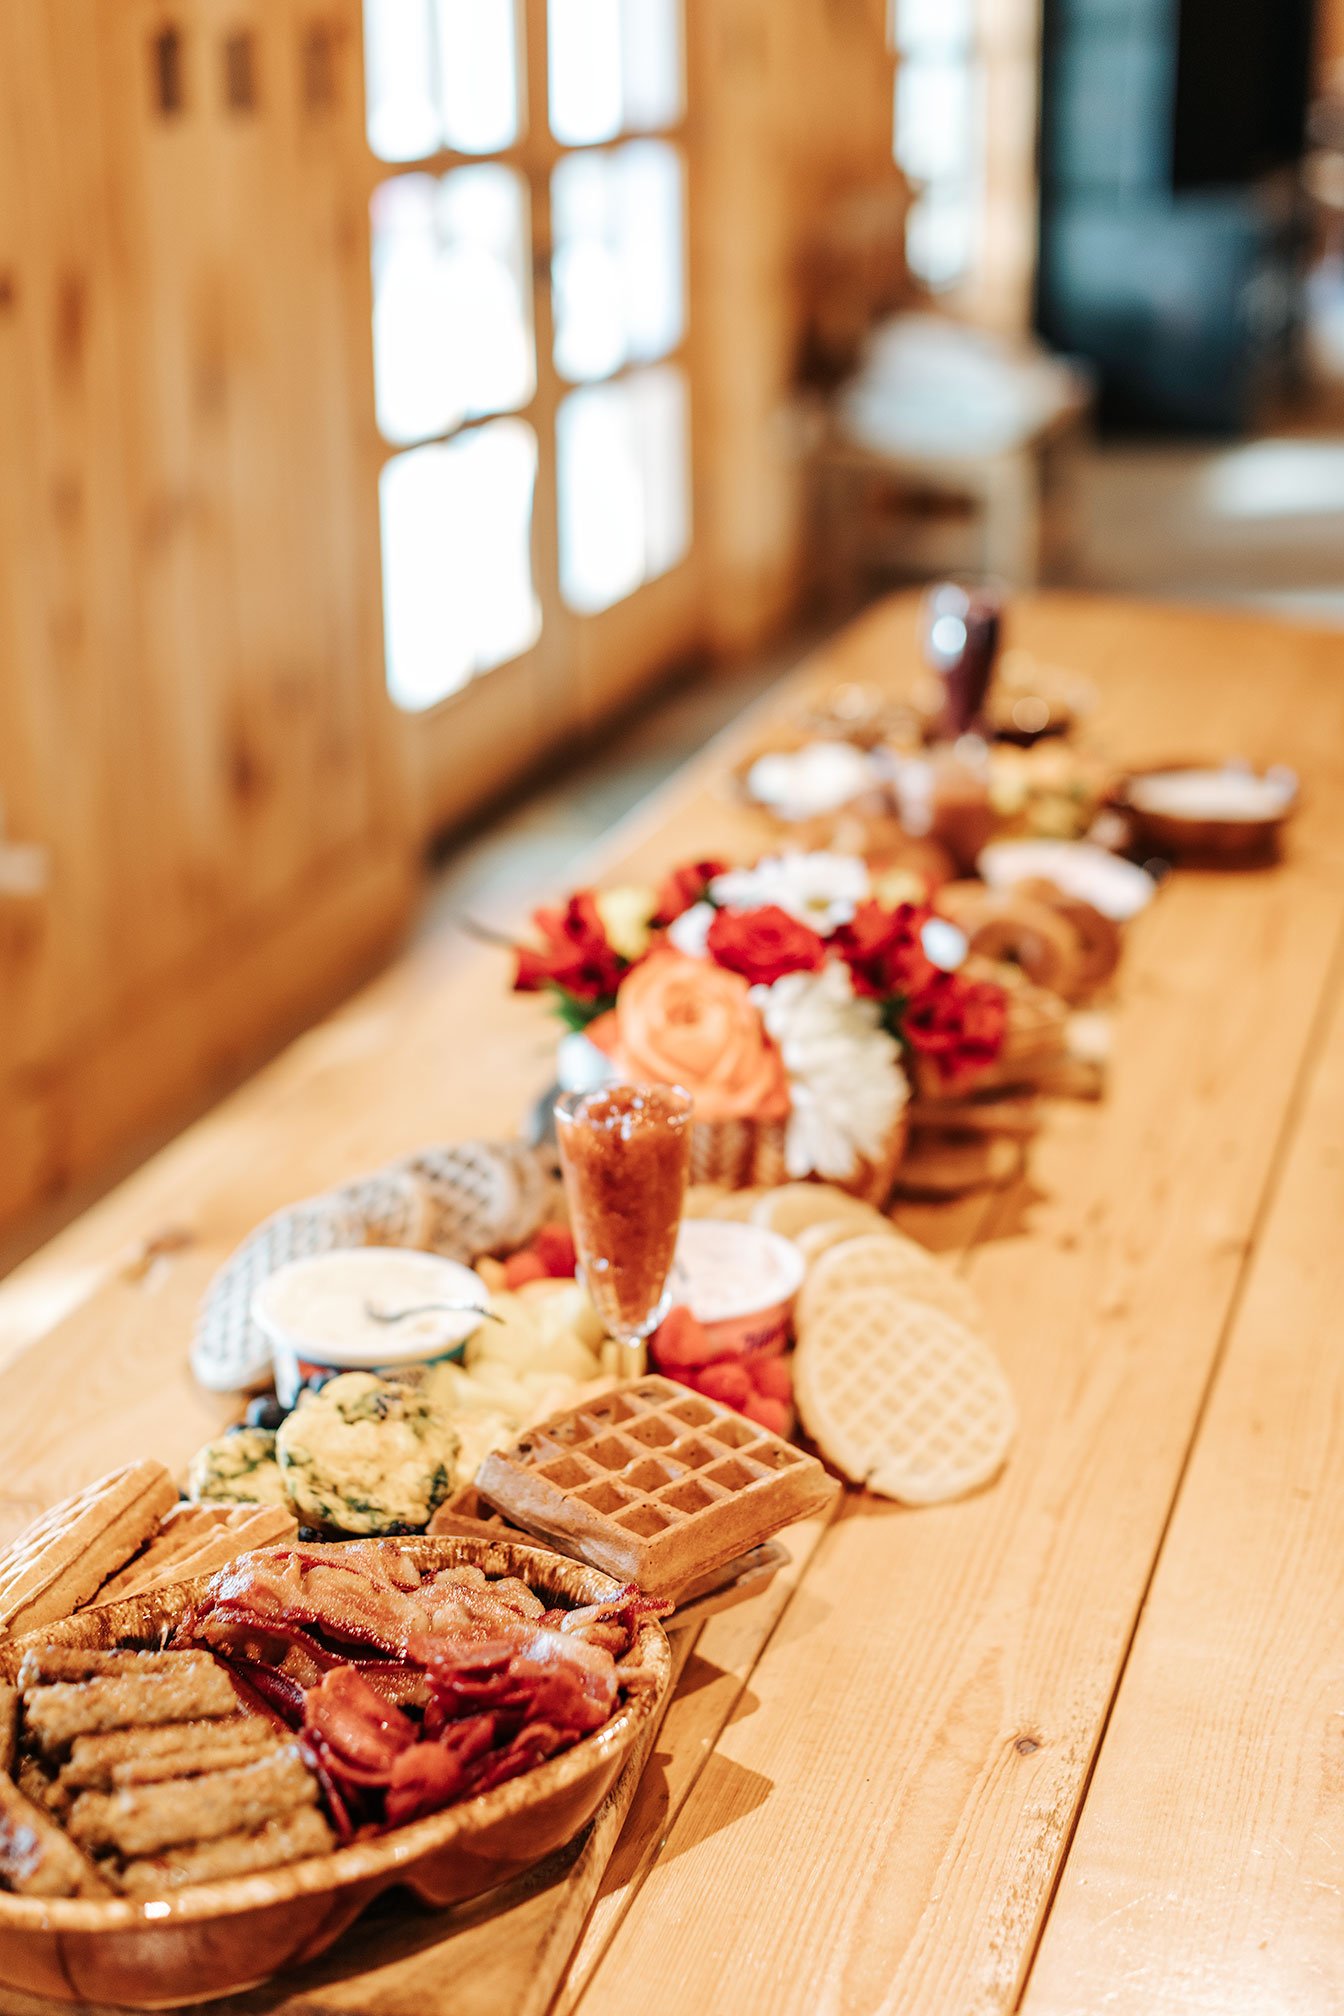
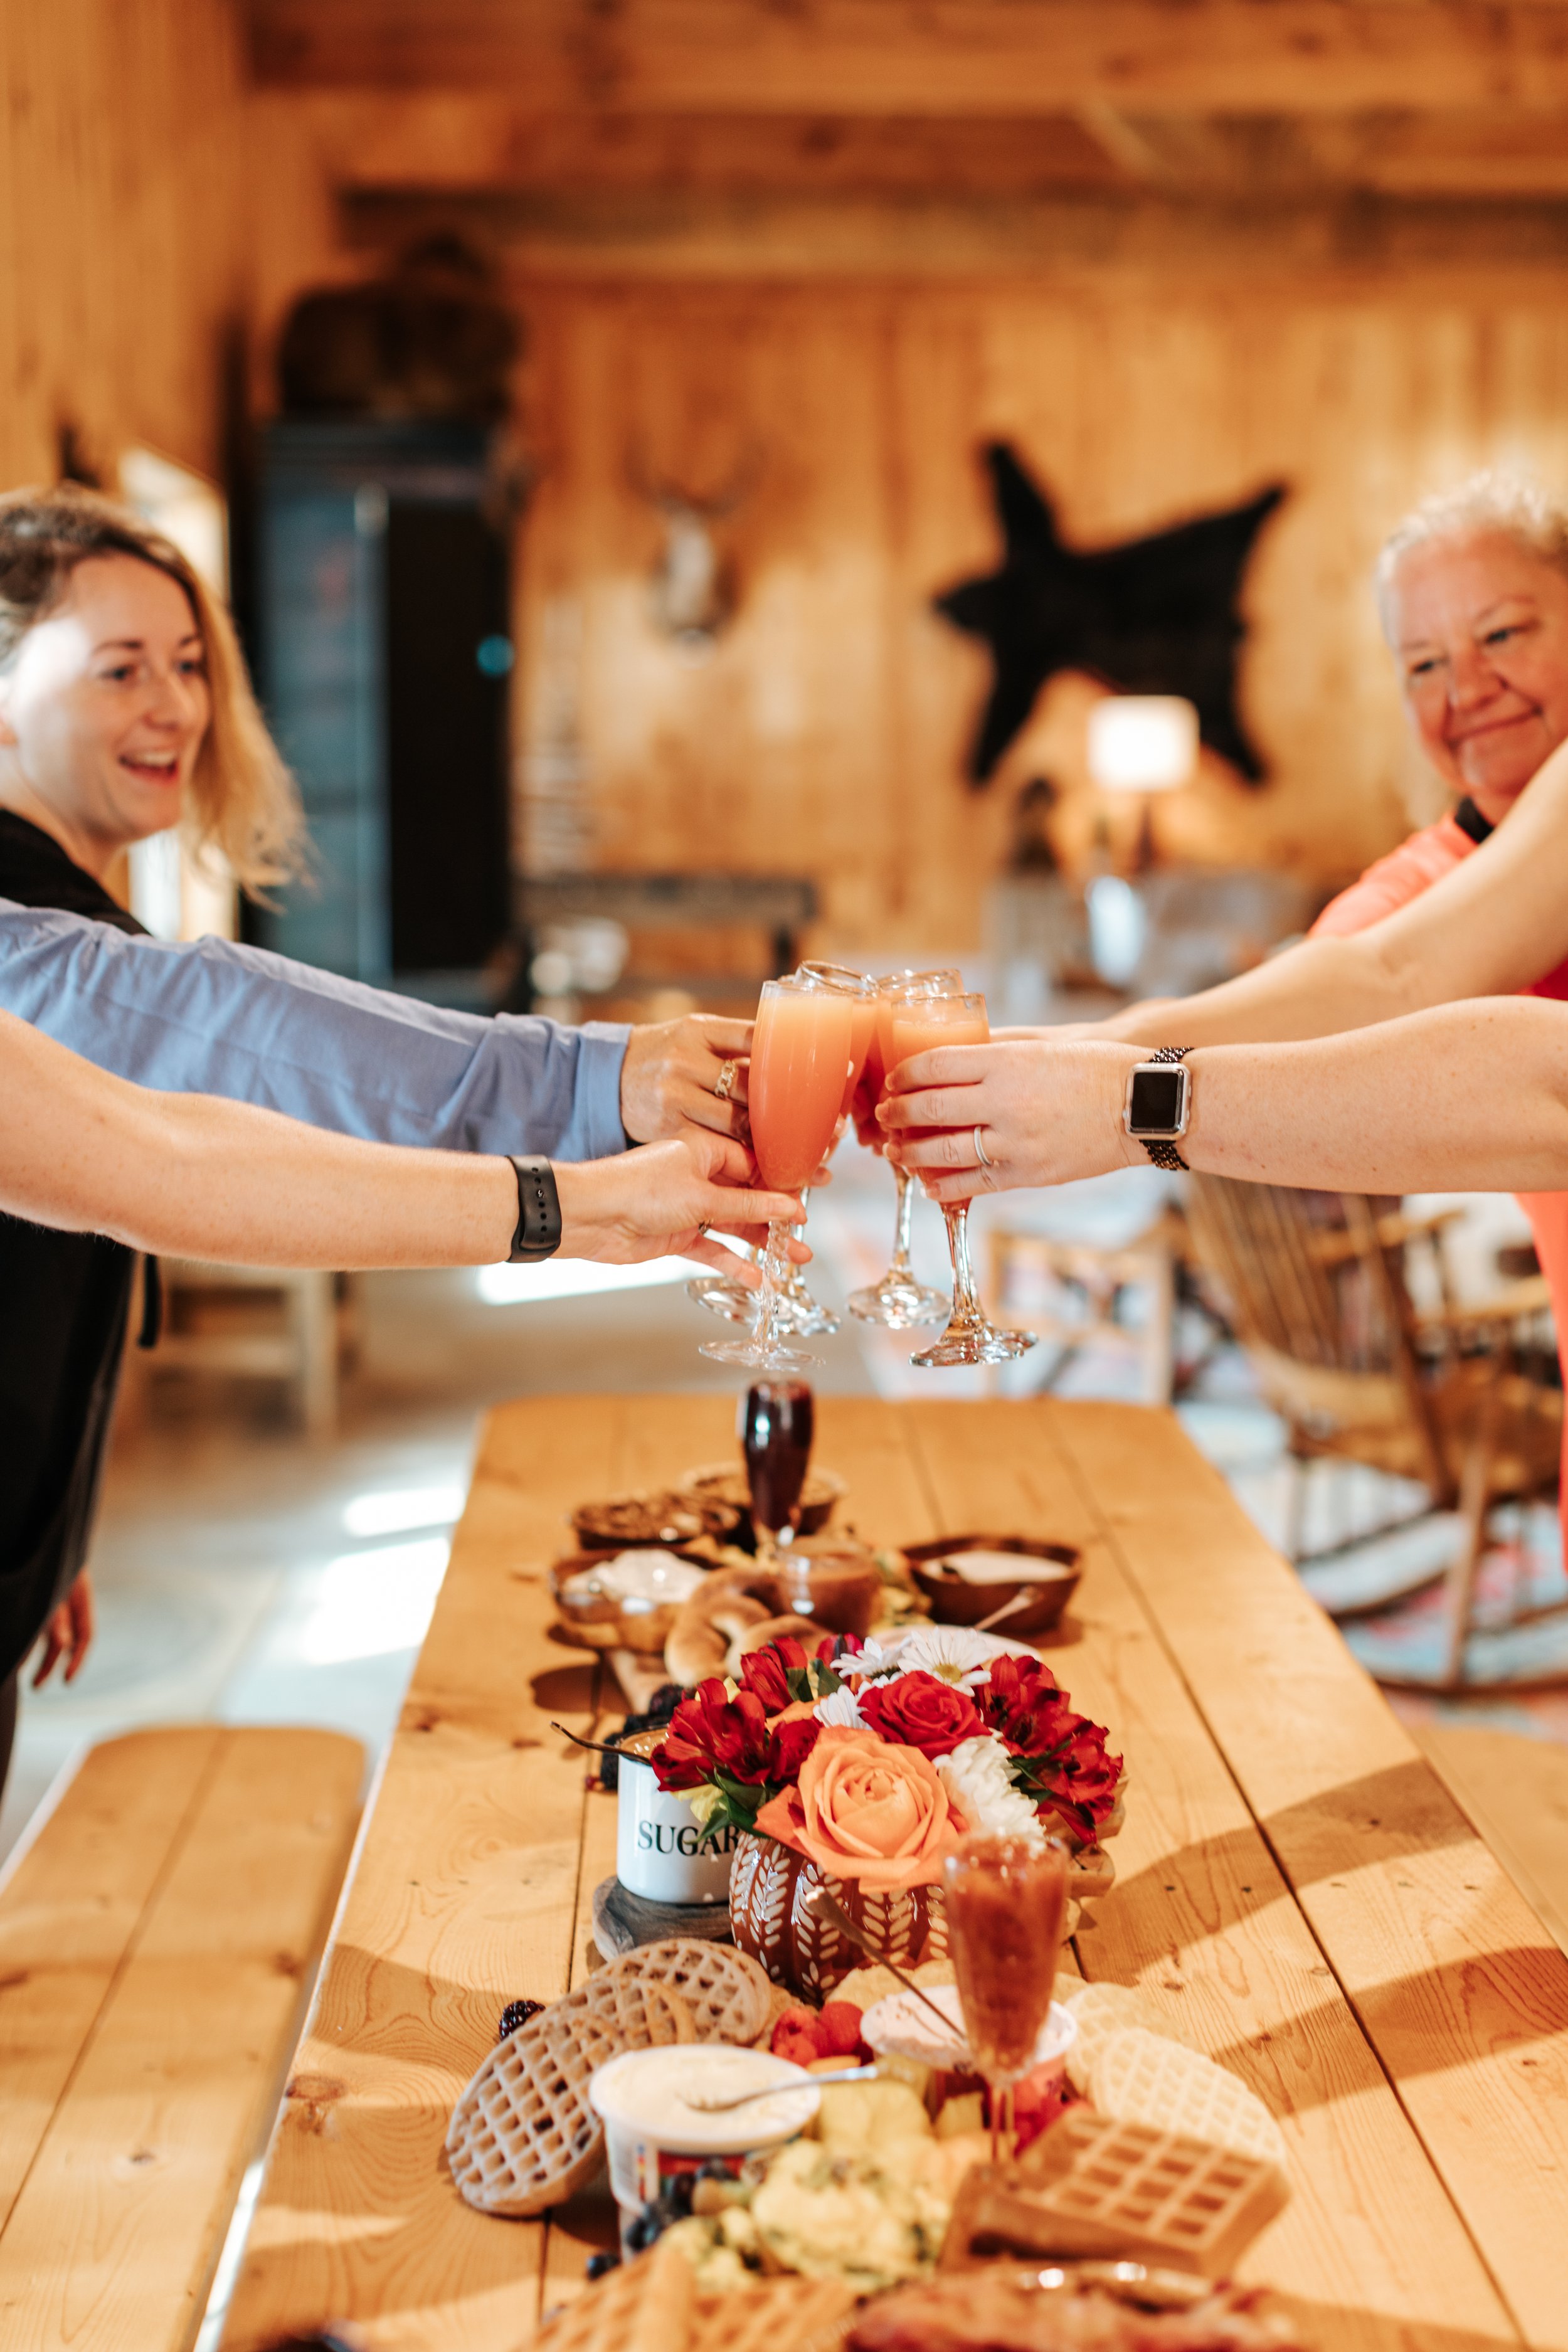
Breakfast Themed Board:
Protein
Pork and turkey bacon, sausage links or patties, scrambled eggs, egg cups or mini quiches (Brand: Applegate)
Dairy
Cream cheese, plain greek yogurt (Brands: Fage, Green Valley)
Produce
Fresh fruit like kiwi, berries, pineapple, melon
Carbs
Waffles, bagels, toast, granola varieties (Brands: SimpleMills, Young Kobras, Purely Elizabeth)
Serve with
Warm maple syrup, nut butter, honey, assorted jams
Mimosas or citrus hibiscus sangria
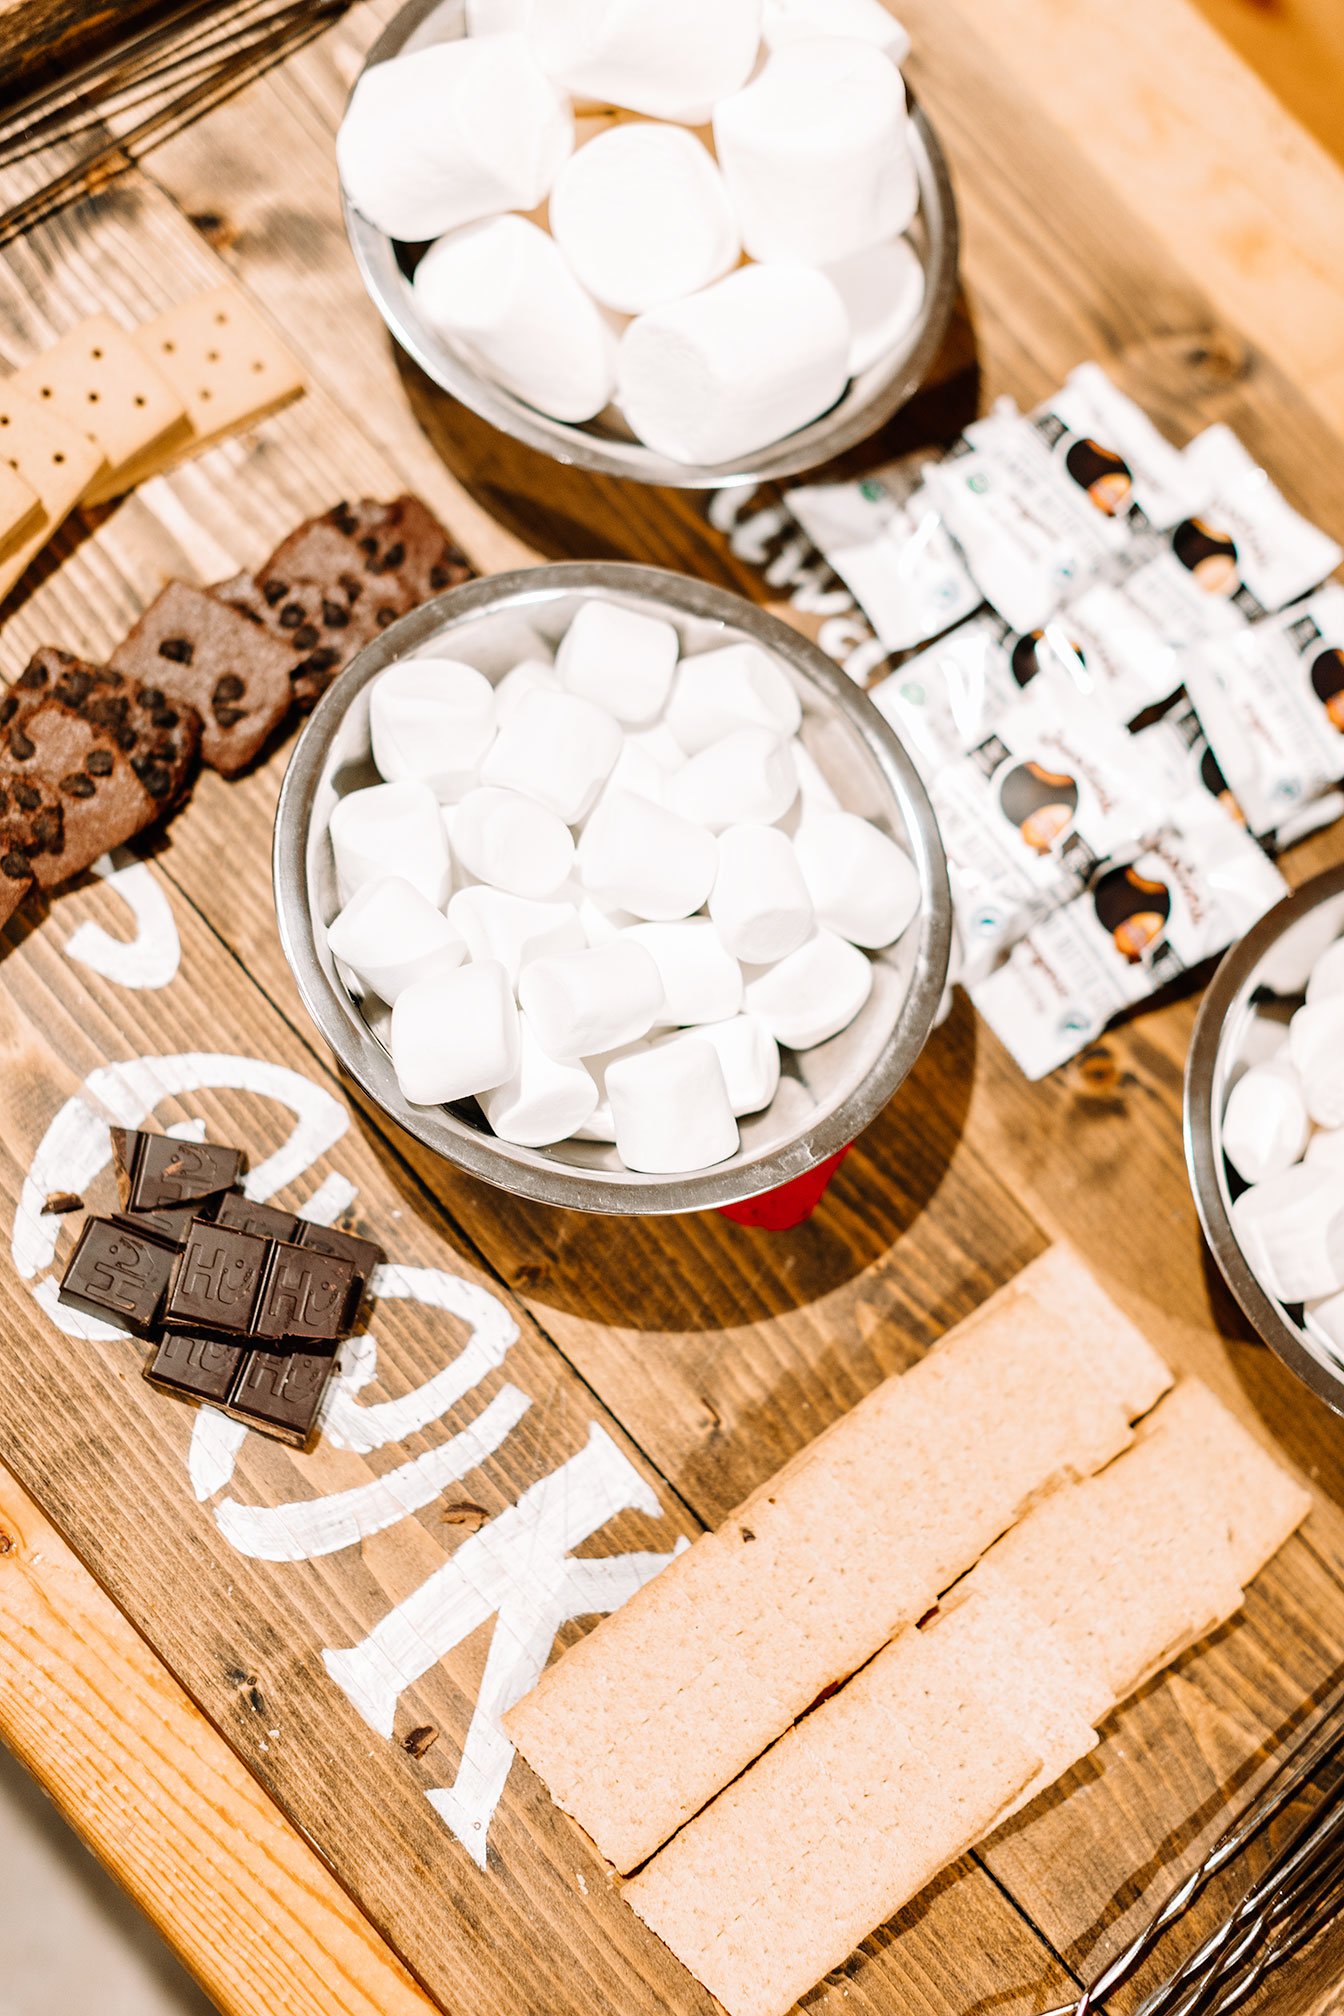

S’mores Themed Board:
Sweets
Dark chocolate squares, peanut butter cups, dark chocolate covered almonds/dried fruit (Brands: Hu Kitchen, Justin’s, Enjoy Life)
Assorted marshmallows (Brand: No Brainer Max Mallow)
Produce
Fresh fruit like cherries, strawberries, blueberries, banana slices
Carbs
Graham crackers, cookies, pretzels (Brand: Simple Mills)
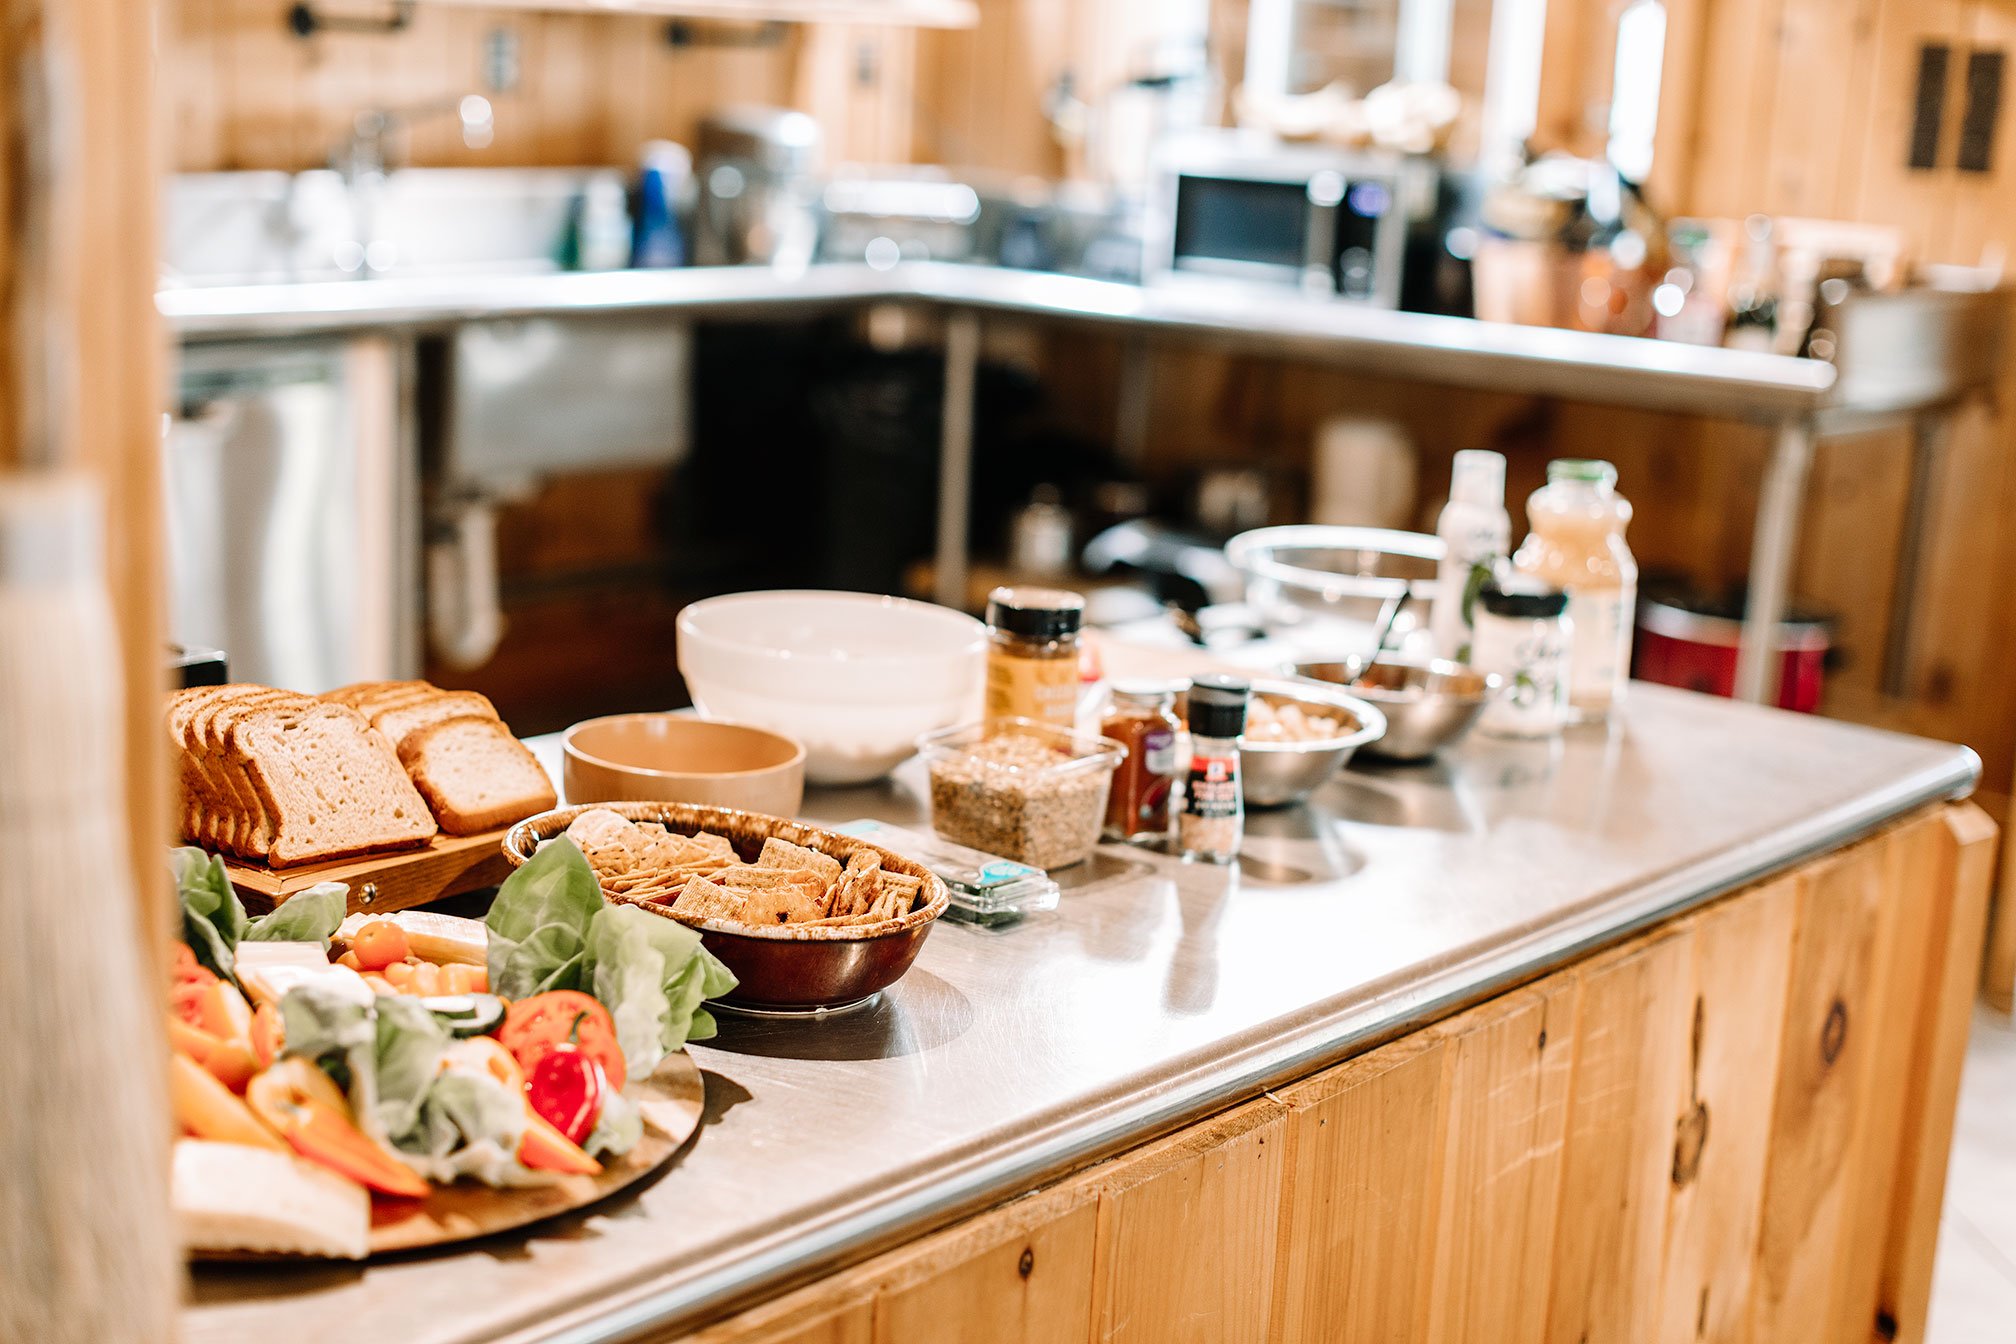
Chicken Salad Themed Lunch Bar:
Protein
Dairy
Cheese slices like gruyere, cheddar, pepper Colby jack
Produce
Tomato slices, mini sweet peppers, carrot sticks, cucumber slices, cherry tomatoes, butter lettuce (great gluten-free / low carb version)
Carbs
Crackers, breads, pretzels
Garnish
Fresh herb like dill
Extras
Pickles, olives, variety of hummus flavors
Condiments like mayonnaise, dijon mustard, oil and vinegar

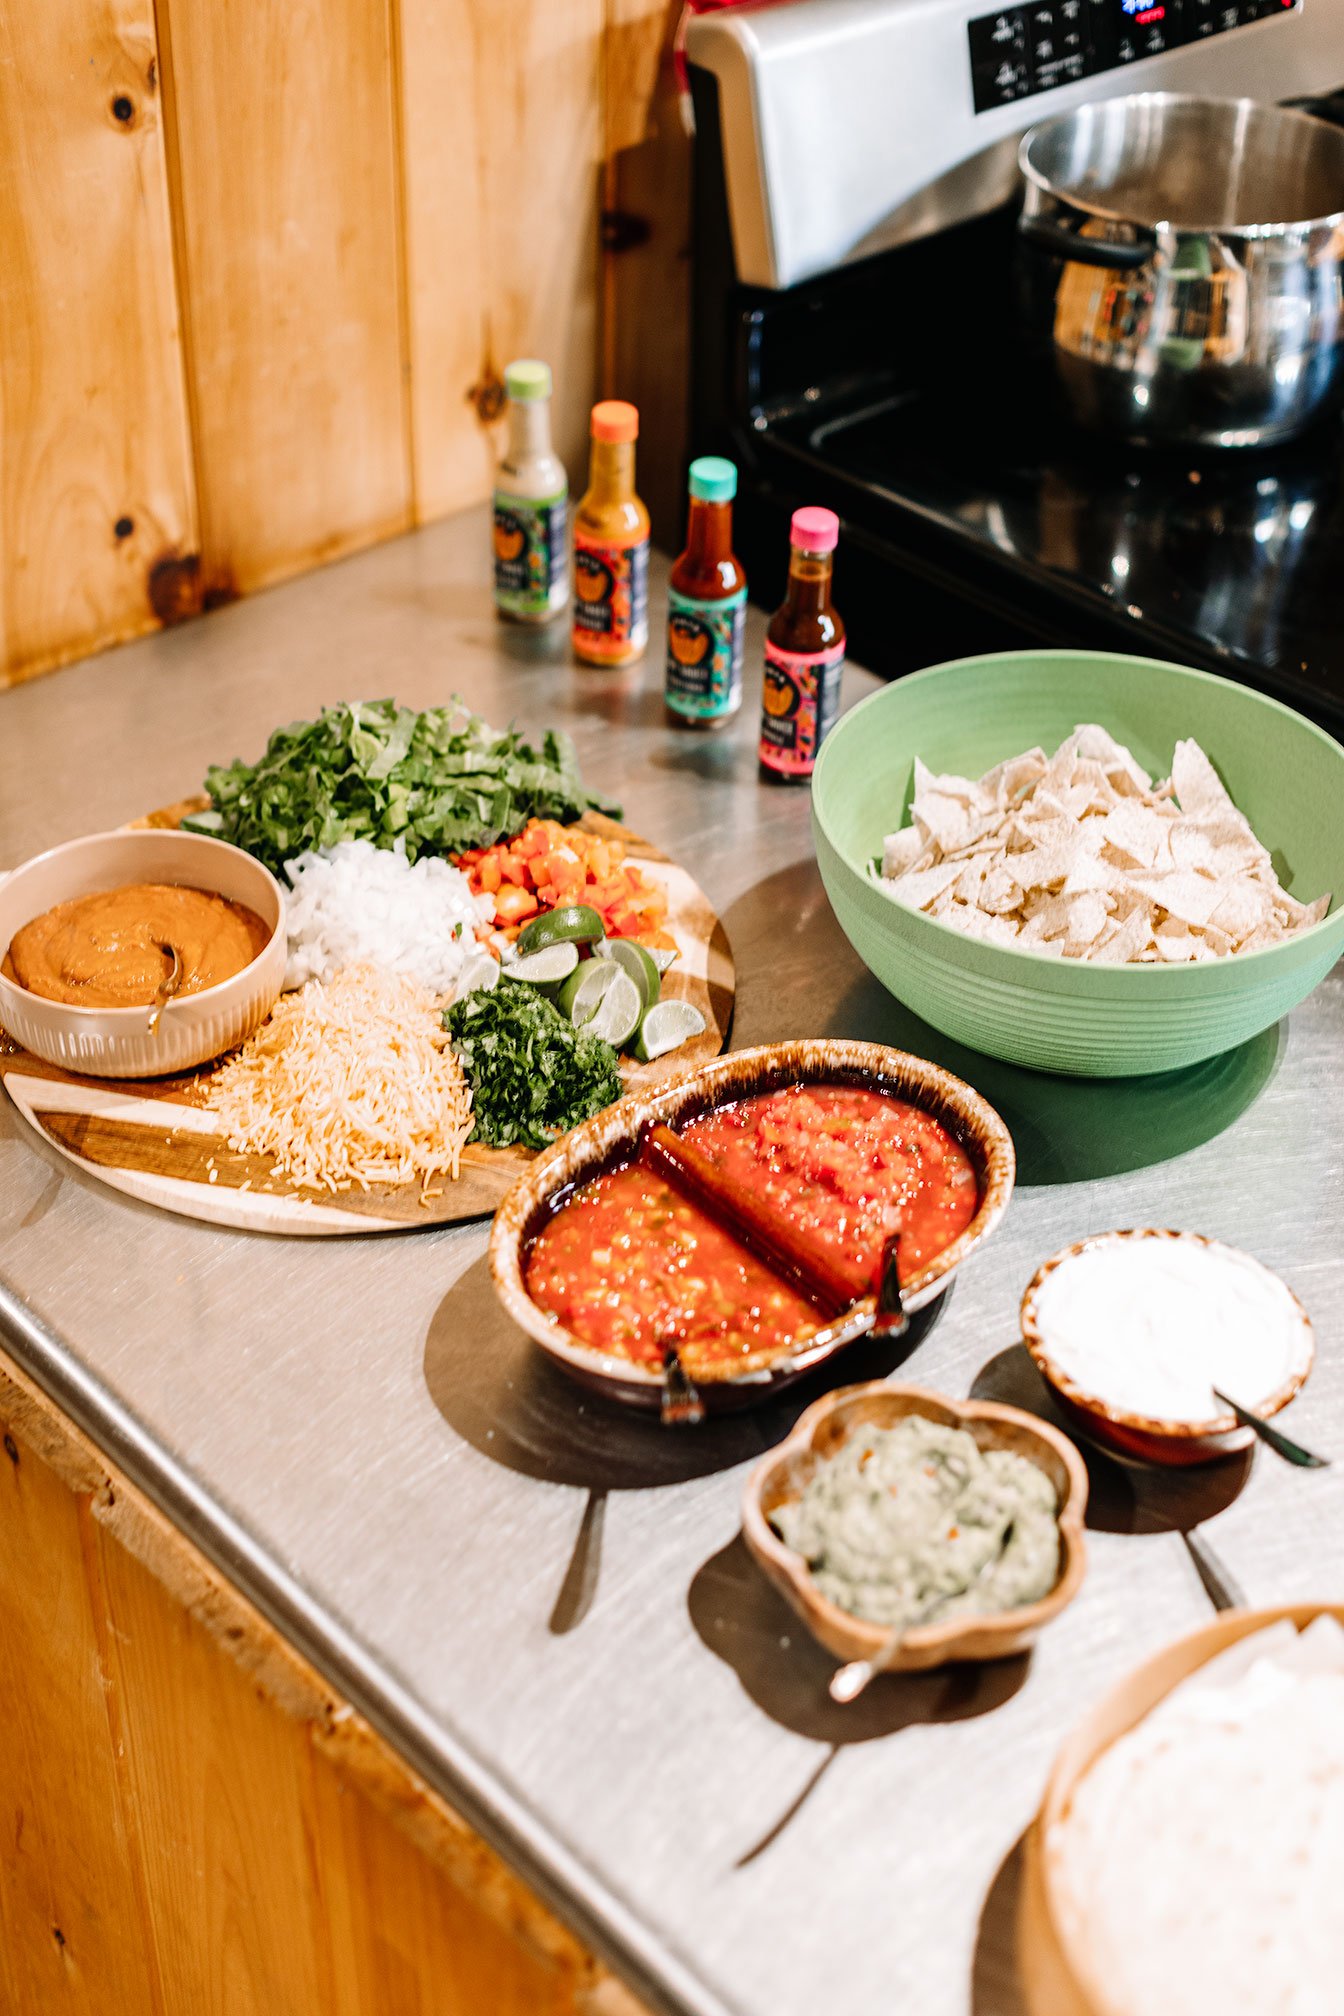
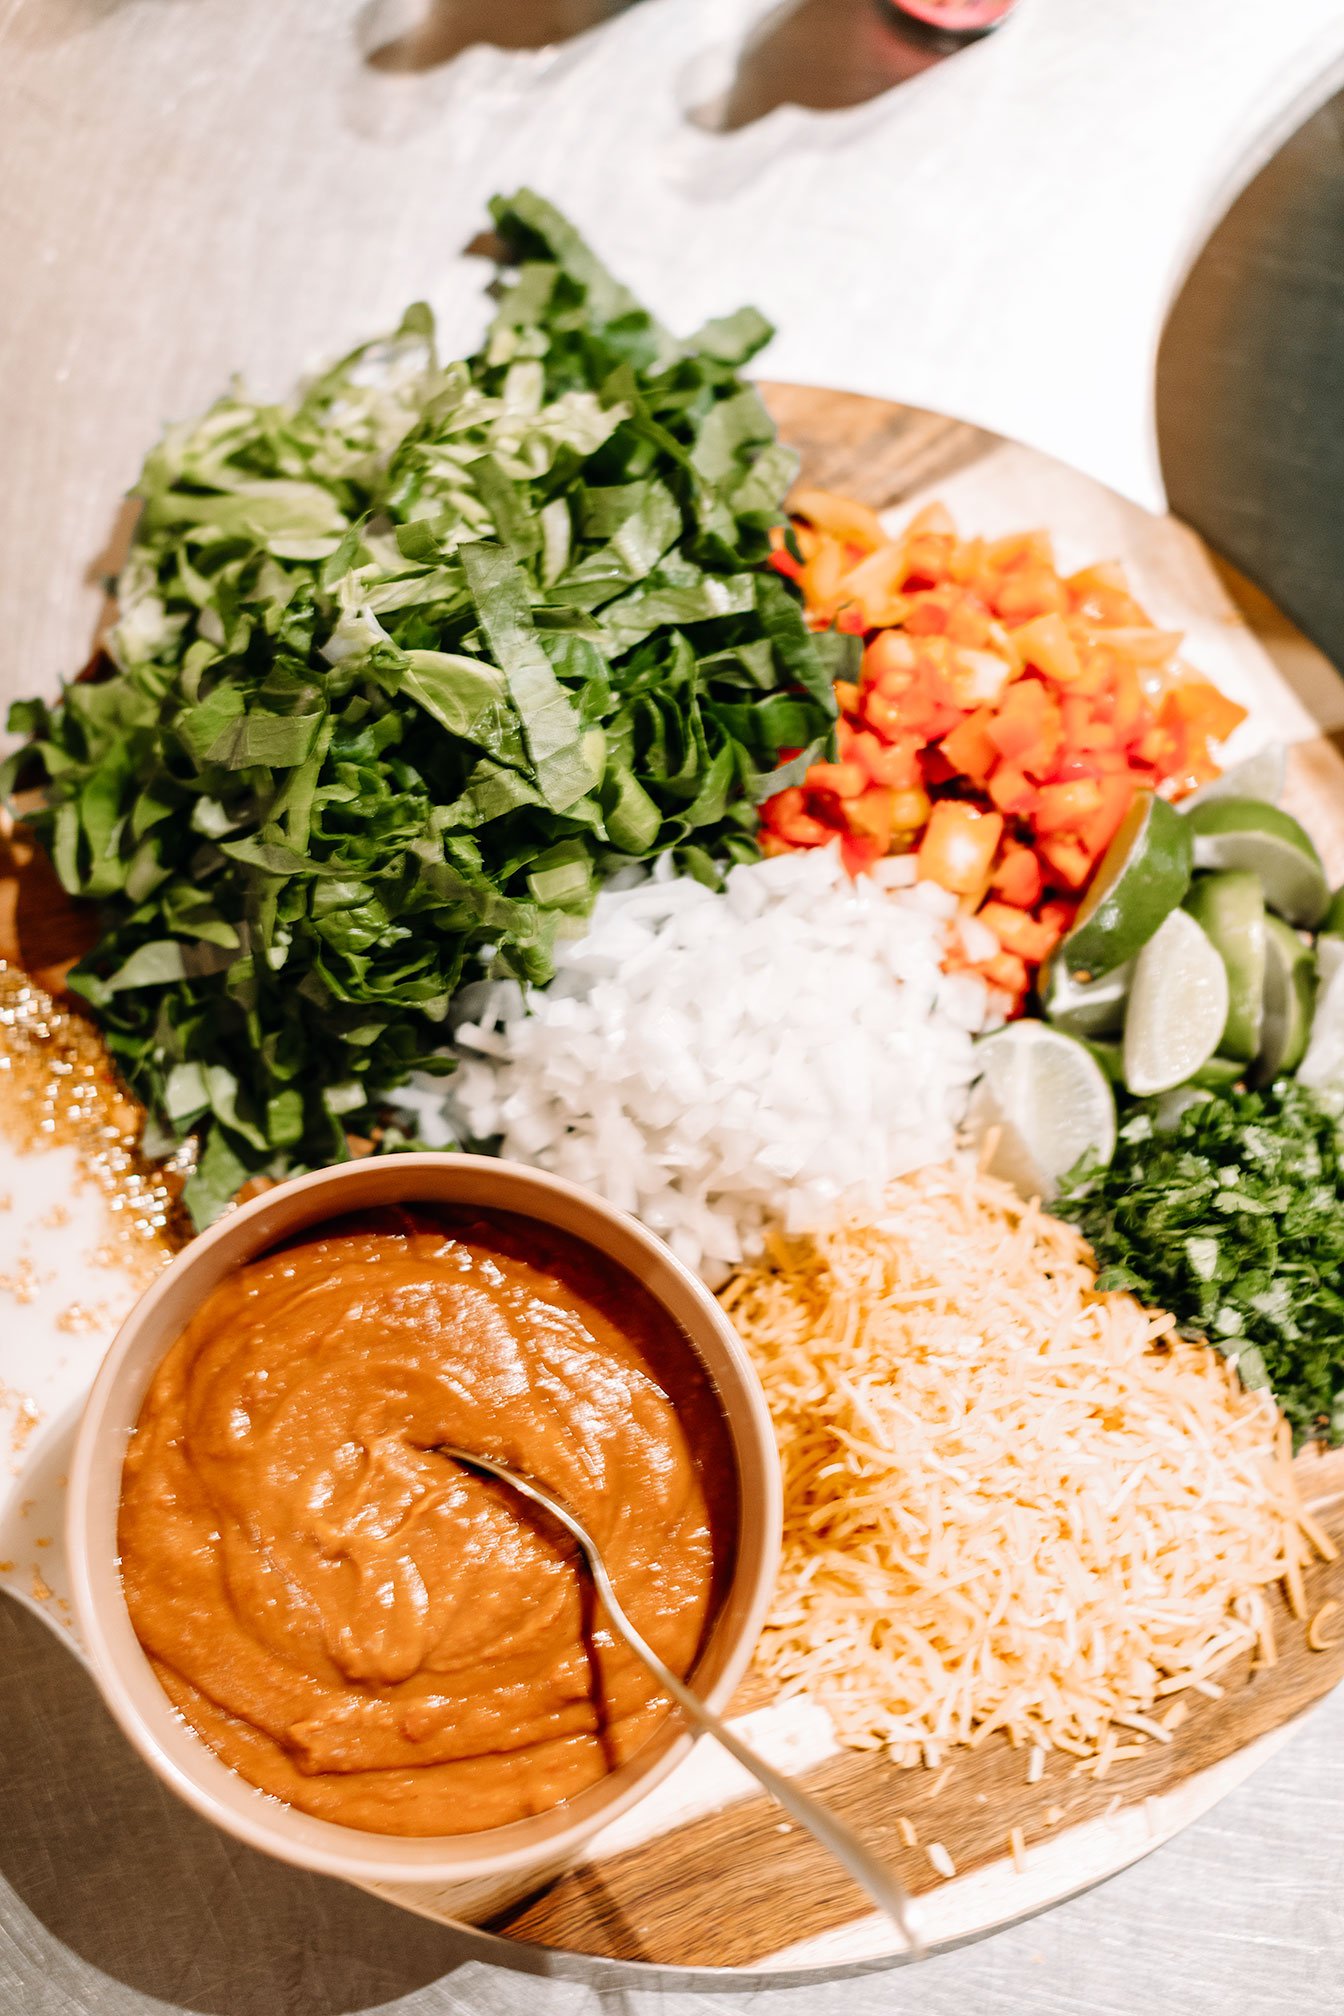
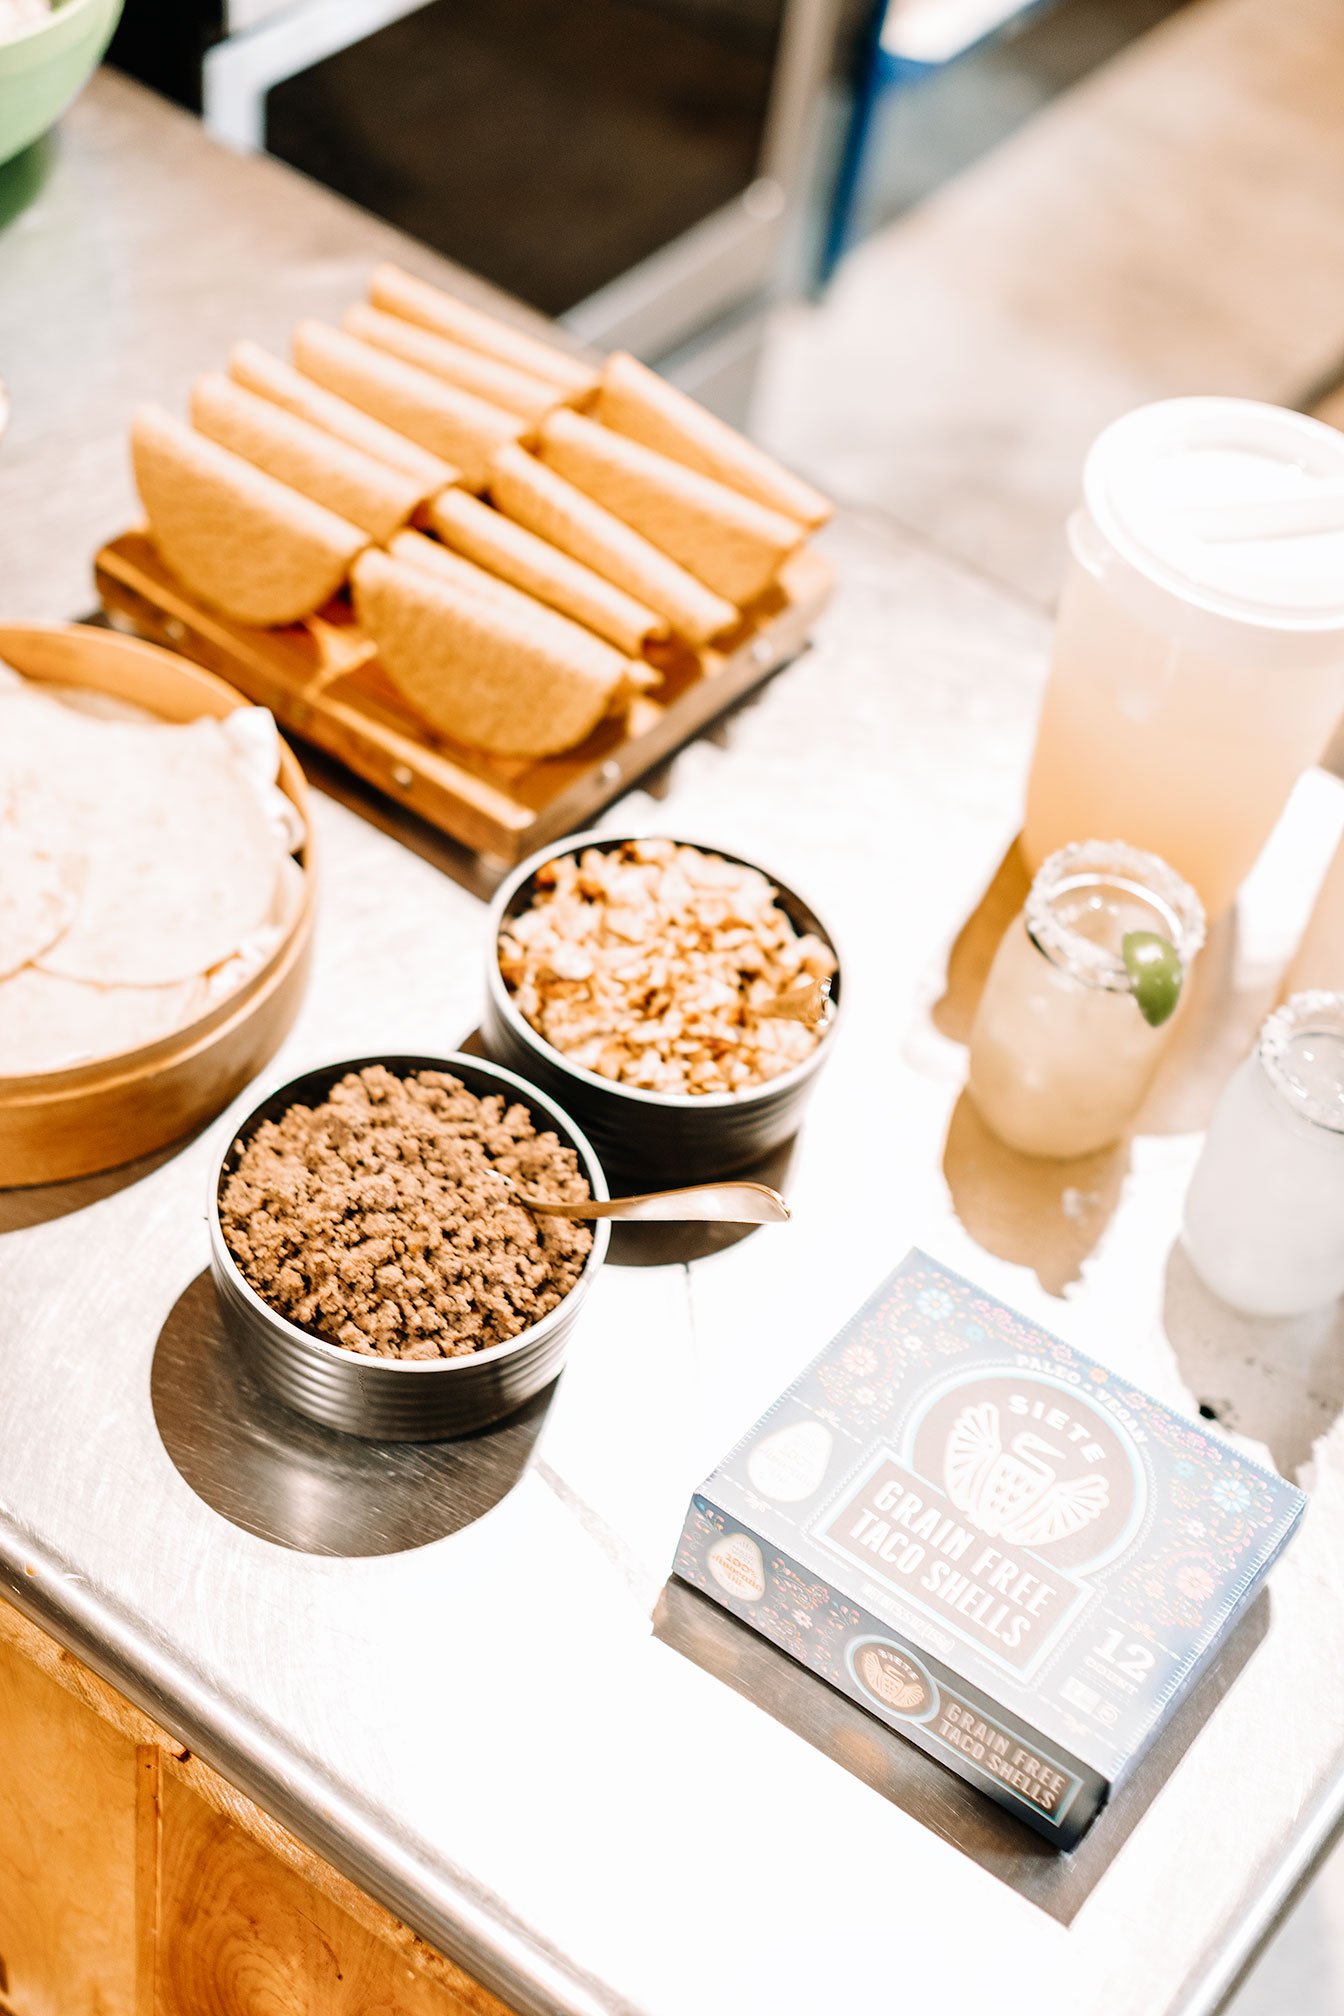
Taco Themed Bar:
Protein
Grilled chicken, verde carne asada, ground beef, chicken or turkey, refried beans, black beans (Brand: Siete Foods)
Dairy
Sour cream, mexican cheese, cotija, queso fresco, vegan cheese sauce
Produce
Shredded lettuce, diced tomatoes, fresh salsa, raw white onions
Carbs
Hard shell, tortillas, tortilla chips, rice (Brands: Siete Foods)
Garnish
Lime wedges, cilantro, assorted hot sauce, pickled or fresh jalapeños,
Extras
Guacamole
Margarita mocktail/cocktails!

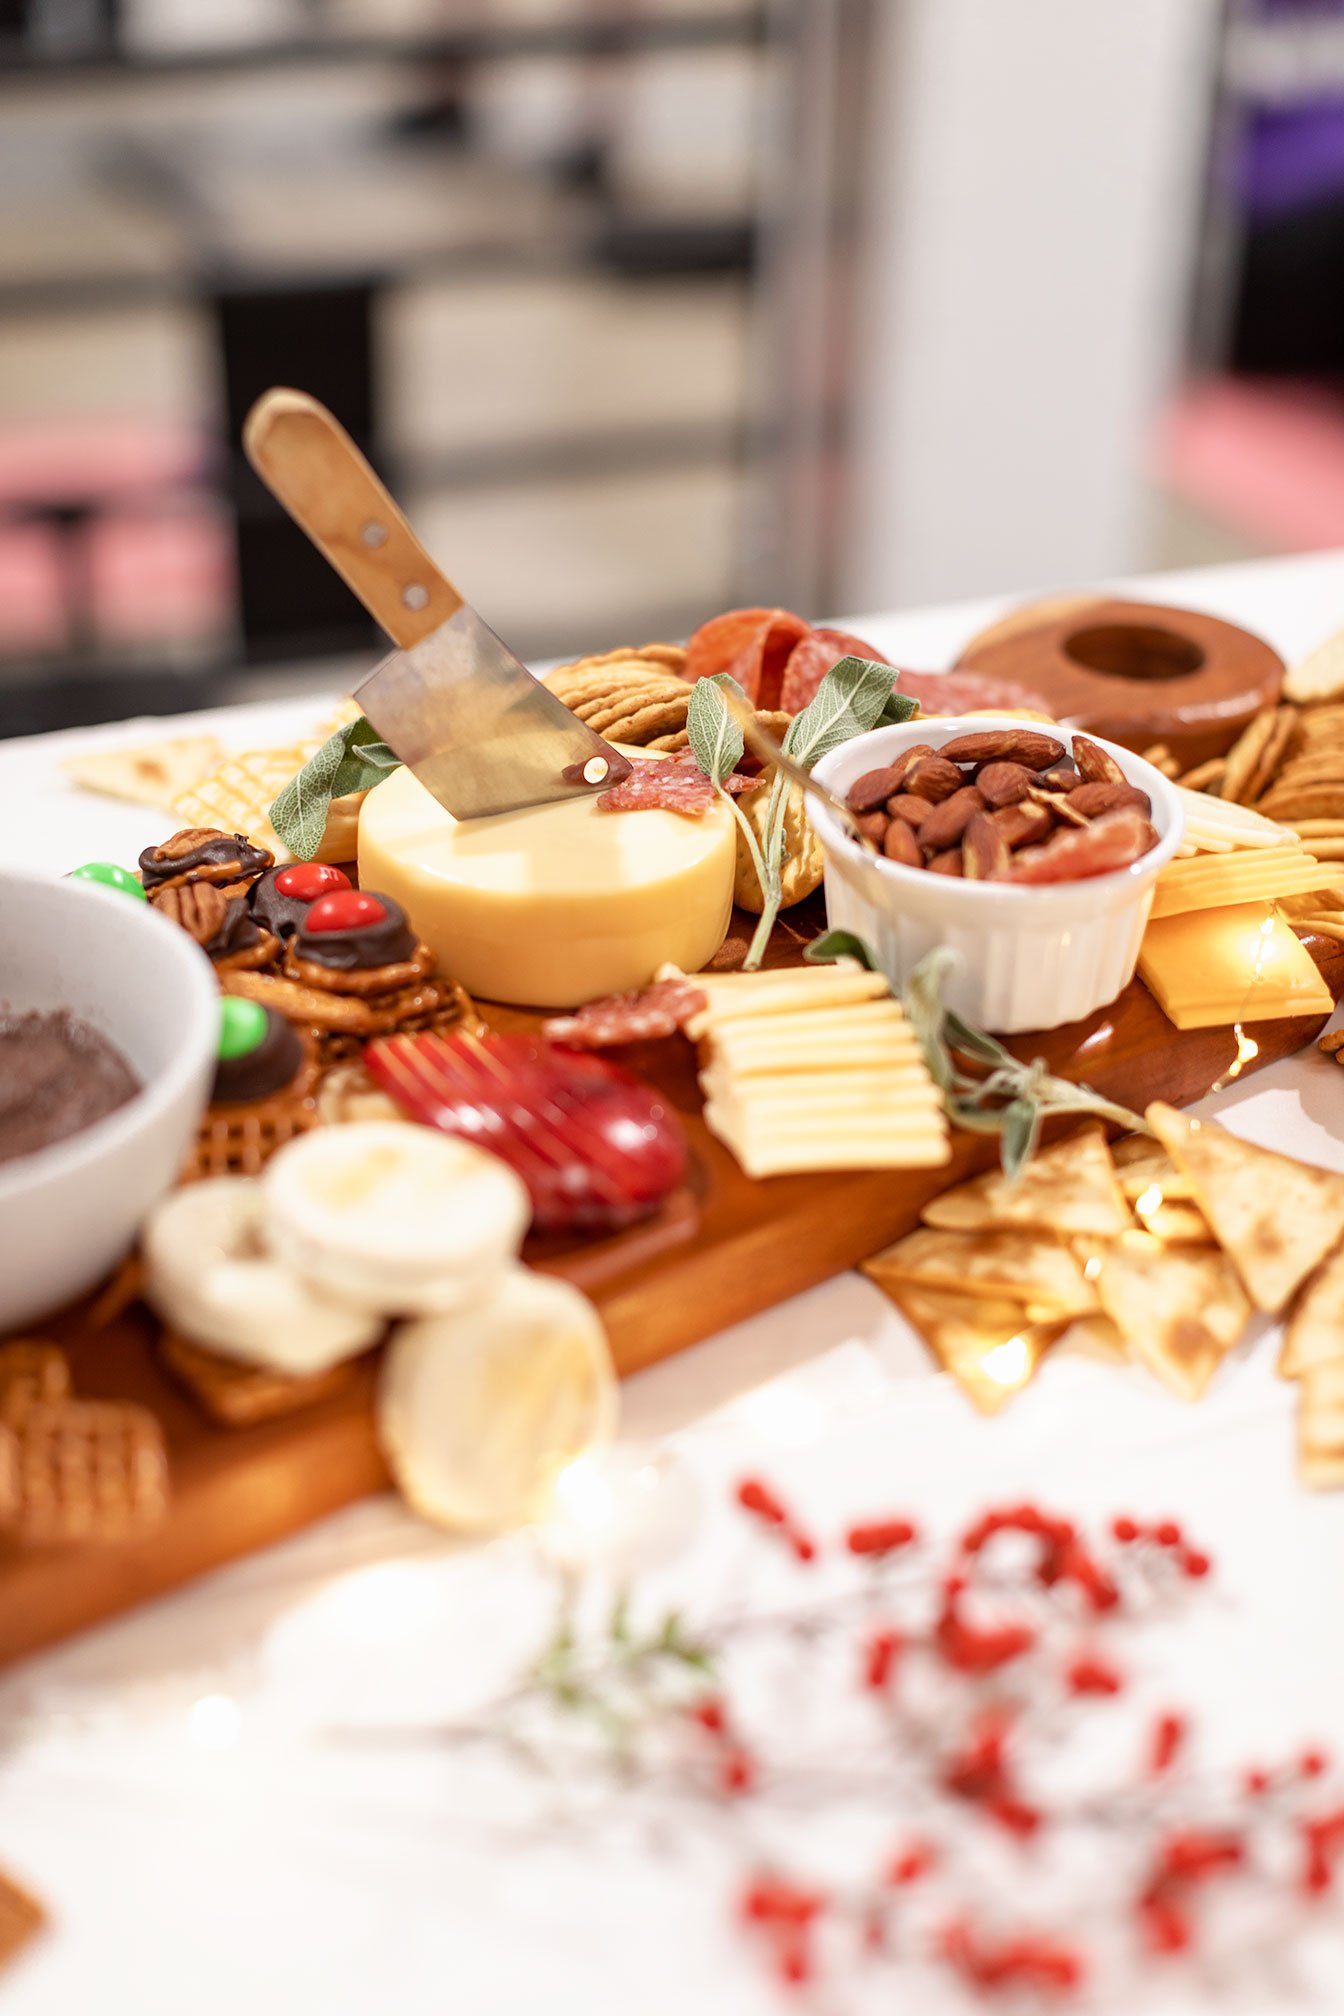
Tips & Tricks
For a well-rounded charcuterie board, it's essential to choose meats with a range of flavor profiles. This will help complement the freshness of the board's other components. Consider incorporating both spicy and mild meats for an optimal balance. The same applies to choosing hard and soft cheeses with bold signature flavors.
For your carbs, consider mixing up with different consistencies. ie - crispy thin cracker and thick baguette slices.
Use fruit, variety of nuts, and fresh herbs to add pops of color and to fill out your board so that there are no spaces.
Incorporate at least two creative snacks to keep the board fun and interesting. This could look like a homemade snack or a fancy and fun flavor combo cheese log!
OUR FAVORITE SERVING TOOLS ON AMAZON!


50 Healthy Travel Snacks and Recipes
Whether you are driving through, U.S. Route 50 “the Loneliest Road in America” or stuck at the airport due to flight delay, having a snack arsenal is a must!
Key snack items I look for when stocking my travel snack bag include foods that will keep me hydrated, keep my lovely gut happy, are portable, minimal ingredients and that don’t require refrigeration, antioxidants (help fight any free radical damage aka when you are packed in an airplane like sardines) and contains a fat and protein source for optimal blood sugar regulation.
Here are snack suggestions that you can find by stocking up at the next gas station, grocery store or make ahead of time:

Jerky! It’s safe to say that jerky has moved past its gas station junk food reputation of having highly processed, hidden sugars, high in sodium and preservatives. Instead, look out for high quality ingredients, minimally processed, low in sugar and sodium, high in protein and no preservatives.
Brands I love: Chomps, Paleovalley, Wyoming, Epic, ayoba biltong Chef’s Cut
Fruit: It’s convenient, can be found in many places (hello, fresh fruit in gas stations now!), travels well, and can be hydrating! And if you are worried about carrying fresh fruit on a plane, I love making my own dehydrated fruits or packing dried or baked fruit snacks: Bare, Rind (look for brands that contain no added sugars, flavorings, colorings or preservatives)
Pair with a fat and protein source like with Jerky to stabilize blood sugar!
Vegetables: Think of veggies that are portable like carrots, broccoli, snap peas, sliced peppers. I also like pickled veggies like this brand for a probiotic punch!
Protein bars. Yes, protein bars are convenient and are found at any food store, but make sure you are checking labels to identify foods like nuts, whole grains, high quality protein sources (grass-fed whey protein), natural sweeteners like from fruit or cane sugar, healthy fats, low to no synthetic or isolated fibers, no sugar alcohols.
Brands I love: RX bar, GoMacro Bar, Thunderbird Bar, Bulk Snack Bars
Chips: Road trip snack of the Gods! But it can be deadly if you are prone to eating an entire bag by yourself. *Guilty! To make sure we aren’t killing our guts with gut-irritating corn and inflammatory “veggie” oils, look for tortilla or potato chips that are made with minimal ingredients and use coconut and avocado oil. Plantain chips made in this fashion and pork rinds cooked in their pork fat and sea salt are also fun healthy alternatives!
Chocolate/sweets: I’m sorry but you can’t have a travel adventure without sweets; it’s just inhumane. So when I look for chocolate or sweets to pack ahead of time, I look for 70-80% or higher cacao and use minimal ingredients (i.e. cane or coconut sugar, unsweetened chocolate, cocoa butter, sea salt).
Electrolytes - Okay, I know this isn’t a snack but I find that it’s so hard to stay hydrated when traveling. And it is summer time, so it’s better to be safe than sorry!
Brands: LMNT, Nuun, Good ole pink Himalayan sea salt
Snack Combos
Not only do I hope this will provide a visual for how to pair your carb source WITH a healthy fat and protein source, but most of these ingredients can be easy to assemble before you head out for your next travel adventure! *Bonus - a great way to clear out the fridge and pantry without having to throw out excess food!

Cantaloupe + prosciutto
Sourdough toast + avocado + nutritional yeast + fried egg + sea salt + sriracha and/or everything but the bagel seasoning
Bone broth + sea salt + seasonings
Ground turkey + veggie + egg muffins
Rice cakes + protein powder + plain yogurt + bluebs + banana slices
Plantain chips + tuna + primal kitchen mayo
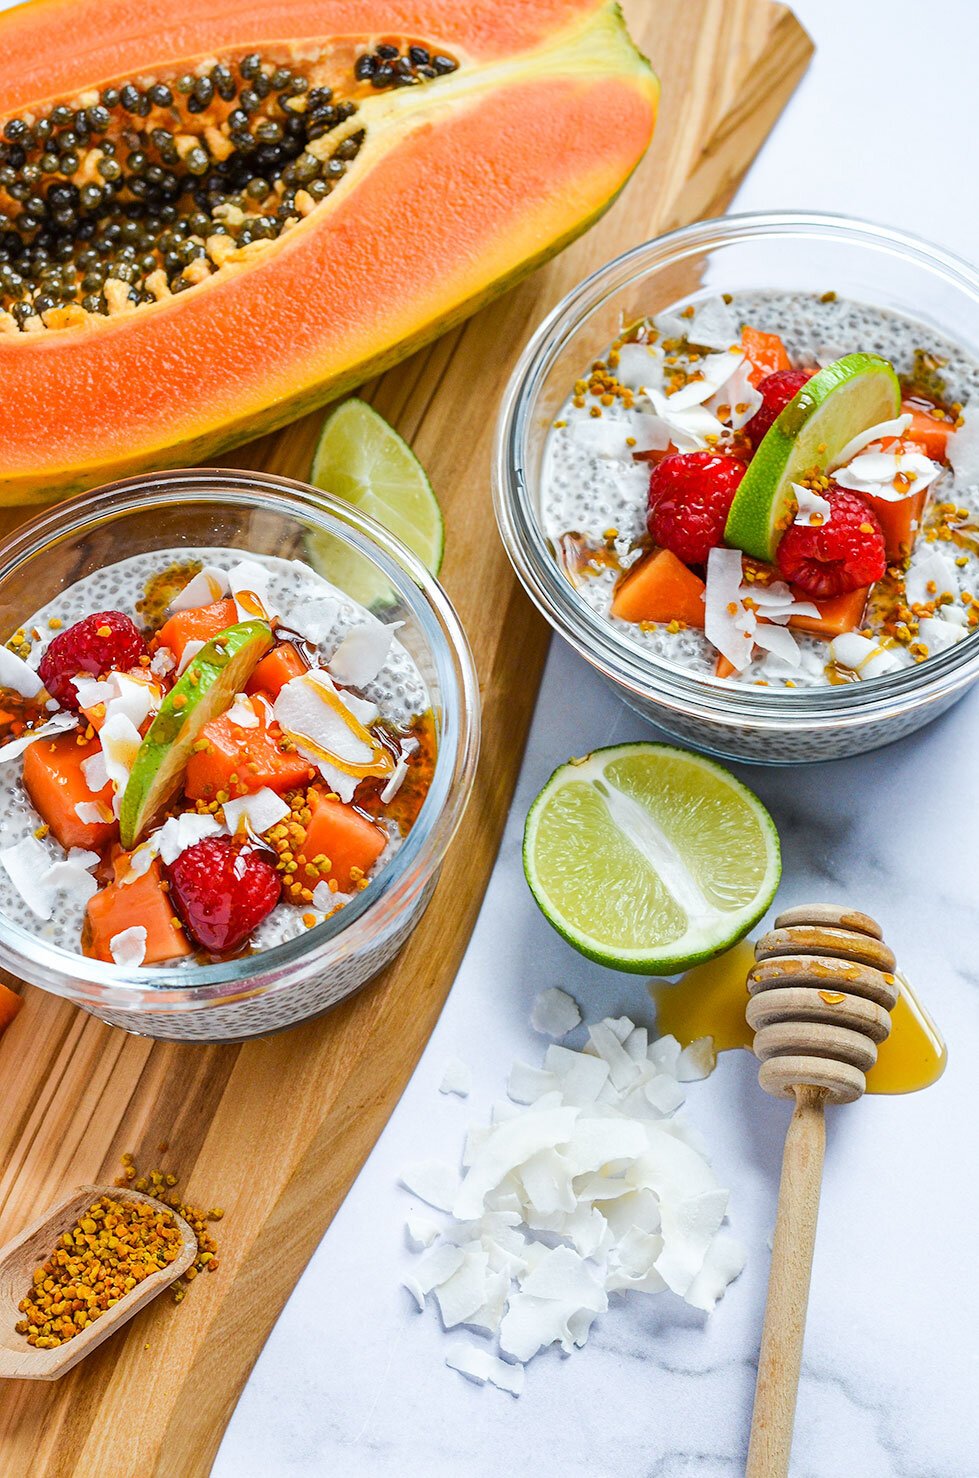
Fruit + goat cheese + raw honey + bee pollen
Apple slices + coconut cream + cacao nibs
Piece of fruit + jerky
Medjool date + goat cheese + crushed pistachio
Make ahead travel snacks
If you want to step up your snack level game, here are some quick and delicious snack recipes that will keep you fueled, satisfied and ready to go!
Lunch and dinner recipes while traveling
Making prepped meals is a must if you are trying to avoid fast food restaurants on the road or in the airport, trying to cut down on food costs, or deal with food sensitivities/allergies.
*Flight tip: If you freeze your prepped meals ahead of time and are flying domestic, your food will most likely thaw when you arrive at your destination. This helps to eliminate frequent ice melting and replenishing!

Chicken sausage and harvest veggies sheet pan
Healthy salmon patties with lemon dill potato salad
Turkey taco spaghetti squash boats
Creamy coconut lime chicken thighs
Mediterranean grain bowl and goat cheese and olive dressing
Spicy thai tofu with crispy coconut spaghetti squash noodles
Turkey taco spaghetti squash boats
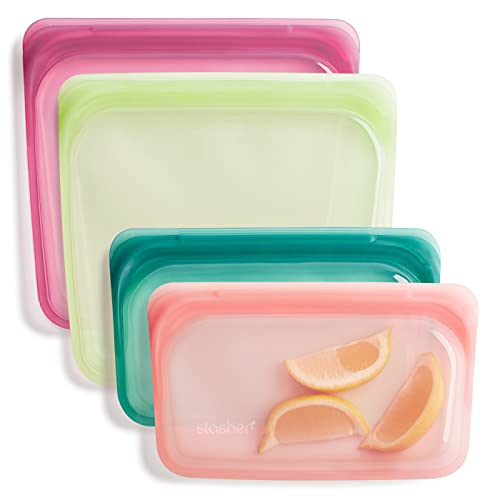
Food travel equipment essentials
From meal prep containers to cute cooler bags, here are a few of my favorite food travel gear that I use when traveling!


Phew, that was a lot of information!
If you found this helpful, please let us know! Leave a comment and tell us what are your favorite go-to healthy snacks and recipes!

And if you would like to know more on how to create nourishing snacks and meals, head over to the Nourishment Program to get started today!