Sort by Category
- December 2025
- November 2025
- October 2025
- September 2025
- August 2025
- June 2025
- August 2024
- July 2024
- June 2024
- May 2024
- February 2024
- January 2024
- December 2023
- November 2023
- October 2023
- September 2023
- August 2023
- July 2023
- March 2023
- February 2023
- January 2023
- December 2022
- November 2022
- October 2022
- September 2022
- August 2022
- June 2022
- May 2022
- April 2022
- March 2022
- February 2022
- January 2022
- December 2021
- November 2021
- October 2021
- September 2021
- August 2021
- July 2021
- June 2021
- May 2021
- April 2021
- March 2021
- February 2021
- January 2021
- December 2020
- November 2020
- October 2020
- September 2020
- August 2020
- July 2020
- June 2020
- May 2020
- April 2020
- March 2020
- February 2020
- January 2020
- December 2019
- November 2019
- October 2019
- September 2019
- August 2019
- July 2019
- June 2019
- May 2019
- April 2019
- March 2019
- February 2019
- January 2019
- December 2018
- November 2018
- October 2018
- September 2018
- August 2018
- July 2018
- June 2018
- May 2018
- April 2018
- March 2018
- February 2018
Asian Mason Jar Salad with Peanut Sauce
These healthy, delicious, and portable asian mason jar salads are made with chicken, mixed greens, cucumbers, cabbage, oranges, shredded carrots or the raw carrot salad (hormone balancing), green onions, cilantro, crushed peanuts with a peanut sauce dressing!
These healthy, delicious, and portable asian mason jar salads are made with chicken, mixed greens, cucumbers, cabbage, oranges, shredded carrots or the raw carrot salad (hormone balancing), green onions, cilantro, crushed peanuts with a peanut sauce dressing!
Mason Jar salads
I never realized I hadn't shared a single mason jar salad recipe on the blog! Back when I was in the corporate world, I used to enjoy these salads regularly, and I had forgotten how simple, versatile, and delicious they can be!
Given my fondness for Asian cuisine, I thought it fitting to make my first mason jar salad an Asian-inspired one.
For those who are part of the Nourished Roots Membership Program, you might recognize this recipe from the January 2024 Meal Prep Guide! If you're not yet a member, sign up today to access more exclusive recipes like this one that may not be featured on the public website!
Tips for assembling Asian mason jar salads:
The key to these jars is layering them correctly so that you can prep your salads in advance without them becoming soggy.
Start by adding your liquids at the bottom and layering your ingredients accordingly. For instance, place the dressing at the bottom and layer your fruits and vegetables from the sturdiest to the most delicate.
Refer to the images below for a visual guide on how to layer each ingredient!
Can I include other ingredients?
Absolutely! These salad jars can be enhanced with different protein sources like marinated pork, turkey, or chickpeas. You can also incorporate grains such as brown rice or quinoa. If you decide to add a grain, place it closer to the dressing layer at the bottom of the jar as they are heartier toppings.
If you try this recipe, let us know! Leave a comment, rate it, and don’t forget to tag a photo to #fromtherootsblog on Instagram. We love seeing what you come up with!
These healthy, delicious, and portable asian mason jar salads are made with chicken, mixed greens, cucumbers, cabbage, oranges, shredded carrots or the raw carrot salad (hormone balancing), green onions, cilantro, crushed peanuts with a peanut sauce dressing!
Servings: 4 | Prep Time: 15 min | Cook Time: 15 min
Ingredients
Mason jar salads
1 lb chicken breast (see below) (1/4 lb per jar)
8 cups mixed greens (2 cups/jar)
1/2 cup diced cucumbers (2 Tbsp/jar)
1 cup shredded red cabbage (1/4 cup/jar)
4 cuties, peeled
1/2 cup shredded carrots or raw carrot salad (2 Tbsp/jar)
Garnish: green onions, cilantro, crushed nuts like peanuts
Chicken Marinade
1 lb chicken breast
1/3 cup coconut aminos or teriyaki sauce
1 tsp garlic powder and S+P
Peanut Sauce
1/4 cup peanut butter
1/4 cup coconut aminos or tamari/soy sauce
1-2 tsp sriracha
2 Tbsp rice vinegar
1/4 tsp ground ginger
1/4 tsp garlic powder
Juice 1/2 orange
1-2 Tbsp warm water
S+P
Directions
Marinate chicken first by seasoning chicken generously with S+P, garlic powder and adding sauce in a Ziploc bag with chicken. Massage chicken in juices, sealed and place in fridge to marinate for 30 min or overnight.
Prepare the rest of the mason jar toppings.
Make the dressing: In a bowl, prepare the dressing by adding in everything. Mix well until combined. May use 1-2 Tbsp warm water to adjust thickness of sauce.
Bake chicken or on stove top as desired.
Assemble: Start with a layer of peanut sauce (~2 Tbsp per jar). Follow with layers of cucumbers, carrots, red cabbage, diced chicken, orange slices, greens and garnish with green onions, cilantro, crushed peanuts.
Store: Seal the mason jars with lids and refrigerate until ready to eat. When ready, add everything to a bowl and mix. store in fridge no more than 4 days.
Notes
*Feel free to add more or less of each ingredient to each salad jar.
Dill Pickle Salad
This simple and nutritious chicken salad recipe incorporates diced dill pickles and pickle juice for a burst of flavor. Perfect for preparing in advance or for meal prepping lunches, it's a tasty way to utilize leftover cooked chicken.
This simple and nutritious chicken salad recipe incorporates diced dill pickles and pickle juice for a burst of flavor. Perfect for preparing in advance or for meal prepping lunches, it's a tasty way to utilize leftover cooked chicken.
If you have a fondness for pickles, you're in for a treat! Inspired by the Trader Joe's Dill-icious Chopped Salad Kit, I created a healthier version.
The salad showcases the tangy and salty essence of dill pickles, both in the garnish and the salad dressing. For an extra twist, consider adding dill-based sauerkraut such as Wildbrine or opt for a wholesome pickle chip brand like Siete Foods.
Interested in more effortless meal prep lunch ideas?
Dill pickle salad is a speedy dish, taking only 25 minutes from start to finish.
Rich in gut-friendly probiotics, high in protein, and low in carbs.
A convenient method to use up leftover batch-cooked chicken or rotisserie chicken.
The pickle flavor will leave you craving more!
GUT-FRIENDLY MEAL ADVANTAGES
To enhance your beneficial bacteria levels, this meal is part of a seven-day meal plan that emphasizes foods promoting healthy gut bacteria growth and maintenance.
You can access this meal plan through the Nourished Roots Membership Plan! Here's the direct link for access!
Check out the fun meal prep hacks in the video below!
If you try this recipe, let us know! Leave a comment, rate it, and don’t forget to tag a photo to #fromtherootsblog on Instagram. We love seeing what you come up with!
This simple and nutritious chicken salad recipe incorporates diced dill pickles and pickle juice for a burst of flavor. Perfect for preparing in advance or for meal prepping lunches, it's a tasty way to utilize leftover cooked chicken.
SERVINGS: 4 PREP TIME: 15 MIN COOK TIME: 25 MIN
Ingredients
SALAD BASE
3 cups shredded chicken (can use rotisserie)
4 cups massaged kale
1 cup dill pickles, chopped
1/2 cup radishes, sliced
2-4 hard boiled eggs
1-2 cups crushed crackers
1 cup sauerkraut (optional)
SALAD DRESSING
1 cup plain greek yogurt
2-4 Tbsp pickle brine
1 Tbsp dill weed (can take from dill container)
1 tsp garlic powder
1/2 tsp maple syrup
S+P (to season)
Directions:
To make dressing: In a small bowl, mix all ingredients until combined. Taste test to see if you need to add more seasoning, acid, or more pickle chunks!
To assemble the salad, combine all vegetable ingredients from SALAD BASE to a large mixing bowl and toss to combine well. Add in dressing and breadcrumbs and toss and garnish with quartered or halved eggs, serve and enjoy!
*To make hardboiled eggs: Place eggs in a small pot. Cover eggs with water and cover pot with lid. Bring water to boil. Once boiling, turn off and set a timer for 12-14 min. When done, drain and place eggs in an ice cold water bath to stop the cooking process. Peel the shells off once cool to touch.
Notes: I use this brand crackers so that this recipe is gluten and grain free!
Ahi Poke Bowl & Stack
I don’t eat out often, but when I do, I get a poke bowl...and I get ALL THE TOPPINGS! Just like a salad, poke bowls are so versatile. You can create so many fun flavor combinations all by the toppings you choose. And for this recipe, it’s the same way!
So even though I have preferred toppings that were used for this specific meal, feel free to change them out to your liking.
But for this recipe, I give you my classic, go-to way of creating a poke bowl that can also be transformed into a stack (if you want to be fancy!)
Ahi Poke Bowl + Stack - 2 fun versions that you can make for a lunch meal prep, refreshing light dinner, or for a crowd!
I don’t eat out often, but when I do, I get a poke bowl...and I get ALL THE TOPPINGS! Just like a salad, poke bowls are so versatile. You can create so many fun flavor combinations all by the toppings you choose. And for this recipe, it’s the same way!
So even though I have preferred toppings that were used for this specific meal, feel free to change them out to your liking.
But for this recipe, I give you my classic, go-to way of creating a poke bowl that can also be transformed into a stack (if you want to be fancy!)
Ahi tuna is my favorite protein so I created a marinade that is full of Asian flavors, a sauce that is sweet but spicy, and toppings that pair really well with those flavors.
Since we are searing the tuna, this recipe is great as a meal prep. So if you want to make 4 servings and divide it amongst you and someone else for the next 2 days then you can. It’s also great as a light and refreshing dinner or for a crowd as people can top their bowl or stack however they would like!
To see how I turn this into a stack version, check out our IG reel here!
So stop paying $10-$15 for a poke bowl and make it yourself!
If you try this recipe, let us know! Leave a comment, rate it, and don’t forget to tag a photo to #fromtherootsblog on Instagram. We love seeing what you come up with!
Ahi Poke Bowl + Stack - 2 fun versions that you can make for a lunch meal prep, refreshing light dinner, or for a crowd!
Ingredients
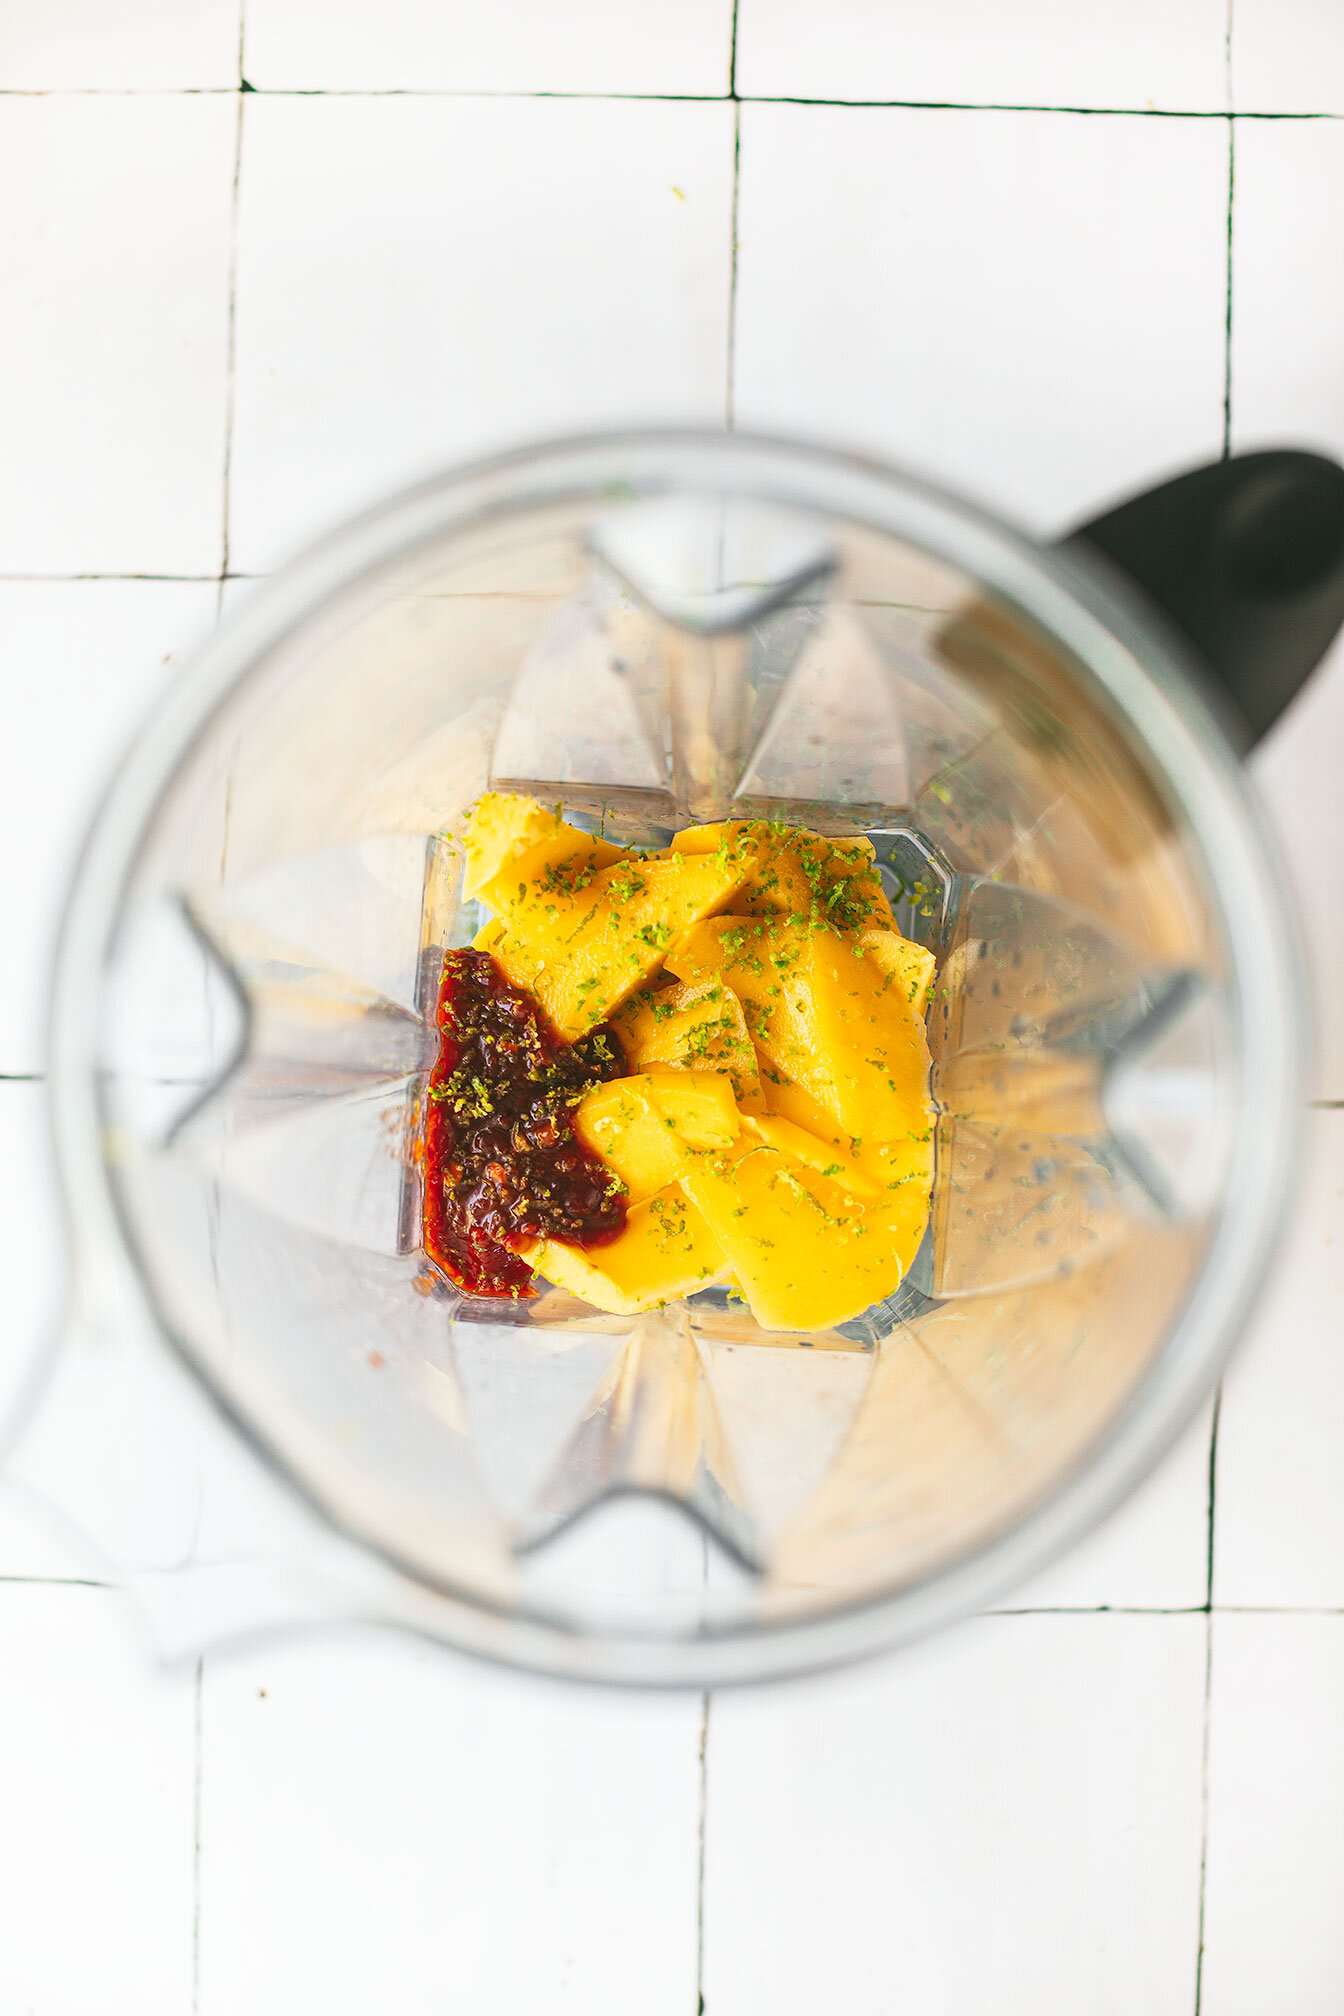
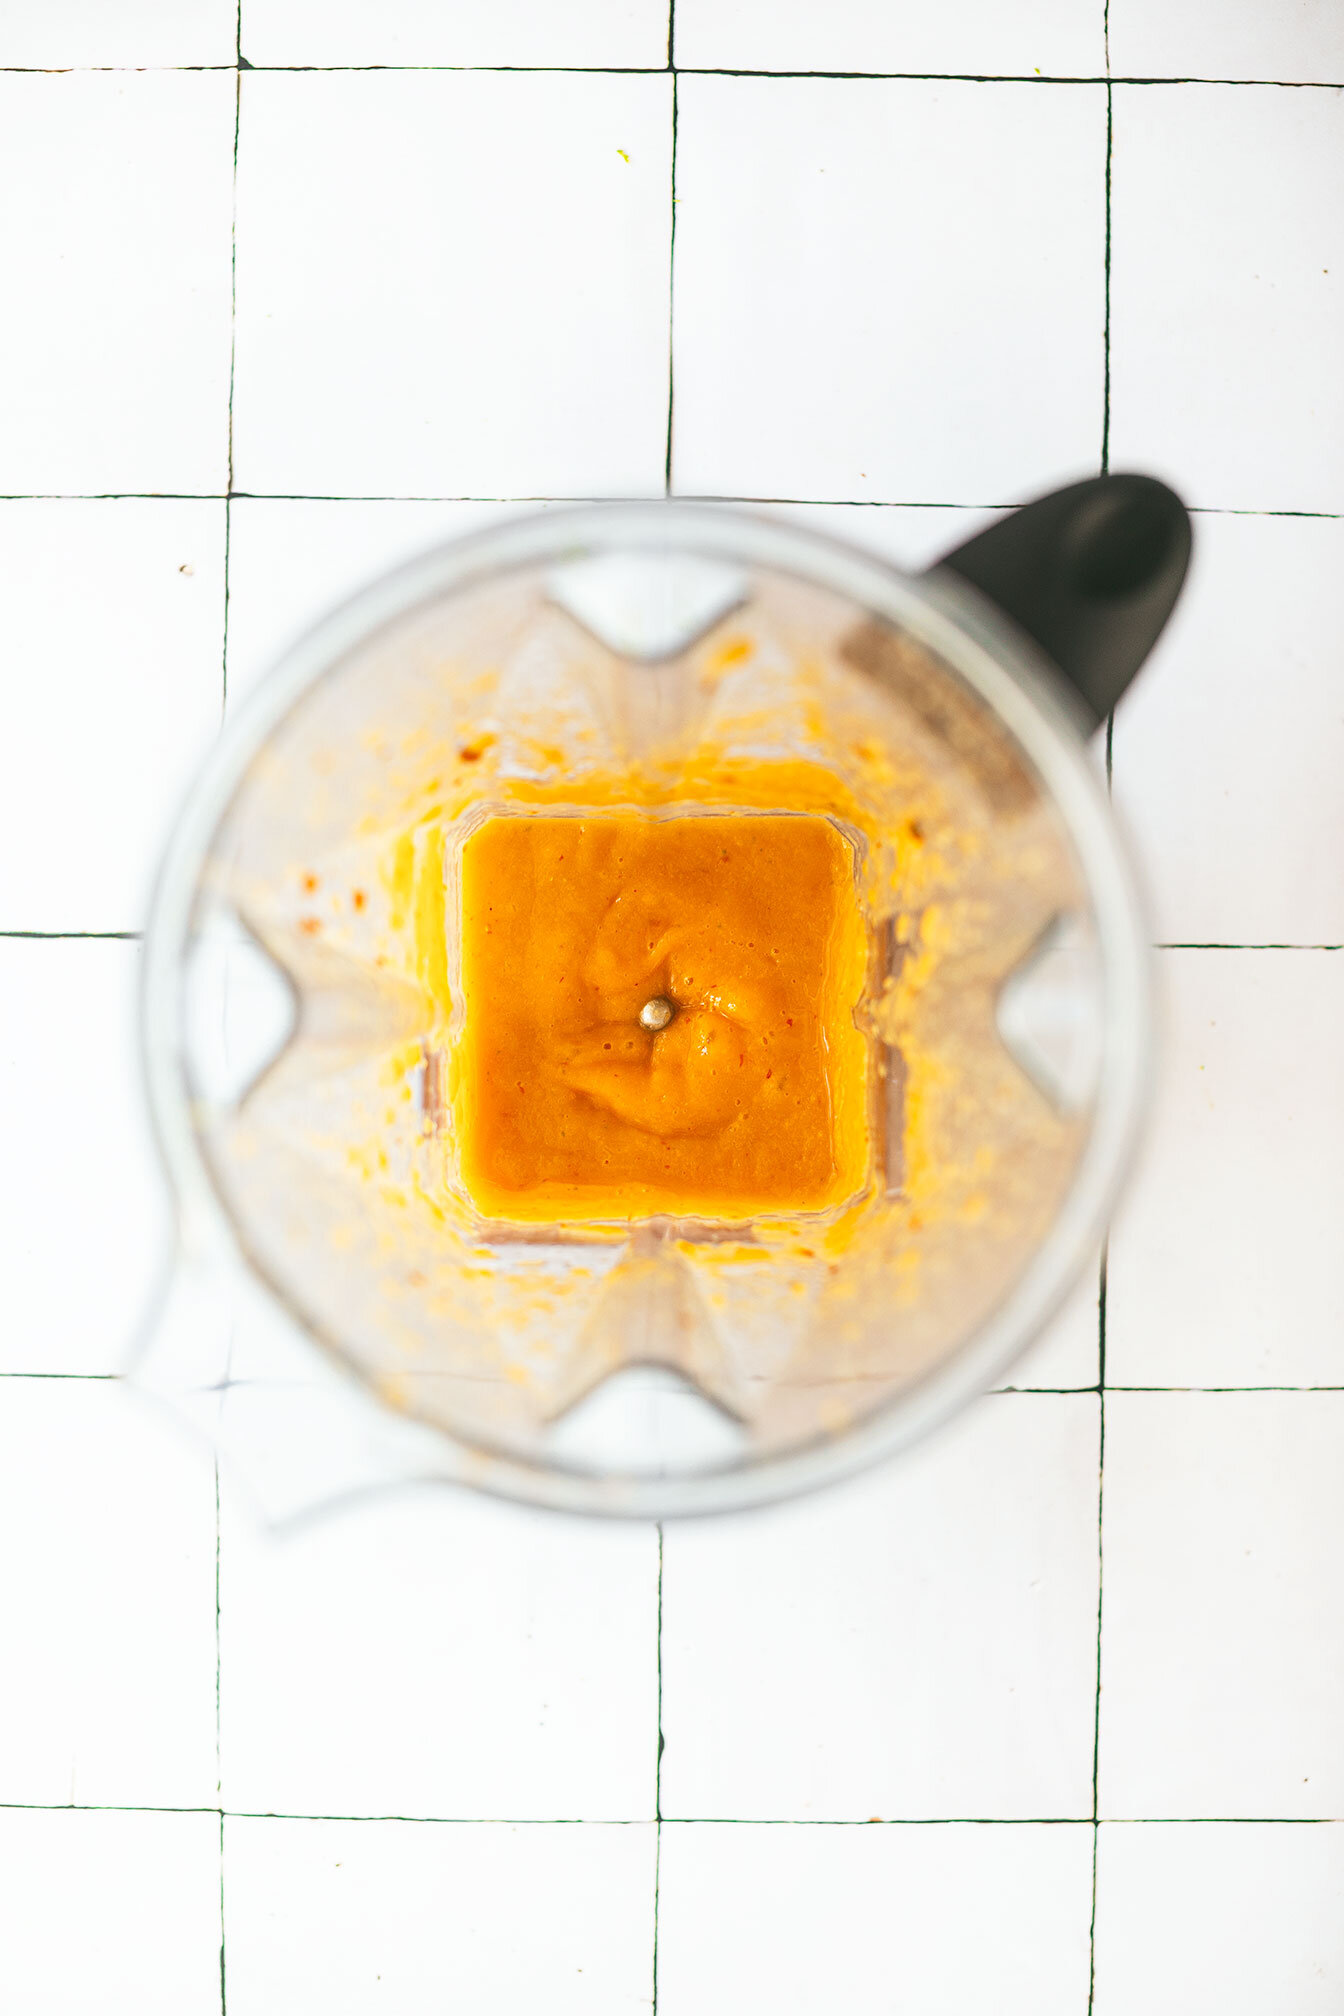
Chili mango sauce
1 whole mango (chunks)
½ juice of 1 lime + zest
1-2 tsp chili garlic sauce
Ahi Tuna marinade
2 ahi tuna steaks (4-6 oz 1.5” thick each)
¼ cup water
2 Tbsp white miso paste
2 Tbsp low-sodium GF tamari
1 Tbsp honey
1 knob fresh garlic (minced)
1 Tbsp sesame oil
1 tsp chili oil
½ juice of 1 lime + zest
Bowl/Stack components (makes 4 servings)
1-2 cups sprouted brown rice
2 cups edamame
Seared ahi tuna steaks
And top with your favorite poke bowl garnishes like mango chili sauce, English cucumbers, shaved carrots, jalapeno slices, nori sheets, green onion, pickled ginger, avocado slices, and microgreens
Directions
Prepare the marinade by combining all ingredients in a shallow bowl or Ziploc bag and marinate in the fridge for at least 30 minutes.
While your steaks are marinating, prepare the chili mango sauce by simply adding all ingredients into a blender and blend until smooth and creamy.
Prepare the rest of the ingredients by steaming your rice and chopping veggies.
Sear tuna steaks either on the grill or in a skillet on medium-high heat (4-6 minutes per side).
To make ahi poke stack version: You can use a 4” springform pan or use a greased 1 cup to create your stack mold. Layer starting with brown rice first and ahi tuna at the end if using a springform pan or the opposite sequence if using a measuring cup.
To make ahi poke bowl version: Add all components and garnishes in a bowl and serve!
Divide all ingredients into ¼ in order to make 4 servings!
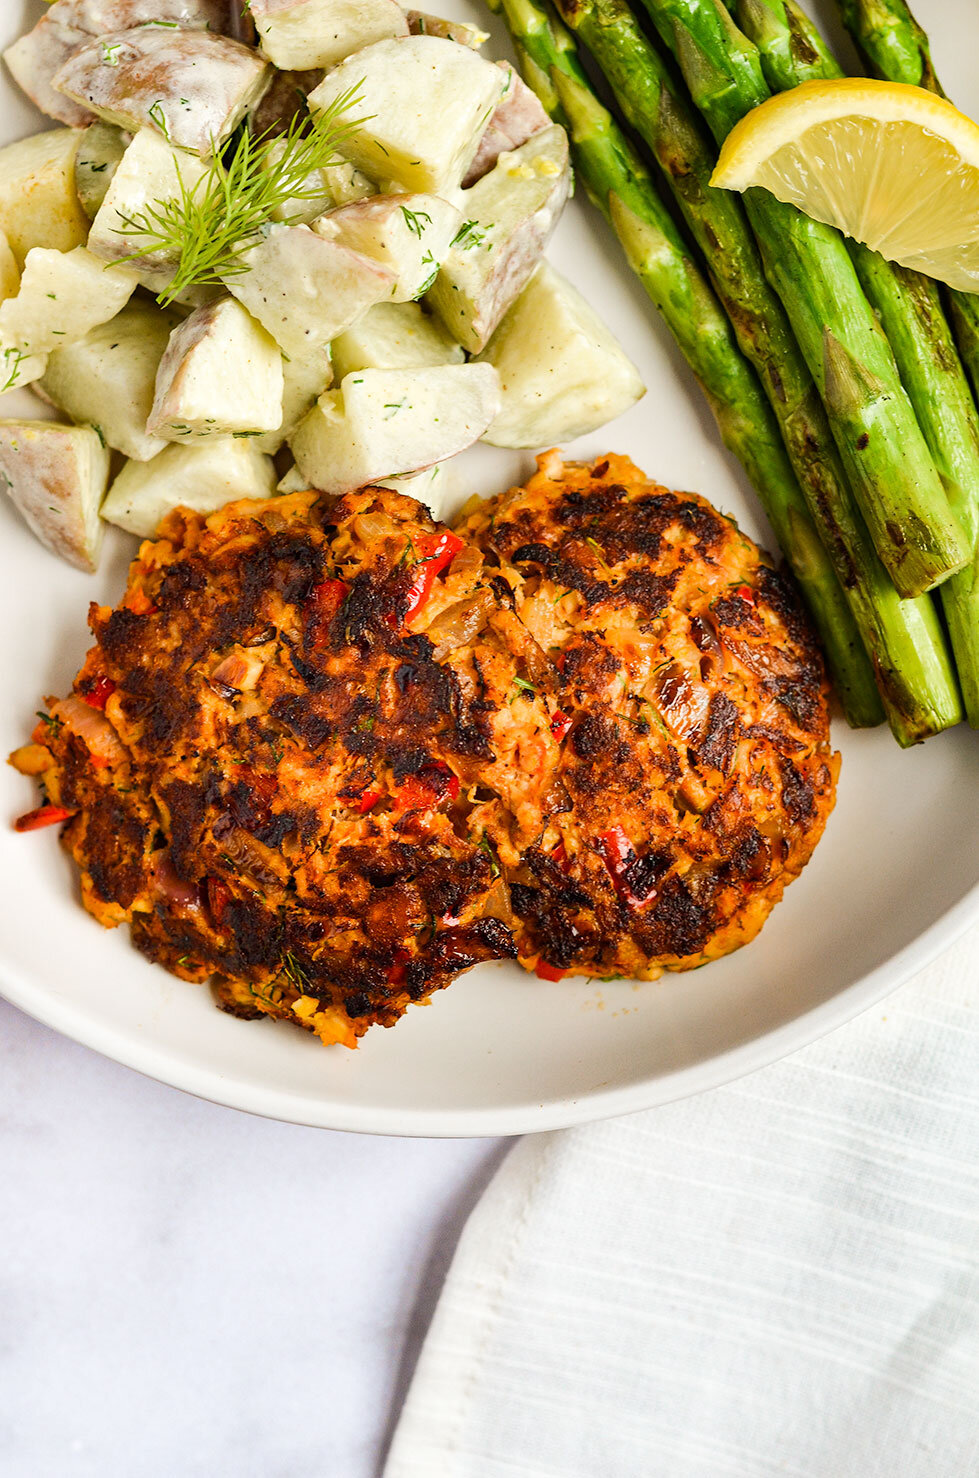
Healthy Salmon Patties with Lemon Dill Potato Salad
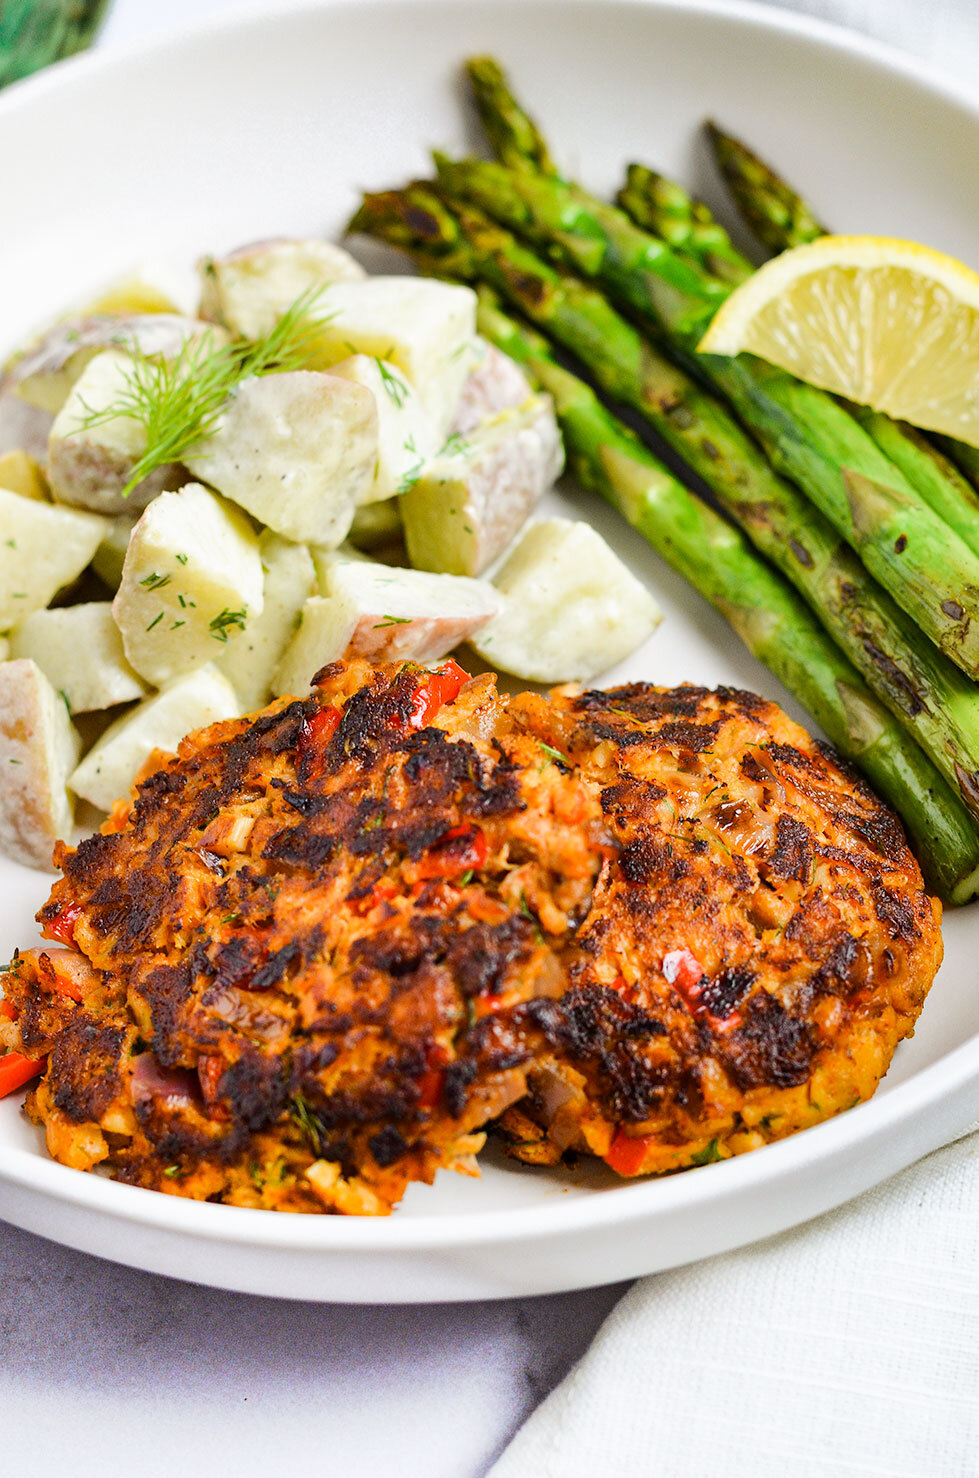
Growing up as a kid, salmon patties were my jam! I loved them so much, my mother would make salmon patties, mashed potatoes, and peas as my birthday dinner meal. There just wasn’t anything that could top that meal, haha!
So in honor of my childhood favorite food, I present to you healthier, less oily, and processed salmon patties! These patties are gluten and dairy-free, paleo, and use clean ingredients that can be made in less than 30 minutes.
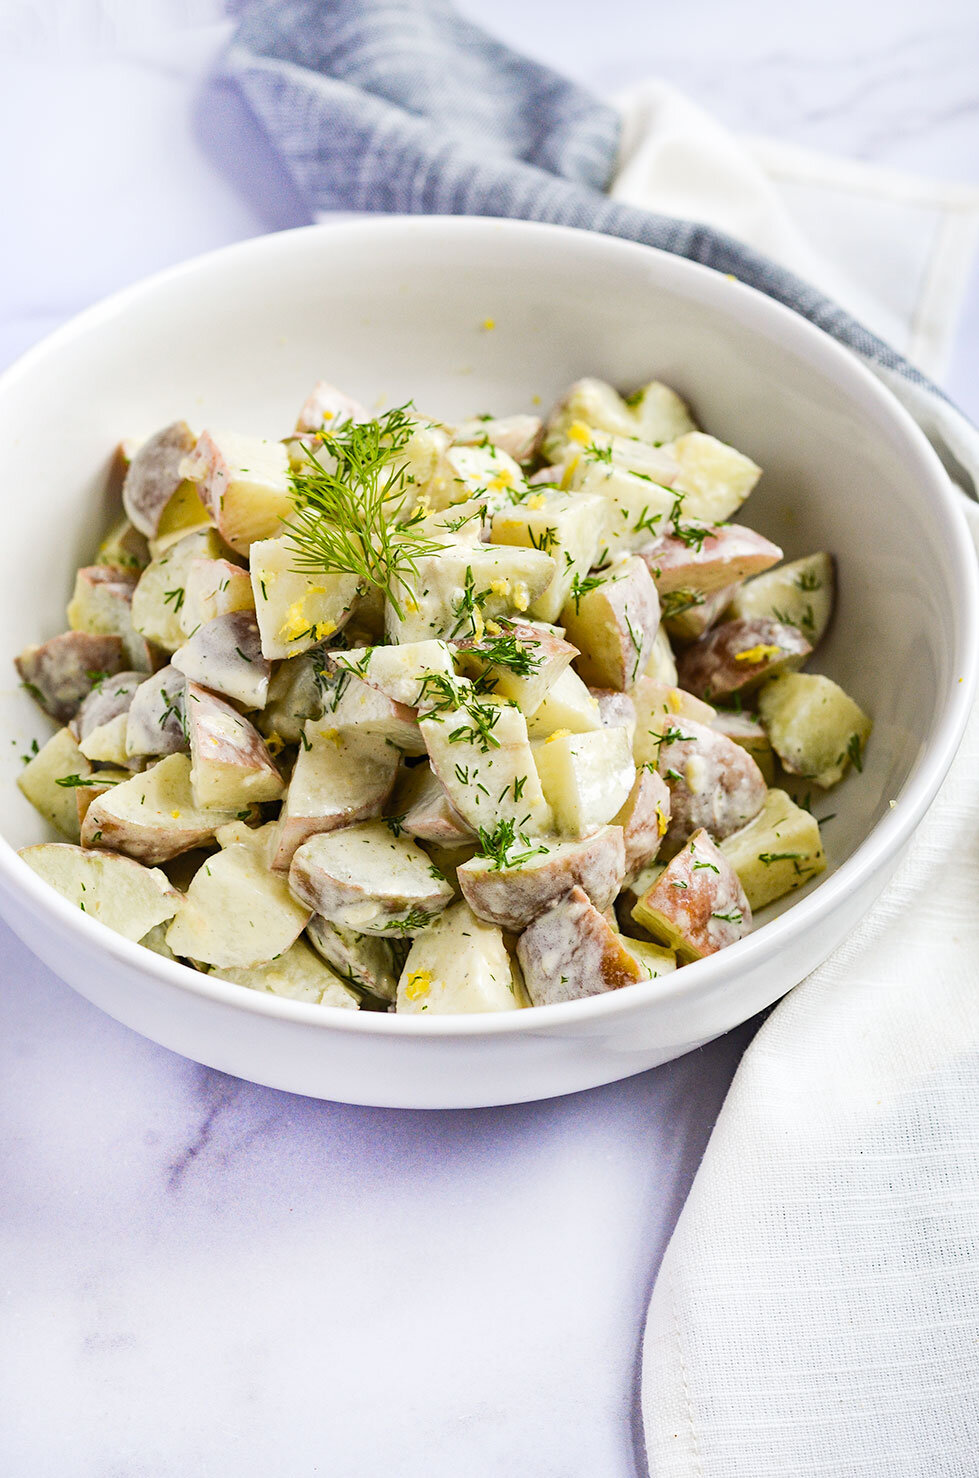
To turn this into meal prep or a full dinner recipe, I have added a simple lemon dill potato salad (dairy-free) and grilled asparagus. Just simply divide all ingredients into 3-4 servings and it’s great to store in the fridge for up to 3-5 days.
Healthy Salmon Patties with Lemon Dill Potato Salad - A healthier, less oily, and processed take on salmon patties! Patties are gluten/dairy-free and paleo and the potato salad is dairy-free - a 30-minute quick dinner meal or meal prep recipe!
Growing up as a kid, salmon patties were my jam! I loved them so much, my mother would make salmon patties, mashed potatoes, and peas as my birthday dinner meal. There just wasn’t anything that could top that meal, haha!
So in honor of my childhood favorite food, I present to you healthier, less oily, and processed salmon patties! These patties are gluten and dairy-free, paleo, and use clean ingredients that can be made in less than 30 minutes.
To turn this into meal prep or a full dinner recipe, I have added a simple lemon dill potato salad (dairy-free) and grilled asparagus. Just simply divide all ingredients into 3-4 servings and it’s great to store in the fridge for up to 3-5 days.
To make this a quick and easy meal prep, I use canned wild salmon, specifically Wild Planet. You can also use leftover salmon if you have it as well. The ingredients are pretty simple and most likely, you will have everything in your pantry or fridge.
If you try this recipe, let us know! Leave a comment, rate it, and don’t forget to tag a photo to #fromtherootsblog on Instagram. We love seeing what you come up with!
Healthy Salmon Patties with Lemon Dill Potato Salad - A healthier, less oily, and processed take on salmon patties! Patties are gluten/dairy-free and paleo and the potato salad is dairy-free - a 30-minute quick dinner meal or meal prep recipe!
Ingredients
For the Salmon Patties
2-(6 oz) cans wild pink salmon (drained)
1 egg (beaten)
½ red onion (finely diced)
½ red bell pepper (finely diced)
4 cloves garlic (minced)
1 Tbsp mayo
2 Tbsp fresh dill
½ lemon (juice)
1 Tbsp avocado oil + more for pan-frying
1 tsp dijon mustard
1 tsp smoked paprika
¼ tsp S&P
For the lemon dill potato salad
1 bag (24 oz) unpeeled golden or tri-color baby potatoes
2 Tbsp mayo
1 Tbsp dijon mustard
1 clove garlic (minced)
1 Tbsp fresh dill
1 tsp avocado oil
½ lemon (juice)
S&P to taste
Side
Asparagus (bunch)
Directions
To make the salmon patties:
Add one Tbsp avocado oil to a medium pan and saute the onion, garlic, and red pepper for 6-8 minutes, or until soft and translucent. Remove from heat and let cool.
To a large mixing bowl, add the cooled onion mixture along with salmon, egg, mayo, dill, lemon juice, mustard, and seasonings. Combine all ingredients with your hands until well mixed.
Form the salmon mixture into small patties with your hands and place them to the side (make about 6 patties).
Heat 1-2 Tbsp avocado oil in a large pan on medium heat and cook the salmon patties for 3-4 minutes on each side. Remove the salmon patties to a paper towel-lined plate.
To make the potato salad:
Boil potatoes in salted water until soft, approx 10 minutes.
Drain and let cool.
While the potatoes are boiling, combine the rest of the ingredients in a large bowl.
Once the potatoes are done and are cooled, cut the potatoes into 2-4 pieces and mix into the bowl with the wet ingredients until all the potatoes are fully coated in the mixture.
Serve with additional salt and pepper to taste along with fresh dill and lemon zest. Serve room temperature or refrigerate until ready to serve.
To turn this into a meal/meal prep, simply add grilled asparagus as the other side. Divide patties, potato salad, and asparagus into 3-4 servings, and enjoy!
Notes
I use the following brands for tuna - Wild Planet, mayonnaise - Primal Kitchen
To make the salmon patties in the oven rather than pan-frying: line a baking sheet or spray avocado oil spray on a baking sheet and bake at 400 degrees for 10-15 minutes on each side.
If you would like to make a dipping sauce, simply mix ½ cup mayonnaise, 1 Tbsp finely chopped fresh dill, juice, and zest of half lemon and S&P together until combined and serve!
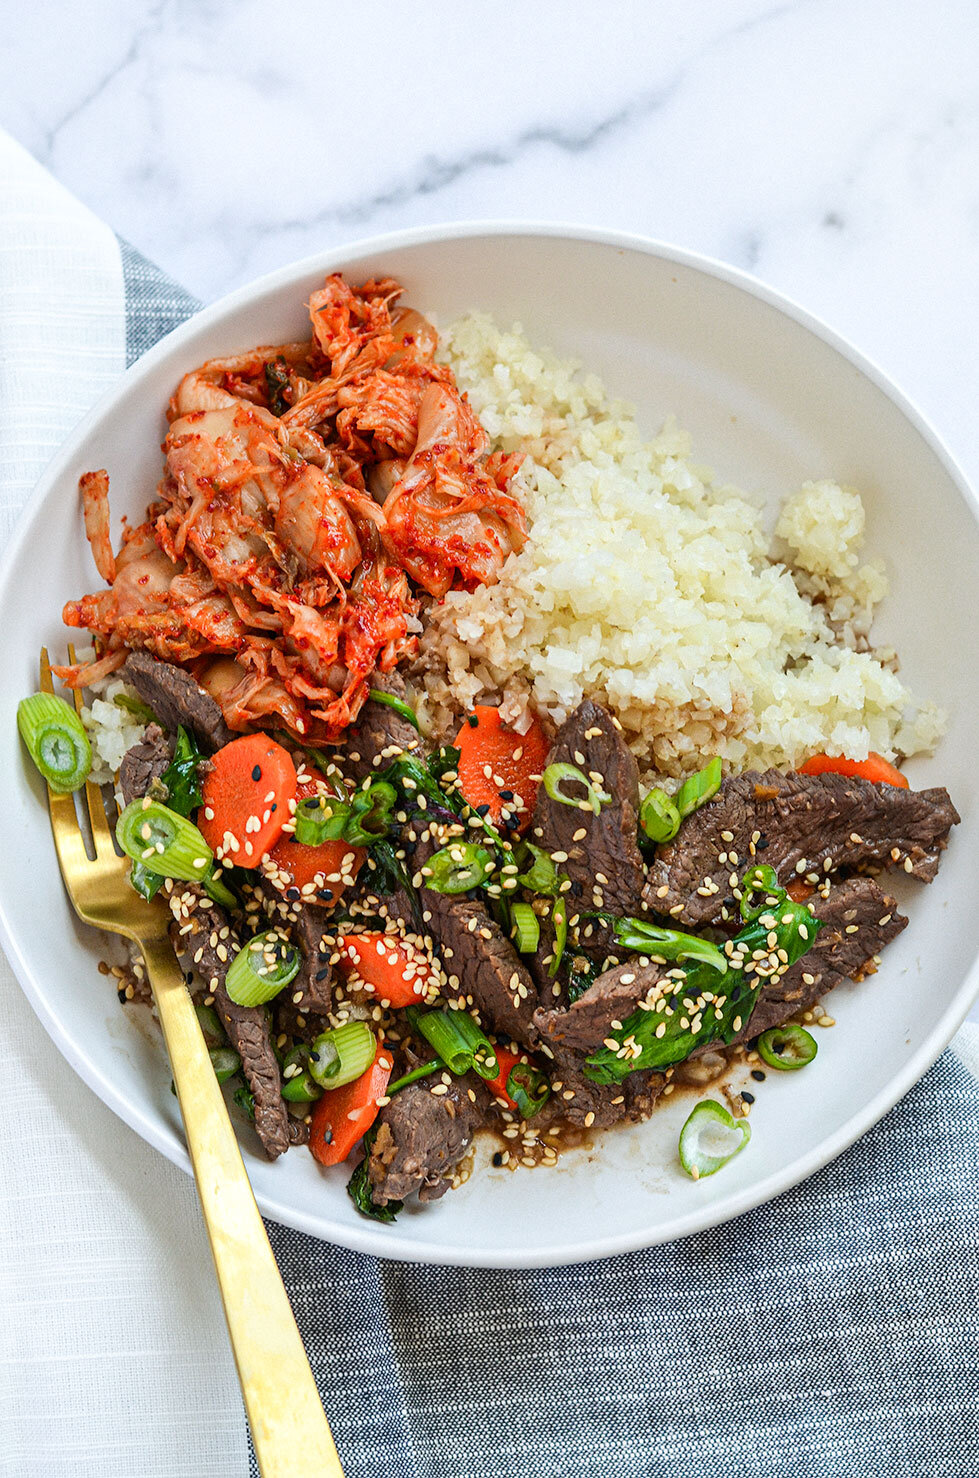
Beef Bulgogi Bowls
If you are wanting something quick and easy to make on your #sundaymealprep days, then look no further! For this recipe, you are simply creating a marinade with ingredients that most would have in their pantry and allow your protein to marinate as you assemble the add-ins for your bowl!
If you notice in the add-in ingredients, there is hardly any prep to this meal! For example, I like to use pre-washed organic spinach, this brand kimchi, and frozen cauliflower rice! That’s pretty much it!
Beef Bulgogi Bowls - A simple and nutritious low carb/high protein lunch meal prep!
Originally, I created this recipe for Emily Schromm’s April edition of Empress but since most of my followers want more meal prep recipes, you are getting this recipe, too!
If you are wanting something quick and easy to make on your #sundaymealprep days, then look no further! For this recipe, you are simply creating a marinade with ingredients that most would have in their pantry and allow your protein to marinate as you assemble the add-ins for your bowl!
If you notice in the add-in ingredients, there is hardly any prep to this meal! For example, I like to use pre-washed organic spinach, this brand kimchi, and frozen cauliflower rice! That’s pretty much it!
Now, let’s get to the recipe!
If you try this recipe, let us know! Leave a comment, rate it, and don’t forget to tag a photo to #fromtherootsblog on Instagram. We love seeing what you come up with!
Beef Bulgogi Bowls - A simple and nutritious low carb/high protein lunch meal prep!
Ingredients
Marinade
1.5 lb flank steak (can sub skirt or sirloin steak)
½ pear
¼ cup coconut aminos
3 cloves garlic
1 Tbsp fresh ginger knob
1 Tbsp toasted sesame seed oil
1 tsp liquid smoke
Add-ins
2 heaping cups spinach
1 cup carrots (chopped)
For assembling the bowls
3 cups cauliflower rice
1 cup kimchi
4 fried free-range eggs
Green onions
Sesame seeds
Directions
In a blender or processor, add the pear, coconut aminos, garlic, ginger, oil, and liquid smoke. Add blended ingredients to a large bowl. *If you do not have a blender, finely chop pear, garlic, and ginger and whisk all marinade ingredients in a large bowl.
Add the sliced beef to the bowl with the marinade and toss to combine. Cover and refrigerate the beef for a minimum of two hours and up to overnight.
When you are ready to cook the steak, heat 1 Tbsp oil in a skillet over medium heat. Add the beef strips and chopped carrots into the skillet. Pour in any remaining marinade also. Cook the beef and carrots, stirring occasionally until all of the marinade juices thicken and begin to caramelize. The beef will be coated with the sauce and will absorb all of the sauce flavors.
Cook for about 10-15 minutes or once the sauce has cooked down enough so it is just coating the meat pieces and the carrots are soft. For the last five minutes, add the spinach.
Assemble the bowls: Divide the rice among four serving bowls and top it with the beef bulgogi. Top each bowl with a fried egg (optional), a portion of kimchi, and garnish with green onions and sesame seeds.
Notes
If you are strictly paleo, you can sub out the sesame seed oil for avocado oil.
This recipe is great for meal prep - if you are wanting to add an egg to your meal, simply fry an egg in the morning or boil an egg beforehand for an easier way to pack your lunch!


