Sort by Category
- October 2025
- September 2025
- August 2025
- June 2025
- August 2024
- July 2024
- June 2024
- May 2024
- February 2024
- January 2024
- December 2023
- November 2023
- October 2023
- September 2023
- August 2023
- July 2023
- March 2023
- February 2023
- January 2023
- December 2022
- November 2022
- October 2022
- September 2022
- August 2022
- June 2022
- May 2022
- April 2022
- March 2022
- February 2022
- January 2022
- December 2021
- November 2021
- October 2021
- September 2021
- August 2021
- July 2021
- June 2021
- May 2021
- April 2021
- March 2021
- February 2021
- January 2021
- December 2020
- November 2020
- October 2020
- September 2020
- August 2020
- July 2020
- June 2020
- May 2020
- April 2020
- March 2020
- February 2020
- January 2020
- December 2019
- November 2019
- October 2019
- September 2019
- August 2019
- July 2019
- June 2019
- May 2019
- April 2019
- March 2019
- February 2019
- January 2019
- December 2018
- November 2018
- October 2018
- September 2018
- August 2018
- July 2018
- June 2018
- May 2018
- April 2018
- March 2018
- February 2018

Beet and Cabbage Sauerkraut
Sauerkraut does not have to be a daunting task, people! It can actually be pretty fun! Requiring 10-20 minutes of prep time, then letting nature take its course.
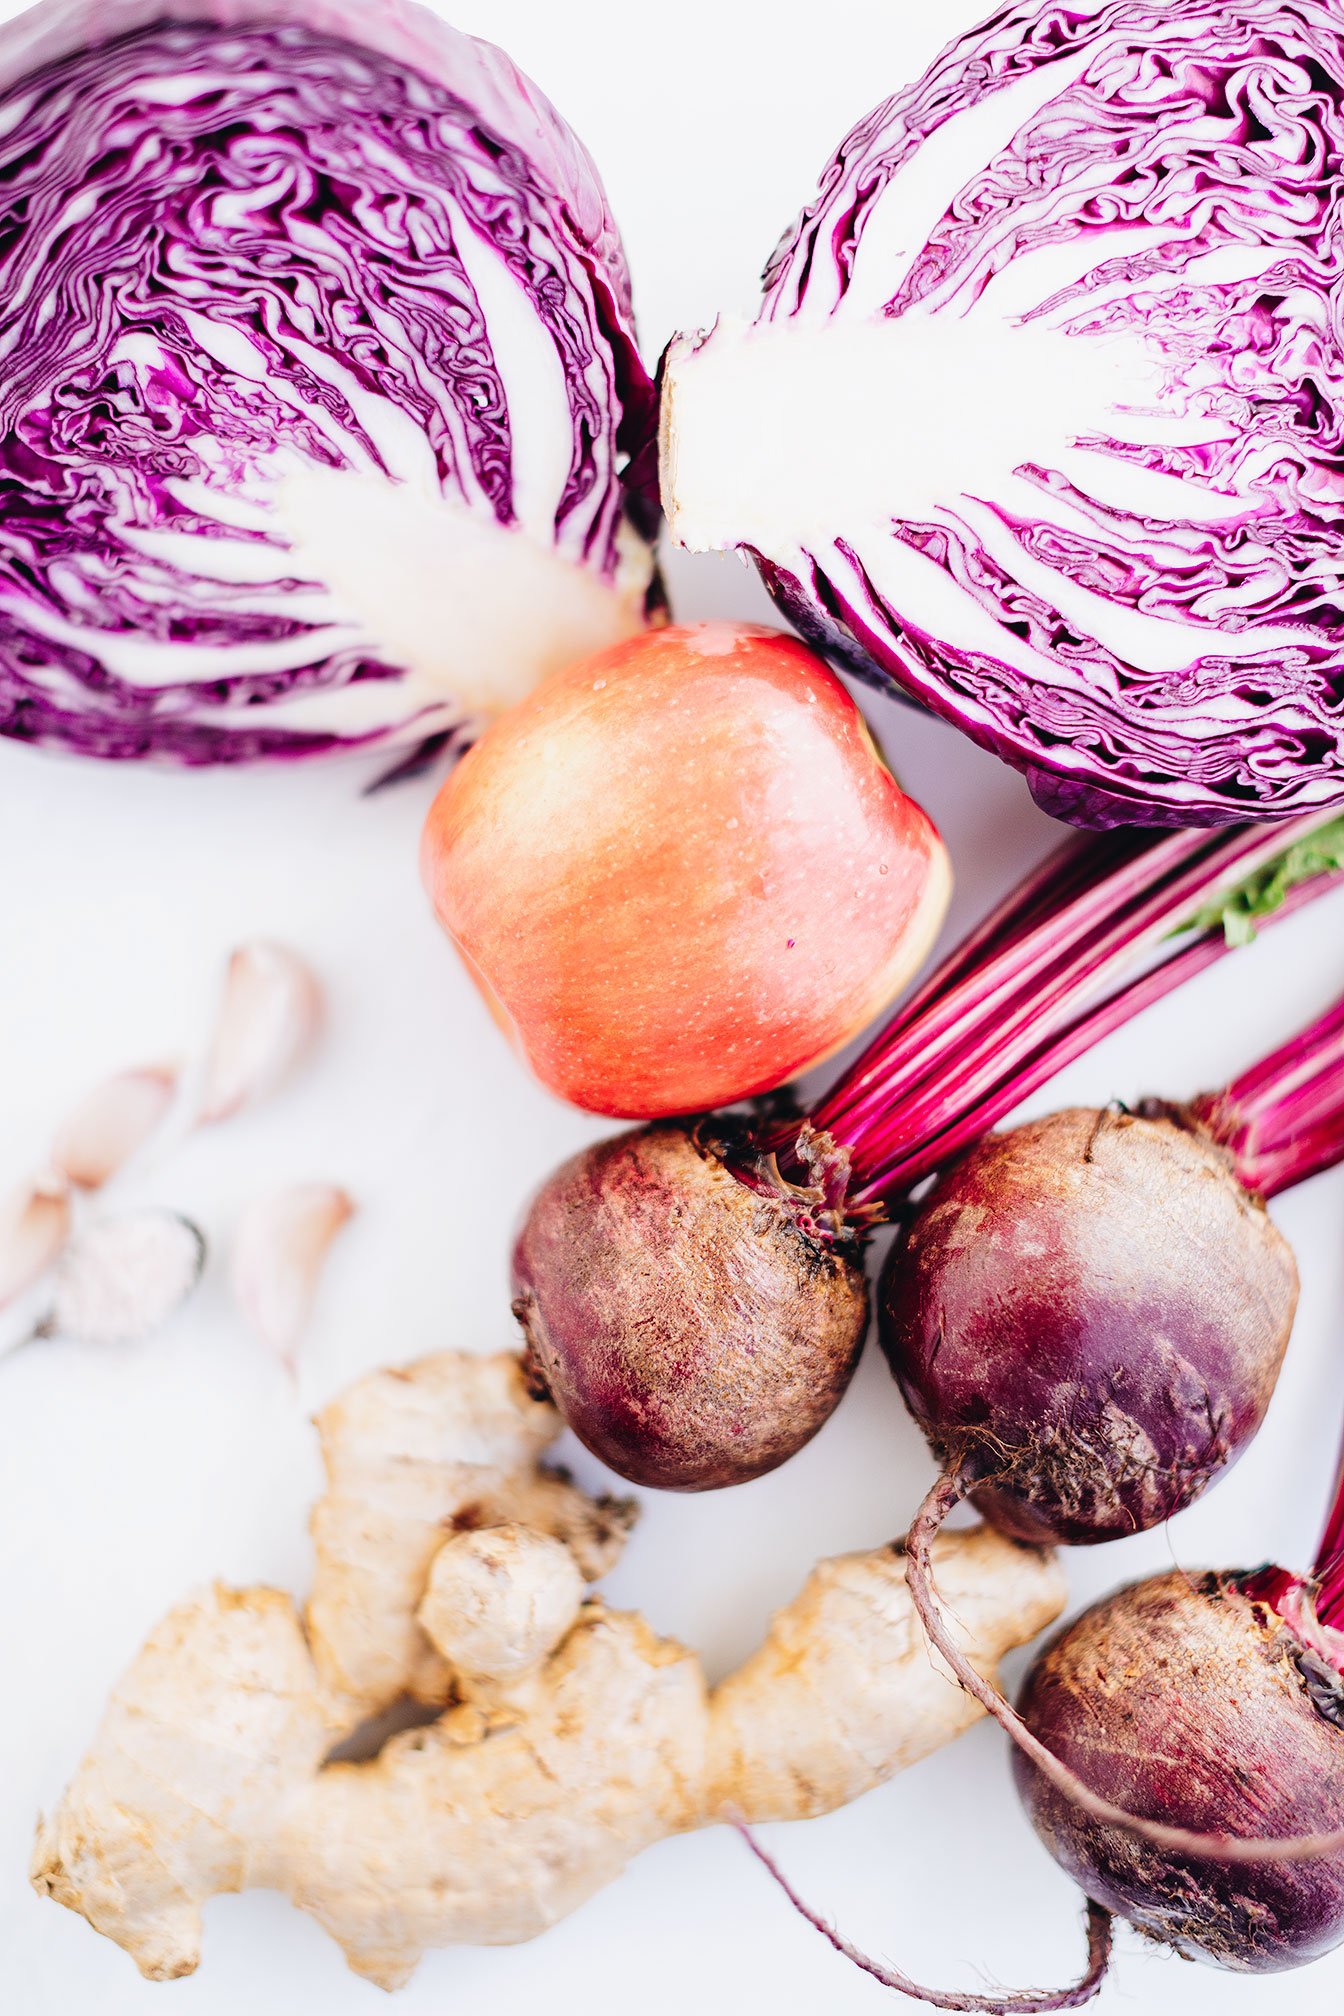
There are many sauerkraut flavor variations but for this recipe, we are using red beets, red cabbage, ginger and apple - inspired by my favorite store bought sauerkraut - Wildbrine red beet and cabbage sauerkraut.
A simple yet flavorful small batch beet and cabbage sauerkraut recipe that is packed with probiotics and beneficial bacteria.

Sauerkraut does not have to be a daunting task, people! It can actually be pretty fun! Requiring 10-20 minutes of prep time, then letting nature take its course.
There are many sauerkraut flavor variations but for this recipe, we are using red beets, red cabbage, ginger and apple - inspired by my favorite store bought sauerkraut - Wildbrine red beet and cabbage sauerkraut.
The sweet and tangy flavors seem to pair nicely with most dishes (i.e. eggs, sandwiches, tacos, wraps and if you are a part of the Nourishment program - nourish bowls!) as well as provide amazing texture to a dish!

Typically, when we talk about foods that are rich in probiotics, we’re referring to foods that have been bacterially fermented. They help introduce beneficial bacteria into our digestive tracts, help keep harmful bacteria at bay, provide helpful digestive enzymes, are nutrient dense, and are low cost - in fact, the ingredients cost $6 to make and it produced 30+ servings!
Gut Friendly Tip
When buying Kombucha, water kefir, or sauerkraut, look for “raw” or “unpasteurized” on the packaging. Pasteurization applies high heat to a food in order to kill bacteria (pathogenic contaminants and probiotics). While this process extends shelf life, it also kills all the wonderful microbes that make these foods uniquely beneficial!

If you try this recipe, let us know! Leave a comment, rate it, and don’t forget to tag a photo to #fromtherootsblog on Instagram. We love seeing what you come up with!
A simple yet flavorful small batch beet and cabbage sauerkraut recipe that is packed with probiotics and beneficial bacteria.
Prep Time: 20 minutes Yield: 30+ servings
Ingredients
1 small red cabbage (finely shredded or chopped)
2 medium raw beets (finely shredded or chopped)
1 inch ginger root (grated)
3 cloves garlic (optional) (grated)
1 medium red apple (honeycrisp) or pear (finely chopped)
2 tsp celtic sea salt
Directions
Prepare ingredients by finely chopped / mandolin sliced cabbage and raw beets.
Sterilize any equipment that you will be using (i.e. mason jars) to allow for proper fermentation. You can do this by pouring boiling water over clean jars/lids and drying completely. Allow the temperature to come back to room temperature before adding ingredients.
To a large mixing bowl, add the finely shredded cabbage and top with salt. Wash hands thoroughly and massage cabbage for ten minutes. You will notice when to stop massaging the cabbage when it starts to soften, shrink in size, and release water.
Add shredded beet, ginger, garlic, and apple and massage once more with clean hands for an additional 5 minutes. Taste test and adjust flavor, grated ginger for more zing, salt for more saltiness, or garlic for more garlicky flavor.
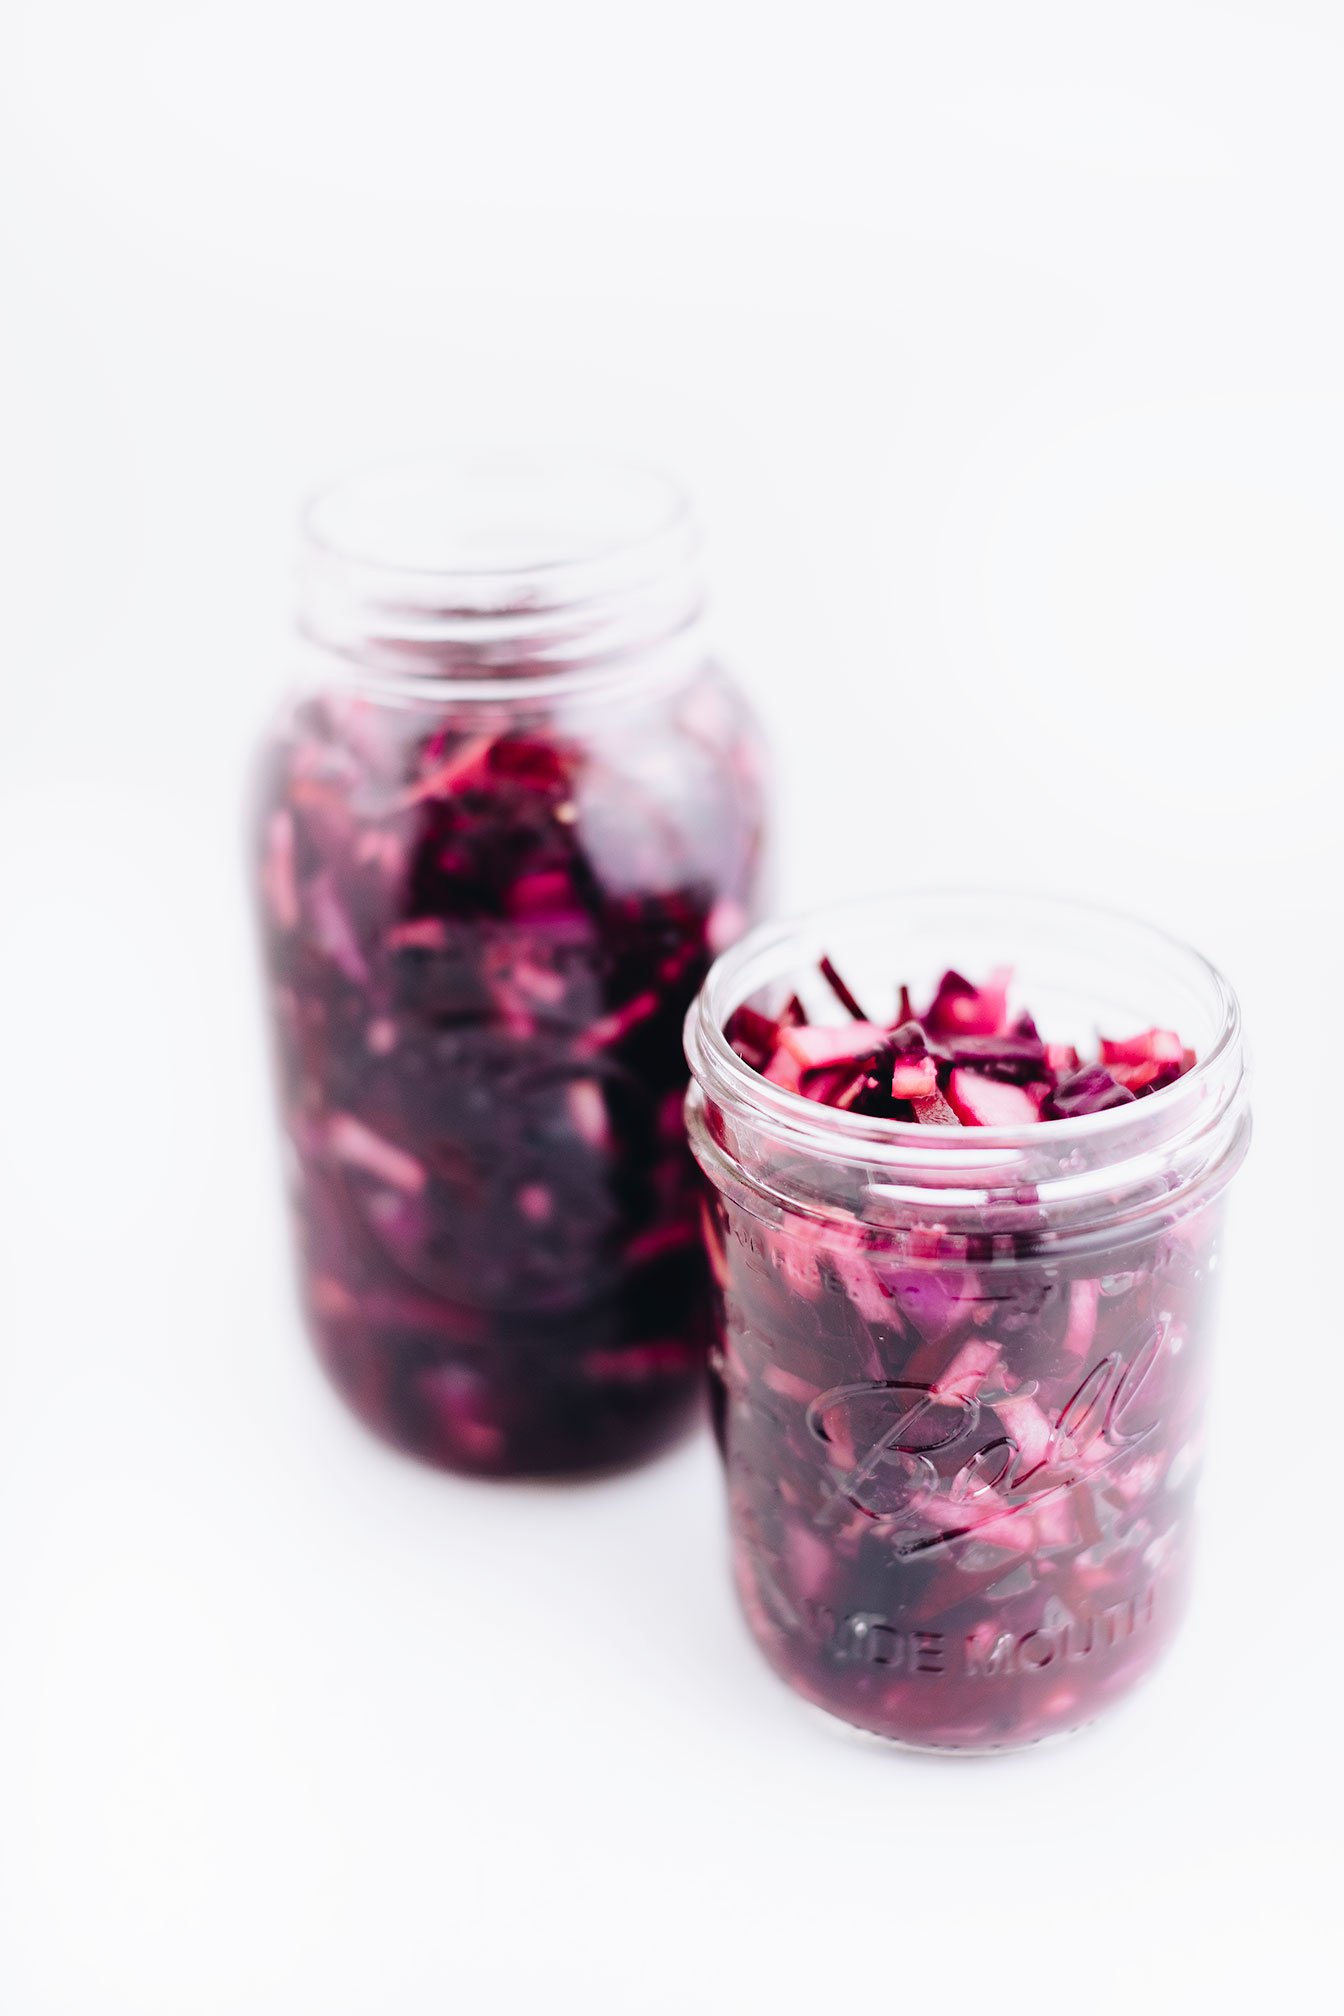
Place mixture and juice in sterilized mason jars and pack it down with a muddler or with the end of a wooden spoon.
If there is not enough liquid to cover, mix one tsp sea salt with 1 cup filtered water and fill until the mixture is submerged - leaving at least an inch of space at the top of the jar.
Cover the jar loosely with the lid and transfer on a pan or bowl (for catching any liquid during the fermentation process)
Place in a dark place (out of direct sunlight) (ideally 65 degrees F). Fermentation may take longer if room temperature is on the colder side.
Check for activity (tiny bubbles should rise to the top) after 3-4 days. The longer it sits and ferments (up to 2-3 weeks), the tangier it will become, so sample occasionally with a clean utensil. Once it has reached the desired tanginess, cover securely and transfer to the fridge when ready to eat.
Sauerkraut should be kept in the fridge for at least 3-6 months.
Notes
Liquid will naturally seep out during the first few days of fermentation as carbon dioxide - bubbles will be produced. That is why it’s best to sit your jars in a pan or bowl!
You need the natural bacteria from a whole cabbage so please do not use pre-shredded cabbage.
Any cabbage that is exposed to air will likely get moldy. Feel free to remove the mold if it is just on the top, you likely can salvage the rest. Always trust your sense of smell though. Fermented cabbage mixture should smell pleasantly sour. Never eat anything that smells yeasty or frankly repulsive.
SHOP OUR FAVORITE TOOLS + INGREDIENTS FOR THIS RECIPE!


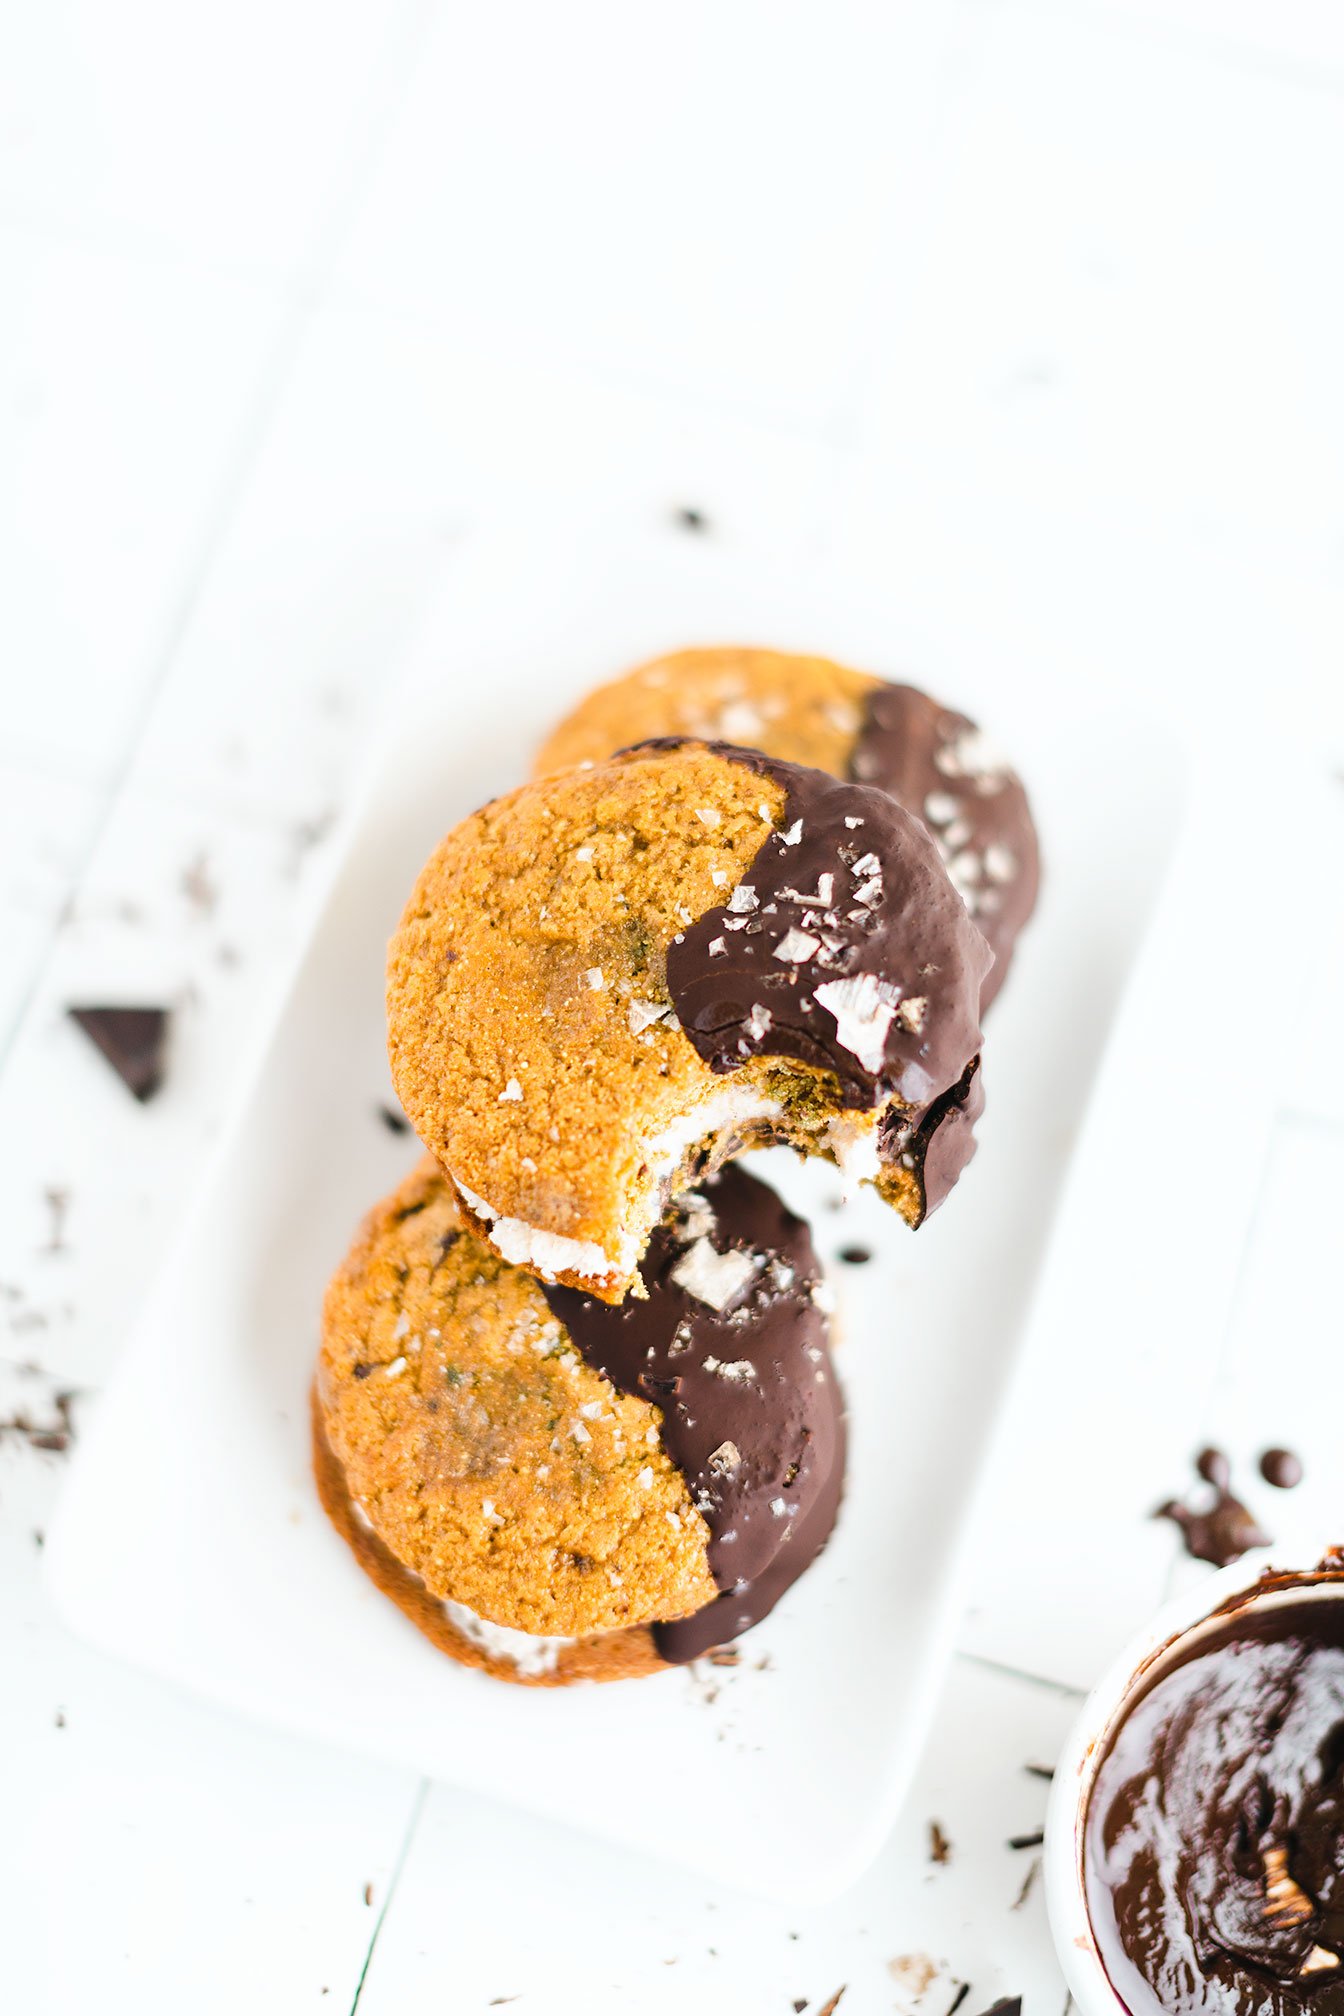
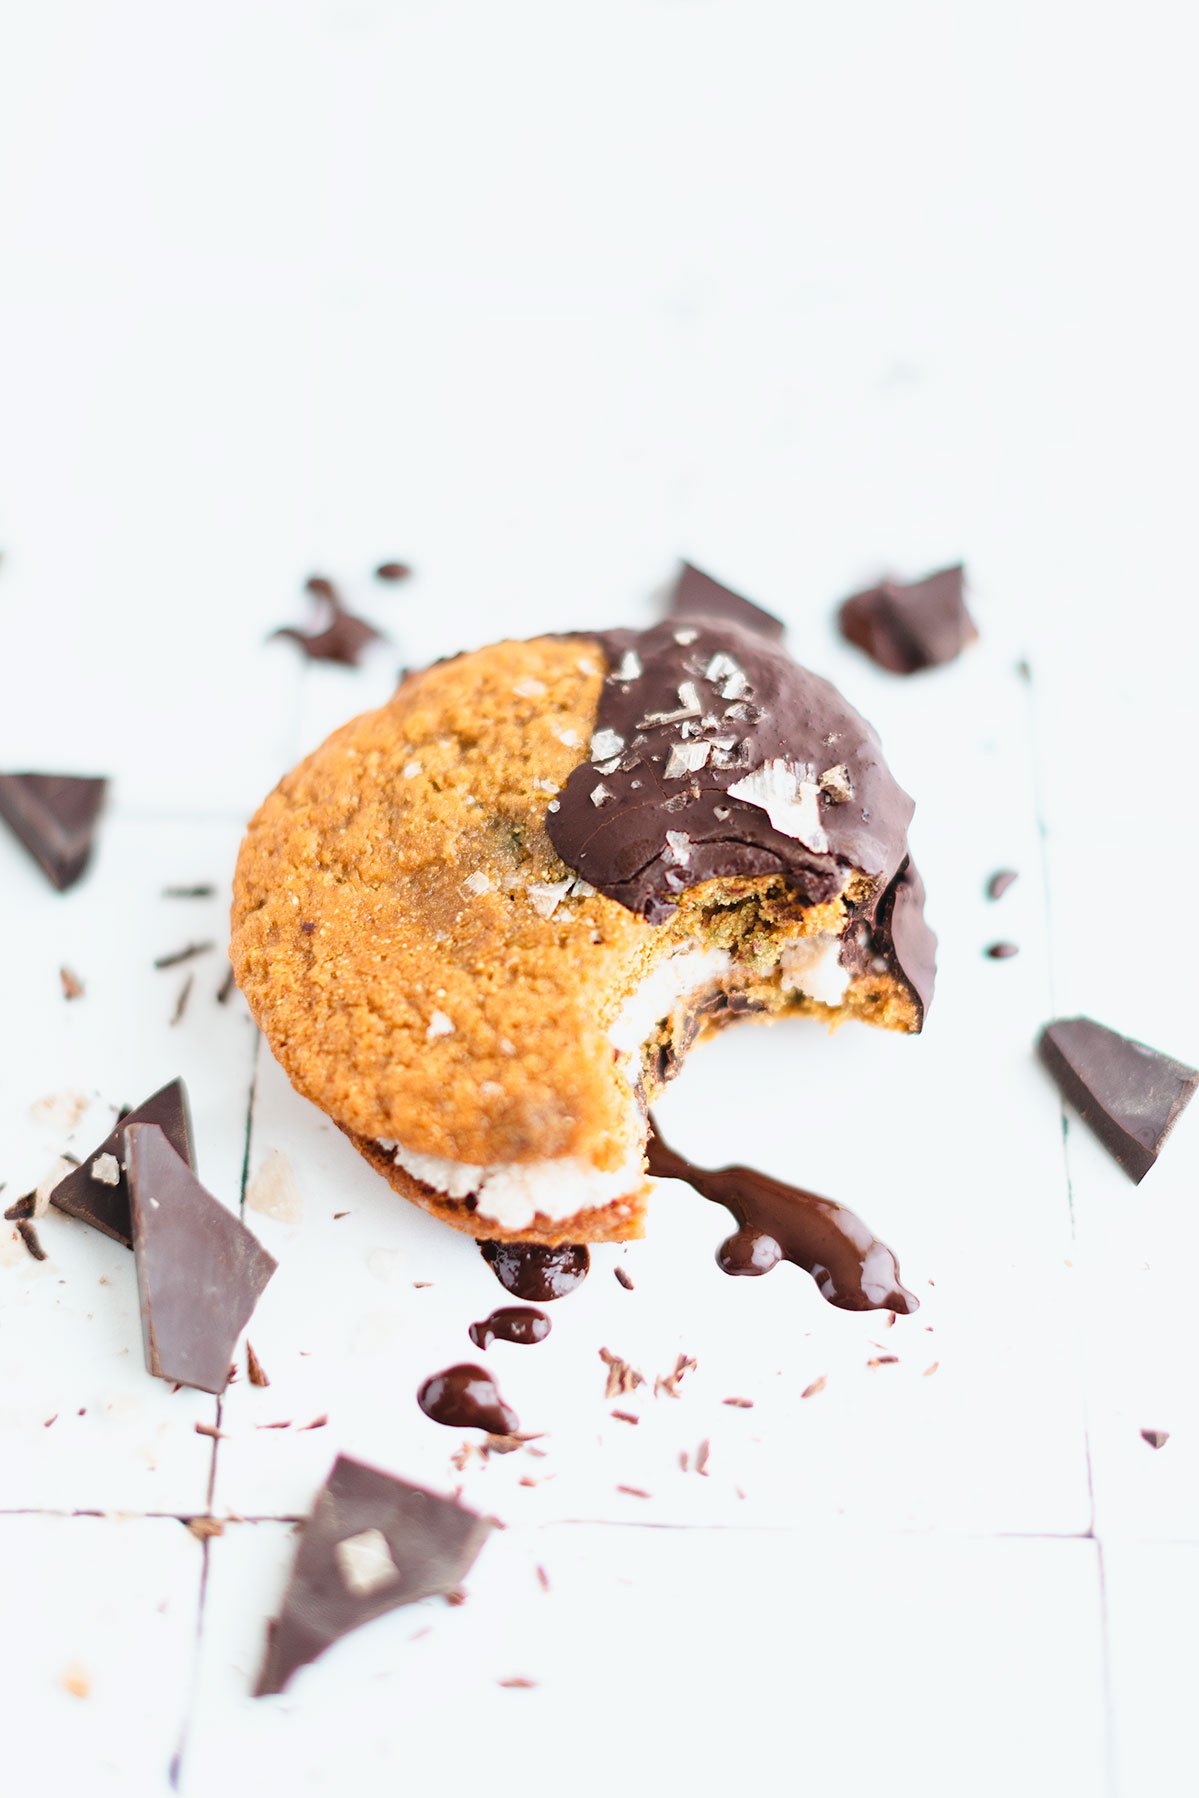
Salted Dark Chocolate Chip Cookie Nice Cream Sandwiches
Hands. Down. My favorite dessert on this blog!
I feel like I always say that but as the stakes get higher, so does the quality of desserts and I’m telling you, this one will be hard to beat!
Honestly, if you just read the tag line and see notes of homemade, soft and chewy, drenched, salted on top of the best dessert words like ice cream, cookie, dark chocolate shell - it’s like my taste buds are crying for joy!
And my taste buds continue to cry as I make this dessert time and time again!
It’s honestly a flawed system because my intentions are to make a big batch, store them in the freezer, so that I can have them longer. But since I know that I have the best dessert ever in my freezer just seconds away from my room, I can’t help but to run straight to the freezer and possibly (cough* eat all of them within days…). Again, as my taste buds scream in delight - sorry, not sorry!
Salted Dark Chocolate Chip Cookie Nice Cream Sandwiches - Made with an easy homemade banana ice cream, sandwiched between two soft chewy cookies and half drenched in a salted dark chocolate shell.
(Dairy-free, gluten-free, refined sugar-free, and grain-free)

Hands. Down. My favorite dessert on this blog!
I feel like I always say that but as the stakes get higher, so does the quality of desserts and I’m telling you, this one will be hard to beat!
Honestly, if you just read the tag line and see notes of homemade, soft and chewy, drenched, salted on top of the best dessert words like ice cream, cookie, dark chocolate shell - it’s like my taste buds are crying for joy!

And my taste buds continue to cry as I make this dessert time and time again!
It’s honestly a flawed system because my intentions are to make a big batch, store them in the freezer, so that I can have them longer. But since I know that I have the best dessert ever in my freezer just seconds away from my room, I can’t help but to run straight to the freezer and possibly (cough* eat all of them within days…). Again, as my taste buds scream in delight - sorry, not sorry!

I would like to mention before you dive right into the recipe that this dessert recipe can be taken apart if you find yourself short for time, don’t have the patience to make banana nice cream, or just simply want to make one recipe over the other - completely up to you! Personally, the cookie recipe is hands down my favorite of them all! They really should have their own blog post on their own (make mental note).
But if you really want to make this recipe and don’t have time, just simply cut corners by purchasing a good quality ice cream vs making homemade nice cream. This is also the right decision if you are allergic to bananas. Enough said.
If you try this recipe, let us know! Leave a comment, pin it, and don’t forget to tag a photo to #fromtherootsblog on Instagram. We love seeing what you come up with!
Salted Dark Chocolate Chip Cookie Nice Cream Sandwiches - Made with an easy homemade banana ice cream, sandwiched between two soft chewy cookies and half drenched in a salted dark chocolate shell.
(Dairy-free, gluten-free, refined sugar-free, and grain-free)
PREP TIME: 45 MIN | COOK TIME: 15 MIN | SERVINGS: 12 COOKIES
Cookies
1 egg
1/2 cup cashew or sunflower butter
1/2 cup coconut sugar
1/2 cup dark chocolate chunks
1/2 cup cassava flour
1/4 cup coconut oil
2 Tbsp plant based milk
1 tsp vanilla extract
1/2 tsp baking soda
1/4 tsp sea salt
Nice cream
2 cups frozen banana slices (1 large banana)
2-4 Tbsp milk of choice
1 tsp vanilla extract
pinch of sea salt
Salted Dark Chocolate Shell
½ cup dark chocolate chips
1 tbsp coconut oil
Smoked (or regular) sea salt flakes
Directions
Prepare the cookie dough by combining the wet ingredients in a medium mixing bowl. Mix in the dry ingredients minus chocolate chips until well combined. Fold in the chocolate chips and set cookie batter in the fridge for at least 30 minutes to firm up.
While the dough is chilling, prepare the banana nice cream by combining all ingredients into a blender or processor until smooth and creamy. May adjust the liquid portion as you want a "soft serve" texture. Transfer ice cream to a bread pan to freeze.
Freeze banana nice cream for 1-2 hours so that it hardens enough to scoop like ice cream, but isn't too hard where you can't scoop it.
When you are ready to make the cookies, preheat the oven to 350 degrees and line a baking sheet with parchment paper.
Using a cookie scoop, scoop out 1-2 Tbsp of cookie dough and roll into a ball (if 2 Tbsp will make 6 large cookies | 1 Tbsp 12 cookies)
Bake for 12-15 minutes and let rest for 10 minutes before transferring cookies to a cooling rack.
Top with smoky flaky sea salt and eat as is or wait oh so patiently so that you can make either ice cream sandwiches or crumble the cookies into the ice cream and make cookie dough ice cream!
If you want to dip the ice cream sandwiches into chocolate, simply melt 1/2 cup dark chocolate chips with 1 tbsp coconut oil and dip premade sandwiches into the melted chocolate. Set sandwiches on a freezer safe plate and freeze for 5-10 min or longer until ready to eat! Sprinkle additional sea salt flakes on chocolate just before you put them in the freezer!
Eat immediately or store in the freezer in a freezer safe container for up to a month...if you can wait that long!
Notes
If you need a great dark chocolate recommendation, I highly recommend Hu Kitchen! Use code FROMTHEROOTS for 15% your first order!
SHOP OUR FAVORITE TOOLS + INGREDIENTS FOR THIS RECIPE!

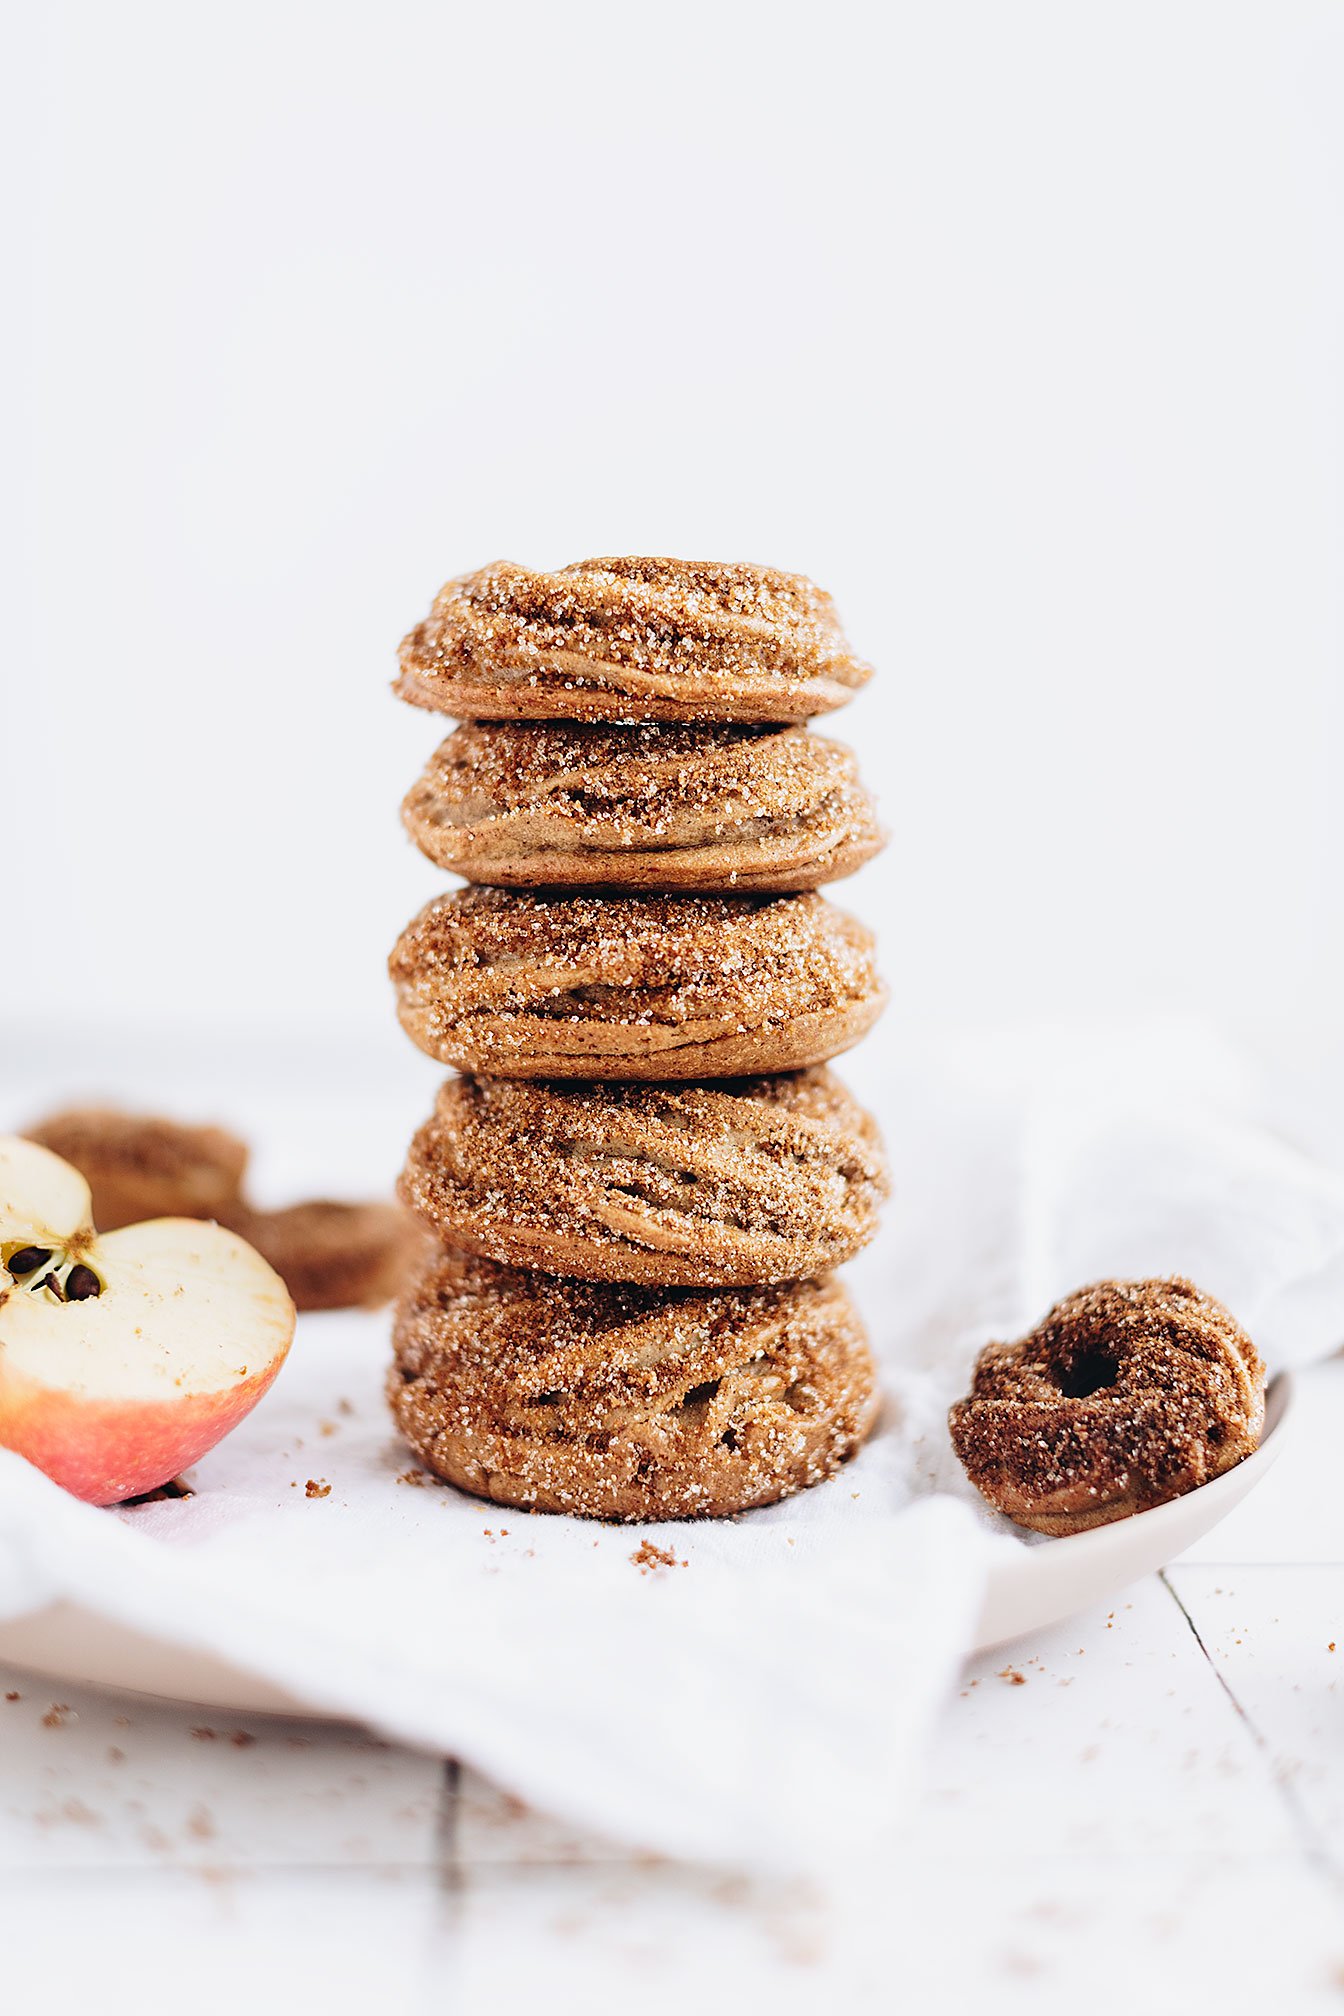
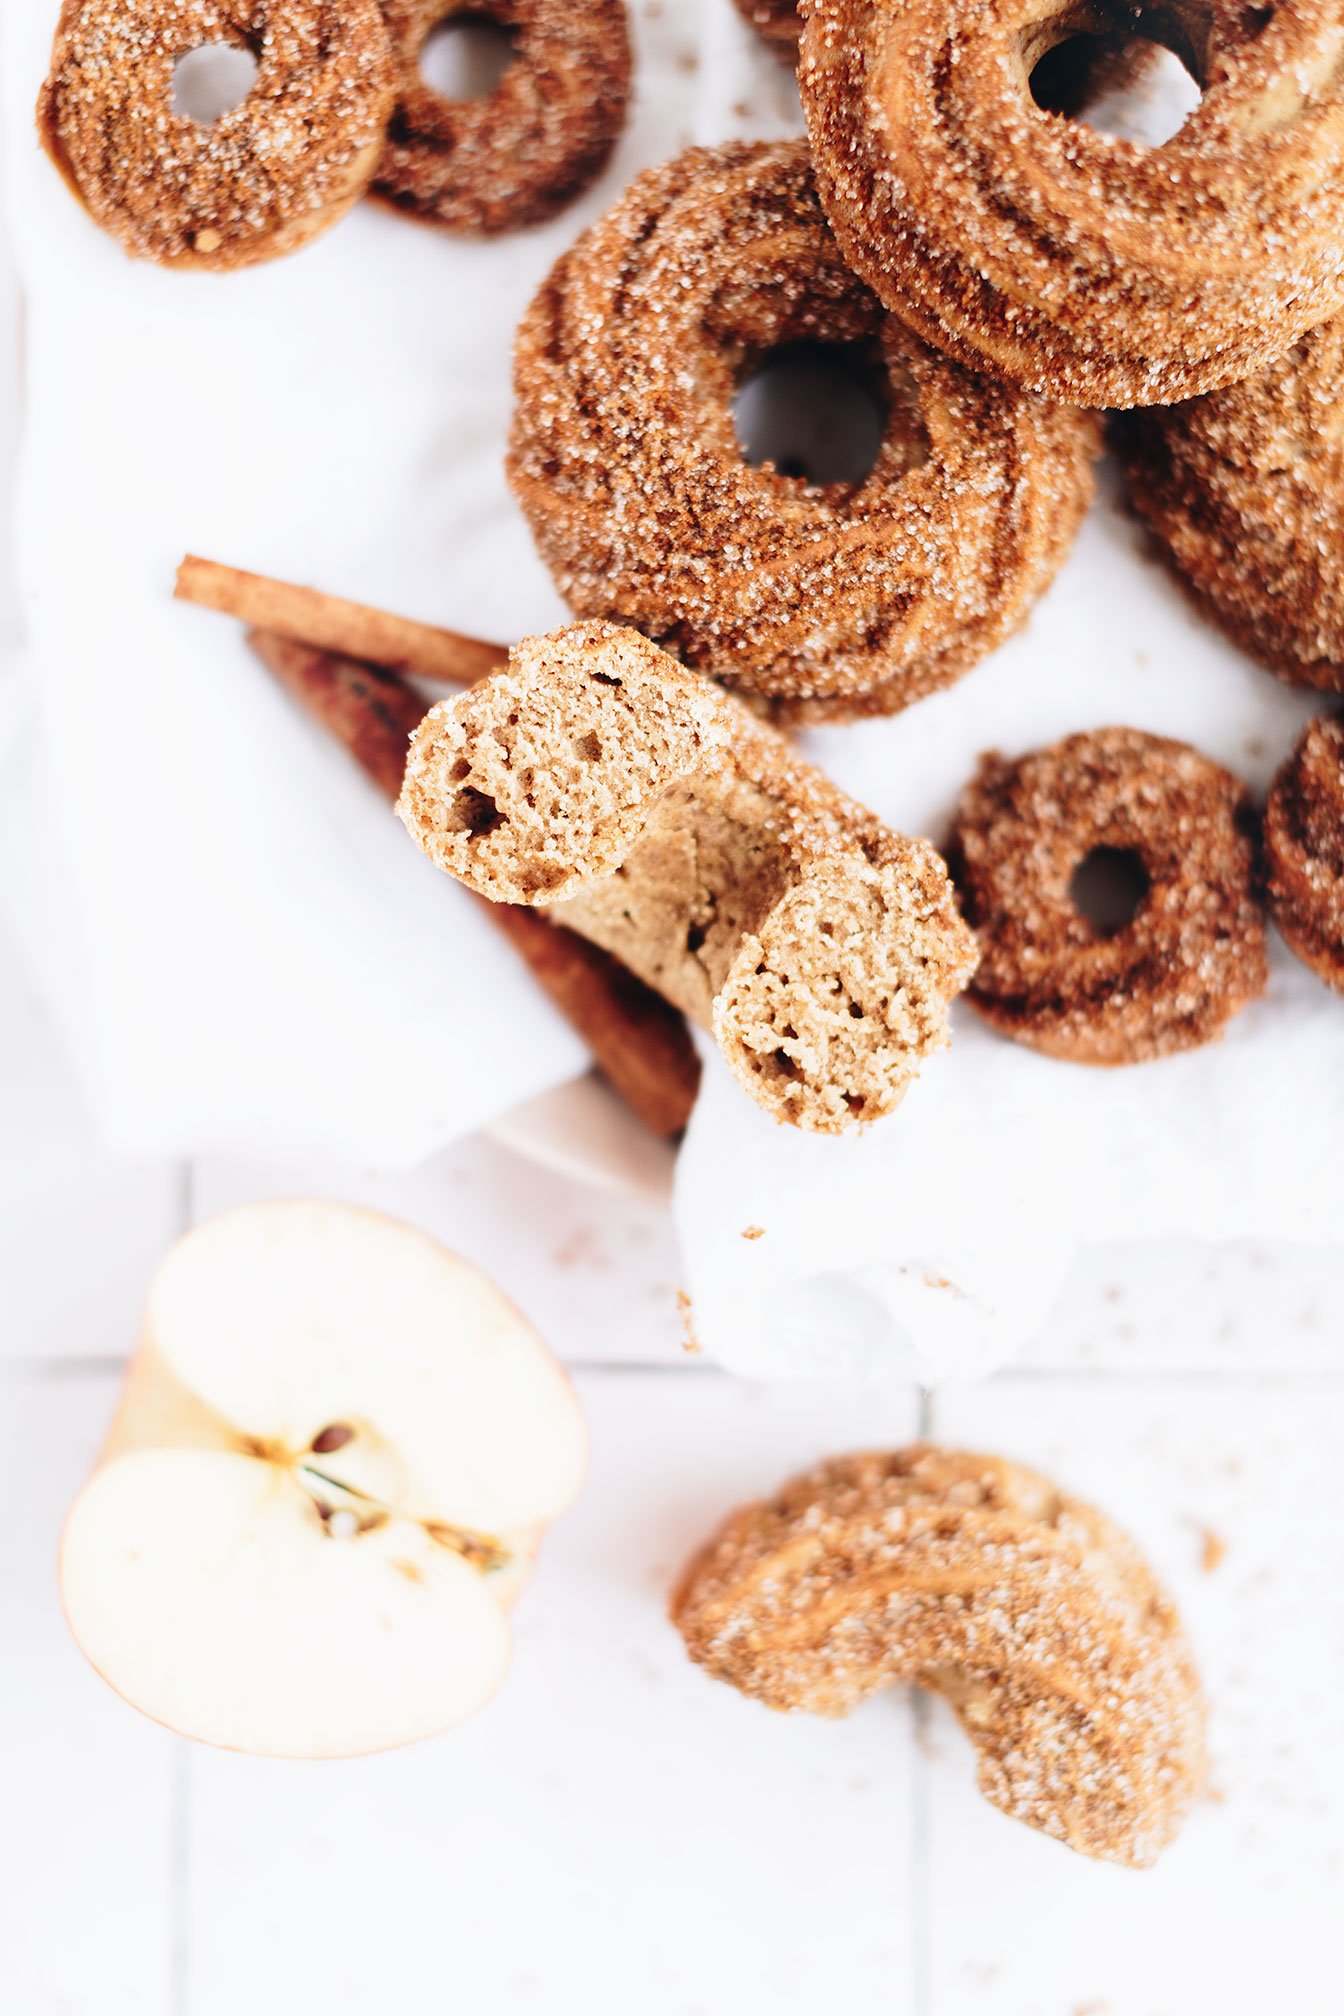
Apple Cider Churro Donuts
Last week, we had a local event in the area where business fronts downtown Hartwell would open their doors for women to shop, receive discounts in store all while enjoying delicious fall treats! In my office building, the chiropractor made warm apple cider, chocolate hummus, and goat cheese stuffed dates with chopped pistachios. So good!
Running on the apple cider train, I decided in my dreams that I should make some sort of apple cider donut! Haha, I swear, pressure to recipe development is where it’s at for me! As you can tell in the pictures, I have cute mini donuts sprinkled in and that is because my initial thought was to use them as a garnish for the apple cider!
Now, if you decide to use the apple cider churro donuts as a garnish for your apple cider or apple cider mimosas, then please take pictures and share - It would just be the cutest thing!
Apple Cider Churro Donuts - Apple cider meets churros - this healthier, baked not fried, donut is a delicious treat to bake during the fall season! Gluten-free, dairy-free, refined sugar free, nut-free, and paleo friendly.

Last week, we had a local event in the area where business fronts downtown Hartwell would open their doors for women to shop, receive discounts in store all while enjoying delicious fall treats! In my office building, the chiropractor made warm apple cider, chocolate hummus, and goat cheese stuffed dates with chopped pistachios. So good!


Running on the apple cider train, I decided in my dreams that I should make some sort of apple cider donut! Haha, I swear, pressure to recipe development is where it’s at for me! As you can tell in the pictures, I have cute mini donuts sprinkled in and that is because my initial thought was to use them as a garnish for the apple cider!

Now, if you decide to use the apple cider churro donuts as a garnish for your apple cider or apple cider mimosas, then please take pictures and share - It would just be the cutest thing!


Okay, I digress again. The reason why I added churro to the recipe name is not because these are made in the traditional sense as they are baked, not fried, but the cinnamon sugar topping! And bonus, if you decide to use a piping bag to fill in the donut pans then they create a natural churro design which is super fun and holds more cinnamon sugar topping. And who doesn’t want more of that!?

If you would like to see the kitchen equipment and ingredients I used to make this recipe, then scroll down below for the links!
So while it is still fall season and you have apple cider and all of your fall spices, then make a batch of these apple cider churro donuts!


I think I will make these for my niece and nephews for Thanksgiving breakfast this year :)
And hey, if you want to get super creative, here are some fun ways you can pair your donut with, if eating them on their own is not enough! Seasonal drinks like adrenal cream cider, coffee, hot cocoa, apple cider, turmeric latte, and chai tea, milk, ice cream (stop it!), dipped in nut butters, jams or the traditional churro style with chocolate sauce.

If you try this recipe, let us know! Leave a comment, pin it, and don’t forget to tag a photo to #fromtherootsblog on Instagram. We love seeing what you come up with!
Apple Cider Churro Donuts - Apple cider meets churros - this healthier, baked not fried, donut is a delicious treat to bake during the fall season! Gluten-free, dairy-free, refined sugar free, nut-free, and paleo friendly.
Prep Time: 15 min | Cook Time: 20 min | Servings: 12 large donuts
Ingredients
Donut Batter
2 cups gluten free 1-to-1 baking flour
¾ cup arrowroot flour
½ cup organic applesauce
⅓ cup coconut sugar
⅓ cup avocado or coconut oil
⅓ cup organic apple cider or apple juice
2 large eggs (room temperature)
1 Tbsp apple pie spice seasoning
2 tsp baking powder
1 tsp pure vanilla extract
½ tsp baking soda
¼ tsp sea salt
Avocado/coconut oil spray for donut pans
Churro Topping
3 Tbsp melted grass-fed butter, ghee, or coconut oil
3 Tbsp coconut sugar, maple sugar or date sugar
1 ½ tsp apple pie spice seasoning
Directions
Preheat the oven to 350 degrees and spray silicone donut pans for easy removal.
In a large mixing bowl, combine dry ingredients (ie both flours, sugar, apple pie spice, baking powder and soda, and salt). Set aside.
In a separate bowl, whisk together the eggs, oil, vanilla, applesauce, and apple cider/juice. Add the dry ingredients to the wet and stir well until fully combined. The batter should be scoopable, not pourable.
You can either spoon the batter or transfer batter into a piping bag and fill into the wells of the lightly greased donut pan to make 11-12 donuts - you might need to do this in 2 batches depending on the size of your donut pan.
Bake in the preheated oven for 18-20 minutes or until set and a toothpick, when inserted, comes out clean. Remove the pan from the oven and place it on a wire rack to cook for about 5 minutes. Once cooled, remove donuts from the pan and place on a wire rack to cool completely.
While the donuts are cooling, make the churro topping. Melt fat of choice in a small bowl. In a separate bowl, stir the sugar and apple pie spice seasoning. Brush the cooled donuts with the fat and either sprinkle with or dip donuts in the sugar mixture. Serve right away or store at room temperature for up to 3 days. Refrigerate or freeze to keep them longer.
Shop our favorite tools + ingredients for this recipe!


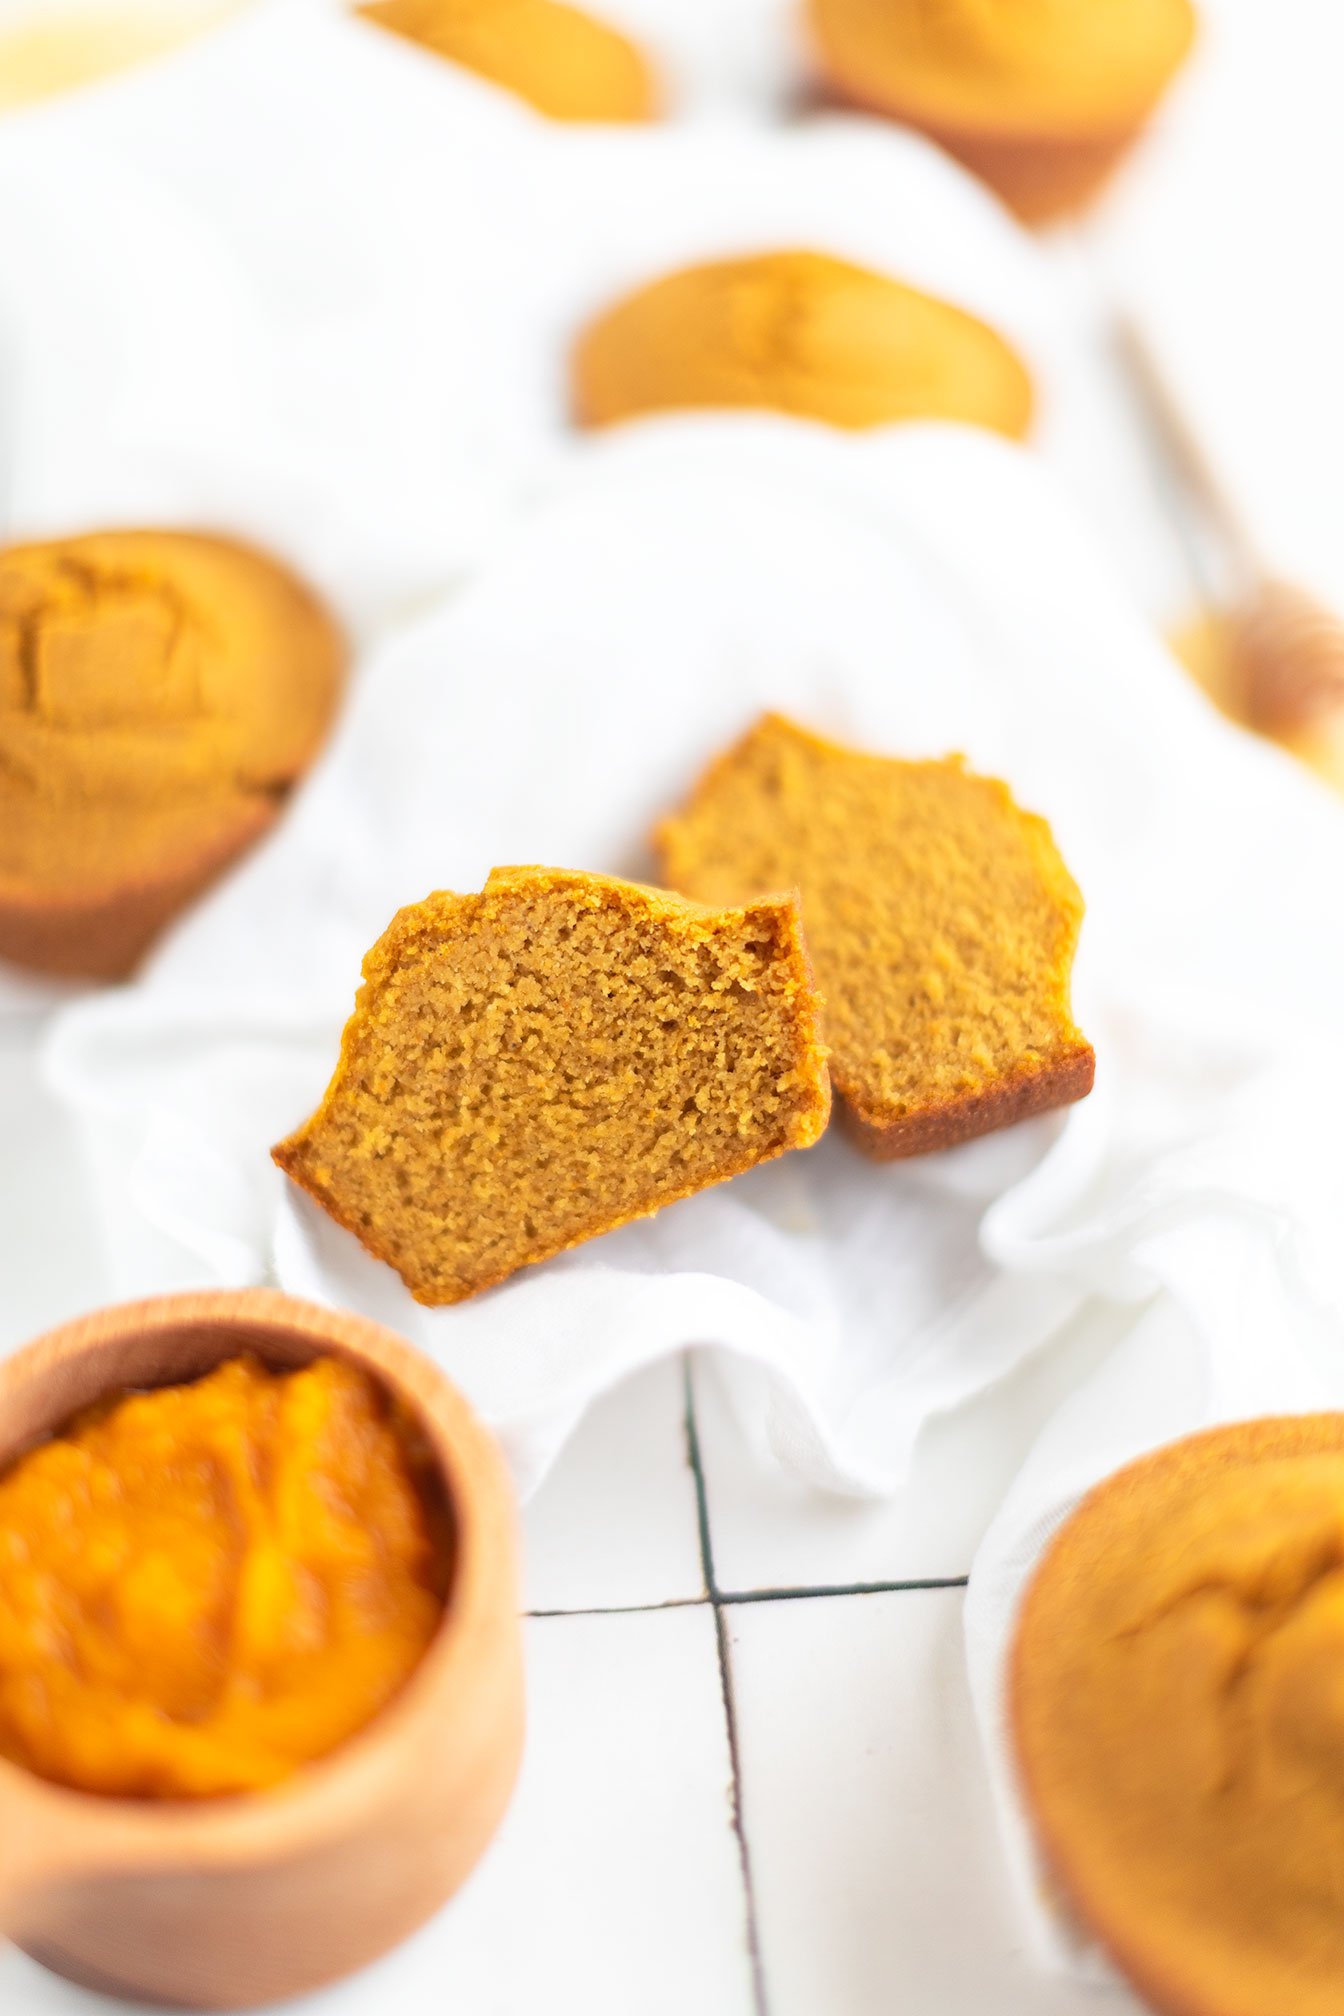
Pumpkin Cornbread Muffins
Another cornbread recipe!? Yes ma’am! This time, we are just going straight into a muffin tin vs cast iron skillet. Why? Well...I tend to just eat straight out of the skillet in one sitting so individually portioned muffins are what I need in life. Haha
Muffins are fun, in general though! But now that I’m thinking about it, I believe I have more muffin recipes on the blog than anything else! Enough small talk, let’s just dive right into this recipe!
I do have to preface by saying that if you don’t like the taste of pumpkin or team no #psl, then please don’t leave! Haha I want to assure you that these pumpkin cornbread muffins actually don’t taste like pumpkin. If anything, they taste more like a jiffy style cornbread flavor. The sole reason pumpkin puree is used in this recipe is because of texture and nutrients!
Pumpkin Cornbread Muffins - The ultimate cozy accompaniment to soups, stews, chilis, and more! (gluten and dairy-free)

Another cornbread recipe!? Yes ma’am! This time, we are just going straight into a muffin tin vs cast iron skillet. Why? Well...I tend to just eat straight out of the skillet in one sitting so individually portioned muffins are what I need in life. Haha

Muffins are fun, in general though! But now that I’m thinking about it, I believe I have more muffin recipes on the blog than anything else! Enough small talk, let’s just dive right into this recipe!

I do have to preface by saying that if you don’t like the taste of pumpkin or team no #psl, then please don’t leave! Haha I want to assure you that these pumpkin cornbread muffins actually don’t taste like pumpkin. If anything, they taste more like a jiffy style cornbread flavor. The sole reason pumpkin puree is used in this recipe is because of texture and nutrients!

Though I love my gluten-free cornbread skillet recipe, and yes, these are gluten-free as well. This cornbread recipe just might have that one beat! The pumpkin puree adds a new level of fluffy texture while elevating the flavors! And yes, there is a small amount of pumpkin spice seasoning in the batter, but again, it just elevates the corn flavor in the cornbread which makes it completely neutral if that makes sense.


So feel free to eat these classic with a pad of grass-fed butter and honey, or accompany to comfort dishes like chicken zoodle soup, creamy tomato pesto soup, butternut squash, kale, and white bean lasagna soup, veggie beef stew, or mexican harvest turkey chili.

If you try this recipe, let us know! Leave a comment, pin it, and don’t forget to tag a photo to #fromtherootsblog on Instagram. We love seeing what you come up with!
Pumpkin Cornbread Muffins - The ultimate cozy accompaniment to soups, stews, chilis, and more! (gluten and dairy-free)
Prep Time: 10 min Cook Time: 20 min Serving Size: 12 standard muffins/ 6 large muffins
Ingredients
1 cup gluten-free cornmeal
¾ cup gluten-free 1-to-1 baking flour
¾ cup plant based milk (or your favorite)
½ cup pumpkin puree (not pie filling)
¼ cup coconut sugar
¼ cup avocado oil
2 eggs, room temperature and lightly beaten
1 tsp apple cider vinegar
1 ½ tsp baking powder
½ tsp baking soda
½ tsp pumpkin spice seasoning
¼ tsp pink himalayan sea salt
Directions
In a liquid measuring cup, measure out milk and add the 1 tsp apple cider vinegar or lemon juice. Mix until combined and set aside. This is how to create “buttermilk” the plant-based way!
Preheat the oven to 375 degrees.
In a large bowl, combine cornmeal, flour, sugar, baking powder, baking soda, spice seasoning and salt. Whisk to combine. Whisk in the rest of the wet ingredients (ie “buttermilk”, pumpkin, lightly beaten eggs, and oil). Stir until combined and no dry clumps remain.
Scoop batter into a standard 12-cup muffin tin or a large 6-cup muffin tin (spray or grease if not nonstick).
Bake for 15-20 minutes, or until cooked through (a toothpick inserted in the center of a muffin and it comes out clean) and slightly golden.
Allow to cool slightly, then serve warm with a pad of grassfed butter and/or honey.
Notes
Like a spicy kick in your cornbread muffins? Feel free to mince 1 jalapeno or green chilis and add to batter.
Shop our favorite tools + ingredients for this recipe!


Mexican Harvest Turkey Chili
Okay, I know I just posted a cozy stew recipe last week but as I get older, the need for comfort fall foods (soups, stews, chili’s) has increased so sorry, not sorry! I have needs too, haha!
Just like the veggie beef stew, this chili recipe is a simple and easy way to load up on things healthy while being super affordable.
Harvest vegetables like butternut squash, yams, sweet potatoes, onions, garlic, pumpkin while adding a Mexican twist that also includes harvest ingredients like green chilies, poblano peppers, fire roasted tomatoes, beans, and corn - you are truly getting the best of both worlds!
Mexican Harvest Turkey Chili - A simple to make healthy and hearty recipe that is packed with flavorful and seasonal ingredients. (gluten and dairy-free)

Okay, I know I just posted a cozy stew recipe last week but as I get older, the need for comfort fall foods (soups, stews, chili’s) has increased so sorry, not sorry! I have needs too, haha!
Just like the veggie beef stew, this chili recipe is a simple and easy way to load up on things healthy while being super affordable.
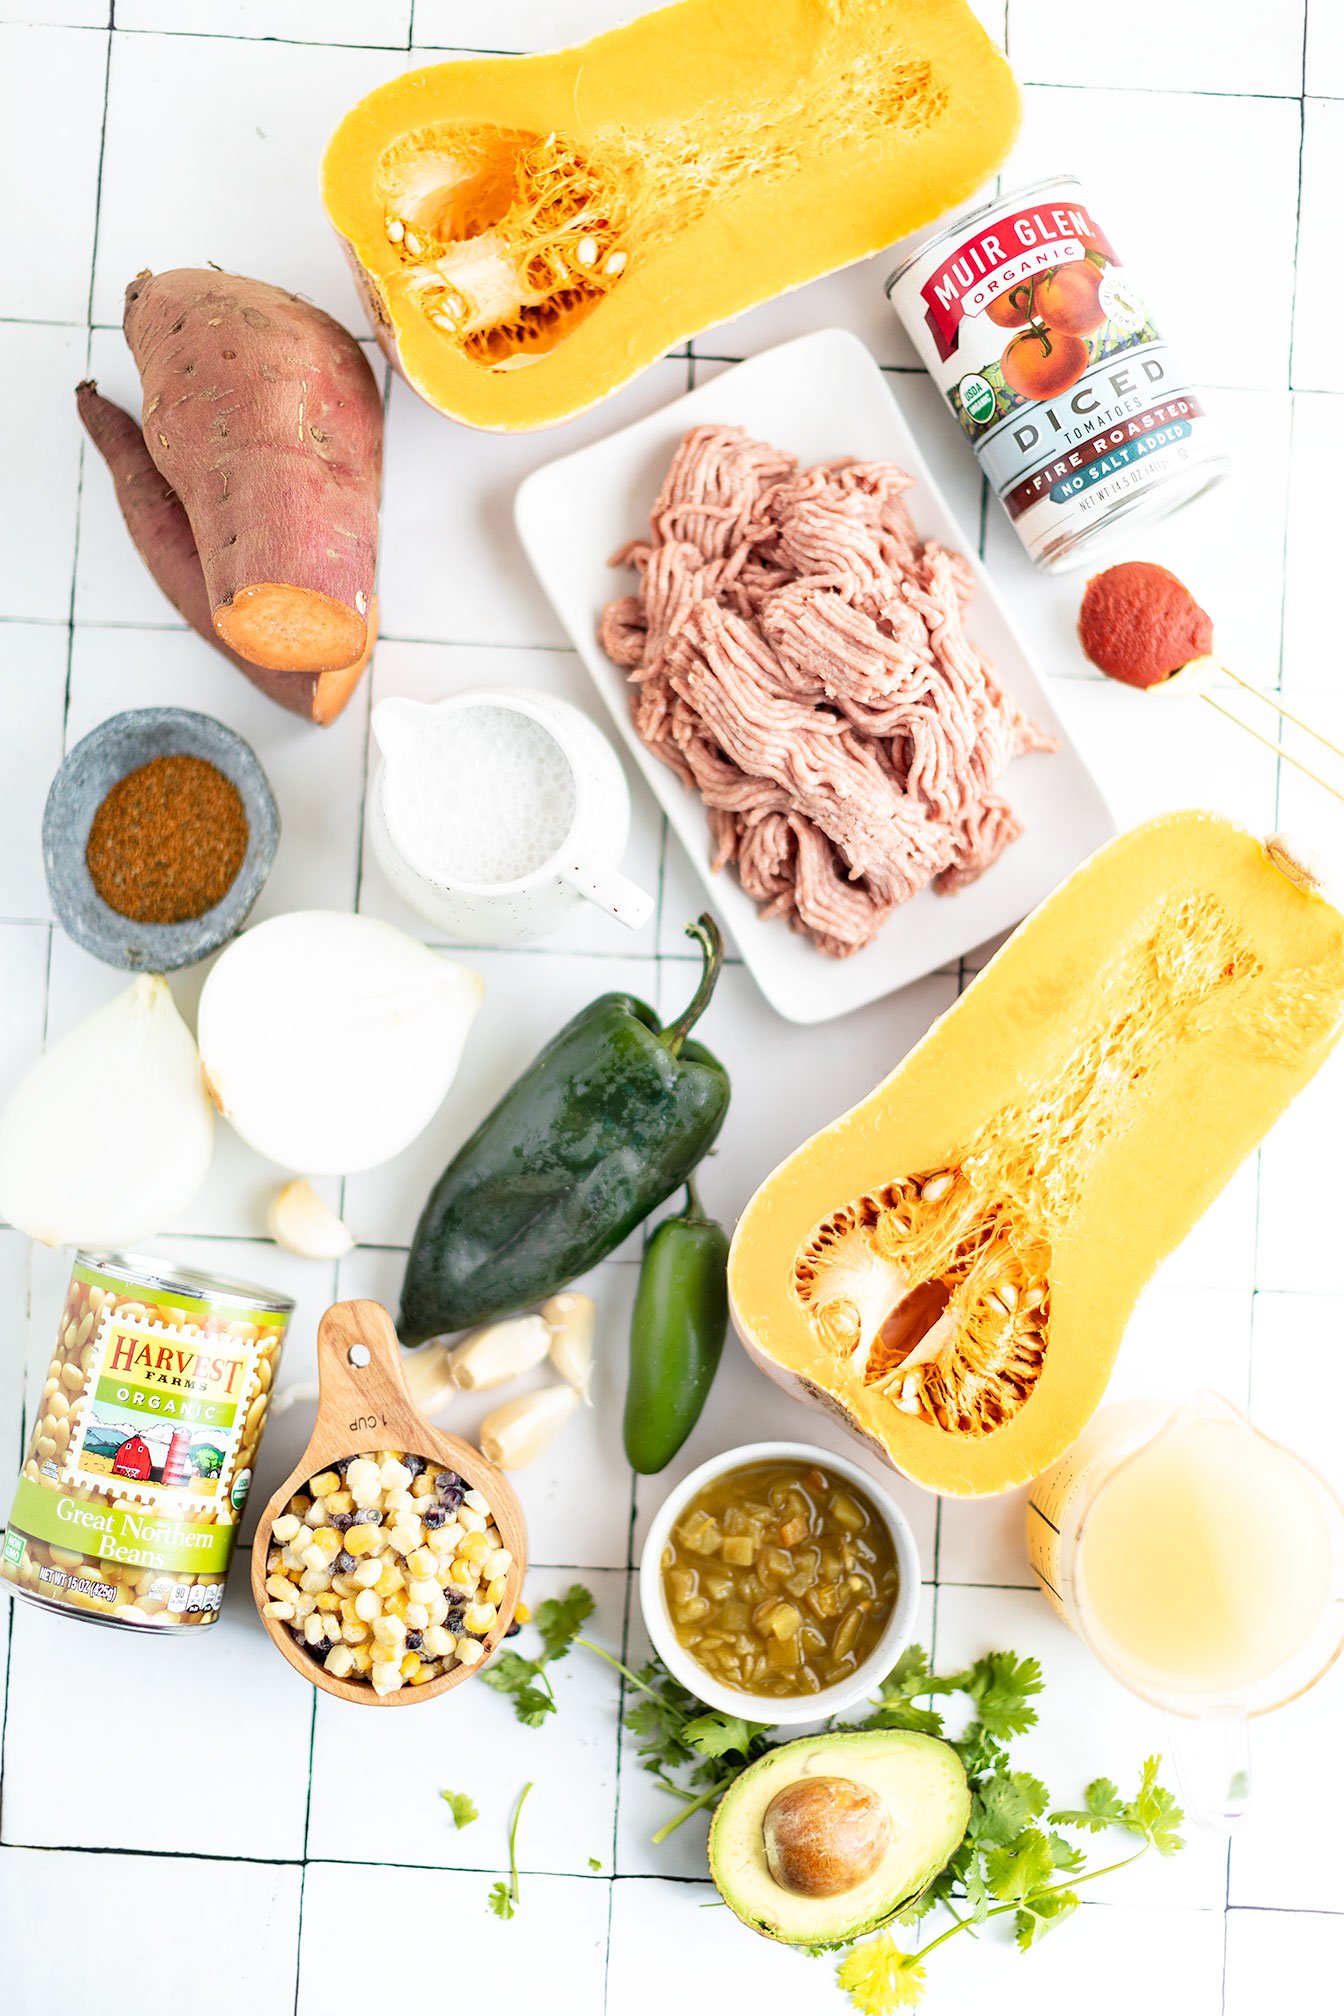
Harvest vegetables like butternut squash, yams, sweet potatoes, onions, garlic, pumpkin while adding a Mexican twist that also includes harvest ingredients like green chilies, poblano peppers, fire roasted tomatoes, beans, and corn - you are truly getting the best of both worlds!

When it comes down to flavor, this chili recipe is a perfect balance of sweet, savory, and spicy. But if you lean more towards spicy, you can refer to the notes section at the bottom.

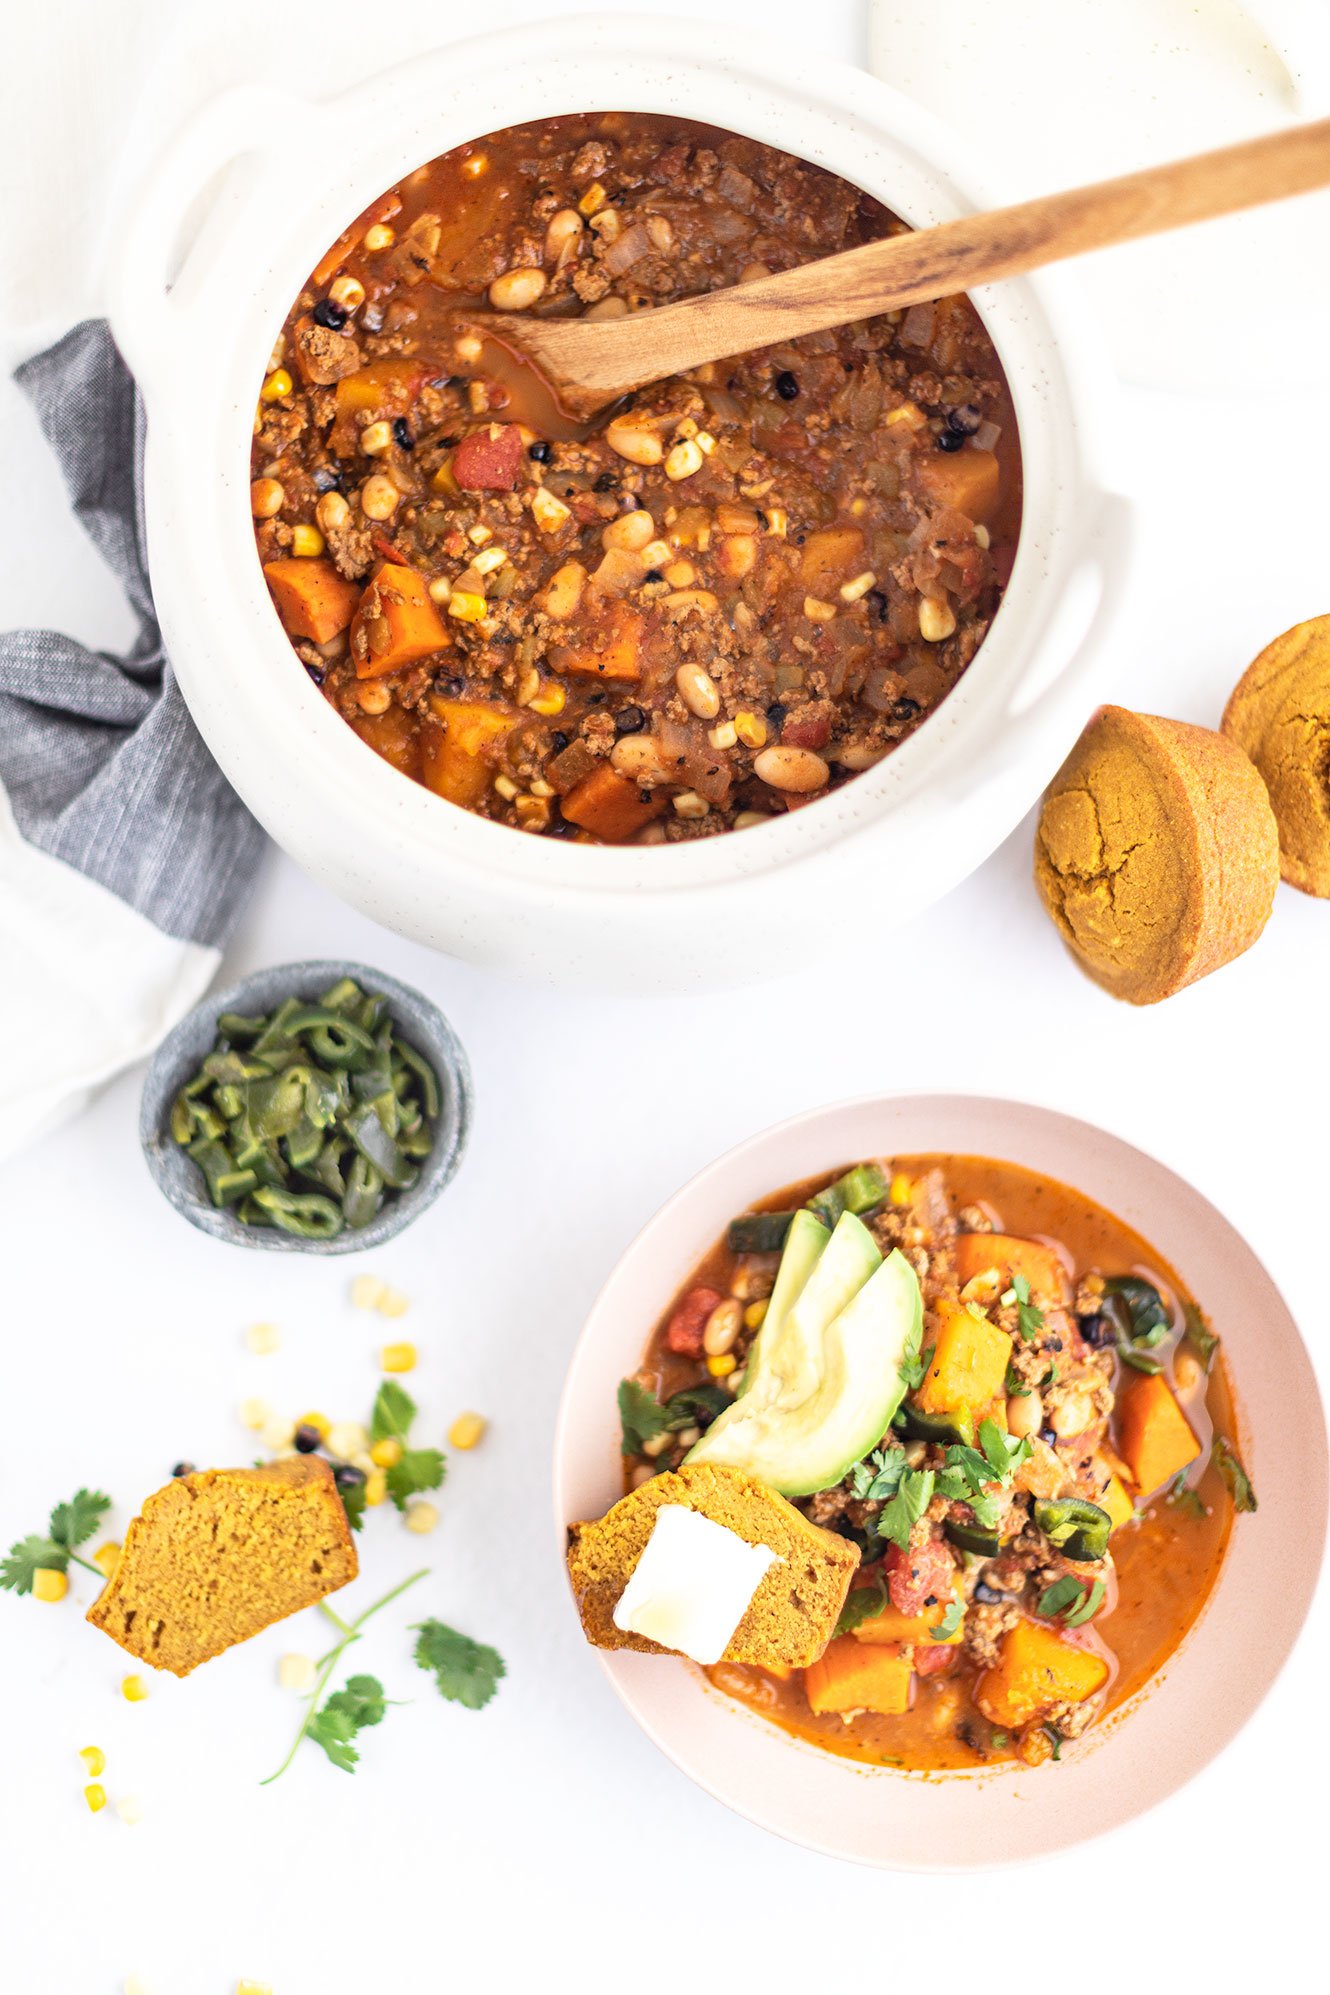
Now, let’s talk about garnishes and sides! For this recipe, I used chopped cilantro, extra roasted poblano slices, pickled jalapeno slices, and avocado. Feel free to follow the same vibe or add plain greek yogurt, green onions, tortilla chips or sliced corn tortilla strips, cotija, lime juice or roasted pepitas!

Pumpkin cornbread muffins are the star side dish for this chili recipe (recipe coming this week!). In the meantime, you can most definitely use the best gluten-free skillet cornbread recipe (*cough*) add sliced jalapenos to the batter!

If you try this recipe, let us know! Leave a comment, rate it, and don’t forget to tag a photo to #fromtherootsblog on Instagram. We love seeing what you come up with!
Mexican Harvest Turkey Chili - A simple to make healthy and hearty recipe that is packed with flavorful and seasonal ingredients. (gluten and dairy-free)
Prep Time: 15 min Cook Time: 45 min Total servings: 6-8
Ingredients
1lb ground turkey
3 cups total (butternut squash, yams, and/sweet potatoes)
peeled, seeded, cut into ½ inch cubes
2 cups low sodium chicken bone broth
1 can (4 oz) green chilies
1 can fire roasted tomatoes, with liquid
1 can northern beans, drained and rinsed
1 medium white onion, diced
1 poblano pepper
1 cup corn (fresh or frozen)
3-5 cloves garlic, minced
¼ cup pumpkin puree
1-3 Tbsp taco seasoning of choice
1 Tbsp tomato paste
S+P
Garnish: jalapeno slices, avocado, cilantro
Directions
Preheat the oven to 425 degrees and line a baking sheet with parchment paper or silicone mat.
Depending on if you are using butternut squash, yams and/or sweet potatoes (I did 1 ½ cup each butternut squash and yam cubes) arrange in a single layer on a prepared baking sheet. Drizzle or spray cooking oil (I like using avocado or coconut oil) over cubes, season with salt, pepper, and cinnamon (optional but so worth it!) and toss to coat. Make room on the baking sheet for the poblano pepper and bake for 20-25 minutes until veggie cubes are tender.
While the veggies are roasting in the oven, heat cooking oil in a large pot over medium high heat.
Add onion and garlic and cook for about 2-4 minutes until fragrant.
Add in the ground turkey, salt and pepper and stir to break it up into small pieces, mixing with the sauteed onion and garlic.
Once turkey is cooked through, add the fire roasted tomatoes, green chilies, tomato paste, broth, pumpkin puree, and spices and stir to combine. Bring to a simmer and cover the pot for 20 minutes.
At this point, the roasted veggies and pepper should be done. Transfer roasted vegetables to the chili pot along with the beans and allow the poblano pepper to cool before handling.
Once roasted poblano pepper is cooled (the skin should appear blackened and blistered) carefully peel away or rub off and discard the charred skins. Cut the stem off, de-seed, chop and add to the chili pot.
Add the frozen corn to the pot and continue to simmer until liquid has reduced to desired “chili” consistency. At this point you will want to adjust salt and pepper to taste.
Serve warm with favorite garnishes and serve with cornbread!
Notes
1| You can really play with the produce in this chili recipe! For example, choose butternut squash, yams, sweet potatoes or a combo - I just use whatever is leftover from batch cooking! Not a northern beans fan? Try pinto, garbanzo, black beans or tri-beans instead.
2| Need more spice? Play around with pepper of choice or add a spicy taco seasoning blend, hot sauce or add jalapenos to your cornbread if adding on the side.