Sort by Category
- May 2026
- March 2026
- December 2025
- November 2025
- October 2025
- September 2025
- August 2025
- June 2025
- August 2024
- July 2024
- June 2024
- May 2024
- February 2024
- January 2024
- December 2023
- November 2023
- October 2023
- September 2023
- August 2023
- July 2023
- March 2023
- February 2023
- January 2023
- December 2022
- November 2022
- October 2022
- September 2022
- August 2022
- June 2022
- May 2022
- April 2022
- March 2022
- February 2022
- January 2022
- December 2021
- November 2021
- October 2021
- September 2021
- August 2021
- July 2021
- June 2021
- May 2021
- April 2021
- March 2021
- February 2021
- January 2021
- December 2020
- November 2020
- October 2020
- September 2020
- August 2020
- July 2020
- June 2020
- May 2020
- April 2020
- March 2020
- February 2020
- January 2020
- December 2019
- November 2019
- October 2019
- September 2019
- August 2019
- July 2019
- June 2019
- May 2019
- April 2019
- March 2019
- February 2019
- January 2019
- December 2018
- November 2018
- October 2018
- September 2018
- August 2018
- July 2018
- June 2018
- May 2018
- April 2018
- March 2018
- February 2018

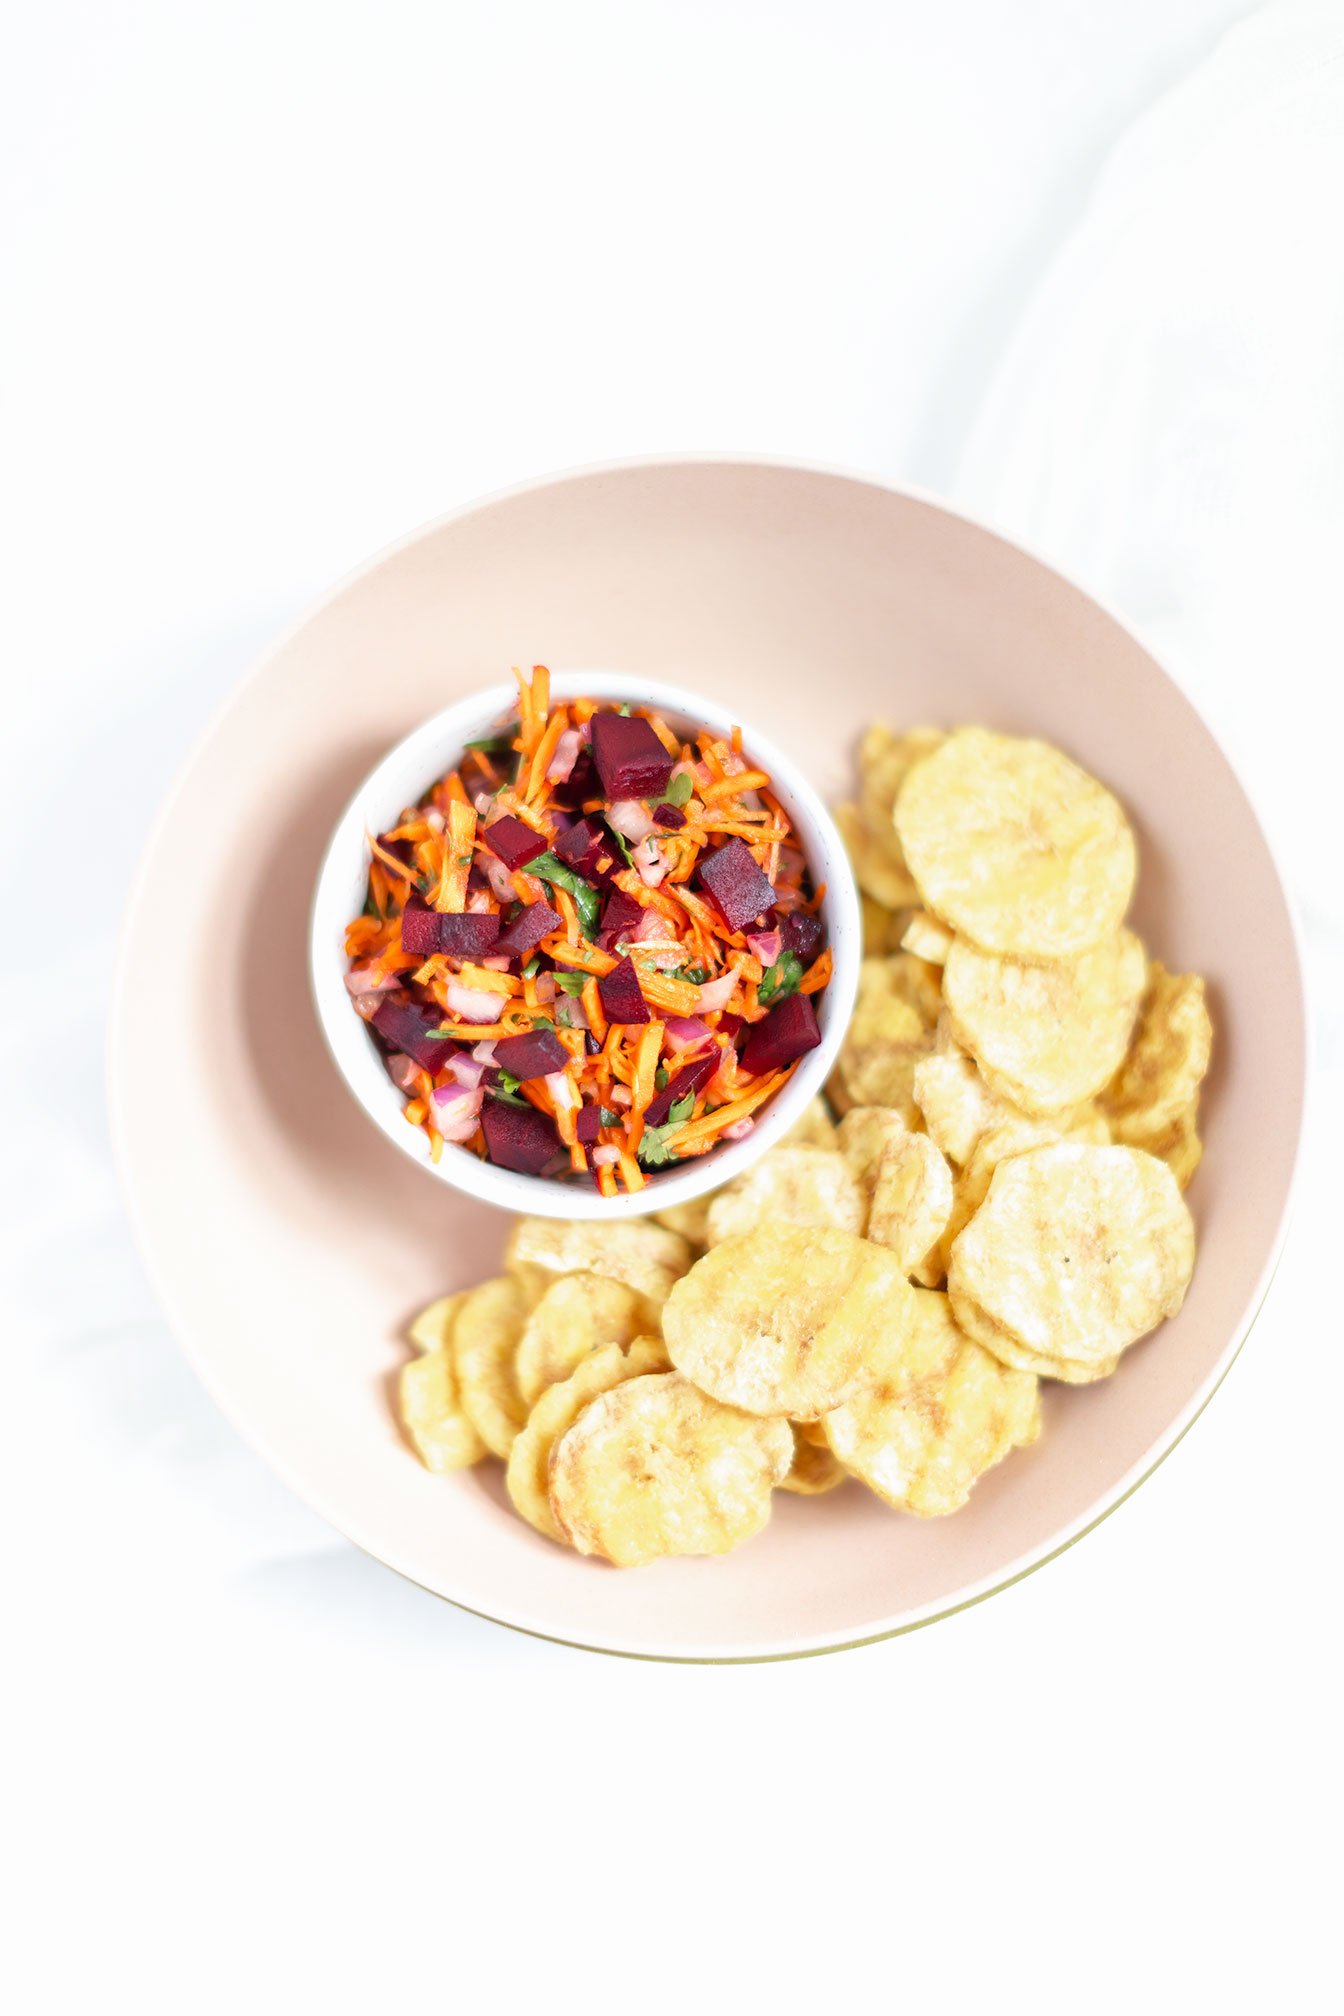
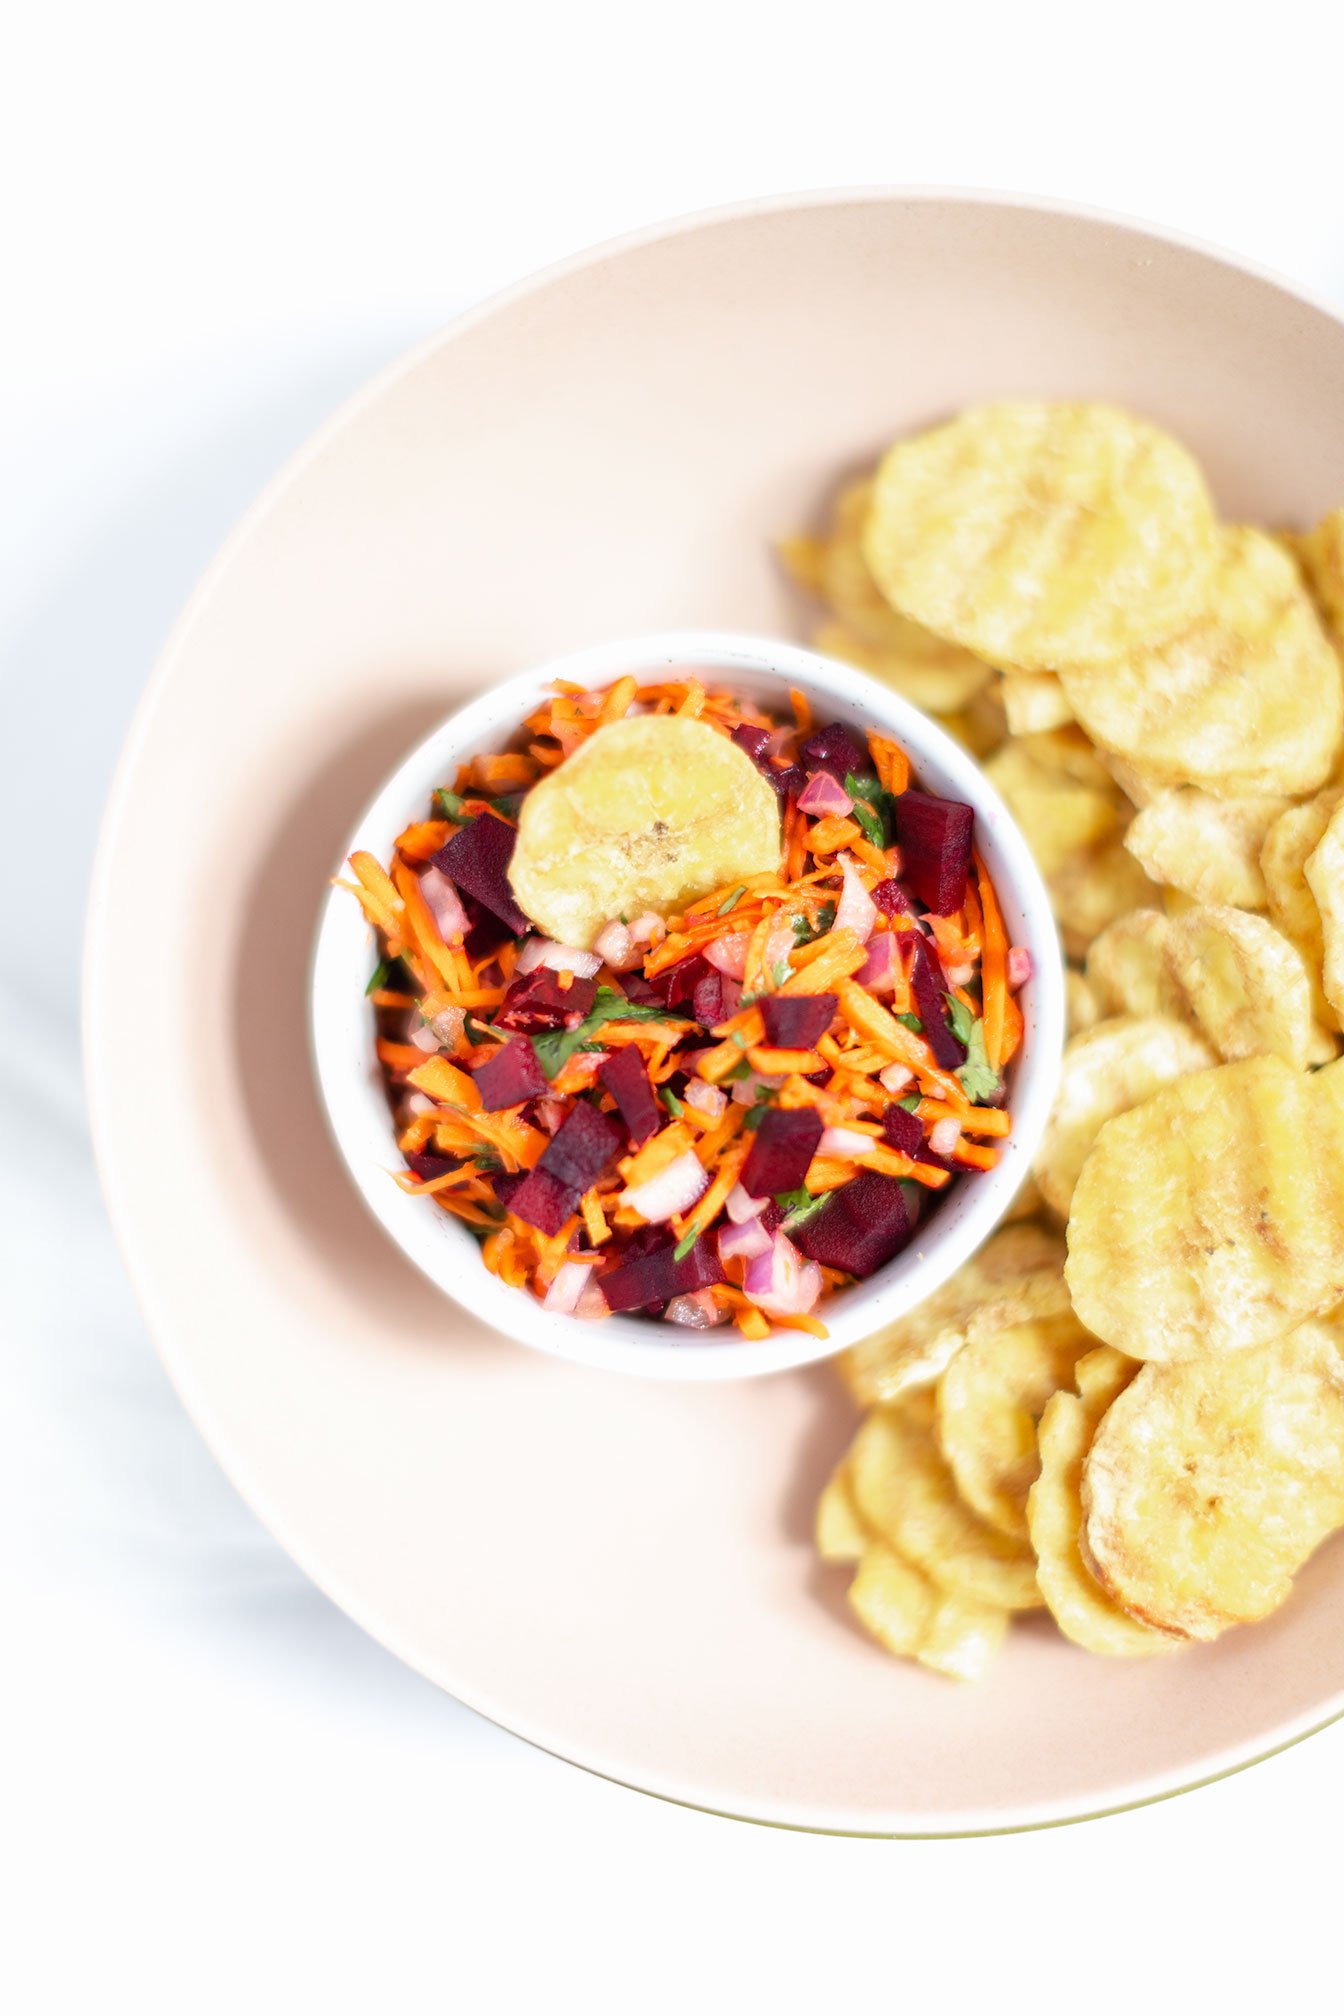
Carrot and Beet Salsa
Beets protect liver cells and bile ducts from free radical damage. They are rich in phytonutrients - betaine, which supports detoxification pathways in the body. Their health benefits don’t stop here! They are also rich in fiber, iron, folate and the trifecta of blood pressure lowering minerals: calcium, magnesium, and potassium.
Other supporting roles are:
Carrots - contain detoxifying properties, rich in fiber and carotenoids including beta-carotene which help stimulate bile to flow and remove wastes.
Apples - hydrating and detoxifying, rich in fiber and natural plant polyphenols that protect cells from free radical damage and inflammation.
Liver Loving Carrot and Beet Salsa

The star ingredient in making this salsa liver loving are beets!

Beets protect liver cells and bile ducts from free radical damage. They are rich in phytonutrients - betaine, which supports detoxification pathways in the body. Their health benefits don’t stop here! They are also rich in fiber, iron, folate and the trifecta of blood pressure lowering minerals: calcium, magnesium, and potassium.
Other supporting roles are:
Carrots - contain detoxifying properties, rich in fiber and carotenoids including beta-carotene which help stimulate bile to flow and remove wastes.
Apples - hydrating and detoxifying, rich in fiber and natural plant polyphenols that protect cells from free radical damage and inflammation.


Now that school is over, here are some simple tips on how to prepare the salsa.
I will say that prep time requires a bit of effort but I promise you, after it’s done - everything comes together within seconds!
Ways to make sure your prep time is cut in half- using a mandolin or food processor with a shredding blade. I promise you - this cuts your prep time in half vs getting a mini workout using a box grater or cutting your ingredients into tiny little bite size pieces.


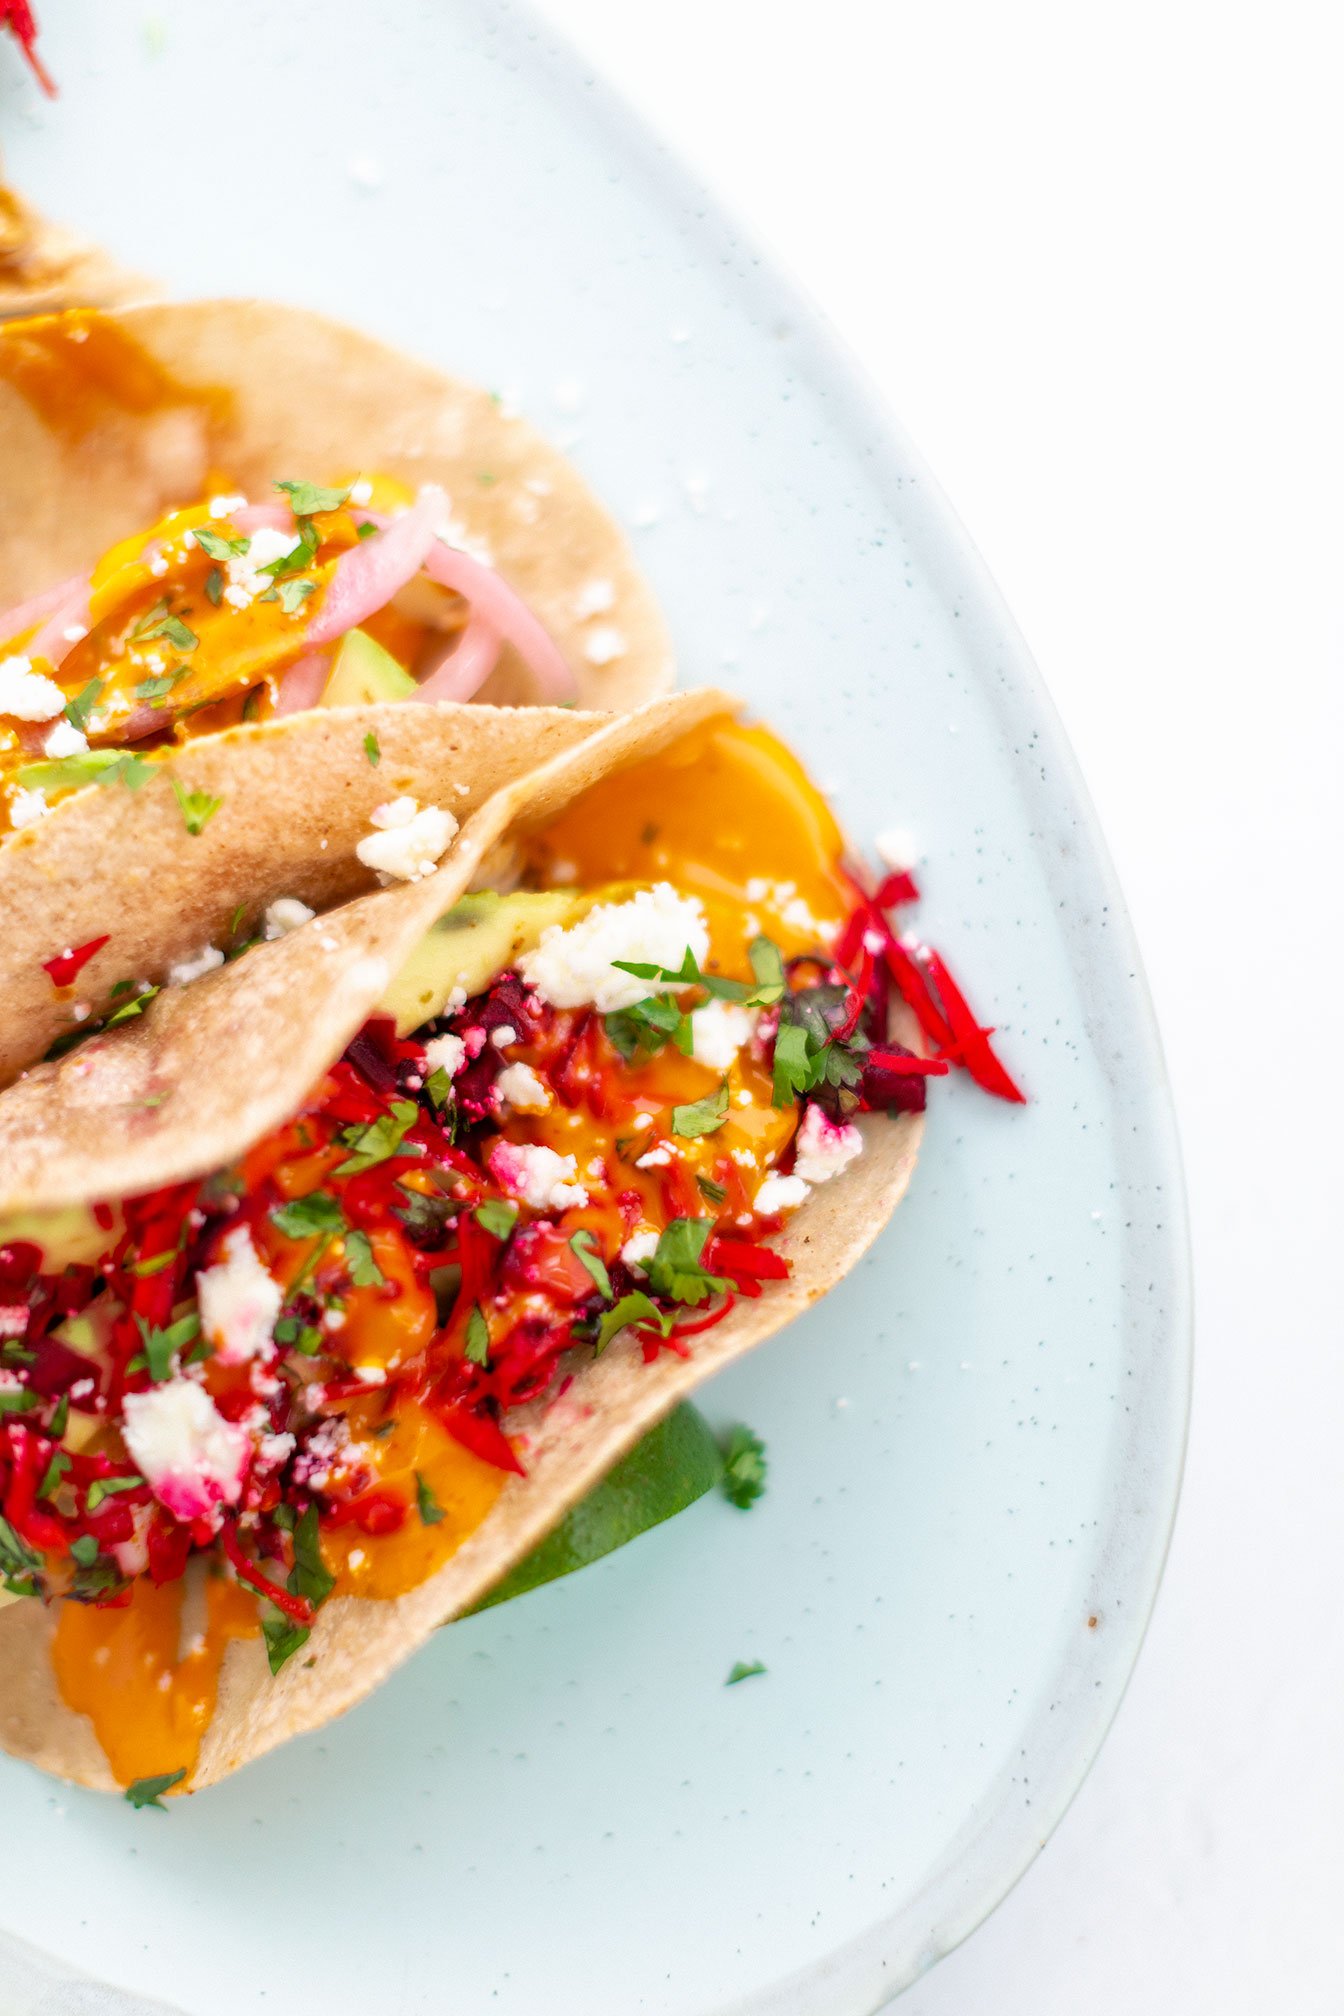
I also want to mention that if you are following the Nourishment Program, you will see that this salsa can be turned into a Six Senses Nourish Meal!
SIX SENSES NOURISH COMPONENTS:
Non-starchy carbs | beet and carrot salsa
Starchy carbs | grain-free tortillas (Siete)
Protein | Grilled tilapia (wild-caught)
Fats | buffalo sauce dressing (primal kitchen), feta/goat cheese, avocado
Probiotics | pickled red onions
Flavor | cilantro, lime, seasonings on fish
If you would like more information on how to build more six senses nourish meals and why it’s an easy and seamless way of getting nutrient dense, whole foods into your diet, then check out the Nourishment Program for more information!
If you try this recipe, let us know! Leave a comment, rate it, and don’t forget to tag a photo to #fromtherootsblog on Instagram. We love seeing what you come up with!
Liver Loving Carrot and Beet Salsa
Ingredients
1 beet
1 carrot
½ red onion
½ red apple
Juice of ½ lime + zest
¼ cup fresh cilantro, chopped
1 jalapeno (optional)
Clove of garlic (optional)
S+P to season
Directions
Shred the beets, carrots, onion and apples. You can use a mandolin, box grater or food processor fitted with the shredded blade. Place the shredded ingredients into a large bowl.
To the bowl, add juice and zest of lime, cilantro, seasonings and optional ingredients and toss until combined. Taste test to see if you need to add more salt, cilantro, etc. Keep in the fridge for at least 30 minutes for the ingredients to marry into each other before serving!
Great to serve with plantain chips, or use as a topping for breakfast eggs, tacos, fish, anything! Keep in the fridge for up to 3 days.

Beet and Cabbage Sauerkraut
Sauerkraut does not have to be a daunting task, people! It can actually be pretty fun! Requiring 10-20 minutes of prep time, then letting nature take its course.
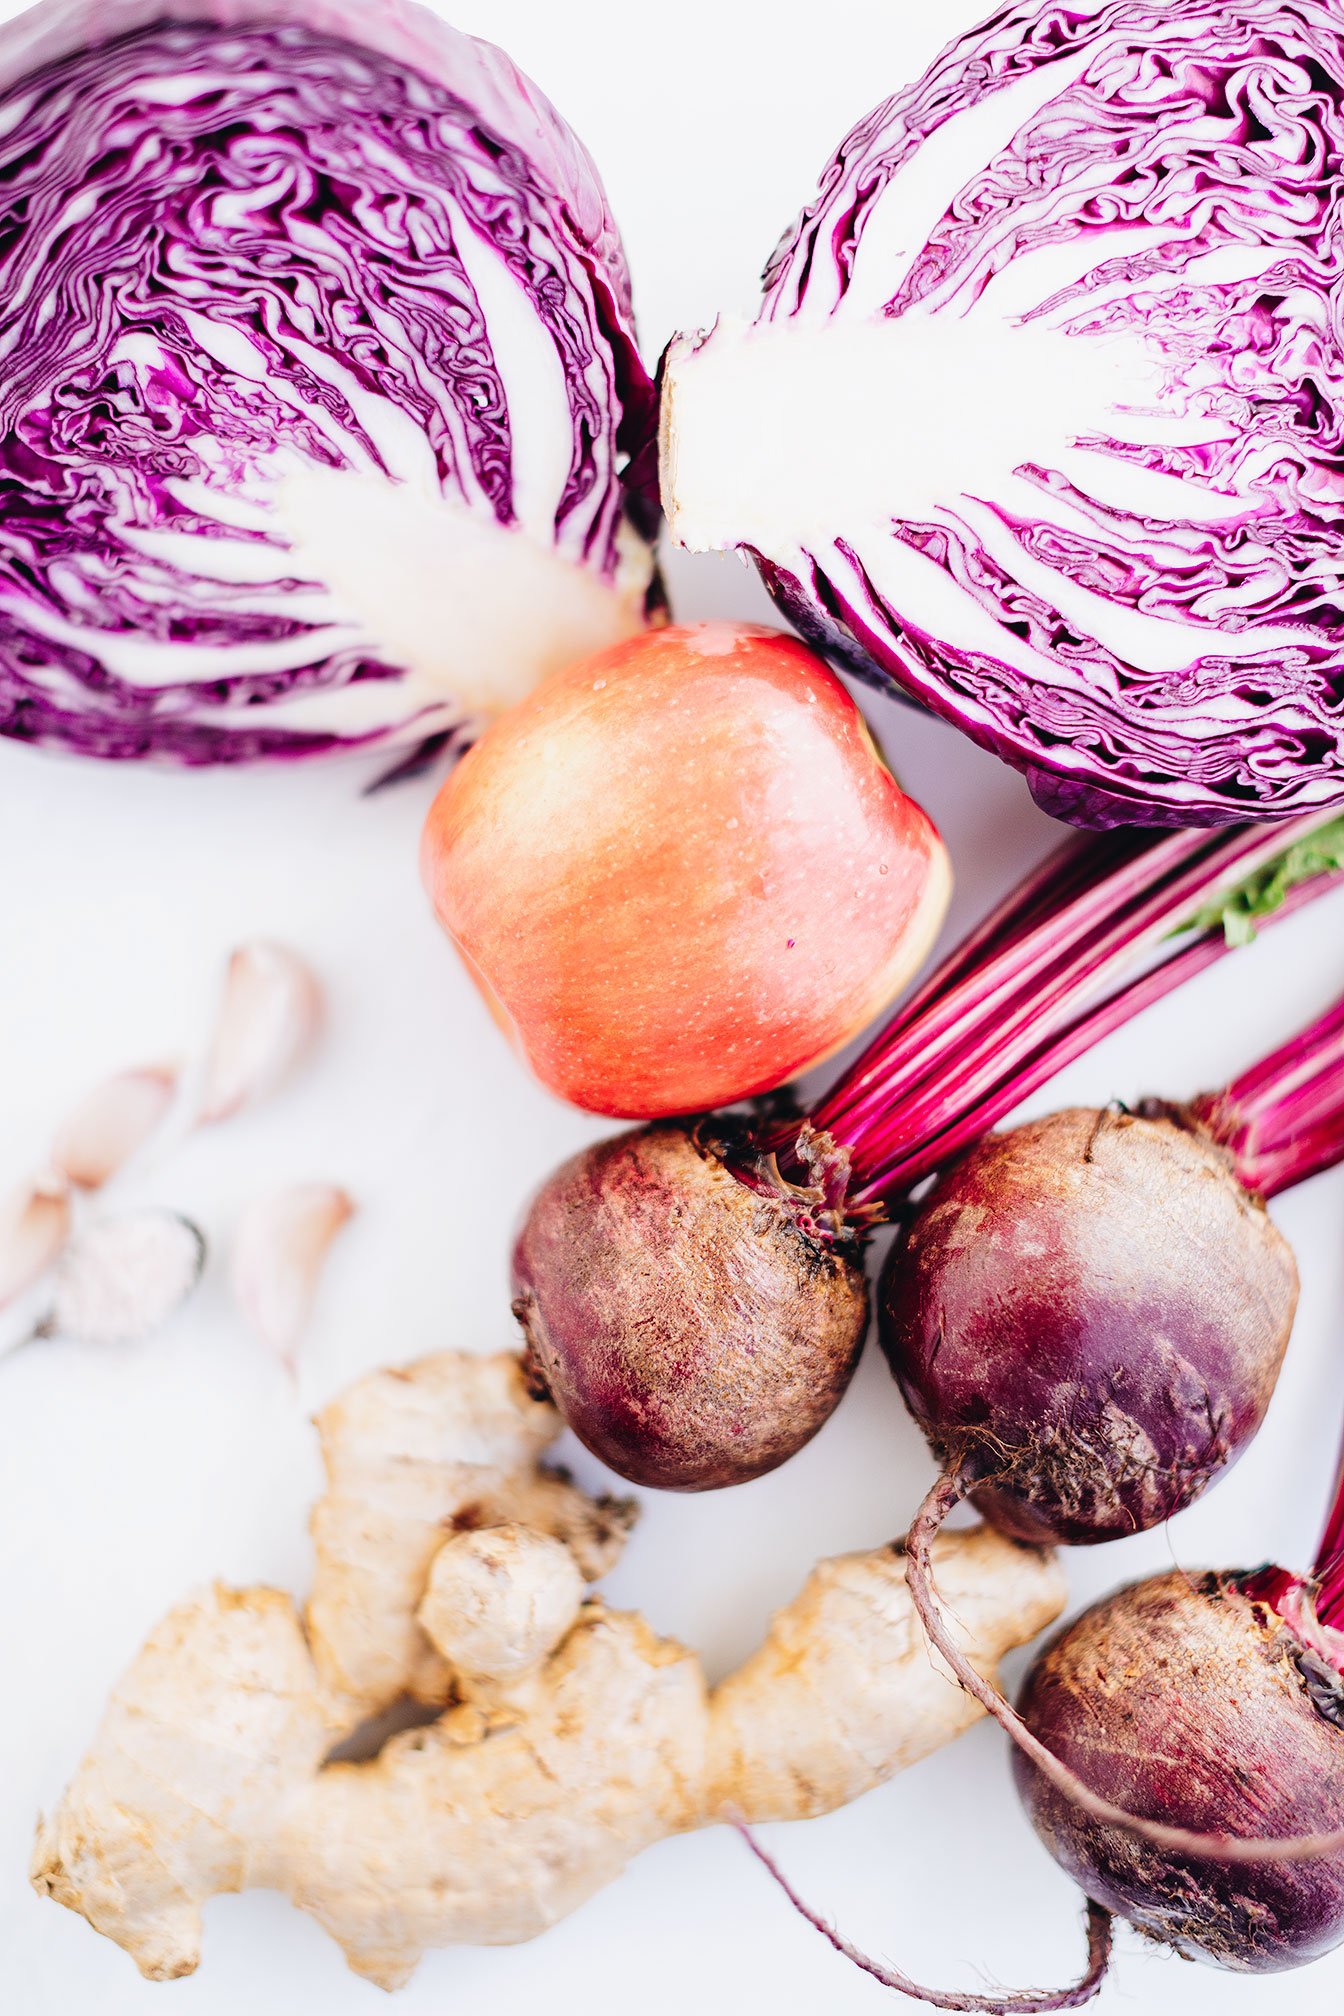
There are many sauerkraut flavor variations but for this recipe, we are using red beets, red cabbage, ginger and apple - inspired by my favorite store bought sauerkraut - Wildbrine red beet and cabbage sauerkraut.
A simple yet flavorful small batch beet and cabbage sauerkraut recipe that is packed with probiotics and beneficial bacteria.

Sauerkraut does not have to be a daunting task, people! It can actually be pretty fun! Requiring 10-20 minutes of prep time, then letting nature take its course.
There are many sauerkraut flavor variations but for this recipe, we are using red beets, red cabbage, ginger and apple - inspired by my favorite store bought sauerkraut - Wildbrine red beet and cabbage sauerkraut.
The sweet and tangy flavors seem to pair nicely with most dishes (i.e. eggs, sandwiches, tacos, wraps and if you are a part of the Nourishment program - nourish bowls!) as well as provide amazing texture to a dish!

Typically, when we talk about foods that are rich in probiotics, we’re referring to foods that have been bacterially fermented. They help introduce beneficial bacteria into our digestive tracts, help keep harmful bacteria at bay, provide helpful digestive enzymes, are nutrient dense, and are low cost - in fact, the ingredients cost $6 to make and it produced 30+ servings!
Gut Friendly Tip
When buying Kombucha, water kefir, or sauerkraut, look for “raw” or “unpasteurized” on the packaging. Pasteurization applies high heat to a food in order to kill bacteria (pathogenic contaminants and probiotics). While this process extends shelf life, it also kills all the wonderful microbes that make these foods uniquely beneficial!

If you try this recipe, let us know! Leave a comment, rate it, and don’t forget to tag a photo to #fromtherootsblog on Instagram. We love seeing what you come up with!
A simple yet flavorful small batch beet and cabbage sauerkraut recipe that is packed with probiotics and beneficial bacteria.
Prep Time: 20 minutes Yield: 30+ servings
Ingredients
1 small red cabbage (finely shredded or chopped)
2 medium raw beets (finely shredded or chopped)
1 inch ginger root (grated)
3 cloves garlic (optional) (grated)
1 medium red apple (honeycrisp) or pear (finely chopped)
2 tsp celtic sea salt
Directions
Prepare ingredients by finely chopped / mandolin sliced cabbage and raw beets.
Sterilize any equipment that you will be using (i.e. mason jars) to allow for proper fermentation. You can do this by pouring boiling water over clean jars/lids and drying completely. Allow the temperature to come back to room temperature before adding ingredients.
To a large mixing bowl, add the finely shredded cabbage and top with salt. Wash hands thoroughly and massage cabbage for ten minutes. You will notice when to stop massaging the cabbage when it starts to soften, shrink in size, and release water.
Add shredded beet, ginger, garlic, and apple and massage once more with clean hands for an additional 5 minutes. Taste test and adjust flavor, grated ginger for more zing, salt for more saltiness, or garlic for more garlicky flavor.
Place mixture and juice in sterilized mason jars and pack it down with a muddler or with the end of a wooden spoon.
If there is not enough liquid to cover, mix one tsp sea salt with 1 cup filtered water and fill until the mixture is submerged - leaving at least an inch of space at the top of the jar.
Cover the jar loosely with the lid and transfer on a pan or bowl (for catching any liquid during the fermentation process)
Place in a dark place (out of direct sunlight) (ideally 65 degrees F). Fermentation may take longer if room temperature is on the colder side.
Check for activity (tiny bubbles should rise to the top) after 3-4 days. The longer it sits and ferments (up to 2-3 weeks), the tangier it will become, so sample occasionally with a clean utensil. Once it has reached the desired tanginess, cover securely and transfer to the fridge when ready to eat.
Sauerkraut should be kept in the fridge for at least 3-6 months.
Notes
Liquid will naturally seep out during the first few days of fermentation as carbon dioxide - bubbles will be produced. That is why it’s best to sit your jars in a pan or bowl!
You need the natural bacteria from a whole cabbage so please do not use pre-shredded cabbage.
Any cabbage that is exposed to air will likely get moldy. Feel free to remove the mold if it is just on the top, you likely can salvage the rest. Always trust your sense of smell though. Fermented cabbage mixture should smell pleasantly sour. Never eat anything that smells yeasty or frankly repulsive.
SHOP OUR FAVORITE TOOLS + INGREDIENTS FOR THIS RECIPE!


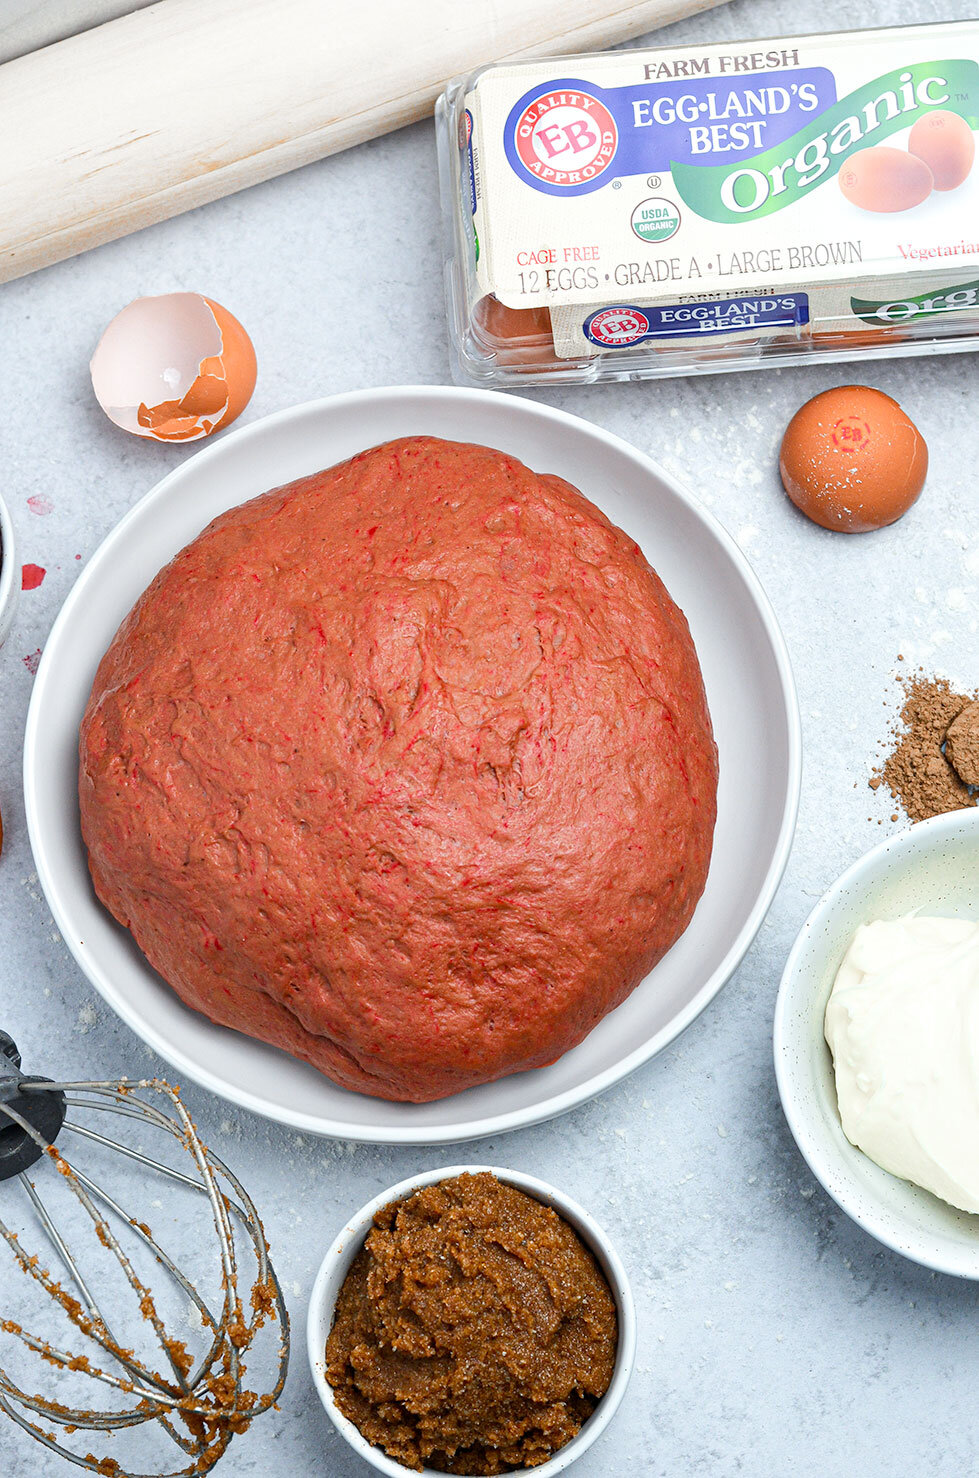
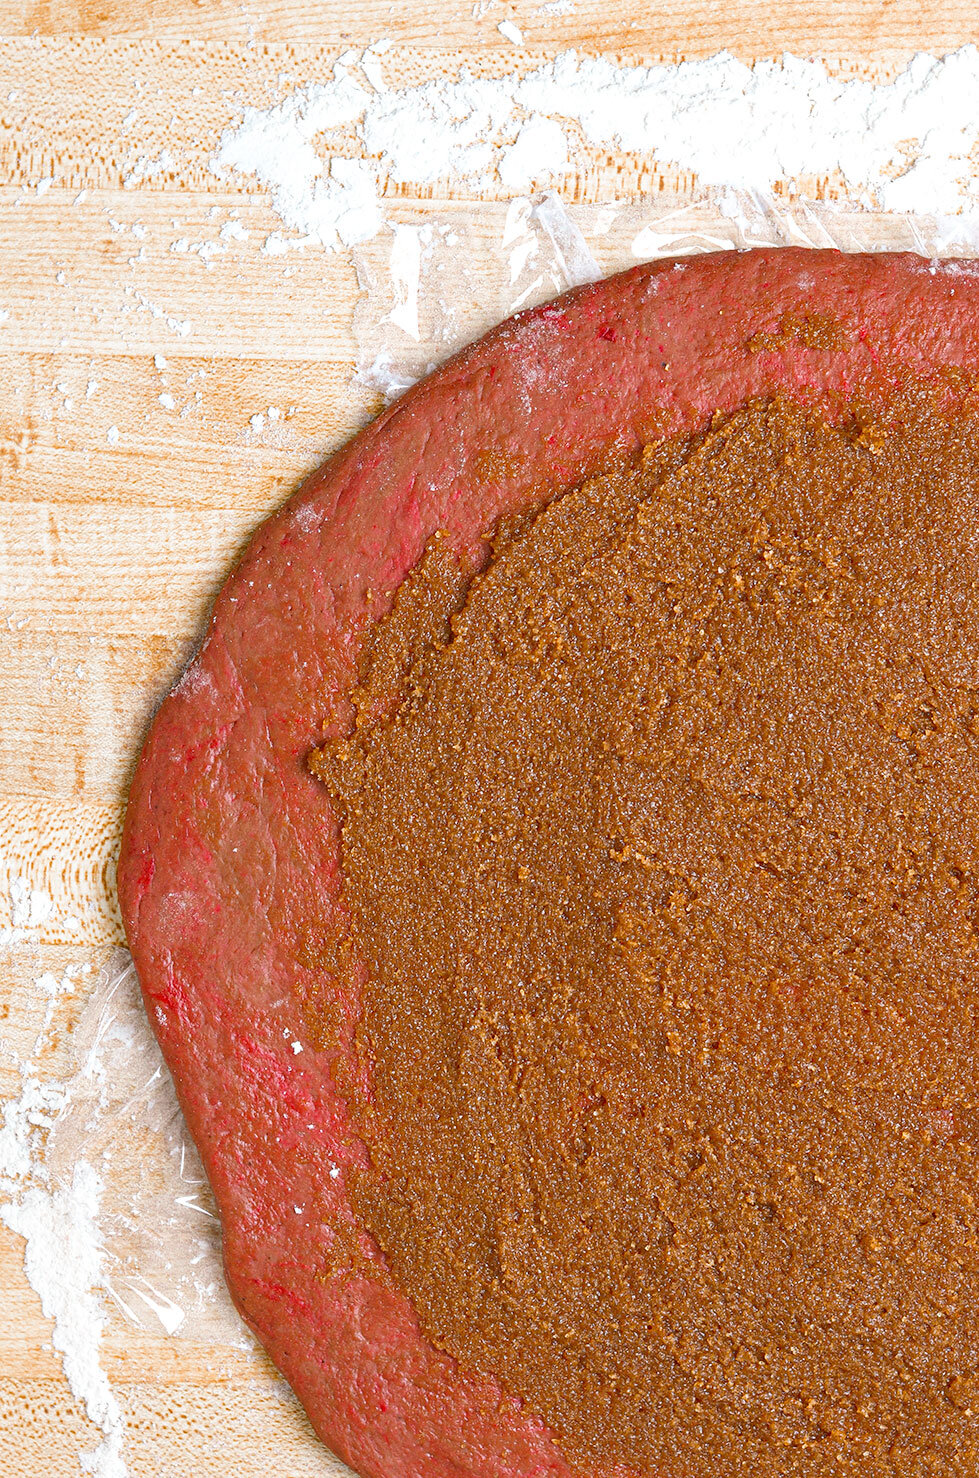
Red Velvet Cinnamon Rolls
Is your love language, baking?! Then here’s your opportunity to bake a delicious, gooey, flaky pan of red velvet cinnamon rolls for your significant other, best friend, or for yourself! The person you are baking for is gluten and/or dairy intolerant/allergic? That’s okay, I have provided swaps!
If you are short on time but still love to make homemade delicious treats, then I have provided a way to make them overnight. That way, you can throw them in the oven first thing in the morning, go back to your snuggle sesh, and be woken up by the delicious aroma of cinnamon rolls!
Red Velvet Cinnamon Rolls - Naturally beet dyed red velvet cinnamon rolls, are the ultimate addition to your slow mornings. Made from scratch, these rolls are delicious, gooey, and flaky with a sweet and thick cream cheese frosting. I have provided ways to make these gluten-free, dairy-free, and instructions on how to make them overnight.

Is your love language, baking?! Then here’s your opportunity to bake a delicious, gooey, flaky pan of red velvet cinnamon rolls for your significant other, best friend, or for yourself! The person you are baking for is gluten and/or dairy intolerant/allergic? That’s okay, I have provided swaps!

If you are short on time but still love to make homemade delicious treats, then I have provided a way to make them overnight. That way, you can throw them in the oven first thing in the morning, go back to your snuggle sesh, and be woken up by the delicious aroma of cinnamon rolls!


I’ve partnered with Eggland’s Best Eggs to make these cinnamon rolls. What I like about them is that Eggland’s Best Eggs are available nationwide. That way, if you don’t have access to get eggs from a local farmer, you can go to any grocery store and still benefit from getting good quality organic cage free eggs!


In order to make these red velvet, you will need chocolate like cocoa powder, vinegar, and red food coloring. Now you can use red food coloring but I wanted to turn these slightly pink since Valentine’s Day is coming up, so I used beetroot juice. I seem to always have it on hand whether I’m boiling beets to make my pickled beets or purchase Love Beets to make my beet hummus. If you decide to use the powder form, make sure you are reserving ¼ cup flour out of the normal recipe as the powder absorbs the liquid mixture causing the cinnamon rolls to be dry.

If you try this recipe, let us know! Leave a comment, rate it, and don’t forget to tag a photo to #fromtherootsblog on Instagram. We love seeing what you come up with!
Red Velvet Cinnamon Rolls - Naturally beet dyed red velvet cinnamon rolls, are the ultimate addition to your slow mornings. Made from scratch, these rolls are delicious, gooey, and flaky with a sweet and thick cream cheese frosting. I have provided ways to make these gluten-free, dairy-free, and instructions on how to make them overnight.
Ingredients
3 cups bread flour
*gluten free version in notes
1 packet (2-1/4tsp) rapid rise yeast
¾ cup warm plant-based milk (110 degrees F)
¼ cup unsalted grass-fed butter (melted & cooled) + 1 Tbsp melted butter
¼ cup organic cane sugar
3 Tbsp cocoa powder
2 Tbsp beet juice or 10-20 drops of natural red food coloring
1 tsp apple cider vinegar
1 tsp baking powder
¼ tsp salt
2 Eggland's Best organic eggs (whisked and room temperature)
Filling
¼ cup softened unsalted butter
¾ cup organic brown sugar
1 Tbsp ground cinnamon
Cream Cheese Frosting:
4-6 oz softened cream cheese or lactose-free cream cheese
¾ cup organic powdered sugar
½ tsp vanilla extract
Directions
Warm milk in a small saucepan until the temperature reaches 110 degrees F. It should feel like warm bath water. Transfer warm milk to the bowl of an electric mixture. Add sugar and sprinkle yeast on top. Let sit for 30 minutes. Add in whisked eggs, vinegar, melted and cooled butter and red food dye of choice. Mix until well combined.
In a medium bowl, combine flour, salt, baking powder, and cocoa powder. Place dough hook on the stand mixer and slowly add flour mixture to the liquid mixer on medium speed for about 4-8 minutes. Dough should form into a nice ball and be slightly sticky. If it’s too sticky (sticking to your hands or to the bottom of the mixer) add in 2 Tbsp increments of flour.
Transfer dough ball to a well-oiled bowl, cover with plastic wrap and a warm towel. Allow dough to rise for up to an hour, or until doubled in size (if doing the gluten-free version, the dough will rise only slightly). To make sure your dough is proofing nicely, you can set the bowl in the oven under the “bread proofing” option and turn the oven off once it hits 100 degrees or you can wrap your bowl around Christmas lights (that’s what I do!)
While your dough is rising, make the filling by adding softened butter, cinnamon, and brown sugar to your electric mixture or small bowl. Mix until well combined. Set cinnamon filling aside and wash out the mixer to make the frosting!
In the bowl of the electric mixer, combine softened cream cheese, powdered sugar and vanilla extract. Beat until smooth and fluffy. Set aside or leave in the mixture until you are ready to spread over cinnamon rolls.
At this point, your dough has doubled in size! Get a large cutting board or large surface and sprinkle flour over the surface and place plastic wrap over it (about 14x9 inch rectangle). Add the dough in the center of the plastic wrap and sprinkle with more flour. Then top with another sheet of plastic wrap. Roll dough out into a 14x9 inch rectangle. Remove the top layer of plastic wrap and spread cinnamon filling over dough; leaving about ¼ inch margin at the far side of the dough. Tightly roll the dough lengthwise into a cylinder. (The bottom layer of plastic wrap helps to get that tight roll!) I like to carefully “smash” both ends together to make a fuller roll!
Use a serrated knife or dental floss to cut into even 9 rolls. You may want to cut about an inch off both ends of the dough since the ends will not be full of the cinnamon filling.
Place cinnamon rolls in a greased 9x9 baking pan or round 9 inch cake pan. For easier clean up, line the pan with parchment paper. Melt the tablespoon of butter and brush the tops of the rolls with melted butter. Cover with a warm towel and let rise again for 30-45 minutes.
Preheat the oven to 350 degrees. Remove the towel and bake cinnamon rolls for 20-25 minutes or until just slightly golden brown on the edges. I say slightly so the center stays gooey! Allow them to cool 5-10 minutes before frosting.
Notes
To make these gluten-free: replace bread flour with gluten-free 1 to 1 baking flour and add an additional tsp of baking powder to the dry mix. The rolls will not rise as much as the original recipe but will still taste just as good, if not better, in my opinion!
I use these brands for the lactose-free version cream cheese: Green Valley Creamy Lactose Free *my favorite and Miyoko’s Vegan Cream Cheese *Still good but more “vinegar” tasting
To make these overnight: After placing rolls into the greased pan (after the first rise), simply cover the pan with tinfoil and place in the fridge overnight. When you are ready to bake them, set the pan on the counter for at least 30-45 minutes (room temperature) before baking (this is their second rise).
If you decide to use beetroot powder instead of beet juice, decrease your flour mixture by ¼ cup and gradually add more flour if the mixture seems to be too sticky when making the dough.

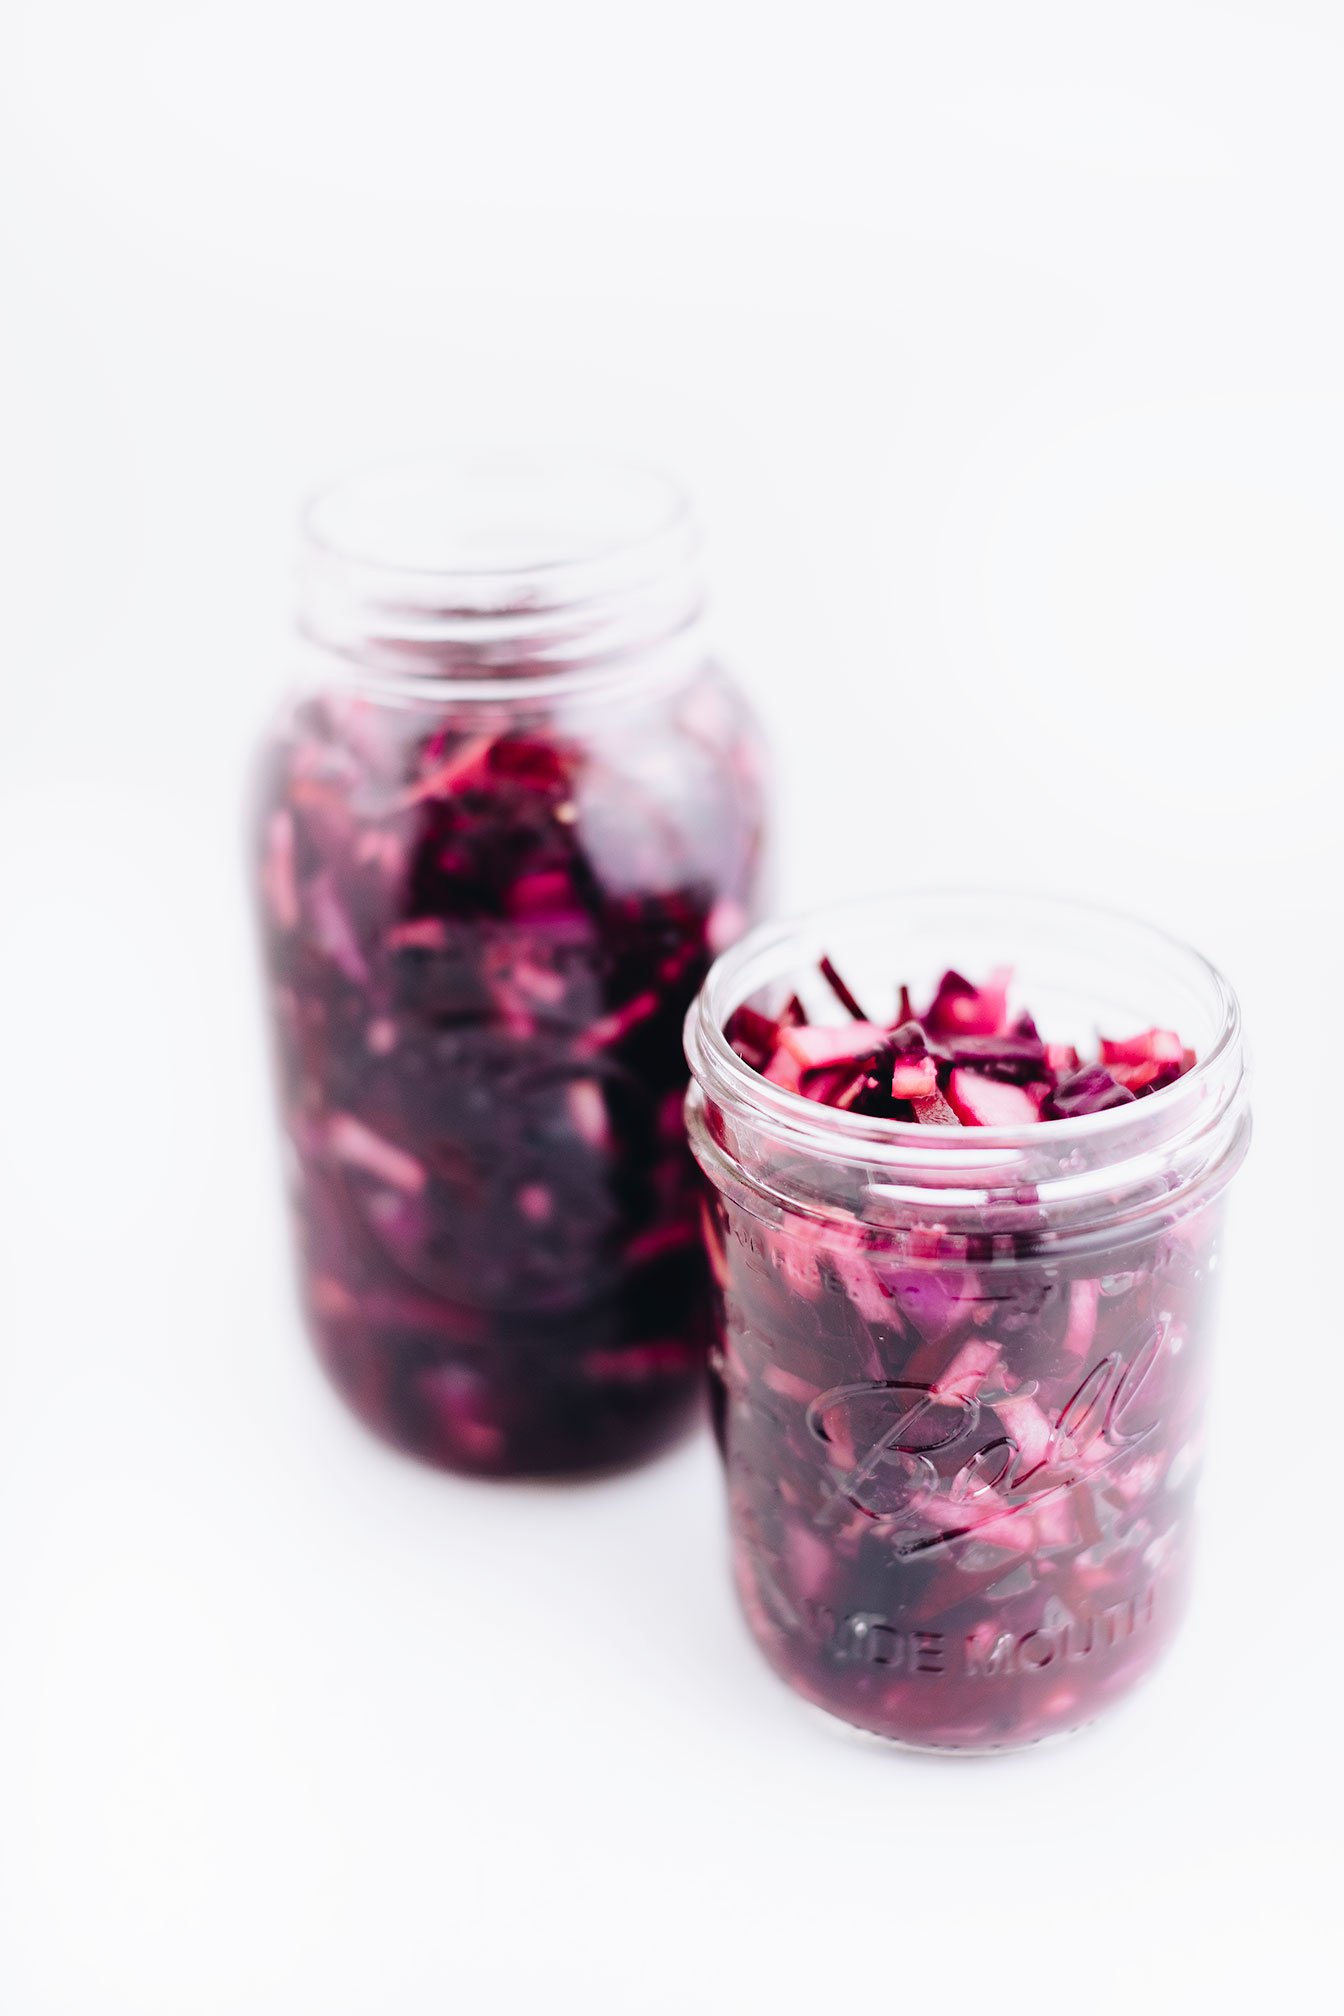
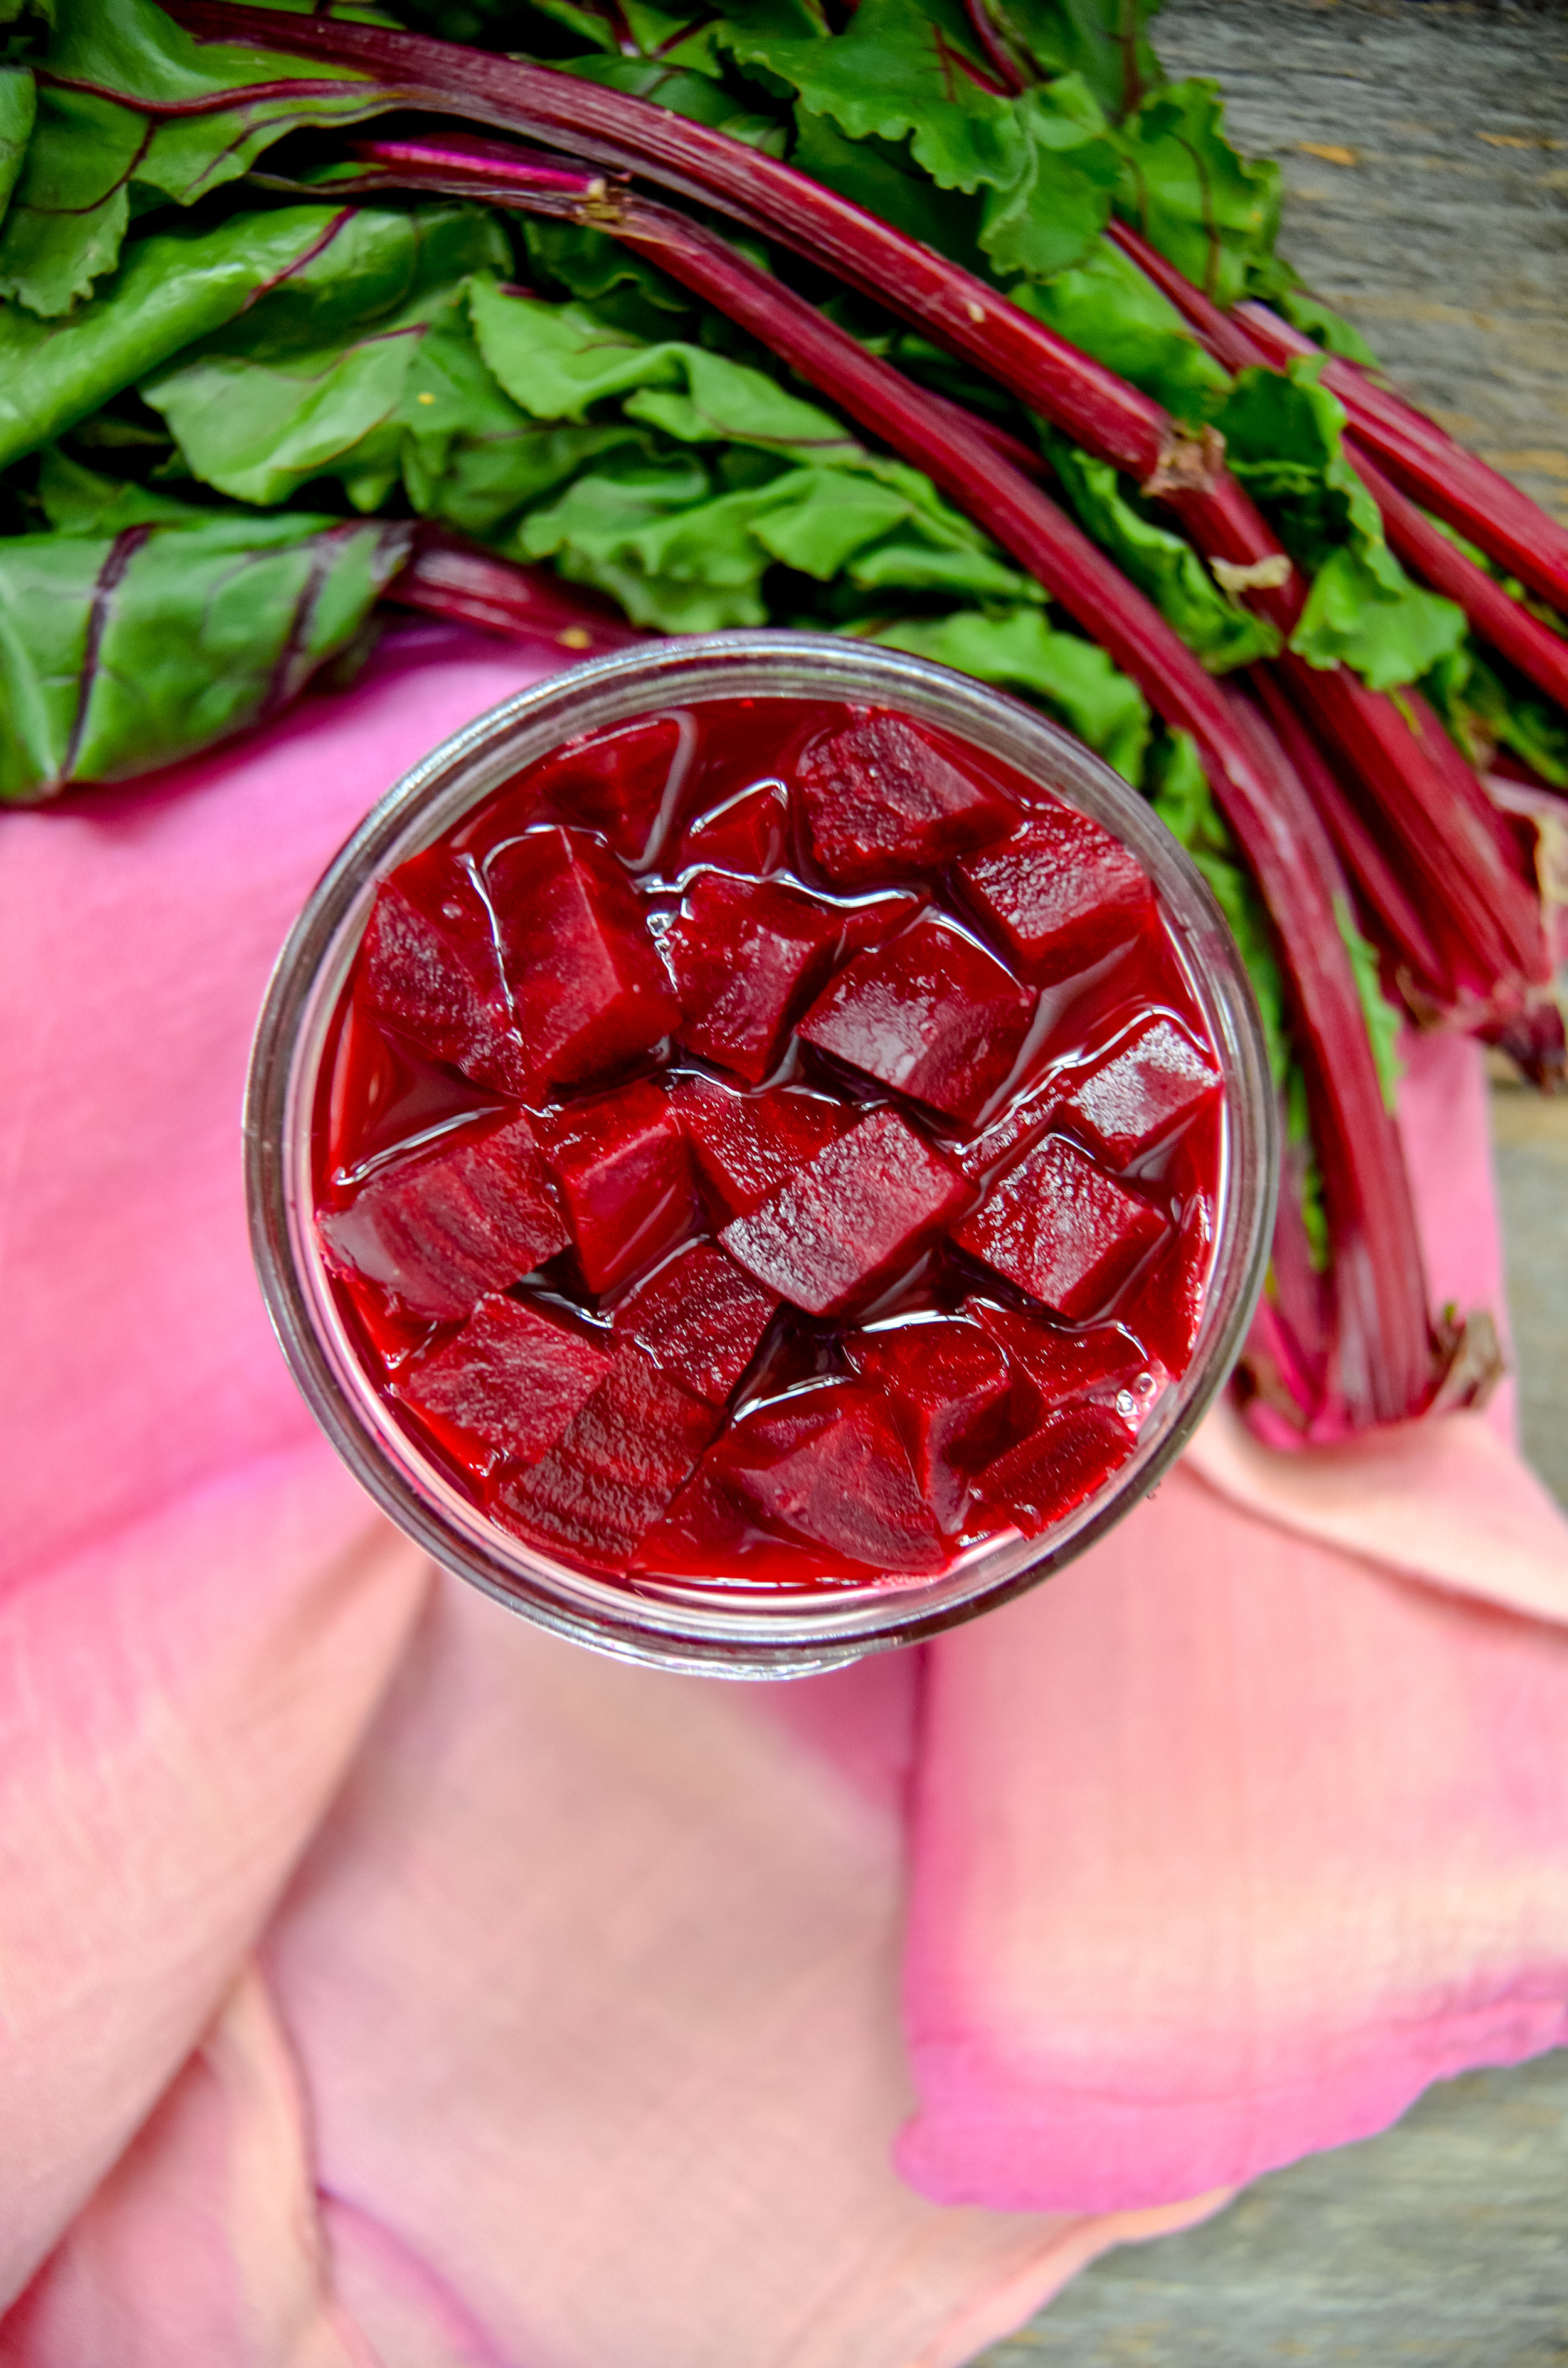
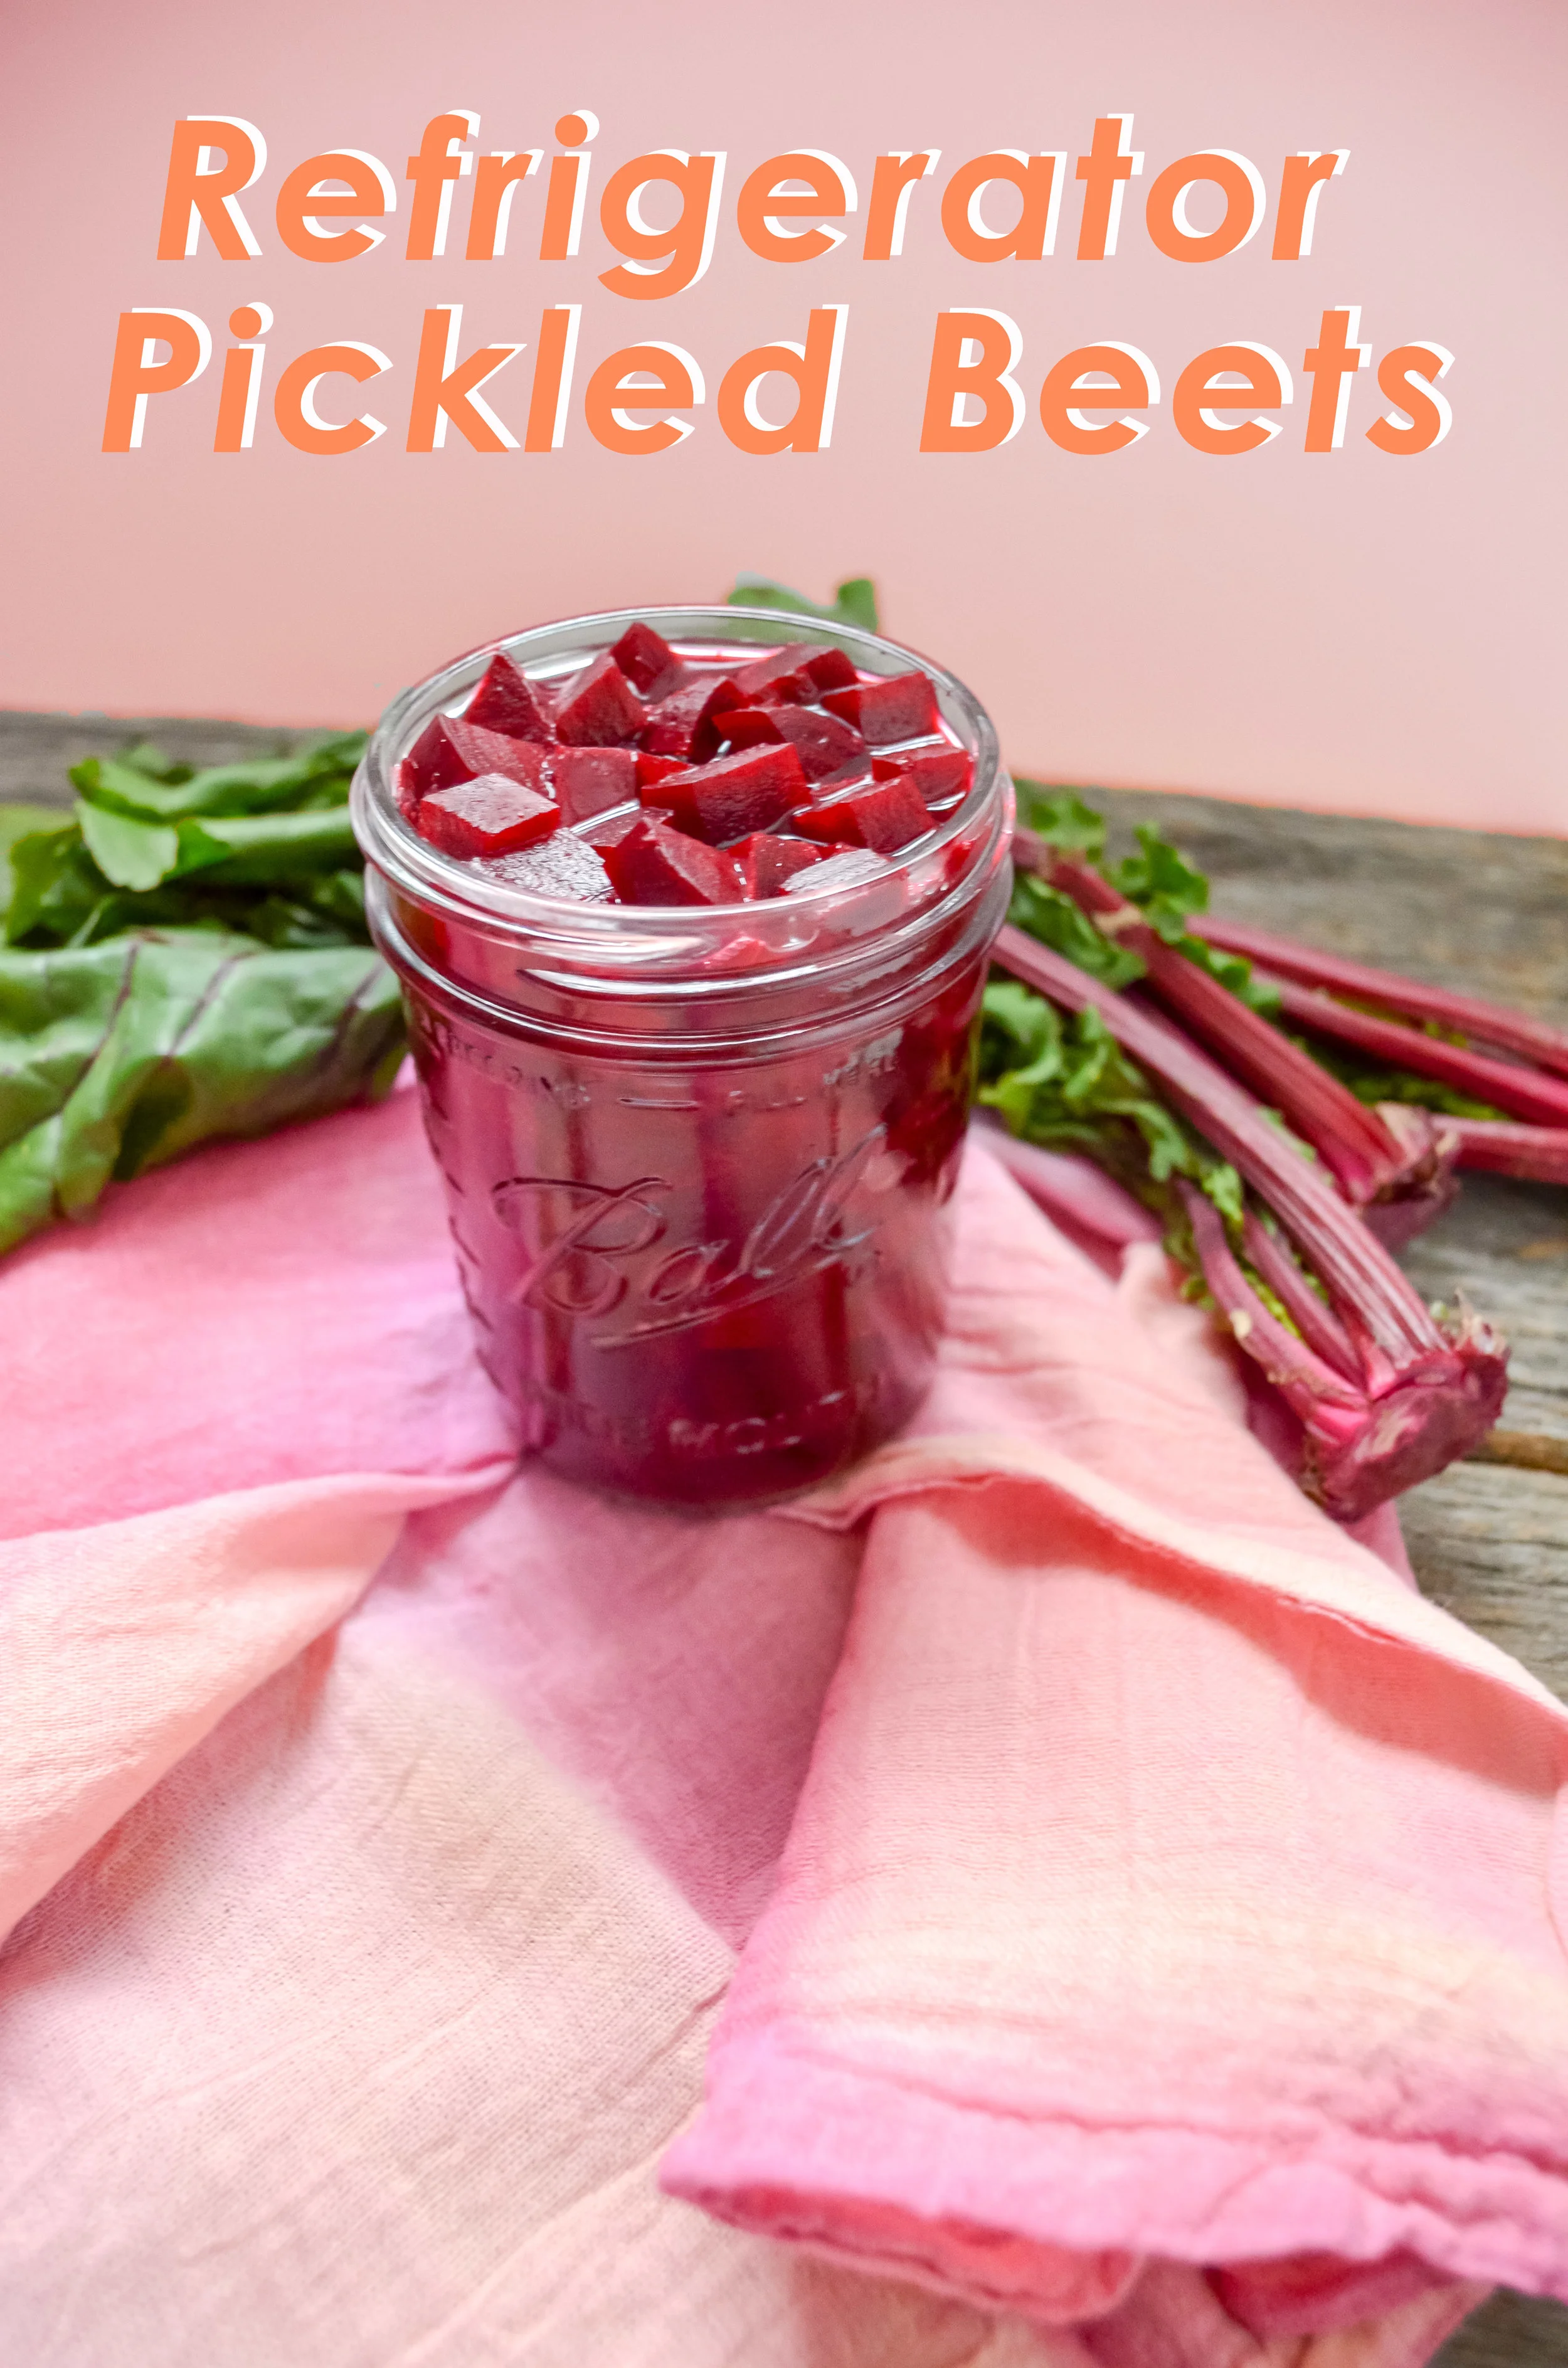
Refrigerator Pickled Beets
We need to talk about beets.
I was not a fan of them in the beginning. It was so bad that I remember my first time trying them. It was at Jason’s Deli, many moons ago. I was with my health freak friends and they were like, “Oh! You have to add beets to your salad, they’re so good for you!”. I thought to myself, “Sure… If beets can make my entire salad pink then they can’t be that bad!”.
Boy, was I wrong; beets taste just like dirt.
A great way to amp up up the nutritional value of beets while being a great addition to salads, side dishes, and appetizers!
We need to talk about beets.
I was not a fan of them in the beginning. It was so bad that I remember my first time trying them. It was at Jason’s Deli, many moons ago. I was with my health freak friends and they were like, “Oh! You have to add beets to your salad, they’re so good for you!”. I thought to myself, “Sure… If beets can make my entire salad pink then they can’t be that bad!”.
Boy, was I wrong; beets taste just like dirt.
Years have gone by since then and I would now consider myself a beet connoisseur. If I go to a cute mom & pop bakery or a hipster smoothie joint, I will initially scour the menu for anything beet flavored and go for it. One of my favorite things that include beet in the recipe is these amazing beet and ricotta cheese donuts from The Underground Cafe with DoughP Doughnutsin Asheville, NC. They were a total game changer!
I have thought about different ways to incorporate beets into my diet, and eventually, I realized one way to implement beets is to pickle them!
Cool facts about pickled beets:
Very low in fat, with less than 0.2g in each cup of slices.
Rich in dietary fiber which helps in promoting a healthy digestive system and stable blood sugar levels.
High levels of many vitamins and minerals like Vitamin A, B and C, potassium, magnesium, and iron.
Detox capabilities!
Contains both essential amino acids betaine (used to help people with depression) and tryptophan (that acts as a natural mood regulator)
There are many ways to incorporate pickled beets into your diet. My favorite way is to add them to salads. You can also add them to a bruschetta style appetizer with goat cheese and basil, breakfast eggs, or a side dish!


Now, let’s talk about how to pickle your beets. Most restaurants or recipes on Pinterest will tell you to pickle your beet or vegetable in sugar or a brine. A little bit of sugar is fine, but I try to avoid adding too much extra sugar to my diet. That is why my recipe uses a very small amount of sugar along with apple cider vinegar just to balance out the flavor. I won’t go too much into detail, as ACV already holds a solid reputation, but ACV is great for regulating blood sugar levels, can improve skin health, and reduce blood pressure. Now, to the recipe, we go!


If you try this recipe, let us know! Leave a comment, rate it, and don’t forget to tag a photo to #fromtherootsblog on Instagram. We love seeing what you come up with!
A great way to amp up up the nutritional value of beets while being a great addition to salads, side dishes, and appetizers!
INGREDIENTS
1 lb fresh beets
1/2 cup apple cider vinegar ((with the mother))
1/2 cup filtered water
1 tsp organic cane sugar
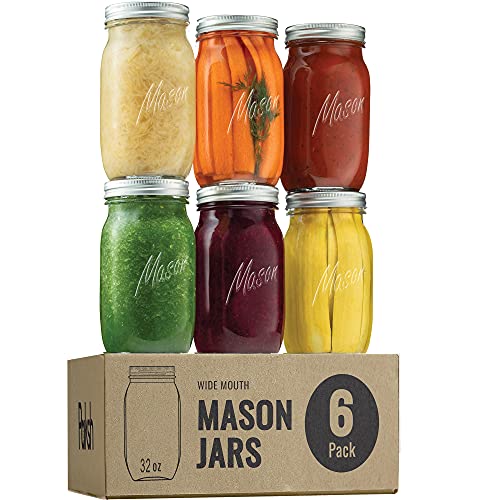
1 pint glass mason jar (wide mouth in picture)
DIRECTIONS
Wash and clean beets and add to a boiling pot of water.
Boil for up to 25 minutes or until fork tender. (Tip* use boiled beet water as a plant fertilizer!)
While beets are boiling, add water, sugar and ACV to a small pot over medium heat. Bring to a boil and simmer on low for 5 minutes. Let the mixture cool to room temperature.
Let the beets rest and then peel off the skin (taking the skin off after boiling process is much easier than when beets are fresh)
Cut into cubes or slices (Tip*place a paper towel over cutting board and wear gloves to prevent staining)
Add beets to a jar and pour the liquid mixture over until full to the rim. Allow the pickled beet mixture to cool until room temperature.
Screw on lid and transfer to the fridge! You can refrigerate for up to two weeks.
NOTES
Canning option: I will be honest and say that I have not tried canning for long-term storage so I am not sure how these would store later so I don’t recommend it.