Sort by Category
- May 2026
- March 2026
- December 2025
- November 2025
- October 2025
- September 2025
- August 2025
- June 2025
- August 2024
- July 2024
- June 2024
- May 2024
- February 2024
- January 2024
- December 2023
- November 2023
- October 2023
- September 2023
- August 2023
- July 2023
- March 2023
- February 2023
- January 2023
- December 2022
- November 2022
- October 2022
- September 2022
- August 2022
- June 2022
- May 2022
- April 2022
- March 2022
- February 2022
- January 2022
- December 2021
- November 2021
- October 2021
- September 2021
- August 2021
- July 2021
- June 2021
- May 2021
- April 2021
- March 2021
- February 2021
- January 2021
- December 2020
- November 2020
- October 2020
- September 2020
- August 2020
- July 2020
- June 2020
- May 2020
- April 2020
- March 2020
- February 2020
- January 2020
- December 2019
- November 2019
- October 2019
- September 2019
- August 2019
- July 2019
- June 2019
- May 2019
- April 2019
- March 2019
- February 2019
- January 2019
- December 2018
- November 2018
- October 2018
- September 2018
- August 2018
- July 2018
- June 2018
- May 2018
- April 2018
- March 2018
- February 2018

Harvest Stuffed Acorn Squash
Harvest stuffed acorn squash is an ideal autumn comfort dish that is rich in protein, features seasonal ingredients, and requires minimal kitchen tools!
Harvest stuffed acorn squash is an ideal autumn comfort dish that is rich in protein, features seasonal ingredients, and requires minimal kitchen tools!


Servings: 4 Prep: 15 MIN Cook time: 55 MIN
Ingredients
For the squash:
2 acorn squash
4 tsp olive oil or olive/avocado spray
S+P
For the filling:
1 lb Italian sausage or chicken sausage
4 oz mushrooms (finely chopped)
1/2 small yellow onion (finely diced)
1 medium honeycrisp apple (finely diced) or 1/4 cup dried cranberries
1/2 tsp salt
1/4 tsp black pepper
1/4 tsp cinnamon
1/8 tsp allspice (optional)
2 cloves minced garlic (or 1 tsp garlic powder)
1 Tbsp fresh sage (chopped)
1/2 cup shredded parmesan cheese, divided
Directions
Preheat oven to 400 degrees and line a baking sheet with parchment paper.
To a medium skillet, heat oil over medium heat and sauté onion and peppers for about 5 minutes. Move sauté veggies to the side and add turkey sausage to the center, crumbling the meat. Let cook, stirring and crumbling meat until meat is completely browned, for about 10 minutes. Turn heat off and let mixture to cool.
In a large mixing bowl, whisk together eggs and yogurt. Add in turkey mixture and incorporate. Add in the rest of the dry ingredients: almond and coconut flour, nutritional yeast, baking powder, and seasonings using a spatula until combined.
Using ¼ - ½ cup or large cookie scoop, make 12 evenly sized balls and place them on the sheet pan. Place in the oven for 12-16 minutes until slightly browned all over.
Remove from the oven and let cool completely before storing in an airtight container in the fridge for up to 5 days.

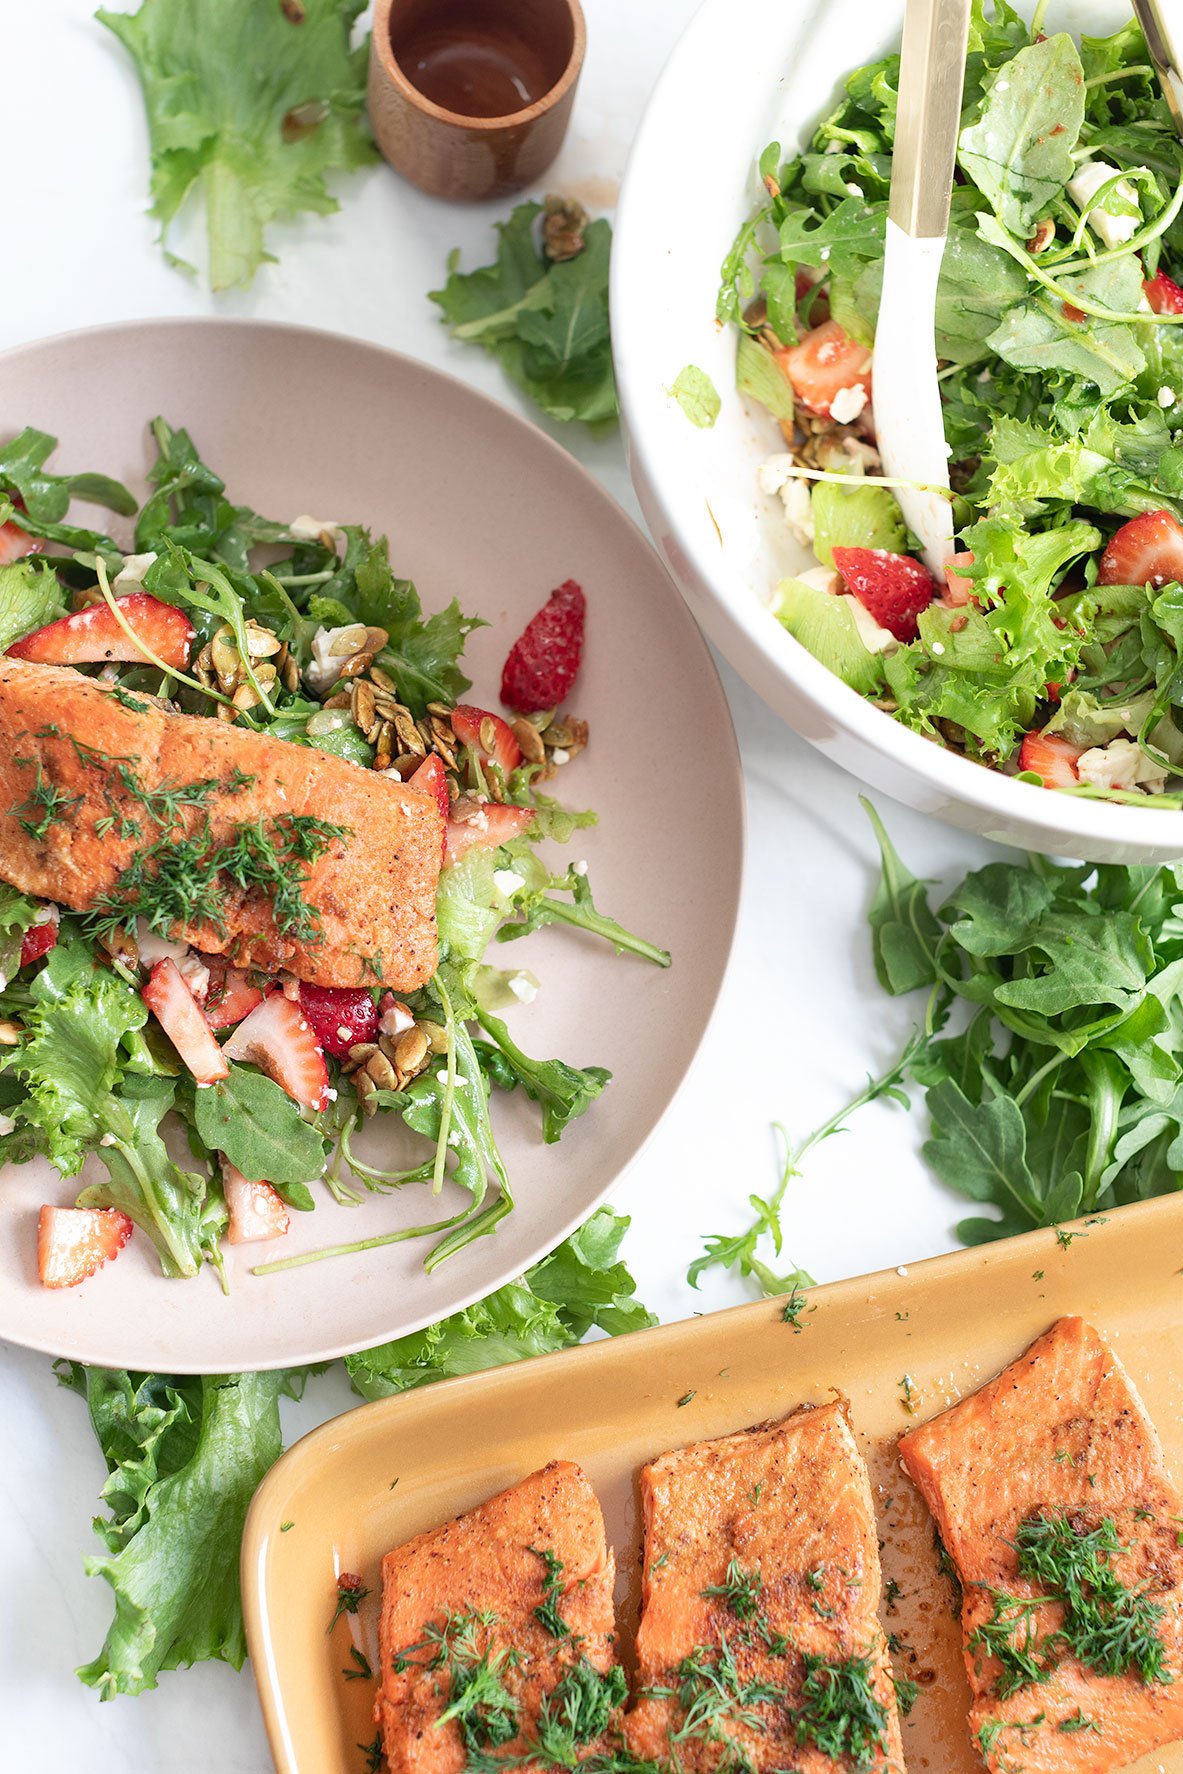
Strawberry Salmon Salad
Simple strawberry salmon salad requires less than six ingredients, your preferred salmon seasoning, and the option of homemade or store-bought dressing - perfect for effortless summer days!
Simple strawberry salmon salad requires less than six ingredients, your preferred salmon seasoning, and the option of homemade or store-bought dressing - perfect for effortless summer days!

I've been preparing this salad throughout the summer! Why? Because it's nutritious, rejuvenating, and incredibly simple to whip up. Everything can be ready in less than 30 minutes, making it an ideal choice for a quick weeknight dinner or for meal prepping for lunch.

TIPS ABOUT STRAWBERRY SALMON SALAD
Simplicity is key! This recipe is all about keeping things easy. I personally opt for my beloved strawberry vinaigrette from the store, but you can also whip up a speedy honey vinaigrette dressing from my alternative strawberry salad recipe.
This salad recipe is simple with just a few ingredients. If you feel like enhancing it, consider incorporating red onions, avocado, or substituting pepitas with pecans or almonds.
In this salad recipe, salmon takes the spotlight due to its quick cooking time and the avoidance of heating up the oven on a hot summer day. To ensure quality and sustainability, opt for wild-caught Alaskan or Sockeye salmon.
To transform this into a lunch meal prep, opt for glass containers when packing salads. This choice helps maintain freshness and prevents sogginess. I would also separate the ingredients like keep the salad undressed and dressing in a separate container and store the cooked salmon separately. (salmon refrigerate up to 3 days).

TO PREPARE THE EASIEST TOASTED HONEY PEPITAS
Heat a skillet over medium-high heat without adding any oil.
Spread pepitas in the skillet to form a single layer and shake occasionally.
Continue shaking until they turn golden brown (4-5 minutes). Transfer the toasted pepitas to a bowl to cool, then add a pinch of salt and 1 tablespoon of honey.
Stir until the seeds are well coated and set aside to cool.

Watch the video below to see how simple it is to prepare this salad!
If you try this recipe, let us know! Leave a comment, rate it, and don’t forget to tag a photo to #fromtherootsblog on Instagram. We love seeing what you come up with!
Simple strawberry salmon salad requires less than six ingredients, your preferred salmon seasoning, and the option of homemade or store-bought dressing - perfect for effortless summer days!
SERVINGS: 4 | PREP TIME: 10 MIN | COOK TIME: 15 MIN
Ingredients
2 - 4 salmon filets
1-2 Tbsp go to salmon seasonings*
4-8 cups favorite salad greens (I used half arugula half mixed)
1 cup strawberries, hulled and sliced
¼ cup pepitas
¼ cup crumbled feta
1 tbsp honey
¼ cup strawberry balsamic vinaigrette*
salt + pepper to taste
fresh dill for garnish, optional
Directions
Prepare Toasted Honey Pepitas:
1) Heat a skillet over medium-high heat without adding any oil. Spread pepitas in the skillet to form a single layer and shake occasionally. Continue shaking until they turn golden brown (4-5 minutes). Transfer the toasted pepitas to a bowl to cool, then add a pinch of salt and 1 tablespoon of honey. Stir until the seeds are well coated and set aside to cool.
To prepare the salmon:
1) Season your salmon with your favorite seasonings (refer to the notes below for my recommendations). Heat oil in a skillet over medium-high heat until it is hot and shimmering. Cook the salmon without moving it, skin side up, until it turns golden and crisp, approx. 4 minutes. Gently flip the fillets and lower the heat to medium. Cook until it reaches your desired level of doneness, around 4-5 minutes. Finally, transfer the salmon to a platter to cool.
Preparing the salad:
1) Coat the salad greens in dressing in a large mixing bowl. Add the remaining ingredients like toasted pepitas, feta, strawberries, salt, and pepper. Top it off with a salmon filet and savor the dish!
Notes:
Choose whatever greens you would like. I used arugula and mixed greens but you can also use spinach, butter lettuce, kale or romaine.
When it comes to my salmon, I favor a classic garlic powder, smoked paprika, salt, pepper and splash lemon juice and chopped fresh dill over. If you need more guidance, there are many salmon or fish focus seasonings that you can use.
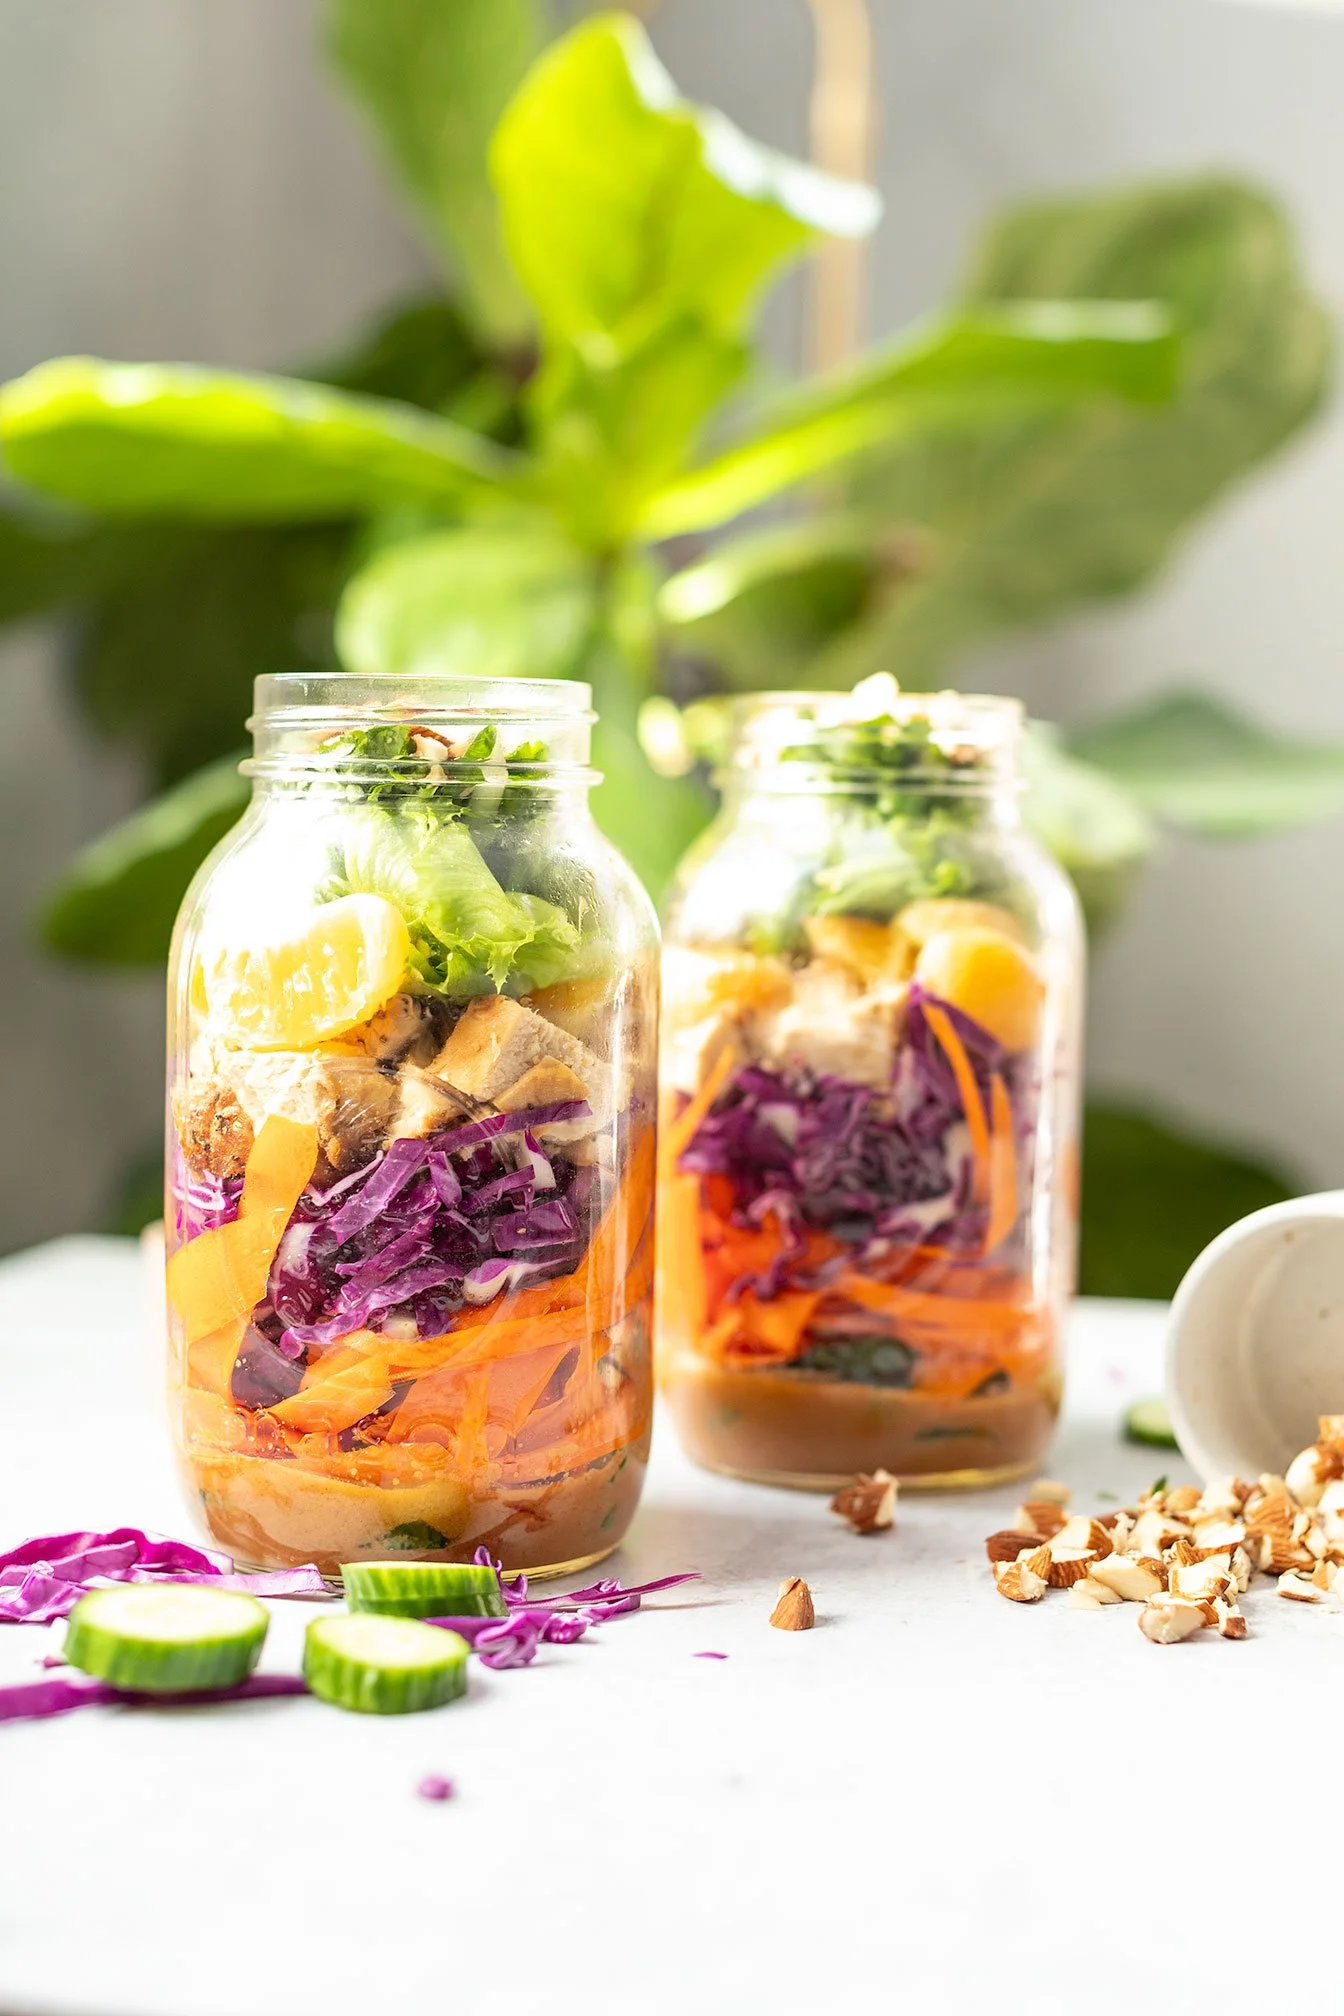
Asian Mason Jar Salad with Peanut Sauce
These healthy, delicious, and portable asian mason jar salads are made with chicken, mixed greens, cucumbers, cabbage, oranges, shredded carrots or the raw carrot salad (hormone balancing), green onions, cilantro, crushed peanuts with a peanut sauce dressing!
These healthy, delicious, and portable asian mason jar salads are made with chicken, mixed greens, cucumbers, cabbage, oranges, shredded carrots or the raw carrot salad (hormone balancing), green onions, cilantro, crushed peanuts with a peanut sauce dressing!

Mason Jar salads
I never realized I hadn't shared a single mason jar salad recipe on the blog! Back when I was in the corporate world, I used to enjoy these salads regularly, and I had forgotten how simple, versatile, and delicious they can be!
Given my fondness for Asian cuisine, I thought it fitting to make my first mason jar salad an Asian-inspired one.
For those who are part of the Nourished Roots Membership Program, you might recognize this recipe from the January 2024 Meal Prep Guide! If you're not yet a member, sign up today to access more exclusive recipes like this one that may not be featured on the public website!

Tips for assembling Asian mason jar salads:
The key to these jars is layering them correctly so that you can prep your salads in advance without them becoming soggy.
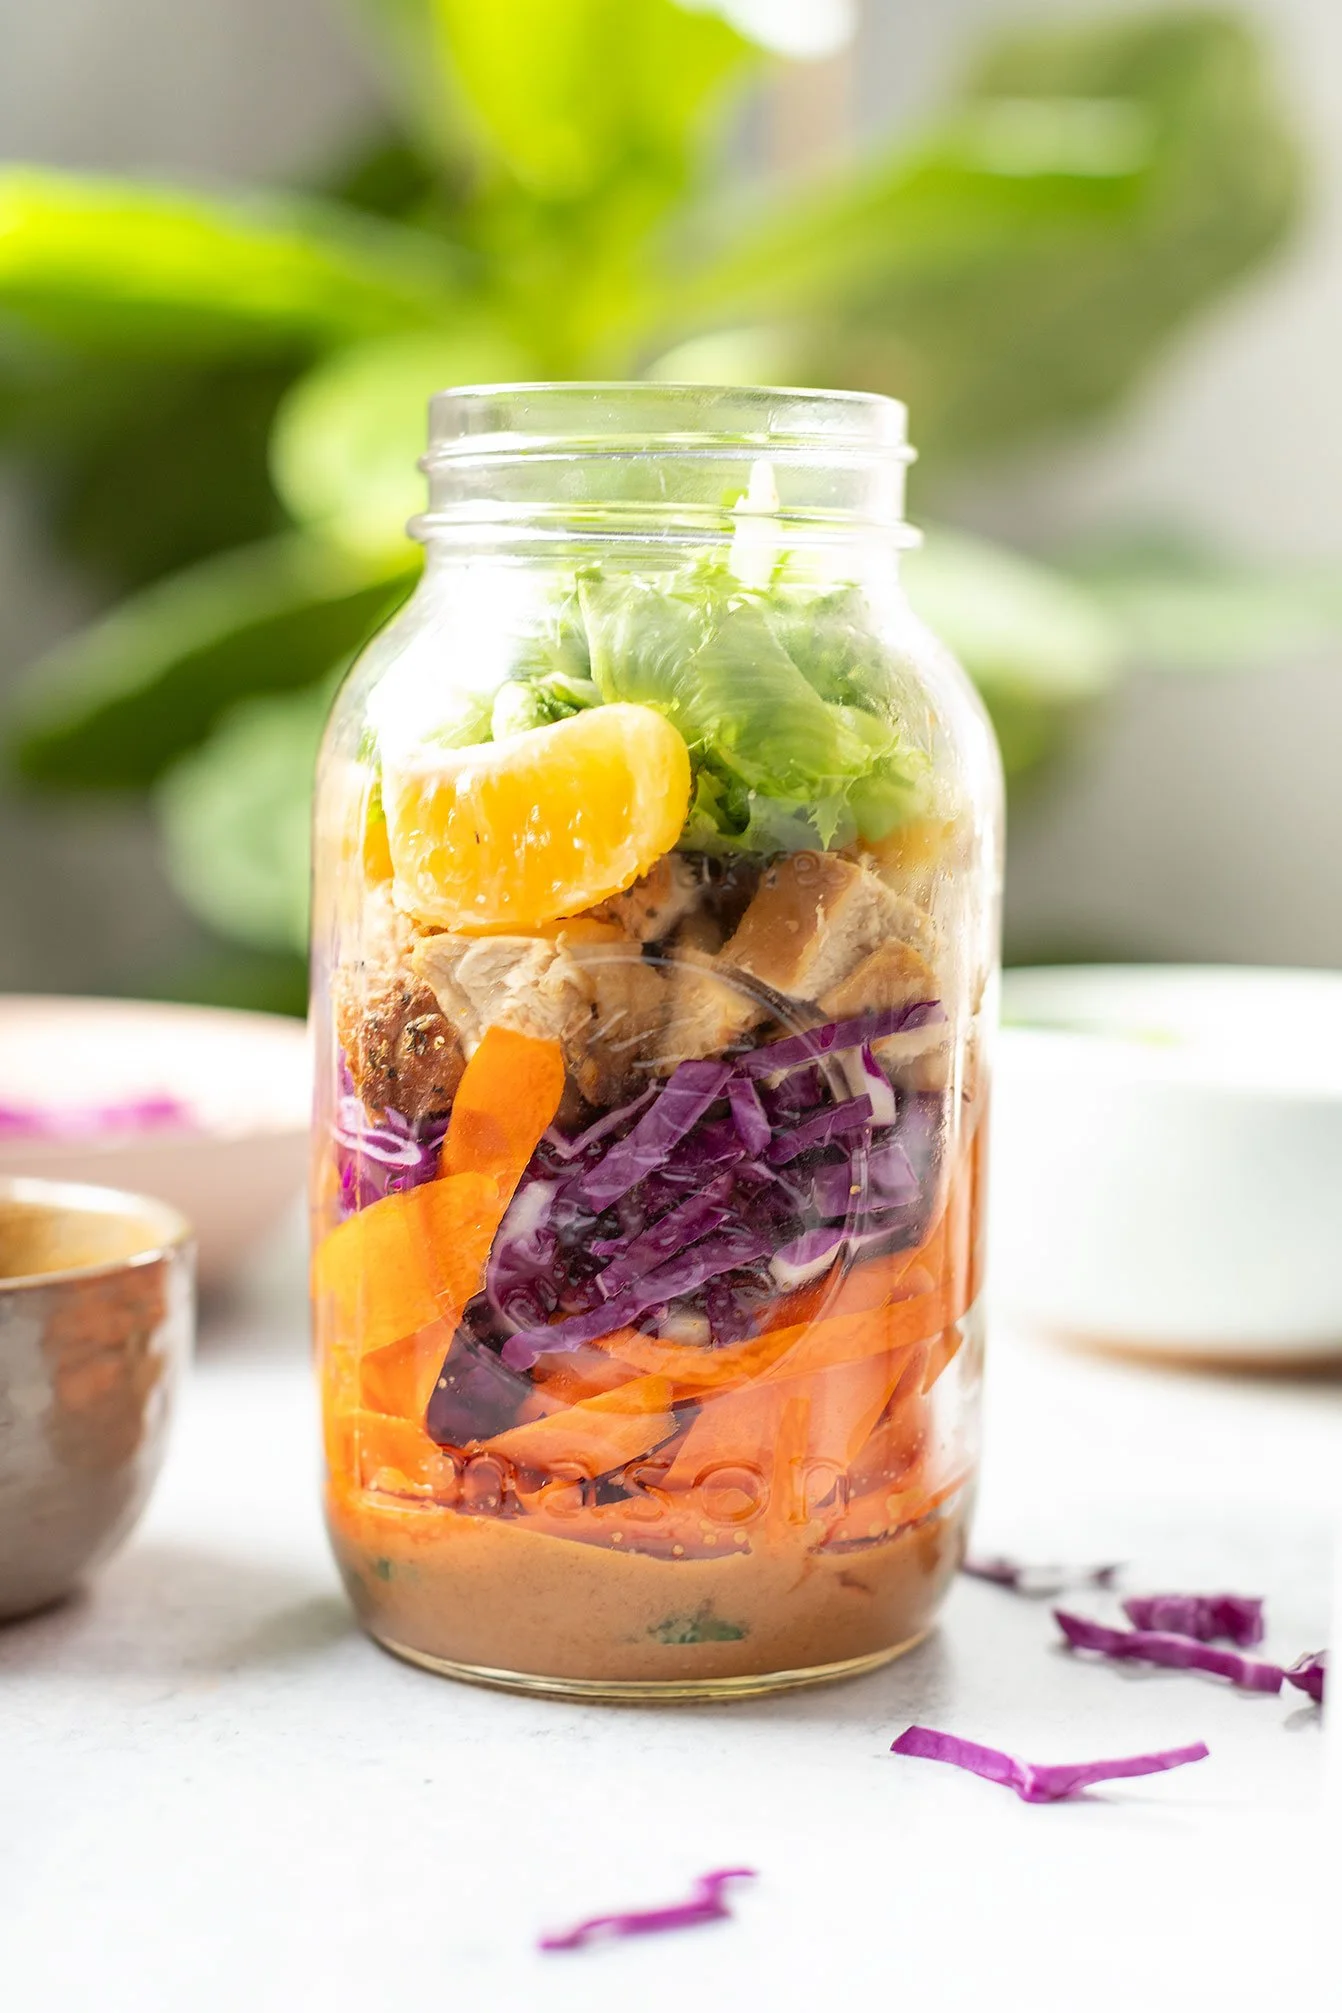
Start by adding your liquids at the bottom and layering your ingredients accordingly. For instance, place the dressing at the bottom and layer your fruits and vegetables from the sturdiest to the most delicate.
Refer to the images below for a visual guide on how to layer each ingredient!


Can I include other ingredients?
Absolutely! These salad jars can be enhanced with different protein sources like marinated pork, turkey, or chickpeas. You can also incorporate grains such as brown rice or quinoa. If you decide to add a grain, place it closer to the dressing layer at the bottom of the jar as they are heartier toppings.

If you try this recipe, let us know! Leave a comment, rate it, and don’t forget to tag a photo to #fromtherootsblog on Instagram. We love seeing what you come up with!
These healthy, delicious, and portable asian mason jar salads are made with chicken, mixed greens, cucumbers, cabbage, oranges, shredded carrots or the raw carrot salad (hormone balancing), green onions, cilantro, crushed peanuts with a peanut sauce dressing!
Servings: 4 | Prep Time: 15 min | Cook Time: 15 min
Ingredients
Mason jar salads
1 lb chicken breast (see below) (1/4 lb per jar)
8 cups mixed greens (2 cups/jar)
1/2 cup diced cucumbers (2 Tbsp/jar)
1 cup shredded red cabbage (1/4 cup/jar)
4 cuties, peeled
1/2 cup shredded carrots or raw carrot salad (2 Tbsp/jar)
Garnish: green onions, cilantro, crushed nuts like peanuts
Chicken Marinade
1 lb chicken breast
1/3 cup coconut aminos or teriyaki sauce
1 tsp garlic powder and S+P
Peanut Sauce
1/4 cup peanut butter
1/4 cup coconut aminos or tamari/soy sauce
1-2 tsp sriracha
2 Tbsp rice vinegar
1/4 tsp ground ginger
1/4 tsp garlic powder
Juice 1/2 orange
1-2 Tbsp warm water
S+P
Directions
Marinate chicken first by seasoning chicken generously with S+P, garlic powder and adding sauce in a Ziploc bag with chicken. Massage chicken in juices, sealed and place in fridge to marinate for 30 min or overnight.
Prepare the rest of the mason jar toppings.
Make the dressing: In a bowl, prepare the dressing by adding in everything. Mix well until combined. May use 1-2 Tbsp warm water to adjust thickness of sauce.
Bake chicken or on stove top as desired.
Assemble: Start with a layer of peanut sauce (~2 Tbsp per jar). Follow with layers of cucumbers, carrots, red cabbage, diced chicken, orange slices, greens and garnish with green onions, cilantro, crushed peanuts.
Store: Seal the mason jars with lids and refrigerate until ready to eat. When ready, add everything to a bowl and mix. store in fridge no more than 4 days.
Notes
*Feel free to add more or less of each ingredient to each salad jar.

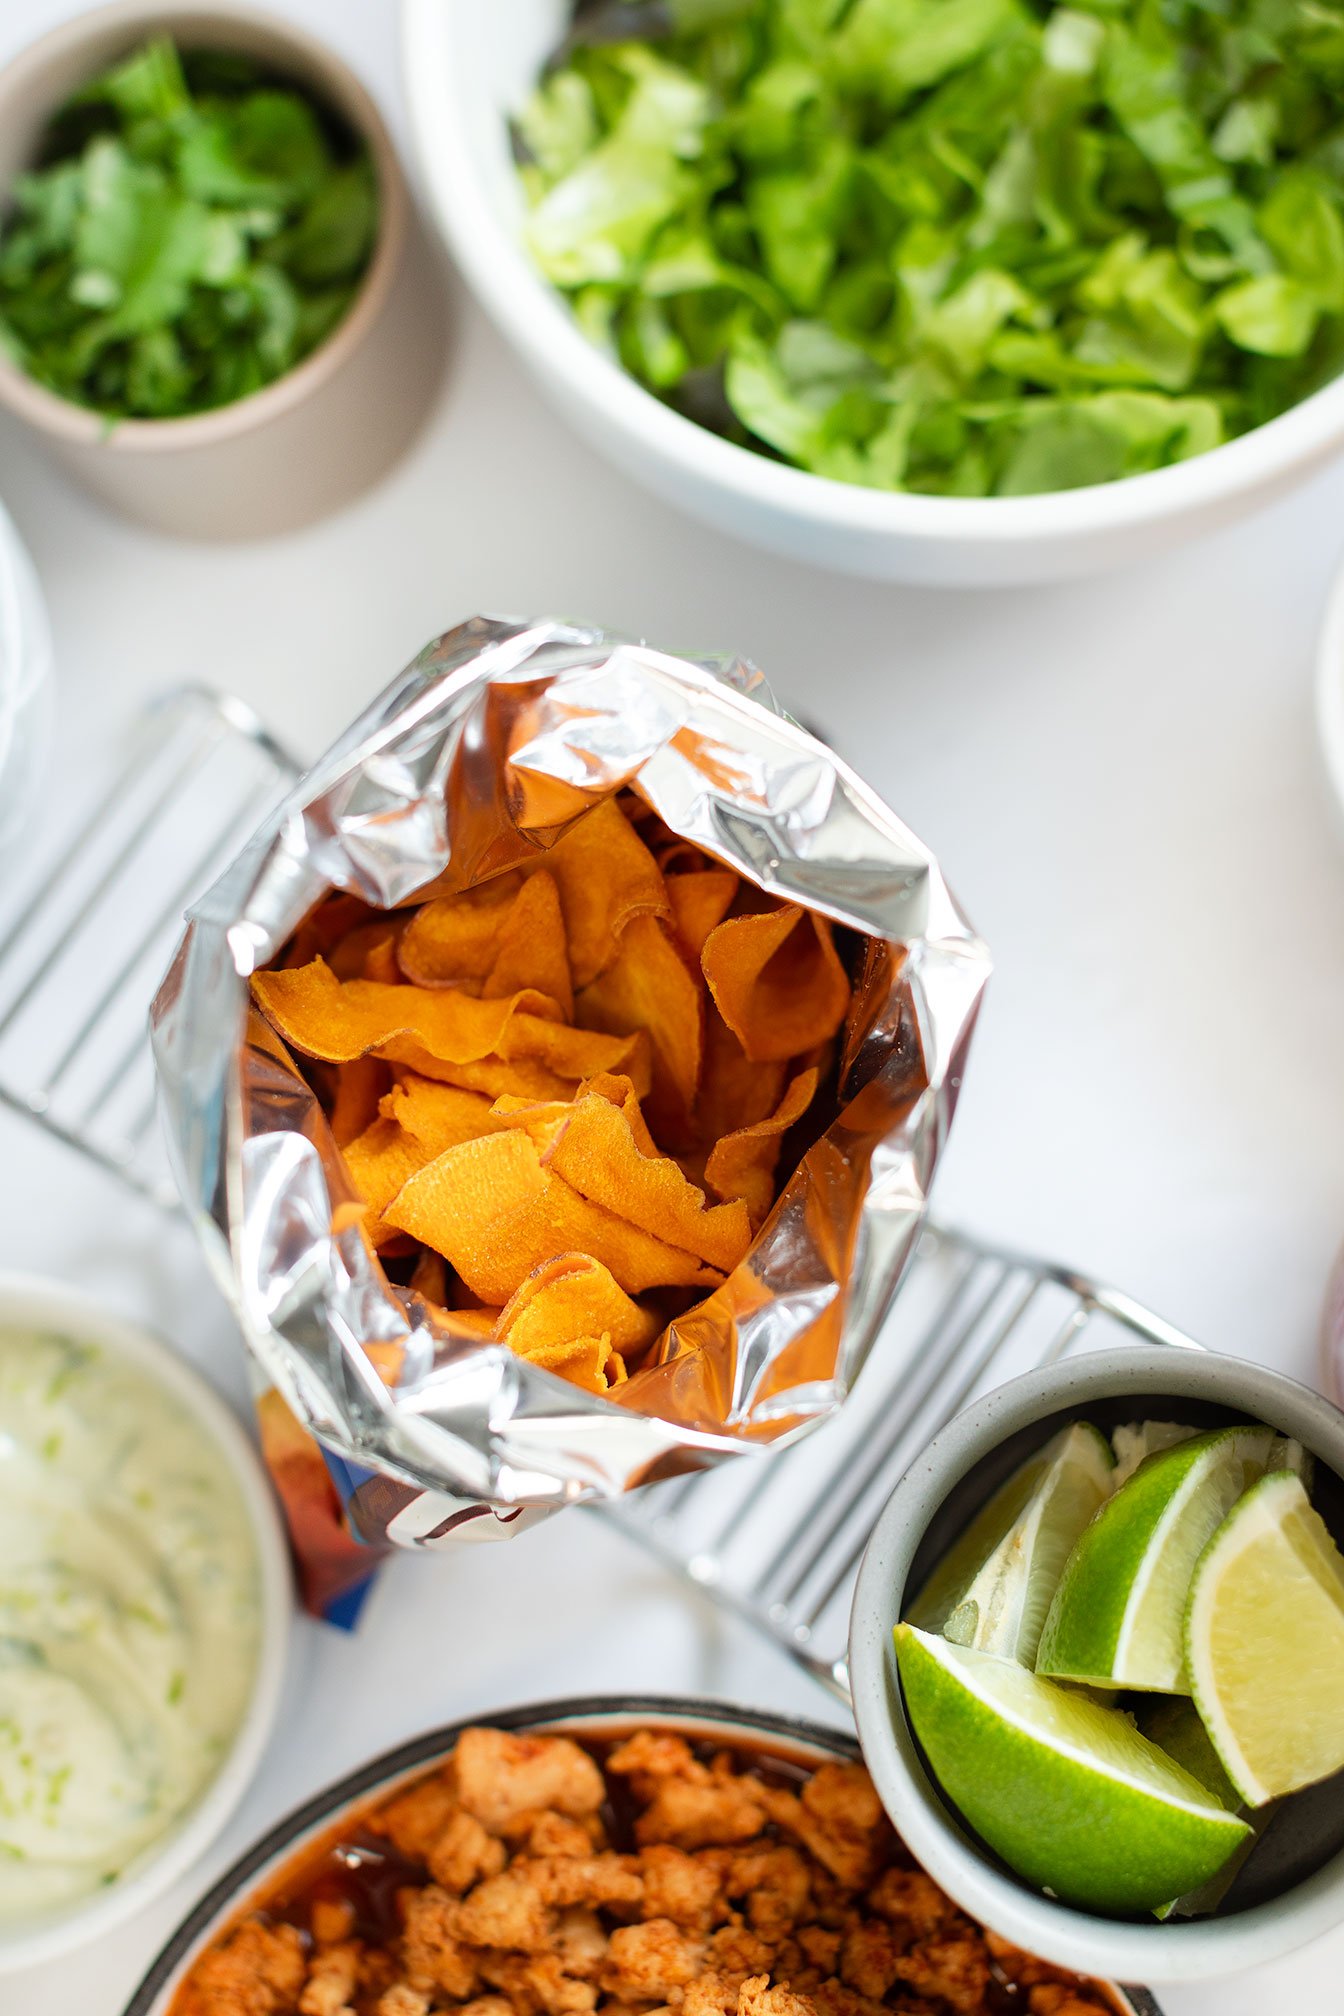
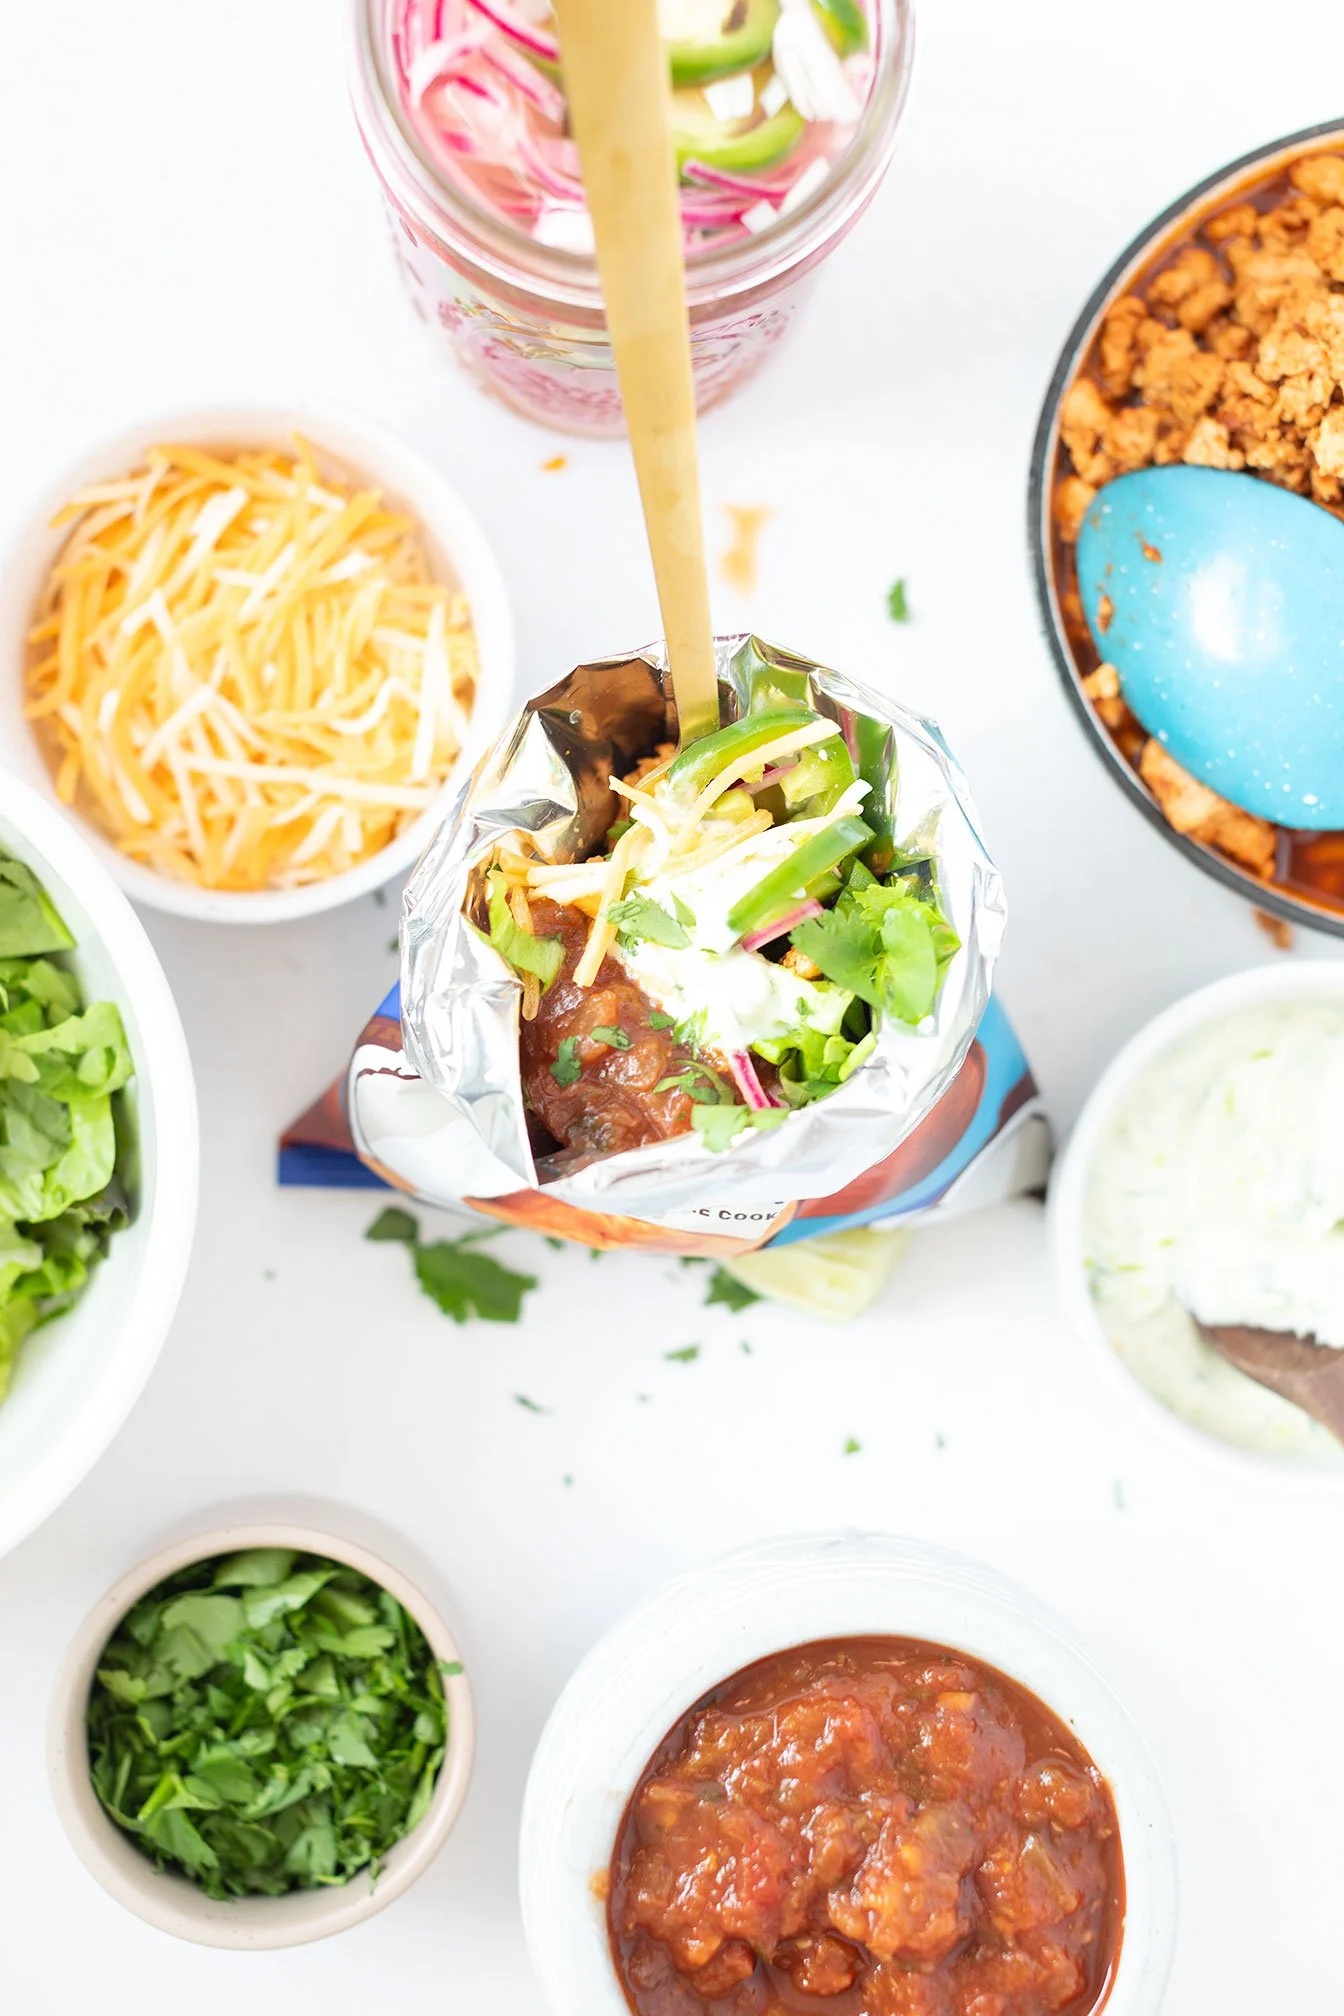
Gluten Free Walking Tacos
Have you ever tried a walking taco? It's the perfect meal for those who are short on time, love customization, and want to keep it healthy. This meal is perfect for quick lunches, lazy family dinners, or even game night!
When I was a child, my family would make tacos in individual-sized chip bags like Fritos or Doritos. This allowed us to choose our own toppings, while also eating right out of the bag, making it mess-free for our parents. It was a delightful experience!
Healthy Walking Tacos: A Quick, Fun, and Customizable Meal

Have you ever tried a walking taco? It's the perfect meal for those who are short on time, love customization, and want to keep it healthy. This meal is perfect for quick lunches, lazy family dinners, or even game night!


When I was a child, my family would make tacos in individual-sized chip bags like Fritos or Doritos. This allowed us to choose our own toppings, while also eating right out of the bag, making it mess-free for our parents. It was a delightful experience!

HOW TO MAKE YOUR WALKING TACO
Assembling your walking taco is easy and fun! Just gather all your favorite taco toppings and go from there. You can even choose healthy and gluten-free options!
grass-fed ground meat
shredded lettuce
fresh organic salsa
lactose free or organic raw shredded cheese
pickled onions (with addition of jalapeños) pg. 54 in cookbook
avocado lime crema pg. 45 in cookbook
Gluten-free chips that are made in premium avocado or coconut oil like Jackson’s chips.

Want more healthy and fun Mexican inspired recipes? Check out: Mexican eggs Benedict, Paleo Crunchwrap Supreme, and Mexican Harvest Turkey Chili.
If you try this recipe, let us know! Leave a comment, rate it, and don’t forget to tag a photo to #fromtherootsblog on Instagram. We love seeing what you come up with!
Servings: 4 Prep: 10 MIN Cook time: 10 MIN
Ingredients
To make taco meat:
1 lb grassfed ground meat (beef, chicken, turkey)
1 packet of siete foods taco seasoning
⅓ cup water
Toppings:
individual chip bags (favorites: Jackson’s Chips, Siete Foods, Barnana Plaintain chips)
shredded lettuce
diced tomatoes or salsa
avocado
lime wedges
cilantro
cheese or queso
sour cream or greek yogurt
Instructions:
To a skillet, add 1 Tbsp avocado oil over medium high heat. Add your ground meat to the skillet and break apart as it cooks. Mix in the seasonings and water once browned. Transfer the meat into a bowl and set aside until ready to assemble walking tacos.
Prepare the rest of the toppings of your choice!
When ready to assemble, take individual sized chip bags and roll down the tops. (You can also add chips to a bowl if you don’t have chip bags!) Fill the bags or bowl with taco meat and the rest of your desired toppings. Enjoy!

Massaged Kale Salad
If you are wanting to level up your salad game, then you need to hop on the massaged kale train! This leafy green is absolutely packed with vitamins like A, C, and K, fiber forward, antioxidants and a powerful anti-inflammatory food. But if you are not familiar with eating kale, it can be a tough food to swallow - no pun intended!
Level up your salad game using massaged kale!

If you are wanting to level up your salad game, then you need to hop on the massaged kale train! This leafy green is absolutely packed with vitamins like A, C, and K, fiber forward, antioxidants and a powerful anti-inflammatory food. But if you are not familiar with eating kale, it can be a tough food to swallow - no pun intended!

Luckily for you, using the massaging technique, will have you eating and loving the vegetable in no time.
Kale, being a cruciferous veggie, has a rough texture by nature so to help physically break down the kale to make it easier to digest, we use the massaging method.

Massaging prior to eating is like pre-digesting the kale. All you have to do is give your kale some love by using your hands.
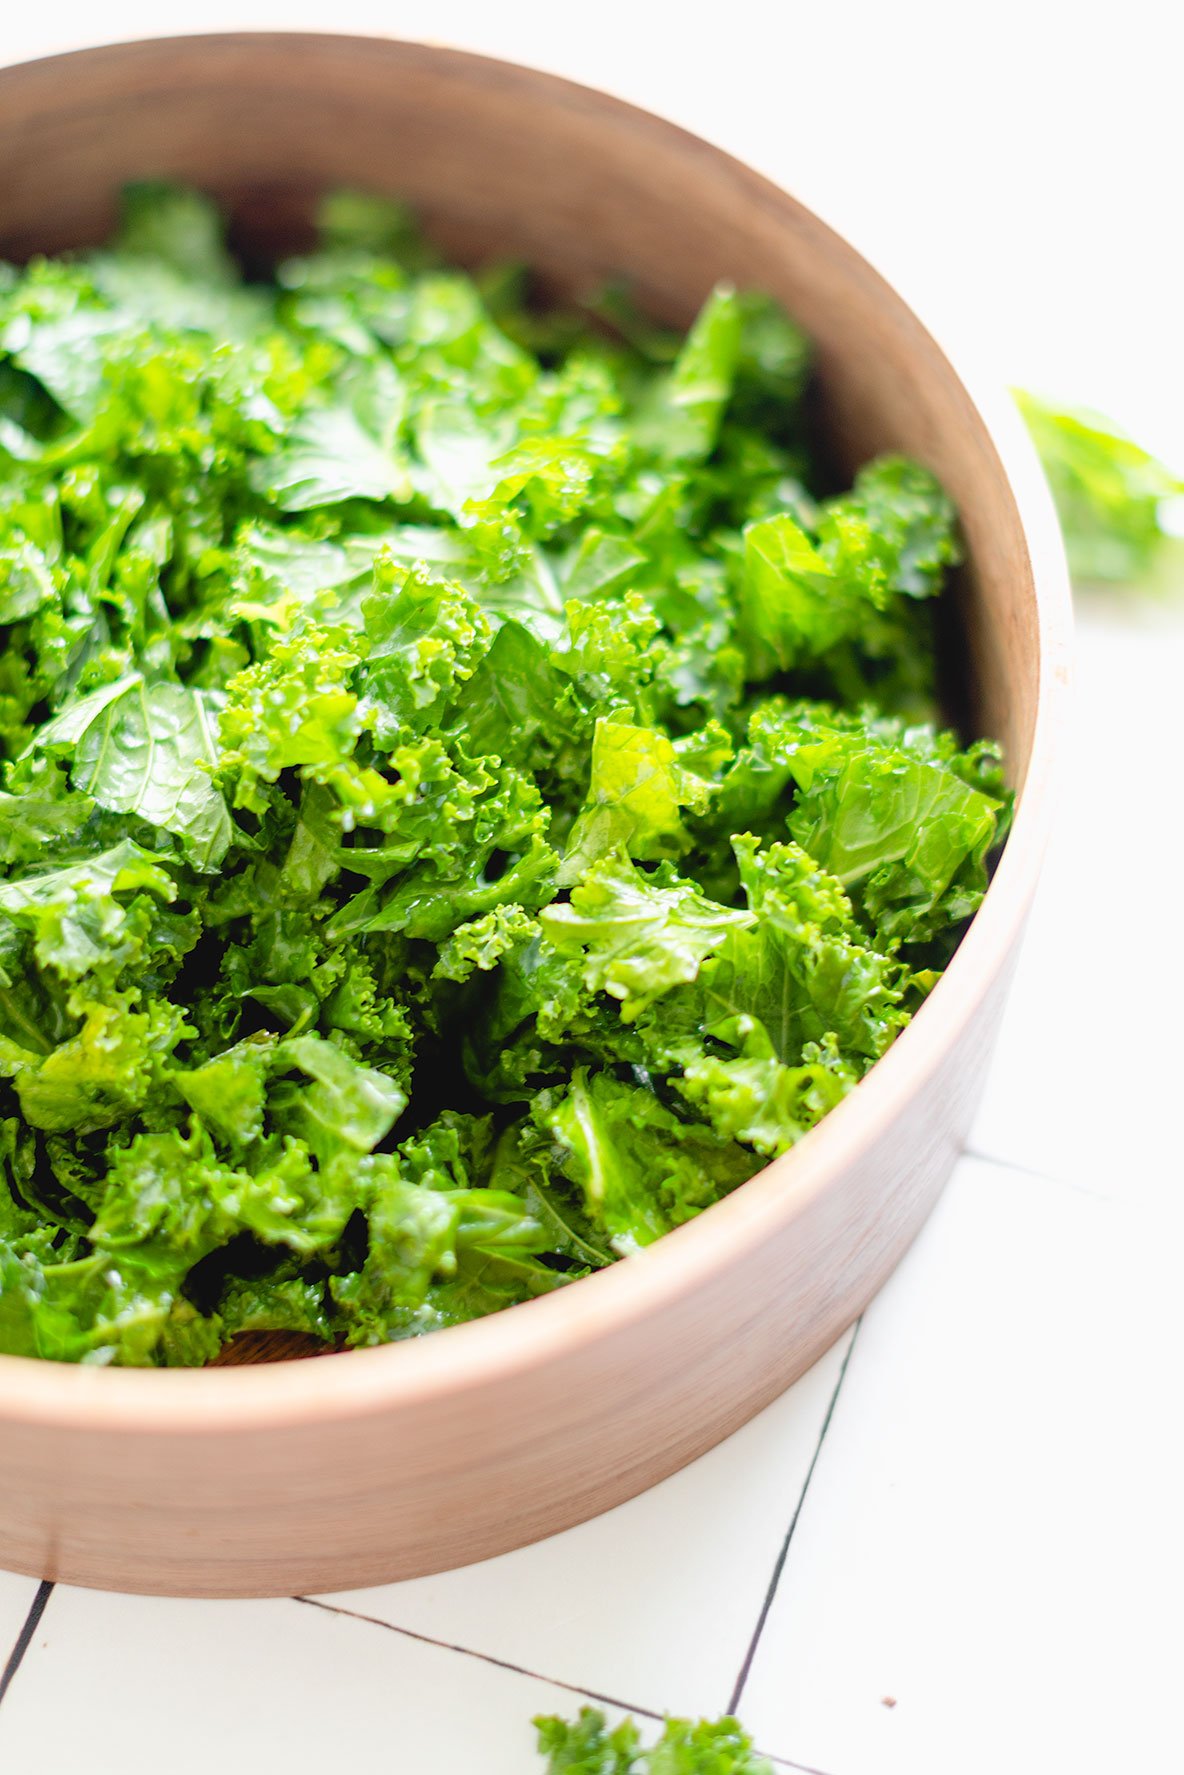
We do this by massaging oil + salt + lemon juice in the kale to help break down the tough, fibrous content in the kale. The kale will visually change before your eyes into a vibrant green and will feel softer in texture.
A bonus about using this method is that it will stay in the refrigerator for a good week even after massaging - unlike other more delicate leafy greens which tend to wilt and become soggy after chopping. Kale will keep its soft but chewy texture without becoming mushy.
That is why, in my new cookbook: The Nourished Cookbook, I show you many ways in how you can add massaged kale into your nourish bowls! It’s a great non-starchy carbohydrate source to batch cook and to pair with so many other base meals! Here are some other massaged kale salad recipes on the blog: Fall Harvest Grain Bowl, Summer Burger Salad, Winter Pear Salad with Citrus Dijon Vinaigrette, and Butternut Squash, Kale, and White Bean Lasagna Soup.

If you try this recipe, let us know! Leave a comment, rate it, and don’t forget to tag a photo to #fromtherootsblog on Instagram. We love seeing what you come up with!
Level up your salad game using massaged kale!
Servings: 4-6 | Prep time: 10 min | Cook time: N/A
Ingredients
4 cups or 3 handfuls of organic raw kale
1-2 tsp olive or avocado oil
Juice of ½ lemon
1 tsp sea salt
Directions
Wash kale thoroughly to remove dirt and de-stem kale leaves. Transfer to a large bowl. Add in the lemon juice and salt. Lightly pour oil onto your hands to coat.
Using a massaging action (similar to kneading bread dough), start to tear the leaves apart and massage. Continue massaging for about 2-5 minutes or until the kale turns a vibrant green and the leaves are soft.
Notes
Can be used as a side dish, a salad base, or as a topping of your choice for a complete meal in a bowl.