Sort by Category
- May 2026
- March 2026
- December 2025
- November 2025
- October 2025
- September 2025
- August 2025
- June 2025
- August 2024
- July 2024
- June 2024
- May 2024
- February 2024
- January 2024
- December 2023
- November 2023
- October 2023
- September 2023
- August 2023
- July 2023
- March 2023
- February 2023
- January 2023
- December 2022
- November 2022
- October 2022
- September 2022
- August 2022
- June 2022
- May 2022
- April 2022
- March 2022
- February 2022
- January 2022
- December 2021
- November 2021
- October 2021
- September 2021
- August 2021
- July 2021
- June 2021
- May 2021
- April 2021
- March 2021
- February 2021
- January 2021
- December 2020
- November 2020
- October 2020
- September 2020
- August 2020
- July 2020
- June 2020
- May 2020
- April 2020
- March 2020
- February 2020
- January 2020
- December 2019
- November 2019
- October 2019
- September 2019
- August 2019
- July 2019
- June 2019
- May 2019
- April 2019
- March 2019
- February 2019
- January 2019
- December 2018
- November 2018
- October 2018
- September 2018
- August 2018
- July 2018
- June 2018
- May 2018
- April 2018
- March 2018
- February 2018

5 Ways To Use Chamoy Sauce
I had to make a separate blog post on this sauce because there are just too many ways to use this crack sauce “aka” chamoy sauce.
I had to make a separate blog post on this sauce because there are just too many ways to use this crack sauce “aka” chamoy sauce.
You can go straight to the mango melon sorbet with chamoy sauce post for the recipe, or you can grab it here:
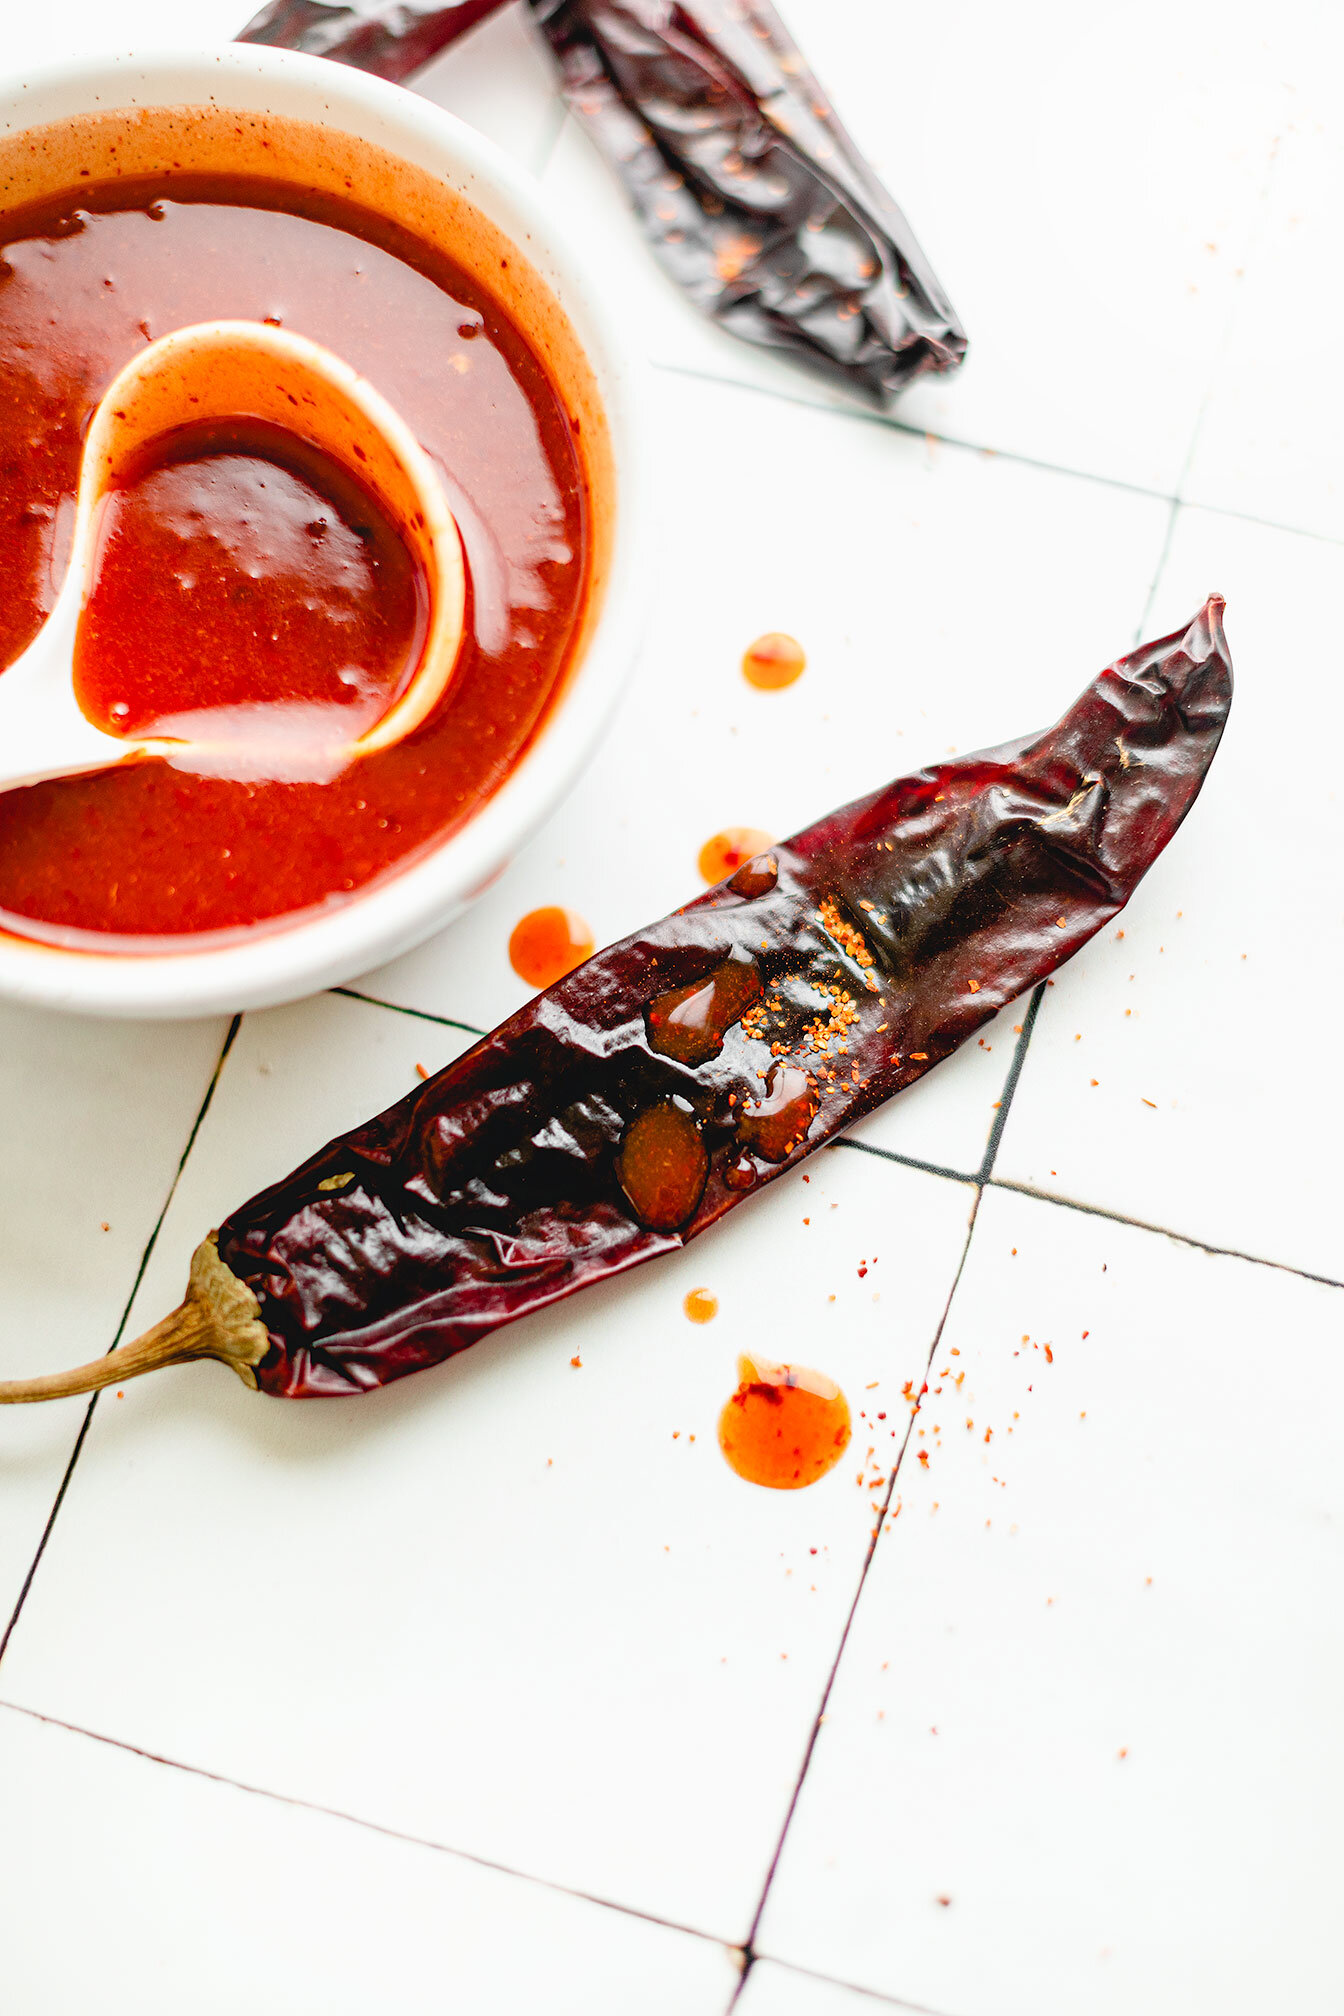
CHAMOY SAUCE
½ cup fresh lime juice (5-7 limes)
1-3 dried ancho chilies
1 - 10 oz jar organic apricot jam
1 tsp salt
¼ tsp cayenne pepper
To make the chamoy sauce
Tear the stem off and deseed the ancho chilies. Submerse dried chilies in boiling water for a few minutes until the chilies are soft.
In a high speed blender, place the soft ancho chilies along with the entire jar of apricot jam, lime juice, salt, cayenne pepper, and a ladle or two of the water that the ancho chilies were in.
Blend on high speed until extremely smooth. Taste sauce and adjust flavors if need to (i.e. I typically add an additional ½ tsp cayenne pepper because I like it super spicy!) as well as sauce consistency. This should make about 2 cups worth. If you are unsure about the sauce consistency, look at the pictures above for reference.
Store in a sealed container in the refrigerator for up to 2 months.
Now that you have the beloved sauce recipe, let’s get into 5 ways to use chamoy sauce!
To get a visual: check out IG reels below!
1| Mango Melon Sorbet

You can grab the recipe here
2| watermelon slices

3| Mangonada

1 cup mango chunks, fresh or frozen
1/2 cup coconut milk, coconut water, or water
Juice of 1/2 lime
Tajin or chili lime seasoning, for the rim
chamoy sauce
Tamarind stick, for serving (optional)
Directions
Rim a glass with a lime wedge and tajin seasoning. Squeeze chamoy sauce inside the glass using a swirling motion.
In a blender, add mango, liquid, lime juice, and a handful of ice and blend until smooth and creamy.
Pour the mango smoothie into the prepared glass about halfway, then layer the smoothie with chamoy sauce, repeat with more smoothie picture and top with chamoy sauce, tajin seasoning, fresh mango, and tamarind stick if desired. Enjoy!
You can also use this chili lime smoothie recipe as well!
4| Mango Slices

5| Fresh watermelon juice / Watermelon margaritas

Here are some quick recipes:

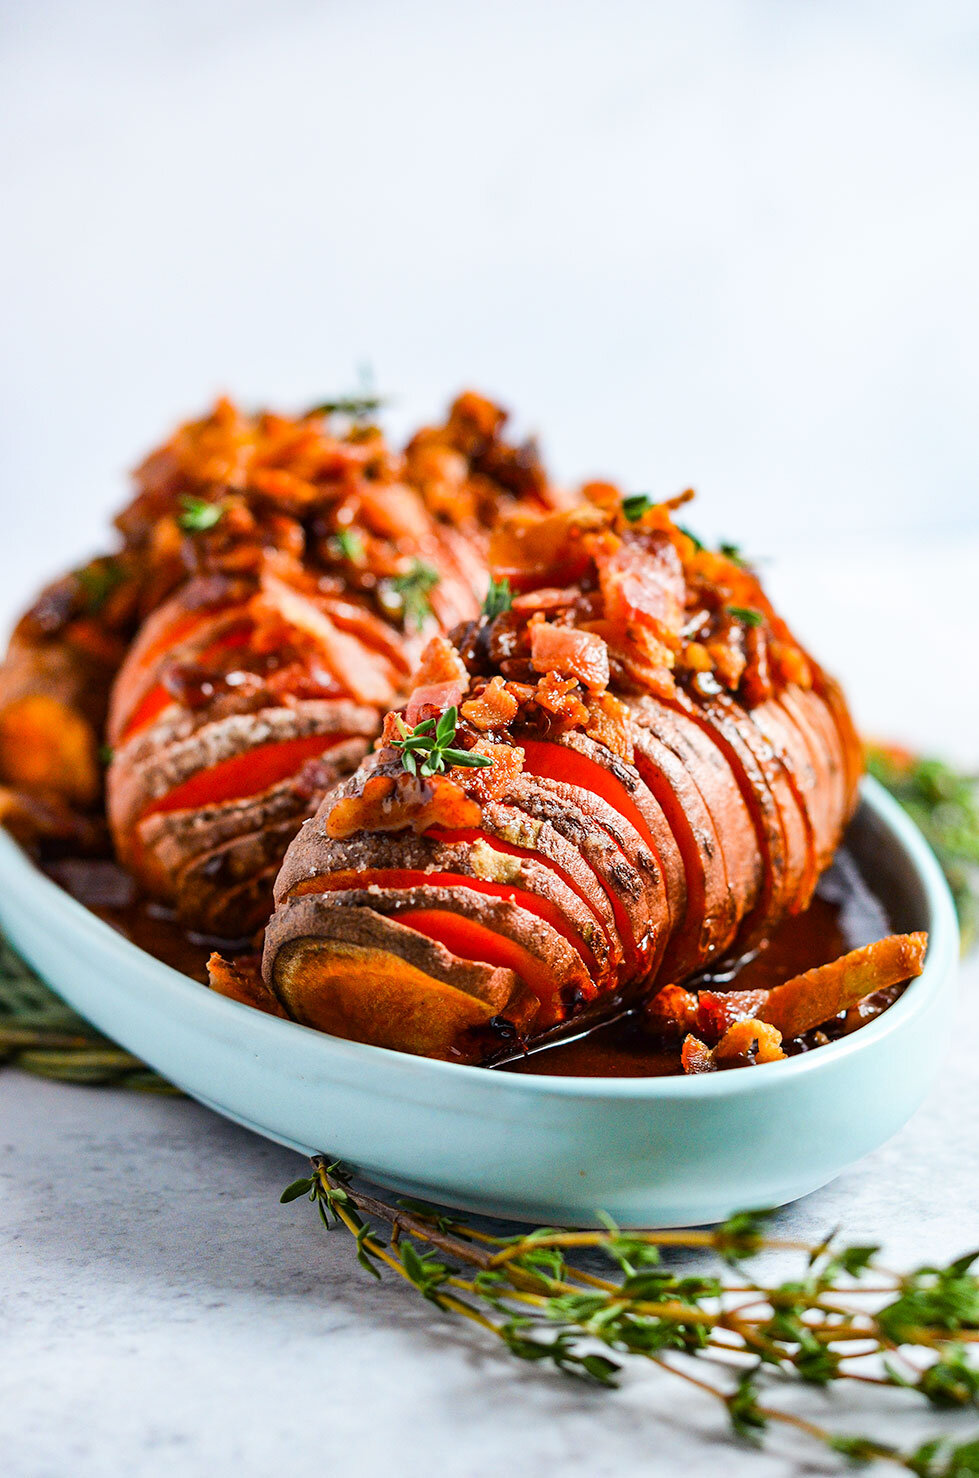
Paleo Hasselback Sweet Potatoes
As someone who doesn’t eat gluten, sweet potatoes are one of my favorite carbohydrate sources. They are great after a hard workout when you need to replenish glycogen stores and nutritionally, are among the best sources of vitamin A along with riboflavin, thiamin, and carotenoids due to their naturally orange color.
Hasselback Sweet Potatoes - Melt in your mouth, sop of buttery sweetness; you can’t tell it’s actually healthy for you! Paleo, dairy-free and gluten-free.
As someone who doesn’t eat gluten, sweet potatoes are one of my favorite carbohydrate sources. They are great after a hard workout when you need to replenish glycogen stores and nutritionally, are among the best sources of vitamin A along with riboflavin, thiamin, and carotenoids due to their naturally orange color.

Sweet potatoes nutrition versatility mirrors its versatility in our diet. They can be eaten any time during the day - paired well with most dishes from a poached egg for breakfast to adding coconut butter and cacao powder for dessert.
For this dish, it’s great for the holidays, as a side dish for dinner or implemented into lunch meal prep rotations!

As a tip, for the best Hasselback sweet potatoes, you’ll need to make deep incisions using a very sharp chef’s knife. Another thing I found was that if you place chopsticks on each side of the sweet potato and cut, it will make the best cut without going all the way through!

I would like to thank Bako Sweet for gifting me with these amazing organic California grown sweet potatoes! For more information regarding nutrition, products, and sourcing, check this link!


Now without further ado, let’s get to the recipe!


If you try this recipe, let us know! Leave a comment, rate it, and don’t forget to tag a photo to #fromtherootsblog on Instagram. We love seeing what you come up with!
Hasselback Sweet Potatoes - Melt in your mouth, sop of buttery sweetness; you can’t tell it’s actually healthy for you! Paleo, dairy-free and gluten-free.
Ingredients
4 Sweet potatoes
4 slices bacon (cooked and crumbled)
¼ cup raw pecans
2 Tbsp pure maple syrup
1 Tbsp coconut sugar
1 Tbsp grass-fed butter
1 tsp ground cinnamon
Avocado oil cooking spray
Pink Himalayan sea salt
Directions
Preheat the oven to 450 degrees. Line a sheet pan with foil, then coat the foil with cooking spray or simply use a silicone non-stick baking liner.
Place a potato on a cutting board between two chopsticks or two wooden spoons. Using a sharp chef’s knife, slice the potato into ¼ inch thick slices. (The chopsticks will prevent you from slicing all the way through the potato)
Repeat the process with the remaining potatoes. Plate the potatoes on the sheet pan. Spray potatoes with avocado oil spray and sprinkle sea salt.
Bake for 50-60 minutes until potatoes are tender, browned and tops are crispy.
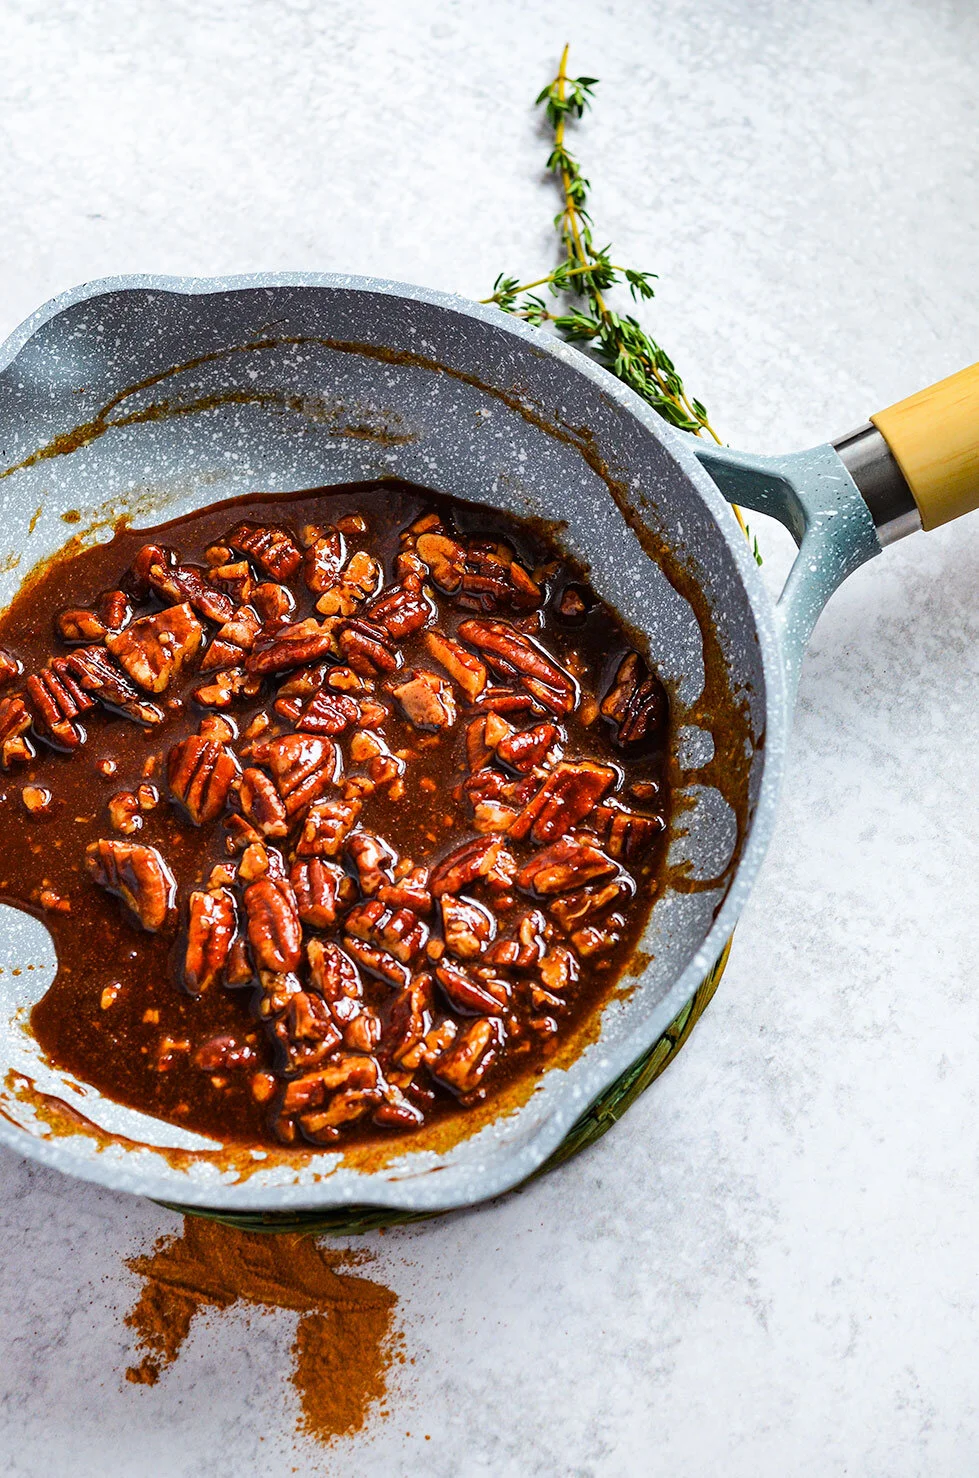
While the potatoes are cooking, melt butter in a small skillet on medium heat. Chop the pecans and add to the melted butter.
Stir for about 2-5 minutes until you get a nutty aroma. Add coconut sugar and maple syrup and stir.
As soon as the mixture starts to bubble, immediately add cinnamon to the mixture and take off the burner. Mix thoroughly until the mixture is thick but liquidy. May need to add tbsp water if the mixture is too thick. *Make sure the sugar doesn’t burn! This process is very fast.
Remove the potatoes from the oven and top each potato with pecan sugar mixture. Sprinkle the bacon and fresh thyme leaves over the top and enjoy!
Notes
Ingredients that I used that are #paleoapproved
Pederson’s Organic No Sugar Added Uncured Smoked Bacon
Primal Kitchen Avocado Oil Spray
Kerrygold Grass-fed Butter

The Best Gluten-Free Skillet Cornbread
During the first few weeks of quarantine, I was a baking machine. I created all the things, paleo banana nut bread, muffins, cookies, sourdough bread, you name it! It was so bad, I had to start freezing the leftovers because my fridge couldn’t handle it!
I was also creating recipes using ingredients from my pantry. Like most, I wasn’t sure if the grocery stores were going to be closed or only provide limited ingredients so I got creative in the fast! But since I’m cooking for one, having a one-pot meal goes a long way!
The BEST gluten-free skillet cornbread made with just 10 ingredients! Fluffy, perfectly sweet, crumbly and so tasty!

During the first few weeks of quarantine, I was a baking machine. I created all the things, paleo banana nut bread, muffins, cookies, sourdough bread, you name it! It was so bad, I had to start freezing the leftovers because my fridge couldn’t handle it!

I was also creating recipes using ingredients from my pantry. Like most, I wasn’t sure if the grocery stores were going to be closed or only provide limited ingredients so I got creative in the fast! But since I’m cooking for one, having a one pot meal goes a long way!

But this recipe, I was completely fine with that! Using all my canned items to make chili (I never make chili the same so sorry if I can’t provide a chili recipe! haha) I also made skillet cornbread, and oh boy, was it good!

Growing up, my mom would make cornbread using Jiffy cornbread mix. It was my favorite version because I would rather have a sweeter cornbread than savory. Though, I do love adding fun add-on ingredients like minced jalapenos or green chilies to give it a kick!

So if you are #teamjiffy, then you will love this recipe! Enjoy as a side with your fall and winter recipes or as an appetizer!
If you try this recipe, let us know! Leave a comment, rate it, and don’t forget to tag a photo to #fromtherootsblog on Instagram. We love seeing what you come up with!
The BEST gluten-free skillet cornbread made with just 10 ingredients! Fluffy, perfectly sweet, crumbly and so tasty!
Ingredients
1 cup yellow cornmeal
1 cup gluten-free 1 to 1 baking flour (or paleo baking flour)
¾ cup unsweetened plant based milk
¼ cup cup organic cane sugar
¼ cup extra virgin olive oil
2 eggs room temperature; lightly beaten
1 Tbsp grass fed butter or coconut oil
1 tsp apple cider vinegar or lemon juice
1 ½ tsp baking powder
½ tsp baking soda
¼ tsp pink Himalayan sea salt
Directions
In a liquid measuring cup, measure out milk and add 1 tsp apple cider vinegar or lemon juice. Mix until combined and set aside. How to create “buttermilk” plant-based way!
Preheat the oven to 375 degrees. In a 9 inch cast iron skillet, melt 1 Tbsp grass fed butter or coconut oil on the stove top. Make sure the melted butter has coated the bottom and sides of the skillet. Set aside to cool.
Add dry ingredients to a large mixing bowl and whisk to combine.
In a medium mixing bowl, mix the oil, “buttermilk” mixture, and whisked eggs until combined.
Slowly pour the liquid mixture into the dry mixing bowl and whisk until fully combined.
The batter should be thick but pour-able. Add more cornmeal or flour if too wet or almond milk if too thick in 1 Tbsp amounts.
Pour batter into the prepared oiled skillet, lightly sprinkle some sugar over batter, and bake on a center rack for 25-30 minutes, or until the edges are light golden brown and a toothpick inserted into the center comes out completely clean.
Let cool completely in the pan for 10-15 minutes - set on a wire rack to speed the cooling process. To remove, run a dull knife around the edges to loosen, then slice and serve.
Serve with butter, maple syrup, or honey.
Store covered at room temperature for 2-3 days, or in the refrigerator for 3-4 days. Freeze up to a month.
Notes
Like a spicy kick in your cornbread? Feel free to mince in 1 jalapeno or green chilis to the batter.
I have not tested this recipe with other sweeteners such as coconut sugar or maple syrup so if you try to sub sugar out, the texture and flavor may be off.
Here are the brands I use for this recipe: GF 1 to 1 baking flour, yellow cornmeal, and paleo baking flour, organic cane sugar

Quinoa Breakfast Bowls 2 Ways
I will be honest and say that I was somewhat apprehensive about implementing quinoa in my breakfast dishes. I’m just so used to adding quinoa to my buddha bowls or as a dinner side. I never thought you could use it for sweet dishes but once I caved, I’ve never gone back.
Quinoa is an excellent versatile option for breakfast. You can make it sweet, like I have discovered, or you can keep it savory.
This recipe is fun and so easy to incorporate for your breakfast meal prep. You can simply cook up four servings, taking ½ cup from that to do whatever your heart's desire.
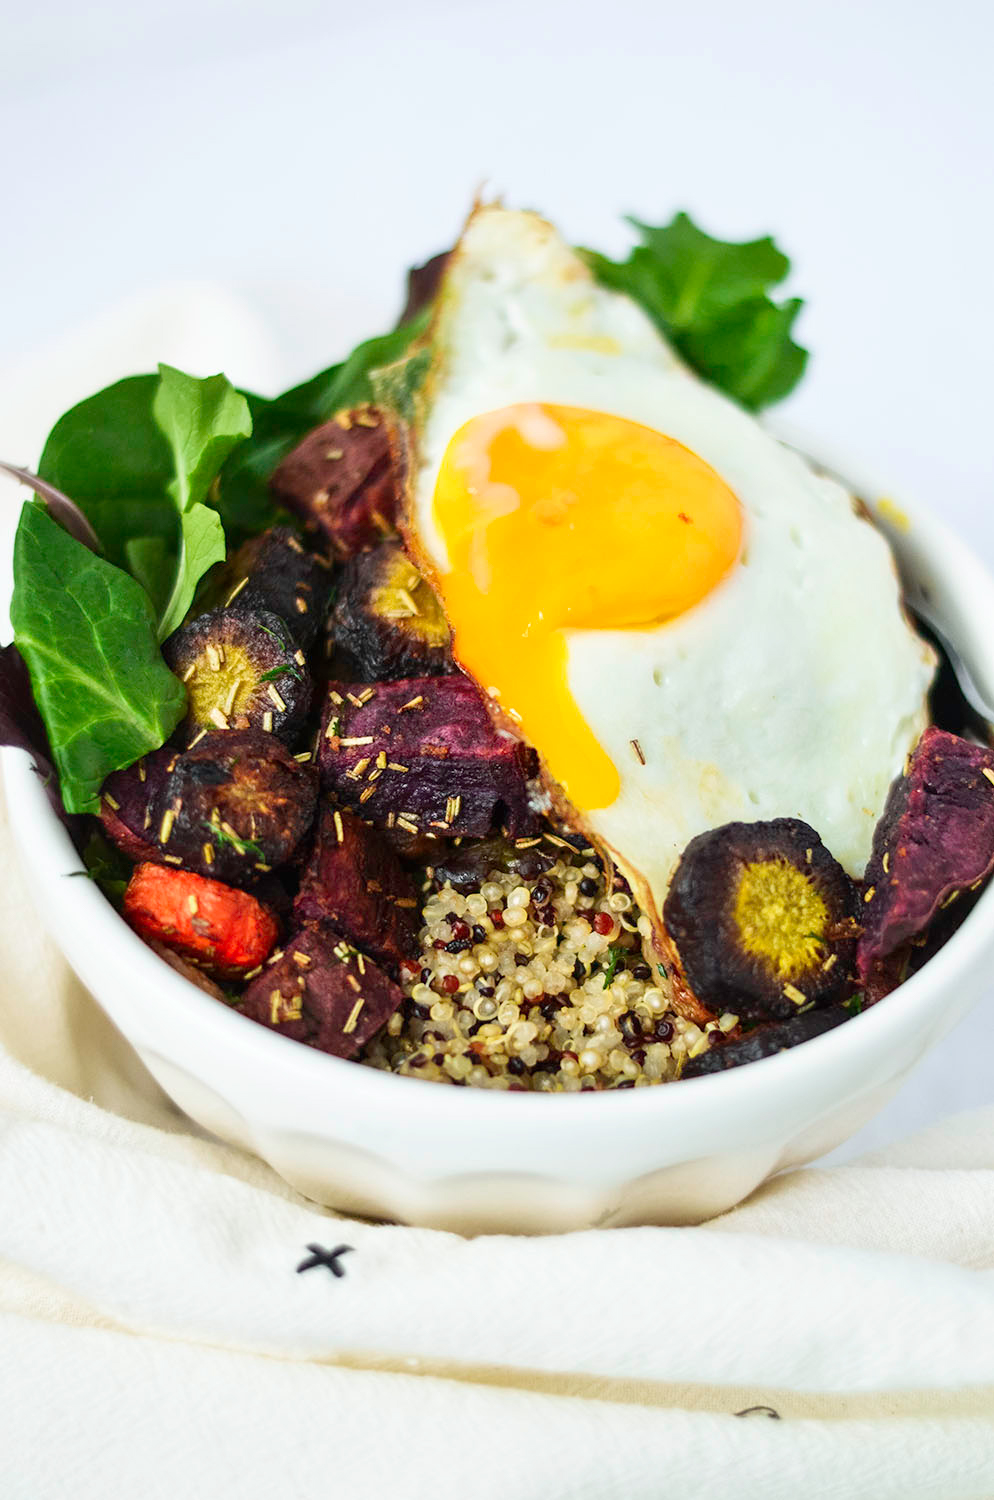
If you want to lean towards the savory side of the quinoa breakfast bowl then you can add roasted veggies, greens, a fried egg, half of an avocado, and possibly another protein source.
Quinoa Breakfast Bowls 2 Ways - A healthy and hearty way to start your morning; sweet or savory!

I will be honest and say that I was somewhat apprehensive about implementing quinoa in my breakfast dishes. I’m just so used to adding quinoa to my buddha bowls or as a dinner side. I never thought you could use it for sweet dishes but once I caved, I’ve never gone back.
Quinoa is an excellent versatile option for breakfast. You can make it sweet, like I have discovered, or you can keep it savory.
This recipe is fun and so easy to incorporate for your breakfast meal prep. You can simply cook up four servings, taking ½ cup from that to do whatever your heart's desire.
If you want to lean towards the savory side of the quinoa breakfast bowl then you can add roasted veggies, greens, a fried egg, half of an avocado, and possibly another protein source.

For something sweet, add cocoa powder, plant-based milk, honey, nut butter, superfood toppings, and assorted fruits.


Whatever way you prefer, quinoa is very easy to incorporate into your diet and pairs well with many foods. It’s gluten-free, high in protein, and one of the few plant foods that contains a sufficient amount of all nine essential amino acids.
If you try this recipe, let us know! Leave a comment, rate it, and don’t forget to tag a photo to #fromtherootsblog on Instagram. We love seeing what you come up with!
Quinoa Breakfast Bowls 2 Ways - A healthy and hearty way to start your morning; sweet or savory!
Sweet Way
½ cup cooked quinoa
1 cup plant-based milk
2 tsp cocoa powder
1 Tbsp honey or pure maple syrup
1 Tbsp nut butter
Toppings
Fruits, coconut flakes, chia seeds, hemp seeds, dairy-free yogurt, dark chocolate
Savory Way
½ cup cooked quinoa
Small handful of assorted greens
Fried egg
Roasted veggies
Half of an avocado
Toppings
Hemp seeds, hot sauce, nutritional yeast flakes, lemon, salt and pepper
How to cook quinoa
Rinse quinoa in a fine mesh sieve until water runs clear. Drain and transfer to a medium pot.
Add 2 cups water, pinch of salt and bring to a boil.
Cover, reduce heat to medium low and simmer until water is absorbed (about 15-20 minutes).
Set aside off heat for 5 minutes. Uncover and fluff with a fork. Makes 4 servings.
You could also follow the same process but in a rice cooker.


