Sort by Category
- October 2025
- September 2025
- August 2025
- June 2025
- August 2024
- July 2024
- June 2024
- May 2024
- February 2024
- January 2024
- December 2023
- November 2023
- October 2023
- September 2023
- August 2023
- July 2023
- March 2023
- February 2023
- January 2023
- December 2022
- November 2022
- October 2022
- September 2022
- August 2022
- June 2022
- May 2022
- April 2022
- March 2022
- February 2022
- January 2022
- December 2021
- November 2021
- October 2021
- September 2021
- August 2021
- July 2021
- June 2021
- May 2021
- April 2021
- March 2021
- February 2021
- January 2021
- December 2020
- November 2020
- October 2020
- September 2020
- August 2020
- July 2020
- June 2020
- May 2020
- April 2020
- March 2020
- February 2020
- January 2020
- December 2019
- November 2019
- October 2019
- September 2019
- August 2019
- July 2019
- June 2019
- May 2019
- April 2019
- March 2019
- February 2019
- January 2019
- December 2018
- November 2018
- October 2018
- September 2018
- August 2018
- July 2018
- June 2018
- May 2018
- April 2018
- March 2018
- February 2018

Rosemary & Red Wine-Braised Short Ribs
‘Tis the season for comfort food, chaotic schedules, and holiday parties. What better dish to appease all three things than a staple braised short rib recipe, amiright?! That’s why I created a dish that requires one pot, very few ingredients (and most you will have on hand), and high-quality meat that is cooked in less time than most short rib recipes.
In my opinion, braising short ribs is the way to go if you want to develop the best flavor!
Rosemary & Red Wine-Braised Short Ribs - These tender wine-braised short ribs will soon be your go-to for healthy comfort food. Ribs braised in a dutch oven and served over brown butter sage mashed sweet potatoes - can’t beat it!

‘Tis the season for comfort food, chaotic schedules, and holiday parties. What better dish to appease all three things than a staple braised short rib recipe, amiright?! That’s why I created a dish that requires one pot, very few ingredients (and most you will have on hand), and high-quality meat that is cooked in less time than most short rib recipes.


In my opinion, braising short ribs is the way to go if you want to develop the best flavor!
The Art of Braising
SALT - Salt your meat generously on all four sides and let sit overnight or salt at least 30 min to 3 hours in the fridge. The longer the better!
BROWN - Heat a cast-iron skillet on medium-high heat using quality oil. Sear meat on all four sides until you get a nice browning. More space between meat gets it brown(er).
BUILD - Layer ingredients in the pan. I.e. use deglazing liquid from browned meat plus water/stock, add the meat back in, aromatics, and herbs.

I paired these short ribs with my favorite brown butter sage mashed sweet potatoes but you can use any side dish you like!


If you try this recipe, let us know! Leave a comment, rate it, and don’t forget to tag a photo to #fromtherootsblog on Instagram. We love seeing what you come up with!
Rosemary & Red Wine-Braised Short Ribs - These tender wine-braised short ribs will soon be your go-to for healthy comfort food. Ribs braised in a dutch oven and served over brown butter sage mashed sweet potatoes - can’t beat it!
Ingredients
3.5 lbs bone-in short ribs (use 3 lbs if using boneless beef short ribs)
1 can (28 oz) fire-roasted diced tomatoes
1 large white onion (sliced)
4 cloves garlic (minced)
2 cups organic low-sodium beef broth
2 cups red wine (cabernet sauvignon)
2 Tbsp Extra Virgin Olive Oil
1 Tbsp balsamic vinegar
1 Tbsp low-sodium Worcestershire sauce
1 Tbsp light brown sugar
4-6 fresh rosemary sprigs
S&P to season to taste
Directions
Generously season your meat on all four sides with salt and pepper and let sit overnight or for at least 30 minutes to 3 hours in the fridge. The longer the better.
Heat oil in dutch oven or cast-iron skillet over medium-high heat.
Add short ribs to hot oil and sear for 3-4 minutes per side until browned. Try not to move the short ribs once you put them down and make sure they have space between the meat.
Remove the short ribs from dutch oven/skillet and set aside. They won't be fully cooked yet, and that’s okay!
Return dutch oven to stovetop and lower temperature to medium heat. Add sliced onions and minced garlic. If the pan looks too dry, add another splash of olive oil. Saute until onion is translucent, about 2-3 minutes.
Add the broth and wine to deglaze the dutch oven. Make sure to scrape down any browned bits off the bottom of the pan with a wooden spoon.
Add the rest of the ingredients (tomatoes, balsamic vinegar, sauce, brown sugar, rosemary sprigs, and S&P) along with the short ribs and mix until combined. Once the mixture is boiling, bring the heat down to low medium and cover the dutch oven with a tight-fitting lid.
Cook on stovetop for 2 hours - 2 hours and 30 minutes or until short ribs easily pull apart with tongs/ fork or the meat is falling off the bone.
Serve short ribs with reserved leftover broth over mashed potatoes or over brown butter sage mashed sweet potatoes.
Garnish with fresh rosemary and pomegranate arils for a festive look!
Notes
No dutch oven? That’s okay! The crockpot will do the trick. Just simply brown short ribs in a skillet and then transfer all ingredients along with short ribs in crockpot and cook on low for 7-8 hours.
If you do not wish to use wine or have it on hand, you can sub out the 2 cups of wine with more beef broth or use cranberry/cherry juice! The flavors will be different but still very tasty.

Brown Butter Sage Mashed Sweet Potatoes
If you are not on the brown butter train, then you need to hop on board, real fast! The basic technique of melting butter at a certain heating point, not only changes the chemistry but also the flavor and aroma. Preparing butter in this way not only enhances the flavor of whatever you put into it but it also adds a rich nutty taste to the dish.
Brown Butter Sage Mashed Sweet Potatoes - Elevated mashed potatoes using brown butter and sage. (dairy-free/paleo/vegan-friendly)

If you are not on the brown butter train, then you need to hop on board, real fast! The basic technique of melting butter at a certain heating point, not only changes the chemistry but also the flavor and aroma. Preparing butter in this way not only enhances the flavor of whatever you put into it but it also adds a rich nutty taste to the dish.

So how do you make it? Well, it’s very easy actually! Add a stick of butter (I personally use pasture-raised butter or clarified ghee) to a pan on medium heat. As the butter slowly melts, swirl the pan occasionally to be sure the butter is cooking evenly.
You will notice that the color will turn from yellow to golden-tan to, finally, a toasty-brown. You will know that the butter is ready to take off the heat when you smell that nutty aroma! Transfer brown butter into a heat-proof bowl to cool.

So now that you are a pro at browning butter, we are taking it up a notch! When you melt the butter, simply add fresh sage leaves and mashed garlic. The infusion of flavors pairs perfectly with the subtle sweetness that is sweet potatoes.
Speaking of pairing, I will share the best main course that will couple perfectly with this recipe so stay tuned! In the meantime, you can use brown butter in just about any sweet or savory recipe.
If you try this recipe, let us know! Leave a comment, rate it, and don’t forget to tag a photo to #fromtherootsblog on Instagram. We love seeing what you come up with!
Brown Butter Sage Mashed Sweet Potatoes - Elevated mashed potatoes using brown butter and sage. (dairy-free/paleo/vegan-friendly)
Ingredients
4 medium sweet potatoes (peeled and cubed)
1 stick butter (pasture-raised, clarified ghee, or vegan butter)
4-6 fresh sage leaves
2-4 cloves of garlic (mashed)
½ cup plant-based milk
S&P
Directions
In a large pot, cover potatoes with water and add a generous pinch of salt. Bring to a boil and cook until totally soft, about 16-20 minutes. Drain and return potatoes to the pot.
Use a potato masher to mash potatoes until smooth.
Meanwhile, prepare the brown butter by adding a stick of butter to a pan on medium heat. As the butter slowly melts, swirl the pan occasionally to be sure the butter is cooking evenly. Add fresh sage leaves and mashed garlic while butter is cooking. As soon as the butter turns to a toasty-brown color, take the pan off the heat. Strain and transfer brown butter into the pot with the mashed potatoes.
Discard sage leaves. Mince garlic cloves and add to mashed potatoes. Add milk, salt, and pepper, and combine. Season to taste and serve!
Notes
If you would like to fry a sage leaf as a garnish, add a small pad of butter to a pan and fry in butter for 2-3 minutes on medium heat.
You can use regular potatoes for this recipe as well.
If you would like to mix things up/I love using half ghee/half butter for this recipe!
Makes 6-8 servings


No-Bake Paleo Pumpkin Cheesecake Bars
No-Bake Paleo Pumpkin Cheesecake Bars - Perfect as a seasonal treat or to make for the holidays.
I created this recipe using Further Food vanilla collagen peptides. The recipe is on their website or you can get straight from here!
If you do not have collagen peptide powder or wish to not use it, you can simply sub the powder out with ½ tsp vanilla extract.
No-Bake Paleo Pumpkin Cheesecake Bars - Perfect as a seasonal treat or to make for the holidays.

I created this recipe using Further Food vanilla collagen peptides. The recipe is on their website or you can get straight from here!


If you do not have collagen peptide powder or wish to not use it, you can simply sub the powder out with ½ tsp vanilla extract.

If you would like to try Further Food, use code FROMTHEROOTSBLOG10 for 10% off your first purchase!
If you try this recipe, let us know! Leave a comment, rate it, and don’t forget to tag a photo to #fromtherootsblog on Instagram. We love seeing what you come up with!
No-Bake Paleo Pumpkin Cheesecake Bars - Perfect as a seasonal treat or to make for the holidays.
Ingredients:
Filling
1 cup raw cashews (soaked for at least 30 minutes)
1/2 cup pumpkin puree (canned)
3-4 Tbsp pure maple syrup
1/2 cup full fat coconut milk
1/2 scoop vanilla collagen powder (further food) or 1/2 tsp vanilla extract
1 tsp pumpkin spice
1/2 tsp ground cinnamon
Crust
1 cup medjool dates (soaked for at least 30 min)
1/2 cup pecans
1/2 cup walnuts
1/4 cup coconut flakes
1/2 tsp cinnamon
dash of pink himalayan salt
Almond Butter Salted Caramel
1/4 cup almond butter
2 Tbsp pure maple syrup
1 Tbsp coconut oil
pinch of sea salt
Directions
To make the crust: Add the pecans, walnuts, and coconut flakes to a food processor and process until broken down and crumbly. Add in the dates, cinnamon, and salt and process until well mixed and the mixture begins to form a ball.
Transfer to a parchment paper-lined 8x8 pan and press out evenly. Place in the freezer.
To a food processor or high powered blender, combine all filling ingredients and blend until texture is smooth. At this point, taste to see if you need to add more maple syrup for sweetness or spices for that pumpkin spice flavor.
Take the crust out of the freezer and pour the filling mixture over the crust. Spread evenly.
Place cheesecake in the freezer for up to two hours to set.
15 minutes before serving, prepare the caramel sauce by combining all ingredients into a small bowl and heating in the microwave for 30-sec increments until fully combined or in a small saucepan on medium heat.
Drizzle caramel sauce over the bars and sprinkle with coarse salt for a salted caramel flavor. (highly recommended!)
Serve immediately, makes 16 small bars.
For storage, place in the fridge for up to a week or in the freezer and thaw naturally for 30 minutes or 15 seconds in the microwave.
Notes
If you are following the further food recipe, nutrition information is for 10 bars, not 16.


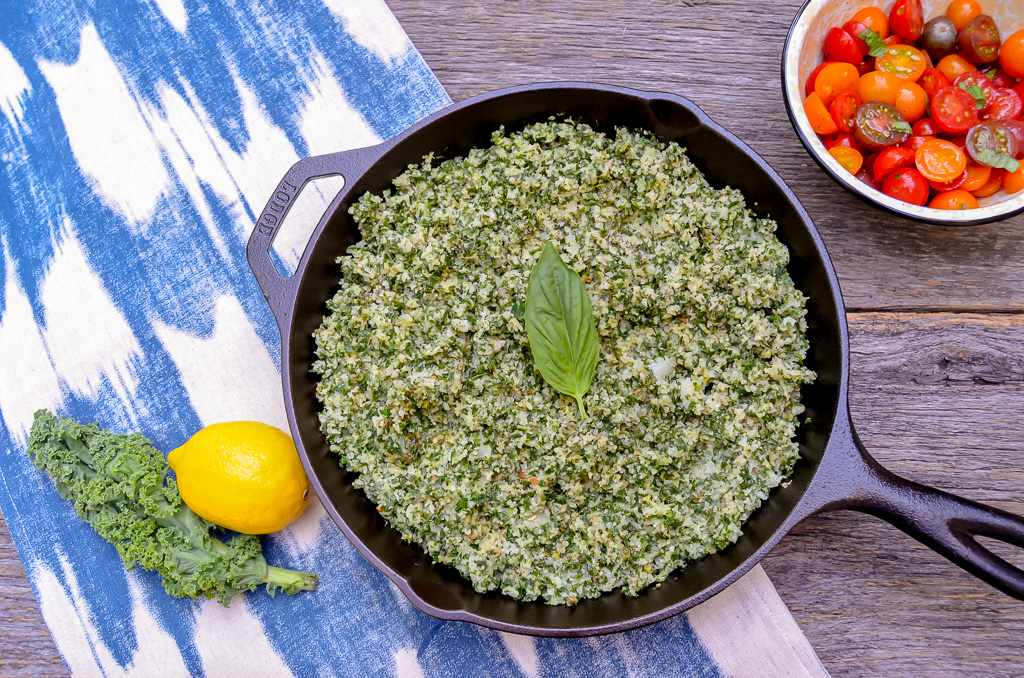
Creamy Tomato Pesto Soup
During the colder months, my mother would make homemade creamy tomato soup with grilled cheese. I’m not much of a soup person, but it was MY FAVORITE! Ever since then, I still drool dream about it to this day! What takes her soup above the rest is love (obviously), fresh herbs, and heavy cream. Well since heavy cream is a no go for this gut, I made a few changes to the recipe.
It’s a very simple recipe, actually. If you are crunched for time and need to have soup asap, (because don’t we all?) then you will only need five ingredients to make this soup. But, if you really want to make your mom’s old recipe jealous, whip up a quick pesto drizzle as a garnish. Dipping your dairy-free/gluten-free grilled cheese in that winning combination will not disappoint your taste buds, trust me.
Creamy Tomato Basil Soup - The creamiest, richest soup you have ever had that’s dairy-free!

During the colder months, my mother would make homemade creamy tomato soup with grilled cheese. I’m not much of a soup person, but it was MY FAVORITE! Ever since then, I still drool dream about it to this day! What takes her soup above the rest is love (obviously), fresh herbs, and heavy cream. Well since heavy cream is a no go for this gut, I made a few changes to the recipe.

It’s a very simple recipe, actually. If you are crunched for time and need to have soup asap, (because, don’t we all?) then you will only need five ingredients to make this soup. But, if you really want to make your mom’s old recipe jealous, whip up a quick pesto drizzle as a garnish. Dipping your dairy-free/gluten-free grilled cheese in that winning combination will not disappoint your taste buds, trust me.

For this recipe, if you are wanting a smooth, “bisque” texture, I would recommend getting a blender or immersion blender. Now, onto the recipe!

If you try this recipe, let us know! Leave a comment, rate it, and don’t forget to tag a photo to #fromtherootsblog on Instagram. We love seeing what you come up with!
Creamy Tomato Basil Soup - The creamiest, richest soup you have ever had that’s dairy-free!
Makes 4-6 servings
Ingredients:
1 white onion (sliced)
4 cloves garlic (smashed)
1 Tbsp grass fed butter (or ghee, coconut oil)
5-8 sprigs fresh oregano (strip leaves from the stem)
1 can (28 oz) fire roasted organic crushed tomatoes
1 can lite coconut milk unsweetened
Pesto drizzle
1 bunch (.75 oz package) fresh basil
¼ cup oil
4 cloves garlic
1 Tbsp feta (or DF cheese)
Directions:
In a large skillet, melt butter over medium heat. Add onions and garlic and saute until translucent. Add can of tomatoes, oregano, and season with salt and pepper. Bring to a boil, reduce heat and simmer uncovered for about 10 minutes or until slightly thickened.
To make the pesto drizzle, add basil, garlic, and feta to a processor. While the processor is on low, pour the oil through the feed tube gradually. Scrape down the sides and add more oil if necessary. Season to taste with salt and pepper and transfer to a small bowl. If you do not have a processor, finely chop ingredients and combine in a small bowl.
Transfer tomato mixture to a blender and process until smooth (remember, mixture is hot!). Alternatively, use an immersion blender, process until smooth.
With soup over low heat, add coconut milk. Season to taste with sea salt, pepper, and optional red pepper flakes.
When ready to serve, drizzle pesto and/or additional coconut milk and serve!
Notes:
I love using this brand for organic canned tomatoes.


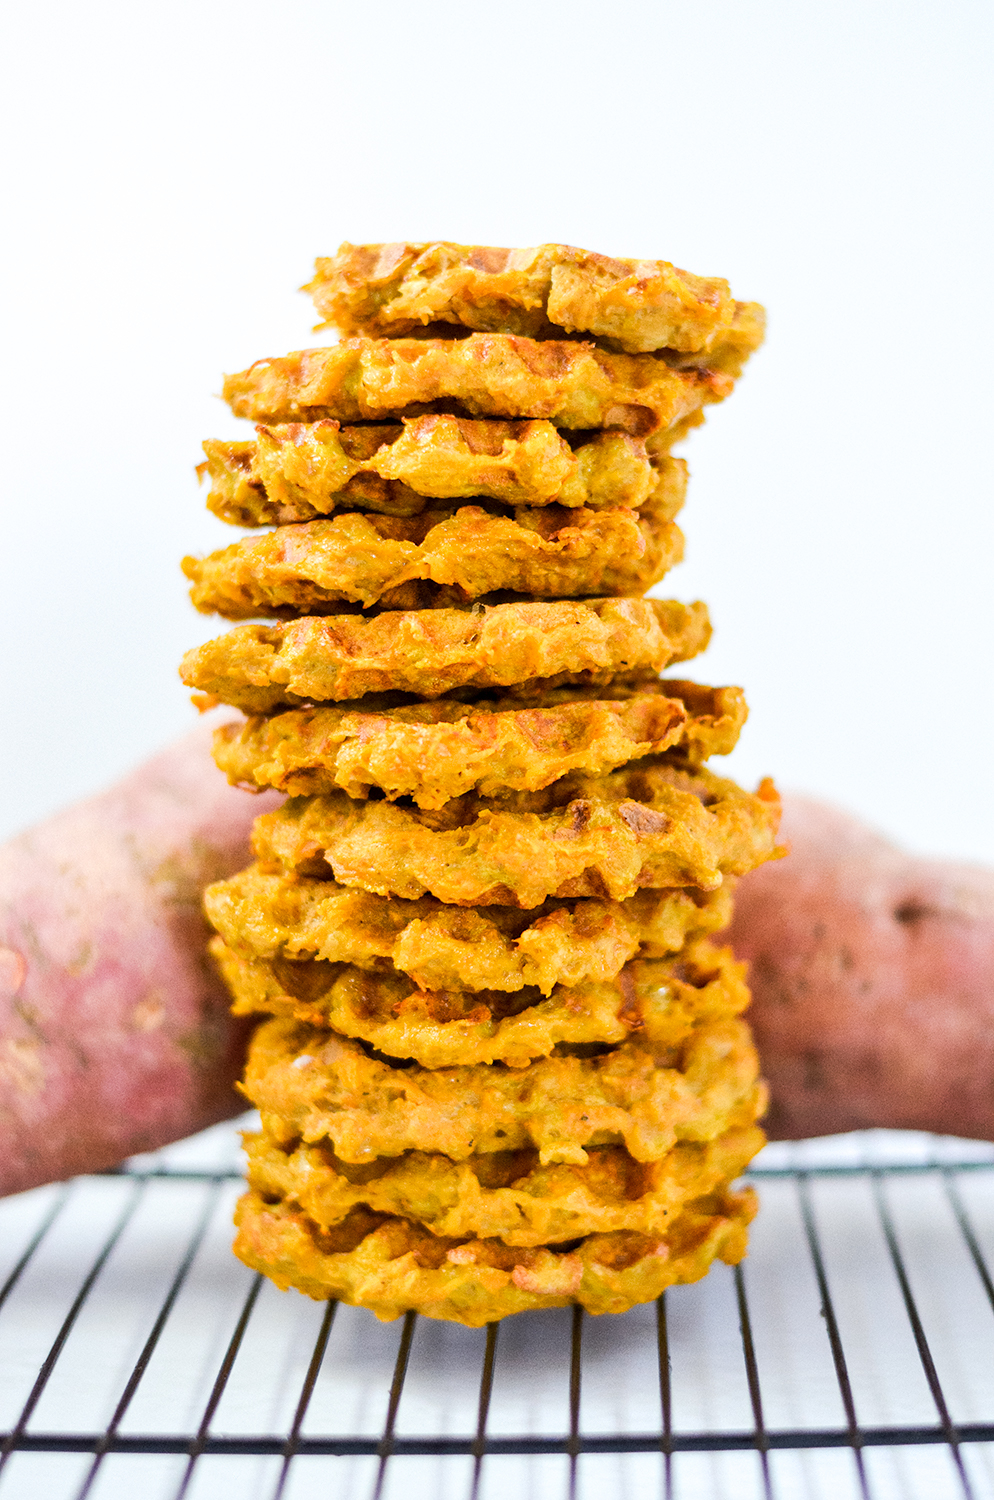
Sweet Potato Waffles
At first, sweet potato toast was my obsession… now it’s sweet potato in waffle form! When I visited friends and family in Atlanta last month I ate at many burger joints. When ordering a burger, I would have to order it naked (no bun). After the second burger joint, ordering a burger with no bun got boring real fast and I ended up loading on fries because I was so hungry.
But then I thought, why not combine fries into a bun that can be healthy, gluten-free, and fun?! And here we are ladies and gents… sweet potato waffles!
To be honest, I feel weird adding this recipe to the blog because it is just too easy to make. Made with only two ingredients, you literally can’t go wrong.
Sweet Potato Waffles - Made with only two ingredients and ready in less than five minutes, these sweet potato waffles are naturally gluten-free and paleo-friendly.
At first, sweet potato toast was my obsession… now it’s sweet potato in waffle form! When I visited friends and family in Atlanta last month I ate at many burger joints. When ordering a burger, I would have to order it naked (no bun). After the second burger joint, ordering a burger with no bun got boring real fast and I ended up loading on fries because I was so hungry.

But then I thought, why not combine fries into a bun that can be healthy, gluten-free, and fun?! And here we are ladies and gents… sweet potato waffles!

To be honest, I feel weird adding this recipe to the blog because it is just too easy to make. Made with only two ingredients, you literally can’t go wrong.


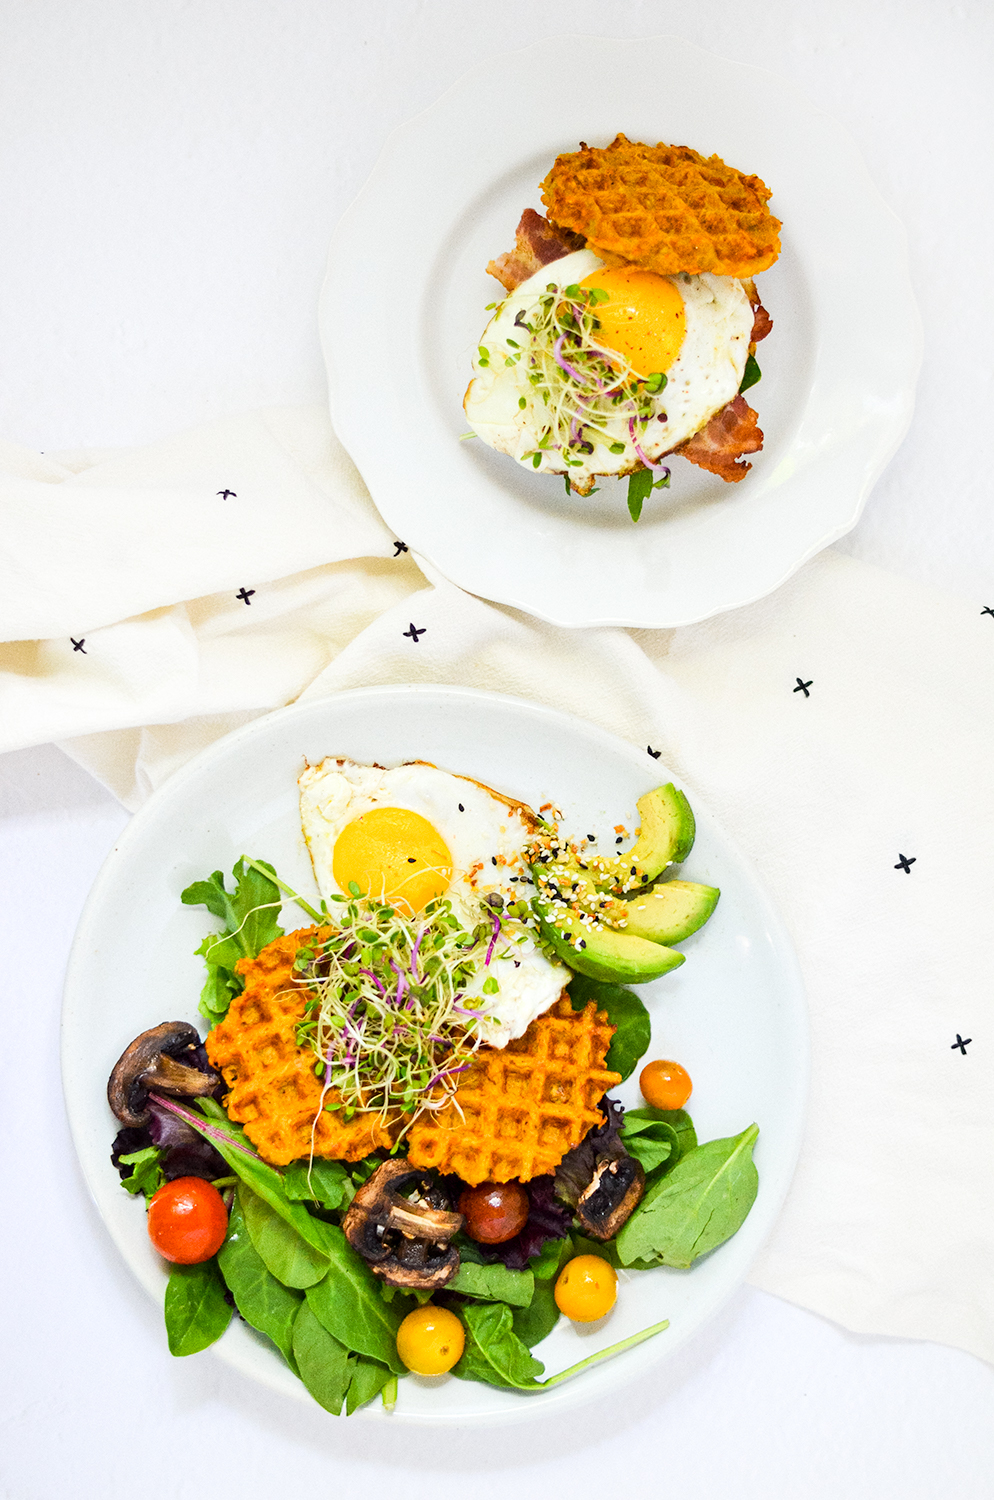
For a more savory sweet potato waffle, you can add seasonings like salt, pepper, garlic powder, and smoked paprika. For a sweeter waffle, you can add cinnamon, pumpkin spice, chai spice, and coconut sugar.


Either way, these waffles are very versatile. I like making two batches of this recipe so that I can freeze the leftover waffles and have extra on hand for #sundaymealprep. These waffles freeze beautifully and retain freshness after popping them in the toaster to reheat.
If you try this recipe, let us know! Leave a comment, rate it, and don’t forget to tag a photo to #fromtherootsblog on Instagram. We love seeing what you come up with!
Sweet Potato Waffles - Made with only two ingredients and ready in less than five minutes, these sweet potato waffles are naturally gluten-free and paleo-friendly.
Ingredients:
1 large sweet potato
2 eggs (whisked)
1 Tbsp oil
Add-ins:
Sweet version: add cinnamon, pumpkin spice, chai spice, or coconut sugar
Savory version: add salt, pepper, garlic powder, smoked paprika
Directions:
Remove the skin of the sweet potato by using a peeler. Finely grate sweet potato until you have about 1 to 1 ½ cup grated sweet potato.
Drain liquid from sweet potato and add to a small bowl.
Add whisked eggs, oil, and preferred seasoning mixture.
Heat a small waffle maker and spray with oil. Using a cookie scooper, scoop about a tablespoon of sweet potato mixture and smooth into a flat circle in the waffle maker.
Cook for about 2-5 minutes or until fully cooked through and golden brown.
Makes about 5-6 small waffles.
Notes:
Store in the refrigerator for up to a week in an airtight container. Can be frozen and popped into the toaster to reheat.
Small waffle maker I use