Sort by Category
- May 2026
- March 2026
- December 2025
- November 2025
- October 2025
- September 2025
- August 2025
- June 2025
- August 2024
- July 2024
- June 2024
- May 2024
- February 2024
- January 2024
- December 2023
- November 2023
- October 2023
- September 2023
- August 2023
- July 2023
- March 2023
- February 2023
- January 2023
- December 2022
- November 2022
- October 2022
- September 2022
- August 2022
- June 2022
- May 2022
- April 2022
- March 2022
- February 2022
- January 2022
- December 2021
- November 2021
- October 2021
- September 2021
- August 2021
- July 2021
- June 2021
- May 2021
- April 2021
- March 2021
- February 2021
- January 2021
- December 2020
- November 2020
- October 2020
- September 2020
- August 2020
- July 2020
- June 2020
- May 2020
- April 2020
- March 2020
- February 2020
- January 2020
- December 2019
- November 2019
- October 2019
- September 2019
- August 2019
- July 2019
- June 2019
- May 2019
- April 2019
- March 2019
- February 2019
- January 2019
- December 2018
- November 2018
- October 2018
- September 2018
- August 2018
- July 2018
- June 2018
- May 2018
- April 2018
- March 2018
- February 2018

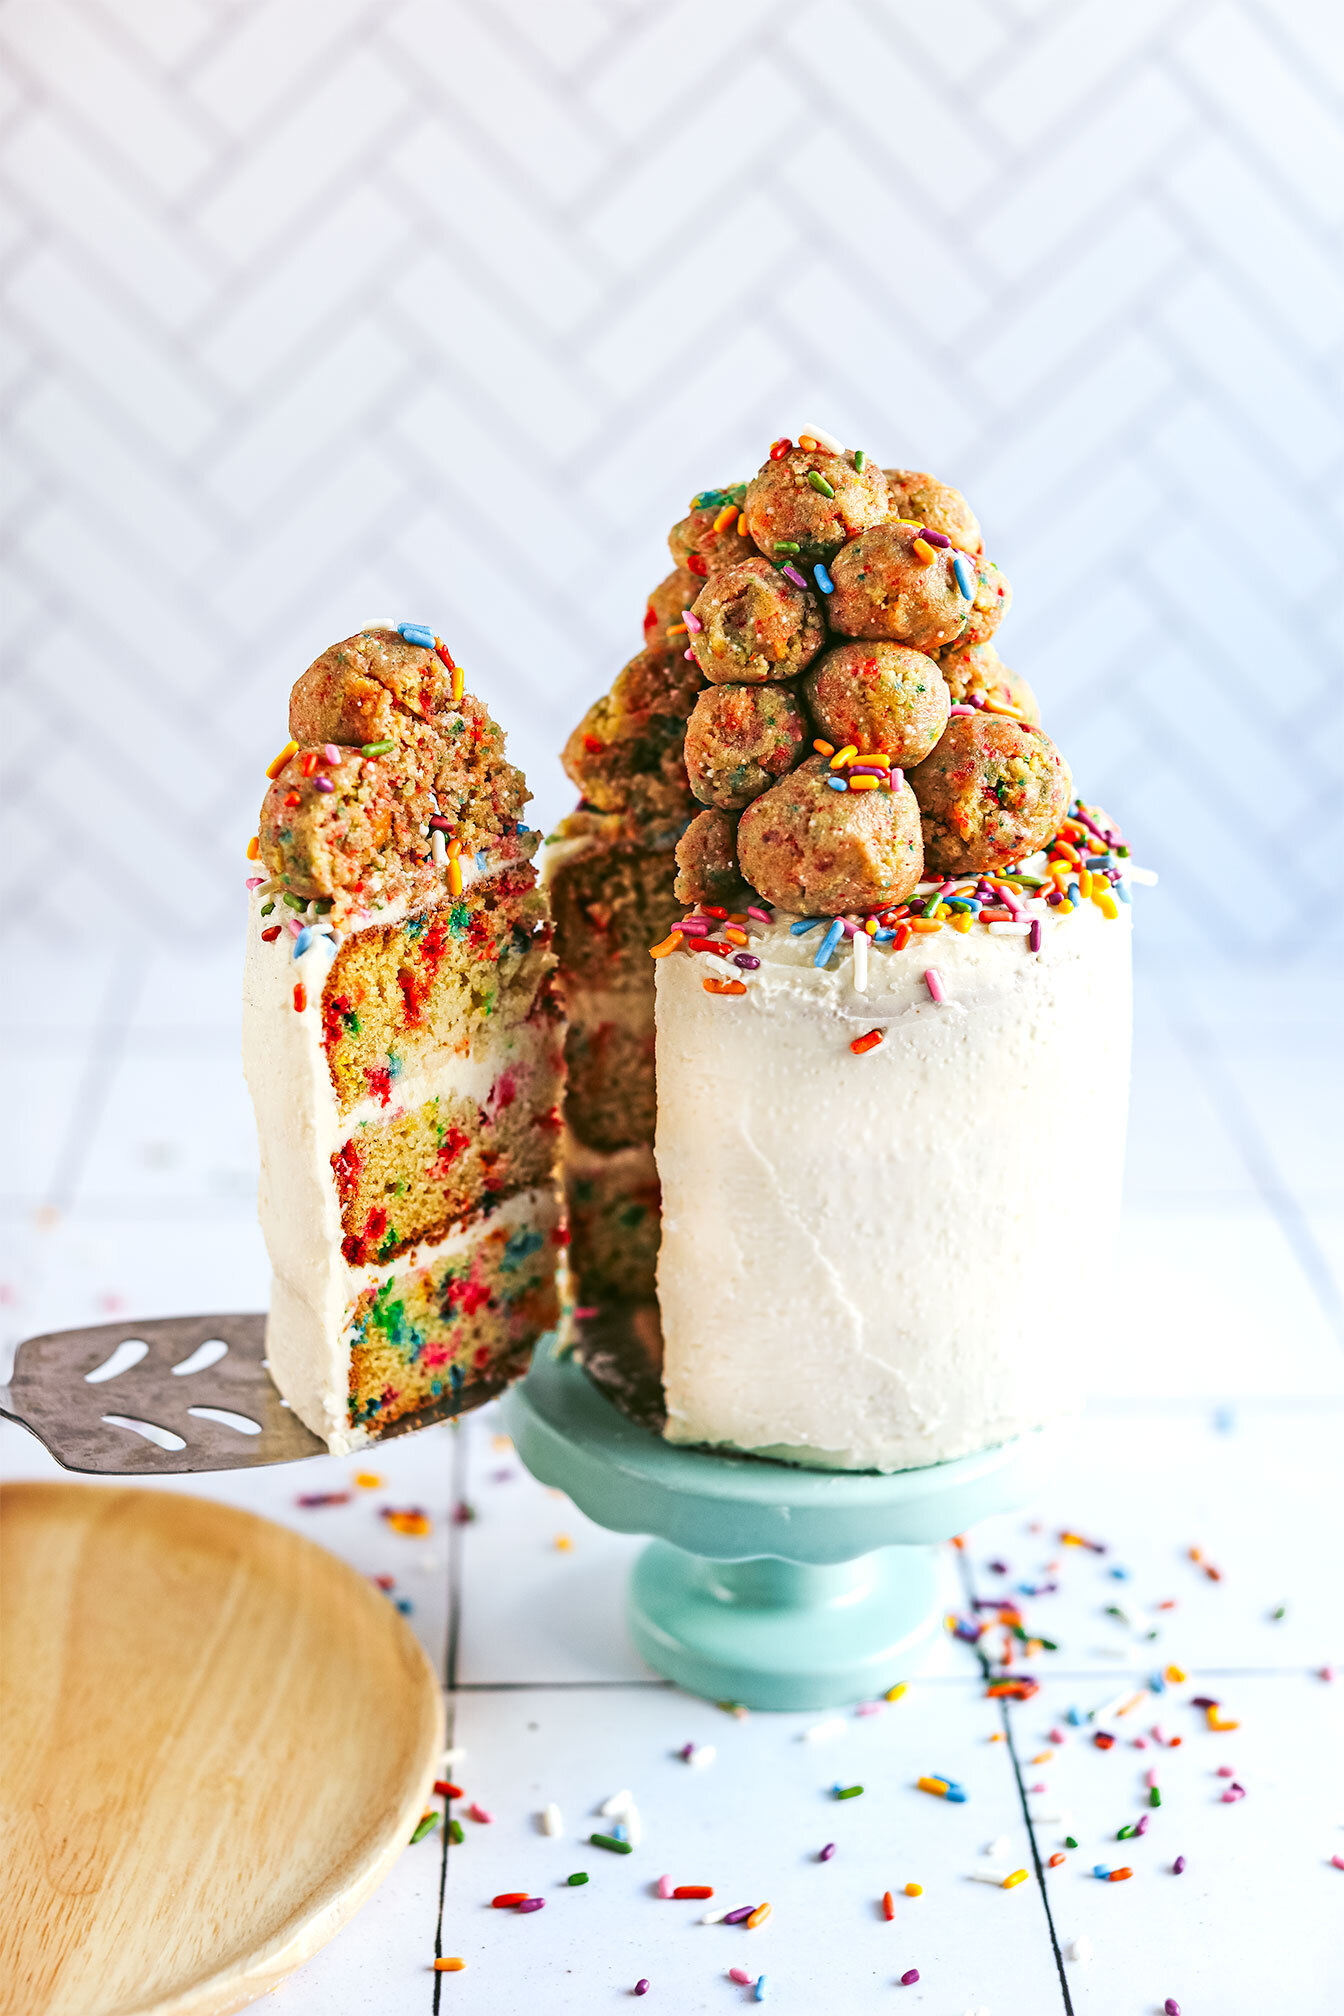
The Best Gluten Free Confetti Cake
The Best Gluten Free Funfetti Cake - Fluffy, tender gluten free cake that reuses layered tops as cake ball garnishes! Includes baking techniques to create that perfect “just came from the bakery funfetti cake.”
I turned the big dirty thirty a couple weeks back (pisces in the house!?) and it feels so good! Ever since I was a kid, I dreamt of this day. For some reason, in my childhood brain, 30 meant that I was going to be a woman. That I would have it all together. That I was going to be successful. And in most ways, it feels that way or at least leading to that prediction.
For so many years, I would let my stomach succumb to a laundry list of ingredients that made me feel like crap for the sake of pleasing coworkers who rarely knew me or family members that “forgot” that I had a gluten and dairy sensitivity. But not this year! This year, I am making my own damn cake! And the cake will have ingredients that I can fully digest and not feel like crap after! Haha
The Best Gluten Free Funfetti Cake - Fluffy, tender gluten free cake that reuses layered tops as cake ball garnishes! Includes baking techniques to create that perfect “just came from the bakery funfetti cake.”
I turned the big dirty thirty a couple weeks back (pisces in the house!?) and it feels so good! Ever since I was a kid, I dreamt of this day. For some reason, in my childhood brain, 30 meant that I was going to be a woman. That I would have it all together. That I was going to be successful. And in most ways, it feels that way or at least leading to that prediction.

For so many years, I would let my stomach succumb to a laundry list of birthday cake ingredients that made me feel like crap for the sake of pleasing coworkers who barely knew me or family members that “forgot” that I had a gluten and dairy sensitivity. But not this year! This year, I am making my own damn cake! And the cake will have ingredients that I can fully digest and not feel like crap after! Haha


So if you feel the same way, you are making a cake for someone with these sensitivities, or just want a really good funfetti cake then look no further!

I’ve been watching a lot of baking shows during COVID: Great British Baking Show Nailed It, you name it! So this cake was inspired by all those late nights drooling over all the glutenous and sugary-laden desserts! Haha!
With that said, even though these recipes are traditional, I learned the techniques that can be applied to gluten and dairy-free baking! With cooking in general, it’s all about learning and finding ways where cooking can work for you! So the techniques used for this cake will, in the end, produce a damn good gluten-free cake.


Directions in the recipe below, provide the techniques used but if you need more information regarding how to: reverse creaming, flat tops for even layering, milk soaking layers, build supported cake layers, frost your cake or leaving it naked, tools needed for a layered cake, and so much more -- check out Erin McDowell’s video on How to Make Layered Cakes and Claire Saffitz Makes Confetti Cake.


If you try this recipe, let us know! Leave a comment, rate it, and don’t forget to tag a photo to #fromtherootsblog on Instagram. We love seeing what you come up with!
The Best Gluten Free Funfetti Cake - Fluffy, tender gluten free cake that reuses layered tops as cake ball garnishes! Includes baking techniques to create that perfect “just came from the bakery funfetti cake.”
Ingredients
1 ½ cups gluten free 1-to-1 baking flour
½ cup organic granulated cane sugar
1 tsp baking powder
½ tsp baking soda
¼ tsp salt
½ cup goat milk + ¼ cup or plant-based milk
1 tsp lemon juice + zest of one lemon
1 egg + 3 Tbsp egg whites (whisked + room temperature)
½ stick grass-fed butter (room temperature)
½ tsp almond extract
⅓ cup (1.75 oz) sprinkles
Frosting
Coconut whipped frosting (homemade or store-bought) or frosting of choice
Toppings
Sprinkles and cake balls (from leftover cake tops + frosting)
Directions
Preheat the oven to 350 degrees F and spray 3 - 4-inch springform pans with cooking spray and line the bottoms with parchment paper. Set aside.
Make your “buttermilk” by adding lemon juice and zest to your goat milk. Let sit for at least 10-15 min. Set aside. *The zest just adds brightness to the cake, not necessarily creating the buttermilk mixture.
Place the flour, sugar, baking powder, baking soda, and salt into the bowl of your stand mixer with the paddle attachment.
Turn the mixer on the slowest speed. Slowly add chunks of your softened butter until everything is mixed and looks like coarse sand.
Add your buttermilk mixture and bump up the speed to 4. Mix for one minute and scrape the bowl. Slowly add the whisked egg mixture, and almond extract and continue mixing for one minute. Stop halfway to scrape the bowl one more time. Mix until combined. Your batter should be thick but creamy and pourable.
Take off the paddle attachment and fold the sprinkles into the batter.
Divide the batter into your greased pans and fill ¾ of the way full. I like to evenly distribute batter by weighing each pan or use a cookie/ice cream scooper to make sure each pan has the right amount of batter.
Bake for 25-30 minutes or until golden brown and a toothpick when inserted, comes out clean.
Remove the cakes from the oven and let them cool for 10 minutes, then gently remove the pan and allow them to cool completely on a wire rack.
Let layers cool completely before stacking and frosting. I like to place my layers in the fridge for about 20-30 min to firm up the cakes for easier stacking.
Before we start stacking, it’s time to start slicing! In order to have even layers for a tall and flat layered cake, we need to make sure each layer is even. Bonus: Slicing the tops off our cakes will make our cake balls for garnish!
Use a knife to score the entire outside edge of the cake - right where the cake stops cooking in the pan (you will see a distinct edge right as it starts to dome up). Go slowly, not too deep, and make sure you are getting down to eye-level.
Take a serrated knife and cut through the cake along the indentation made with the knife marker. The best way of doing this without breaking the layers putting each cake layer on a decorating turntable. That way, you're slowly moving the serrated knife as the cake is turning. Eventually, you will end up in the middle and the top layer should come right off without any buckling or crumbling.
Set the domed top part of each layer to the side in a medium bowl to make cake balls for later.
To assemble:
Spread a bit of frosting onto the middle of the cake board, serving plate, or decorating turntable. (I like to cut out a piece of 4” round cardboard as a base for my cake so that it’s easier to transfer to a serving plate without messing with the finished product) If you are using this method, place the cardboard piece on frosting so that it stays. Dab another bit of frosting on that and then center your first layer on it.
Use a pastry brush or small spoon and dab leftover goat milk onto each cake. Don’t overdo it as you don’t want a soggy cake. Sprinkle extra lemon zest - optional but so good!
Stack the layers on top of one another, using an offset spatula to spread about half-inch frosting between each layer. Repeat each layer with milk dab, zest, and frosting. The last layer, turn the layer upside down so that the cake bottom is on top. *Makes for a clean flat top!
Crumb coat by covering the whole cake in a very thin layer of frosting. You can also pipe in between layers where there are visible holes.
Chill the cake in the fridge until the frosting has firmed up; about 20 minutes.
Apply the final coating of frosting.
To make the cake balls: Crumble domed cake tops in a small bowl with leftover frosting. Combine until you can make a ball without it crumbling. Create different size cake balls and set them aside.
To garnish, sprinkle the cake top with sprinkles or however you would like to decorate and stack cake balls in the center. Let set in the fridge so that everything is firm. Slice and enjoy!
Notes:
Simple Mills vanilla frosting, Sprinkles, cake pans, cake decorating starter kit
Even though goat milk has lactose, I have found that my body tolerates it better than cow’s milk. If you don’t know if you can tolerate goat milk then do plant-based milk instead!

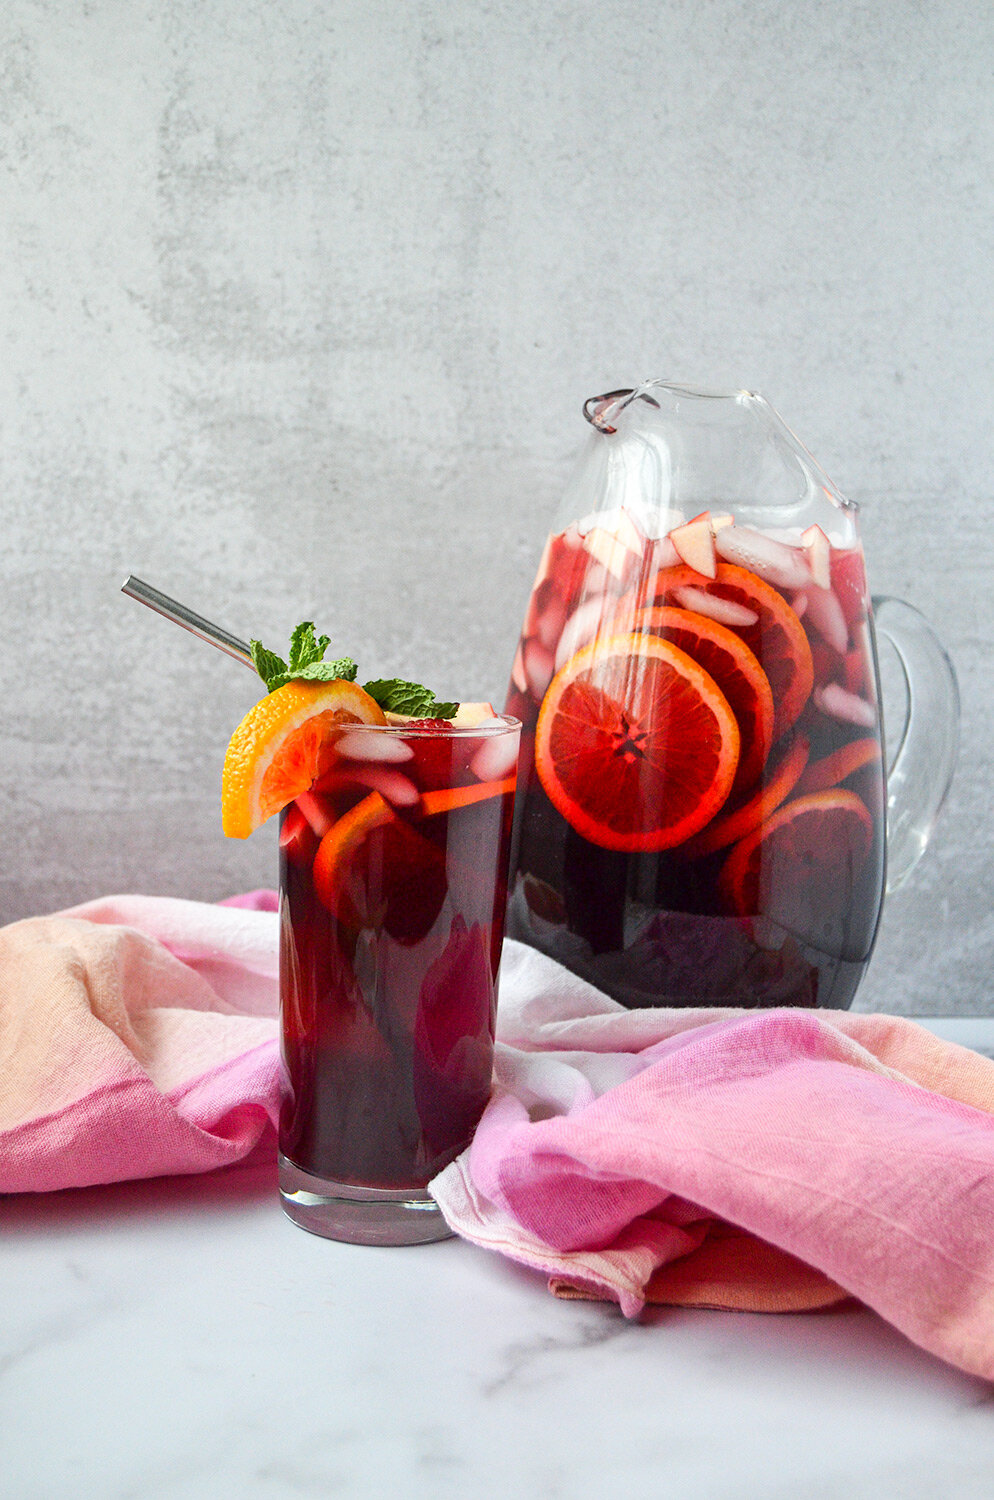
Citrus Hibiscus Sangria
Having From the Roots just turned 1 yesterday and the website getting a face-lift, I wanted to celebrate with something, fun, fruity, and flavorful. What better way to celebrate than with a drink?
From the Roots has become way more than I have ever imagined. I started out just posting recipes I have created throughout the years and now it has turned into so much more. Within this year, we have been invited to do pop-up events, catered for parties and grand openings for businesses, collaborated with major health product companies, became a brand ambassador for Further Food, Banza, Manitoba Harvest Hemp Foods, and have connected with so many amazing people - YOU!
I couldn’t have done this without YOU, so thank you so much! Well, I could keep rambling, but let’s get to the recipe! I made this into a mock-tail form originally for a Galentine’s Day event. It was such a big hit! But TBH, it would be an even more hit if you added wine or prosecco to it… But you can do whatever you like! ;)
CHEERS TO A HEALTHY, SEASONAL SANGRIA MOCKTAIL. CAN MAKE INTO COCKTAIL VERSION TOO IF THAT’S YOUR THING!
Having From the Roots just turned 1 yesterday and the website getting a face-lift, I wanted to celebrate with something, fun, fruity, and flavorful. What better way to celebrate than with a drink?
From the Roots has become way more than I have ever imagined. I started out just posting recipes I have created throughout the years and now it has turned into so much more. Within this year, we have been invited to do pop-up events, catered for parties and grand openings for businesses, collaborated with major health product companies, became a brand ambassador for Further Food, Banza, Manitoba Harvest Hemp Foods, and have connected with so many amazing people - YOU!

I couldn’t have done this without YOU, so thank you so much! Well, I could keep rambling, but let’s get to the recipe! I made this into a mock-tail form originally for a Galentine’s Day event. It was such a big hit! But TBH, it would be an even more hit if you added wine or prosecco to it… But you can do whatever you like! ;)

When making sangria, it is best to use seasonal produce so that you can the best, full-bodied flavor from the fruits you are using. For this recipe, I cut up blood oranges, apples, and lemons. The tea I used is Stash’s Wild Raspberry Hibiscus so I added fresh raspberries and fresh mint for a refreshing beverage.
You can also make this drink ahead of time by brewing the hibiscus tea with mint the night before to store in the fridge. When you are ready to make the drink, add the hibiscus tea with the juices and mineral water with fresh cut fruits. It’s that easy!

Want more drink recipes? Check out The Holiday Mule, Strawberry Watermelon Mint Agua Fresca, and Watermelon Lime Refresher.
If you try this recipe, let us know! Leave a comment, rate it, and don’t forget to tag a photo to #fromtherootsblog on Instagram. We love seeing what you come up with!
Ingredients:
4 wild raspberry hibiscus tea bags
4 cups filtered water
½ cup organic cane sugar
½ cup fresh mint leaves
1 liter sparkling mineral water
1 qt 100% pure juice (pomegranate, strawberry lemonade, cranberry)
Orange
Lemon
Garnish
Apples, raspberries, fresh mint, blood orange, lemon, lime, grapes, blackberries
Directions:
In a small saucepan, add water and sugar and bring to a boil over medium high heat; stirring until sugar has dissolved.
Remove from heat; add hibiscus tea and fresh mint. Cover and let steep for 15 minutes.
Pour tea mixture through a fine sieve into a bowl or large pitcher and add ice.
Stir in mineral water, juice, and freshly squeezed juice of orange and lemon.
Chill drink in refrigerator until completely cold.
30 minutes before serving, add sliced fruits for presentation and added flavor!
Notes:
I like using Santa Cruz and R.W. Knudsen 100% juice brands. My favorite combo is mixing ½ qt. pomegranate and ½ qt. strawberry raspberry juice.
For tea - I like using Stash’s wild raspberry hibiscus tea.
To make this into a cocktail, replace mineral water with red wine or prosecco.


