Sort by Category
- May 2026
- March 2026
- December 2025
- November 2025
- October 2025
- September 2025
- August 2025
- June 2025
- August 2024
- July 2024
- June 2024
- May 2024
- February 2024
- January 2024
- December 2023
- November 2023
- October 2023
- September 2023
- August 2023
- July 2023
- March 2023
- February 2023
- January 2023
- December 2022
- November 2022
- October 2022
- September 2022
- August 2022
- June 2022
- May 2022
- April 2022
- March 2022
- February 2022
- January 2022
- December 2021
- November 2021
- October 2021
- September 2021
- August 2021
- July 2021
- June 2021
- May 2021
- April 2021
- March 2021
- February 2021
- January 2021
- December 2020
- November 2020
- October 2020
- September 2020
- August 2020
- July 2020
- June 2020
- May 2020
- April 2020
- March 2020
- February 2020
- January 2020
- December 2019
- November 2019
- October 2019
- September 2019
- August 2019
- July 2019
- June 2019
- May 2019
- April 2019
- March 2019
- February 2019
- January 2019
- December 2018
- November 2018
- October 2018
- September 2018
- August 2018
- July 2018
- June 2018
- May 2018
- April 2018
- March 2018
- February 2018

Dark Chocolate Tahini Cookies
These gluten-free dark chocolate tahini cookies are made with almond flour, coconut flour, and rich tahini for the perfect crispy-outside, soft-inside texture. Naturally sweetened with coconut sugar and loaded with dark chocolate chunks—your new favorite healthy cookie!
These gluten-free dark chocolate tahini cookies are made with almond flour, coconut flour, and rich tahini for the perfect crispy-outside, soft-inside texture. Naturally sweetened with coconut sugar and loaded with dark chocolate chunks—your new favorite healthy cookie!

There’s something about the combination of dark chocolate and tahini that feels both nostalgic and elevated at the same time. I actually stumbled onto these cookies one cold afternoon when I was craving something cozy but didn’t want to make a full-on decadent dessert. I opened my pantry, spotted a jar of tahini I usually save for dressings, and thought… what if this could work in a cookie?
Spoiler: it absolutely works.
The earthy richness of tahini paired with sweet coconut sugar and melty dark chocolate creates this irresistible balance of nutty, toasty sweetness. And the texture? Chef’s kiss. Crispy around the edges, soft and almost brownie-like in the center — the kind of cookie that makes you pause mid–first bite.
These quickly became a go-to in our house, especially when I want something that feels indulgent but still uses simple, wholesome ingredients. If you love a bakery-style cookie with a little twist, you’re going to be obsessed with these Dark Chocolate Tahini Cookies. Serve them warm with a glass of cold milk and thank me later.

These cookies are the perfect mix of nutty, rich, and deeply chocolatey. The tahini adds a subtle sesame flavor that pairs so well with dark chocolate, while the almond and coconut flour combination creates crisp edges and a soft, chewy middle. They’re naturally gluten-free, sweetened with coconut sugar, and truly next-level with a sprinkle of flaky sea salt.
⬇️ 🎥 A YouTube video tutorial below if you want to watch the full step-by-step!
✨ If you try this recipe, make sure to tag me in your socials so I can cheer you on in the kitchen! Or leave feedback in the comments!
Dark Chocolate Tahini Cookies (Gluten-Free, Soft + Crispy!)
These gluten-free dark chocolate tahini cookies are made with almond flour, coconut flour, and rich tahini for the perfect crispy-outside, soft-inside texture. Naturally sweetened with coconut sugar and loaded with dark chocolate chunks - your new favorite healthy cookie!
Coconut flour behaves differently than most flours because it absorbs significantly more moisture. Small measurement differences can affect the dough texture, which is why the updated version includes additional guidance for best results.
Ingredients
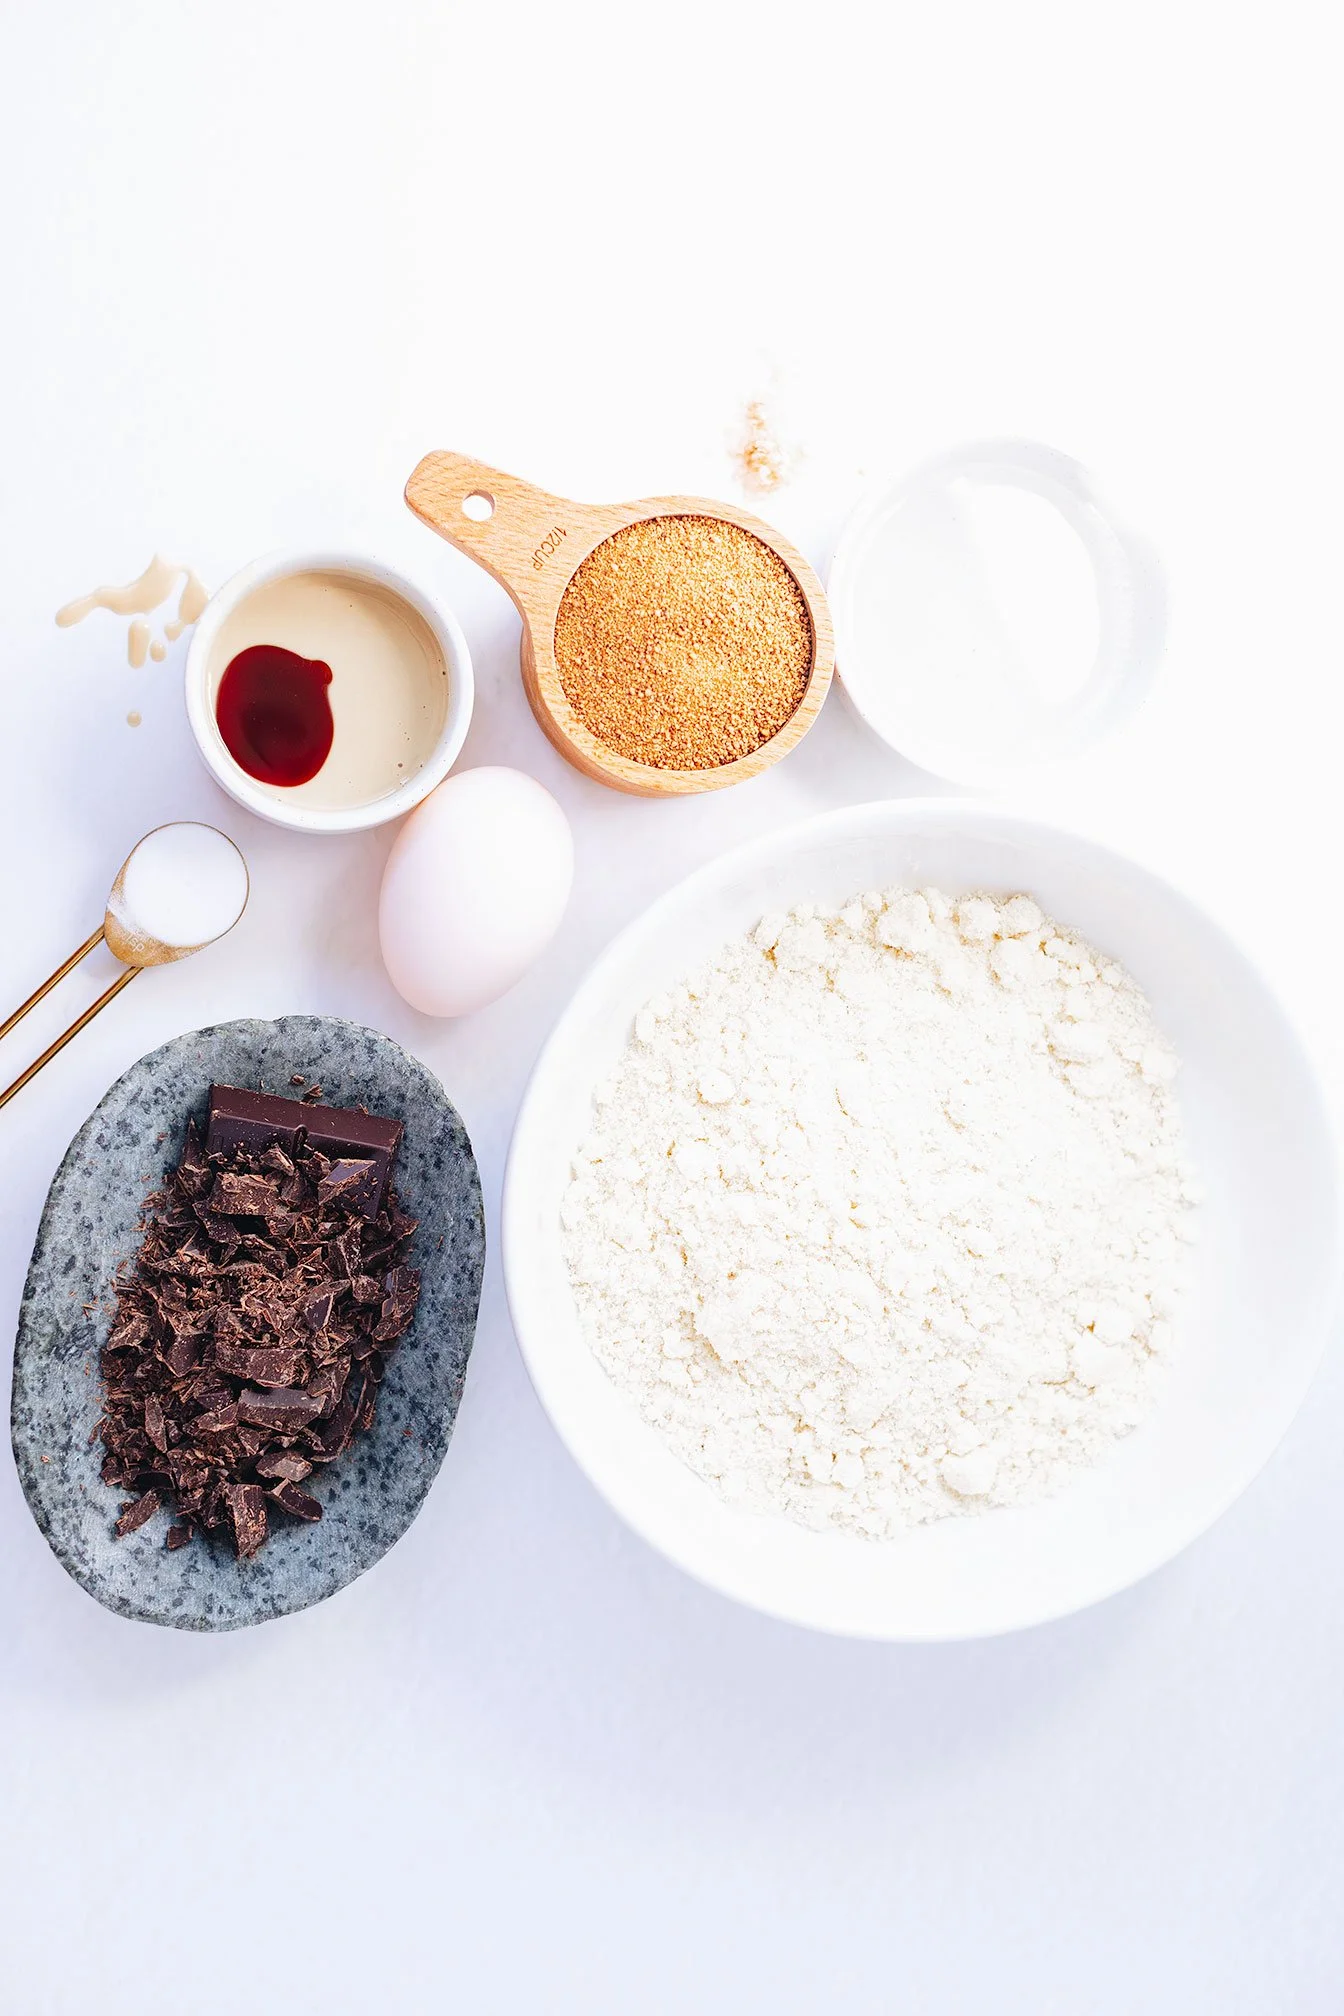
1 ¼ cups almond flour
¾ cup coconut flour (spooned and leveled, not packed)
2 tbsp arrowroot starch (optional but recommended for better texture)
⅓ cup coconut oil or grass-fed butter, melted and slightly cooled
½ cup coconut sugar
1 large egg, room temperature
¼ cup tahini (well stirred and pourable)
1 tsp vanilla extract
¾ tsp baking soda
2.1 oz dark chocolate bar, chopped or 1 cup dark chocolate chunks/chips
Flaky sea salt, for topping
Directions
Mix the dry ingredients
In a medium bowl, whisk together the almond flour, coconut flour, arrowroot starch (if using), coconut sugar, and baking soda.
Mix the wet ingredients
In another bowl, whisk together the melted coconut oil or butter, egg, tahini, and vanilla extract until smooth.
Combine
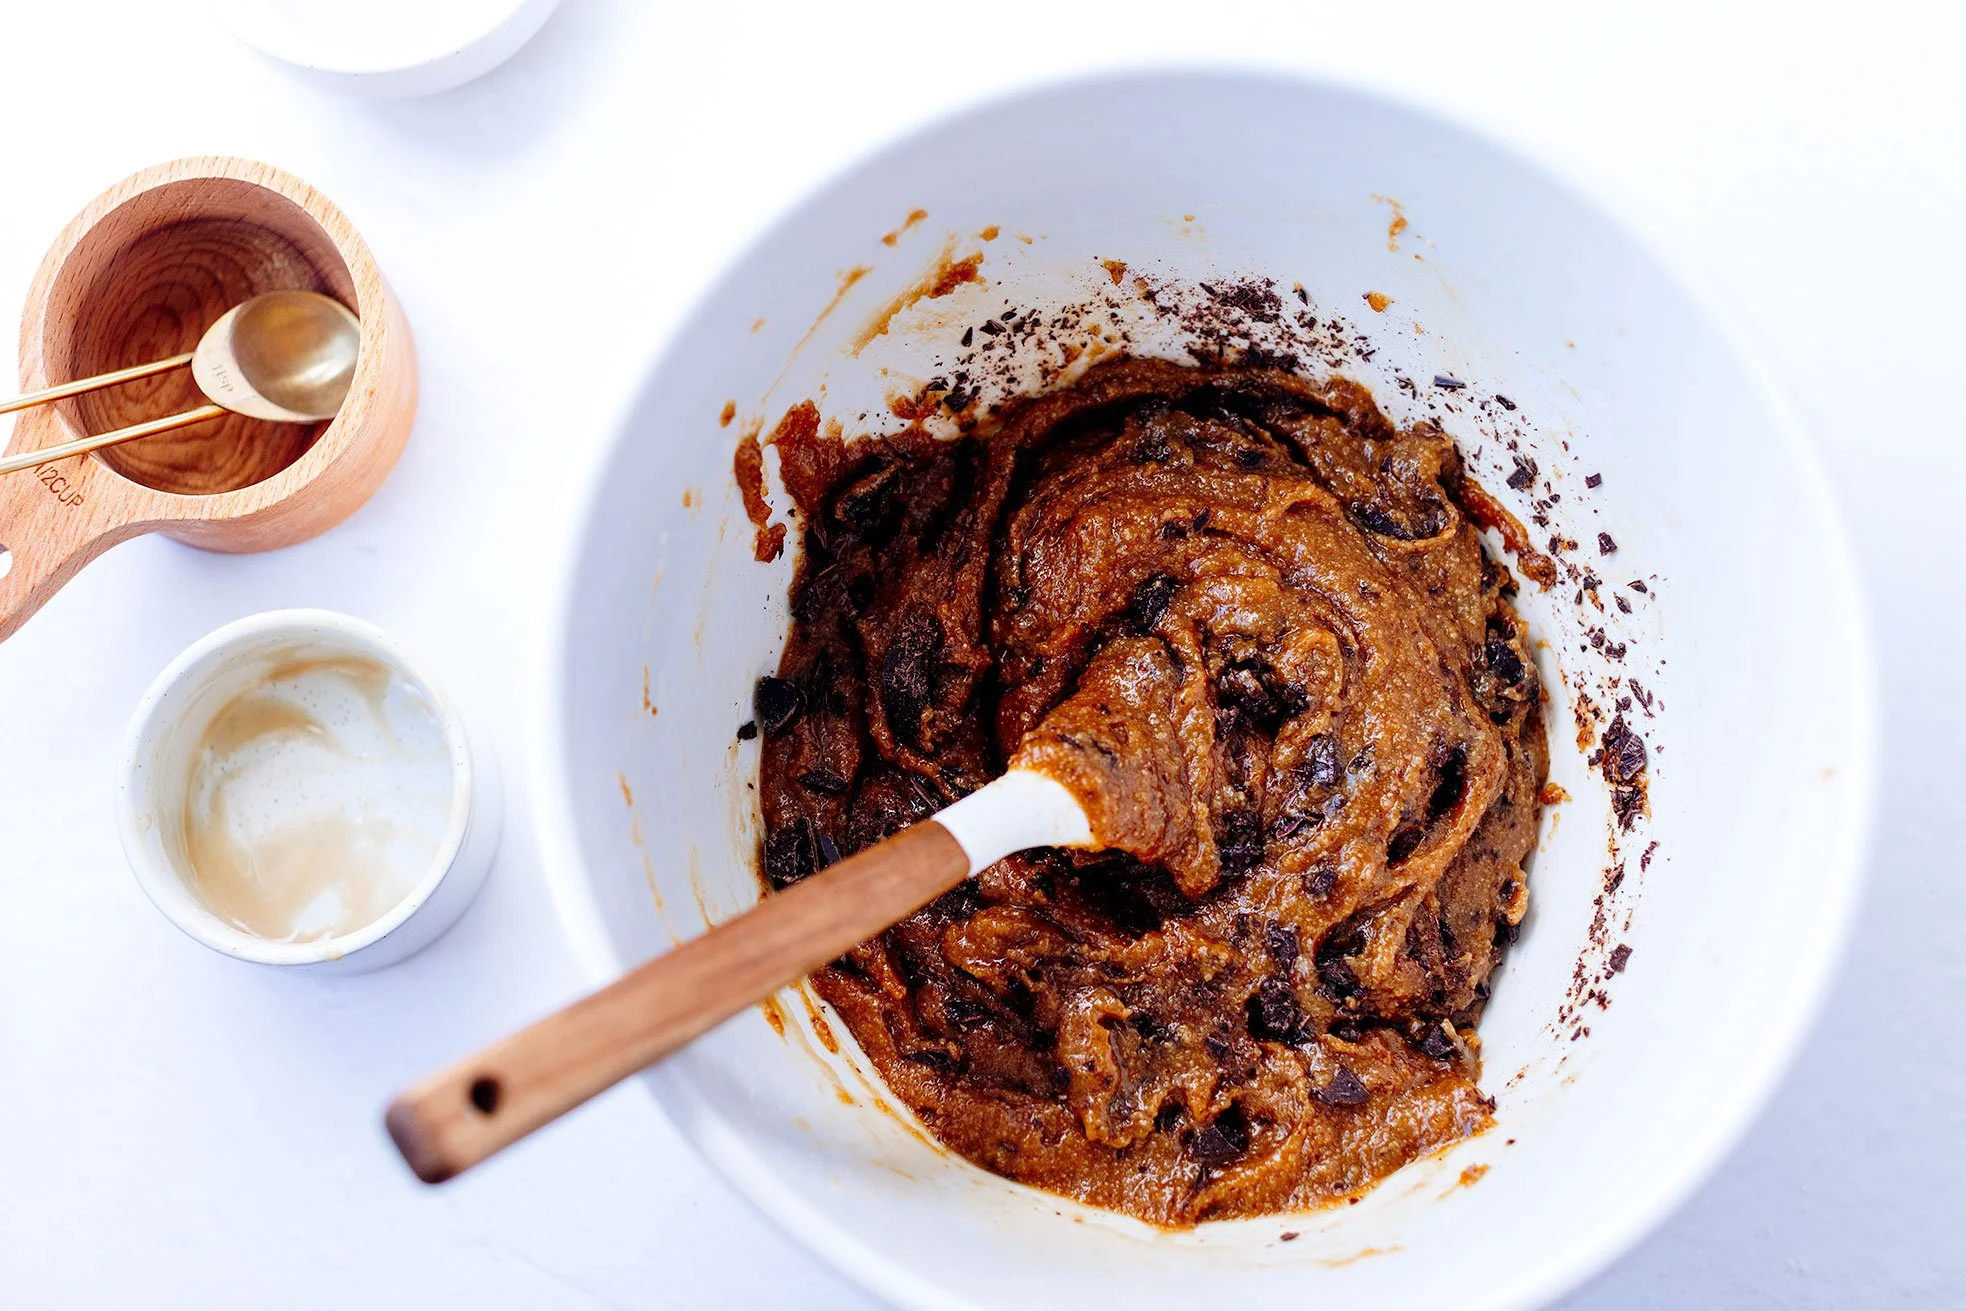
Pour the wet ingredients into the dry ingredients and stir until a thick dough forms. Fold in the chopped dark chocolate.
If the dough feels too crumbly to hold together, mix in 1–2 tablespoons of water or milk until it forms a scoopable dough.
Chill
Cover the dough and refrigerate for at least 1 hour (or up to overnight). Chilling helps the coconut flour fully hydrate and improves the texture of the cookies.
Bake
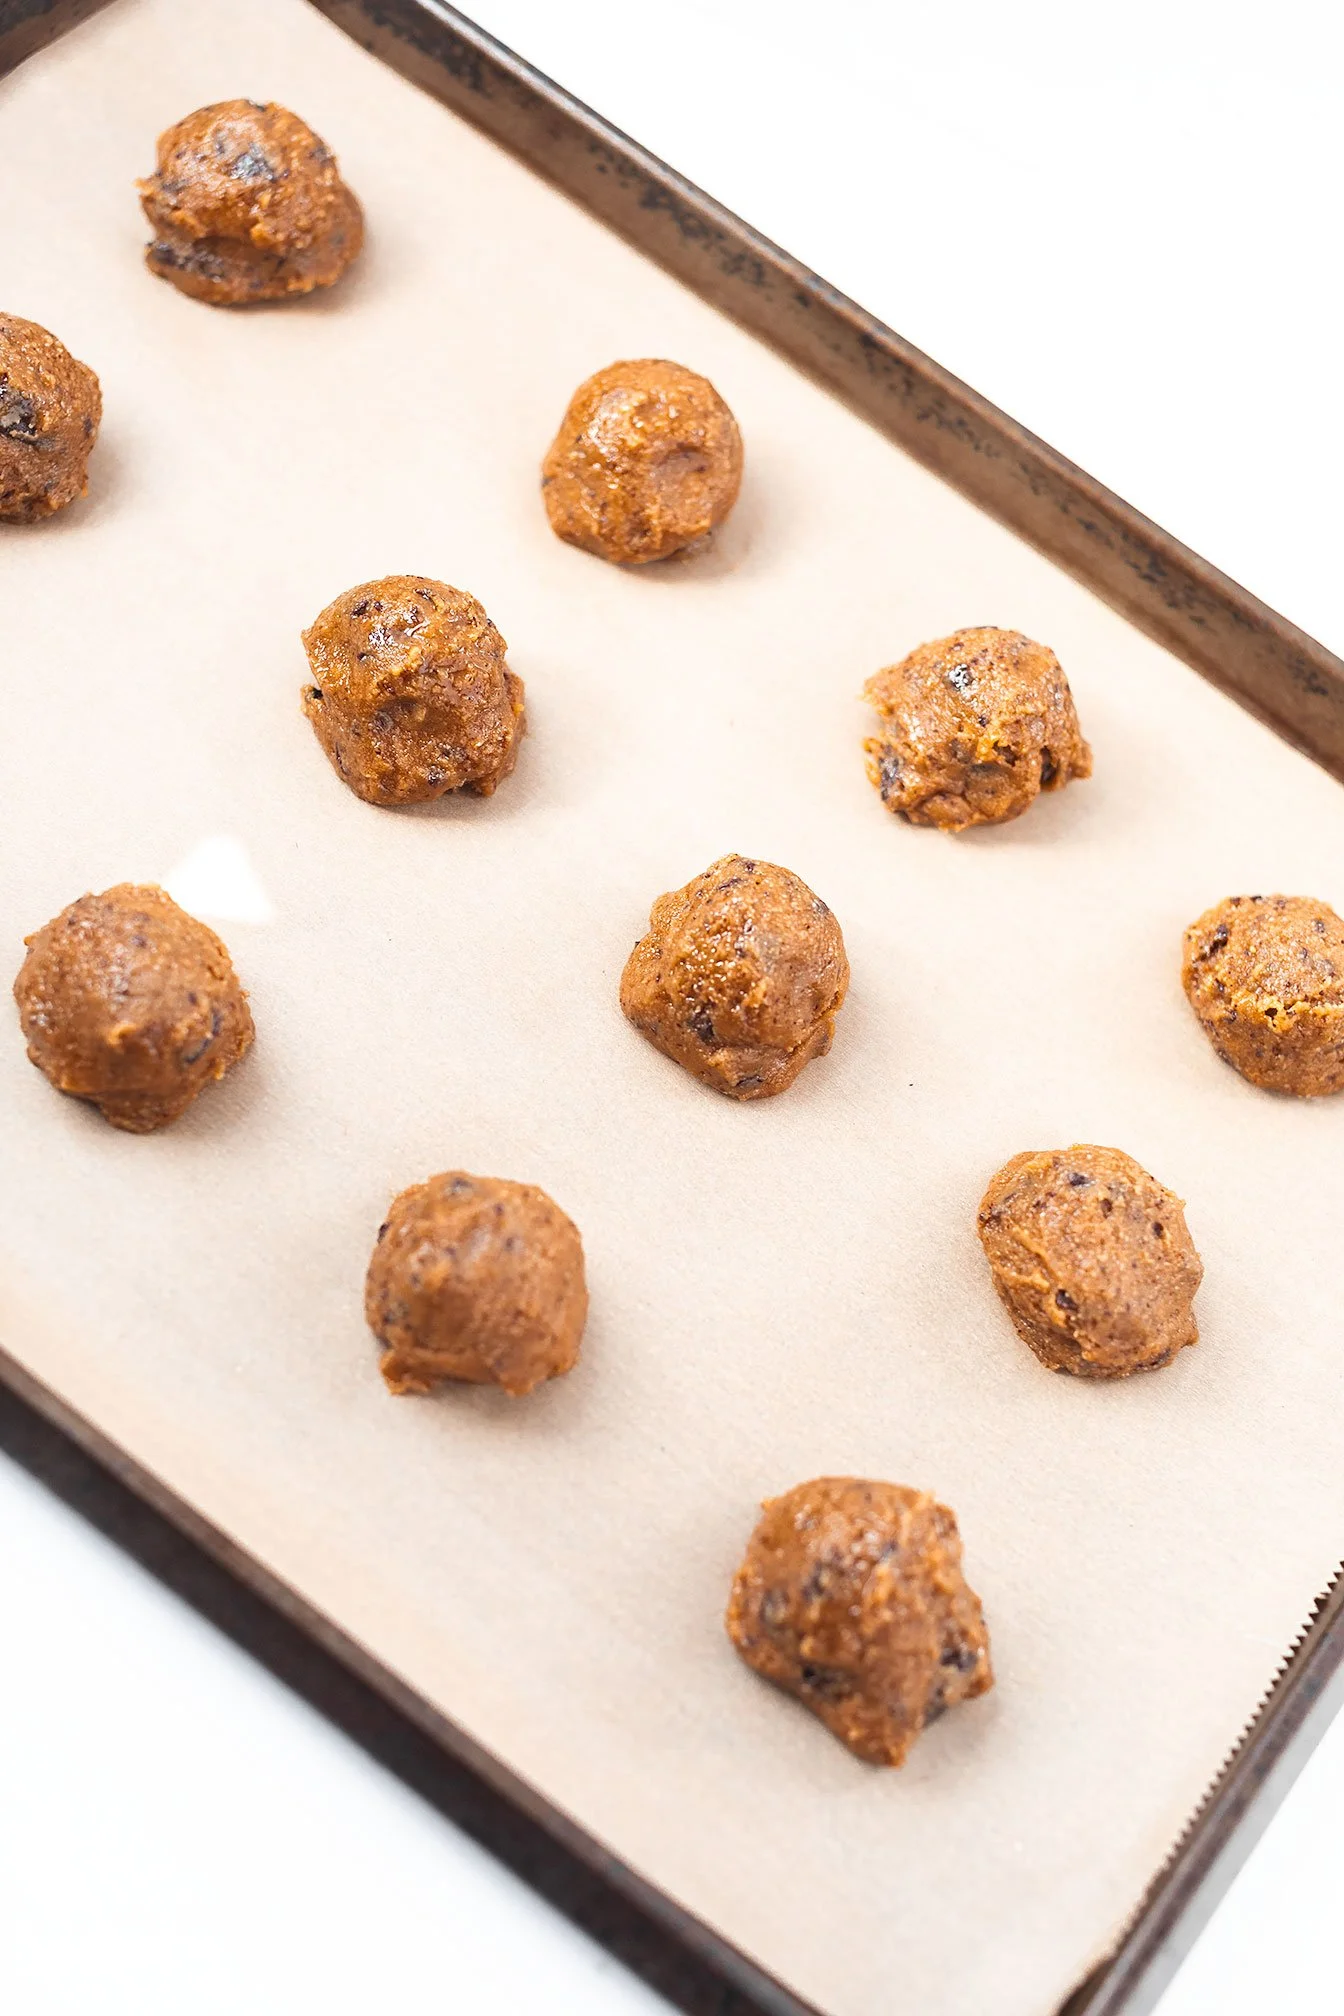
Preheat the oven to 350°F and line a baking sheet with parchment paper.
Scoop dough into balls (about 1–2 tablespoons each) and place on the baking sheet.
Because coconut flour cookies don’t spread much on their own, gently press each dough ball slightly to flatten.
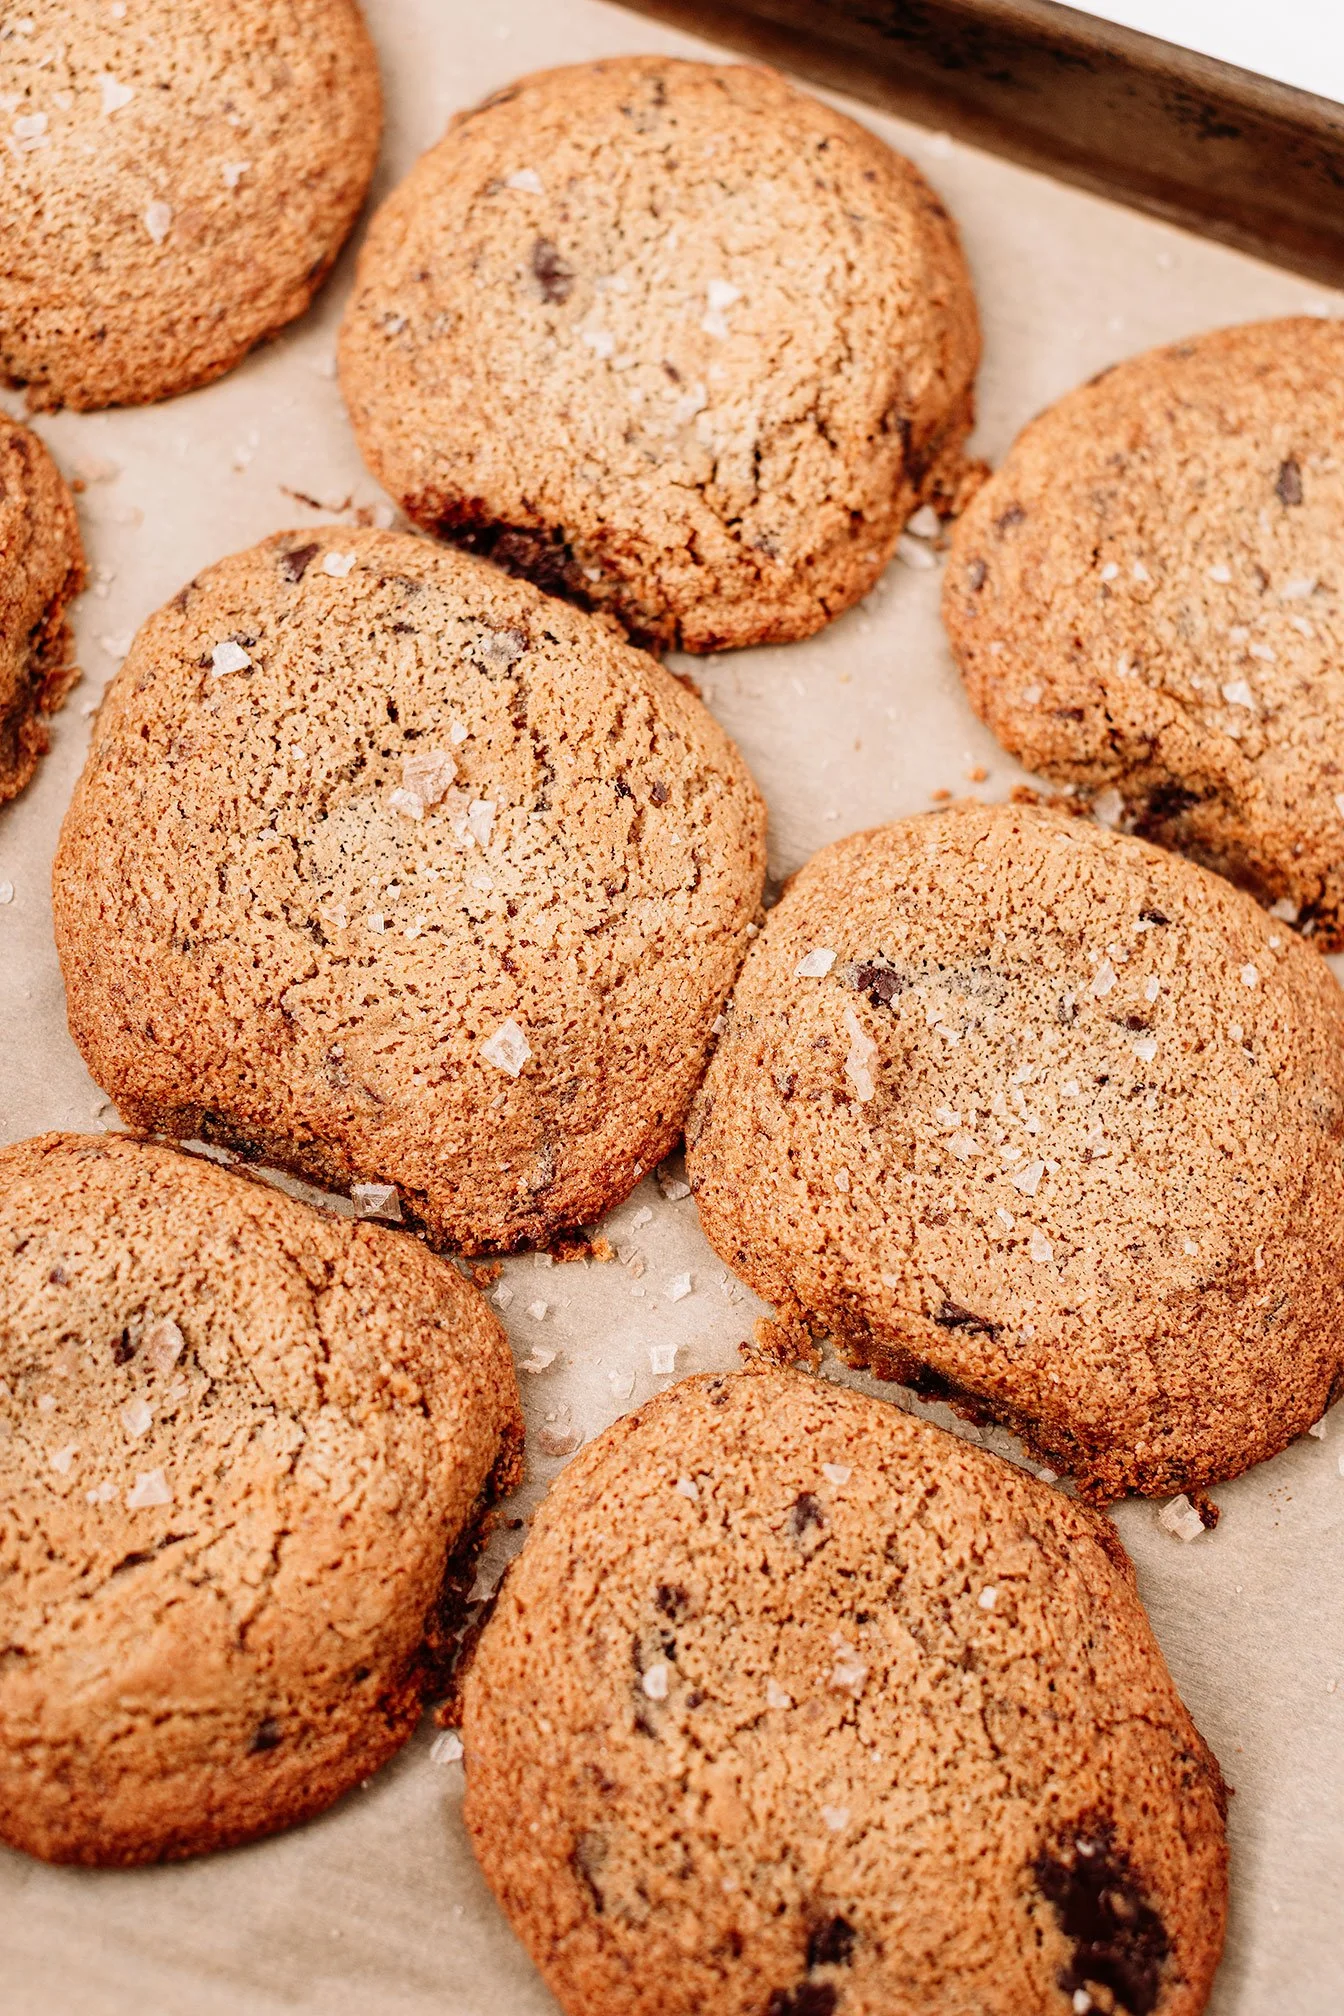
Bake for 9–11 minutes, until the edges are lightly golden but the centers still look soft.
Finish + Serve
Immediately sprinkle the tops with flaky sea salt.
Let cookies cool on the tray for 10 minutes before transferring to a rack. This helps them set properly.
Enjoy warm with a cold glass of milk!
Notes
Coconut flour should be spooned into the measuring cup and leveled, not packed, since packing can make the dough dry.
Tahini should be well stirred so the oil is evenly incorporated.
Dough color may vary depending on the brand of tahini and coconut sugar used.
If the dough feels dry, adding 1–2 tablespoons of water or milk will bring it together.
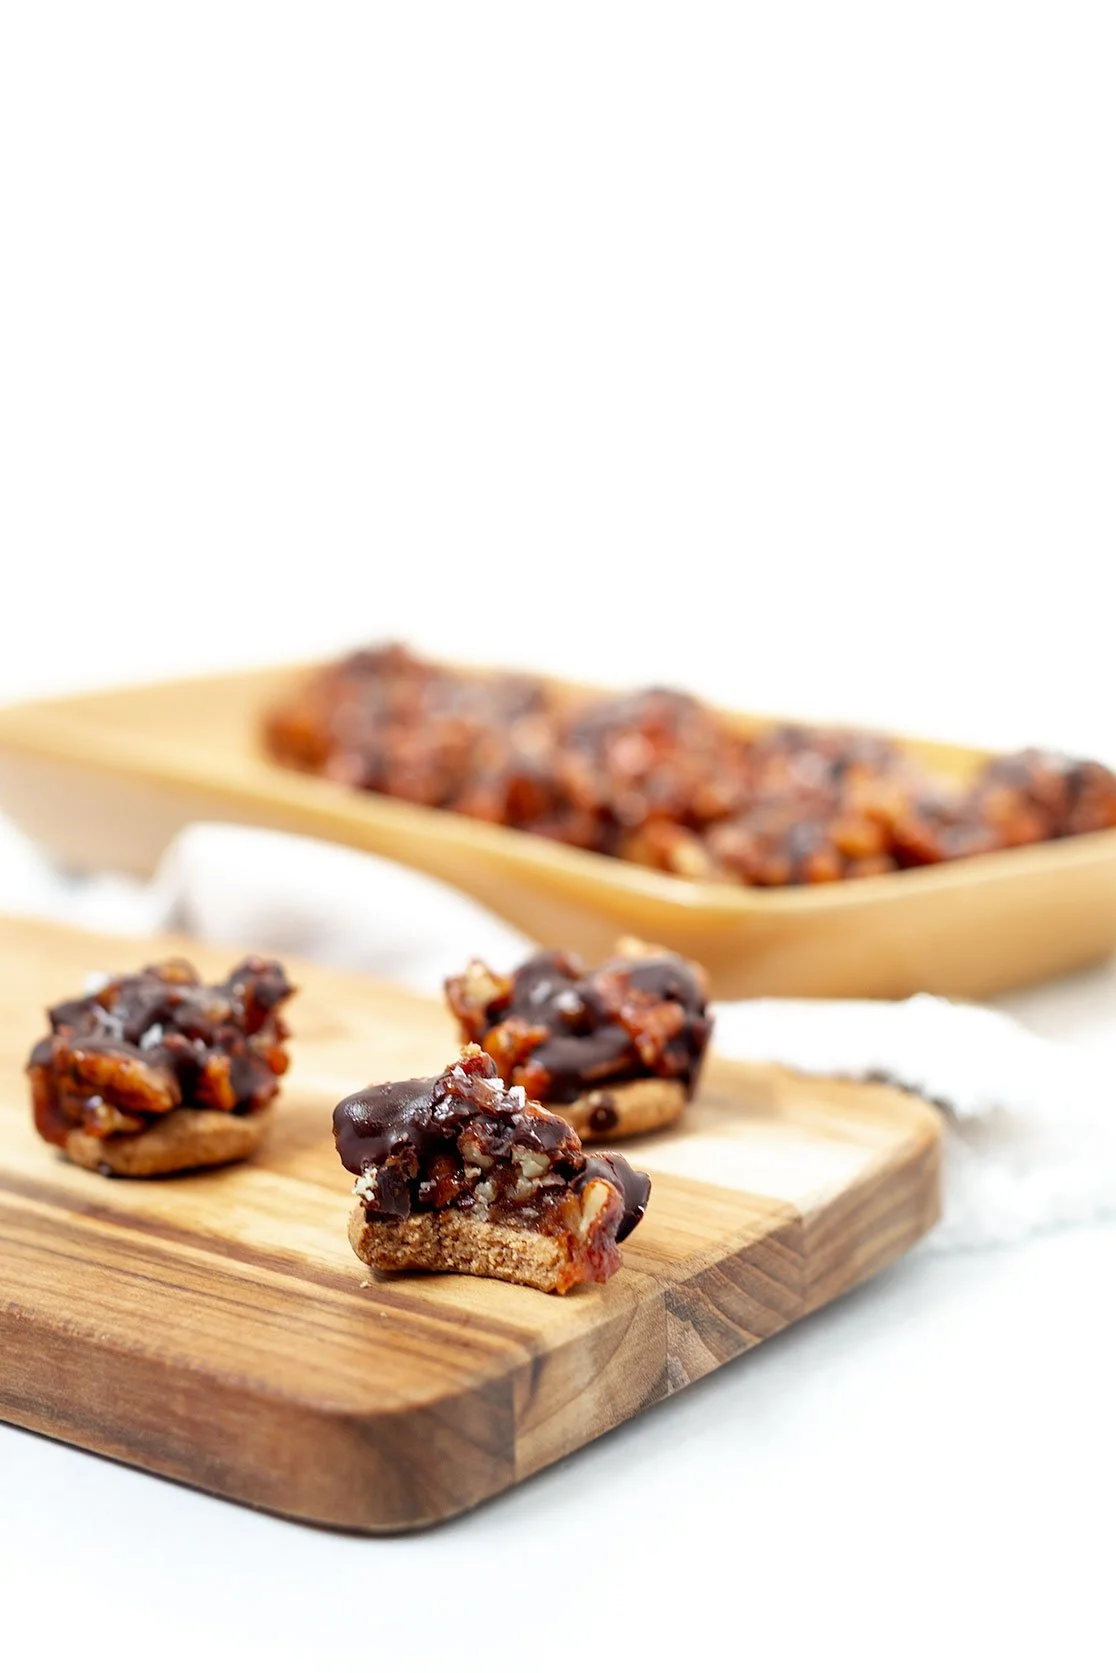
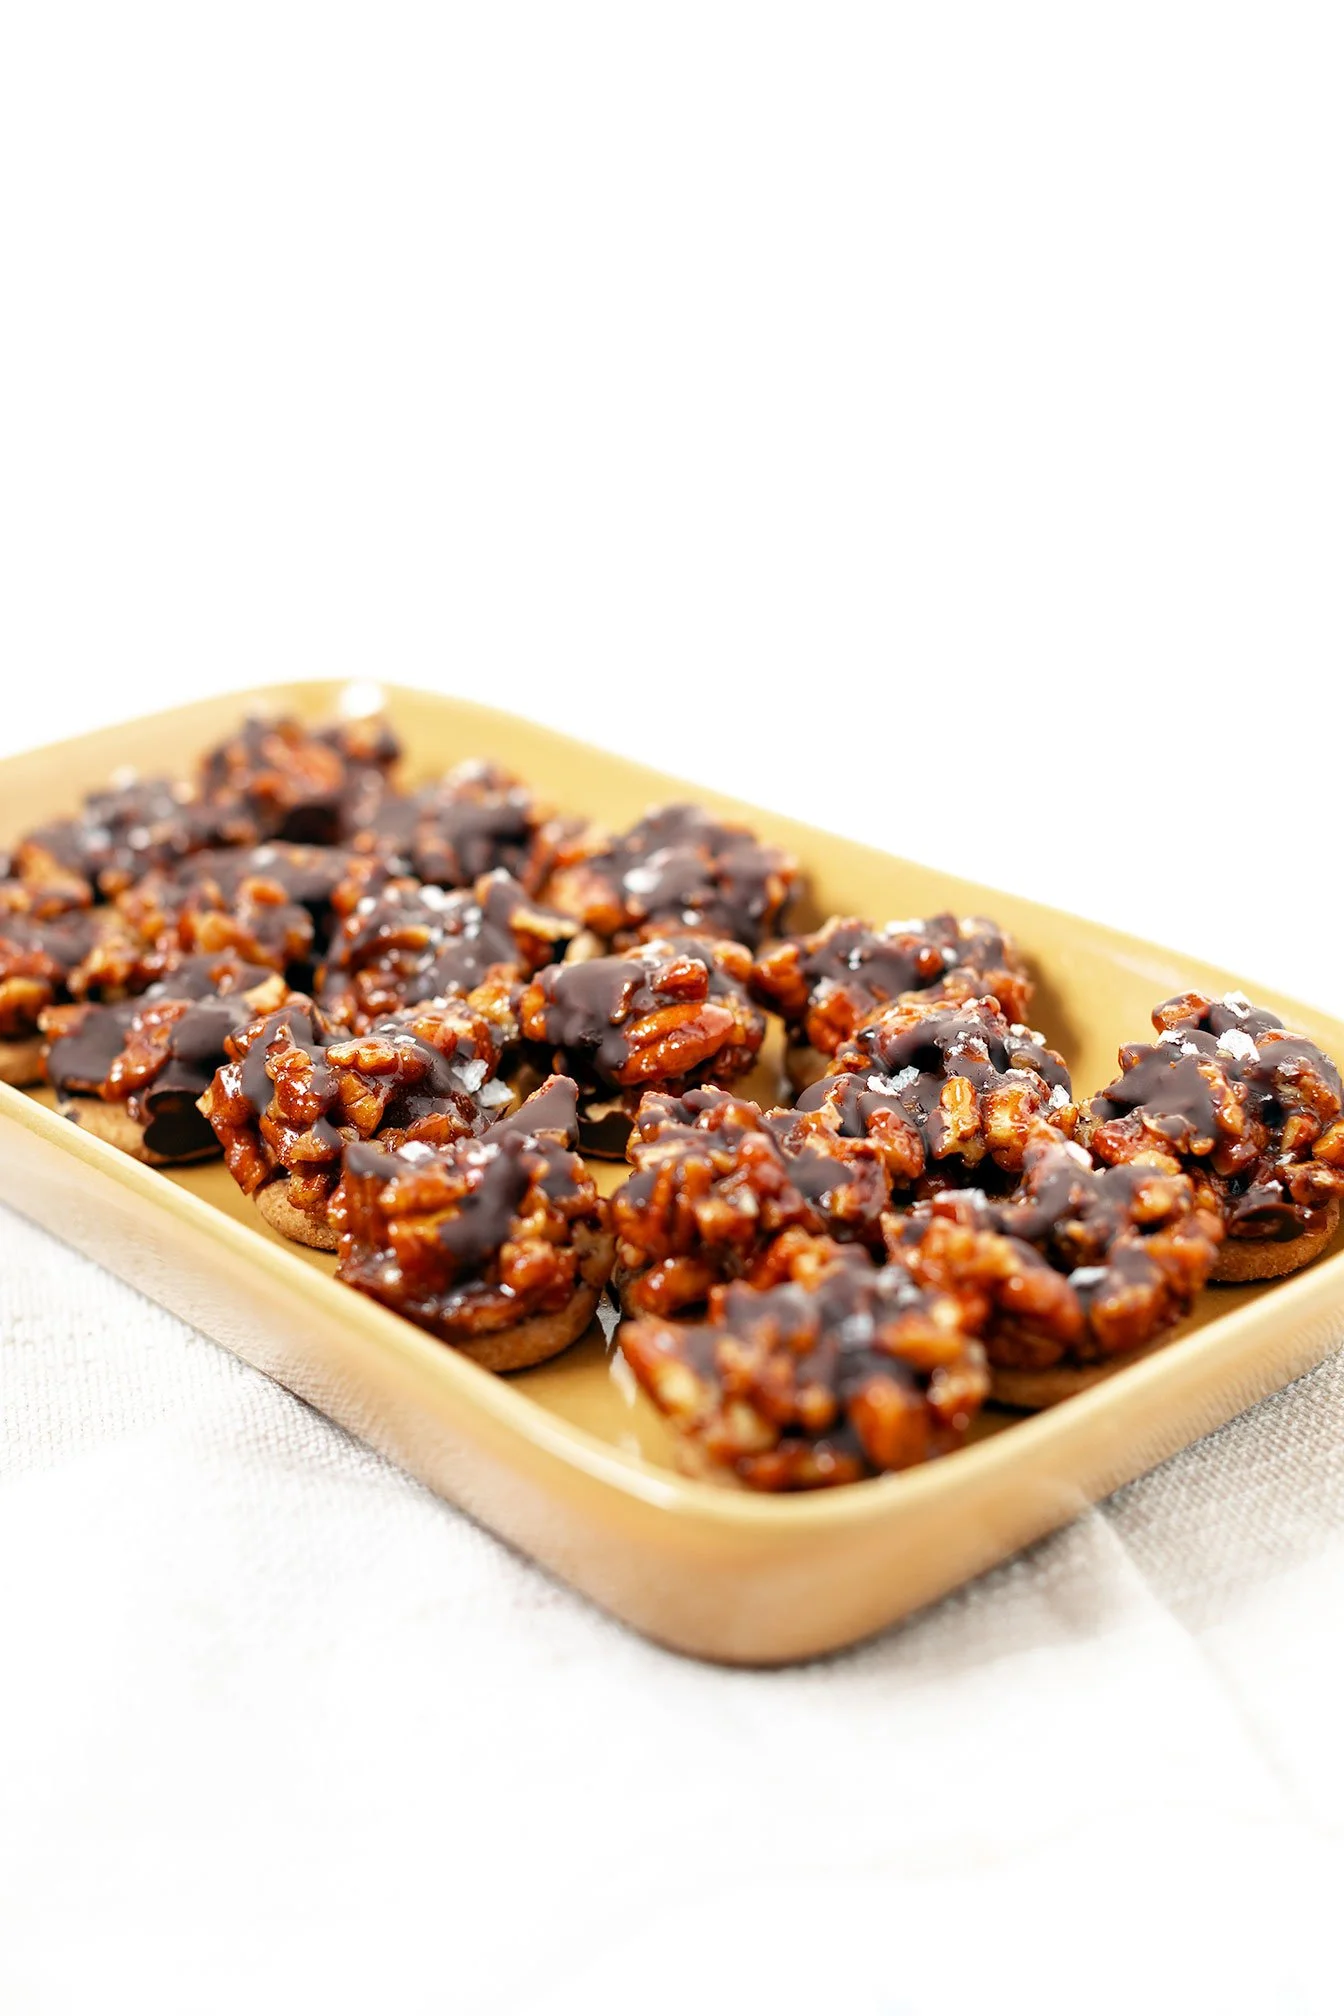
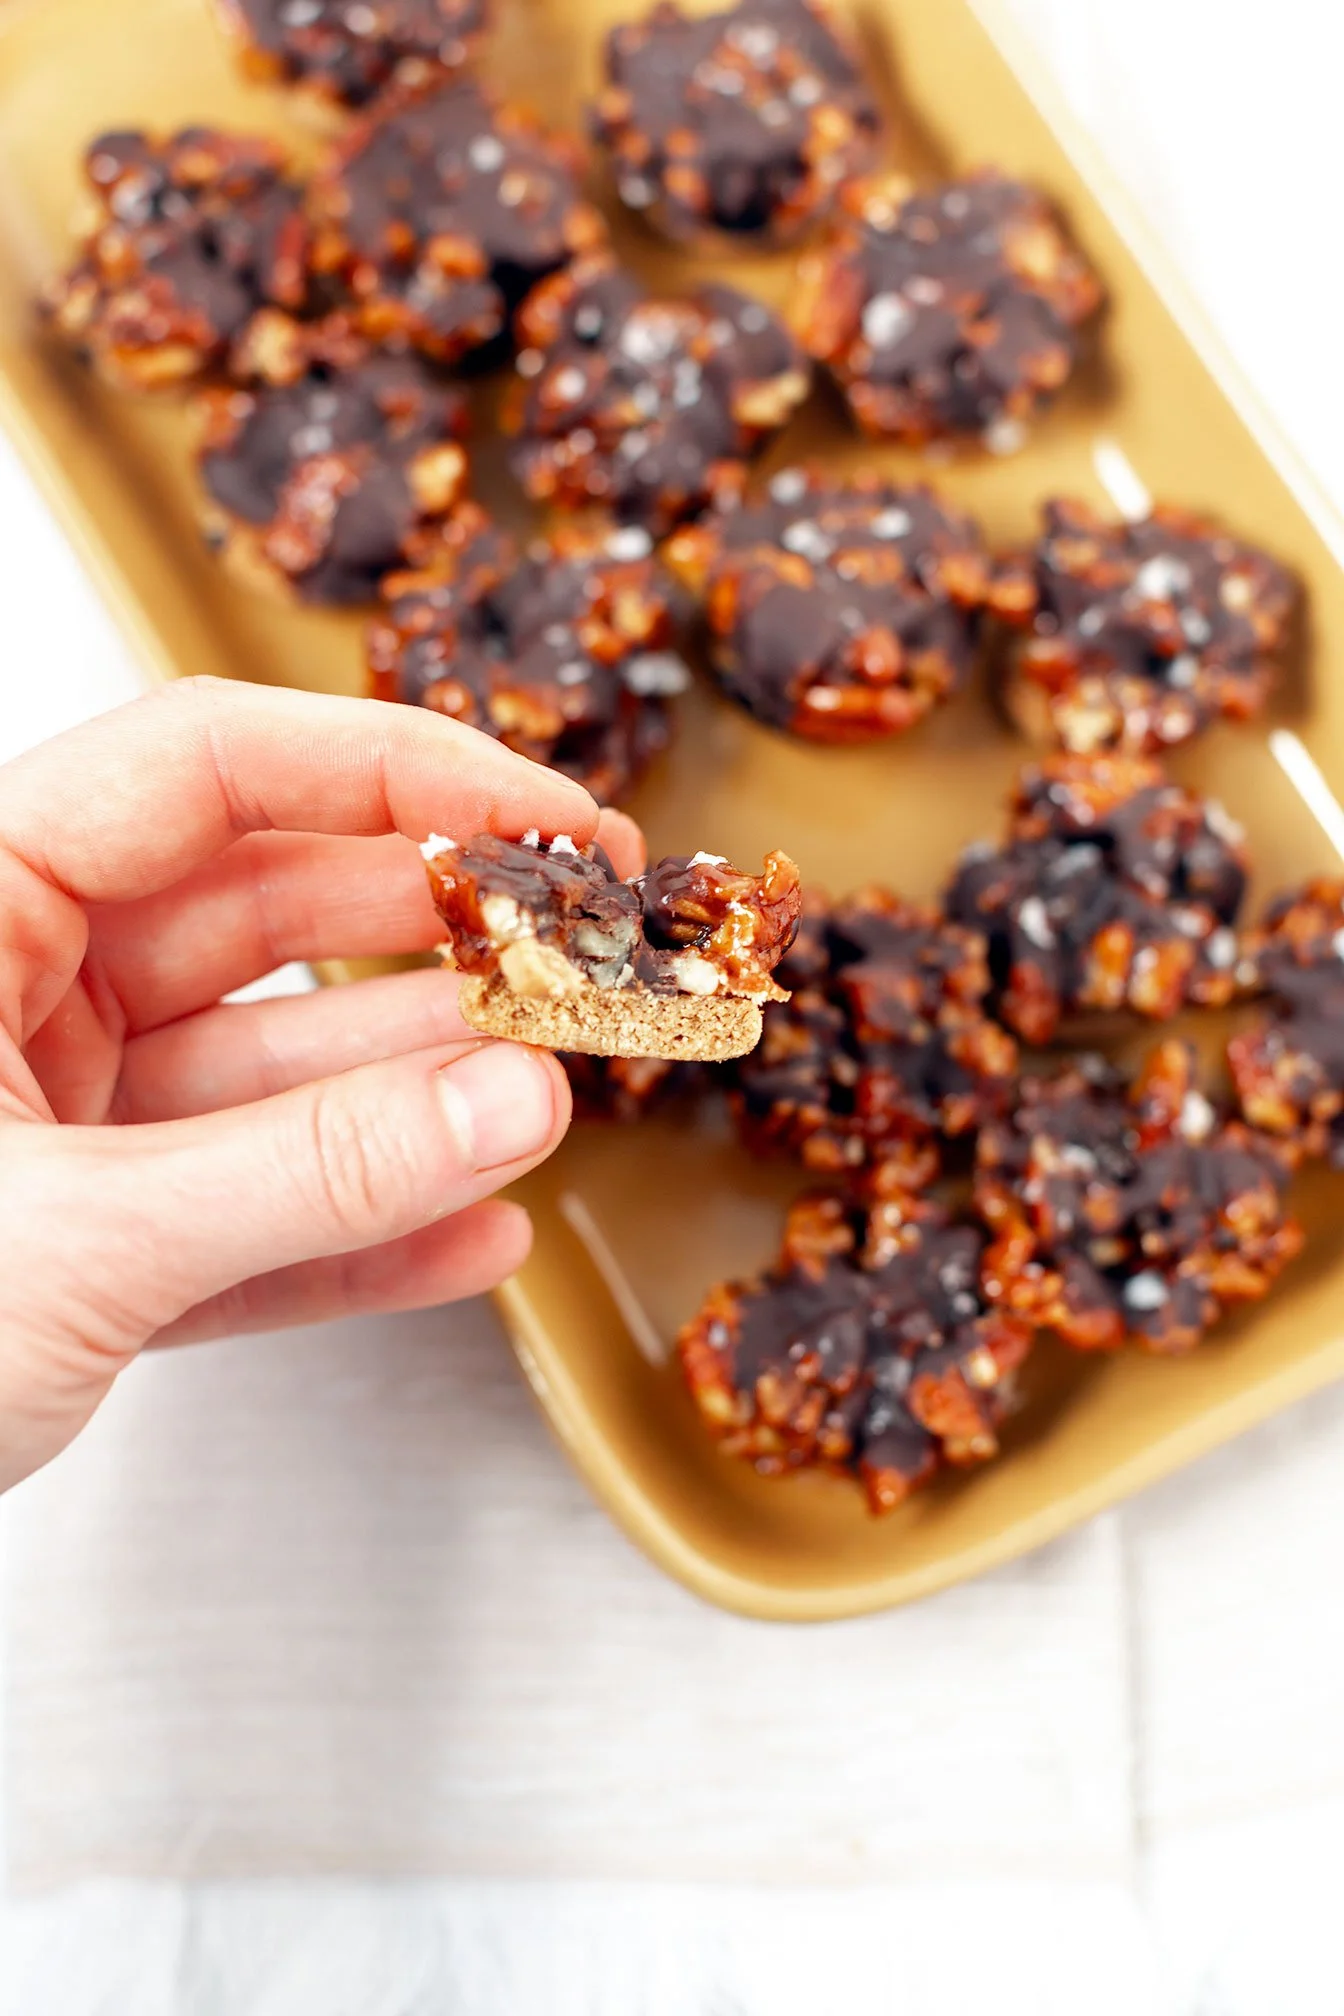
No-Bake Mini Pecan Pie Bites
These no-bake mini pecan pie cups are gluten-free, refined sugar-free, and made with Siete cookies. Quick, healthy-ish, and perfect for holiday desserts!
These no-bake mini pecan pie cups are gluten-free, refined sugar-free, and made with Siete cookies. Quick, healthy-ish, and perfect for holiday desserts!

If you love pecan pie but don’t love baking crust, rolling dough, or turning your kitchen into chaos… these No-Bake Mini Pecan Pie Cups are about to become your new obsession.
They’re:
✔ gluten-free
✔ refined sugar-free (sweetened with maple + date sugar)
✔ made in under 15 minutes
✔ no crust, no oven, no fuss
✔ perfectly sweet + salty + crunchy


Instead of a traditional crust, these mini pies use Siete Mexican Shortbread Cookies as the base — which makes them buttery, crumbly, and naturally gluten-free without any extra work from you. Top them with a drizzle of chocolate and flaky sea salt and they taste like a gourmet holiday dessert with zero effort.

⬇️ 🎥 A YouTube video tutorial below if you want to watch the full step-by-step!
Storage Instructions (Food Safety-Friendly)
Refrigerator:
Store in an airtight container for up to 7 days. Because the filling contains butter and nuts, keeping them chilled preserves freshness and prevents oil separation.
Freezer:
Freeze in a sealed container for up to 3 months.
Let thaw at room temperature for 10–15 minutes before enjoying.
Recipe Notes + Brand Recommendations
Cookies: Siete Mexican Shortbread Cookies make the perfect gluten-free base. You can use my code ROOTS15 15% off.
Salt: I use flaky salt from Redmond Real Salt — code ROOTS15 works here too.
Chocolate: Hu Kitchen Sea Salt Dark Chocolate gives the best flavor for drizzling.
✨ If you try this recipe, make sure to tag me in your socials so I can cheer you on in the kitchen! Or leave feedback in the comments!
No-Bake Mini Pecan Pie Bites (Gluten-Free, Healthy-ish + SO Easy)
These no-bake mini pecan pie cups are gluten-free, refined sugar-free, and made with Siete cookies. Quick, healthy-ish, and perfect for holiday desserts!
Servings: 22 mini pies Prep: 10 MIN chill time: 20 MIN
Ingredients
Base
22 Siete Mexican Shortbread Cookies (1 per muffin cup; sometimes bags contain 20–22)
Pecan Pie Filling
2–4 Tbsp butter (use 4 tbsp for richer filling; 2 tbsp works if you prefer lighter)
½ cup maple syrup
⅔ cup date sugar
1 tsp vanilla extract
Generous pinch of cinnamon
Generous pinch of sea salt
1½ cups chopped pecans
Optional Chocolate Drizzle
½ bar Hu Kitchen Sea Salt Dark Chocolate
1–2 tsp coconut oil
Flaky sea salt (I use Redmond Real Salt)
Directions
Prepare the muffin tin.
Lightly spray a 24-count mini muffin tin with avocado oil. This helps the mini pies release easily, especially if adding chocolate.Add the cookie base.
Place one Siete Mexican Shortbread Cookie into each muffin cup. You should get 20–22 cookies per bag — either amount works.Toast pecans in butter.
In a medium skillet over medium-high heat, melt the butter. Add the chopped pecans and stir until they are fully coated and lightly toasted (1–2 minutes).Create the filling mixture.
Add the maple syrup and date sugar. Stir quickly and continuously to prevent burning. Once the mixture becomes glossy and sticky, immediately remove the skillet from heat.Add flavor.
Stir in vanilla, cinnamon, and a pinch of salt. Mix until everything is evenly combined.Fill the cups.
Using a 1 tablespoon scoop, spoon the warm pecan filling over each cookie. Work quickly before the mixture thickens.(Optional) Add chocolate drizzle.
Melt chocolate with coconut oil (microwave or double boiler). Drizzle over the top of each pecan pie cup and finish with flaky sea salt.Chill + remove.
Transfer the muffin tin to the fridge for 15–20 minutes to set.
Once firm, slide a thin knife around the edges to release (most should pop out easily, especially with the oil spray).Serve or store.
Enjoy immediately or store chilled — see storage notes above.
Note:
Date sugar is less refined and does not dissolve like traditional sugar. If you prefer a smoother, less grainy texture, you can reduce the date sugar to ⅓ cup. Using the full ⅔ cup creates a richer, more traditional sweetness with a slightly more textured filling. Adjust based on taste and texture preference.

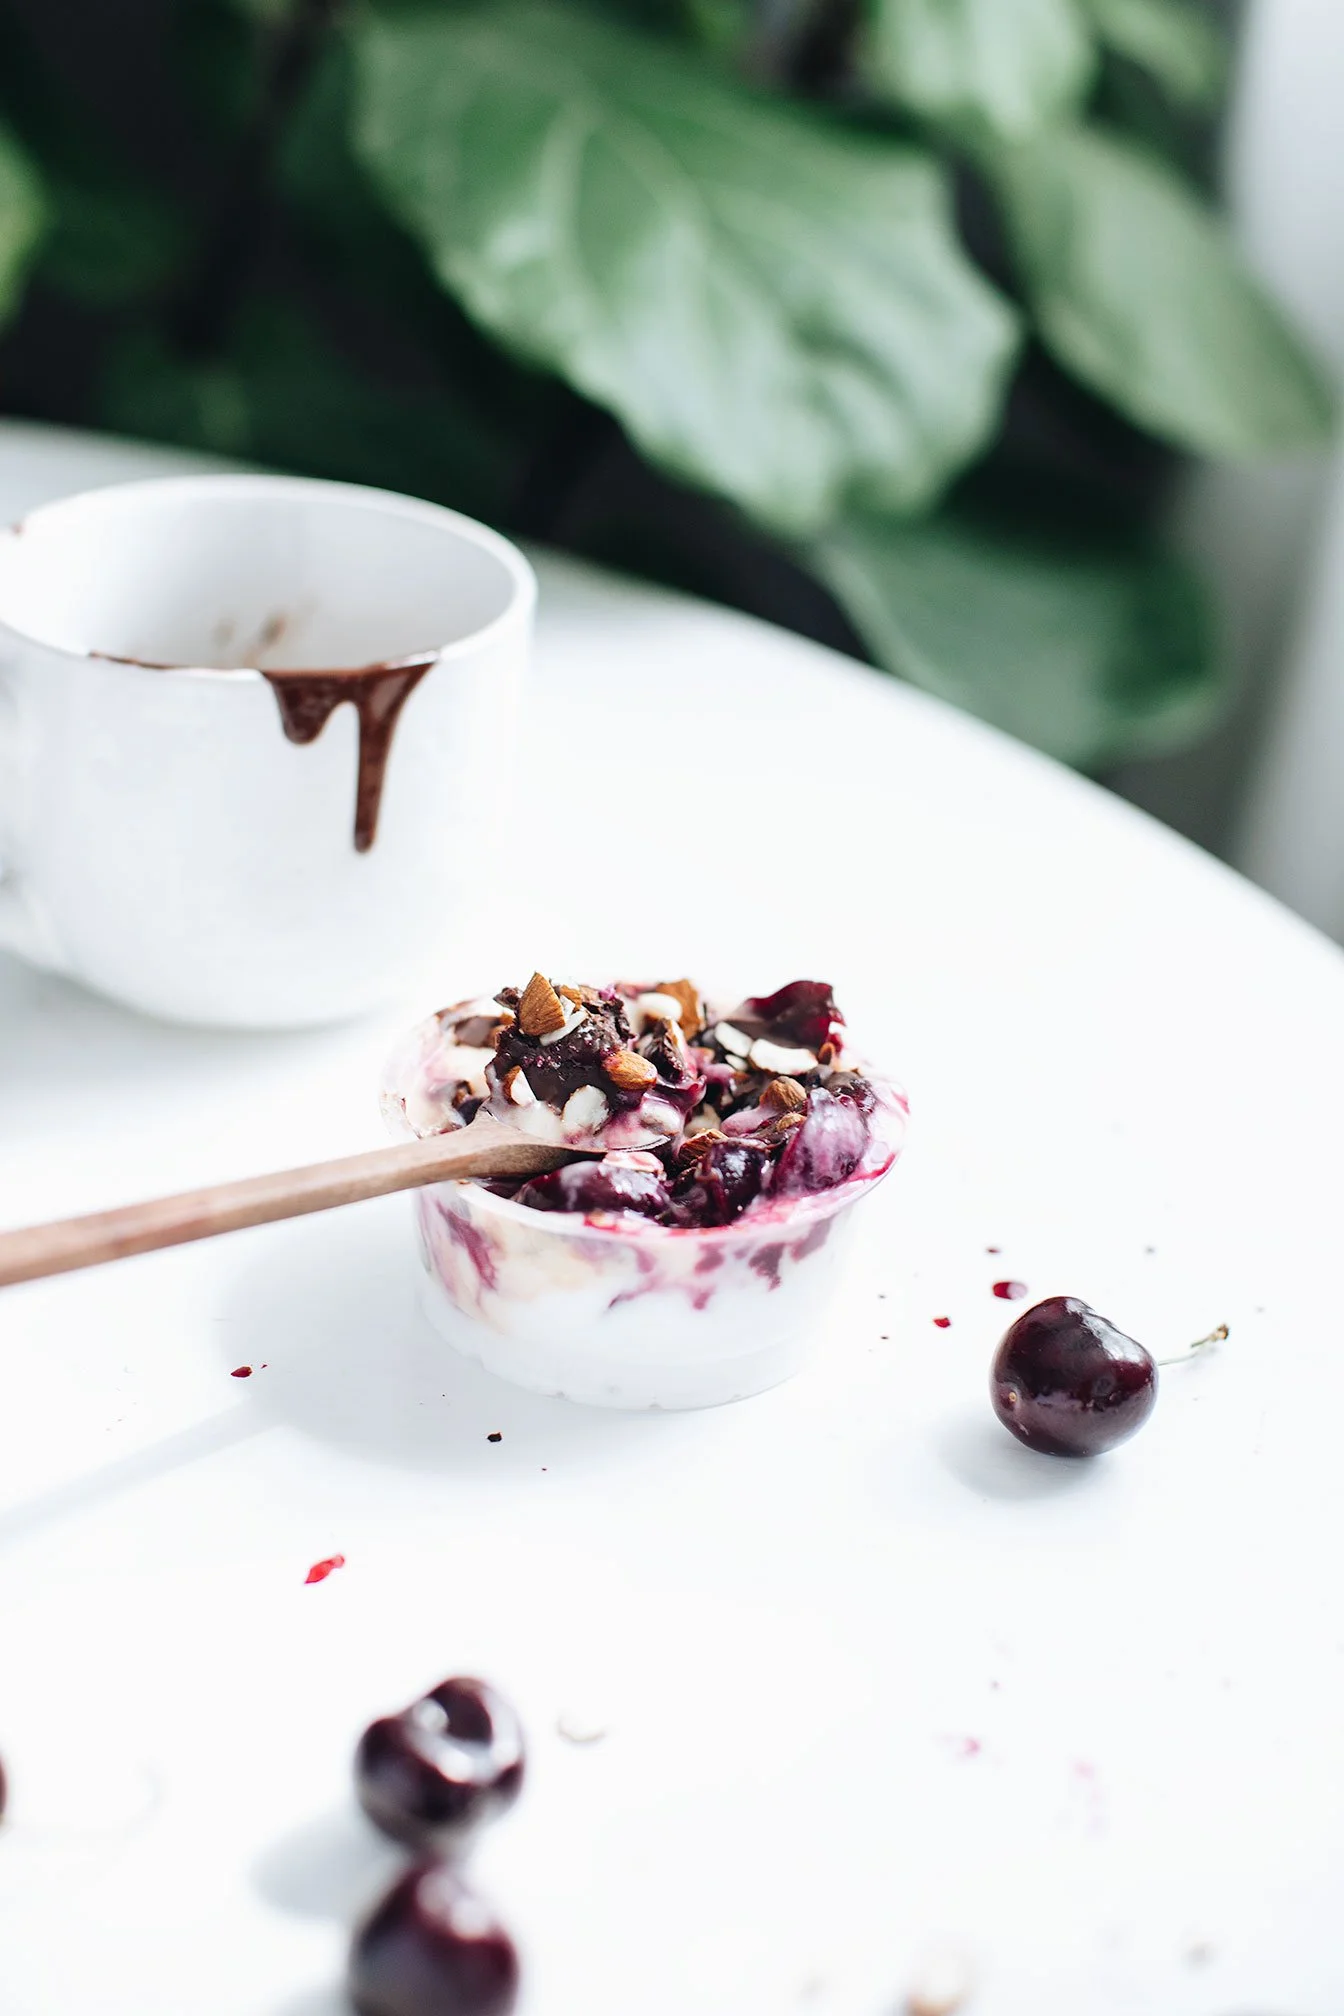
Cherry Almond Protein Yogurt Cup
Yogurt and cottage cheese cups have become a popular high protein snack trend, and with good reason!
You can:
Mix in new ingredients without having to dirty another bowl.
Increase the amount of protein by adding a scoop of collagen or favorite protein powder.
Crack into a hardened dark chocolate shell with a spoon. Who doesn’t love that!?
Yogurt and cottage cheese is often marketed as a healthy food; however, added sugar and flavorings can alter their health-promoting properties so choosing the best yogurt or cottage cheese cup is very important.
Yogurt and cottage cheese cups have become a popular high protein snack trend, and with good reason!

You can:
Mix in new ingredients without having to dirty another bowl.
Increase the amount of protein by adding a scoop of collagen or favorite protein powder.
Crack into a hardened dark chocolate shell with a spoon. Who doesn’t love that!?
Yogurt and cottage cheese is often marketed as a healthy food; however, added sugar and flavorings can alter their health-promoting properties so choosing the best yogurt or cottage cheese cup is very important.
A great first step in choosing the best yogurt or cottage cheese is simply reading the label. You want to look for a plain style that has few ingredients. They should include milk, the bacterial cultures used to turn milk into yogurt or cottage cheese, and not much else. If you consume plant-based yogurt, the same holds true.


Protein amount is also very important as it relates to this post. Greek yogurt has more protein and fewer carbs, while plant based yogurt tends to have less fat and no lactose. Organic may be richer in certain nutrients, but it’s lower in others.
Cherry almond protein yogurt cup video will show you how you can make your own protein packed yogurt cup using a plant based yogurt but will show protein amounts for both greek style and cottage cheese cups for reference.

If you try this recipe, let us know! Leave a comment, rate it, and don’t forget to tag a photo to #fromtherootsblog on Instagram. We love seeing what you come up with!
Ingredients
1 plain flavored yogurt cup (non-dairy, greek, or cottage cheese)
1 scoop vanilla protein powder*
1 tsp almond extract
1-2 Tbsp dark chocolate chips, melted
1 Tbsp cherry preserve or fresh cherries, mashed
7 raw almonds, chopped
Pinch of sea salt flakes
Directions
Mix protein powder, almond extract and cherries into your preferred yogurt cup.
Top with melted dark chocolate, almonds and a pinch or two of sea salt flakes.
Freeze for 10 minutes to harden the chocolate, crack into it with a spoon and enjoy!
Notes: *Equip Foods is my go-to for protein powder! Use code: ROOTS for 15% off your first order today!

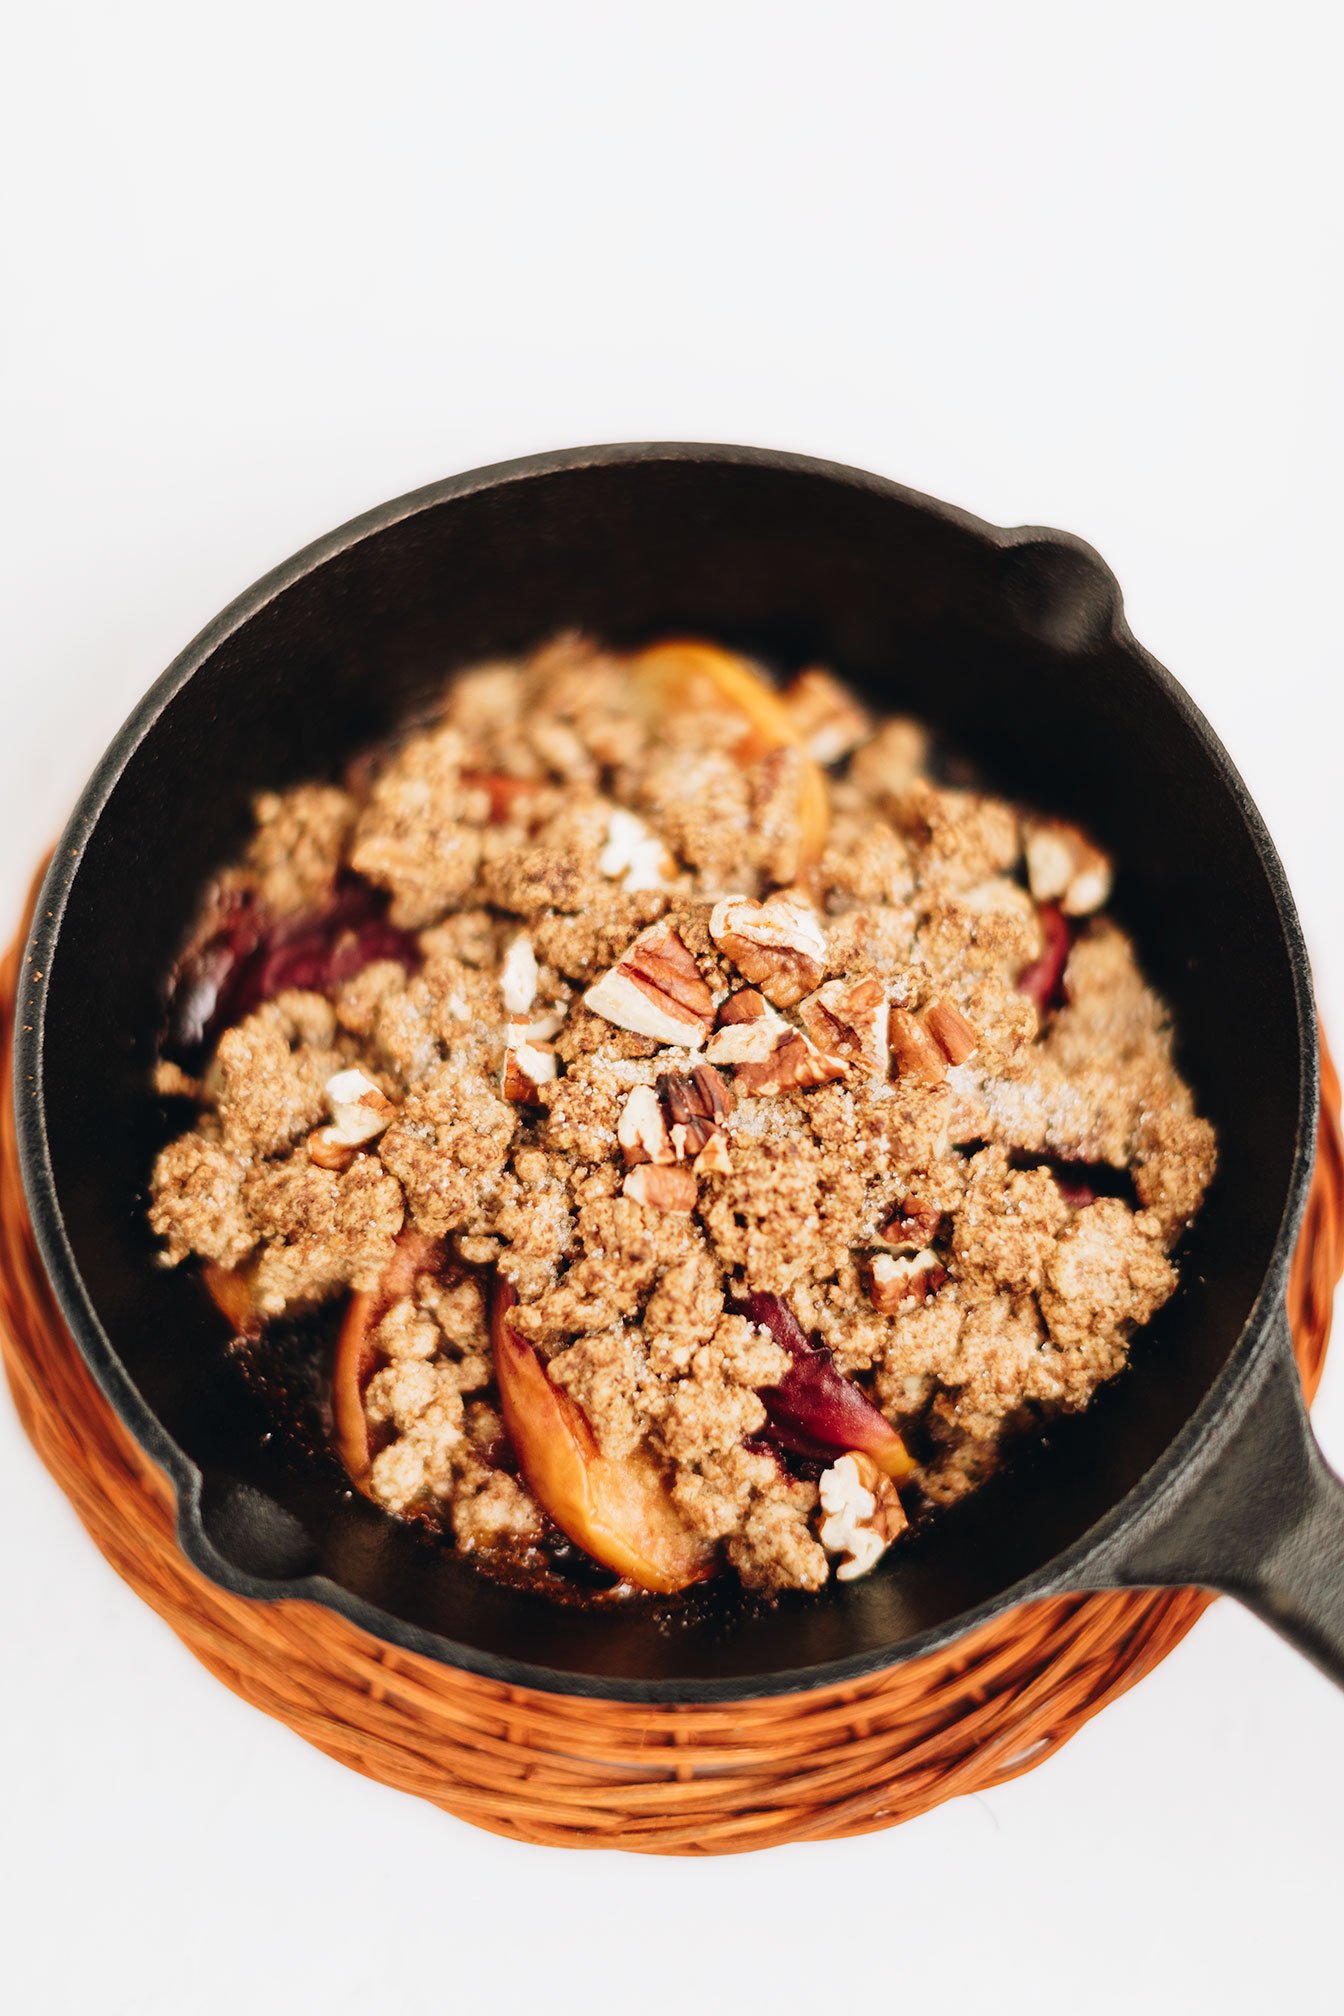
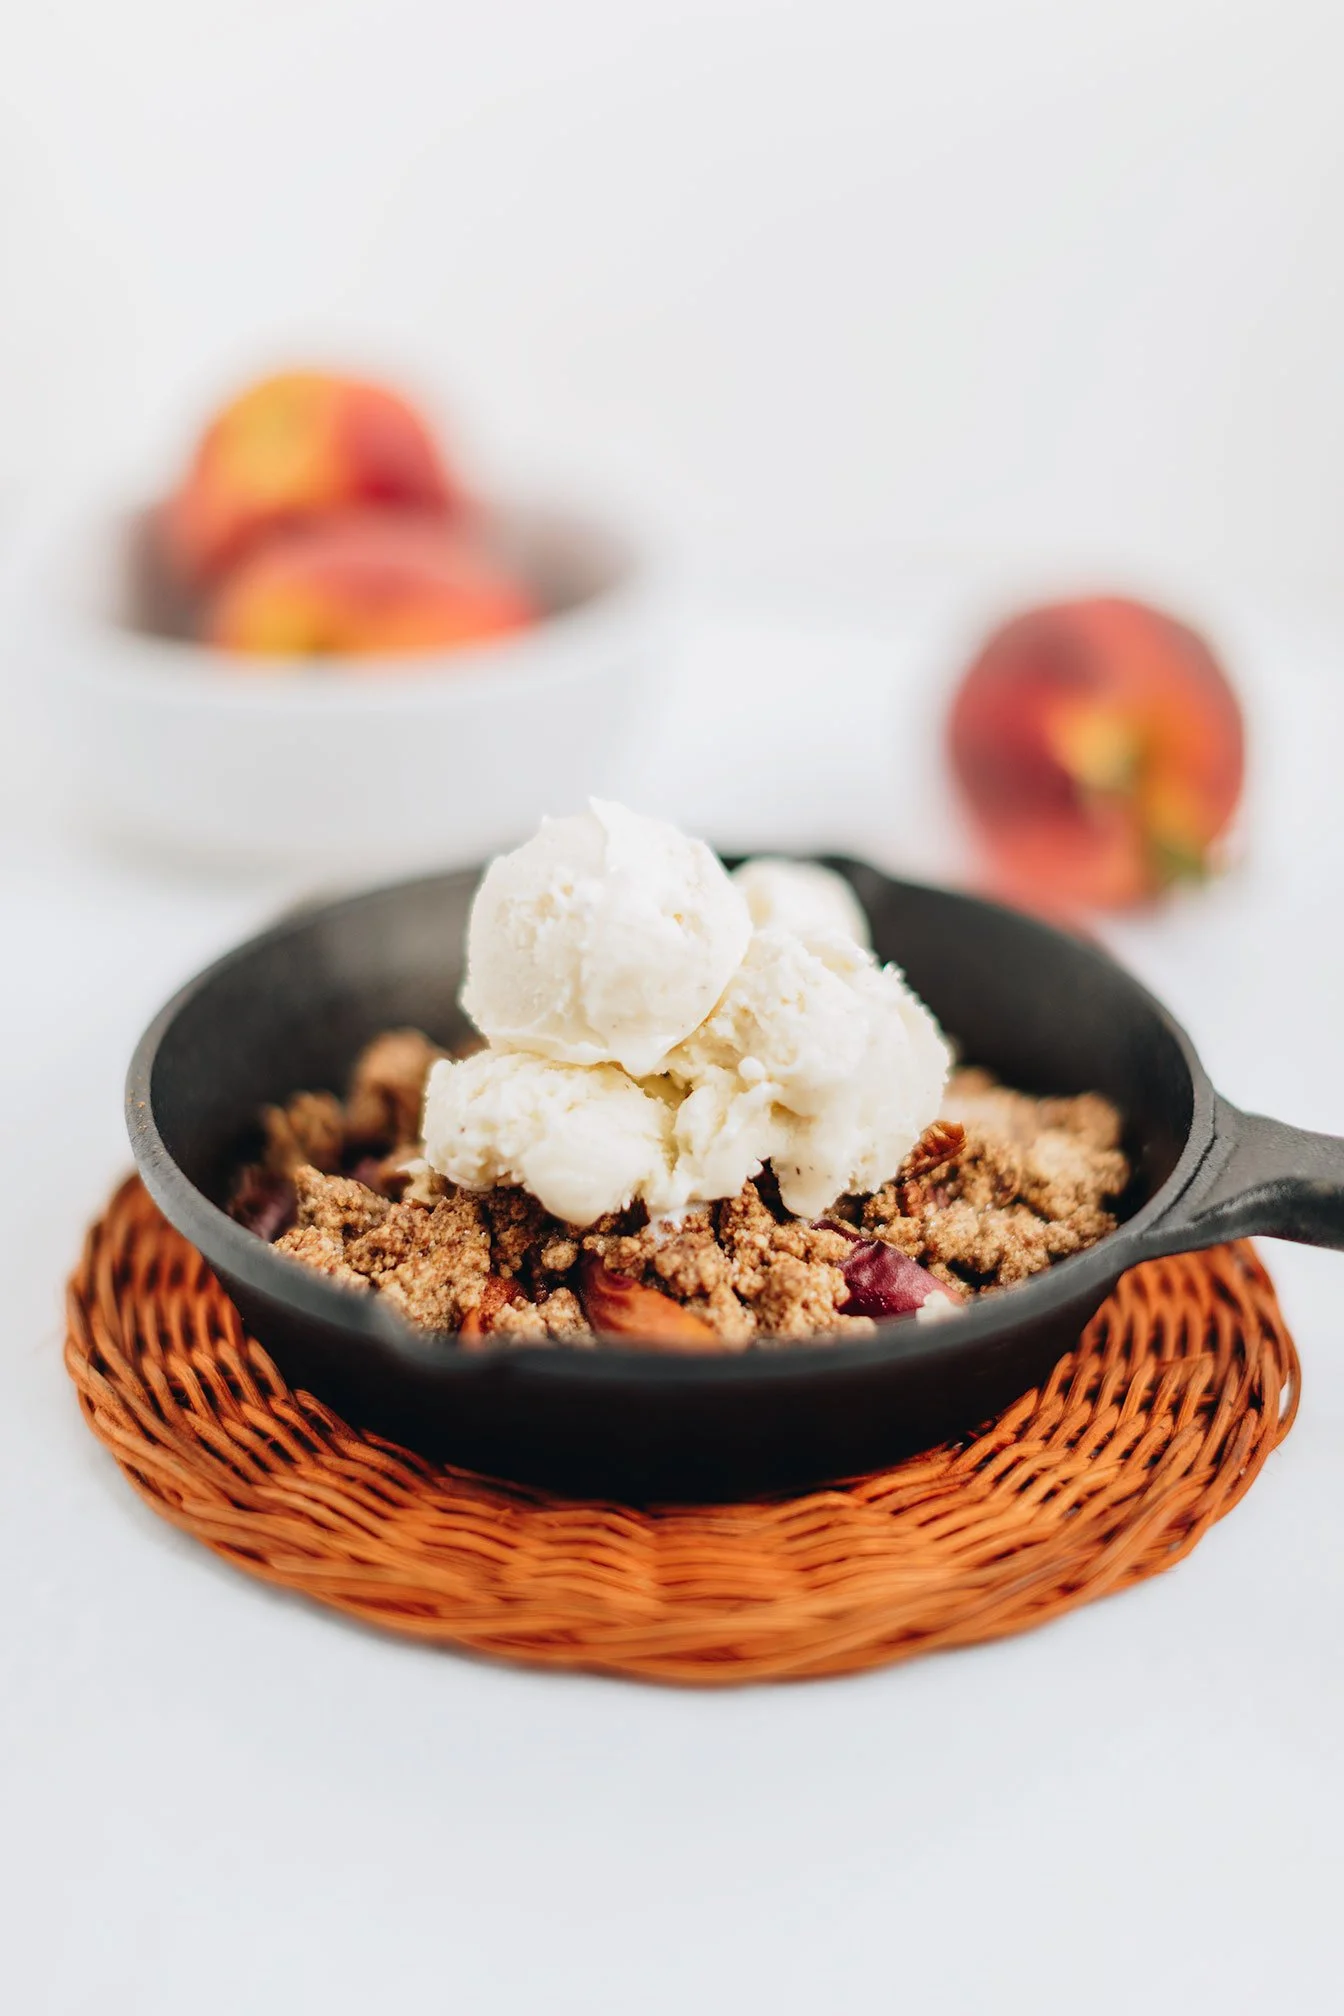
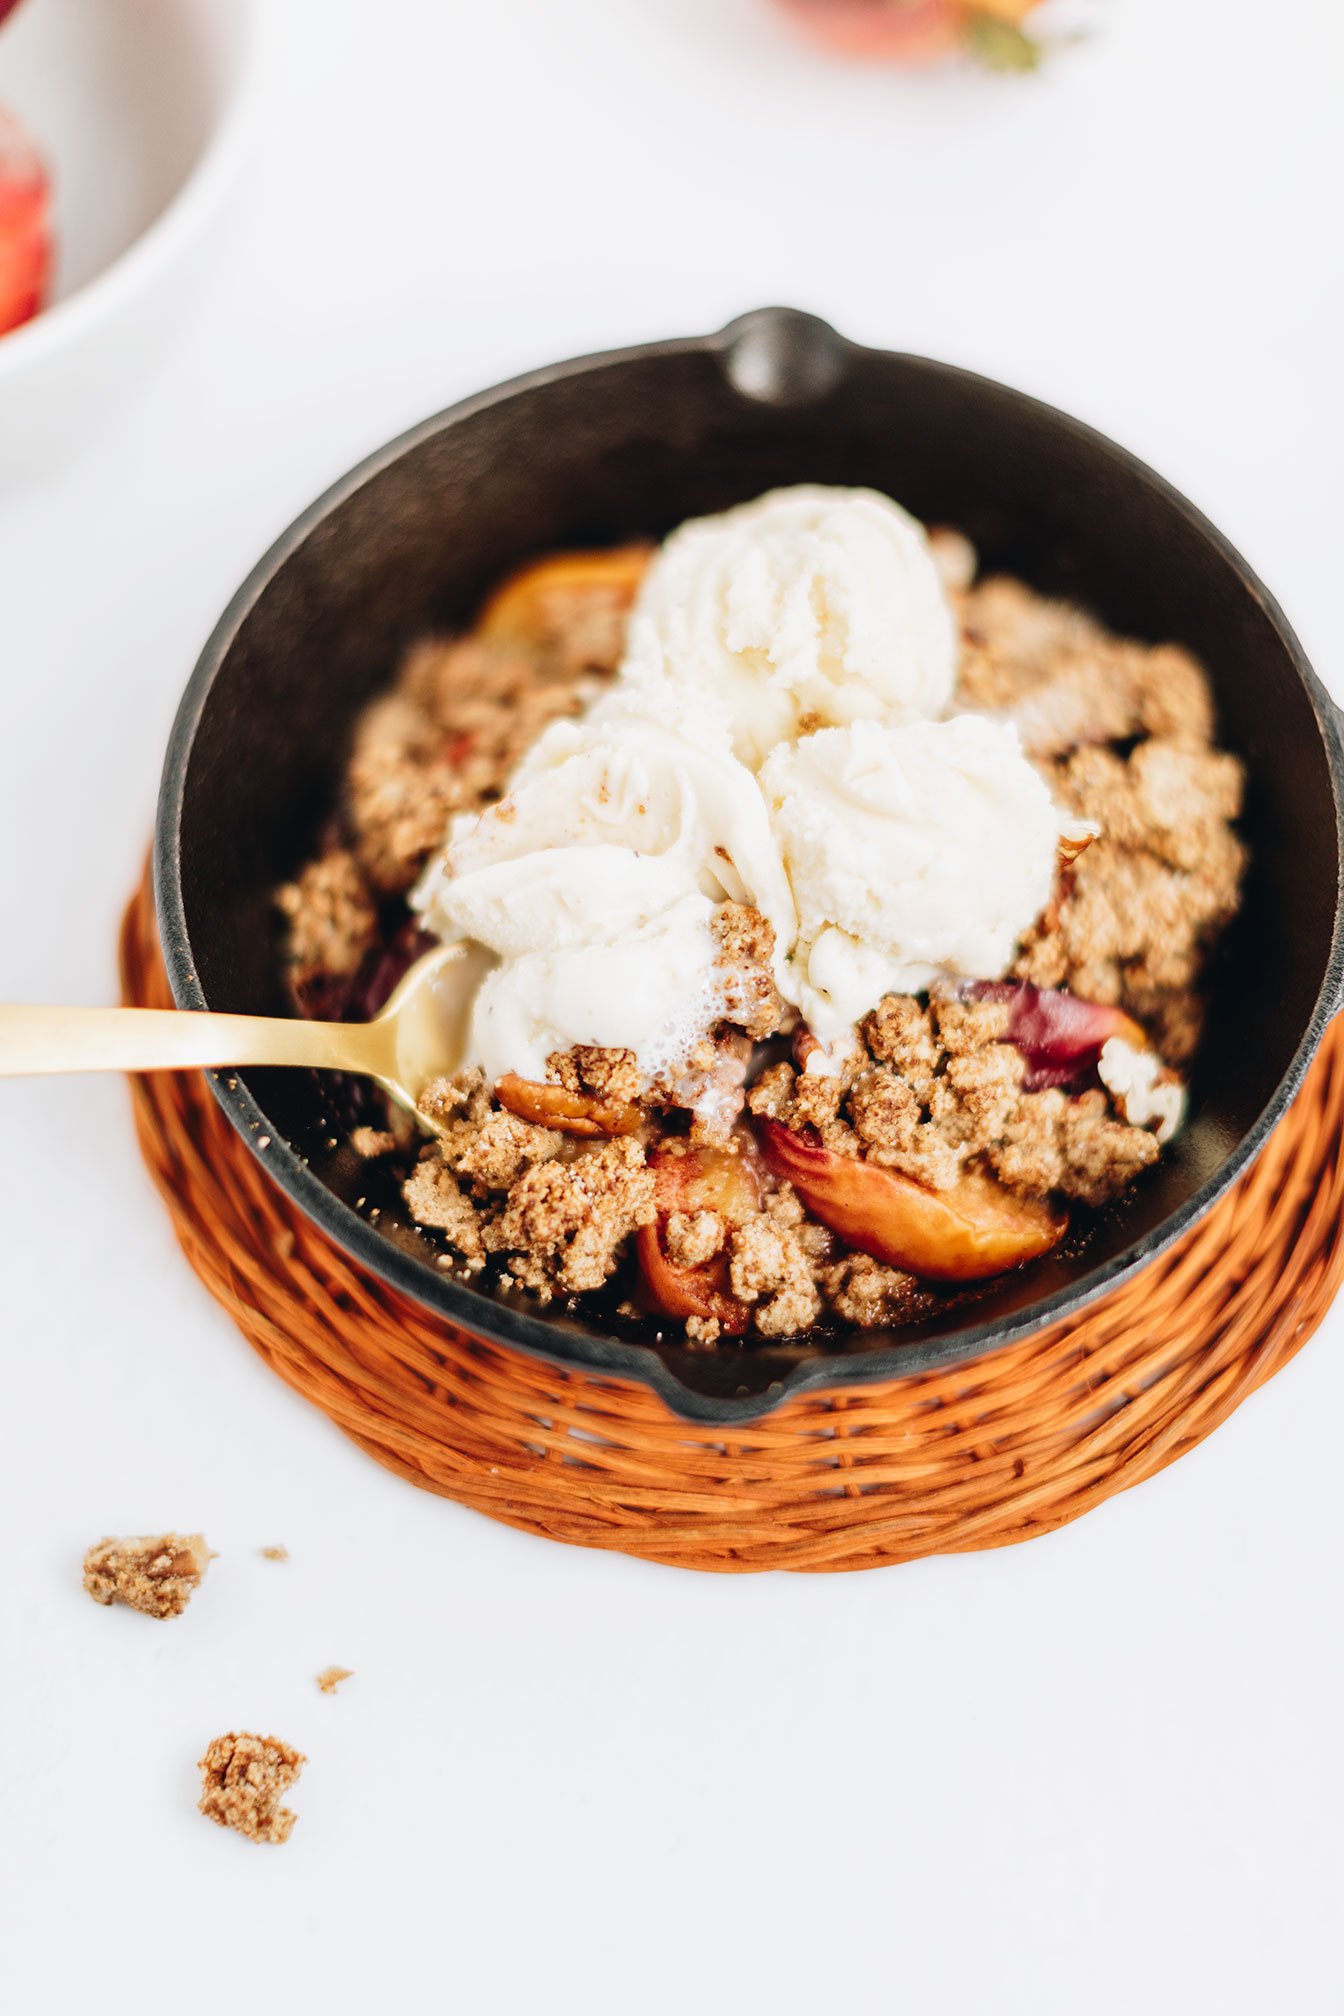
Peach Crisp Skillet For One
Peach Crisp Skillet For One - Healthy peach crisp that is easy, gluten-free and no leftovers!
Summertime = peach season, here in Georgia and I am HERE. FOR. IT!
My favorite thing to do is turn on the grill to make my favorite go-to summer salad Grilled Peach and Steak Salad and with the leftover peaches, make this single serve peach crisp skillet!
With that being said, this recipe is flexible as you can cook the peach crisp on the grill or in the oven, up to you!
Individually portioned desserts have been my new favorite - especially during the summer time when I don’t want an entire tray of brownies staring me down, begging to be eaten!
Peach Crisp Skillet For One - Healthy peach crisp that is easy, gluten-free and no leftovers!

Summertime = peach season, here in Georgia and I am HERE. FOR. IT!
My favorite thing to do is turn on the grill to make my favorite go-to summer salad Grilled Peach and Steak Salad and with the leftover peaches, make this single serve peach crisp skillet!


With that being said, this recipe is flexible as you can cook the peach crisp on the grill or in the oven, up to you!


Individually portioned desserts have been my new favorite - especially during the summer time when I don’t want an entire tray of brownies staring me down, begging to be eaten!
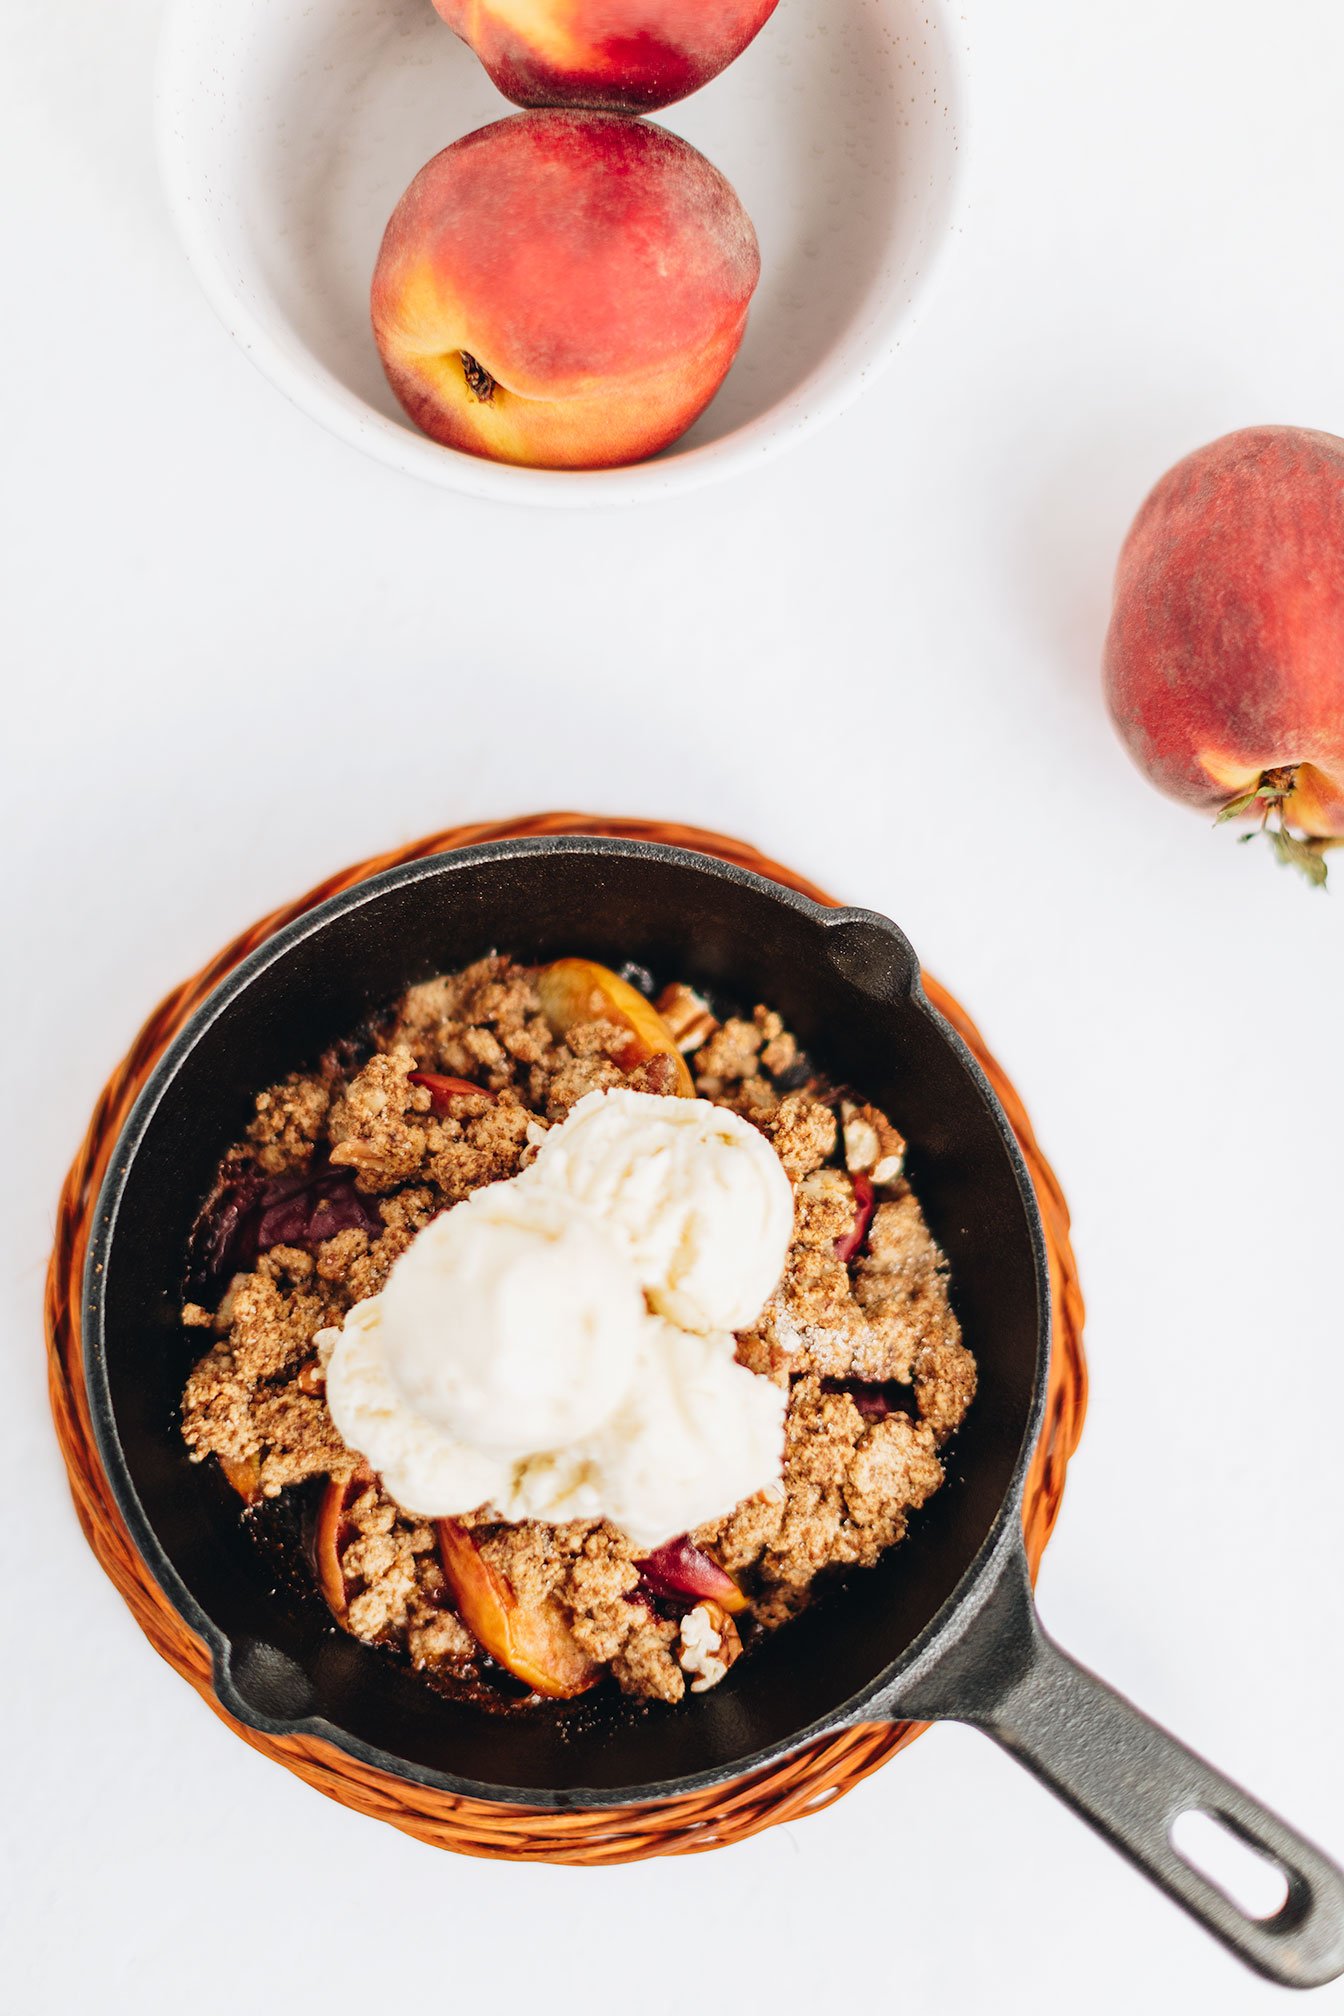
If you would like to share this recipe with friends and family, then simply double, triple, etc the recipe ingredients and use a bigger skillet or dish!

If you try this recipe, let us know! Leave a comment, rate it, and don’t forget to tag a photo to #fromtherootsblog on Instagram. We love seeing what you come up with!
Peach Crisp Skillet For One - Healthy peach crisp that is easy, gluten-free and no leftovers!
Serving: 1 | Prep Time: 10 min | Cook Time: 20 min
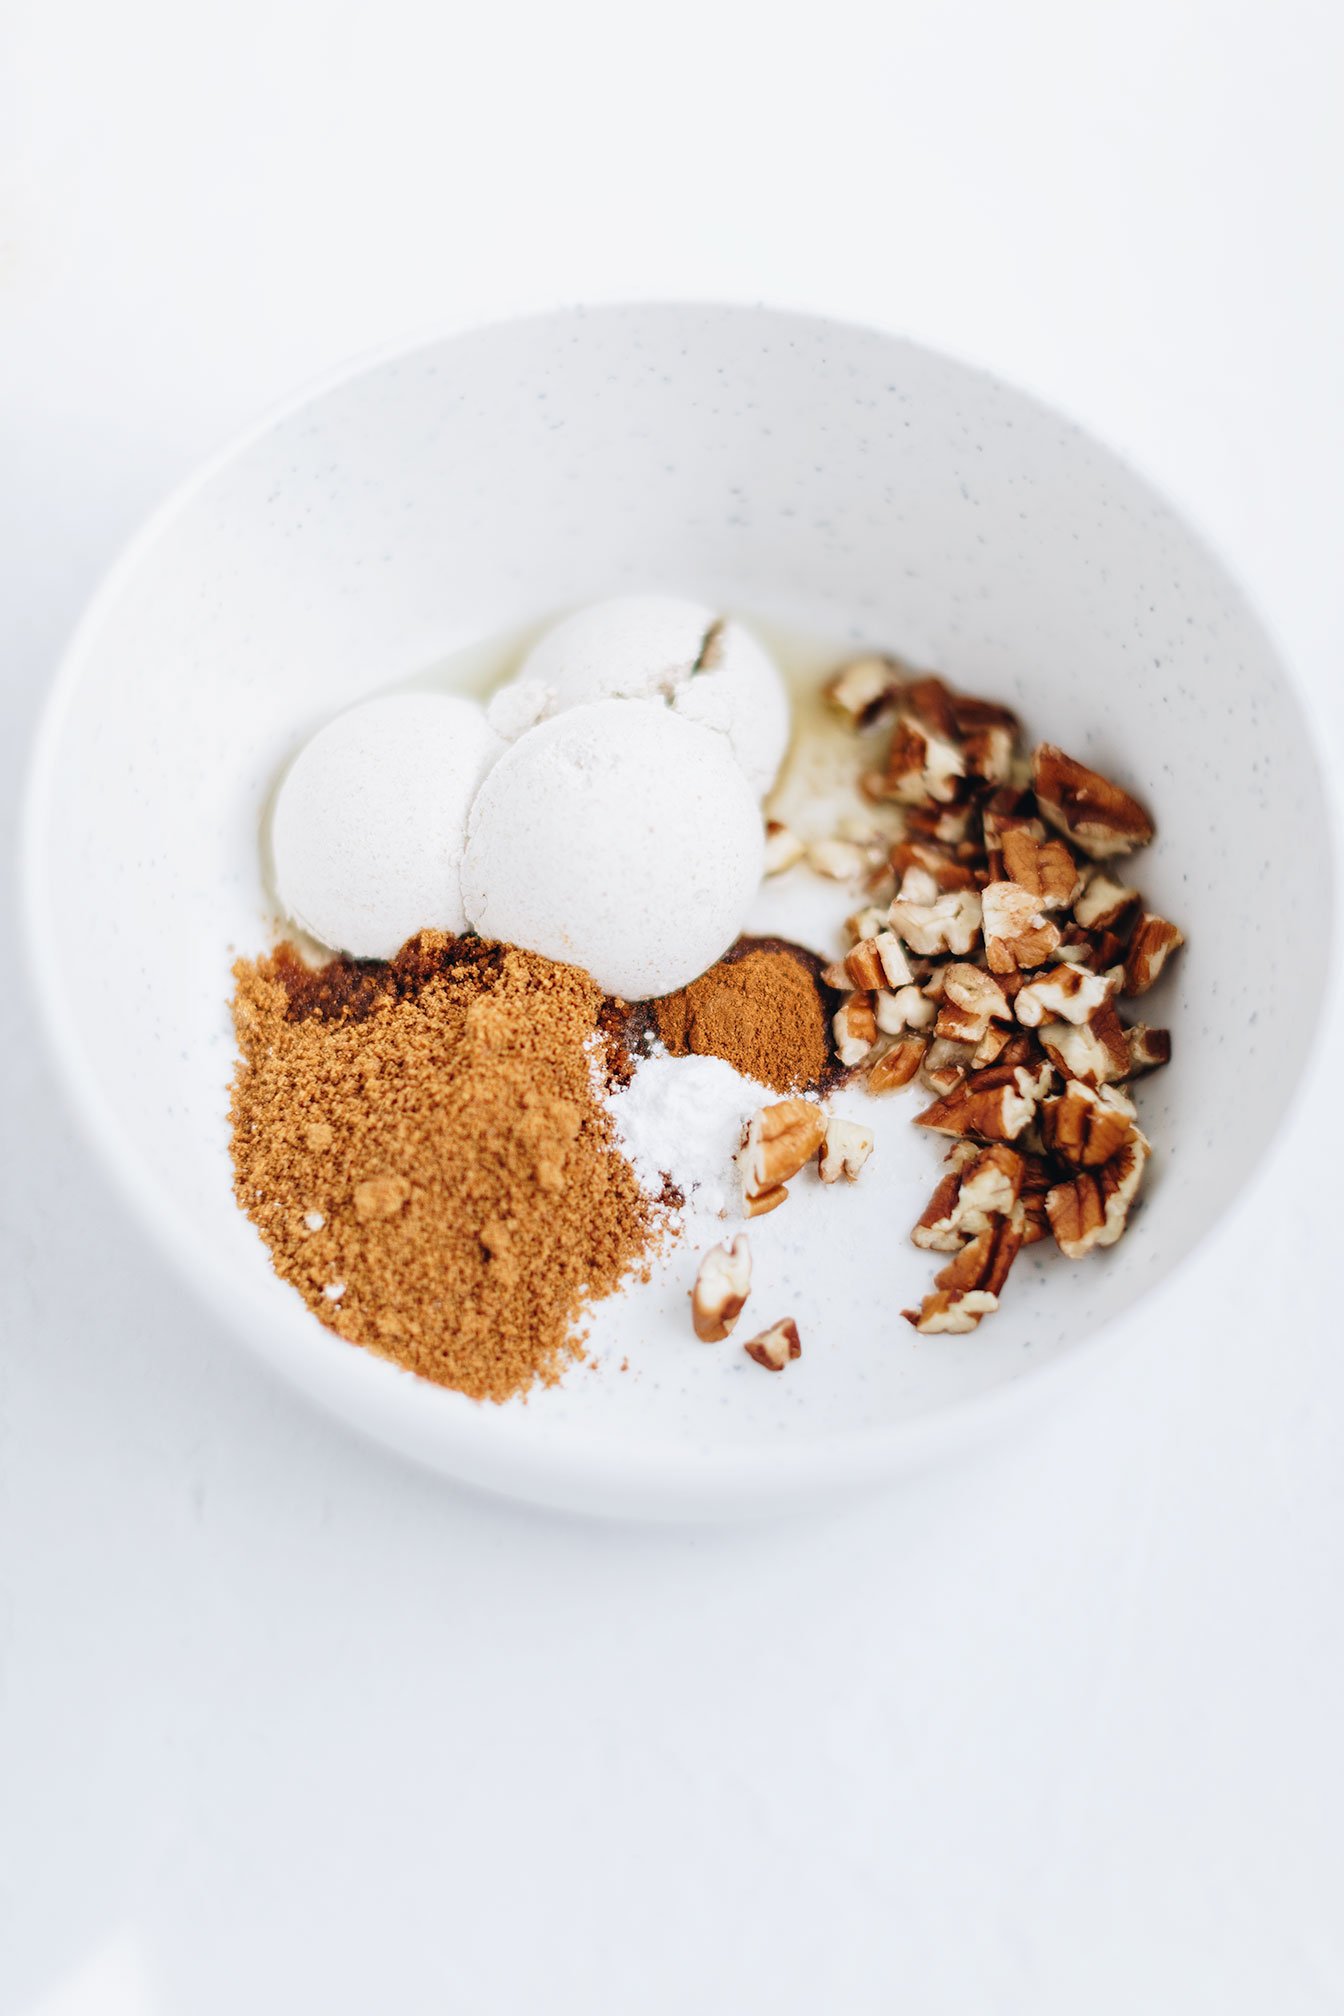
Ingredients
1 fresh peach, sliced and peeled (optional)
3 Tbsp gluten free oat flour
1 Tbsp butter or coconut oil
1 Tbsp coconut sugar
¼ tsp baking powder
¼ tsp vanilla
¼ tsp cinnamon
1 Tbsp chopped pecans (optional)
Directions
Preheat oven to 350 degrees
Spray cast iron skillet or small ramekin with cooking spray oil and lay peaches in a spiral. Dust peaches with cinnamon and coconut sugar and set skillet or ramekin aside.
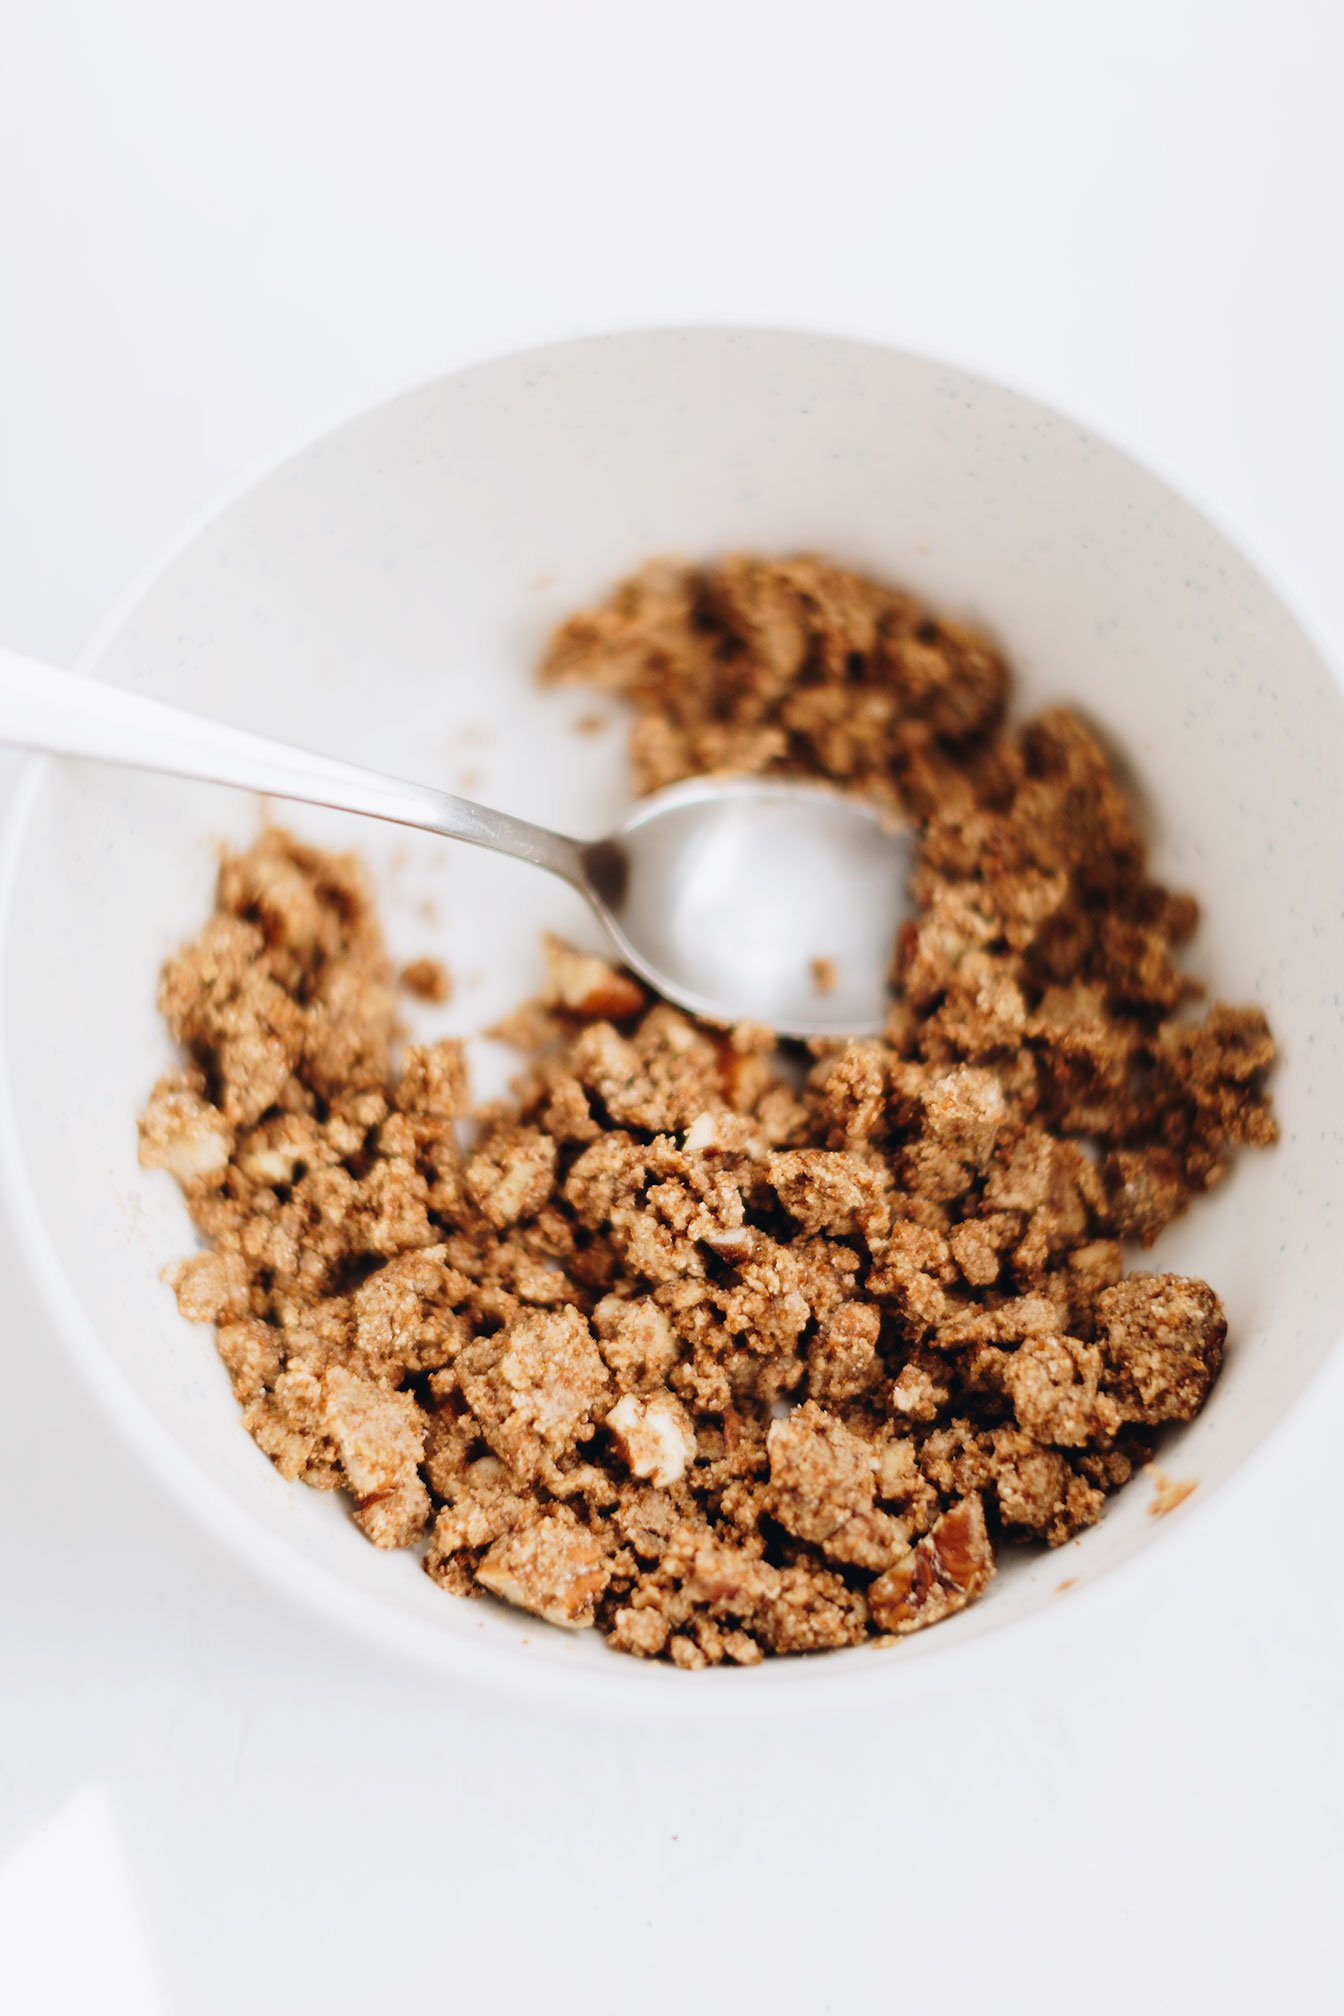
In a small mixing bowl, combine the rest of the ingredients until fully incorporated and the mixture is crumbly.
Cover peaches with the crumble topping and bake for 18-24 minutes or until topping is golden brown and juices are bubbling.
Top with a scoop of ice cream and garnish with chopped pecans (optional) and enjoy!
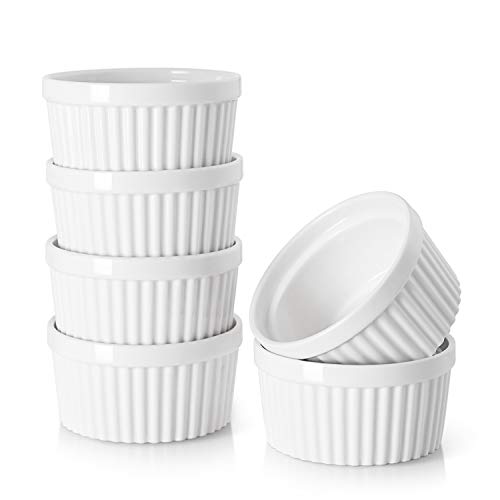
SHOP OUR FAVORITE TOOLS + INGREDIENTS FOR THIS RECIPE!


Coconut Milk Panna Cotta
When I was in Italy, panna cotta was one of my favorite desserts! And fortunately enough, my body was able to tolerate the luxurious mixture of whole milk and heavy cream. But when ordering panna cotta from an Italian restaurant in the states, it definitely hits me (and my gut!) differently. Lol
So that is why I have created a healthy spin on the traditional panna cotta, using full fat canned coconut milk. Not only is this dessert dairy free, but it’s also free of refined sugar using pure maple syrup as the sweetener.
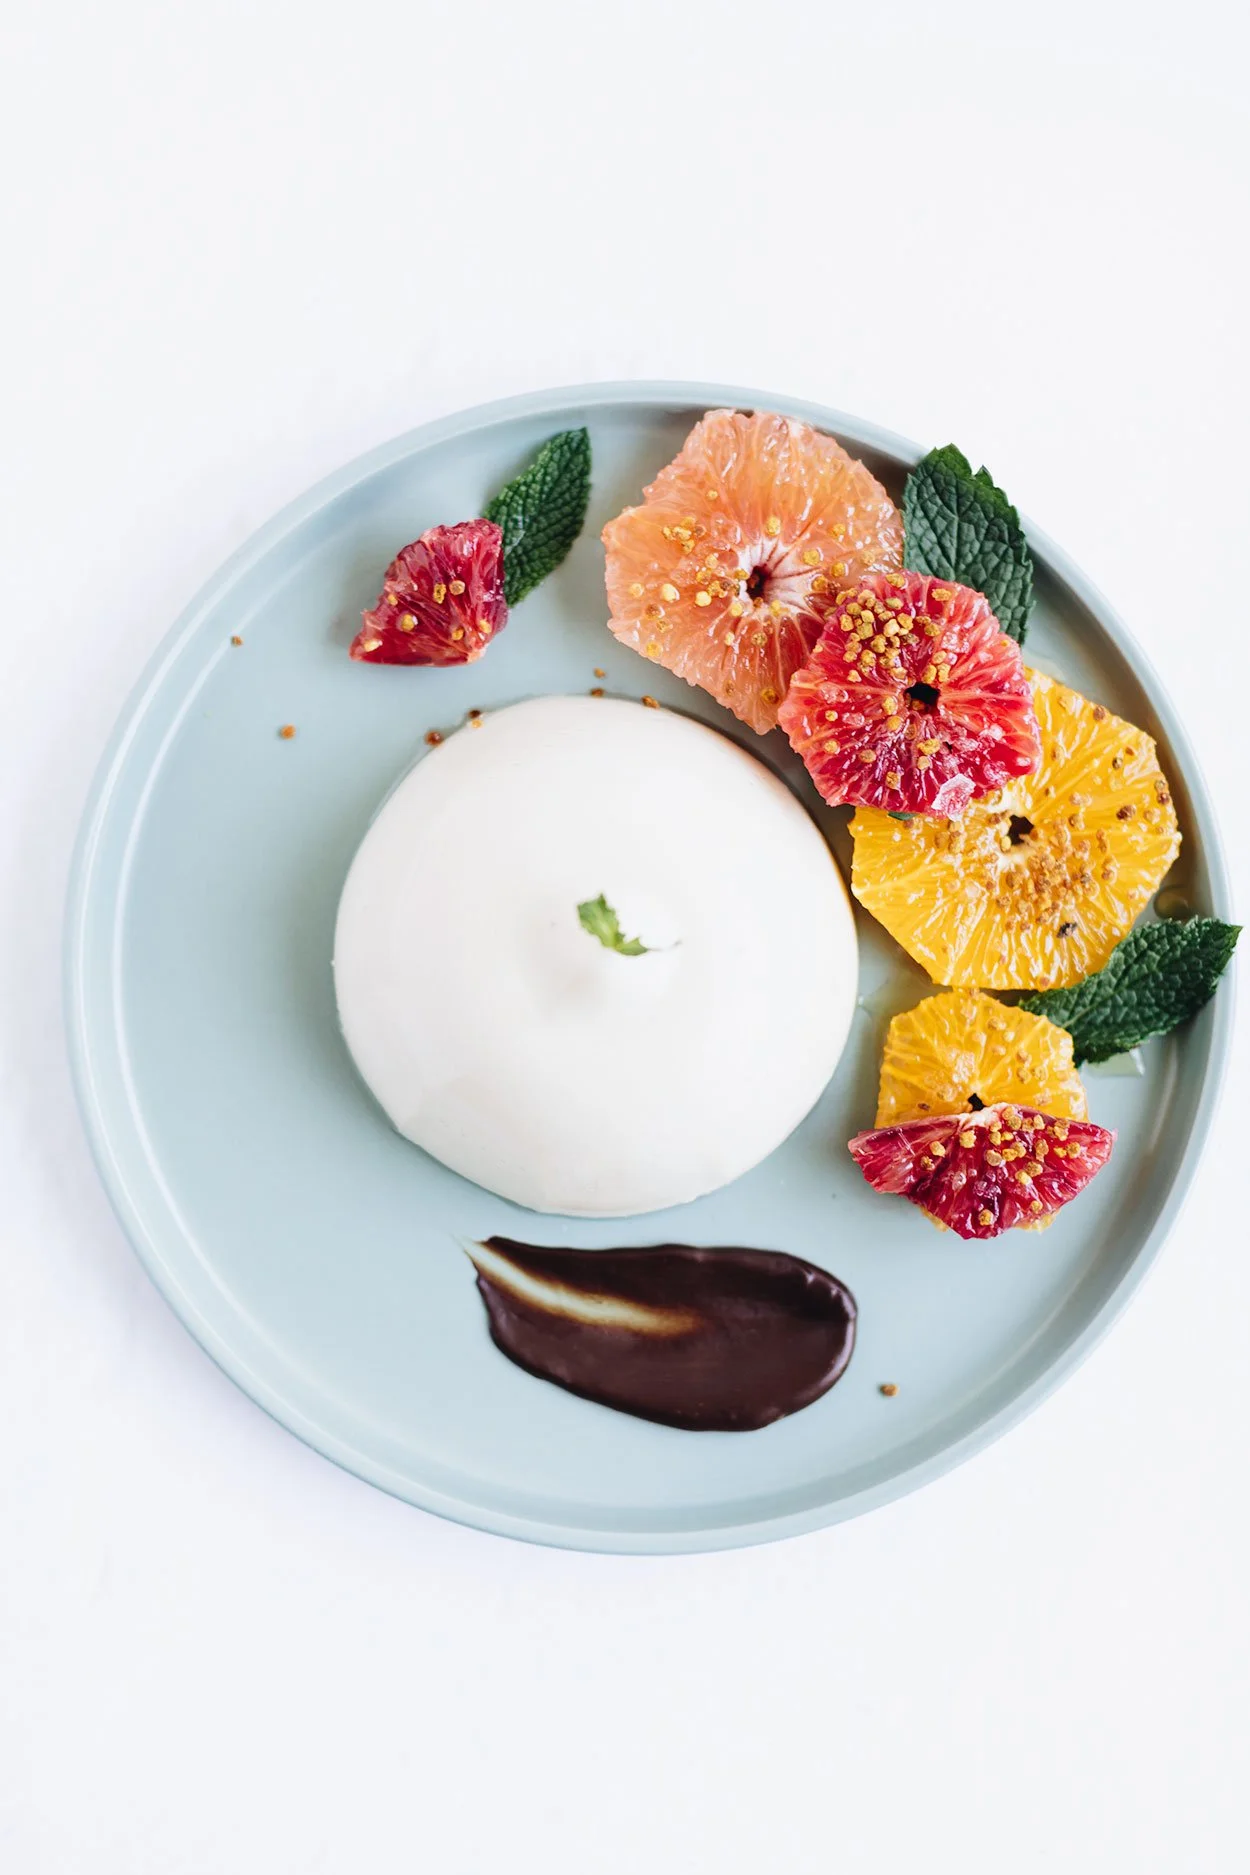
Coconut Milk Panna Cotta - A healthy spin on a classic Italian dessert that’s dairy-free, refined sugar-free and gluten-free. Accompanied by your choosing of honey citrus compote, strawberry sauce and dark chocolate sauce!
When I was in Italy, panna cotta was one of my favorite desserts! And fortunately enough, my body was able to tolerate the luxurious mixture of whole milk and heavy cream. But when ordering panna cotta from an Italian restaurant in the states, it definitely hits me (and my gut!) differently. Lol
So that is why I have created a healthy spin on the traditional panna cotta, using full fat canned coconut milk. Not only is this dessert dairy free, but it’s also free of refined sugar using pure maple syrup as the sweetener.

Travel nostalgia birthed this recipe but also the idea of using bovine gelatin. Recently, I have switched over to using Perfect Supplements as my main supplement source - taking desiccated liver capsules as my “multi-vitamin” and switching over to their hydrolyzed collagen powder. And now, I have been wanting to experiment using their bovine gelatin.
To give you the lowdown on this form of gelatin:
Made with 100% beef gelatin (collagen protein)
Sourced exclusively from brazilian pasture raised (grass fed) cows
The only gelatin to receive perfectly pure certification
And is great for recipes that call for gelatin or a gelling or thickening agent. (i.e. soups, fruit gelatin, gummy treats, custards, marshmallows and more!)
If you want to try it for yourself, here is CANDACE10 for 10% off your first order!
Now, back to Panna Cotta!


A couple tips when making this dish:
Make sure to not boil the coconut milk or the gelatin will lose its setting power
The consistency of panna cotta should have a soft jiggly texture.
Panna cotta can be made ahead of time (up to 2 days) and stored in the fridge.
You can easily double the recipe when making for a crowd or dinner party!
Instead of vanilla extract, you could use ½ vanilla bean.
If you try this recipe, let us know! Leave a comment, rate it, and don’t forget to tag a photo to #fromtherootsblog on Instagram. We love seeing what you come up with!
Coconut Milk Panna Cotta - A healthy spin on a classic Italian dessert that’s dairy-free, refined sugar-free and gluten-free. Accompanied by your choosing of honey citrus compote, strawberry sauce and dark chocolate sauce!
4 servings | Cook time 10 min | Prep Time 20 min
Ingredients
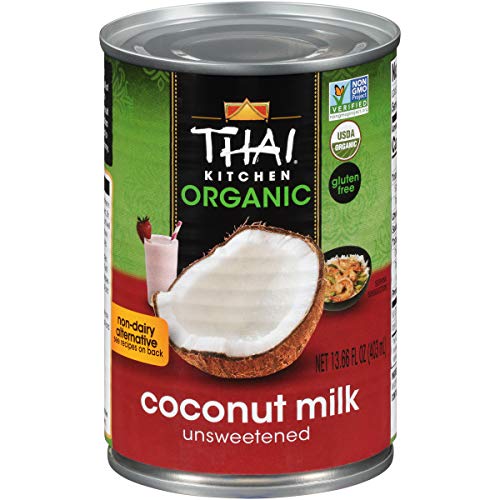
1 can full fat unsweetened coconut milk
⅓ cup pure maple syrup
1 scoop or ¼ oz gelatin
1 tsp vanilla extract
Strawberry sauce
2 cups fresh or frozen strawberries, hulled and sliced
3 Tbsp water
1 Tbsp organic sugar or pure maple syrup
Juice of half lemon
Honey citrus compote
1-3 citrus fruits (grapefruit, orange, blood orange)
Honey
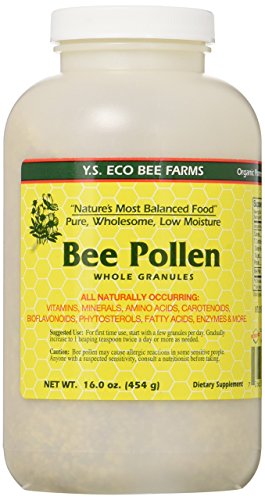
Bee pollen
Fresh mint leaves
Directions
Grease 4 small dishes (ie ramekins, bowls, pudding dishes) to pour the panna cotta into.
In a small saucepan, whisk together half of the coconut milk and gelatin until combined. Set aside for about 5-10 min at room temperature to let the gelatin bloom.
Place the saucepan over medium heat and add vanilla. Whisk thoroughly until gelatin dissolves. Continue to heat until steam rises (but do not bring to a boil). Turn off the heat.
Remove from heat and whisk in maple syrup and remaining coconut milk. Pour the mixture equally into each dish, let sit at room temperature before placing them in the fridge for 2-3 hours.
While the panna cotta is setting, prepare sauce mixture or citrus salad, or both!
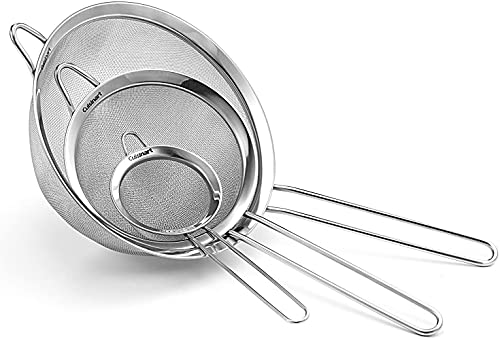
For the strawberry sauce: add sliced strawberries, lemon juice, honey and water to a medium pot. Cook for 7-12 minutes and remove from heat. Blend using an immersion blender, food processor or blender. Strain the sauce into a sieve (to remove strawberry seeds) and transfer sauce to a bowl or jar until ready to use.
For the citrus salad: slice the citrus fruits, and remove any pith. Cut in smaller pieces if desired. Add a drizzle of honey, bee pollen and mint!
To serve, you can either serve them directly in the dish or unmold them onto a plate. Top with strawberry sauce, citrus salad, or chocolate sauce and enjoy!
SHOP OUR FAVORITE TOOLS + INGREDIENTS FOR THIS RECIPE!