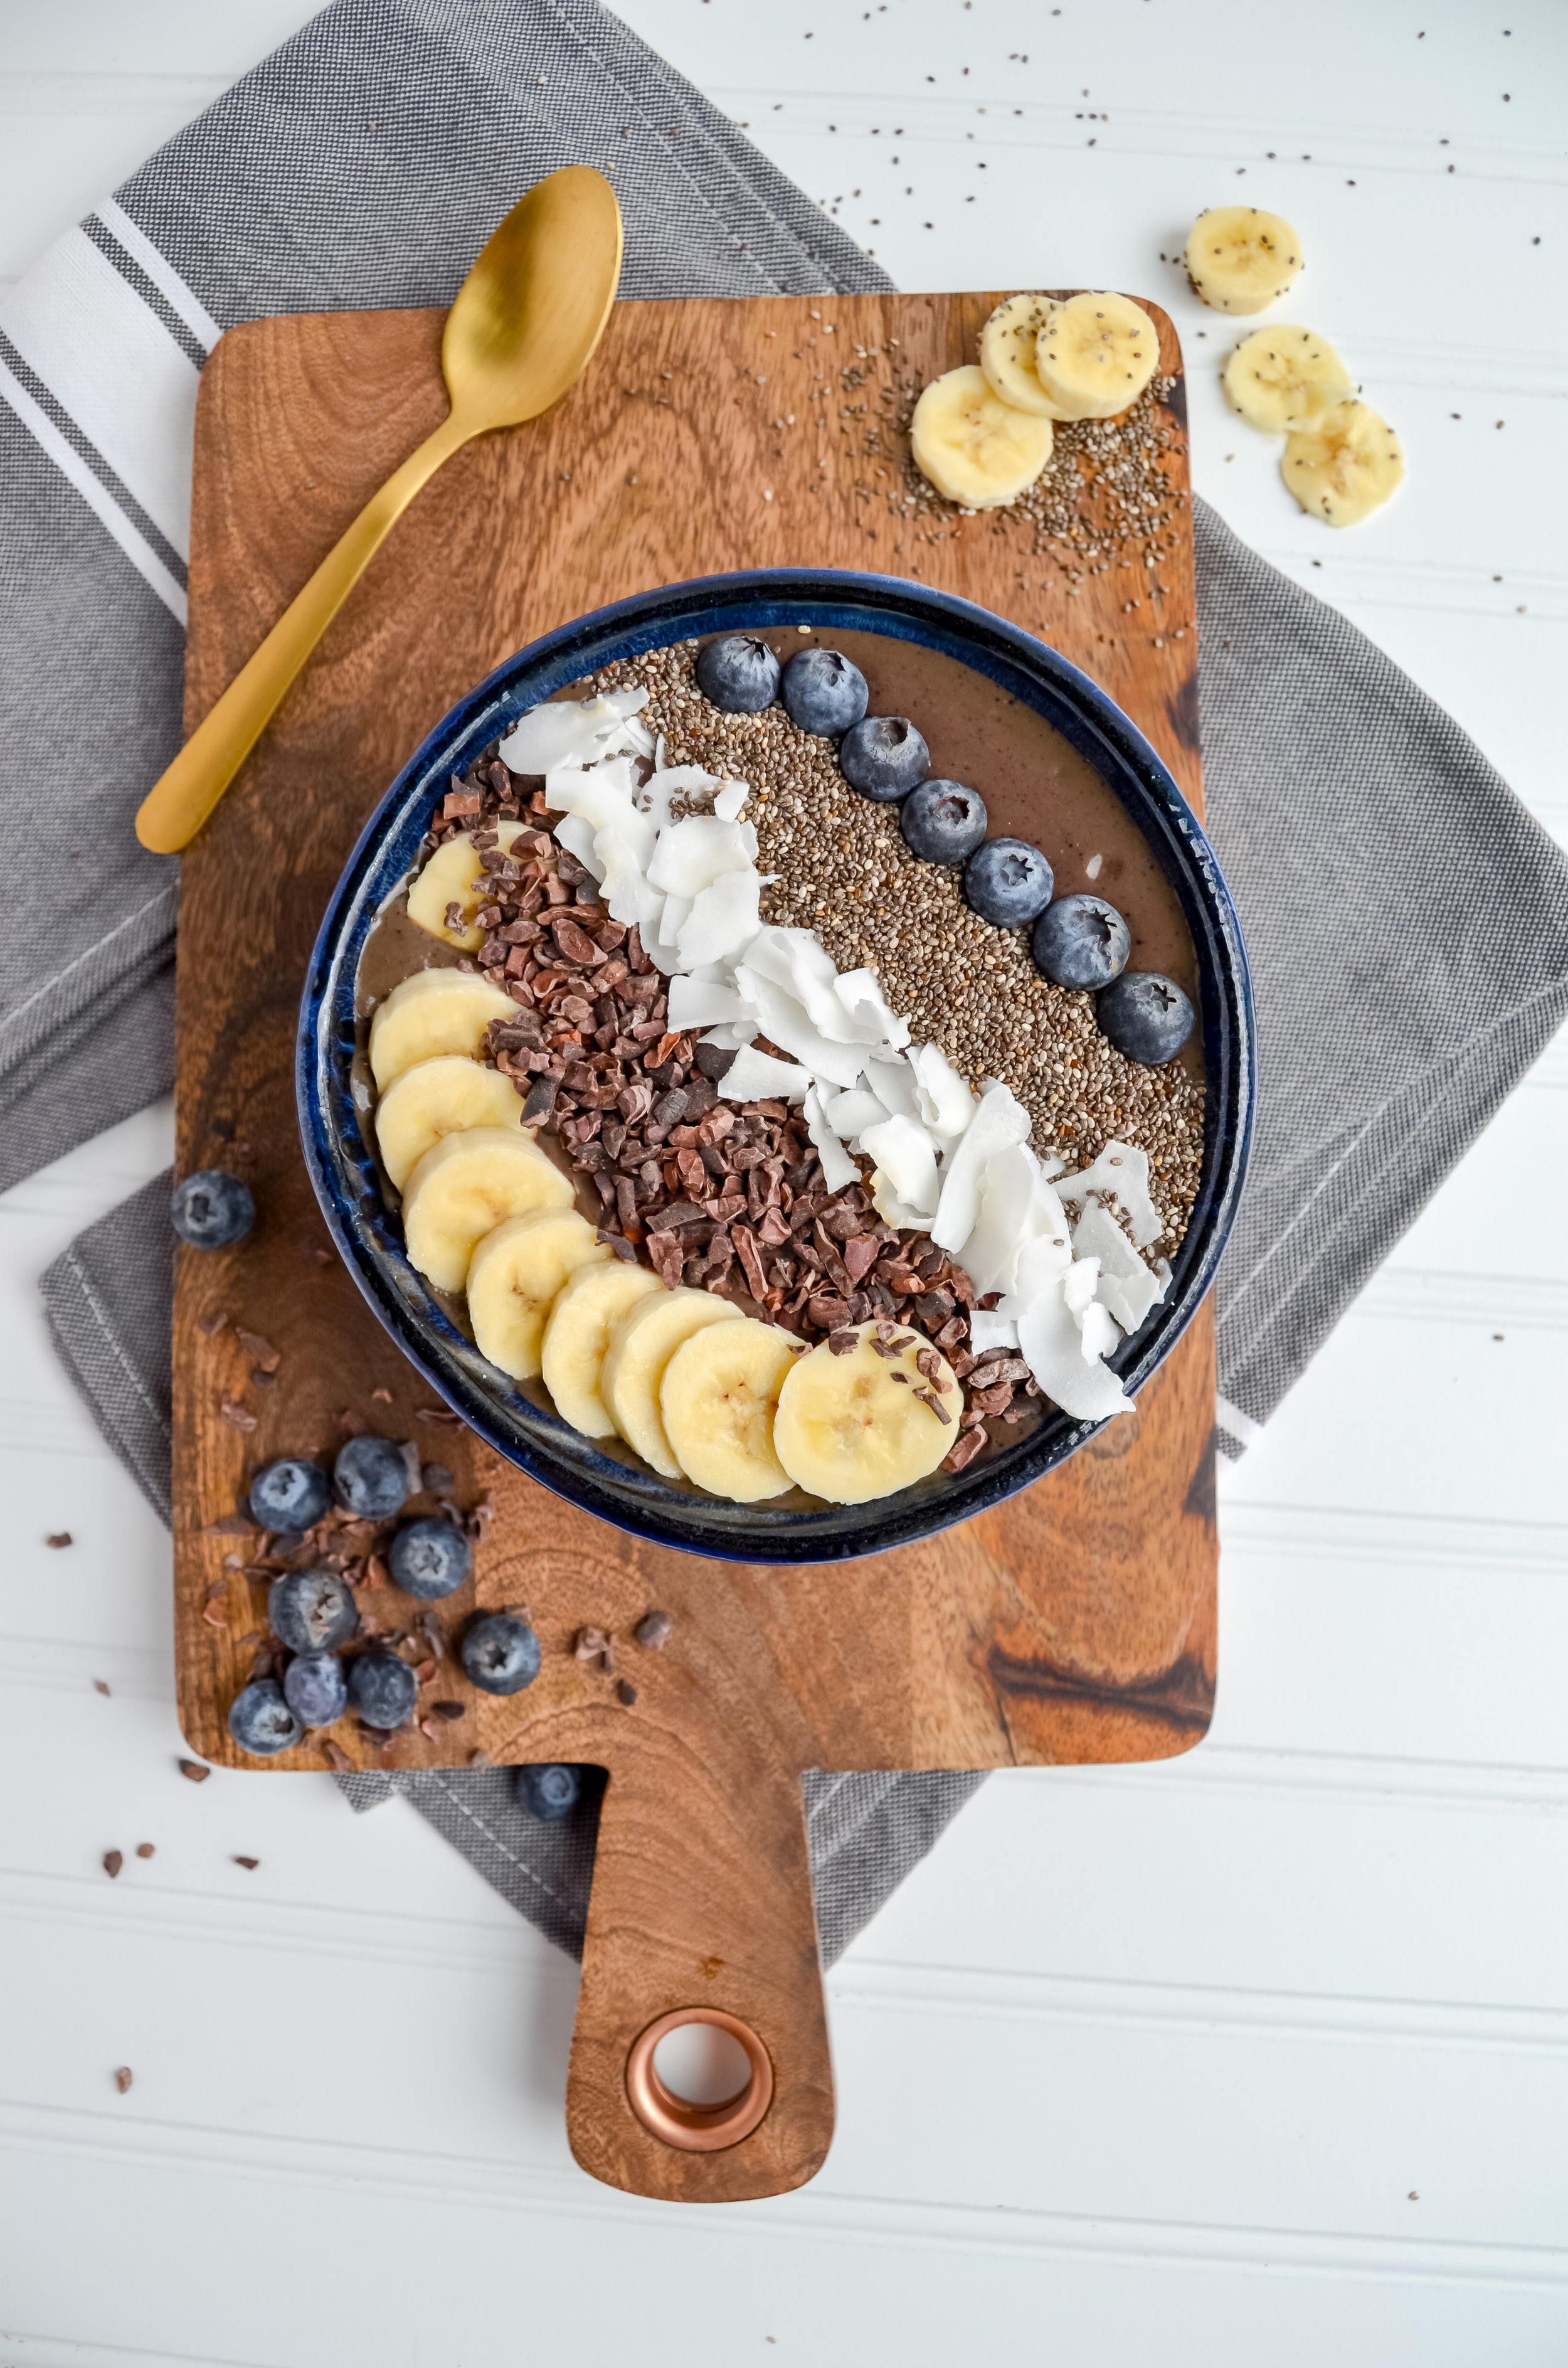
Sort by Category
- May 2026
- March 2026
- December 2025
- November 2025
- October 2025
- September 2025
- August 2025
- June 2025
- August 2024
- July 2024
- June 2024
- May 2024
- February 2024
- January 2024
- December 2023
- November 2023
- October 2023
- September 2023
- August 2023
- July 2023
- March 2023
- February 2023
- January 2023
- December 2022
- November 2022
- October 2022
- September 2022
- August 2022
- June 2022
- May 2022
- April 2022
- March 2022
- February 2022
- January 2022
- December 2021
- November 2021
- October 2021
- September 2021
- August 2021
- July 2021
- June 2021
- May 2021
- April 2021
- March 2021
- February 2021
- January 2021
- December 2020
- November 2020
- October 2020
- September 2020
- August 2020
- July 2020
- June 2020
- May 2020
- April 2020
- March 2020
- February 2020
- January 2020
- December 2019
- November 2019
- October 2019
- September 2019
- August 2019
- July 2019
- June 2019
- May 2019
- April 2019
- March 2019
- February 2019
- January 2019
- December 2018
- November 2018
- October 2018
- September 2018
- August 2018
- July 2018
- June 2018
- May 2018
- April 2018
- March 2018
- February 2018

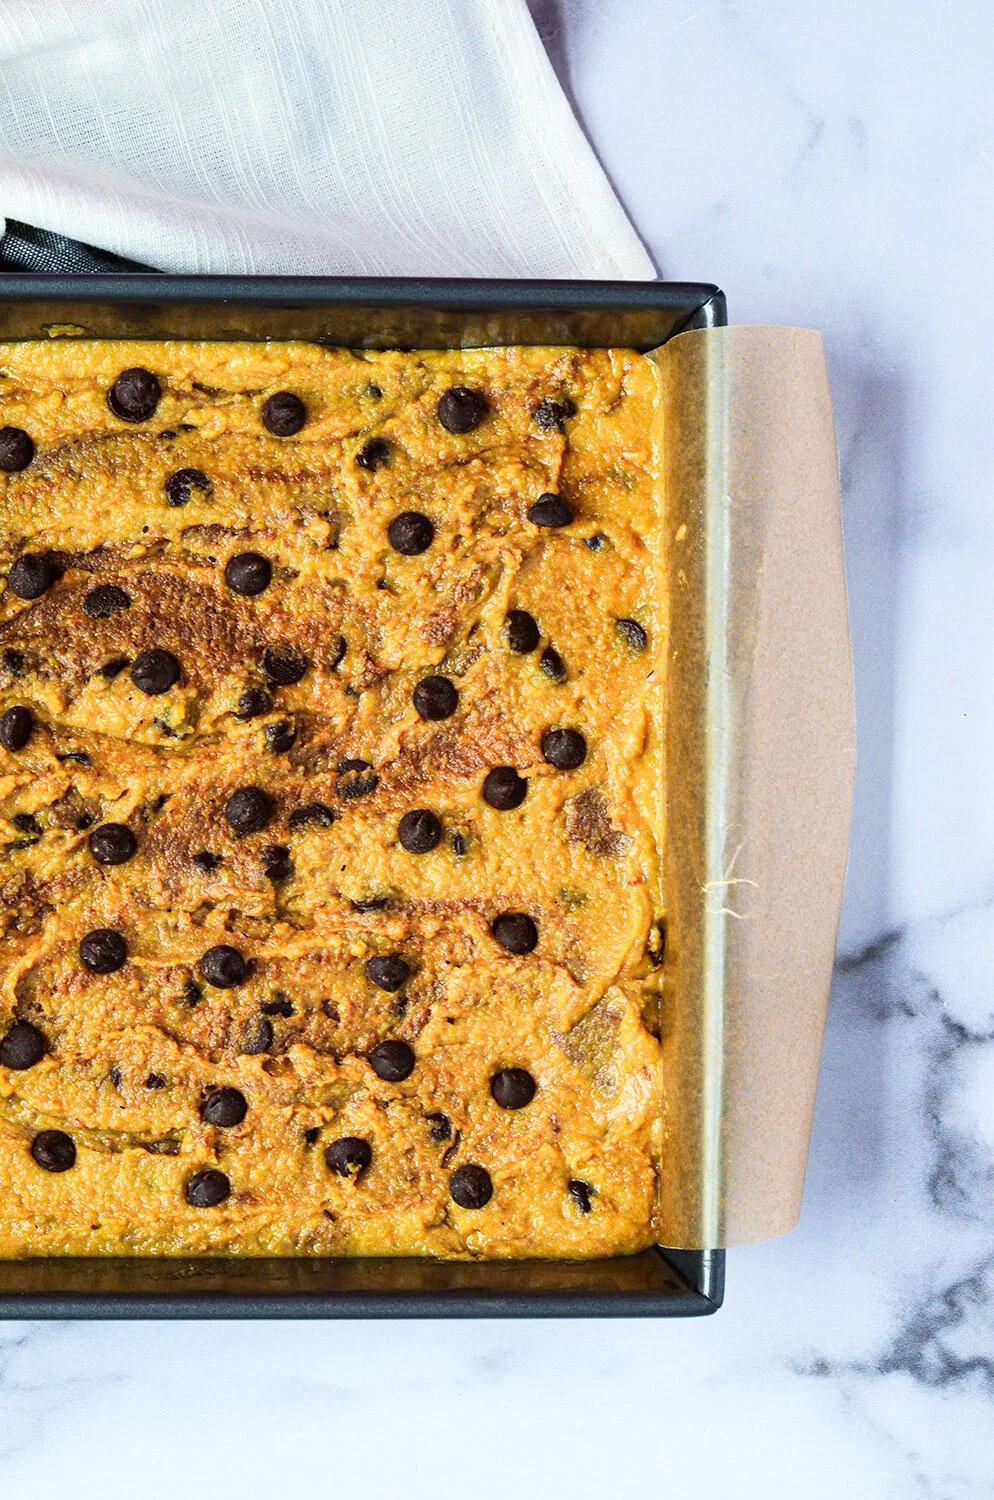
Half Baked Chickpea Blondies + Edible Cookie Dough Dip
When you are stuck at home due to COVID-19, you think of creative ways to pass the time. So for this month, I’m creating recipes based on what is in my pantry.
I assume that most people will have the same ingredients so let’s look inside our pantry to see if we have these ingredients on hand:
can of chickpeas, almond flour, a jar of peanut butter, random ⅓ bag of dark chocolate chips, maple syrup from last week's pancakes, and baking essentials like baking soda, baking powder, salt, cocoa powder, and vanilla extract.
Have all these ingredients? Alright, let’s start baking!
Edible cookie dough dip transformed into a blondie if you decide to cook the batter! Vegan, gluten-free, dairy-free, and flour-less.

When you are stuck at home due to COVID-19, you think of creative ways to pass the time. So for this month, I’m creating recipes based on what is in my pantry.

I assume that most people will have the same ingredients so let’s look inside our pantry to see if we have these ingredients on hand:
can of chickpeas, almond flour, jar of peanut butter, random ⅓ bag of dark chocolate chips, maple syrup from last week's pancakes, and baking essentials like baking soda, baking powder, salt, cocoa powder, and vanilla extract.
Have all these ingredients? Alright, let’s start baking!

Personally, I think that most baking recipes that call for chickpeas as a healthy ingredient swap are great and all, except that I get the “chickpea” taste in the dessert. So to create a neutral and creamy texture to this recipe, I followed the same technique that I used for my hummus recipes.
Simply place chickpeas in a medium saucepan with ½ tsp baking soda. Cover the chickpeas with several inches of water, then bring to a boil over high heat. Boil for about 20 minutes or until the chickpeas look bloated, soft, and their skins are falling off. In a fine mesh strainer, drain the chickpeas and run cool water over them.

Now, you have the option of creating one batch of this recipe for either a small batch of blondies or to create edible cookie dough dip!
If you are wanting to create half baked blondies, you will double the recipe and split the batter in half. In one batter, you are adding about ⅓ cup chocolate chips. The other batter, you are adding ⅓ cup chocolate chips and 3 Tbsp cocoa powder.

To create the “marbled” effect, spoon half of the regular batter into the prepared pan, and then top it with half of the chocolate batter. Repeat this with the remaining regular batter and chocolate batter. Swirl the batters together with a knife just a few times - do not overmix! A slight swirl will create that beautiful marbled look once it’s all baked.

Both options taste amazing and would be great for a party, healthy snack, or dessert.
If you try this recipe, let us know! Leave a comment, rate it, and don’t forget to tag a photo to #fromtherootsblog on Instagram. We love seeing what you come up with!
Half Baked Chickpea Blondies + Edible Cookie Dough Dip - Edible cookie dough dip transformed into a blondie if you decide to cook the batter! Vegan, gluten-free, dairy-free, and flour-less.
Ingredients
(Double this recipe if you are making half baked blondies)
1 can chickpeas (drained and rinsed) + ½ tsp baking soda
⅓ cup peanut butter
⅓ cup pure maple syrup
⅓ cup dark chocolate chips
¼ cup almond flour
1 tsp vanilla extract
¼ tsp baking soda
¼ tsp baking powder
¼ tsp salt
3 tbsp unsweetened cocoa powder - for the brownie batter
Directions
Edible cookie dough dip
Place chickpeas in a medium saucepan with ½ tsp baking soda. Cover the chickpeas with several inches of water, then bring to a boil over high heat. Boil for about 20 minutes or until the chickpeas look bloated, soft, and their skins are falling off. In a fine mesh strainer, drain the chickpeas and run cool water over them.
Add the chickpeas to a food processor along with the rest of the ingredients sans chocolate chips and cocoa powder.
Blend until the mixture is thick and creamy, scrape down the sides as necessary.
If you are wanting edible chocolate chip cookie dough dip, fold in ⅓ cup chocolate chips.
If you are wanting edible brownie batter dip, fold in ⅓ cup chocolate chips + 3 Tbsp cocoa powder.
Pour into a bowl and serve with various fruits, pretzels, and cinnamon sugar pita chips.
half baked blondies:
Double the recipe by adding two cans of chickpeas in a medium saucepan with 1 tsp baking soda. Cover the chickpeas with several inches of water, then bring to a boil over high heat. Boil for about 20 minutes or until the chickpeas look bloated, soft, and their skins are falling off. In a fine mesh strainer, drain the chickpeas and run cool water over them.
While the chickpeas are boiling, preheat the oven to 350 degrees and line and grease an 8x8 baking pan.
Add the chickpeas to a food processor along with the rest of the ingredients sans chocolate chips and cocoa powder.
Blend until the mixture is thick and creamy, scrape down the sides as necessary.
Split batter in half. In one batter, you are adding about ⅓ cup chocolate chips. The other batter, you are adding ⅓ cup chocolate chips and 3 Tbsp cocoa powder.
To create the “marbled” effect, spoon half of the regular batter into the prepared pan, and then top it with half of the chocolate batter. Repeat this with the remaining regular batter and chocolate batter. Swirl the batters together with a knife just a few times - do not overmix! A slight swirl will create that beautiful marbled look once it’s all baked.
Top with additional chocolate chips and bake in the oven for 25-30 minutes.
Let the pan cool for at least 10 minutes before cutting into squares. Enjoy! Optional: Sprinkle sea salt flakes before serving.

Magic Bar Cookie Skillet
As I was packing food supplies for my winter retreat, I noticed that I didn’t have anything for dessert. Who doesn’t think about packing dessert!? But I didn’t want to bring a lot of ingredients to make something homemade so that’s when I came up with an idea to make “a cookie skillet in a jar”! All the dry ingredients are in a jar. Just bring one egg and coconut oil and you are all set!
Magic Bar Cookie Skillet - Great for camping trips, DIY holiday gifts, or when you are hankering for a cookie skillet! - Paleo, naturally low in sugar, dairy-free, and gluten-free.

As I was packing food supplies for my winter retreat, I noticed that I didn’t have anything for dessert. Who doesn’t think about packing dessert!? But I didn’t want to bring a lot of ingredients to make something homemade so that’s when I came up with an idea to make “a cookie skillet in a jar”! All the dry ingredients are in a jar. Just bring one egg and coconut oil and you are all set!


Dry ingredient layers (bottom to the top)
Almond flour
Paleo flour
Baking soda
Salt
Coconut sugar
Chocolate chips
Toasted coconut flakes
Chopped raw walnuts

You can also use the batter to make cookies! For these cookies, I swapped out the “magic bar” toppings for chocolate chips and salted caramel almond butter. Reserve ¼ serving of salted caramel to drizzle over the cookies, add a pinch of coarse sea salt, and bam! Perfection!

If you try this recipe, let us know! Leave a comment, rate it, and don’t forget to tag a photo to #fromtherootsblog on Instagram. We love seeing what you come up with!
Magic Bar Cookie Skillet - Great for camping trips, DIY holiday gifts, or when you are hankering for a cookie skillet! - Paleo, naturally low in sugar, dairy-free, and gluten-free.
Ingredients
1/2 cup blanched almond flour
1/2 cup paleo flour
1/4 cup coconut oil (solid)
1 egg
1/3 cup coconut sugar, dark chocolate chips, chopped raw walnuts, toasted coconut flakes
1 tsp vanilla extract or vanilla powder
1/4 tsp salt
1/4 tsp baking soda
Directions
Preheat oven to 350 degrees.
Combine sugar and solid coconut oil together.
Add the egg, salt, baking soda, and fours and blend using a mixer until well combined.
Fold chocolate chips, walnuts, and coconut flakes into the dough until well combined.
Grease a 6 inch cast iron skillet and press cookie dough firmly into skillet
Cook for 16-20 minutes
After the cookie skillet has cooled down, top with dairy-free whipped cream or ice cream and enjoy!
Notes
If you do not have paleo flour, double up on almond flour. Vice versa for paleo flour.
Here is the paleo flour brand I use.

No-Bake Paleo Pumpkin Cheesecake Bars
No-Bake Paleo Pumpkin Cheesecake Bars - Perfect as a seasonal treat or to make for the holidays.
I created this recipe using Further Food vanilla collagen peptides. The recipe is on their website or you can get straight from here!
If you do not have collagen peptide powder or wish to not use it, you can simply sub the powder out with ½ tsp vanilla extract.
No-Bake Paleo Pumpkin Cheesecake Bars - Perfect as a seasonal treat or to make for the holidays.

I created this recipe using Further Food vanilla collagen peptides. The recipe is on their website or you can get straight from here!


If you do not have collagen peptide powder or wish to not use it, you can simply sub the powder out with ½ tsp vanilla extract.

If you would like to try Further Food, use code FROMTHEROOTSBLOG10 for 10% off your first purchase!
If you try this recipe, let us know! Leave a comment, rate it, and don’t forget to tag a photo to #fromtherootsblog on Instagram. We love seeing what you come up with!
No-Bake Paleo Pumpkin Cheesecake Bars - Perfect as a seasonal treat or to make for the holidays.
Ingredients:
Filling
1 cup raw cashews (soaked for at least 30 minutes)
1/2 cup pumpkin puree (canned)
3-4 Tbsp pure maple syrup
1/2 cup full fat coconut milk
1/2 scoop vanilla collagen powder (further food) or 1/2 tsp vanilla extract
1 tsp pumpkin spice
1/2 tsp ground cinnamon
Crust
1 cup medjool dates (soaked for at least 30 min)
1/2 cup pecans
1/2 cup walnuts
1/4 cup coconut flakes
1/2 tsp cinnamon
dash of pink himalayan salt
Almond Butter Salted Caramel
1/4 cup almond butter
2 Tbsp pure maple syrup
1 Tbsp coconut oil
pinch of sea salt
Directions
To make the crust: Add the pecans, walnuts, and coconut flakes to a food processor and process until broken down and crumbly. Add in the dates, cinnamon, and salt and process until well mixed and the mixture begins to form a ball.
Transfer to a parchment paper-lined 8x8 pan and press out evenly. Place in the freezer.
To a food processor or high powered blender, combine all filling ingredients and blend until texture is smooth. At this point, taste to see if you need to add more maple syrup for sweetness or spices for that pumpkin spice flavor.
Take the crust out of the freezer and pour the filling mixture over the crust. Spread evenly.
Place cheesecake in the freezer for up to two hours to set.
15 minutes before serving, prepare the caramel sauce by combining all ingredients into a small bowl and heating in the microwave for 30-sec increments until fully combined or in a small saucepan on medium heat.
Drizzle caramel sauce over the bars and sprinkle with coarse salt for a salted caramel flavor. (highly recommended!)
Serve immediately, makes 16 small bars.
For storage, place in the fridge for up to a week or in the freezer and thaw naturally for 30 minutes or 15 seconds in the microwave.
Notes
If you are following the further food recipe, nutrition information is for 10 bars, not 16.


Very Berry Galette
Before summer ends I thought I would share one of my favorite summertime activities... berry picking! Growing up in the South there was never a shortage of blueberry bushes or blackberry vines. In the summers it was always hard going home with a substantial amount of berries because we would end up eating them right off the bush.
Very Berry Galette - Fresh, juicy blackberries and blueberries nestled in a dairy, gluten, and grain-free buttery crust! (paleo friendly)

Before summer ends I thought I would share one of my favorite summertime activities... berry picking! Growing up in the South there was never a shortage of blueberry bushes or blackberry vines. In the summers it was always hard going home with a substantial amount of berries because we would end up eating them right off the bush.

High Hill Orchard is a small, family-owned farm in Eastern Kentucky where I love to go for berry picking and to purchase pasture-raised eggs and meat. If you live around the area, you can pick your own berries during early June through mid-August.

There are so many things you can make with berries, but what I have found myself making all summer, due to high demand, are galettes. This recipe was actually an accident. I have researched how to make galettes before but could never find a promising recipe that was free of gluten, dairy, and grain. I don’t do this often but I had to pat my back for this one because it came out perfectly the first time!

While the ingredients and directions may seem complex, don’t fret! Galettes are easy to make and you may already have most of the ingredients on hand. One ingredient you may not have, however, is paleo flour. Bob’s Red Mill just introduced paleo baking flour this year and I’m so glad they did! I’ve used this flour in most of my paleo baking dishes as it is made with only 4 ingredients - almond flour, arrowroot starch, organic coconut flour, and tapioca flour. Completely dairy, gluten, and grain-free as well! Now, on to the recipe!
If you try this recipe, let us know! Leave a comment, rate it, and don’t forget to tag a photo to #fromtherootsblog on Instagram. We love seeing what you come up with!
Very Berry Galette - Fresh, juicy blackberries and blueberries nestled in a dairy, gluten, and grain-free buttery crust!
Ingredients
CRUST
4 oz cold unsalted grass-fed butter (or cold coconut oil, vegan butter)
2 Tbsp chilled vodka
1 Tbsp chilled apple cider vinegar
1 Tbsp water
200g paleo baking flour
1 Tbsp raw sugar + more for sprinkling over the galette
1/2 tsp sea salt
FILLING
5oz blackberries
5oz blueberries
1 Tbsp arrowroot flour
pinch of sea salt
1 Tbsp lemon juice
1 tsp vanilla
2 Tbsp raw sugar
EGG WASH
1 egg white
1 Tbsp almond milk
Directions
Slice butter into small pieces and place in freezer for 10 min
Chill vinegar, vodka, and water by adding ice cubes to a measuring cup
Place flour, sugar, and salt in a food processor. Pulse to mix ingredients.
Add the chilled butter and pulse a few times. Next, add chilled liquid (straining ice cubes) and pulse to mix them in. Pulse to mix until there is no dry flour left. Squeeze a little of the dough in your hands to see if it comes together to form a ball. If it doesn't, slowly add more chilled water.
Form dough into a ball and wrap in plastic wrap and refrigerate for at least 1 hour.
While the dough is chilling, prepare filling by adding all ingredients into a bowl. Gently toss to mix and set aside.
Prepare egg wash by mixing the egg white and milk together and set aside.
Preheat oven to 400 degrees
When the galette is ready to come out of the fridge, place a piece of parchment paper down (the one you will be using for the baking tray so it's the same size) on a flat surface.
Generously sprinkle flour down on paper and place the malleable dough on top. Dust the top of the dough with a little flour as well. Roll out the dough until you have a rough round shaped disc that's about 12 inch in diameter. Transfer onto a baking sheet with the dough still on parchment paper.
Starting in the center, place the filling on top of the dough, leaving a 2-inch border from the edge of the dough.
Fold over the dough borders. Generously brush the top of the pie dough with egg wash. Sprinkle raw sugar over crust and filling.
Bake in the oven for 30-35 minutes or until crust is golden brown. Remove the galette from the oven and gently lift the galette onto a baking rack to cool. (If you feel unsure about transferring the galette to a baking rack from the parchment paper then you can keep it on the paper - I haven't found mine to get soggy and cools down beautifully)
Serve the galette while warm and top with a scoop of DF vanilla bean ice cream or whipped cream. Enjoy!
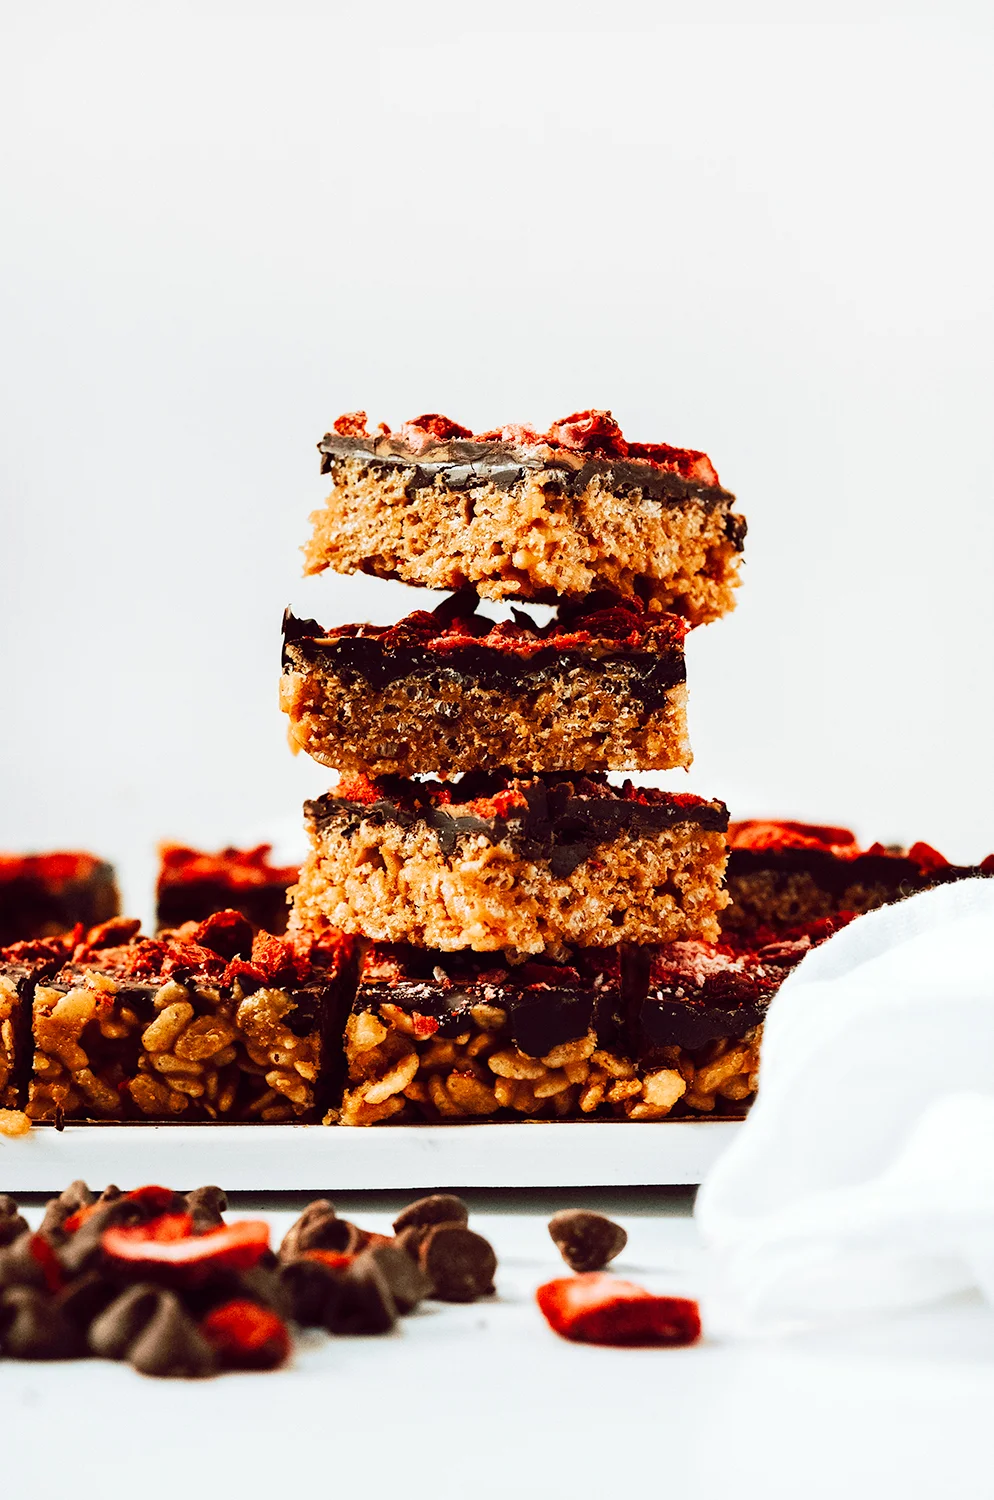
Healthy Strawberry Brown Rice Krispie Treats
After finding out that I was sensitive to gluten, my love for rice krispie treats grew. I know that sounds bad and unhealthy, but hey, at the time, there weren’t too many gluten-free options when it came to desserts!
But within a year of only eating rice krispie treats, I felt like I was done for life. 5 years later, that’s all I crave! So, without further ado, I have made for you a healthier rice krispie treat -- but with a spin.
Healthy Strawberry Brown Rice Krispie Treats - Healthy play on the traditional rice krispie treat! Gluten-free, dairy-free, and naturally lower in sugar!

After finding out that I was sensitive to gluten, my love for rice krispie treats grew. I know that sounds bad and unhealthy, but hey, at the time, there weren’t too many gluten-free options when it came to desserts!
But within a year of only eating rice krispie treats, I felt like I was done for life. 5 years later, that’s all I crave! So, without further ado, I have made for you a healthier rice krispie treat -- but with a spin.

Instead of using marshmallows, I used a mixture of peanut butter, coconut oil, pure maple syrup and strawberry preserves. I just love the addition of strawberry preserves, making these rice krispie treats taste more like a PB&J or a no bake cookie!

You can also play with the toppings if you would like. My favorite way to add color and to play off the strawberry preserves is to add freeze dried strawberries, goji berries, and melted peanut butter into the dark chocolate. You could keep it classy with melted dark chocolate and sea salt flakes, or create a superfood rice krispie treat with goji berries, bee pollen, nuts and seeds, cacao nibs, and coconut flakes. The possibilities are endless!

These are great as a healthy snack and dessert as each serving size is less than 200 calories with about 10 grams of sugar per serving. The ingredients I used in predicting these numbers are listed in the notes section below.
If you try this recipe, let us know! Leave a comment, rate it, and don’t forget to tag a photo to #fromtherootsblog on Instagram. We love seeing what you come up with!
Healthy Strawberry Brown Rice Krispie Treats - Healthy play on the traditional rice krispie treat! Gluten-free, dairy-free, and naturally lower in sugar!
Makes 16 servings
Ingredients
3 cups brown rice cereal
1 cup dark chocolate
½ cup natural peanut butter
⅓ cup pure maple syrup
2 Tbsp coconut oil
Pinch of salt
1 Tbsp strawberry preserves
Toppings
Freeze dried strawberries
Goji berries
Directions
Line 8x8 pan with parchment paper. Set aside
Place a small saucepan on the stove-top over low heat. Combine peanut butter, maple syrup, coconut oil, strawberry preserves, and a pinch of salt. Mix until smooth and well combined, about 1-2 minutes. Add brown rice cereal to a medium bowl and pour peanut butter mixture over the brown rice. Mix until combined and cereal is completely coated.
Transfer rice krispie mixture to the parchment paper lined pan and press mixture down flat using a spatula to create an even surface.
In a small microwave safe bowl, add dark chocolate and 1 tbsp coconut oil (optional) and heat in 30-second increments (stirring in between) until chocolate is fully melted and smooth.
Pour chocolate mixture over krispie mixture and add toppings. You can follow the strawberry trend and add freeze dried strawberries, goji berries, and melted peanut butter or you can keep it classic with sea salt or naked. Up to you!
Place pan in the refrigerator for at least 30 minutes until bars are completely cooled and chocolate is set.
Place bars onto a cutting board and cut into 16 bars. Bars should be kept in the fridge covered for up to a week.
Notes
Ingredients I used: Erewhon organic brown rice gluten free cereal, pure maple syrup, dark chocolate, strawberry preserves.
If you would like to add more protein to these bars, add a scoop of collagen peptides to the peanut butter mixture when everything is in the saucepan heating.