Sort by Category
- October 2025
- September 2025
- August 2025
- June 2025
- August 2024
- July 2024
- June 2024
- May 2024
- February 2024
- January 2024
- December 2023
- November 2023
- October 2023
- September 2023
- August 2023
- July 2023
- March 2023
- February 2023
- January 2023
- December 2022
- November 2022
- October 2022
- September 2022
- August 2022
- June 2022
- May 2022
- April 2022
- March 2022
- February 2022
- January 2022
- December 2021
- November 2021
- October 2021
- September 2021
- August 2021
- July 2021
- June 2021
- May 2021
- April 2021
- March 2021
- February 2021
- January 2021
- December 2020
- November 2020
- October 2020
- September 2020
- August 2020
- July 2020
- June 2020
- May 2020
- April 2020
- March 2020
- February 2020
- January 2020
- December 2019
- November 2019
- October 2019
- September 2019
- August 2019
- July 2019
- June 2019
- May 2019
- April 2019
- March 2019
- February 2019
- January 2019
- December 2018
- November 2018
- October 2018
- September 2018
- August 2018
- July 2018
- June 2018
- May 2018
- April 2018
- March 2018
- February 2018

4 Minute Plank Tabata Challenge
Tabata workouts are a great way to improve endurance or if you are short on time. It’s a high intensity interval training (HIIT) workout that last about 4 minutes! There are many varied tabata style workouts that you can do, all you have to do is follow this simple guideline:
20 sec: work out
10 sec: rest
Complete 8 rounds
So for the first 20 seconds, you workout as hard as you can and then rest for 10 seconds. This is for one set. In total, you will complete 8 rounds. You can do whatever workout you would like that targets large muscle groups: burpees, squats, lunges, planks, etc.
For this particular tabata, we will be targeting the most love/hate muscle group - abdominal; using planks as the workout!
Feel free to pin the workout for later or download the PDF here!
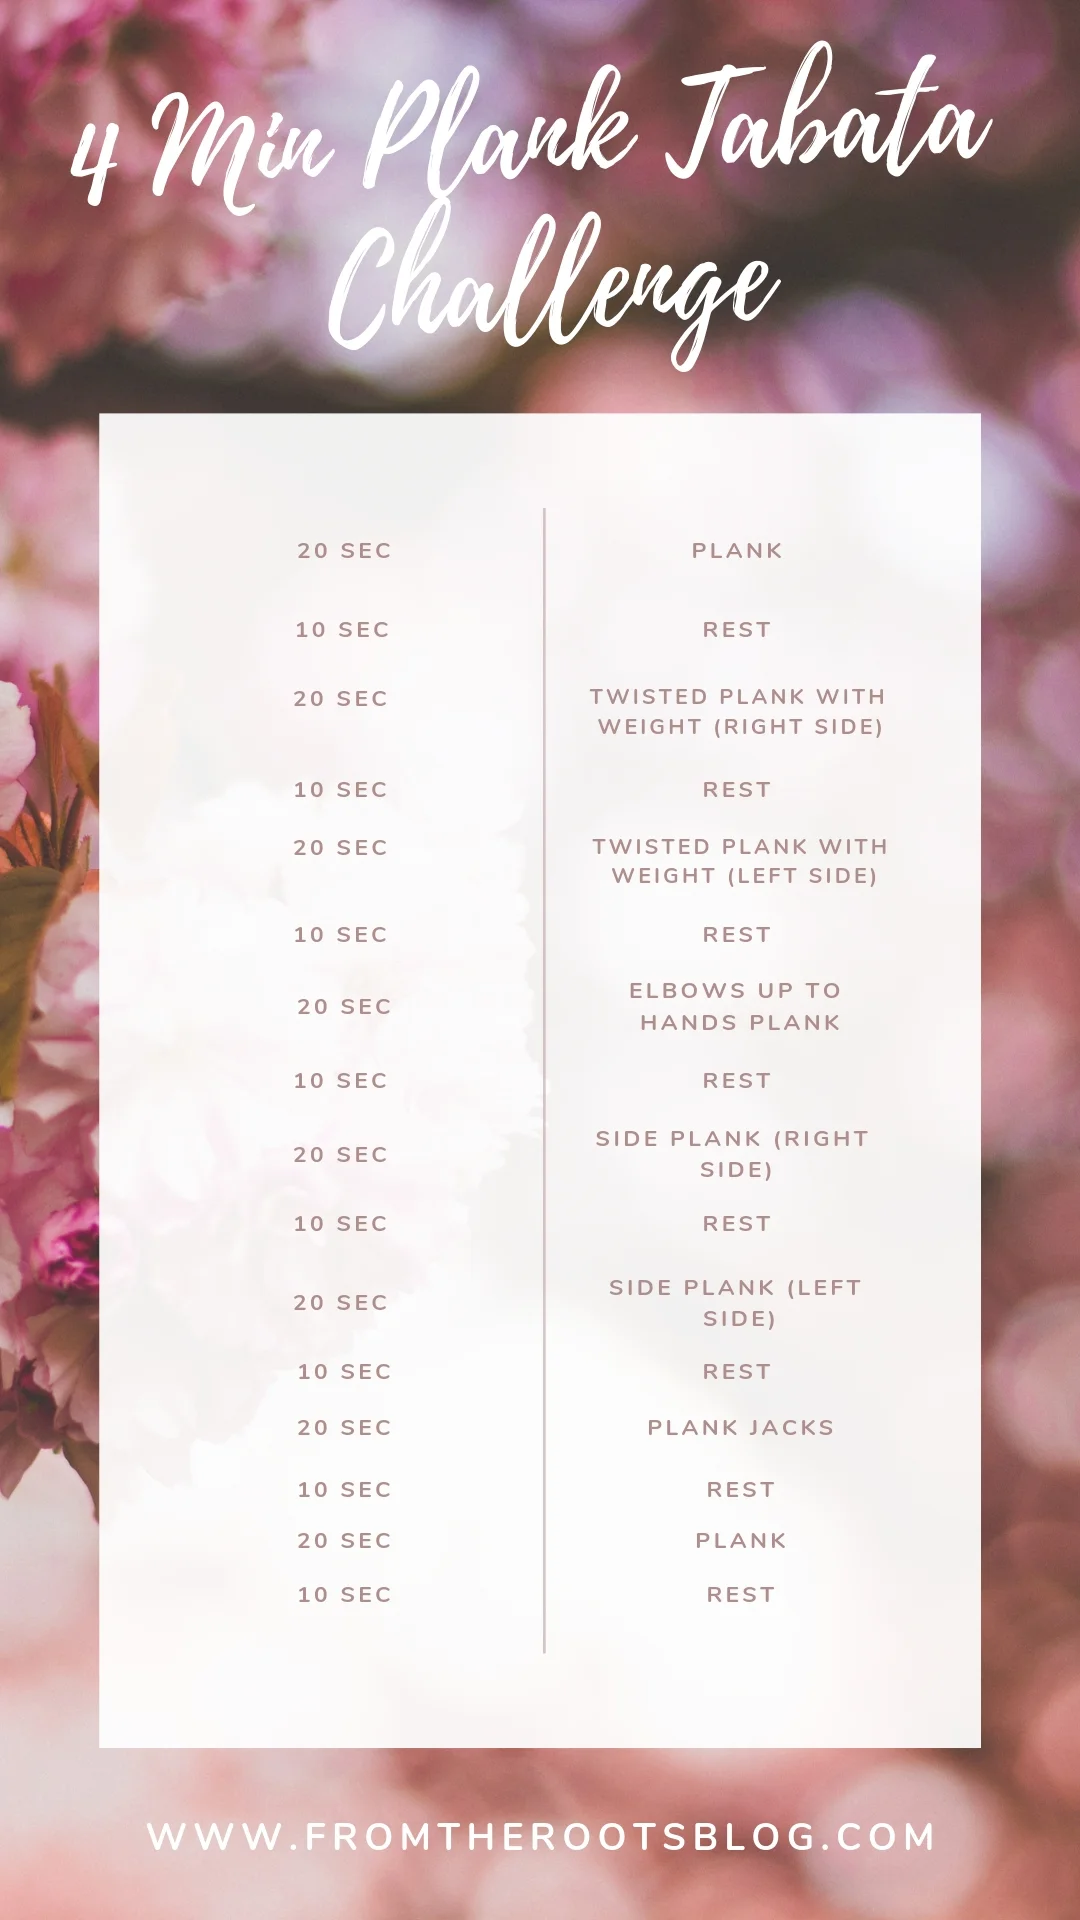

PLANK
Place the forearms on the ground with the elbows aligned below the shoulders. Arms should be parallel to the body at about shoulder-width distance. If flat palms bother your wrists (like mine!), clasp your hands together. This plank variation can be performed with straight arms!

TWISTED PLANK WITH WEIGHT
Starting in plank position, have your hands or elbows beneath your shoulders. Pivot to one side, raising the arm vertically above you as you twist. Pause and return to the starting position. You will perform both movements on the right and left side. Weights are optional but highly recommended!

ELBOWS UP TO HANDS PLANK
Starting in plank position, have your hands or elbows beneath your shoulders. One arm at a time, push yourself into a push-up position, arms fully extended beneath you. Lower yourself, one arm at a time, back down to the elbow plank starting position. Repeat this movement, alternating which side your lower first with each rep.

SIDE PLANK
Lie on one side with the legs stacked on top of one another then prop the body up on one hand or elbow. You will perform this movement for both right and left side.

PLANK JACKS
Starting in plank position, have your hands or elbows beneath your shoulders. Keep your core engaged, jump your feet out and in (like jumping jacks). (my feet kept slipping and I felt like I was going to hit the wall..lol…but remember to keep that plank position *flat back* throughout the movement)
If you try this workout, let us know! Leave a comment, rate it, and don’t forget to tag a photo to #fromtherootsblog on Instagram.

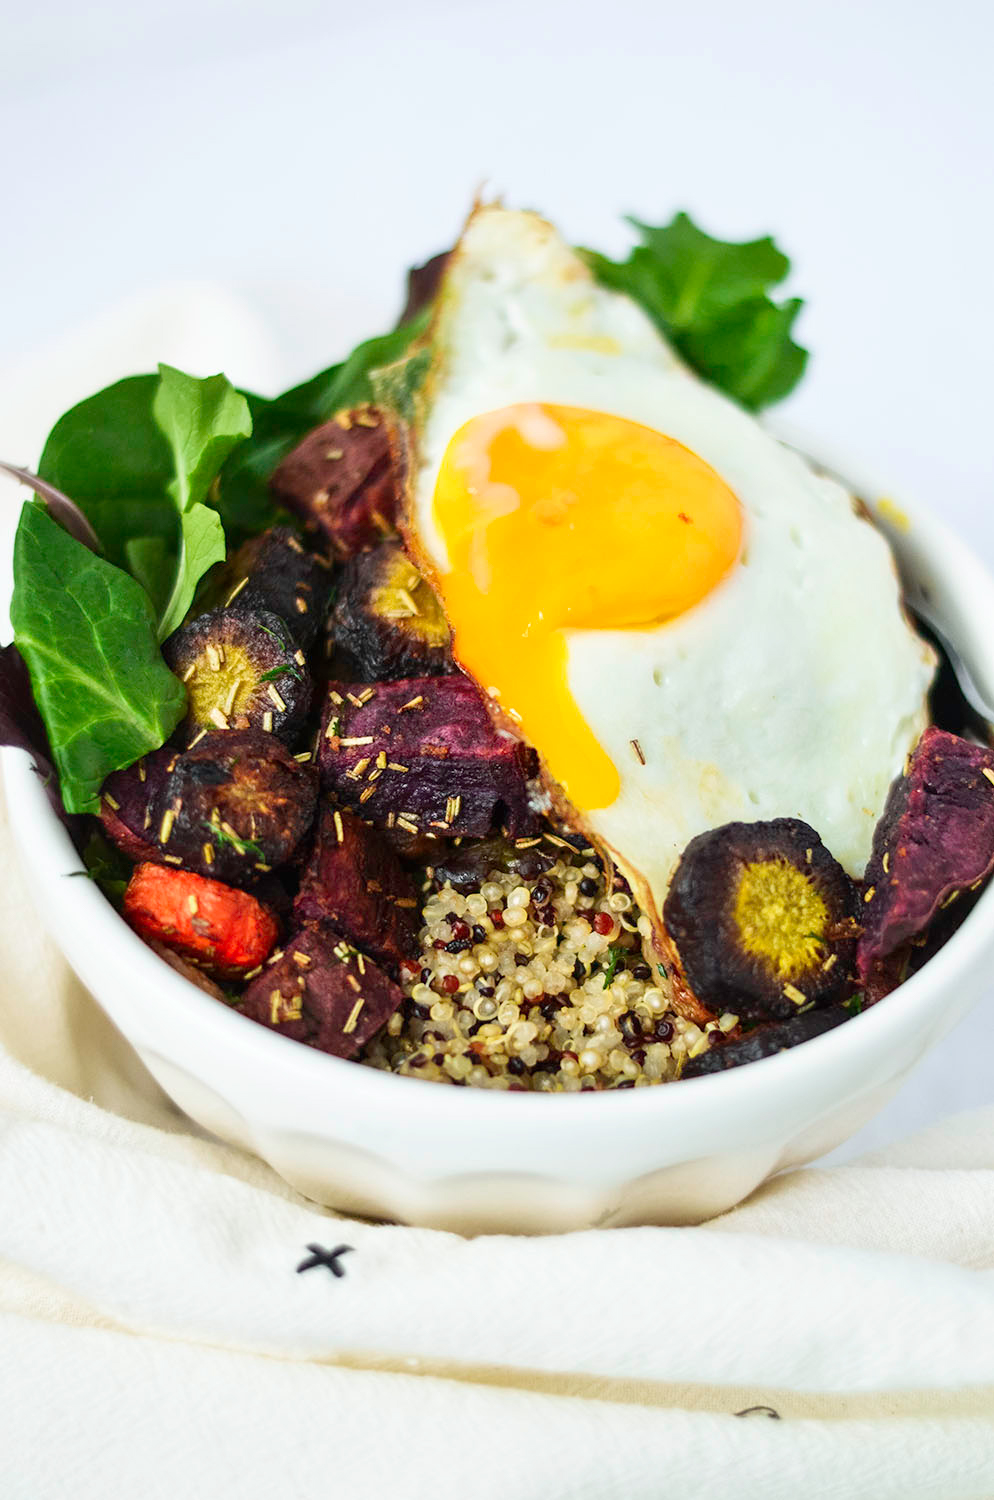
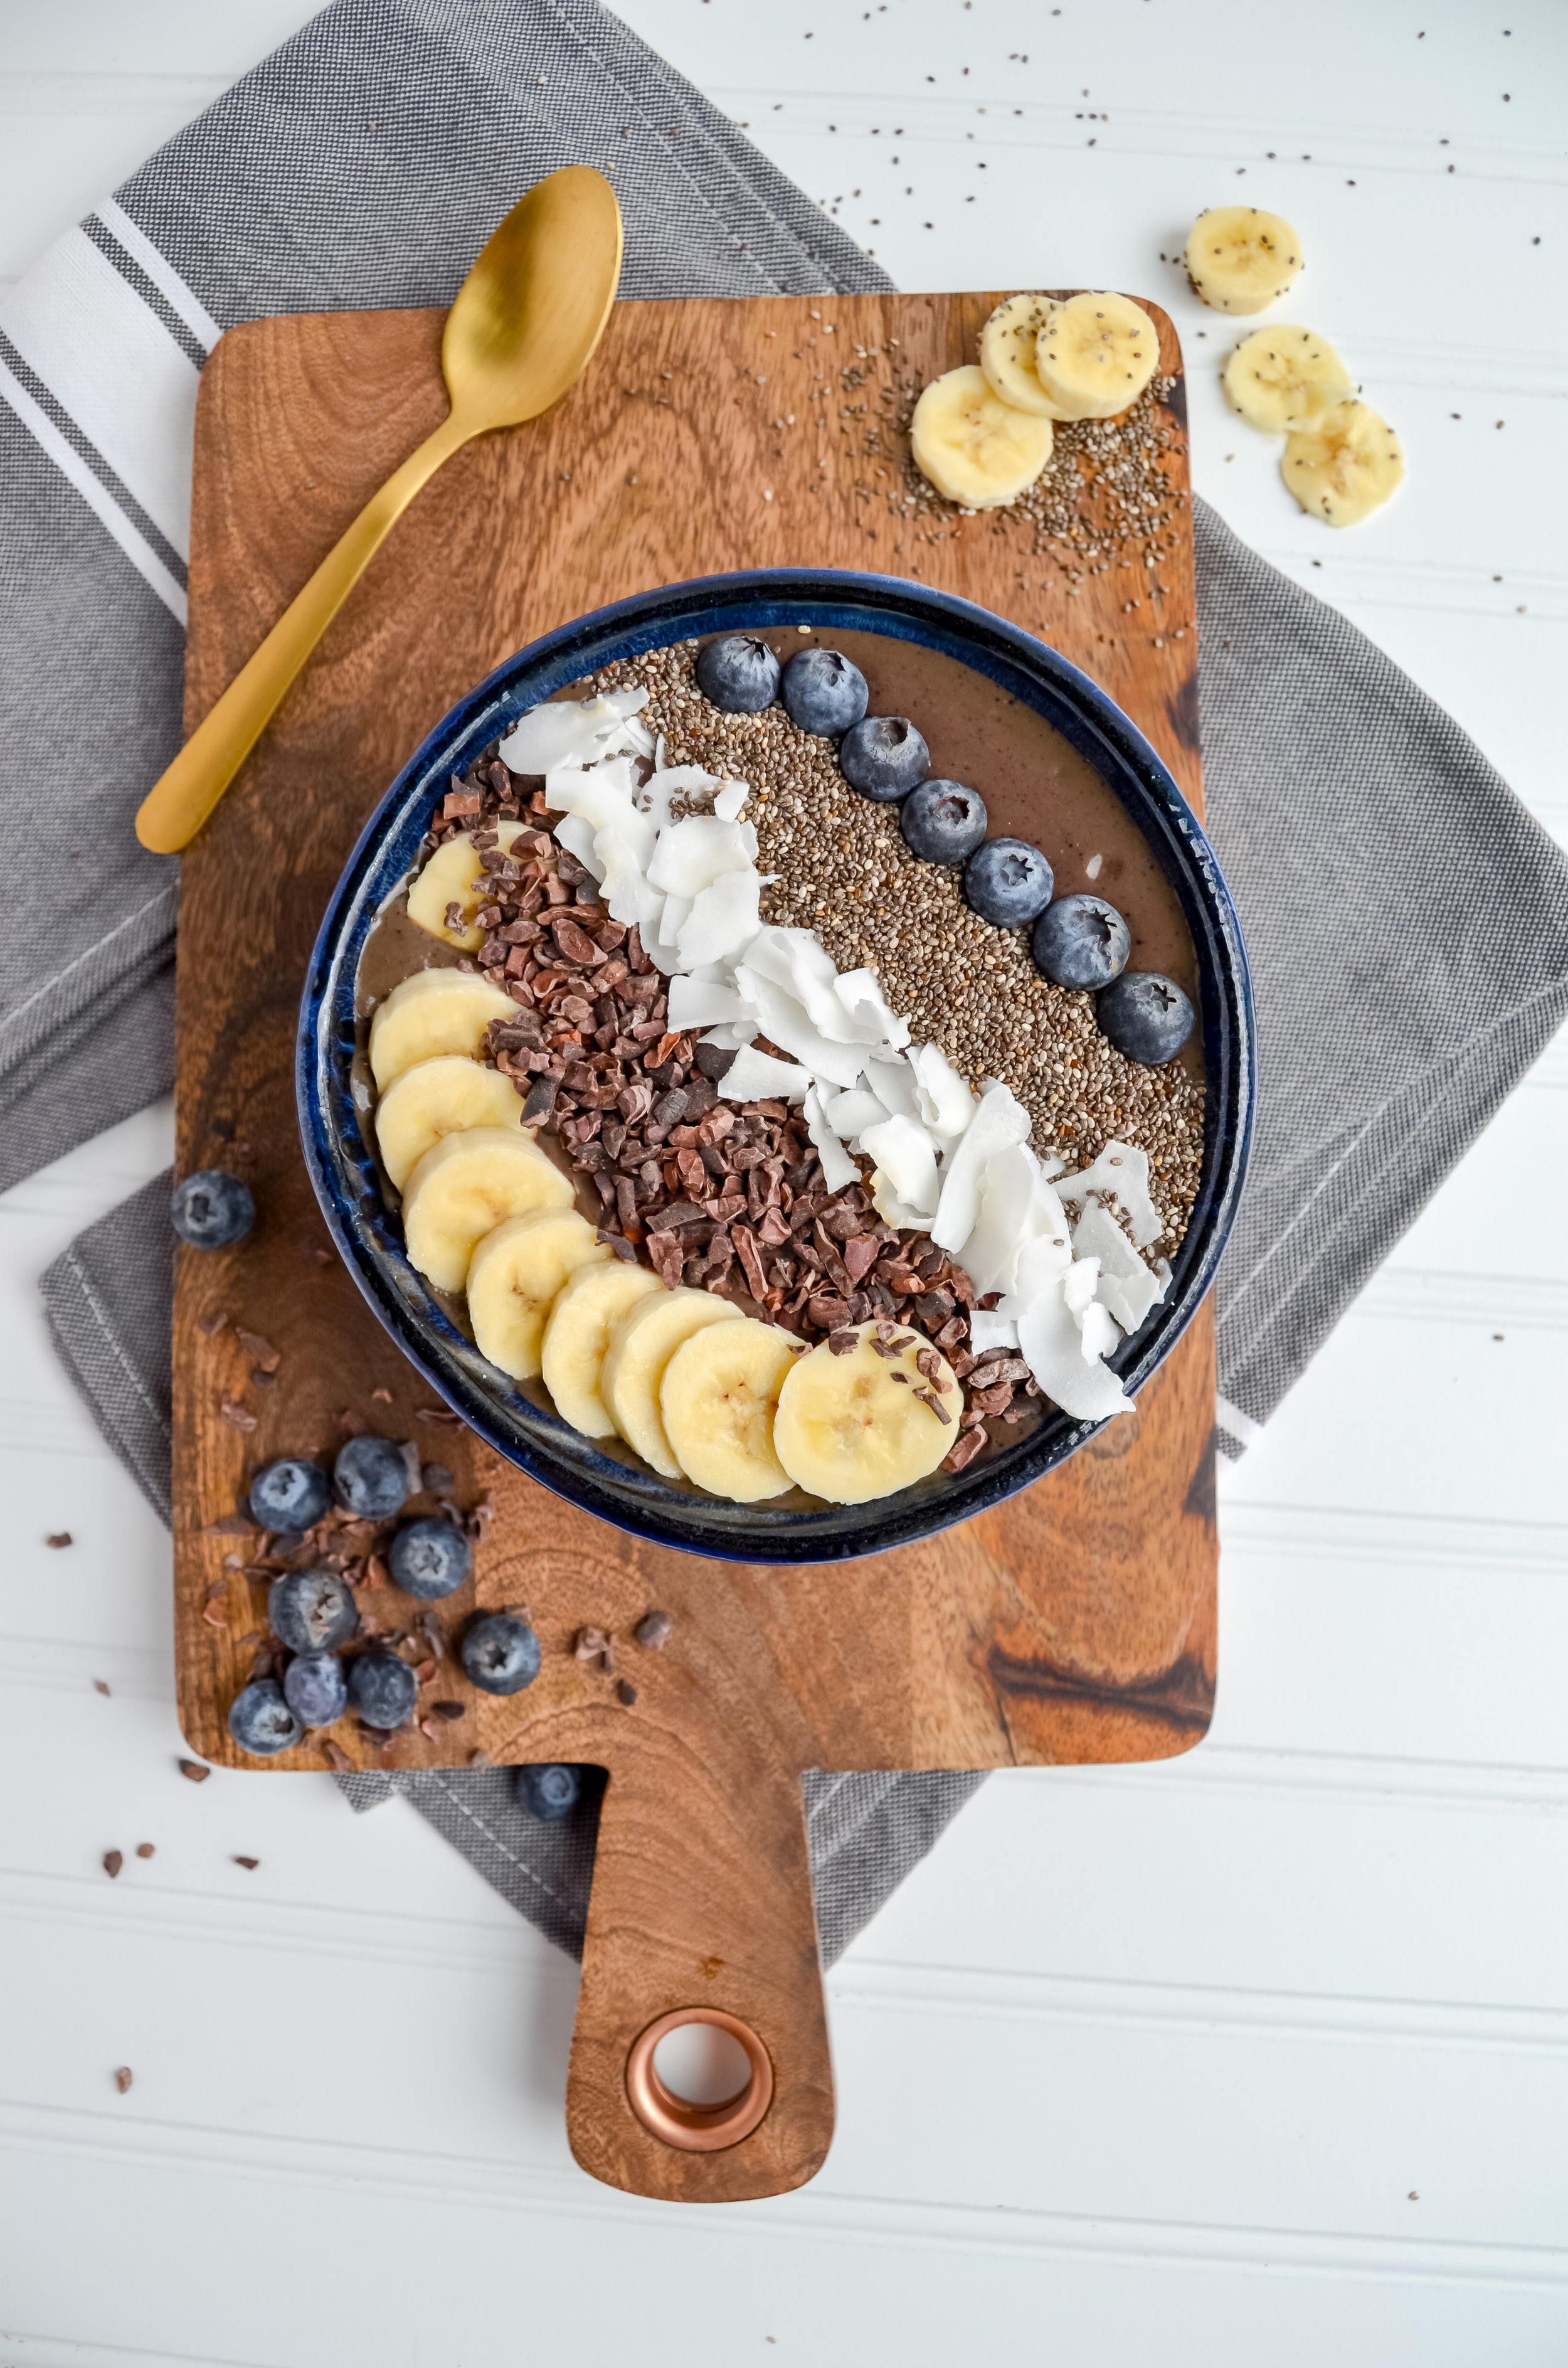
Quinoa Breakfast Bowls 2 Ways
I will be honest and say that I was somewhat apprehensive about implementing quinoa in my breakfast dishes. I’m just so used to adding quinoa to my buddha bowls or as a dinner side. I never thought you could use it for sweet dishes but once I caved, I’ve never gone back.
Quinoa is an excellent versatile option for breakfast. You can make it sweet, like I have discovered, or you can keep it savory.
This recipe is fun and so easy to incorporate for your breakfast meal prep. You can simply cook up four servings, taking ½ cup from that to do whatever your heart's desire.
If you want to lean towards the savory side of the quinoa breakfast bowl then you can add roasted veggies, greens, a fried egg, half of an avocado, and possibly another protein source.
Quinoa Breakfast Bowls 2 Ways - A healthy and hearty way to start your morning; sweet or savory!

I will be honest and say that I was somewhat apprehensive about implementing quinoa in my breakfast dishes. I’m just so used to adding quinoa to my buddha bowls or as a dinner side. I never thought you could use it for sweet dishes but once I caved, I’ve never gone back.
Quinoa is an excellent versatile option for breakfast. You can make it sweet, like I have discovered, or you can keep it savory.
This recipe is fun and so easy to incorporate for your breakfast meal prep. You can simply cook up four servings, taking ½ cup from that to do whatever your heart's desire.
If you want to lean towards the savory side of the quinoa breakfast bowl then you can add roasted veggies, greens, a fried egg, half of an avocado, and possibly another protein source.

For something sweet, add cocoa powder, plant-based milk, honey, nut butter, superfood toppings, and assorted fruits.


Whatever way you prefer, quinoa is very easy to incorporate into your diet and pairs well with many foods. It’s gluten-free, high in protein, and one of the few plant foods that contains a sufficient amount of all nine essential amino acids.
If you try this recipe, let us know! Leave a comment, rate it, and don’t forget to tag a photo to #fromtherootsblog on Instagram. We love seeing what you come up with!
Quinoa Breakfast Bowls 2 Ways - A healthy and hearty way to start your morning; sweet or savory!
Sweet Way
½ cup cooked quinoa
1 cup plant-based milk
2 tsp cocoa powder
1 Tbsp honey or pure maple syrup
1 Tbsp nut butter
Toppings
Fruits, coconut flakes, chia seeds, hemp seeds, dairy-free yogurt, dark chocolate
Savory Way
½ cup cooked quinoa
Small handful of assorted greens
Fried egg
Roasted veggies
Half of an avocado
Toppings
Hemp seeds, hot sauce, nutritional yeast flakes, lemon, salt and pepper
How to cook quinoa
Rinse quinoa in a fine mesh sieve until water runs clear. Drain and transfer to a medium pot.
Add 2 cups water, pinch of salt and bring to a boil.
Cover, reduce heat to medium low and simmer until water is absorbed (about 15-20 minutes).
Set aside off heat for 5 minutes. Uncover and fluff with a fork. Makes 4 servings.
You could also follow the same process but in a rice cooker.


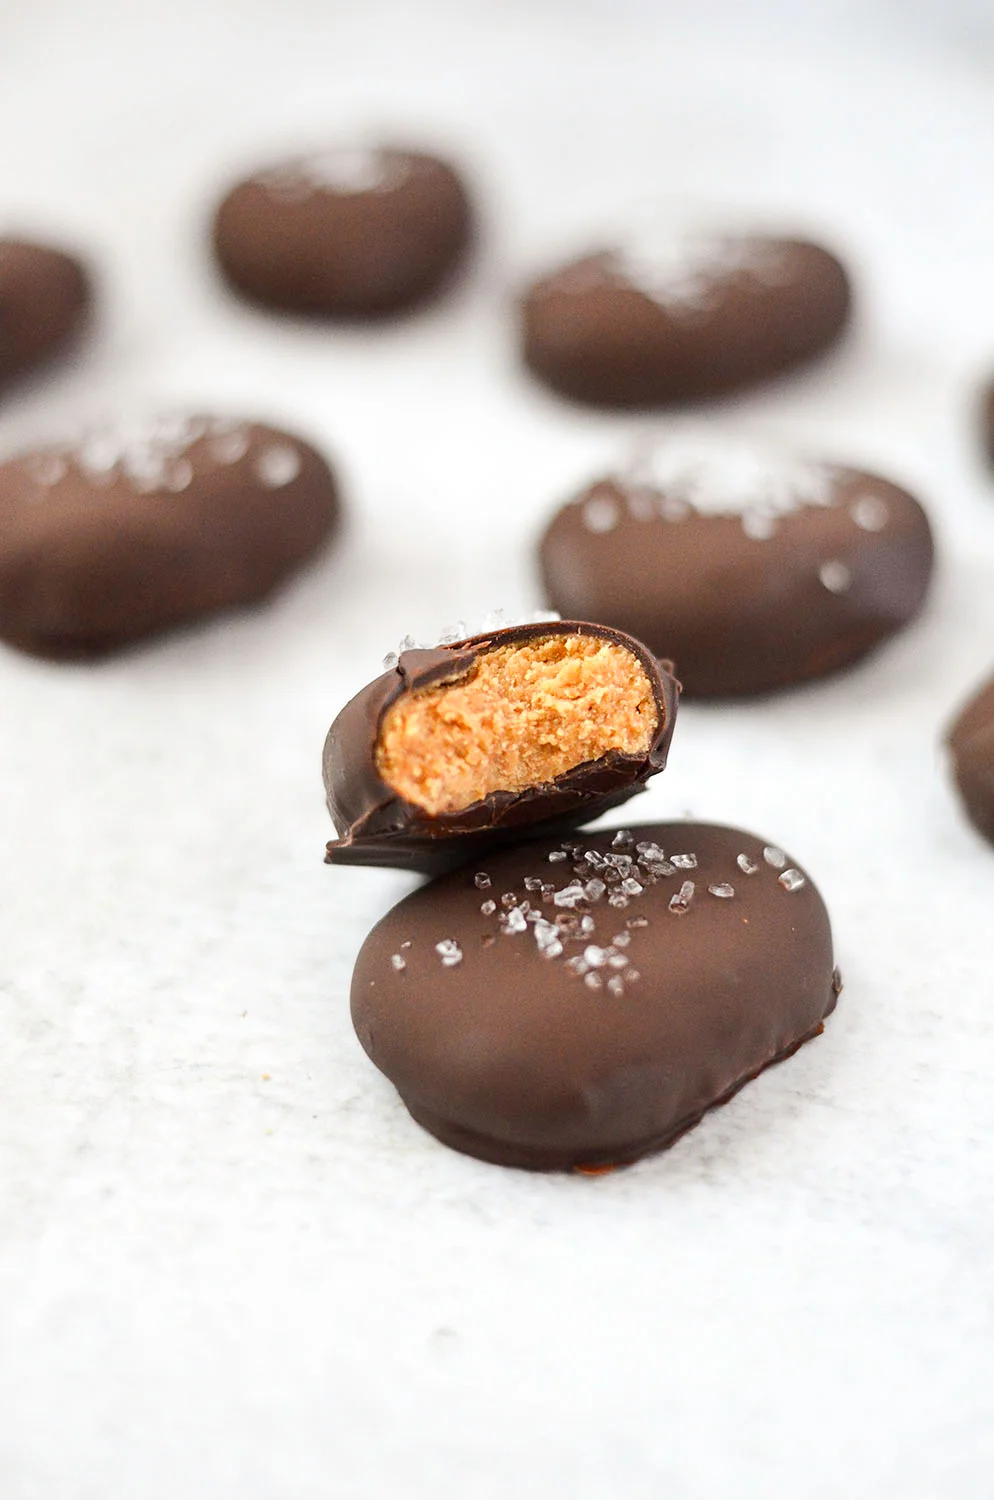
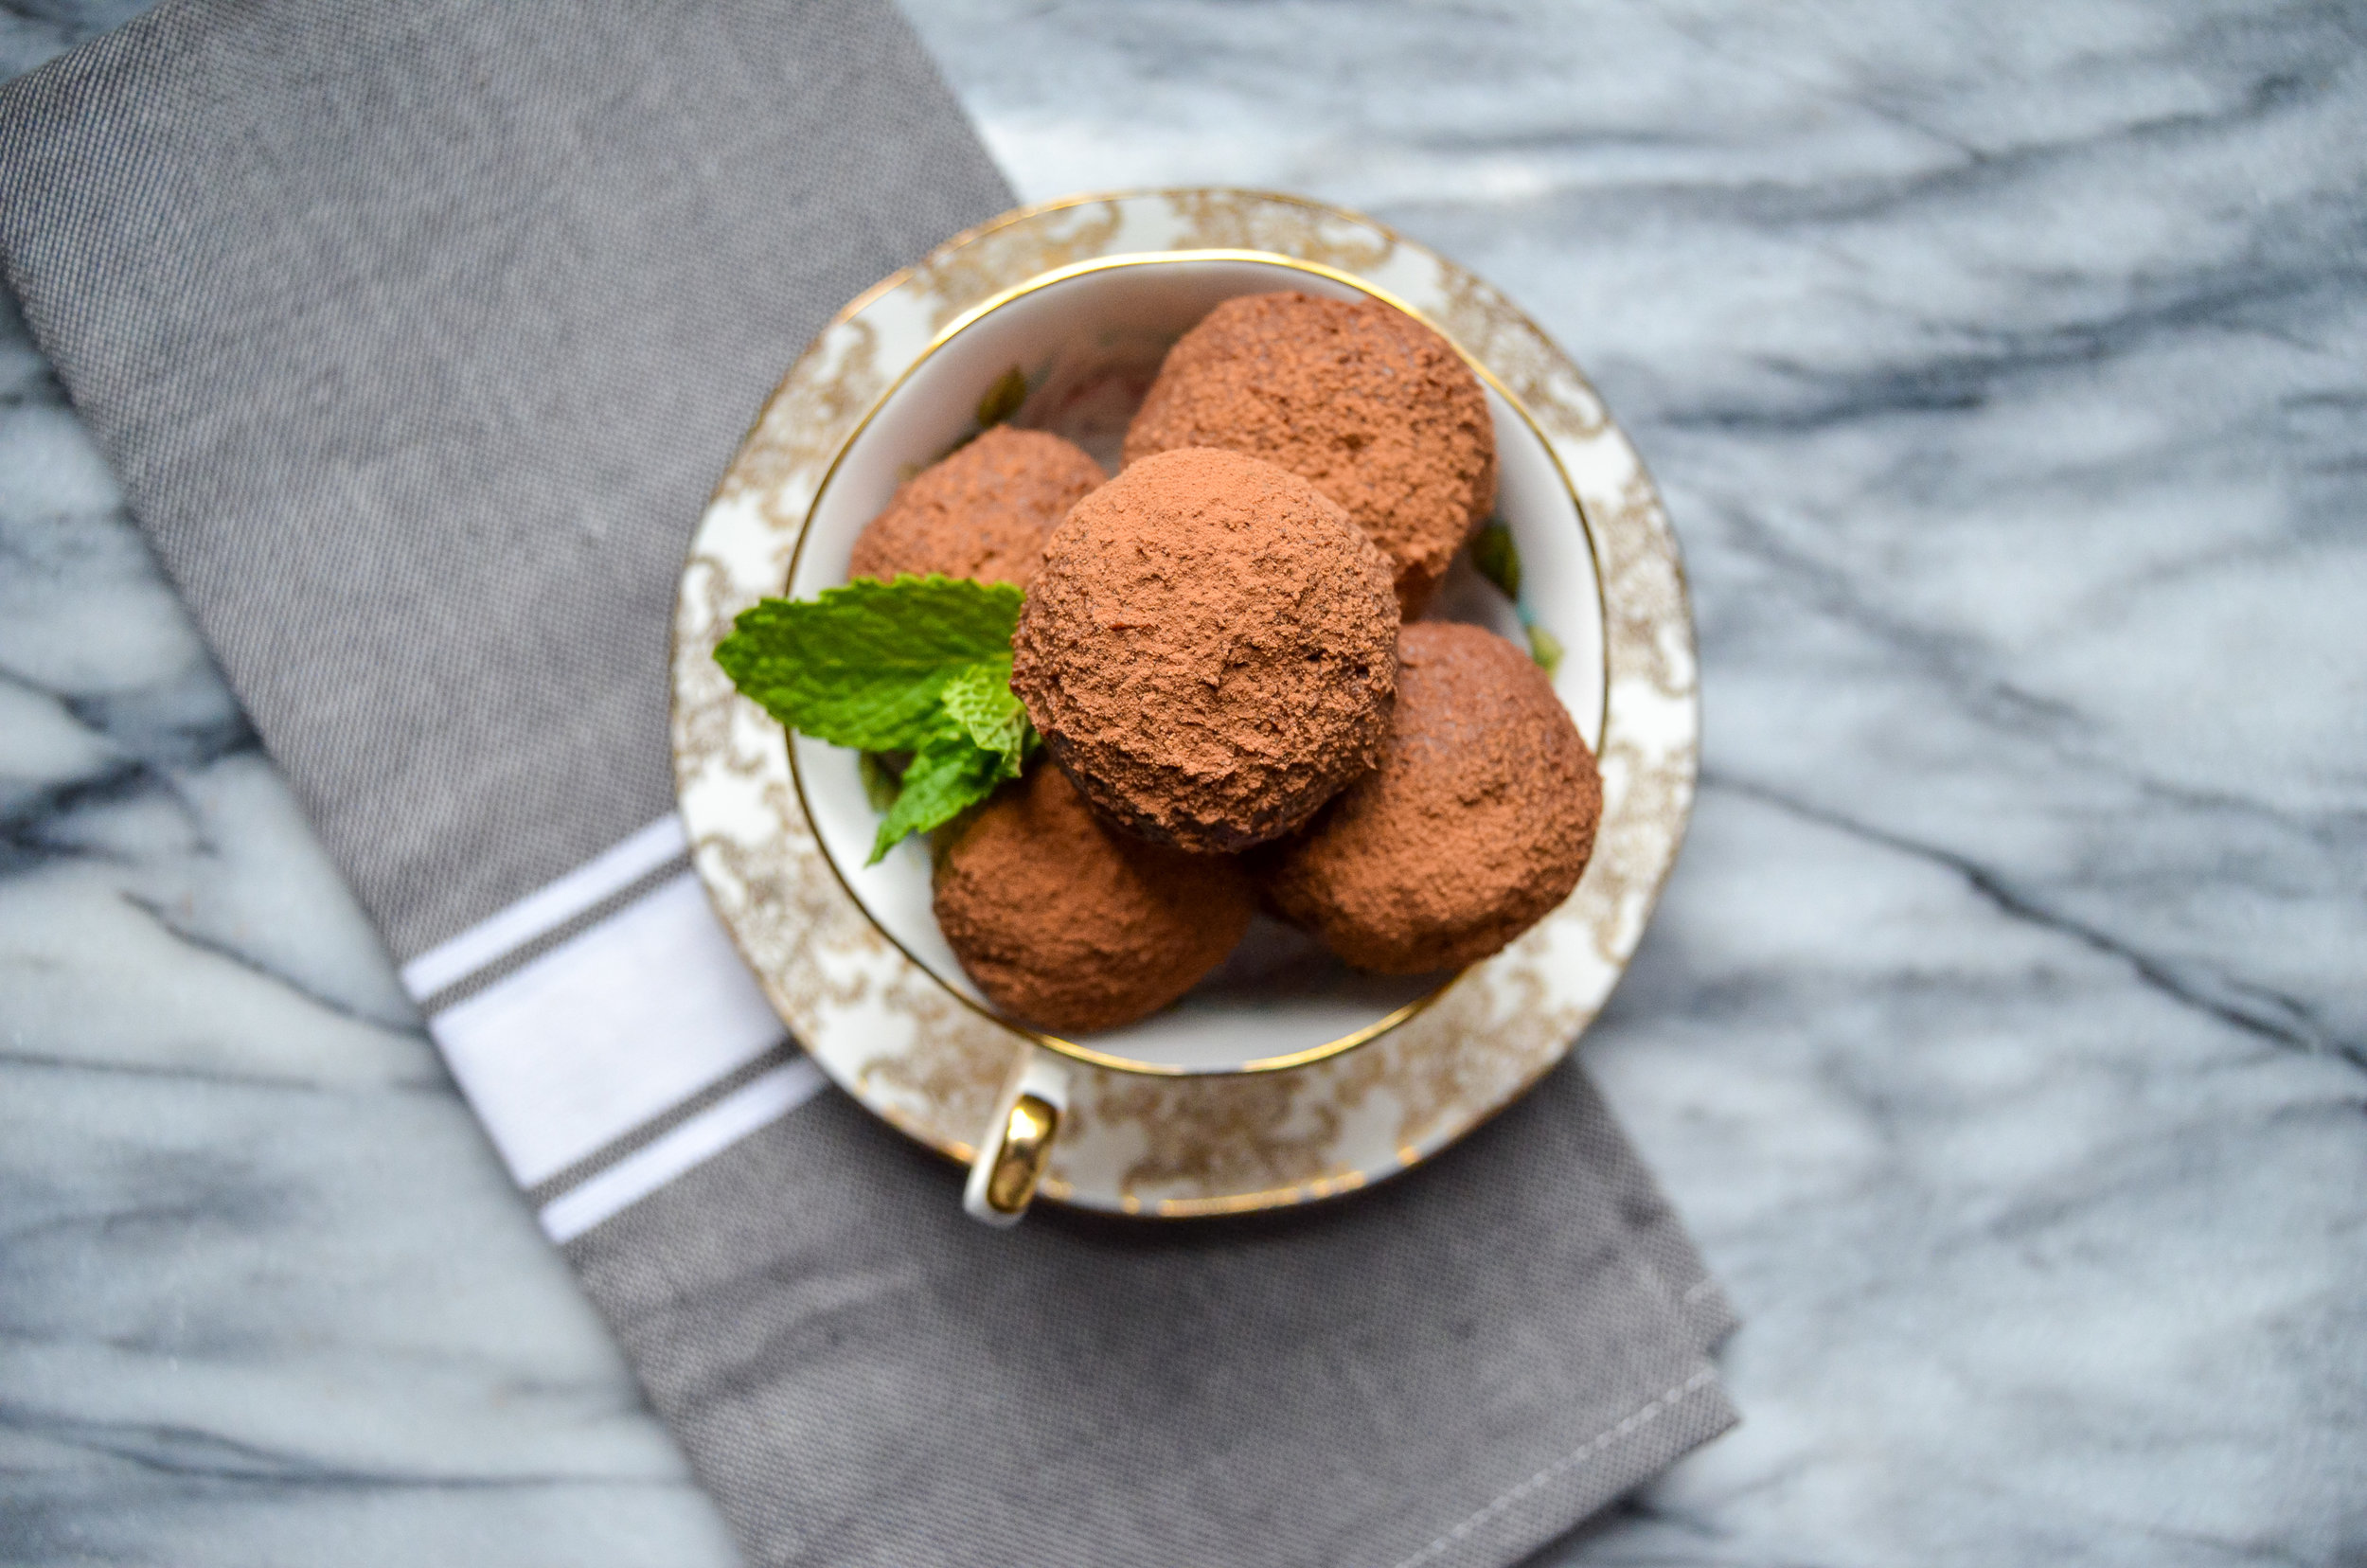
Healthy Reese's Peanut Butter Eggs
Growing up as a kid, Reese’s peanut butter eggs were always included in the Easter basket. Of course, there would also be a typical stuffed bunny or chick, a book or cute Easter pencils, and other candy (lots of it!) but the Reese’s eggs were my favorite.
I guess this recipe stems from nostalgia. As adults, we aren’t getting Easter baskets anymore. Instead, we may be the one putting them together! The good news is that I don’t have to wait around like I did as a child because I can now make them at home!
Healthy Reese’s Peanut Butter Eggs - Healthier version of the classic Reese’s peanut butter eggs sans refined sugar. Dairy-free, gluten-free, and vegan!

Growing up as a kid, Reese’s peanut butter eggs were always included in the Easter basket. Of course, there would also be a typical stuffed bunny or chick, a book or cute Easter pencils, and other candy (lots of it!) but the Reese’s eggs were my favorite

I guess this recipe stems from nostalgia. As adults, we aren’t getting Easter baskets anymore. Instead, we may be the one putting them together! The good news is that I don’t have to wait around like I did as a child because I can now make them at home!

What makes this situation better is that the recipe is made with only 5 ingredients. These healthy Reese’s peanut butter eggs are gluten-free, dairy-free, and vegan with no refined sugars!

I started recipe testing these back in February for an Easter post, but what I found is that these can be made any time of the year. You can definitely shape these into eggs for the Easter or simply make them into balls. Whatever you end up doing, you will soon find that these are super addicting!
I like to store the peanut butter eggs in the freezer for those random sweet tooth moments, but if you are eating them that week, then the fridge is fine too!


If you try this recipe, let us know! Leave a comment, rate it, and don’t forget to tag a photo to #fromtherootsblog on Instagram. We love seeing what you come up with!
Makes 8-9 eggs.
Ingredients
½ cup peanut butter
¼ cup coconut flour
2 Tbsp maple syrup
½ cup dark chocolate
1 Tsp coconut oil
Directions
In a small bowl, combine peanut butter, coconut flour, and maple syrup. The mixture should be firm and tacky. If the mixture is runny, slowly add more coconut flour.
Scoop out 1 tablespoon of the mixture. Form the egg shape by rolling a ball and then placing the ball onto a small baking sheet lined with parchment paper. Press down onto ball until flat, then shape the top part where it makes a point.
Transfer tray to the freezer for 10 minutes.
While the eggs are setting in the freezer, combine chocolate and coconut oil into a small bowl. Place the bowl in the microwave and melt chocolate in 30 second increments until smooth and melted.
Take the tray out of the freezer and use a fork to dip each egg into melted chocolate. Make sure the egg is fully coated. Transfer back to parchment lined baking sheet and top with coarse sea salt if desired.
Immediately place baking sheet back into the freezer for 30 minutes to 1 hour.
Store in freezer for long term or fridge if eating immediately to one week.
Notes
You can use honey instead of maple syrup if not vegan.
Feel free to try other types of nut/seeds butter for this recipe! Just make sure you slowly add in the coconut flour so that the mixture isn’t too runny or too dry.
If dairy isn’t an issue for you, you can sub out the dark chocolate for milk chocolate. I made these using milk chocolate for my husband and he says that it taste closer to Reese’s eggs.


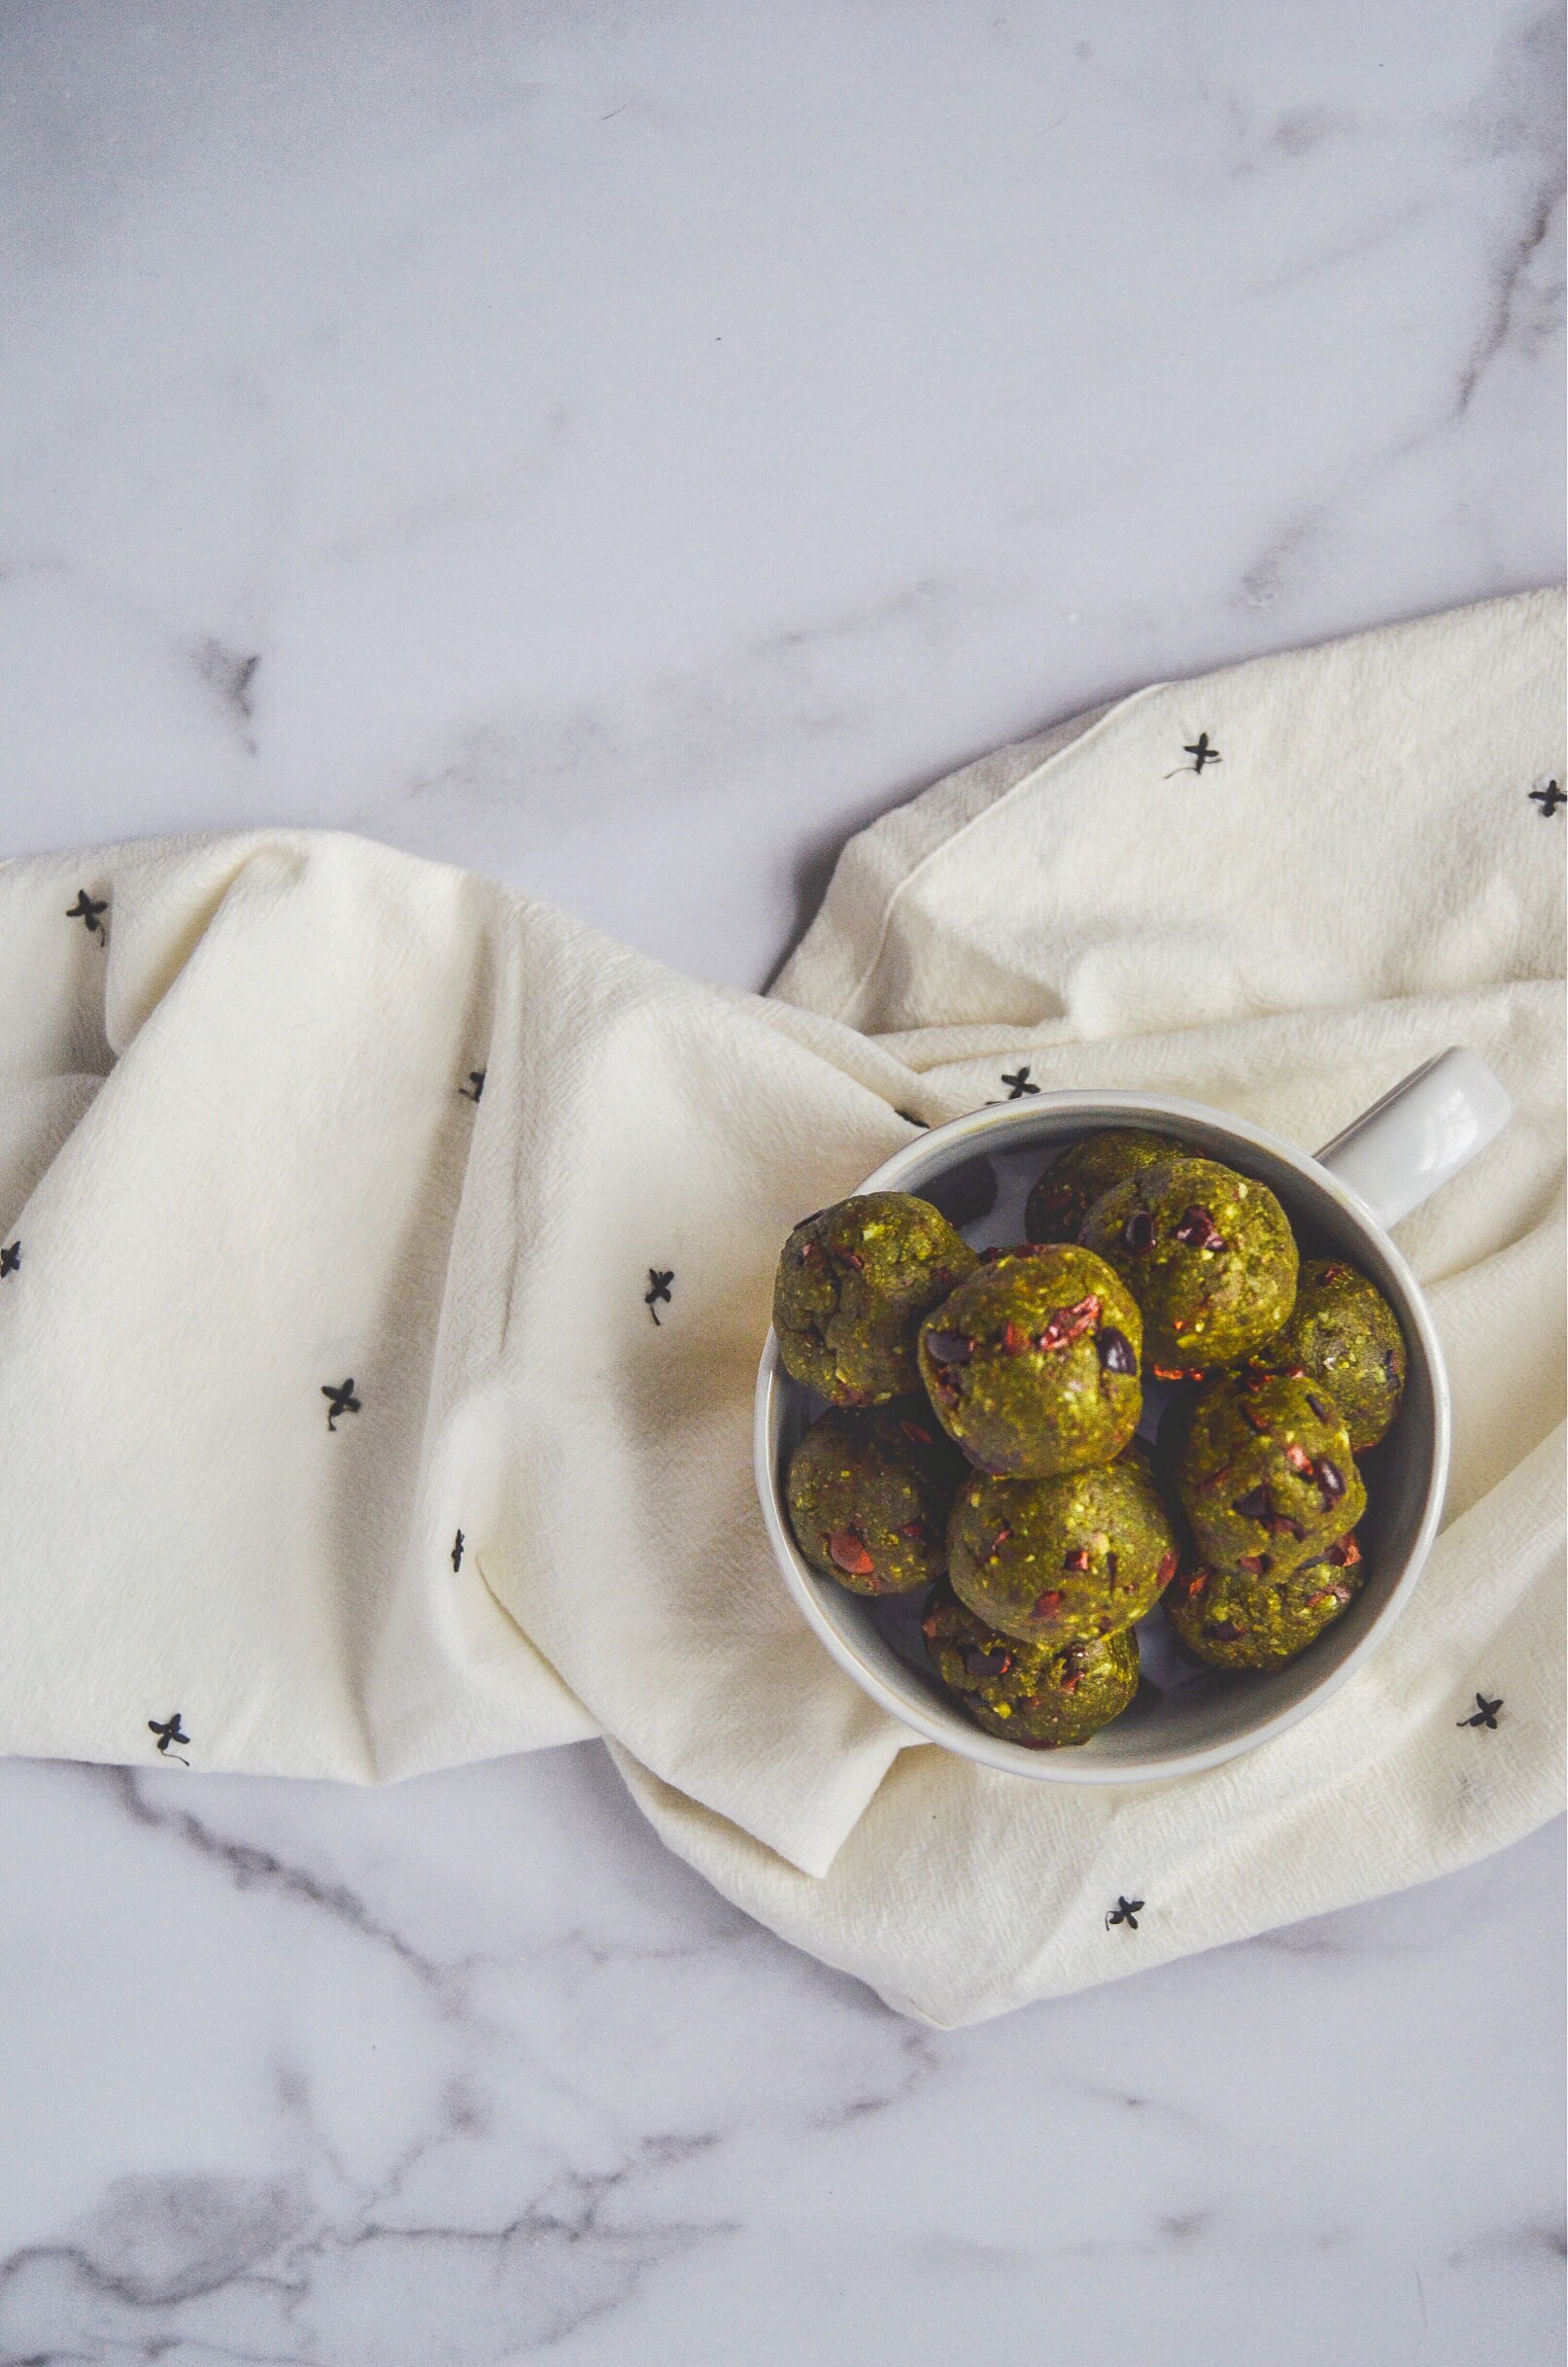
Chocolate Hummus
I’m not sure why I waited so long to jump on the “sweet hummus” train. At first, it sounded like a weird concept. Who would add sweet ingredients to chickpeas, olive oil, tahini, and lemon!? But once you take out certain ingredients and replace them with sweet substitutes, you can see how genius this concept actually is!
In the health world, you can find tahini and chickpeas in most vegan desserts. If you follow Ambitious Kitchen, you know she is the #tahiniqueen for all of her most recent desserts like my personal fav grain free tahini brownies.
What’s great about this hummus is…. it’s still hummus! Which means you can eat this as a snack, use as a spread, or for dessert and still feel good about yourself.
Chocolate hummus - The perfect healthy sweet treat! Vegan, gluten-free, and dairy-free.

I’m not sure why I waited so long to jump on the “sweet hummus” train. At first, it sounded like a weird concept. Who would add sweet ingredients to chickpeas, olive oil, tahini, and lemon!? But once you take out certain ingredients and replace them with sweet substitutes, you can see how genius this concept actually is!
In the health world, you can find tahini and chickpeas in most vegan desserts. If you follow Ambitious Kitchen, you know she is the #tahiniqueen for all of her most recent desserts like my personal fav grain free tahini brownies.
What’s great about this hummus is…. it’s still hummus! Which means you can eat this as a snack, use as a spread, or for dessert and still feel good about yourself.

I mentioned this in my IG stories a few weeks back but in order to create a super creamy hummus, you need to boil the chickpeas with baking soda until the chickpeas become mushy.
I have stayed true to this tip for both my savory hummus like roasted beet hummus, and this one. The only downside of this trick is that your hummus will be lighter in color, but sometimes choosing texture over aesthetics is better.
By making a creamy hummus you could almost use this as an icing! I think I might be onto something here. So, while I figure out how to make a chocolate cake to go with this hummus, how ‘bout you check out how to make this chocolate hummus?

Feel free to add fresh strawberry sauce as the “olive oil” and chocolate chips and cacao nibs as garnish!

Looking for a protein boost?
When it comes to desserts or sweet snacks, I always seek opportunities to incorporate additional protein, such as protein powder. One of my top choices for enhancing chocolate hummus is Equip Foods' chocolate Prime Protein. This clean protein powder is one I personally use and recommend to my nutrition and personal training clients. If you're interested in increasing your protein intake, be sure to check them out and use code ROOTS to enjoy 15% off your first order today!
When using protein powder in your recipe, consider adding a scoop to your mixture. You might need to adjust the consistency by incorporating some water to achieve that perfect hummus texture, as omitting this step may result in a drier hummus.
If you try this recipe, let us know! Leave a comment, rate it, and don’t forget to tag a photo to #fromtherootsblog on Instagram. We love seeing what you come up with!
Chocolate hummus - The perfect healthy sweet treat! Vegan, gluten-free, and dairy-free.
INGREDIENTS
1 canned chickpeas (washed and drained)
¼ cup tahini
¼ cup cocoa powder
2 Tbsp pure maple syrup
1 tsp vanilla extract
Pinch of salt
DIRECTIONS
Place chickpeas in a medium saucepan with ½ tsp baking soda. Cover the chickpeas with several inches of water, then bring to a boil over high heat. Boil for about 20 minutes or until the chickpeas look bloated, soft, and their skins are falling off. In a fine mesh strainer, drain the chickpeas and run cool water over them.
Add the chickpeas to a food processor along with the rest of the ingredients.
Blend until the mixture is thick and creamy. Scrape down the sides and add more water as necessary.
Pour into a bowl and serve with various fruits, pretzels, and cinnamon sugar pita chips!
NOTES
You can make this hummus without having to boil the chickpeas. The hummus may just be chunkier but the flavor is still there!
Looking for more protein? Refer to the notes above for my top protein booster recommendations along with some discounts!


All Natural Citrus Cleaner
I wish I could say that I was the one who created this amazing citrus cleaner but that would be a lie if I did. If you search “citrus cleaner” or “DIY citrus peel cleaner” on Google then you will get this recipe. The reason why I am showing you this is because the recipe actually works and it aligns with my core values -- clean ingredients for food and home!
All natural citrus cleaner - Can be used on most surfaces and is made with ingredients you already have on hand!

I wish I could say that I was the one who created this amazing citrus cleaner but that would be a lie if I did. If you search “citrus cleaner” or “DIY citrus peel cleaner” on Google then you will get this recipe. The reason why I am showing you this is because the recipe actually works and it aligns with my core values -- clean ingredients for food and home!


I also do not like wasting food so this is a perfect solution. While there are many uses in repurposing citrus peels, the number one thing I do is to create another batch of citrus cleaner. For every orange eaten for breakfast or for every lime used for tacos (or margaritas!), I add the peels to a large mason jar and fill to the top with white distilled vinegar.

Most pantries are stocked with white distilled vinegar but if you don’t have any, that’s fine - a large jug will cost you about $2 at most grocery stores and will last you a long time! It is best for the peels and vinegar to sit for a minimum of two weeks. You can also mix things up by adding fancy herbs or essential oils.

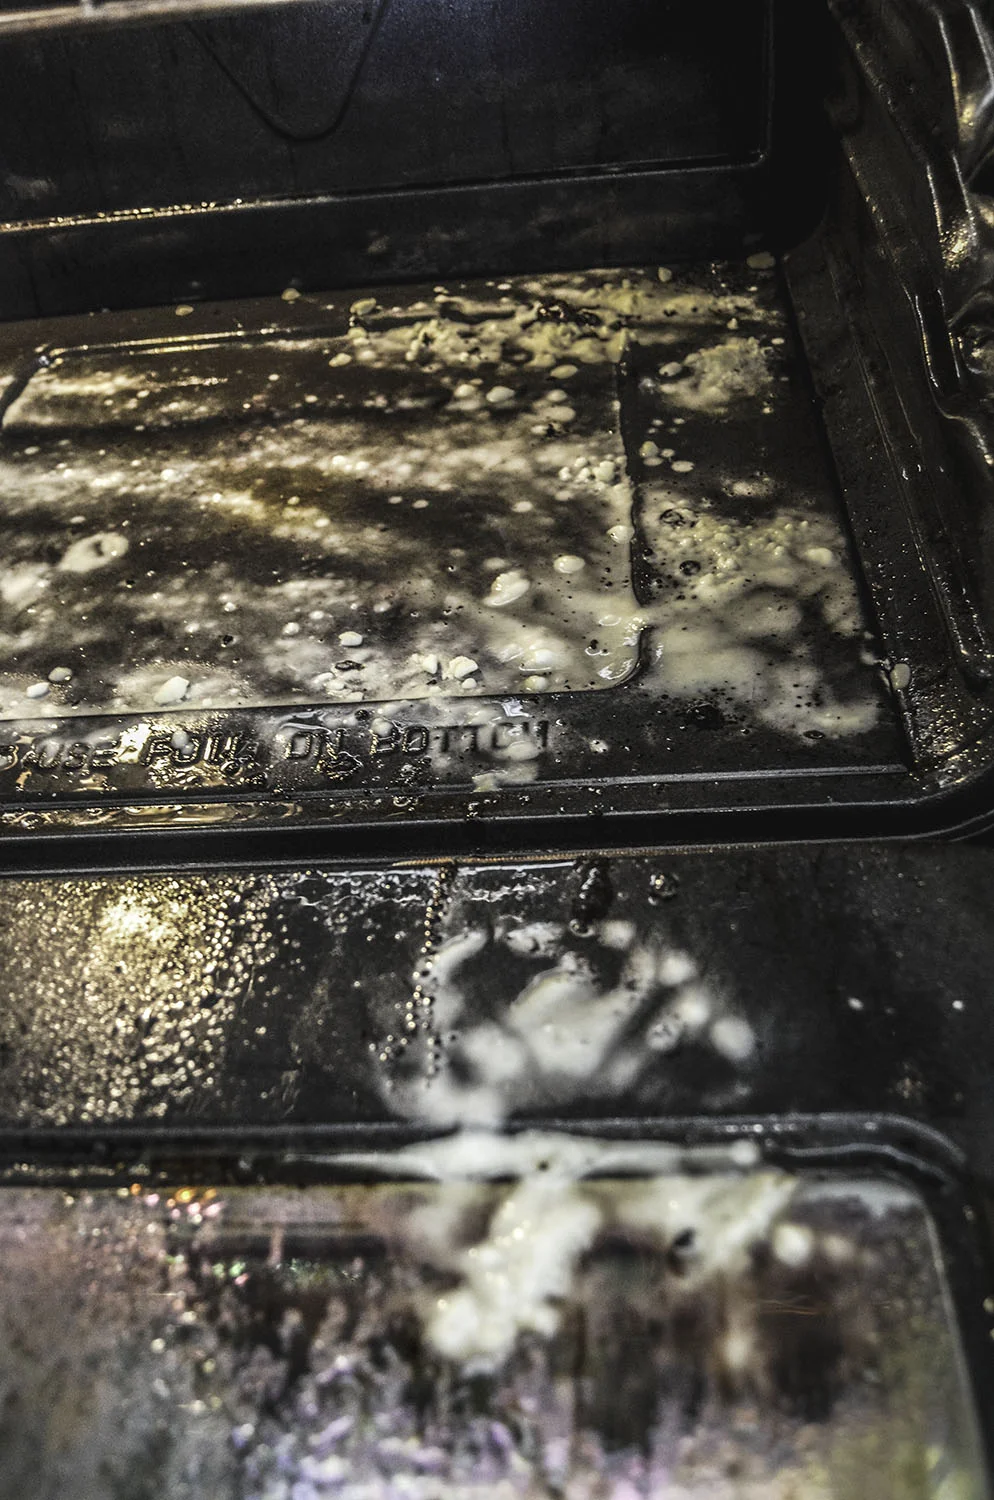
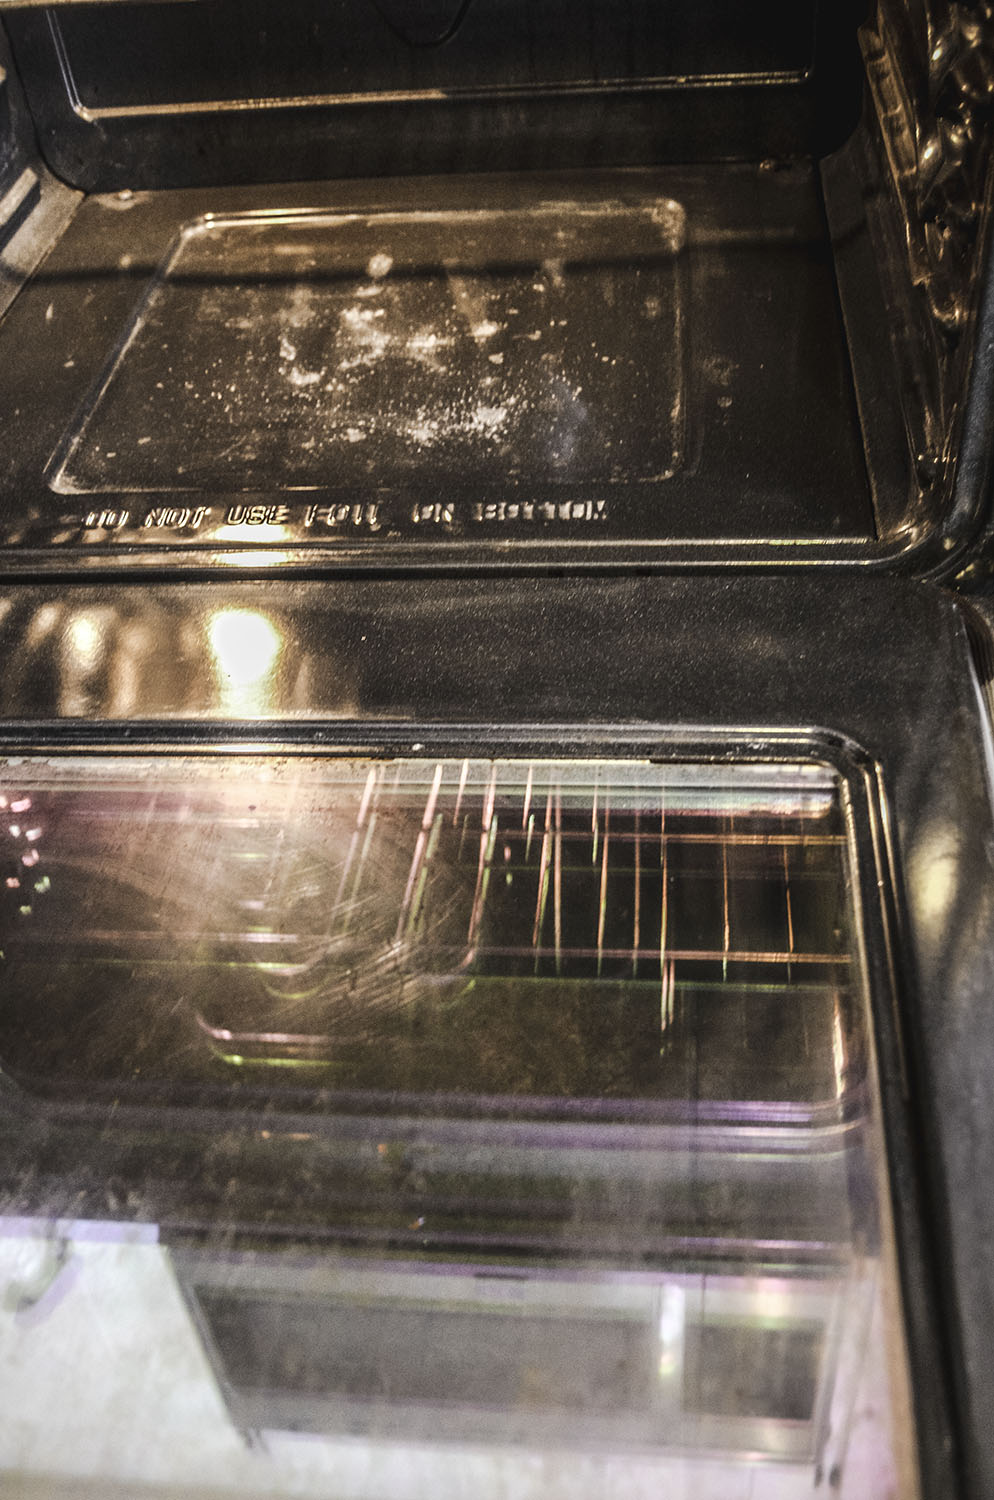
My favorite part about this citrus cleaner? It’s a genie in the oven!
Our oven has never been the best but when we moved into our home, the bottom of the inside was absolutely awful. Every time you turned the oven on, a burning smell would emit. I tried all kinds of cleaners with no success... until I tried this! You will need to use baking soda in addition to the cleaner. Just cover the area with baking soda, spray the citrus cleaner over the soda, and let sit for at least 30 minutes. Soon enough, you, my friend, will have a clean surface again! (after picture - the center are scrape marks from previous owner :/ )

With that said, if you’re not sure whether the mixture is ready to use, spray the mixture over fresh baking soda. If the baking soda doesn’t activate then you know the citrus cleaner needs to sit for a little longer.
If you try this recipe, let us know! Leave a comment, rate it, and don’t forget to tag a photo to #fromtherootsblog on Instagram. We love seeing what you come up with!
INGREDIENTS
1 large mason jar
Citrus peels from 4-5 assorted citrus
White distilled vinegar
DIRECTIONS
Put orange peels into mason jar
Fill jar with white distilled vinegar until peels are fully submersed.
Place tight fitting lid on.
Store in a dark place for at least 2 weeks.
Strain the liquid and pour mixture into a spray bottle; about halfway full.
Add water to fill up the rest of the half until full.
NOTES
All natural citrus cleaner is great as an all purpose cleaner that you can use on most countertops, glass windows, and ovens. Please note that this cleaner contains a high acid content that may not be suitable for marble, stone surfaces, and granite countertops.