Sort by Category
- October 2025
- September 2025
- August 2025
- June 2025
- August 2024
- July 2024
- June 2024
- May 2024
- February 2024
- January 2024
- December 2023
- November 2023
- October 2023
- September 2023
- August 2023
- July 2023
- March 2023
- February 2023
- January 2023
- December 2022
- November 2022
- October 2022
- September 2022
- August 2022
- June 2022
- May 2022
- April 2022
- March 2022
- February 2022
- January 2022
- December 2021
- November 2021
- October 2021
- September 2021
- August 2021
- July 2021
- June 2021
- May 2021
- April 2021
- March 2021
- February 2021
- January 2021
- December 2020
- November 2020
- October 2020
- September 2020
- August 2020
- July 2020
- June 2020
- May 2020
- April 2020
- March 2020
- February 2020
- January 2020
- December 2019
- November 2019
- October 2019
- September 2019
- August 2019
- July 2019
- June 2019
- May 2019
- April 2019
- March 2019
- February 2019
- January 2019
- December 2018
- November 2018
- October 2018
- September 2018
- August 2018
- July 2018
- June 2018
- May 2018
- April 2018
- March 2018
- February 2018

Shrimp and Grits
It’s so easy to forget where we come from. To get lost in our own little world. But sometimes we need to go backward before we can move forward.
I watched an episode of Chef’s Table, Mashama Bailey - Owner of The Grey in Savannah, Georgia, and I came back to my senses. I remembered where I came from. My Roots. I remembered the sound of fried chicken crackling in a cast-iron skillet. The egregious smell of chitlins cooking in a large black pot outside on a hot summer day. The sweet taste of muscadines after picking them straight off the vine.
Shrimp and Grits - Classic southern dish but with a healthy twist! Packed with flavor and seasonal southern ingredients all while staying true to its roots.

It’s so easy to forget where we come from. To get lost in our own little world. But sometimes we need to go backward before we can move forward.
I watched an episode of Chef’s Table, Mashama Bailey - Owner of The Grey in Savannah, Georgia, and I came back to my senses. I remembered where I came from. My Roots. I remembered the sound of fried chicken crackling in a cast-iron skillet. The egregious smell of chitlins cooking in a large black pot outside on a hot summer day. The sweet taste of muscadines after picking them straight off the vine.

And most of these memories were created by the Black American women who helped raise and shaped me into the person I am today. They are the reason why soul cooking is a thread in my DNA and they inspire the recipes that I create.
Now for this recipe, grits are the star of this dish. And even though this woman didn’t raise me, she influences the way that I cook today. Edna Lewis. As a renowned chef, author, and teacher, she inspired generations of Southern cooks to honor their own roots.
Most importantly, she taught me how to make grits. And since this is a health food blog and ...that I and dairy do not get along, I have healthified the recipe but stayed true to her technique.

Southern soul food is also about cooking with seasonal vegetables. Well, I can't think of a better vegetable to highlight in this recipe, other than okra. Pairing its roots to a creole inspired "gumbo" sauce, we are highlighting all walks of southern soul food!
And of course, we can't forget about the bacon!

The last nostalgic thing I will say is that this was my first official meal in my new place. I wanted to Christen the place with a meal that paid an ode to my southern roots and the amazing women that got me to where I am today.

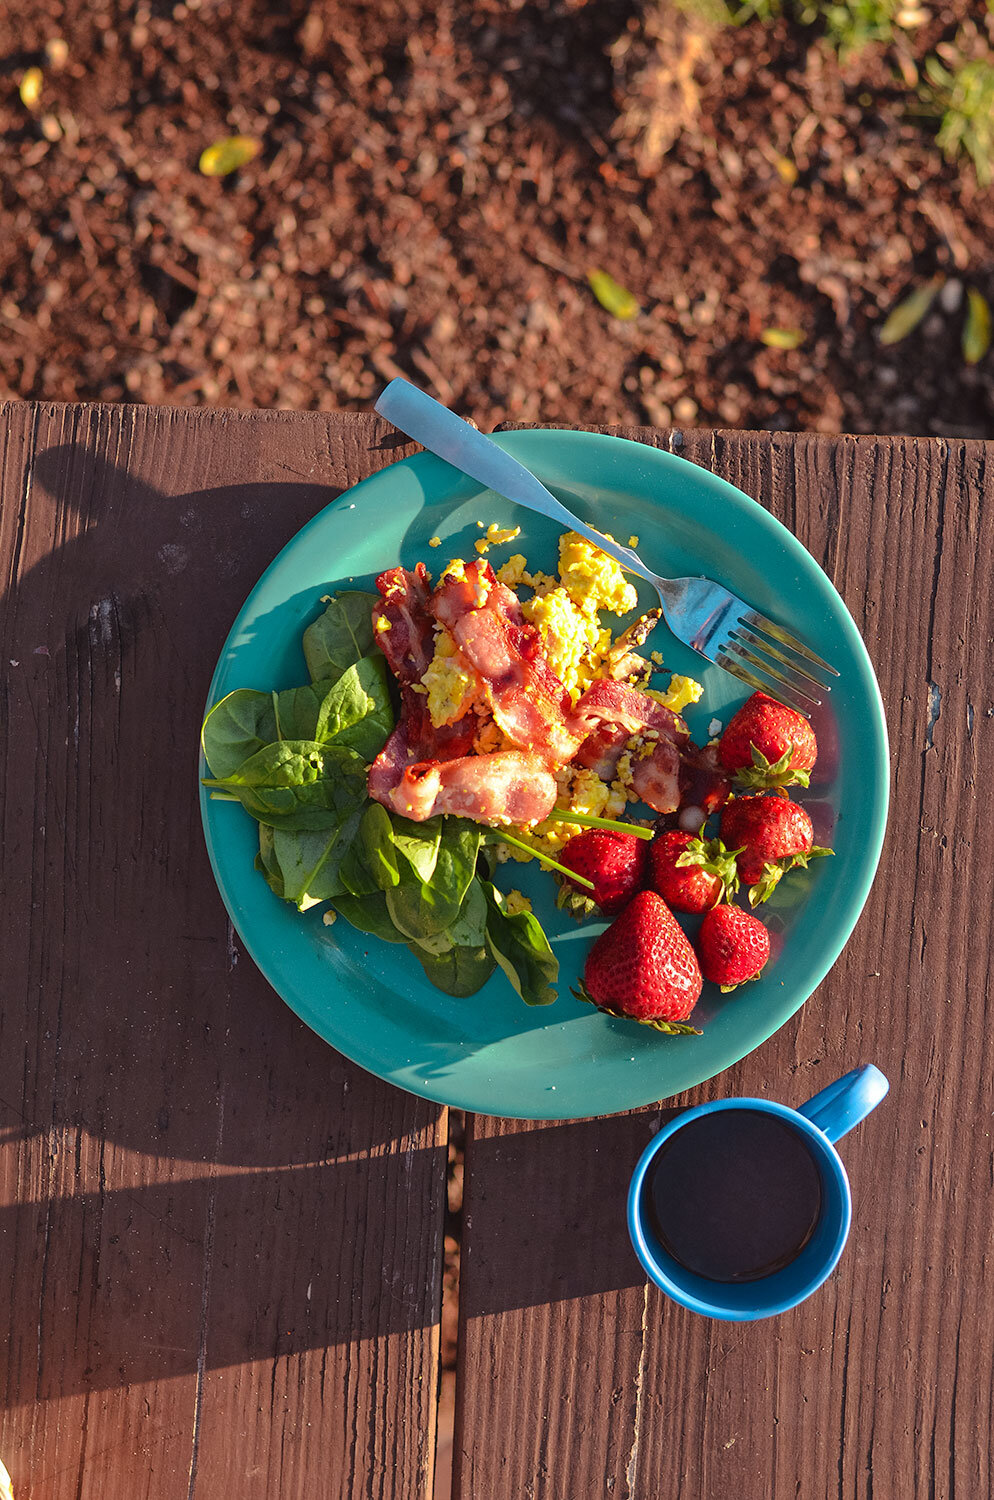
Picture of the meal - in my new apartment. It’s only right to be drinking dry white wine from the meal in a cup. I hope this nourishing comfort meal sparks something inside of you to either find the appreciation of soul food like I have or to find it in your own roots.
Shrimp and Grits - Classic southern dish but with a healthy twist! Packed with flavor and seasonal southern ingredients all while staying true to its roots.
Ingredients
Grits
2 cups of water
2 cups plant-based unsweetened milk
1 cup instant grits
1 Tbsp grass-fed butter
Shrimp
1 lb medium-large raw shrimp peeled, de-veined, tail-on
1 tsp cajun seasoning
½ lemon
1 Tbsp olive oil
Sauce
1 tbsp gluten-free flour
1 tsp low-sodium worcheshire sauce
½ medium onion, chopped
1 jalapeno pepper, seeded and chopped
3 cloves garlic, minced
1 fennel bulb, white part thinly sliced
½ cup chicken or seafood broth/stock
¼ cup dry white wine
1 Tbsp grass-fed butter
Salt, hot sauce, and red pepper flakes to taste
Add ons
6 oz whole okra
1 tbsp grass-fed butter
8 slices cooked bacon
Garnish: Fennel fronds
Instructions
To prepare the grits: Bring 2 cups of water and milk in a medium saucepan until just simmering. Stir grits into the simmering water and milk. Cook, while stirring often, until the grits are tender to the bite and have thickened to the consistency of oatmeal. As the grits thicken, stir them more often to keep them from sticking and scorching. Season grits generously with salt and stir in the butter. Remove from heat and let rest, covered, until serving. Serve hot.
To cook the shrimp, toss them with the Cajun seasoning. Add the olive oil to a large skillet over medium-high heat and add the shrimp. Saute until opaque (about 2 min) and remove from skillet. Squeeze the juice of 1/2 lemon and set aside.
Add the flour to drippings in the skillet and whisk well. Add the onion, jalapeno, and fennel; saute about 5 minutes. Add the garlic and saute for another minute. Add the stock and simmer until reduced by half (about 10 minutes). Add the worcheshire, wine, and butter. Taste for seasoning, and add salt if you like. I love it spicy so I add red pepper flakes and hot sauce to mine.
To pan-fry okra: Cut okra in half; long wise or chopped. Heat a pad of butter to a medium skillet over medium-high heat. Once the butter is melted, add okra. Cook for about 5 minutes or until each side is brown and crispy.
Serve immediately over the warm grits. Add slices of cooked bacon and pan-fried okra. Garnish with fennel fronds for color and enjoy!

Chair Cardio Movements for Lower Body Injuries
I sprained my ankle in Chicago after graduating from the NTA program back in February. Ever since my entire right foot has not been the same. I re-injured it a month later that developed into a stress fracture; which leads me to the boot! And even though I am no longer in a boot, the doctors have found that I have a tarsal coalition that can lead to surgery or wearing orthotics for the rest of my life. So while I am weighing my options, I have been getting creative in my workouts so that I don’t make it worse.
I sprained my ankle in Chicago after graduating from the NTA program back in February. Ever since my entire right foot has not been the same. I re-injured it a month later that developed into a stress fracture; which leads me to the boot! And even though I am no longer in a boot, the doctors have found that I have a tarsal coalition that can lead to surgery or wearing orthotics for the rest of my life. So while I am weighing my options, I have been getting creative in my workouts so that I don’t make it worse.

That’s why I have come up with over 35 non-weight and weight-bearing movements that you can do using a chair! These movements helped me immensely while I was in the boot so if you are recovering from an injury, disability, limited mobility, or just looking for variety, this is for you.
Even though things are starting to slowly open back up in some areas, I know a lot of you are still working out from home! And even if you may not follow the criteria mentioned above, if you are working from home, watching television, or just sitting, these movements are great to get that heart rate going!

Exercise is an important way to accelerate healing; when done safely! The healing process requires adequate blood circulation and optimal flow of replenishing blood to the injury area. However, your exercise choices need to be safe and smart. With that said, you must be cleared by your doctor or PT before starting this or any new exercise routine. Always listen to your body and if anything puts your healing in jeopardy, stop!
This is not a workout necessarily, but movements that you can implement or carry into your exercise recovery routine. If you are dealing with an injury, pay close attention to how you move through each exercise and go for quality not quantity.
WATCH VIDEO NOW:
Equipment Needed:
Sturdy chair (no wheels)
Optional: dumbbells, kettlebells, resistance bands
Here are some of the movements that you can do using a chair:
single leg side squats
lateral leg raises
plank
push ups
incline push ups
kettlebell rows
leg raises with a twist
chair body lift with leg extensions
squats
around the head with kettlebell
arm stretches
resistance band movements
bicycle crunches
knee to elbow
single leg deadlift
sitting ab movements
toe taps
tricep extensions
single leg kickbacks
bent over lateral raise
jab cross
starfish
push press
side bends
russian twists
side bends
cycling crunches
seated dips
crunch kicks
side raise
Implement these movements into your exercise recovery routine or complete each movement for 60 seconds and take a 10 second break in between.
If you try these movements, let us know! Leave a comment and don’t forget to tag a photo to #fromtherootsblog on Instagram. We love seeing what you come up with!

Brownie Batter Banana Bread Muffins
Who doesn’t love a fun mashup! *No pun intended! I have combined my two favorites into one magnificent treat, paleo banana bread, and chocolate! And while I may have used different ingredients, these muffins are still paleo-friendly and naturally lower in sugar.
What I love about these muffins, is that they arguably taste like dessert! It’s hard to believe they are nutritious enough to be considered a snack, pre-workout fuel, or a great addition to your morning smoothie!
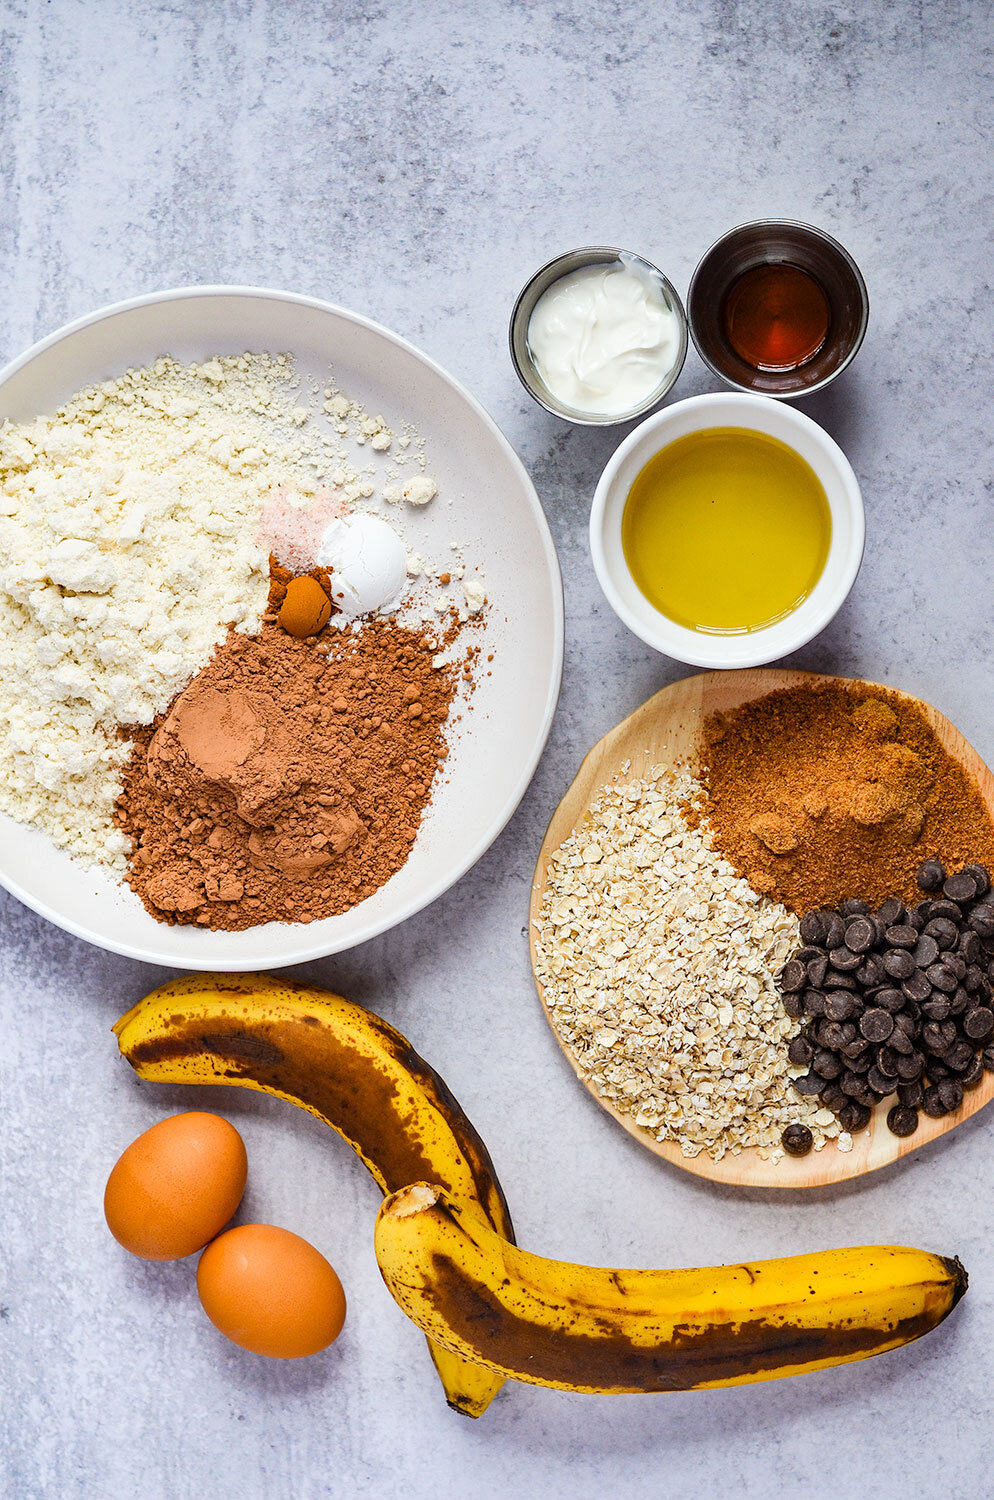
Brownie Batter Banana Bread Muffins - These double chocolate banana bread muffins are delightful treats made with whole food ingredients for a guiltless pleasure. Paleo-friendly, grain-free, dairy-free, and naturally low in sugar.

Who doesn’t love a fun mashup! *No pun intended! I have combined my two favorites into one magnificent treat, paleo banana bread, and chocolate! And while I may have used different ingredients, these muffins are still paleo-friendly and naturally lower in sugar.

What I love about these muffins, is that they arguably taste like dessert! It’s hard to believe they are nutritious enough to be considered a snack, pre-workout fuel, or a great addition to your morning smoothie!


Bonus: these muffins freeze beautifully! The reason why I point that out is that these are now my go-to snack. I just pop one muffin in the microwave for 20 sec, or leave one out to thaw, a dollop of dairy-free unsweetened yogurt, and top with fresh bluebs and cinnamon. The best sweet snack!


As I said earlier, these muffins honestly taste like a dessert! But if you would like a more substantial muffin, then add ½ cup gluten-free oats to the batter. You can tell in the pictures which one is the oatmeal muffin version. Both are tasty and satisfying!

If you try this recipe, let us know! Leave a comment, rate it, and don’t forget to tag a photo to #fromtherootsblog on Instagram. We love seeing what you come up with!
Brownie Batter Banana Bread Muffins - These double chocolate banana bread muffins are delightful treats made with whole food ingredients for a guiltless pleasure. Paleo-friendly, grain-free, dairy-free, and naturally low in sugar.
Ingredients
1 cup paleo flour
2 large bananas (ripe)
½ cup unsweetened cocoa powder
¼ cup dark chocolate chips
¼ cup avocado oil
¼ cup coconut sugar
2 eggs
2 tbsp dairy-free unsweetened yogurt
1 tsp vanilla extract
1 ½ tsp baking soda
¼ tsp pink himalayan sea salt
¼ tsp ground cinnamon
Optional: heartier muffin, add ½ cup GF oats
Directions
Preheat the oven to 350 degrees. Spray muffin tin with nonstick cooking spray or add muffin liners to a muffin tin (about 10).
In a medium bowl, whisk together the dry ingredients minus the chocolate chips.
In a separate bowl, mash bananas using a fork until you get a smooth and liquid consistency. Add the rest of the liquid ingredients and mix until smooth and creamy.
Add wet ingredients to dry ingredients and mix until just combined. Gently fold in chocolate chips.
Divide batter evenly into muffin tins, sprinkle each muffin with a few more chocolate chips and bake for 25-30 minutes or until the toothpick comes out clean.
Cool muffins for 5 min then remove and transfer to a wire rack to finish cooling. Muffins are best served warm and even better the next day. Makes about 10 muffins.
Notes
If you want a heartier muffin, add ½ cup GF oats! Just make sure the batter is still a pourable consistency and not too dry and thick. If it is, then slowly add in yogurt.
Muffins are freezer friendly! Simply place in a ziplock bag or airtight container and freeze for up to 3 months. When ready to eat, microwave for 20-30 seconds or thaw out.
Ingredient brands I love for this recipe: paleo flour, dark chocolate chips, yogurt.
Spicy Watermelon Margaritas
When I think about the summer, I think about watermelon - lots of it! During the summer, I usually have a watermelon on the kitchen counter, watermelon cubes in the freezer (recipe coming soon), or fresh watermelon juice in the fridge. Can’t get enough of this sweet melon!
So what are ways that you can use watermelon cubes or fresh watermelon juice? Make margaritas, of course! I mean, why wouldn’t you! All you have to do is salt a rim, juice a lime, ice in a glass, and add optional jalapeno slices for the spice factor! How easy is that?
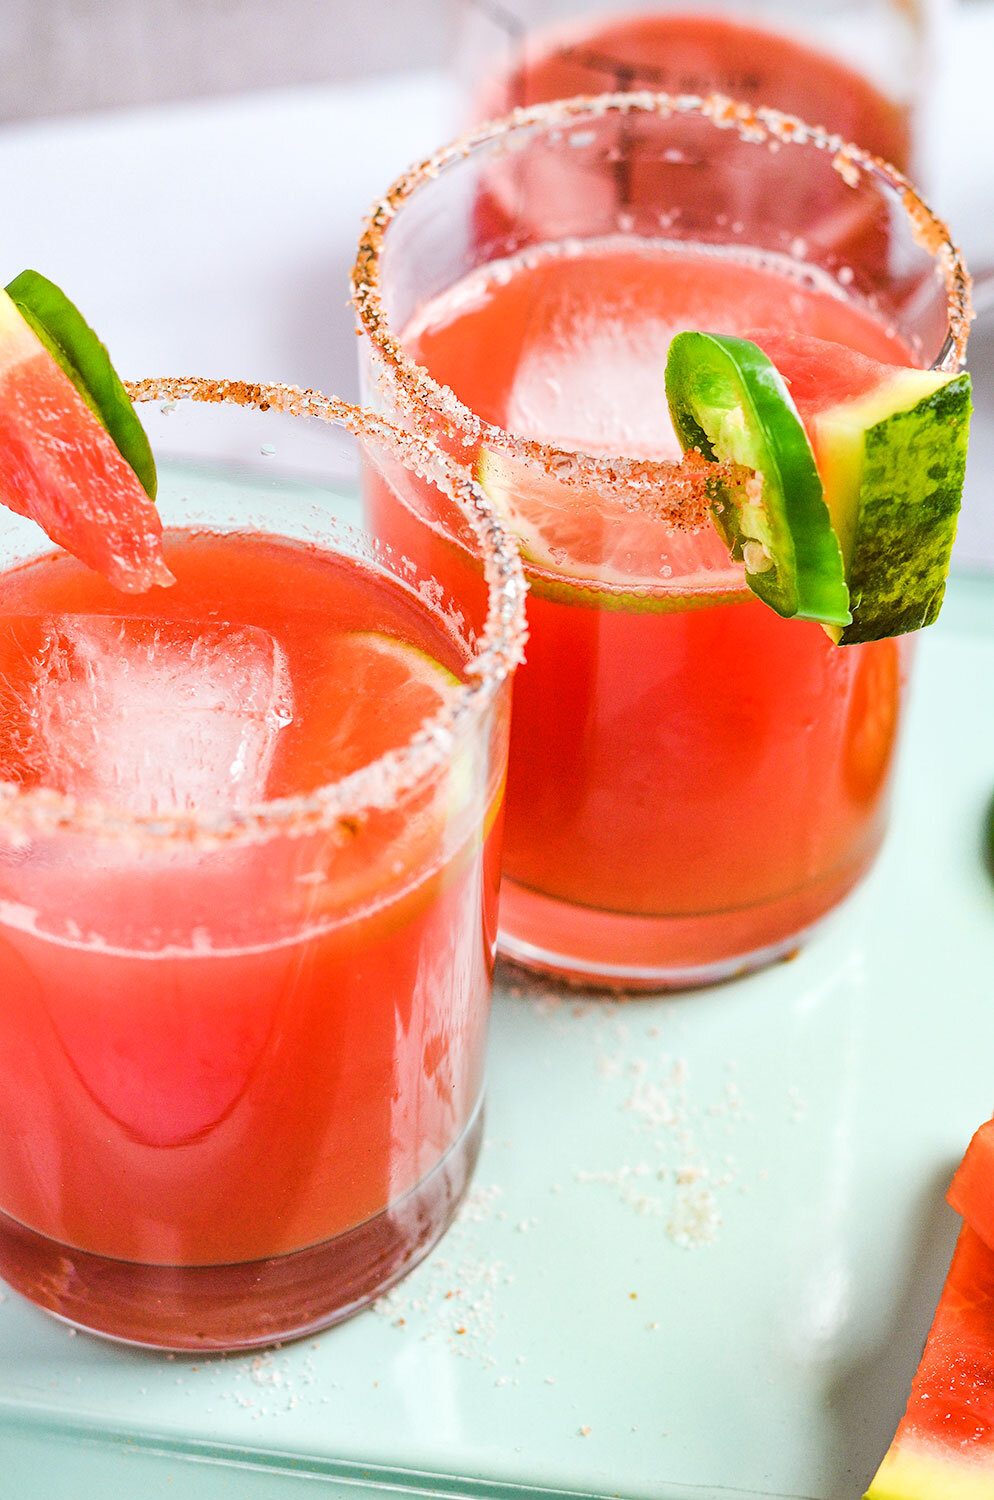
Spicy Watermelon Margaritas - That is naturally sweetened with fresh watermelon juice. So easy to make with the perfect amount of sweet and spicy!

When I think about the summer, I think about watermelon - lots of it! During the summer, I usually have a watermelon on the kitchen counter, watermelon cubes in the freezer (recipe coming soon), or fresh watermelon juice in the fridge. Can’t get enough of this sweet melon!

So what are ways that you can use watermelon cubes or fresh watermelon juice? Make margaritas, of course! I mean, why wouldn’t you! All you have to do is salt a rim, juice a lime, ice in a glass, and add optional jalapeno slices for the spice factor! How easy is that?


There are two ways that you can add jalapenos to your margarita mix. You can either blend one jalapeno (de-seeded and stemmed) to your watermelon cubes and lime juice, pour juice mixture over a fine-mesh strainer, and serve into a glass or you can add sliced jalapenos to your cocktail shaker or pitcher, with the rest of the ingredients. Shake and serve into a glass.

If you want to make a spicy or classic watermelon margarita during the offseason when watermelons aren’t readily available, my favorite thing is to use watermelon kombucha! Not only are you still enjoying a summer treat during the winter, but your gut is getting some love! This is my favorite watermelon kombucha drink, hands down!
If you try this recipe, let us know! Leave a comment, rate it, and don’t forget to tag a photo to #fromtherootsblog on Instagram. We love seeing what you come up with!
Spicy Watermelon Margaritas - That is naturally sweetened with fresh watermelon juice. So easy to make with the perfect amount of sweet and spicy!
Ingredients
Watermelon juice
1 small seedless watermelon, or half of a larger watermelon
Juice of 2 limes
Ingredients per margarita
2 ounces fresh watermelon juice
1 ½ oz 100% agave silver or blanco tequila
Juice of ½ lime
½ tsp honey (optional)
1-4 jalapeno slices (based on preference)
Salt rim
1 part pink Himalayan sea salt
1 part tajun or chili lime seasoning
Lime zest
Lime wedges
Garnish
tiny watermelon wedges, jalapeno slices, lime slices
Directions
To make fresh watermelon juice:
Simply blend watermelon cubes and lime juice in your blender and blend until smooth. Pour juice over a fine mesh strainer. Measure out what you need for the margaritas.
To make fresh watermelon juice with jalapeno, add one jalapeno (de-stemmed and de-seeded) to the blender with the rest of the ingredients. Taste test mixture before straining to achieve the desired spice level.
To prepare your margarita glasses:
On a small, rimmed plate, mix together equal parts salt, seasoning, and lime zest. Run a lime wedge around the top of each glass. Dip the top of the glass into the salt blend and roll it from side to side to catch the salt. Add ice cubes to your glass and set it aside.
To make margaritas from a cocktail shaker: Fill a cocktail shaker with ice. Pour in the watermelon juice, tequila, lime juice, optional sweetener and jalapeno slices.
Secure the lid to the shaker and shake for 10-30 seconds. Taste and add additional sweetener/acid/spice if necessary. Strain the liquid into your prepared glass(es) and garnish. Enjoy!
To make a pitcher:
For 8 drinks you will need: 2 cups tequila, ½ cup lime juice, 2 cups watermelon juice, 1-2 jalapenos (sliced), and 2-3 Tbsp sweetener (optional). Pour mixture in a large pitcher with ice. Stir well with a wooden spoon until well combined. Taste and add additional sweetener/acid/spice if necessary and enjoy!
Notes
Don’t have watermelon on hand or not in season? That’s okay! I love using watermelon kombucha instead! Just omit the sweetener part and it should taste the same, if not better!

Pacific Coast Highway Road Trip in a Camper Van Part 2
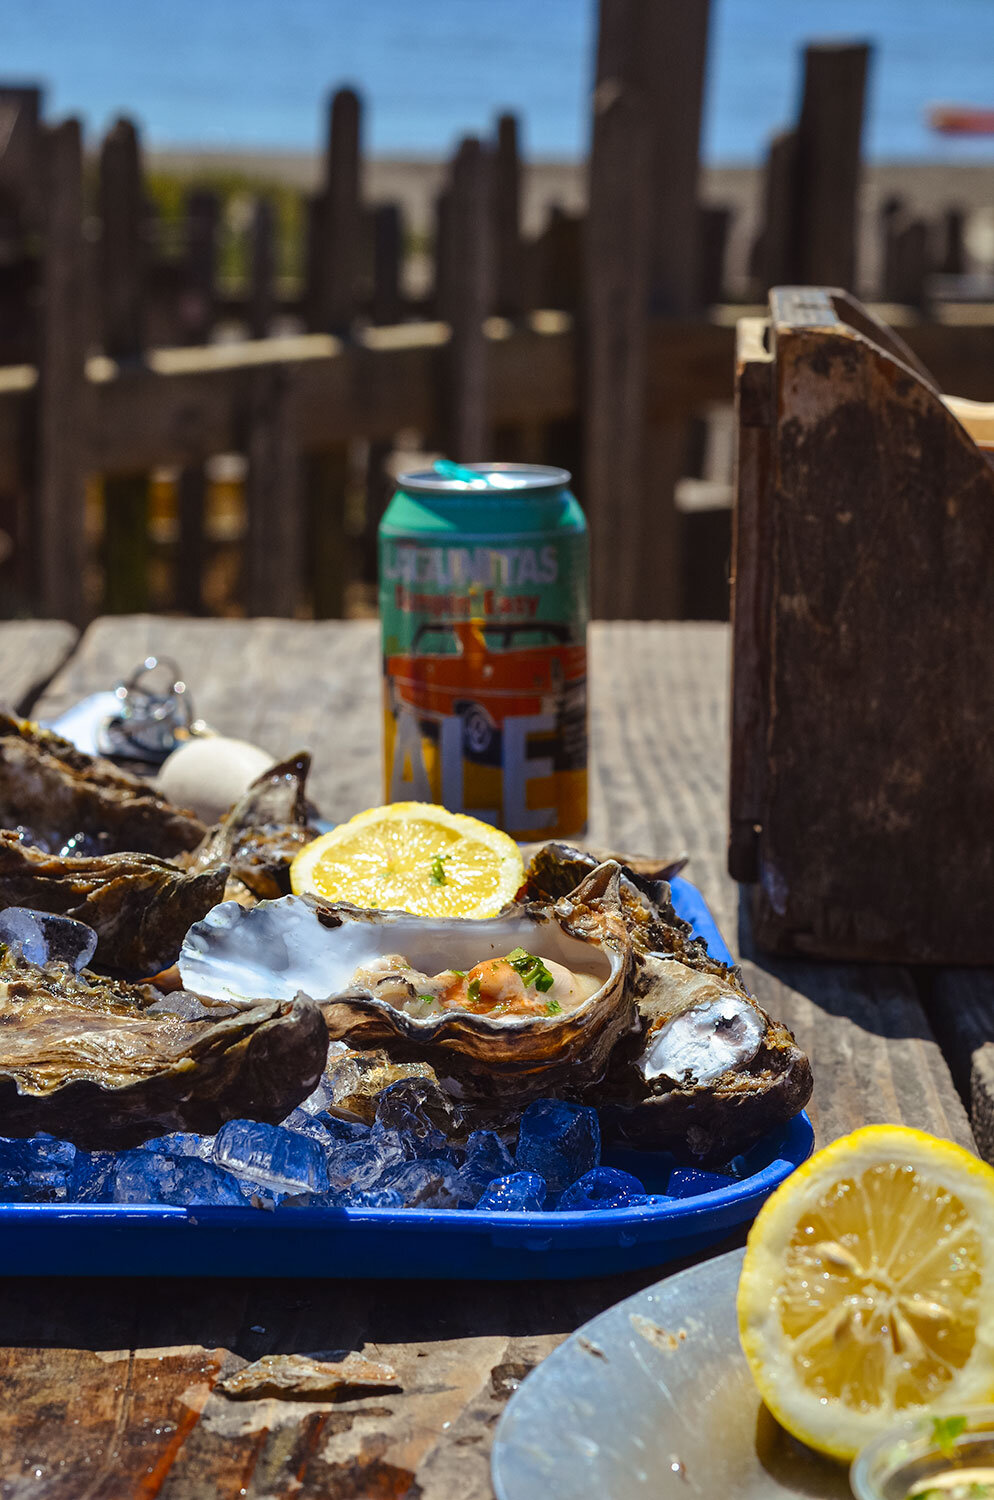
As we are driving down to San Francisco, we stopped by this amazing oyster restaurant, Hog Island Oyster Co in Marshall, where you can shuck your own oysters! We didn’t stop at too many restaurants because we have a kitchen in the van, but you must stop here! If you want more information, I love this blog post on the experience.
After stuffing our faces with oysters, San Fran bound for the rest of the day! Depending on what you want to do in the City by the Bay, one to two days is plenty of time! For the day, here is what we did:
Day 5
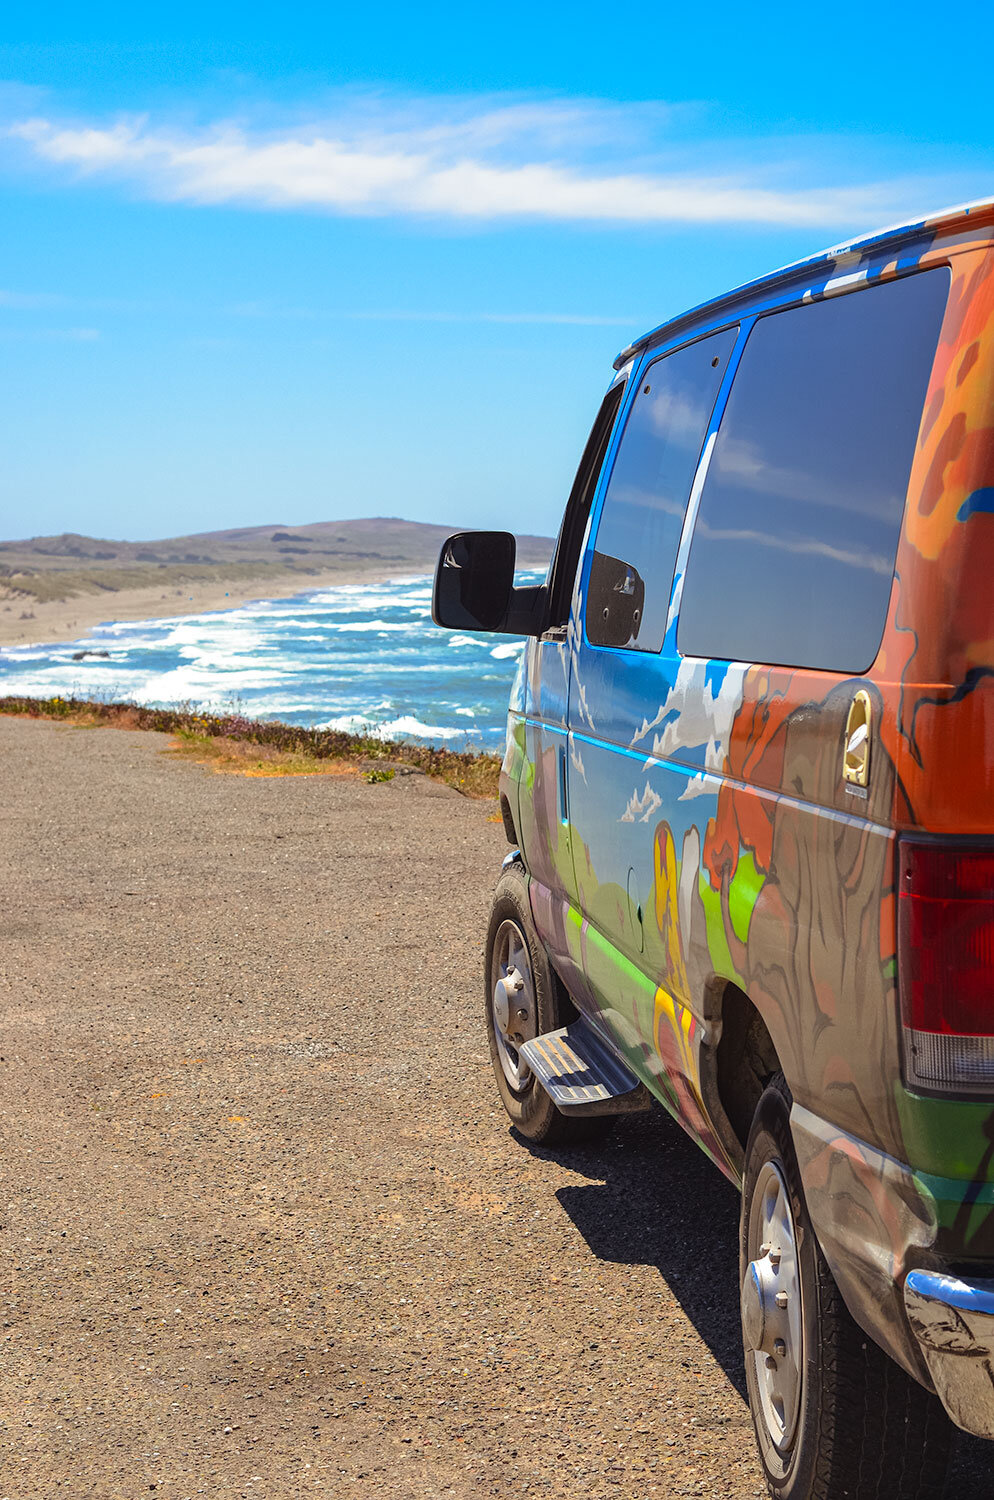
As we are driving down to San Francisco, we stopped by this amazing oyster restaurant, Hog Island Oyster Co in Marshall, where you can shuck your own oysters! We didn’t stop at too many restaurants because we have a kitchen in the van, but you must stop here! If you want more information, I love this blog post on the experience.

After stuffing our faces with oysters, San Fran bound for the rest of the day! Depending on what you want to do in the City by the Bay, one to two days is plenty of time! For the day, here is what we did:
Drive through super twisty Lombard Street (yes, the camper van made it and yes, I thought I was going to have a heart attack the entire time!)
Get the best views of the Golden Gate Bridge. Fortunately, we were able to get both the sunny view just as we entered SF.
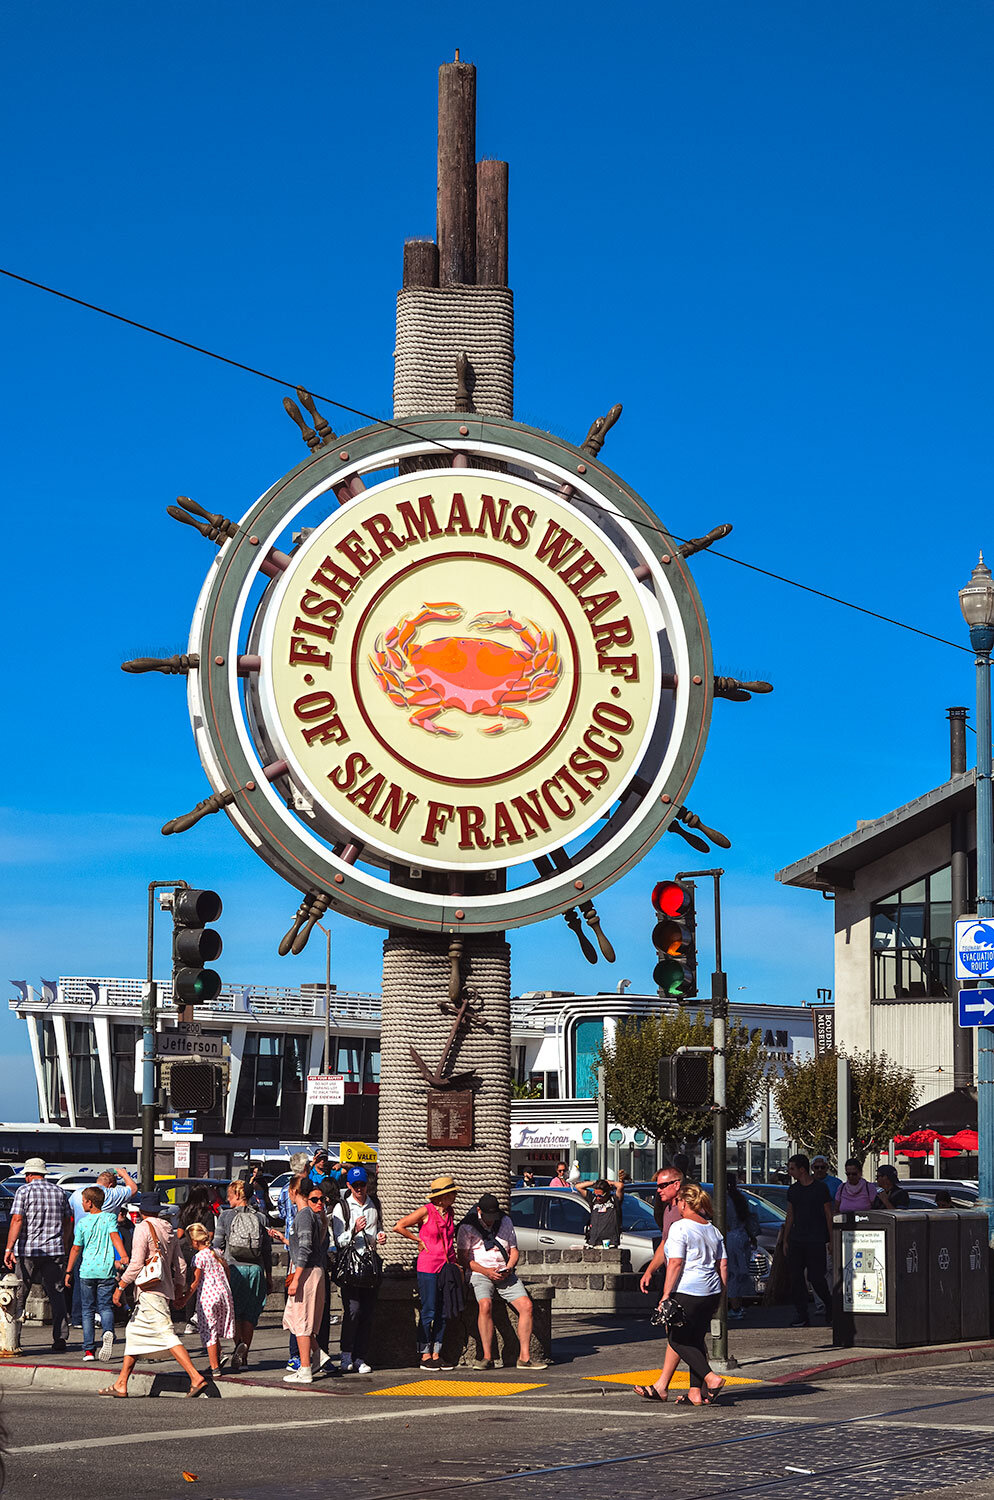
Go say “hi” to the sea lions on Pier 39 while you are at the Fisherman’s Wharf!
Hike near Lands End - The best spot to hike in the morning fog as you get incredible views of the Pacific Ocean and the GG Bridge. You can also see remains of a shipwreck, hear sea lions in the background, and walk down to see the Labyrinth.
Visit Alcatraz Island. Pro tip: Purchase tickets early - like two months in advance!
Muir Woods National Monument - Walk among massive trees; just can’t get enough of them!


Day 6
After visiting, “Karl the Fog” over the GGB in the morning - Yes, the fog in the Foggy City has a name! (Even has an Instagram account!) We headed south towards LA. On our way, we were able to stop by many locations! If only there was more time!
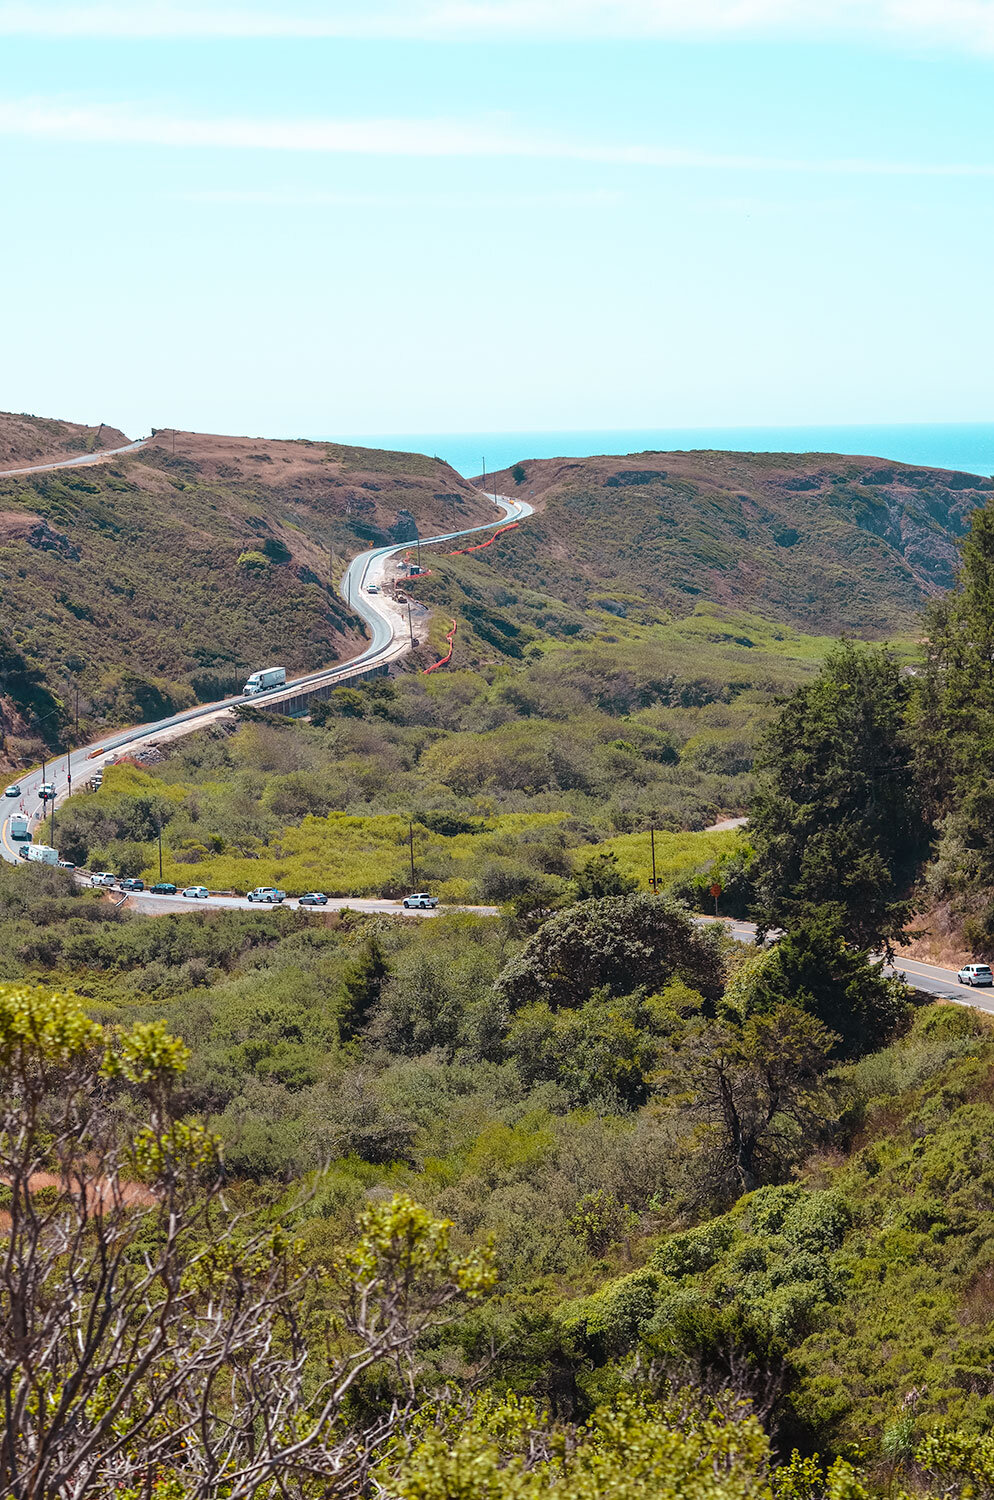
But to give a brief itinerary for each location that we stopped at we are driving on HWY1:
Pacifica, CA - Devil’s Slide Trail - Used to be the most dangerous portion of the PCH but is now a trail for hiking and baking. Great roadside views!
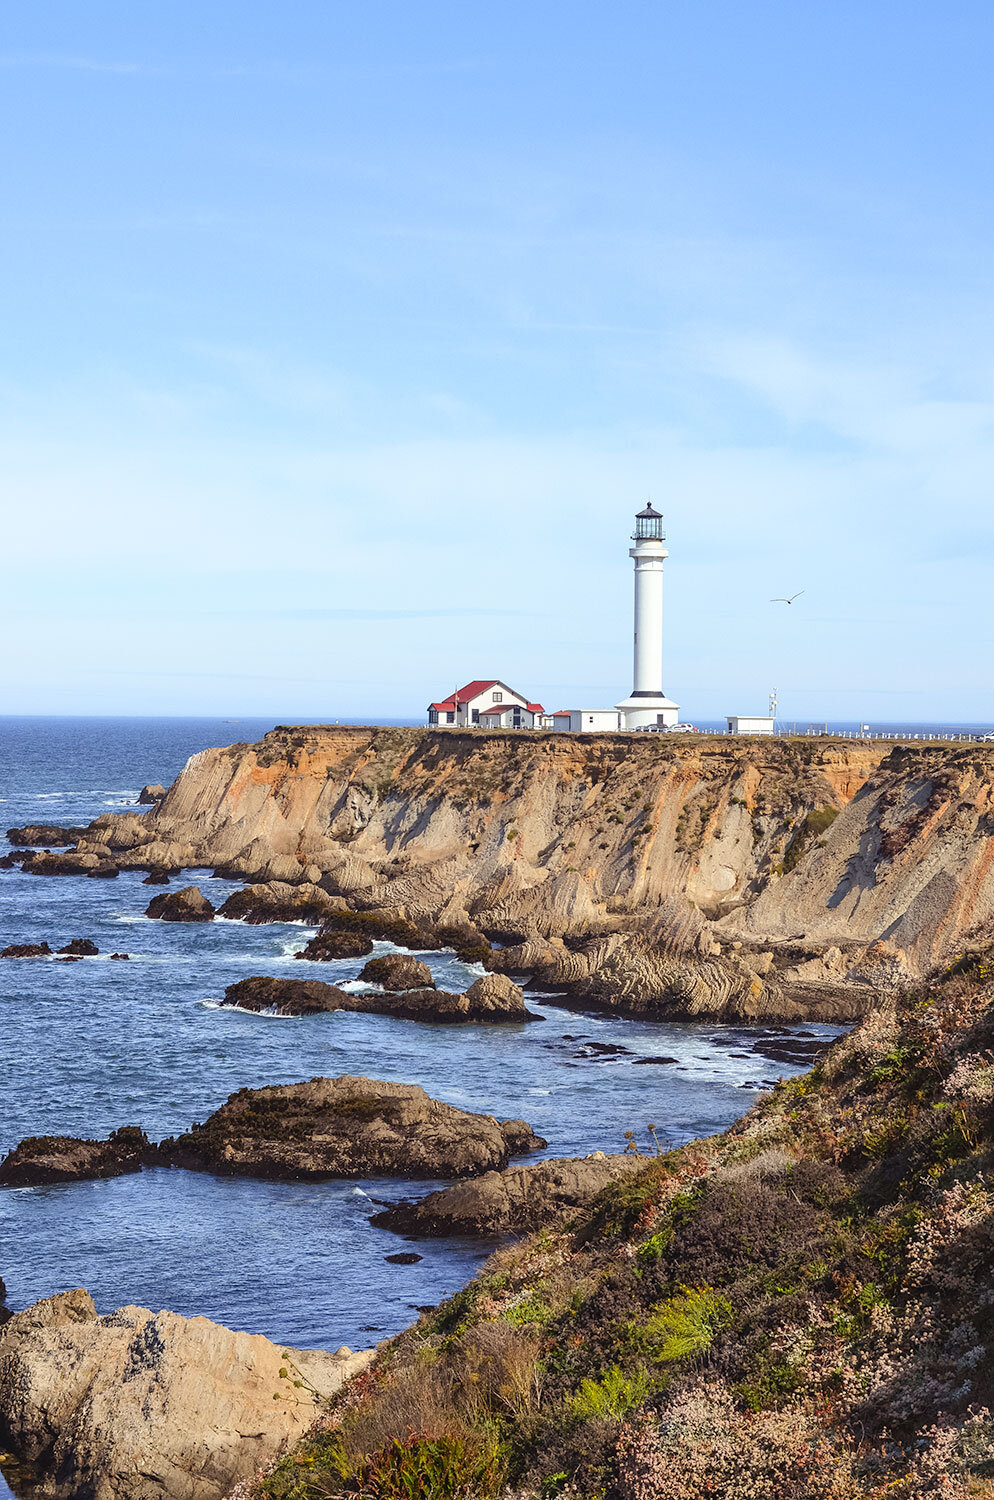
Pescadero, CA - Pigeon Point Lighthouse - The tallest lighthouse on the West Coast.
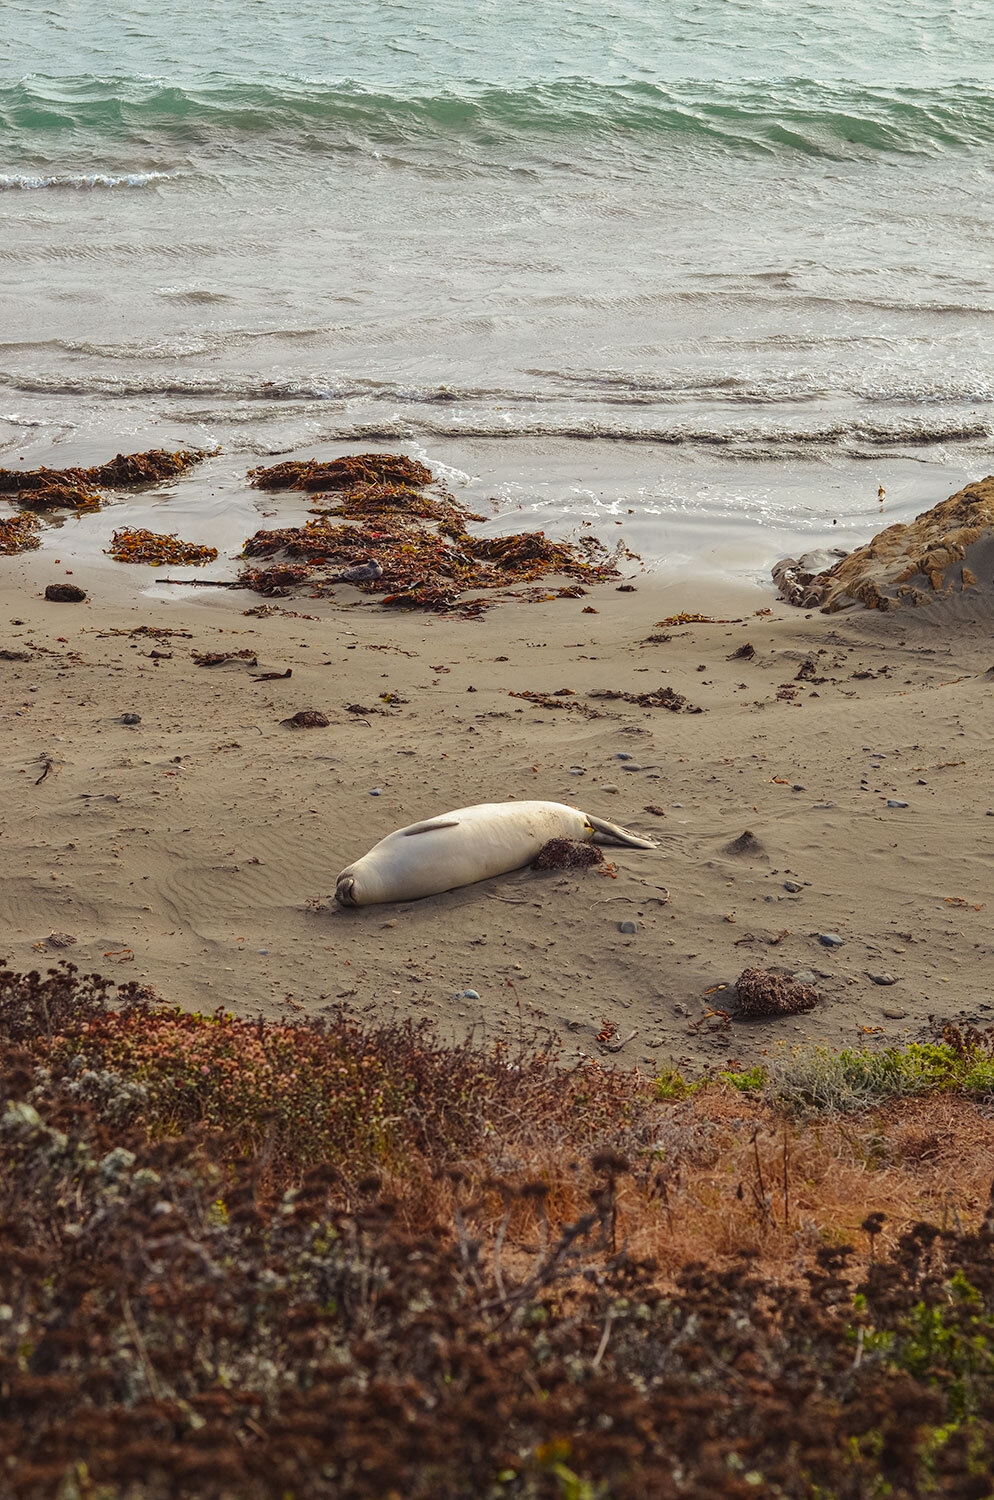
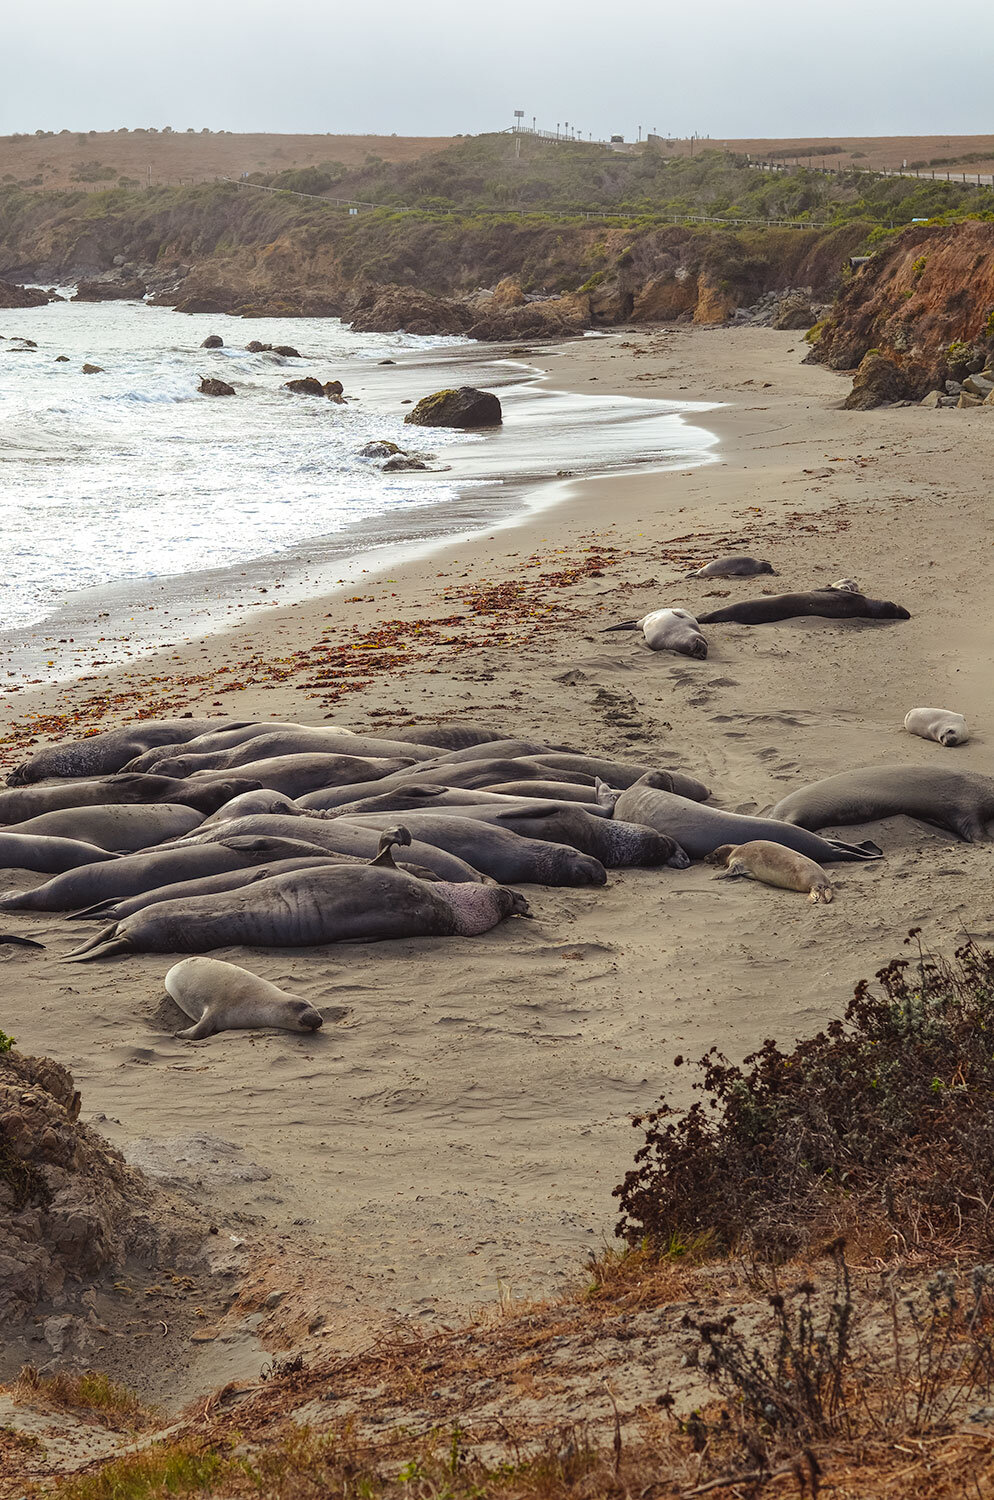
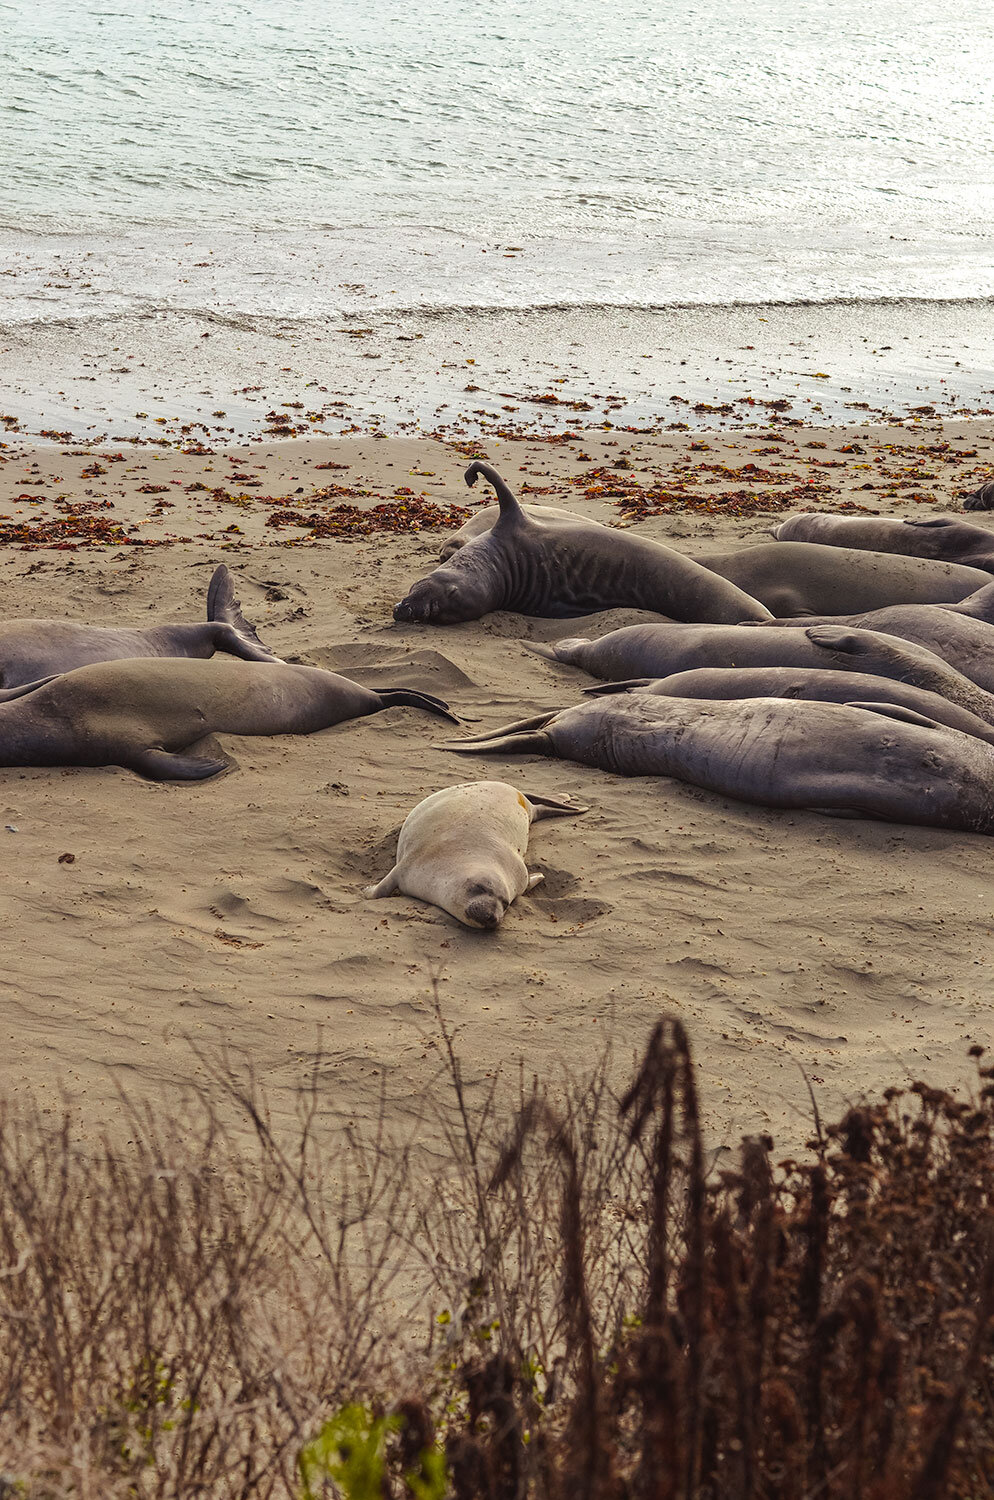
Ano Nuevo State Park - Have to stop by to see the sleeping sea lions! There is also a 3-mile trail that takes you close to them.
Davenport, CA - Shark Fin Cove - Title says it all - cove with a giant rock shark fin formation.
Monterey, CA - Where Big Little Lies was filmed!
Carmel-by-the-Sea, CA - Such a charming little town with lots of shops and wineries to check out. This is also where we locked our keys in the van (facepalm!)


Big Sur
Pfeiffer Beach - a beach with purple sand and “the window”
Bixby Bridge - One of the most famous bridges on the west coast.
McWay Falls at Julia Pfeiffer Burns State Park - Iconic waterfall that goes into the ocean.
Santa Barbara - Drove through but if you have more time, check out State Street, Rincon Beach, and Shoreline Park.
Malibu, CA - Leo Carrillo State Park - Cool area where we made an early dinner! If you have time, check out the coastal caves, tide pools, or watch surfers/windsurfers.


Santa Monica, CA - Santa Monica Pier - Classic west coast pier.
Los Angeles - Griffith Park - Griffith Observatory and the Hollywood Sign Hike
Finally made it to LA around 5pm in which we drove straight over to Griffith Park to hike the Hollywood sign. You would think it would be easy to navigate this area since it is so popular, but it is not! I should have saved our exact coordinates but if you find yourself having the same problem we had, here is a great post on locating the exact Hollywood Sign Hike.


CONFESSION TIME: We did not stay in an RV spot for our last night on our camper van road-trip! There, I said it! But to be fair, we thought we wouldn’t have time to get to LA on this day so we were expecting to find an RV spot before we got to LA. So, we stayed at a Double Tree, ate way too many double tree cookies (have you had them!? they are amazing!) and left early in the am.
Day 7
Last day! Since LA was our stopping point for the trip, we needed to drop off the camper van at noon and fly out in the evening. With that said, we pretty much had a full day to do just about anything!
All day LA itinerary:
Had our last meal around Santa Monica Pier - Made friends with the beach volleyball players real fast!
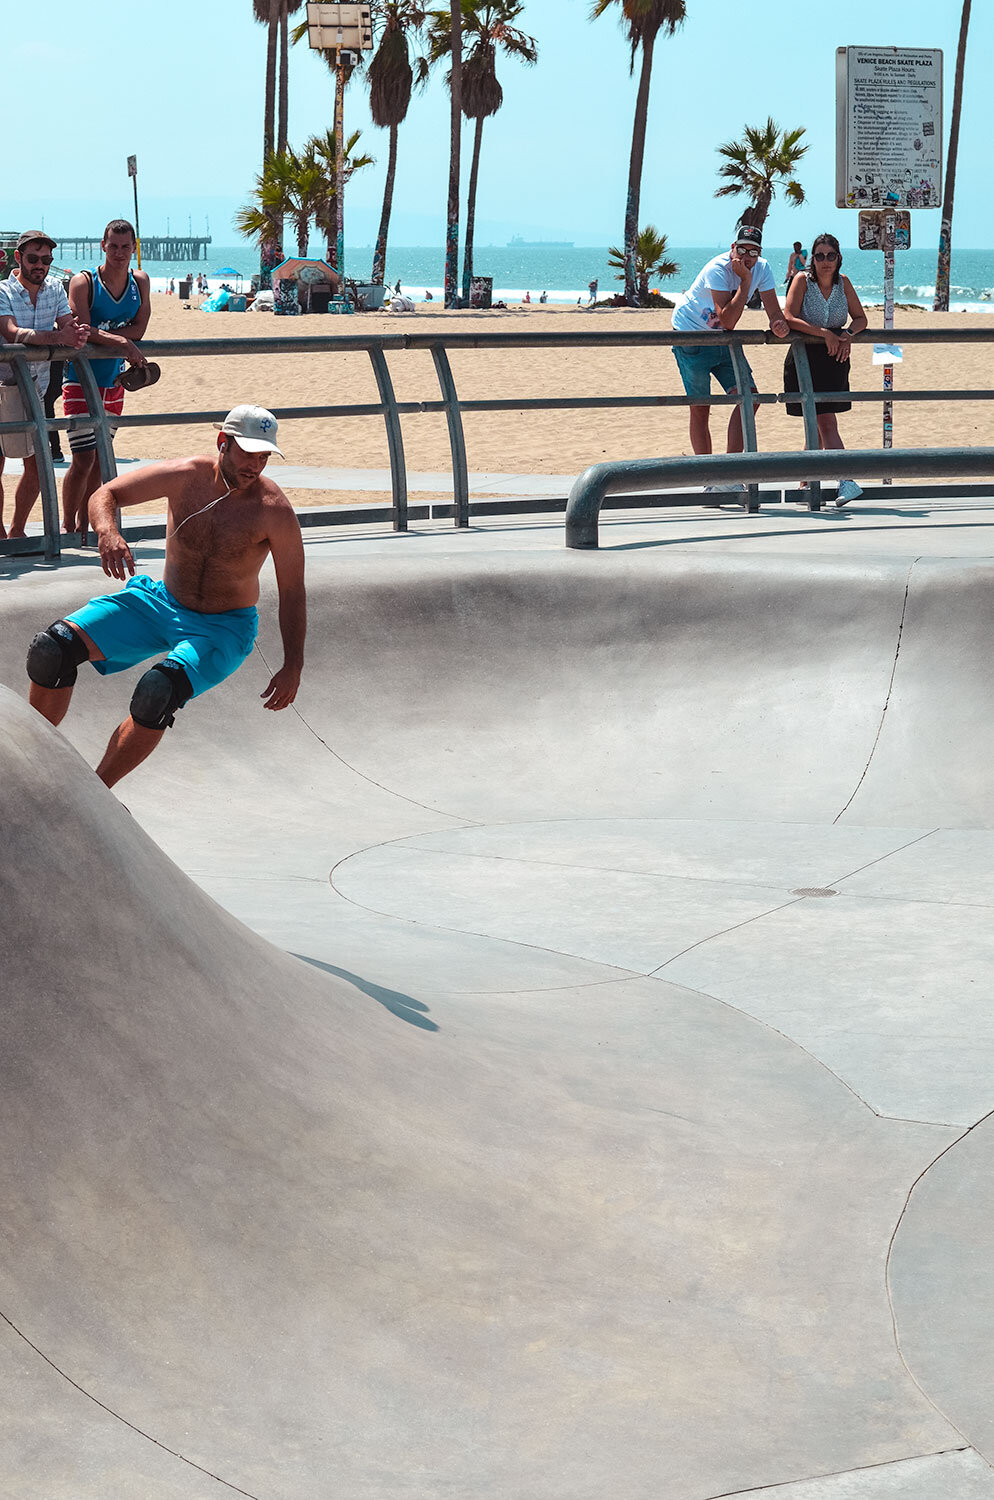
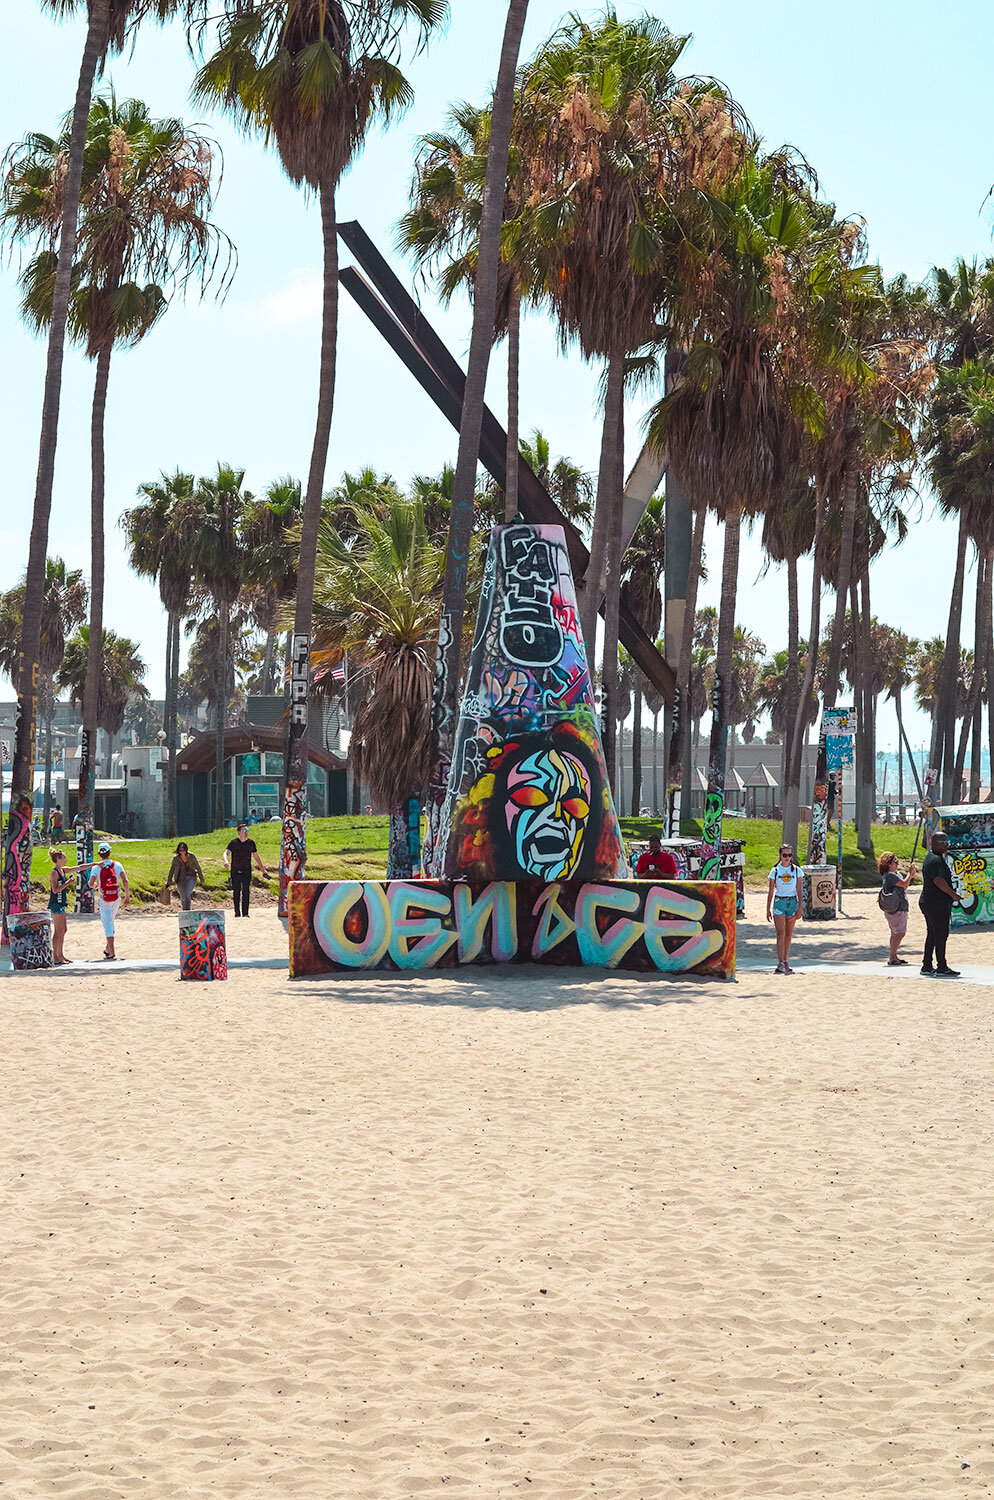
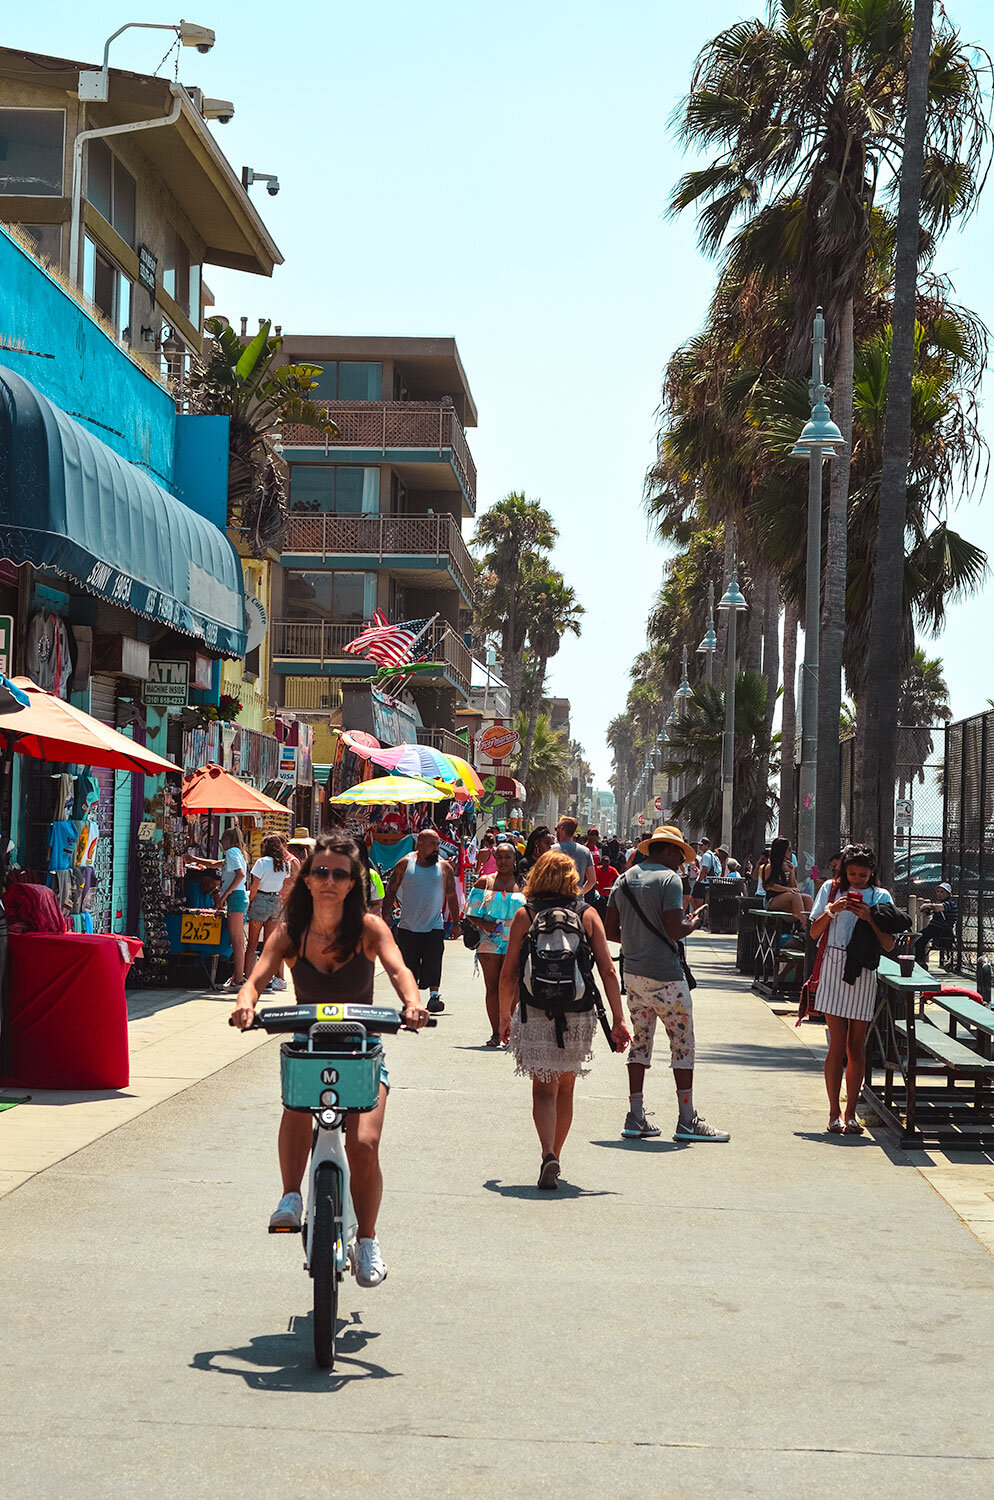
Located about 3 miles away from the pier in Venice Beach where we spent the rest of the morning. Great spot to see live shows, people watching, shopping, and do a pull up at muscle beach!
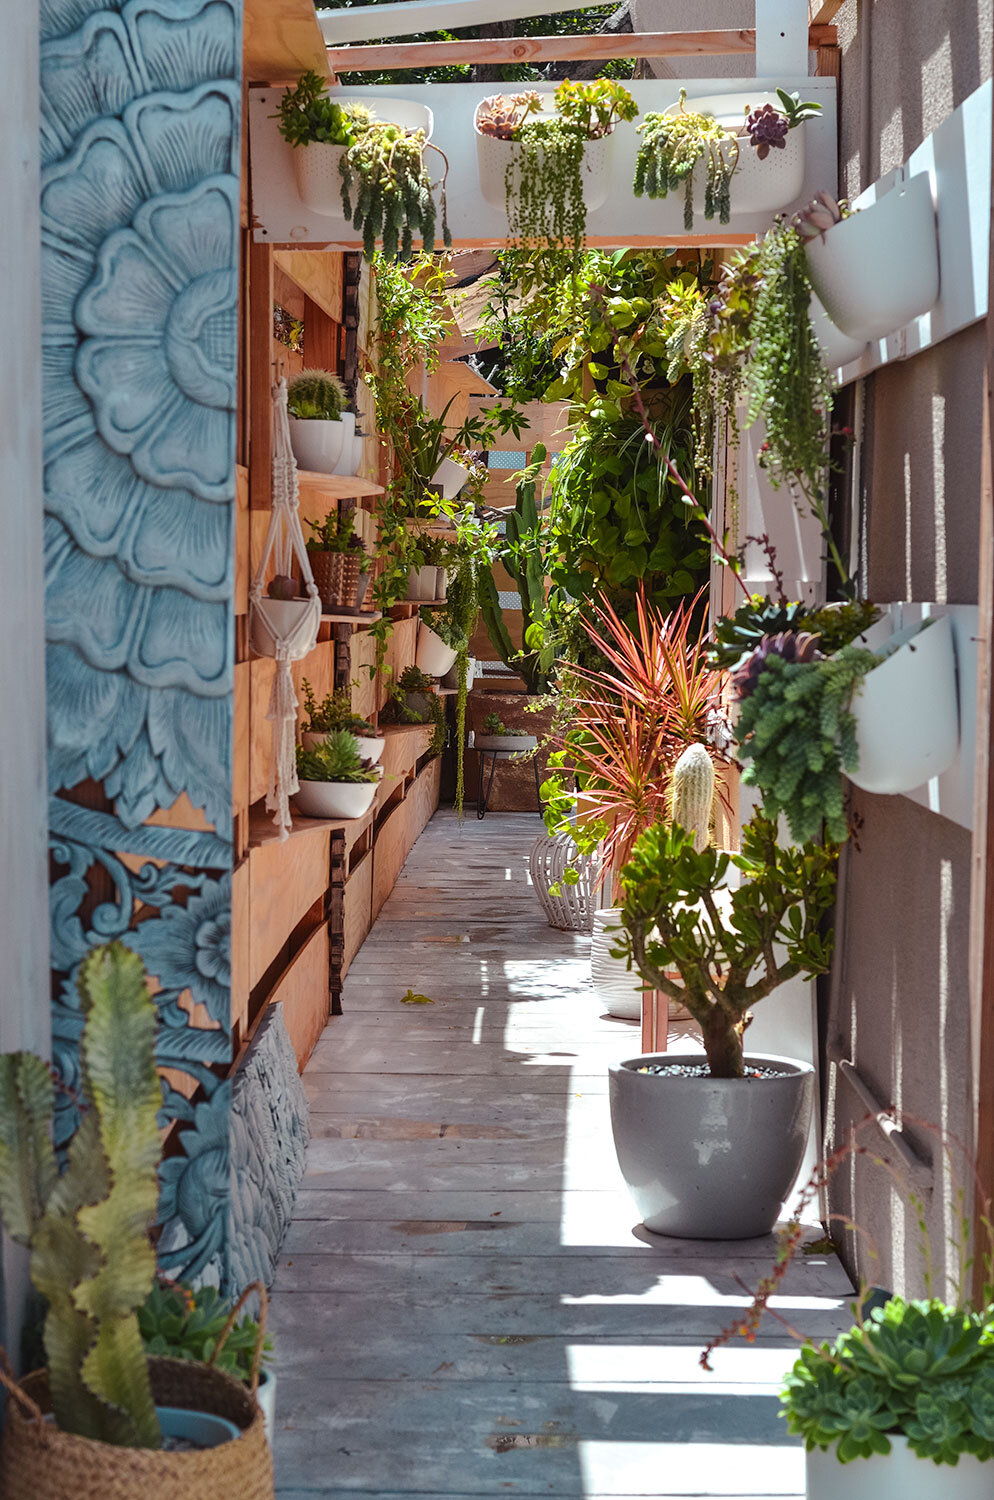
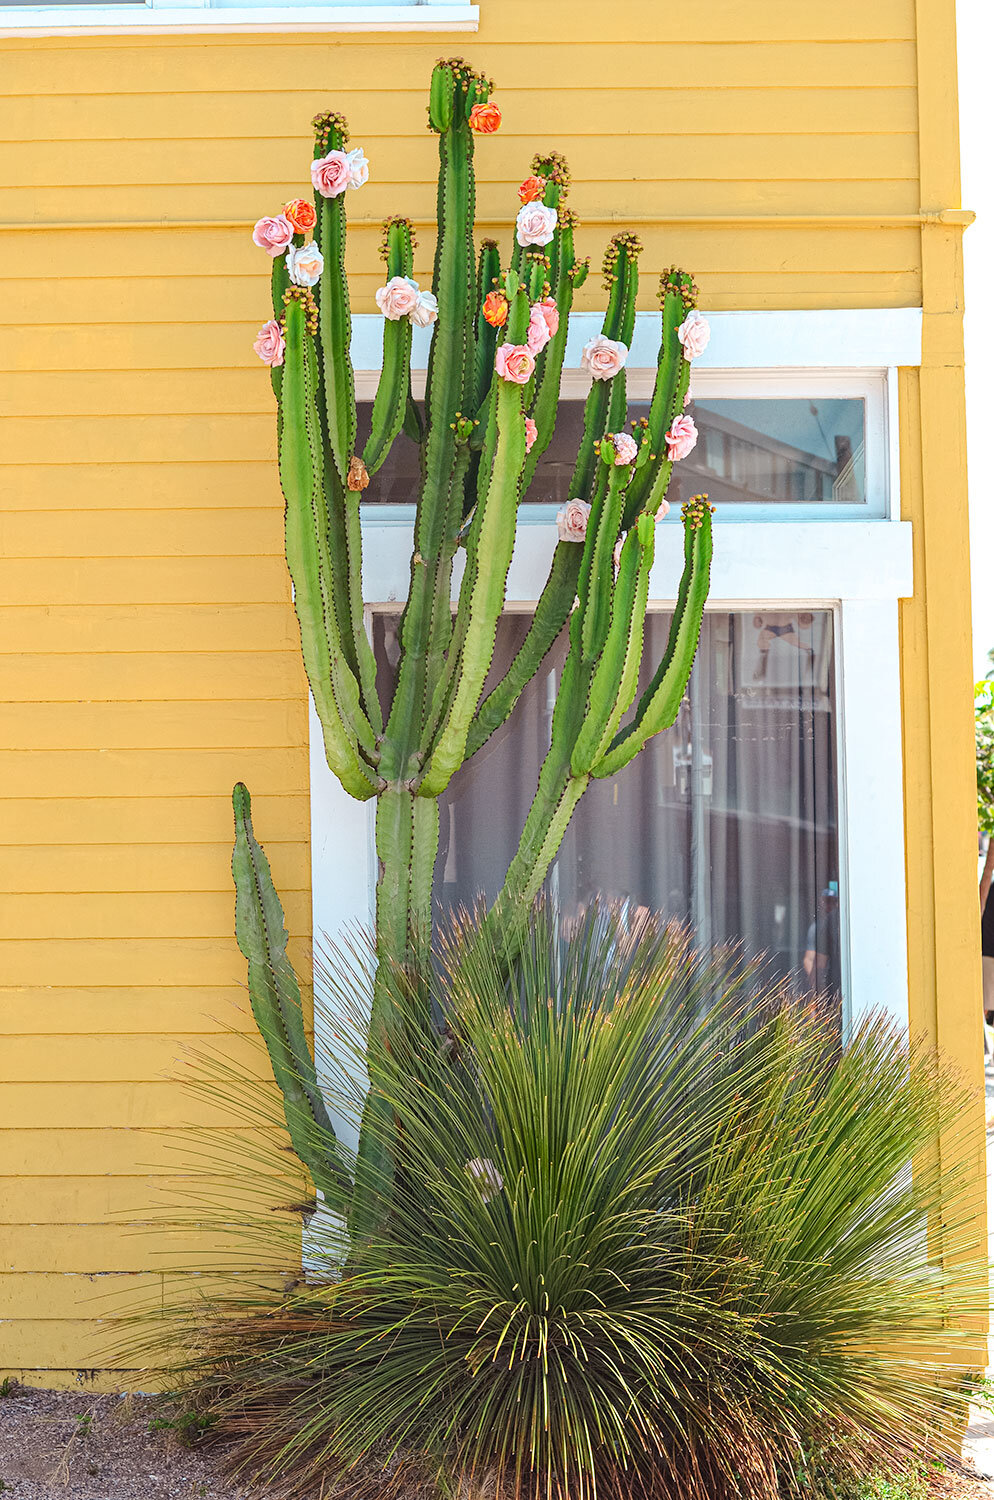
Stroll through Melrose Avenue and Abbot Kinney - Great areas to explore cute boutiques, cafes, bars, and to see some awesome street art.

Drop off the Camper van! (tears were shed!)
A dear friend from LA picked us up and we spent the rest of the day getting a local’s guide to the city!
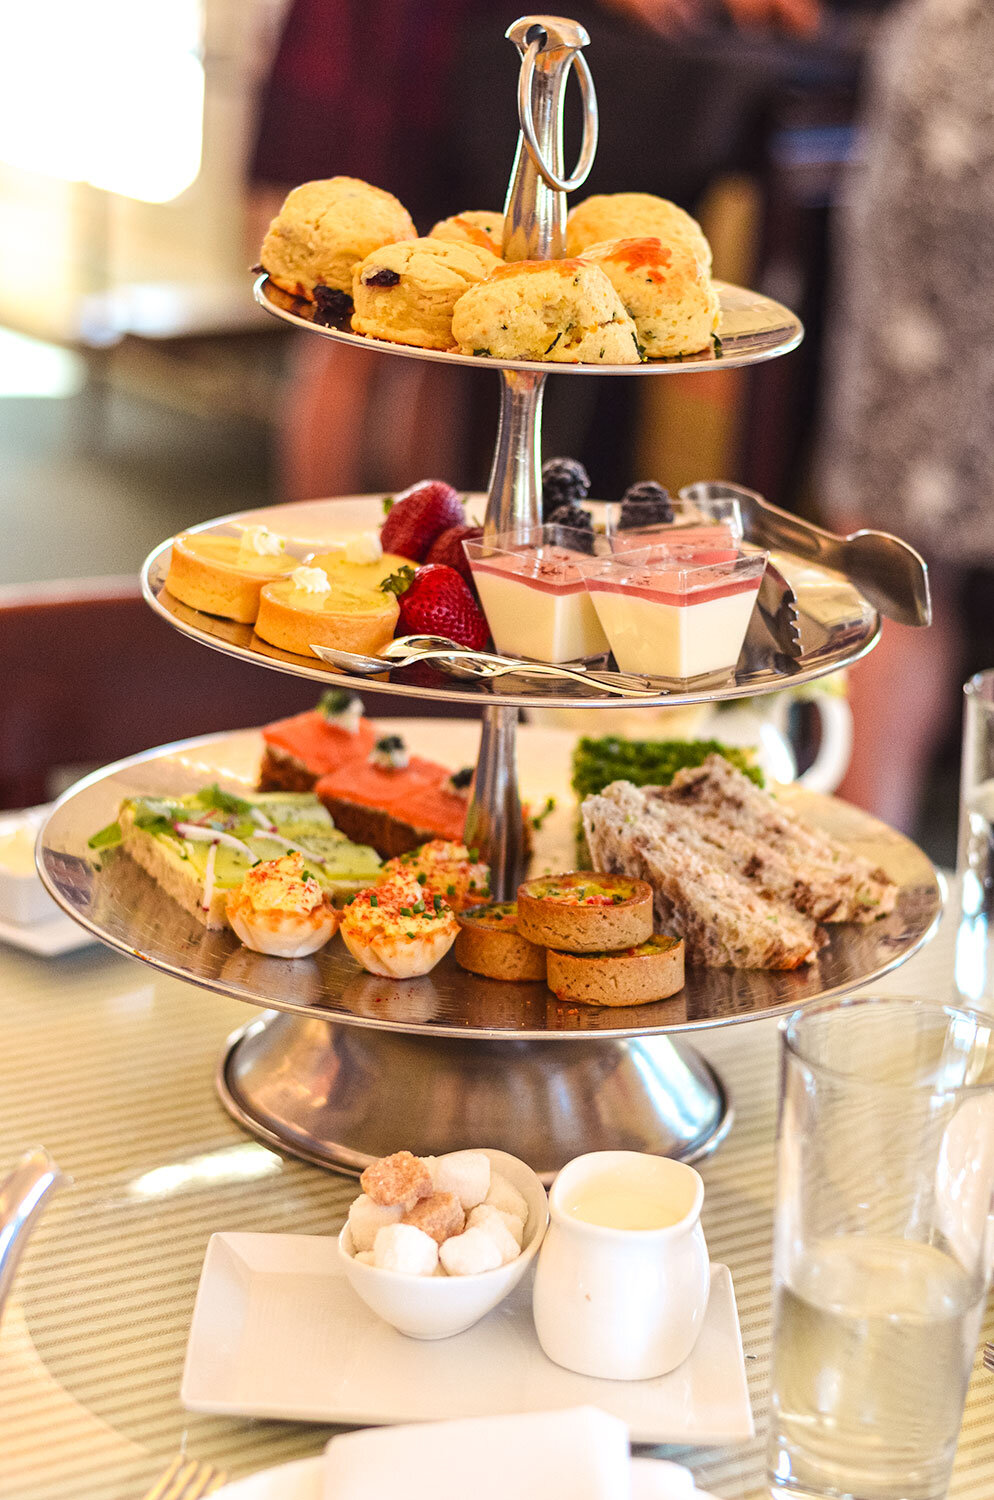
Just outside of LA in San Marino, CA is The Huntington - Library, Art Museum, and Botanical Gardens. My friend surprised me by making tea reservations at the Rose Garden Tea Room! Such a fun and memorable experience!
I had the ultimate local experience at San Pedro Fish Market where I had their famous Shrimp Tray. My mouth is watering as I write this!
Fly out of LAX with a full and happy belly!


Essential Tips for First Timers:
When to Travel: We went during the summer months because of our schedule. With that said, the summertime brings in tons of tourists, and it will be harder to reserve an RV/camping spot so plan ahead! So-Cal will stay warm even during the summer months, but the more north you go, the colder it will be. Spring and Fall will have the fewest crowds and all around great weather.
Which direction to take: When planning your road trip, I highly recommend starting North to South. This will keep you on the coastal side and makes it easy to take advantage of pullouts.
Attire: Make sure you dress in layers. We experienced colder weather during the first half of the trip since we were up north but as you drive down the coast, it can get pretty windy. Also, make sure you bring waterproof layers in case of rain.
Park Passes: If you think that you will be hitting up National Parks, BLM, National Forests, and National Wildlife Refuges, throughout your trip, you may save money in getting a parking pass. Here is the link if you are interested.
Be Flexible: Most of the small stops along the coast were things that we ended up discovering on a whim. You never know what area you’ll discover and love so make a plan but give yourself flexibility. Also, if you are planning on hiking and visiting state parks, make sure you schedule more time since certain parks can take hours to actually get to them.
Plan ahead: Yes, it’s great to be flexible but it’s also smart to plan! You will notice that cell reception is almost obsolete in most state parks and as you are driving down the coast so make sure you have a general idea of where you are going. For example, instead of relying on google maps, download an offline map in advance. That being said, make sure you know where gas, rest, food, and rv spots are.
Here are some apps that I found helpful for this trip:
Travel
Spotify - All good road trips need an awesome playlist! That’s why I created an End of Summer Road Trip Playlist.
Roadtrippers - Road trip planner that includes how much money you’ll spend on fuel and far you have to drive.
Gasbuddy - Find the cheapest gas along your route.
Accuweather - Self-explanatory but when traveling north to south, you want to be prepared for all weather conditions.
iExit - Use for the practical part of your road trip like what amenities are available at the upcoming exit.
Chimani - Helps you to navigate national parks.
National Parks Service - Great for providing live updates on events in the area, where to sleep/eat, and road closures.
Scout - If you are traveling alone or want to keep your family/friends in the loop while you’re traveling.
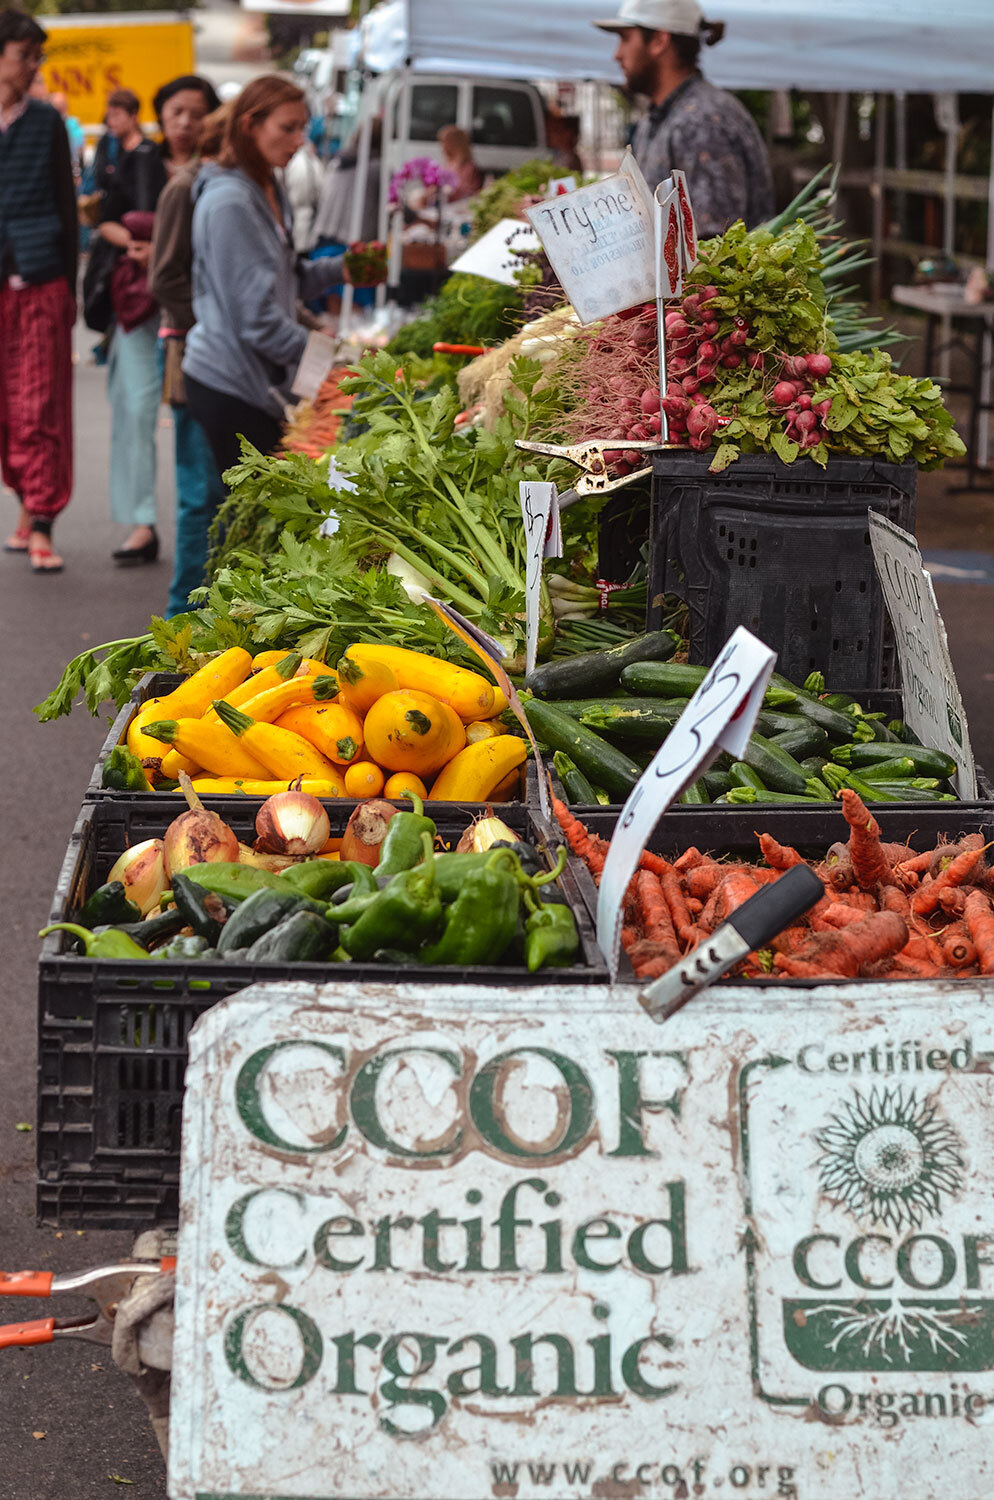
Food Tripping - Suggests healthier food options like organic coffee stops, juice joints, microbreweries, farmers’ markets, among others.
BringFido- We didn’t bring the dogs with us for this trip, but if you are traveling with a furry companion this app is great as a pet travel and hotel directory.
AllTrails - The best hiking, running, backpacking, biking, etc trails around the world.

Camping
KOA - Campgrounds across North America
Hipcamp - Private, unique camping spots
The Dyrt - Campsites, National, State, and Private
Recreation.gov - National Parks only
Tentrr - Glamping, platform tents
REI Co-op National Parks Guide - National Parks only, no reservations
Campendium - RV, tent campgrounds
Allstays - Range of campgrounds, rest stops, and free camping spots across the US.
