Sort by Category
- December 2025
- November 2025
- October 2025
- September 2025
- August 2025
- June 2025
- August 2024
- July 2024
- June 2024
- May 2024
- February 2024
- January 2024
- December 2023
- November 2023
- October 2023
- September 2023
- August 2023
- July 2023
- March 2023
- February 2023
- January 2023
- December 2022
- November 2022
- October 2022
- September 2022
- August 2022
- June 2022
- May 2022
- April 2022
- March 2022
- February 2022
- January 2022
- December 2021
- November 2021
- October 2021
- September 2021
- August 2021
- July 2021
- June 2021
- May 2021
- April 2021
- March 2021
- February 2021
- January 2021
- December 2020
- November 2020
- October 2020
- September 2020
- August 2020
- July 2020
- June 2020
- May 2020
- April 2020
- March 2020
- February 2020
- January 2020
- December 2019
- November 2019
- October 2019
- September 2019
- August 2019
- July 2019
- June 2019
- May 2019
- April 2019
- March 2019
- February 2019
- January 2019
- December 2018
- November 2018
- October 2018
- September 2018
- August 2018
- July 2018
- June 2018
- May 2018
- April 2018
- March 2018
- February 2018
How to Create a Healthy Stress-Free Summer Picnic + Watermelon Salad
A couple of weeks ago, I hosted a summer picnic with my friends Maria, Rebecca, Kayla, and Liz before some of us separated. It was such a fun time enjoying each other's company while eating delicious food! The biggest reason why we were able to enjoy the moment before the big farewell was because it was stress-free!
Now, it seems like it can be tiresome setting a time, location, menu and actually prepping the food but I have some secrets that can make this picnic experience pretty fun and stress-free! If you are wanting to host your first summer picnic, here is what you need to know to make this as stress-free as possible:
KEEP IT SIMPLE
Insider guide on how to create a healthy stress-free summer picnic plus a watermelon salad recipe!
A couple of weeks ago, I hosted a summer picnic with my friends Maria, Rebecca, Kayla, and Liz before some of us separated. It was such a fun time enjoying each other's company while eating delicious food! The biggest reason why we were able to enjoy the moment before the big farewell was because it was stress-free!
Now, it seems like it can be tiresome setting a time, location, menu and actually prepping the food but I have some secrets that can make this picnic experience pretty fun and stress-free! If you are wanting to host your first summer picnic, here is what you need to know to make this as stress-free as possible:
KEEP IT SIMPLE
From the decorations to the menu, keep it simple, simple, simple! The summertime is the best season to host a picnic because the flowers are blooming and the grass is green - what’s great is that you don’t even have to pay for it!
Another way to keep your decorations simple is by using things you already own. By doing a quick scan around the house, I was able to scrounge up blankets, trays, plates, forks and mason jars that had a simple color scheme that reflected summer colors. So not only are you using your environment for decorations, you are also using things you already own so a win-win on the wallet!
What’s great about the summer is that it’s hot so people typically like to eat lighter, more refreshing type foods. This will make creating the menu that much easier!
SERVE YOURSELF
I could literally devote an entire page on food allergies from all five of us combined, but I will refrain. With that said, you will most likely have someone in your group with a food allergy/sensitivity. This may seem a little overwhelming as your creating the menu, but if you create simple dishes and give them the opportunity to serve themselves then it puts the pressure off of you.
A charcuterie board is a prime example. A charcuterie board mostly consist of a variety of meat and cheeses, with fruits and nuts. You can also cater to your board to your friend’s palettes. My board was kept pretty simple as I had to be sensitive to food allergies but even though one of my friends is allergic to nuts, I was able to separate the nuts by keeping them in their own bowl.
My classic healthy chicken salad is a great main dish that is simple and can be catered to preference. This chicken salad is always a hit in the office so I knew it would be great for the picnic! Again, there were allergies so I just simply omitted the carrots and sunflower seeds and kept the spices neutral and it was still a great main dish! If you have friends that are gluten-free, use lettuce to make chicken salad lettuce wraps.
HYDRATION
You can totally get away with bringing water to a summer picnic- it’s actually encouraged! The summer heat may seem like you’re melting so your guests won’t notice that you didn’t bring rosé or something fancy - they will be looking for water! To take that summer drink up a notch, why not infuse them with herbs and fruit like mint, lemon, and blueberries.
Another great way to take that water up a notch is with my newest recipe, watermelon lime refreshers! You can bring them for drinks or go a simple step further and make them into popsicles. The popsicles were the best part because by the time everyone finished stuffing faces, it was time for something sweet, light and refreshing to end a perfect picnic!
What are some ways you like to create a healthy stress-free summer picnic? Leave a comment, rate it, and don’t forget to tag your summer picnic photo to #fromtherootsblog on Instagram. We love to see your healthy and stress-free summer picnic photos!
Summery watermelon salad that is sure to be a hit at your next summer picnic!
INGREDIENTS
1/2 small seedless watermelon (cubed)
1/4 cup crumbled feta
2 Tbsp chopped fresh mint
juice of 1/2 lime
Toppings
Balsamic glaze
Directions
Combine all ingredients the day of the picnic or as your setting up the picnic and drizzle balsamic glaze as a nice touch!
Strawberry Fields Salad
Spring is finally here!
The birds are chirping, the flowers are blooming, and the sunshine lasts longer. I always look forward to the weather becoming warmer and our frozen world coming back to life. The spring is a gentle reminder that seasons do not last forever and that eventually, flowers will begin to bloom again. How can this reawakening of a flower relate to our story as women? Are you currently stuck in a career that does not allow for growth? Do you want to get your health back on track but don’t know where to start? Just like a flower emerging from its winter slumber, so can we as women come into a new season of life. It might take some hard work and sacrifice, but with time you will begin to see the fruition of your efforts and fulfillment of your goals.
This spring salad was featured in Bliss Women Magazine. Their mission is to make women's health and well-being a priority. Check out their website to learn more!
Spring is finally here!
The birds are chirping, the flowers are blooming, and the sunshine lasts longer. I always look forward to the weather becoming warmer and our frozen world coming back to life. The spring is a gentle reminder that seasons do not last forever and that eventually, flowers will begin to bloom again. How can this reawakening of a flower relate to our story as women? Are you currently stuck in a career that does not allow for growth? Do you want to get your health back on track but don’t know where to start? Just like a flower emerging from its winter slumber, so can we as women come into a new season of life. It might take some hard work and sacrifice, but with time you will begin to see the fruition of your efforts and fulfillment of your goals.
Not only do flowers bloom but so does spring produce! In-season produce reaps the most nutritional value so look for these fruits and veggies at your local farmer’s market or produce aisle:
Strawberries
Asparagus
Radishes
Peas
Rhubarb
Arugula
Beets
Fava beans
Artichokes
Avocados
Citrus Fruits
Fresh herbs
What better way to incorporate these ingredients than to make a spring salad! Salads are a super-convenient way to get in a couple of servings of vegetables and/or fruit into your diet. Salads can also be fun, colorful and full of great texture.
For this healthy recipe, I have created a vegetarian style salad with most of these spring ingredients that contain healthy fats, protein and complex carbohydrates that will keep you satisfied.
This winning strawberry fields salad is complex in flavor, yet super simple to make. It provides just the right amount of sweetness from the strawberries and honey balsamic vinaigrette, nuttiness from the pecans, creaminess from the avocado and goat cheese, tartness from the green apples, and spiciness from the arugula and radishes. The honey balsamic vinaigrette pairs beautifully with the contrasting flavors and textures of the salad.
If you try this recipe, let us know! Leave a comment, rate it, and don’t forget to tag a photo with #fromtherootsblog on Instagram. We love seeing what you come up with!
This strawberry fields salad will become your new go-to salad for the spring! Made with fresh spring produce and a bright honey balsamic vinaigrette. A vegetarian and gluten-free option!
INGREDIENTS
1 cup pecan halves
1 Tbsp coconut sugar
1 tsp coconut oil
1 cup strawberries (sliced)
1 large handful fresh mixed greens
1 small handful fresh arugula
2 Tbsp goat cheese (crumbled)
1 Tbsp fresh mint leaves
1/2 cup carrots (shredded)
1/2 granny smith apple (sliced)
1/4 cup radishes (sliced)
1/2 cup fresh snow peas
1/2 avocado (sliced
Honey Balsamic Vinaigrette
1/2 lemon with zest
2 Tbsp balsamic vineger
1 Tbsp EVOO
1 Tbsp honey
1/4 tsp dijon mustard
salt and pepper to season
DIRECTIONS
Preheat oven to 300 degrees.
Mix coconut oil and sugar together and add pecans. Toss until thoroughly coated. Place pecans in a single layer on a baking sheet with parchment paper.
Cook for 5-10 minutes on one side and then flip them and cook for an additional 5-10 minutes.
While the pecans are roasting, whisk together the vinaigrette ingredients until corporated. Give it a test taste. If you like it sweeter, add a touch more honey. If you like more vinegar, add a touch more balsamic.
Toss dressing with the salad and top with avocado and coconut sugar roasted pecans.
Avocado Deviled Eggs
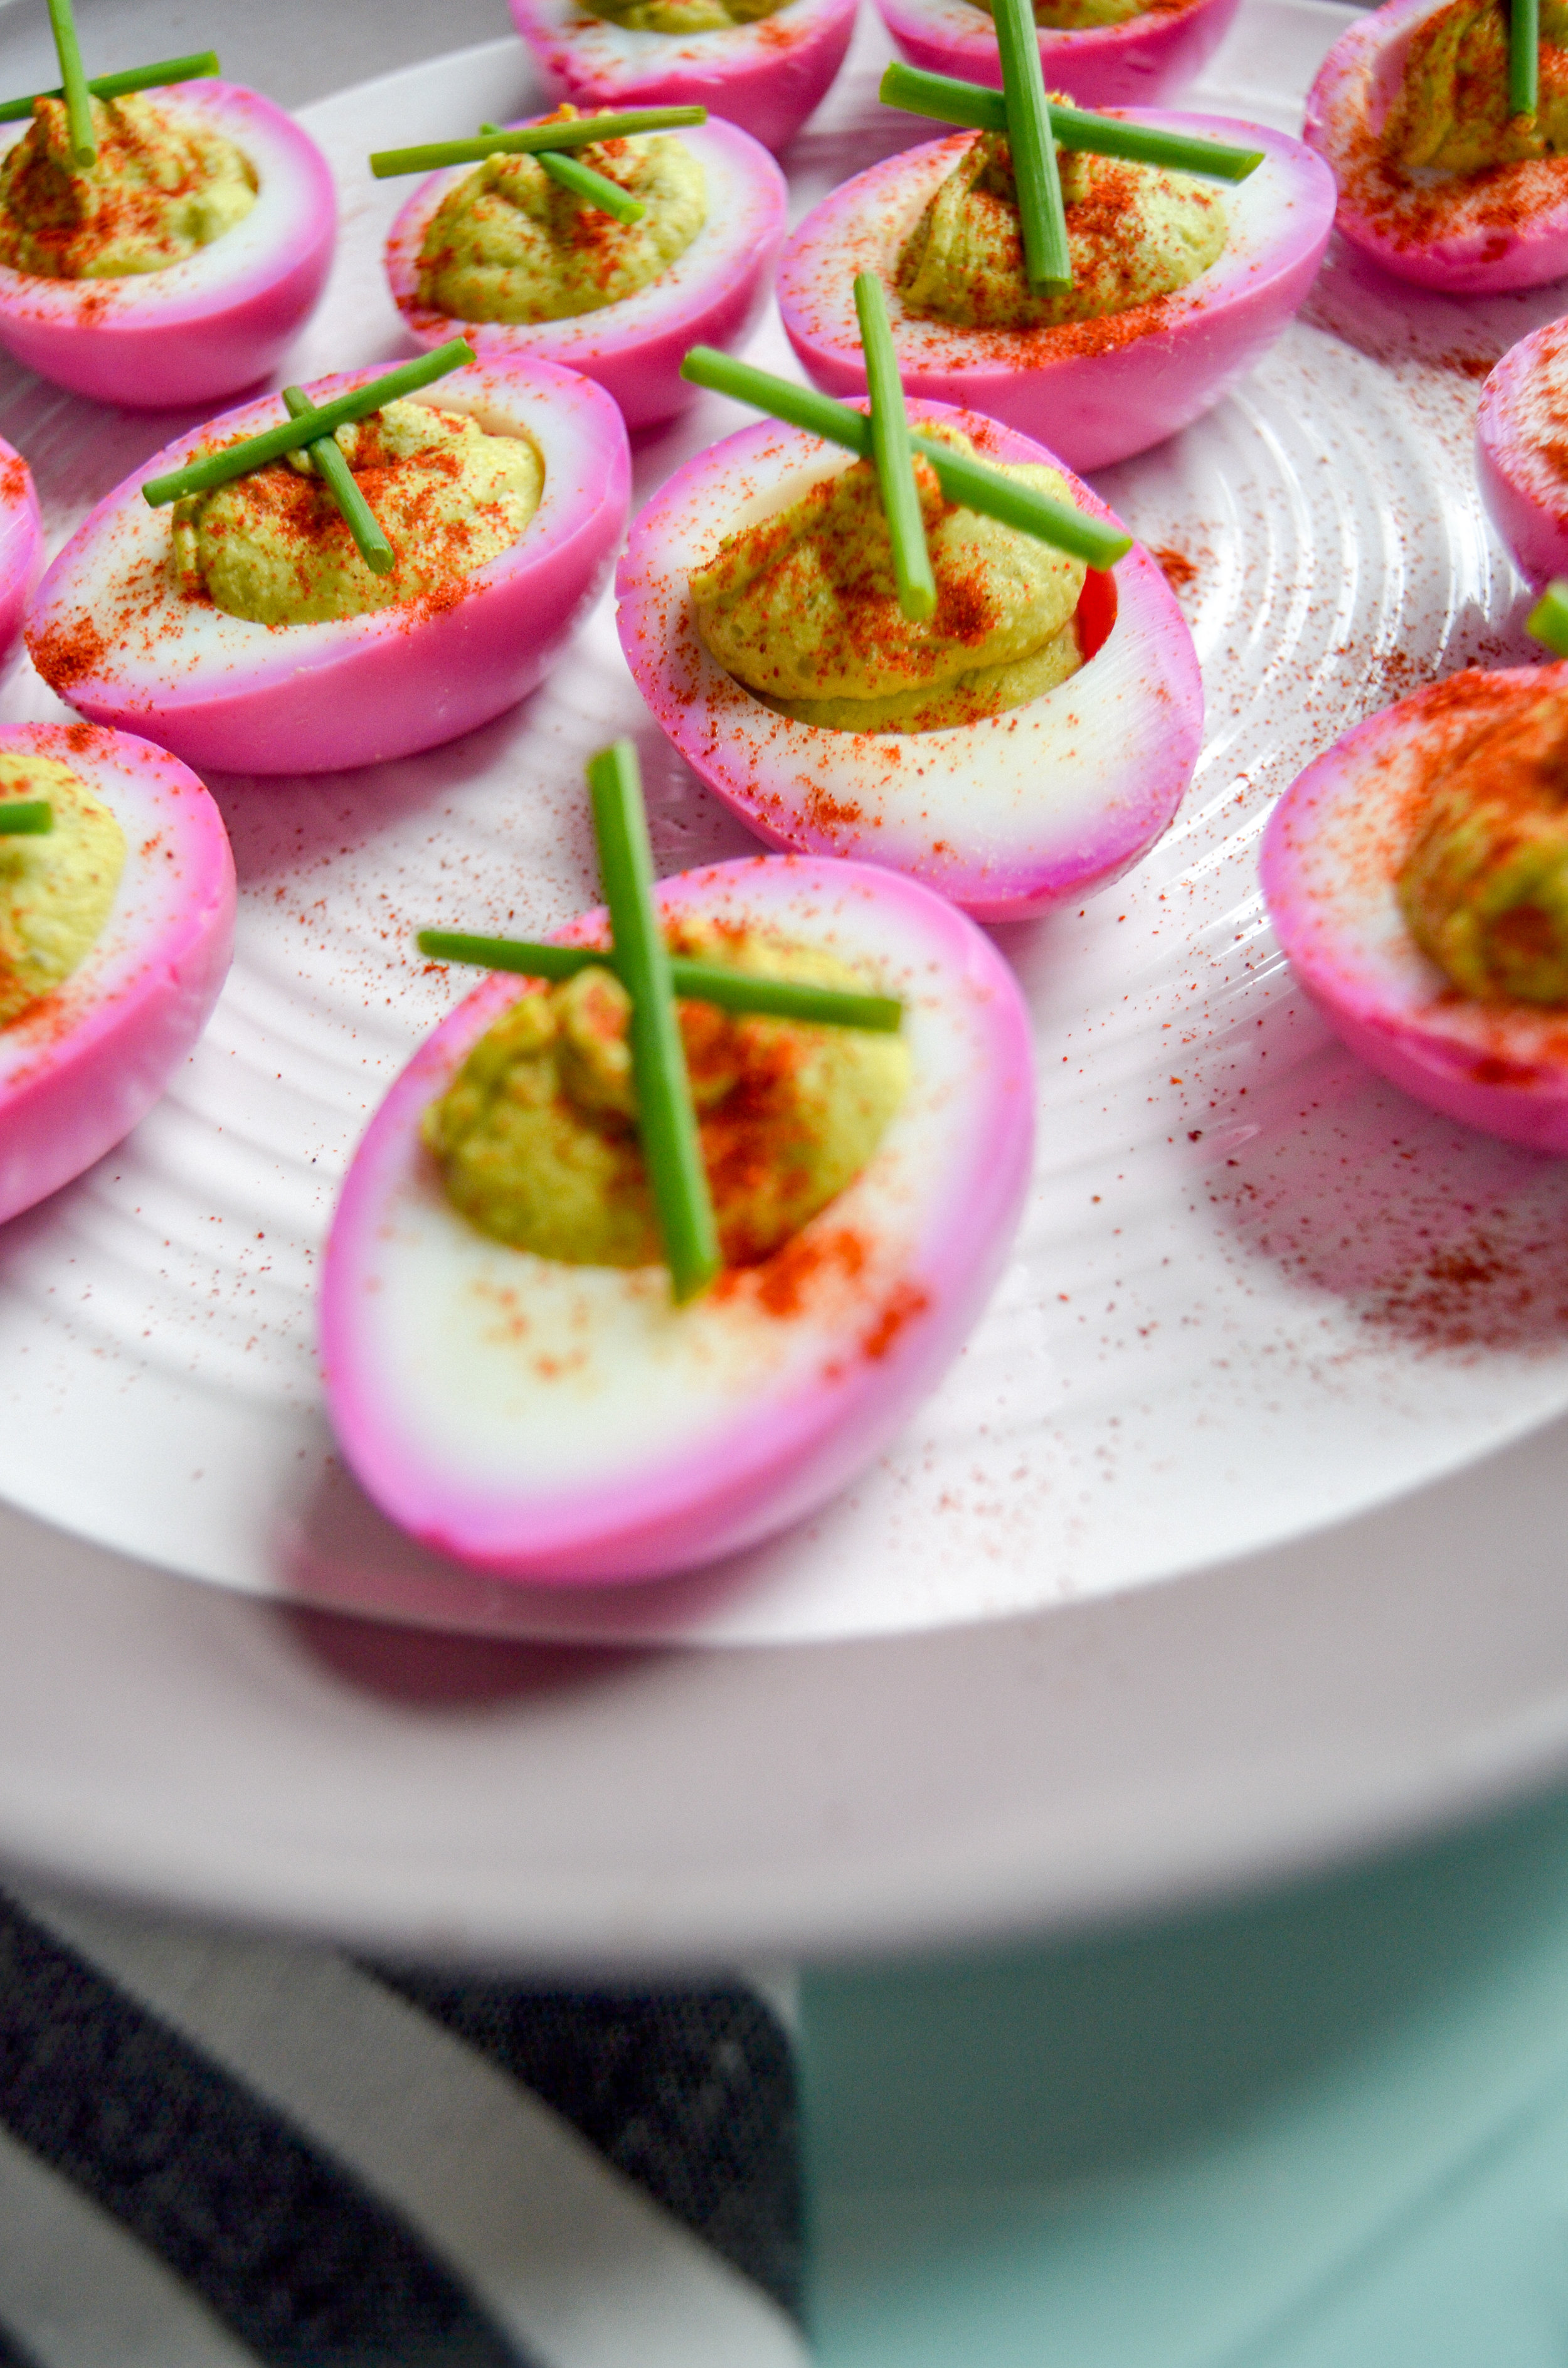
They’re perfect for Easter or for an upgraded snack. Sprinkle with chives or dill and smoked paprika for garnish!
Growing up as a child, my mother would make deviled eggs for every occasion; Christmas, Easter, you name it! But since I live in a different state from her, it looks like it's up to me to continue the tradition in my home! This recipe will be similar to my mother’s recipe but tweaked so it’s healthier for you.
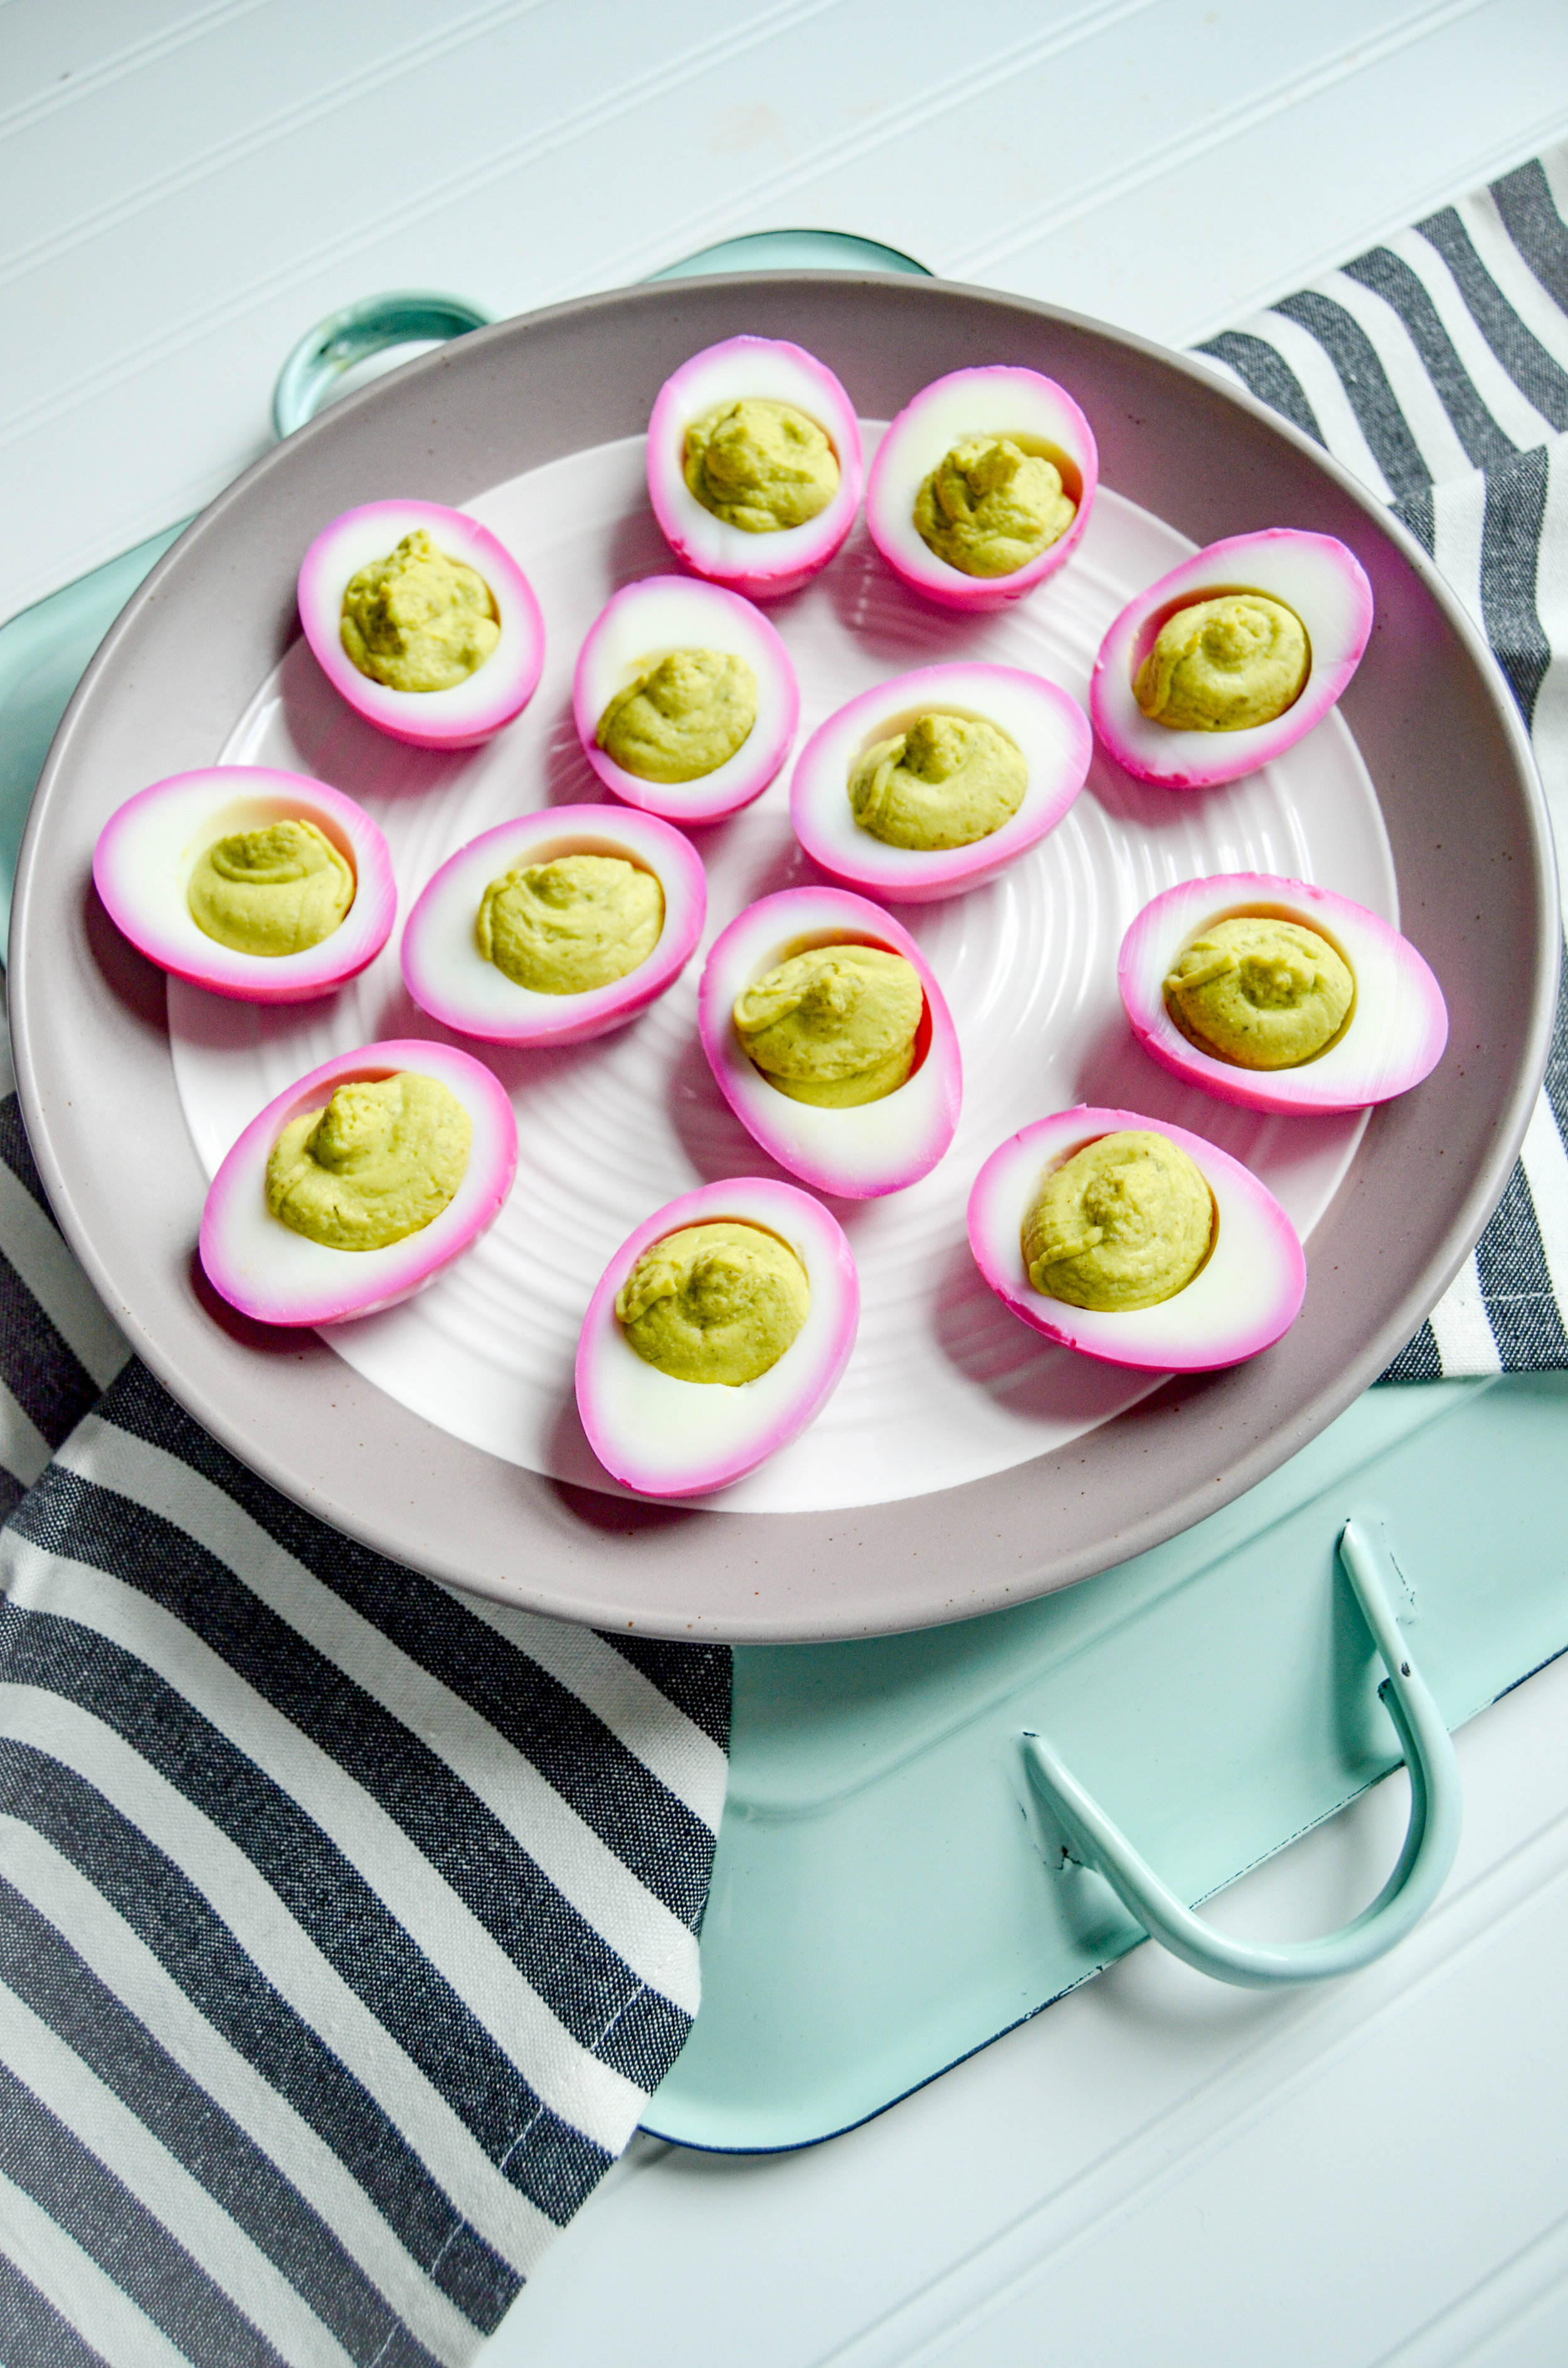
Made with avocado instead of mayonnaise, these healthy avocado deviled eggs are just as creamy and delicious without the guilt.
They’re perfect for Easter or for an upgraded snack. Sprinkle with chives or dill and smoked paprika for garnish!
Growing up as a child, my mother would make deviled eggs for every occasion; Christmas, Easter, you name it! But since I live in a different state from her, it looks like it's up to me to continue the tradition in my home! This recipe will be similar to my mother’s recipe but tweaked so it’s healthier for you.
Eggs can get a bad reputation with the fat content but eggs actually contain healthy fats that are essential to overall health. Eggs are also a great source of protein as one whole egg contains six grams of protein. They are great from a culinary standpoint to help emulsify sauces or dressings and important in baking to add structure, leavening, and to enhance flavor.
Speaking of healthy fats, a great whole food alternative to mayonnaise is using avocado instead! An avocado provides just a quarter of the calories mayo does along with healthy fats, fiber, and important vitamins like folate and Vitamin C.
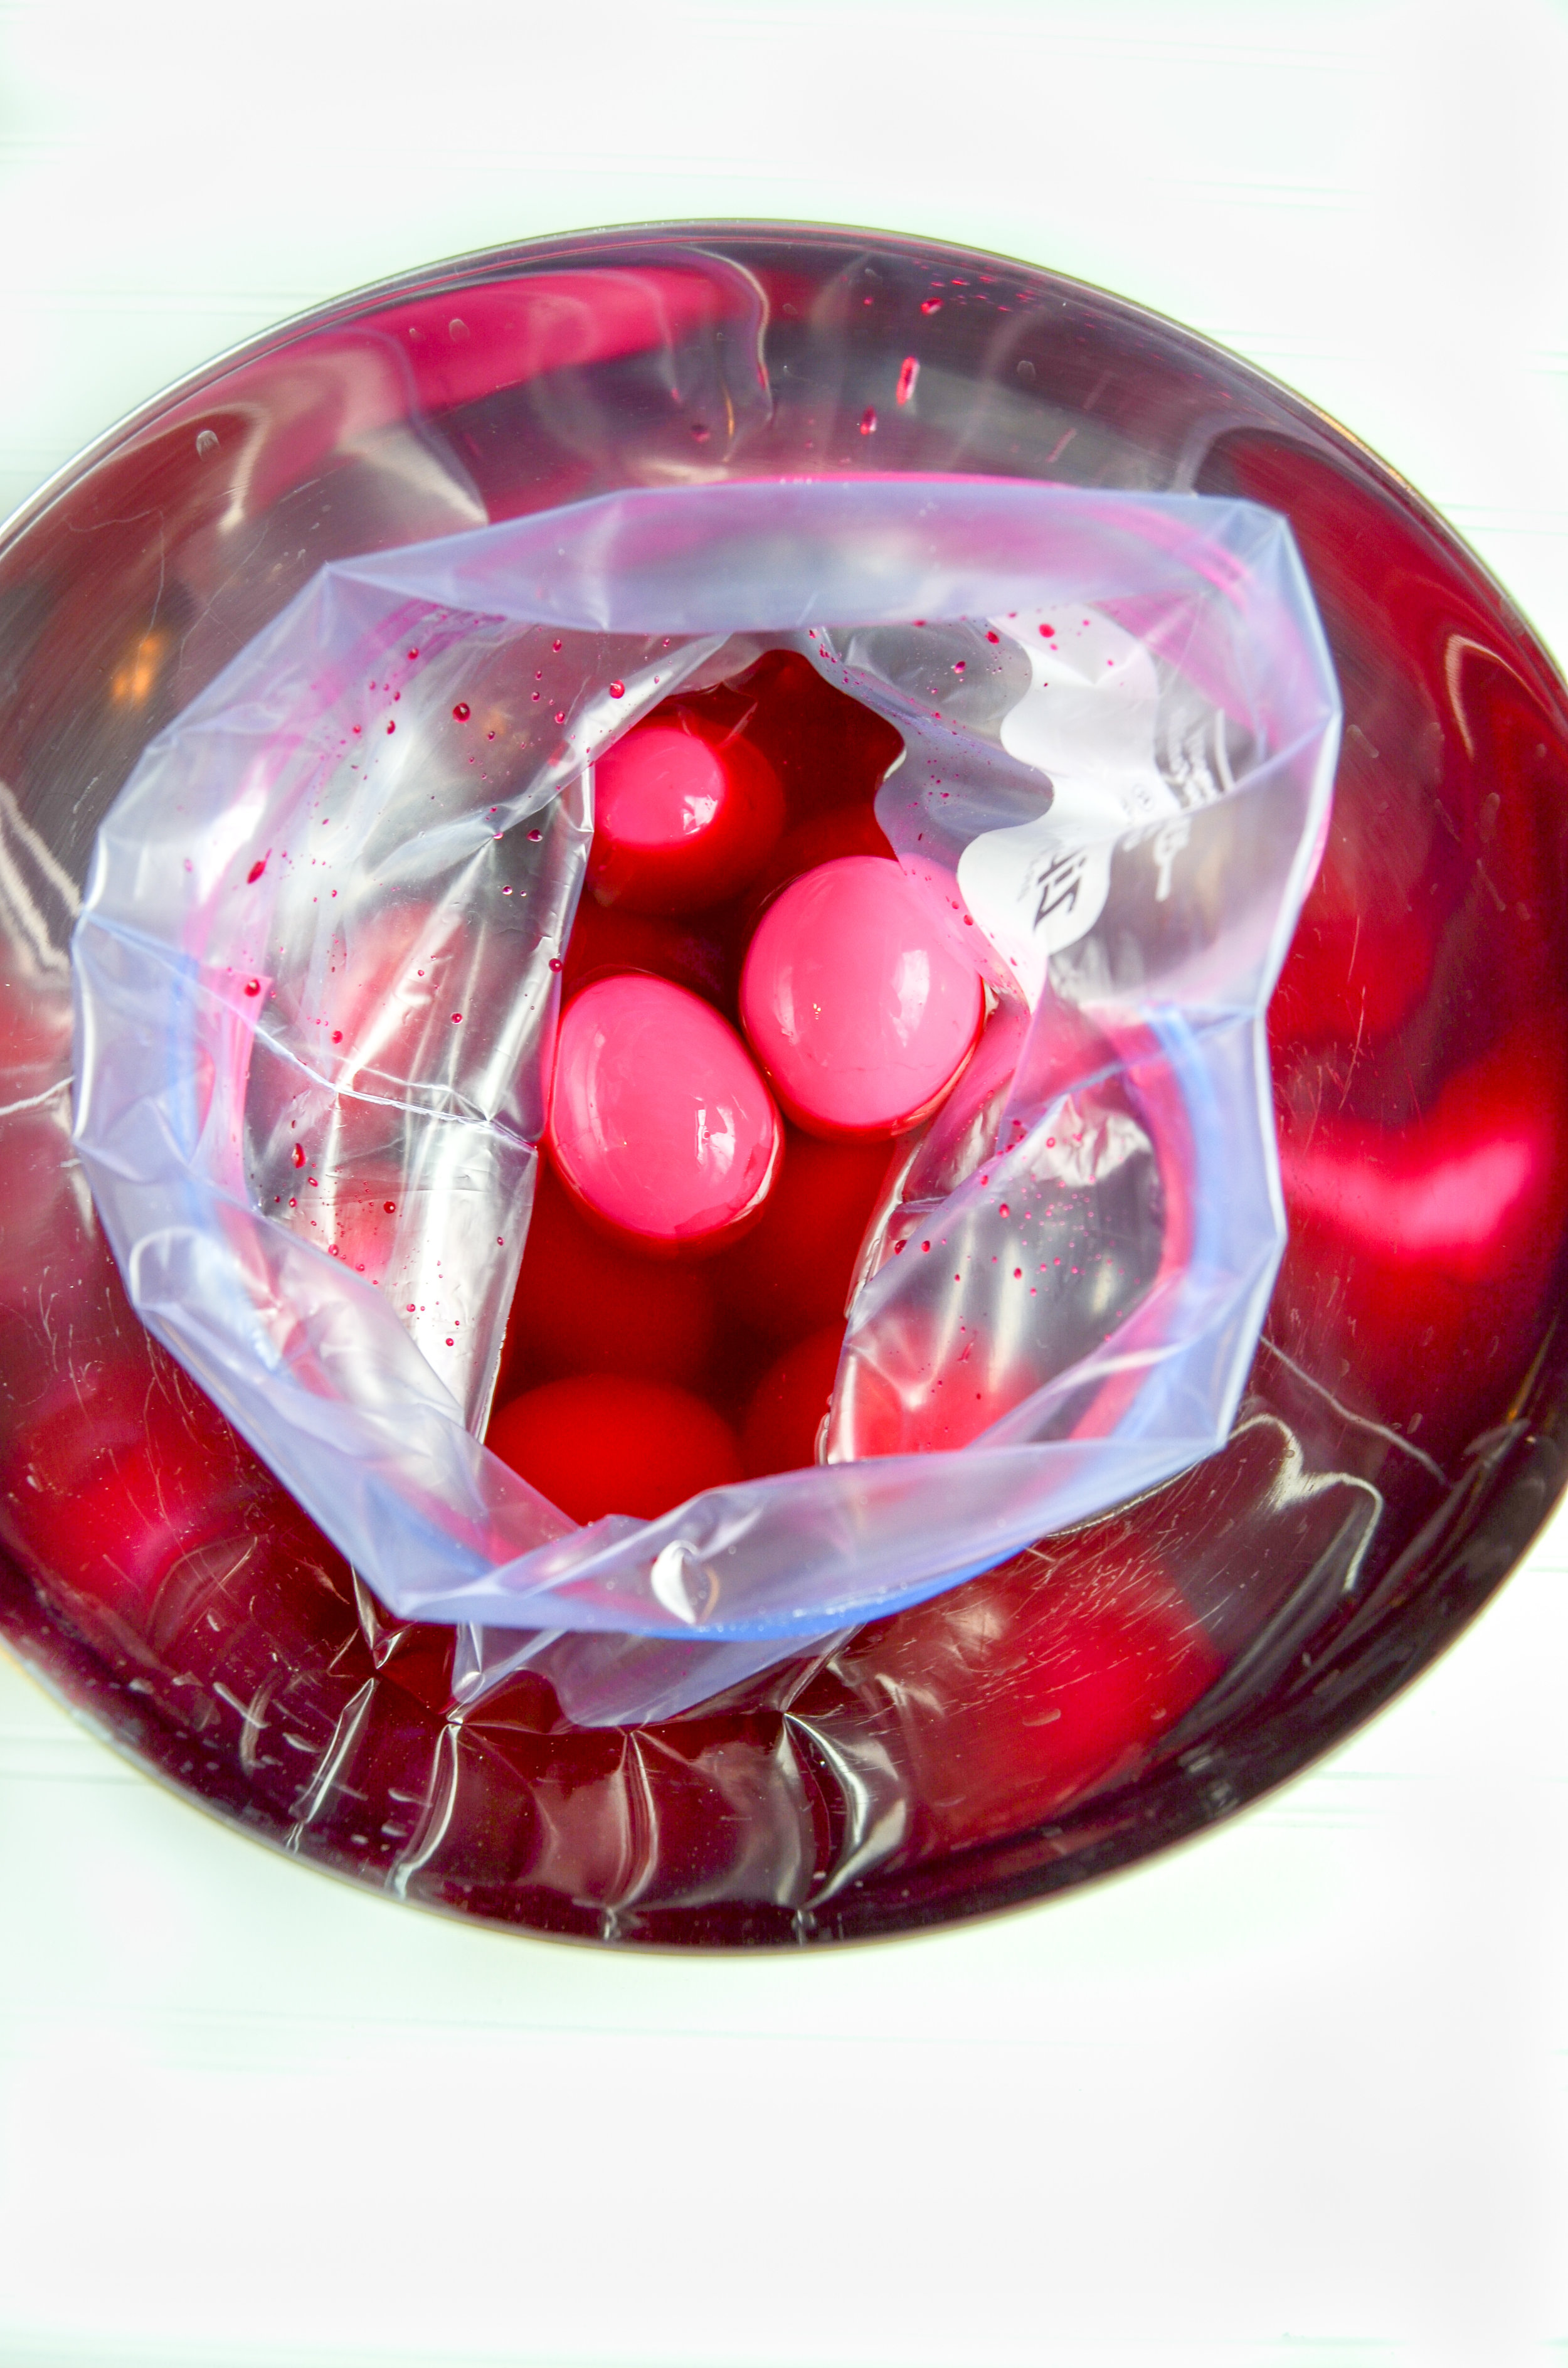
Since I absolutely love deviled eggs, I thought I would kick up the game a little bit. You can completely omit this part (why would you!?) but these eggs are beet-dyed! Dying the eggs are merely for presentation. The beet dying process does not affect flavor at all! If you would like to give your eggs this pretty color, check out the Created by Diane blog post on beet dying. I followed her foolproof method but used the juice from my Refrigerator Pickled Beets recipe instead, to cut out some steps.
Enjoy these not so devilish eggs as a quick protein snack or as an appetizer to share this Easter holiday, picnic or barbecue.
If you try this recipe, let us know! Leave a comment, rate it, and don’t forget to tag a photo with #fromtherootsblog on Instagram. We love seeing what you come up with!
Made with avocado instead of mayonnaise, these healthy avocado deviled eggs are just as creamy and delicious without the guilt.
INGREDIENTS
1 dozen, 12 fresh eggs
1 large ripe avocado
2 Tbsp minced sweet pickles (bread and butter pickles or gherkins)
2 Tbsp dijon mustard
1/2 tsp celery salt
1/4 tsp garlic powder
Garnish
smoked paprika, chives or fresh dill
DIRECTIONS
To hard boil the eggs: Place 12 eggs in a large saucepan with cold water until eggs are fully covered. Set the oven on medium heat and let the water boil gradually (this prevents the eggs from cracking if set on high). Once boiling, cover with a lid and sit on the back burner for about 11-13 min (depending on the size of your egg). When the eggs are cooked, immediately transfer eggs to an ice cold water bath to stop the cooking process. Gently crack shells to remove the egg.
To beet dye eggs: Place de-shelled eggs in a large ziploc bag and place bag in a bowl to keep the ziploc bag upright. Pour beet juice from (pickled beets recipe) and dilute with water until all eggs are covered. (or use beet mixture from (Created by Diane). Place in fridge for at least 1 hour. Rinse the beet juice off the eggs using a strainer and pat dry
Slice eggs in half and remove eggs yolks saving 4 egg yolks (8 halves) and add to a bowl. Discard or keep remaining yolks for another dish.
For this filling: add avocado, pickles, dijon mustard and seasonings to the bowl with yolks and mash until fully incorporated. Adjust seasonings to taste. It is best to use the back of a fork for easy mashing.
To serve: place filling in a ziploc bag and cut one corner to squeeze the filling into the hollowed part of the egg. Sprinkle with smoked paprika and top with chopped fresh chives or dill.
Store in an airtight container for up to 1 week and enjoy!
NOTES
The egg and avocado mixture should fill exactly 24 halved eggs but just in case you might have used a small avocado, add more egg yolk to the mixture to ensure you have enough filling for 24 halved eggs.
Kale and Pesto Cauliflower Rice
Cauliflower rice has become the new “it” vegetable. Not a day goes by where I don’t see a new cauliflower rice recipe being passed around by all the low-carb, veggie lovers. Even though it may seem like a trend, I am not so sure it will fade away anytime soon. I believe cauliflower rice is here to stay and I am perfectly okay with that! It has become a staple for my dinners as it lowers my carb intake. I also use cauliflower rice when I batch cook since it is so easy to prepare!
Cauliflower rice is cooked with kale and pesto for a low carb, gluten-free, easy and healthy dish!
Cauliflower rice has become the new “it” vegetable. Not a day goes by where I don’t see a new cauliflower rice recipe being passed around by all the low-carb, veggie lovers. Even though it may seem like a trend, I am not so sure it will fade away anytime soon. I believe cauliflower rice is here to stay and I am perfectly okay with that! It has become a staple for my dinners as it lowers my carb intake. I also use cauliflower rice when I batch cook since it is so easy to prepare!
So, what’s with the hype for this smelly vegetable? Here are some quick facts about cauliflower:
Cauliflower ranks one of the highest powerhouse vegetables according to the Centers for the Disease Control and Prevention’s Aggregate Nutrient Density Index (Ranks food based on nutrient content in relation to calorie total.)
The entire cauliflower (florets, leaves, and stalks) are edible!
Just one cup of cooked cauliflower can provide 73% of your daily recommended amount of vitamin C.
Great source of fiber!
Despite knowing how healthy it is to eat cauliflower, the taste sometimes discourages me from eating it. There is just something about the taste of plain cauliflower that my taste buds do not agree with which is why I have created this recipe in such a way that adds zest and boosts the nutritional value. The wonderful thing about cauliflower is that it’s a vegetable that will take on whatever flavor you add. In this cauliflower rice recipe, I have combined it with my quick and easy 5 ingredient pesto sauce. Kale is used to amp up the veggie and fiber intake, and finally, I add lemon to complement the pesto sauce and bring out the savory taste of kale.
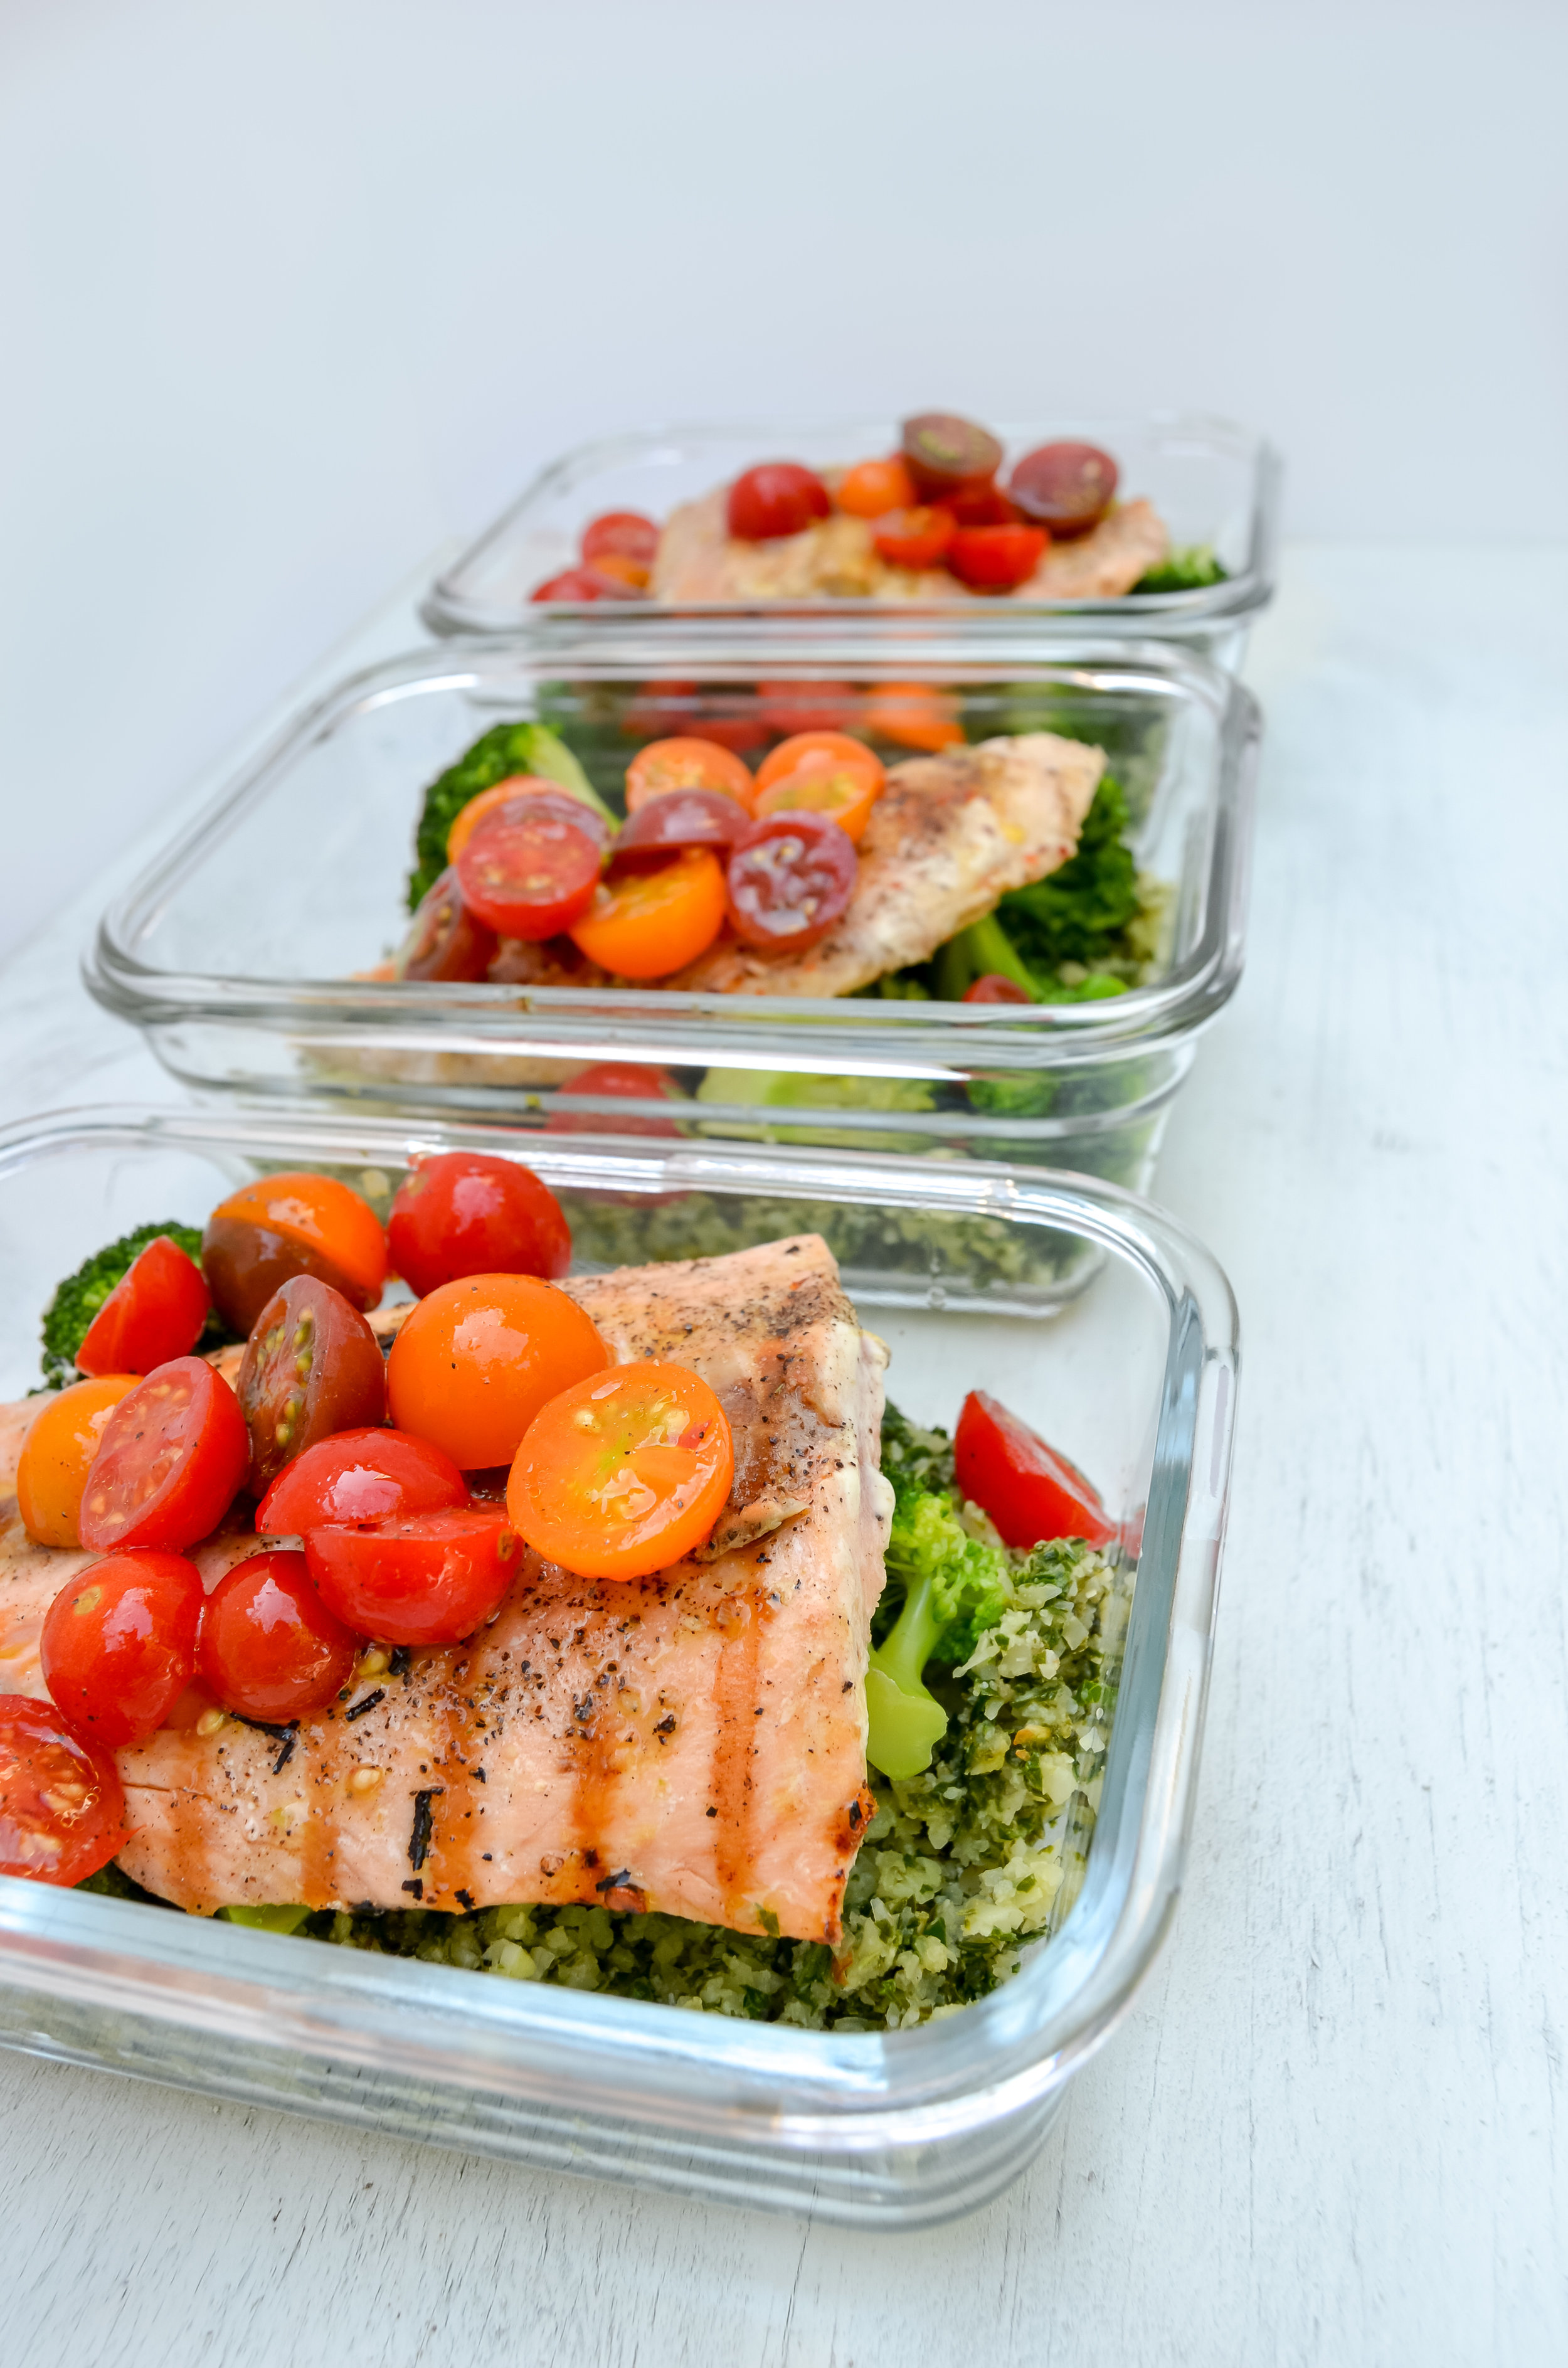
You can use cauliflower rice to substitute your typical heavy carb sides. Here, I have made kale and pesto cauliflower rice for dinner along with grilled chicken, roasted cherry tomatoes, and steamed broccoli.
Cauliflower rice is so easy and quick to make that I often prepare it when I batch cook on Sundays!
If you try this recipe, let us know! Leave a comment, rate it, and don’t forget to tag a photo with #fromtherootsblog on Instagram. We love seeing what you come up with!
Cauliflower rice is cooked with kale and pesto for a low carb, gluten-free, easy and healthy dish!
INGREDIENTS
1 cauliflower head ((or 16 oz bag frozen cauliflower rice))
1 large bunch fresh kale ((stem out))
1-3 Tbsp pesto (less or more depending on preference)
1 tsp coconut oil
1/2 lemon
DIRECTIONS
Begin by bringing about ¼ inch of water to a boil in a large frying pan.
Add ½ tsp fine sea salt and cauliflower florets* (or frozen cauliflower rice)
Cover and steam for about 3-8 minutes until desired tenderness
Drain the cauliflower rice and add back to the frying pan with 1 tsp of coconut oil on medium-high heat. Cook for about 5 minutes.
Add kale, pesto sauce, and S&P. Stir and cook for about 5-10 minutes until rice is crispy, kale has wilted and rice is fully coated with pesto sauce.
Take off heat and garnish with freshly squeezed lemon.
NOTES
*If using fresh cauliflower, cut into florets and then briefly pulse in the food processor until they are the size of grains of rice.
This recipe will make four servings. With that in mind, if you would like to use this in meal prep, divide up your protein, roasted cherry tomatoes with avocado oil and basil, and steamed broccoli.
Refrigerator Pickled Beets
We need to talk about beets.
I was not a fan of them in the beginning. It was so bad that I remember my first time trying them. It was at Jason’s Deli, many moons ago. I was with my health freak friends and they were like, “Oh! You have to add beets to your salad, they’re so good for you!”. I thought to myself, “Sure… If beets can make my entire salad pink then they can’t be that bad!”.
Boy, was I wrong; beets taste just like dirt.
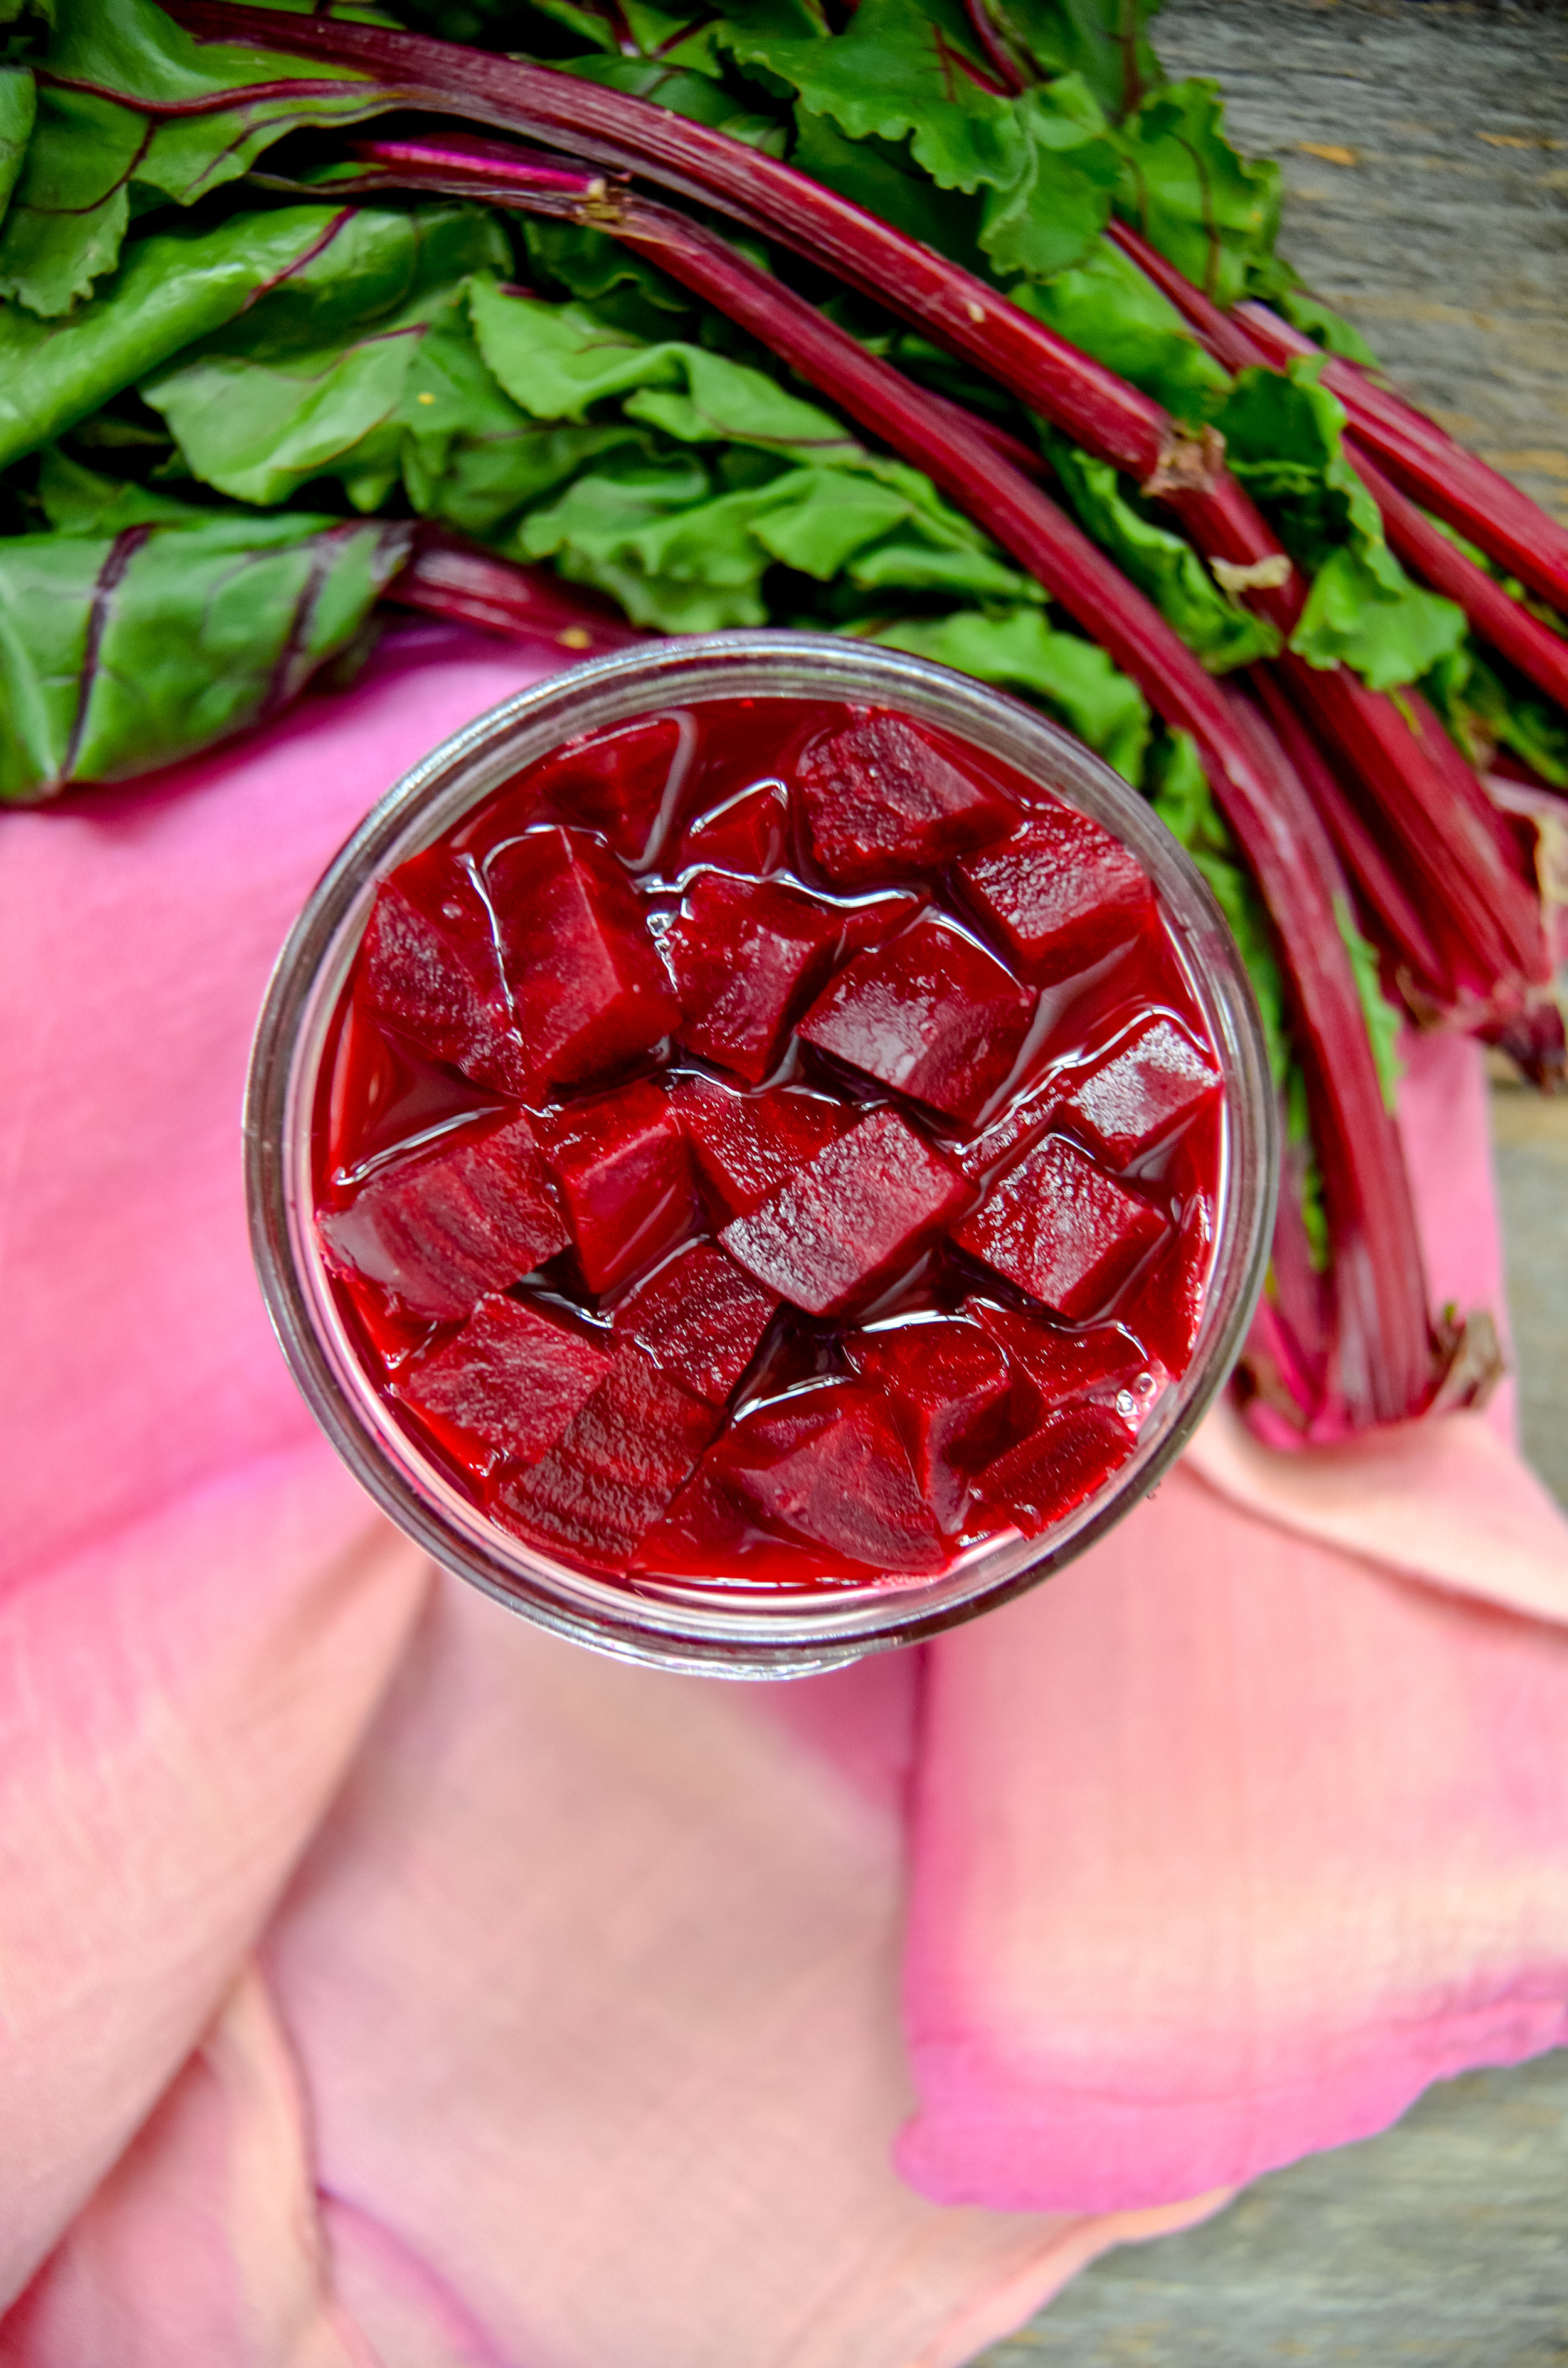
A great way to amp up up the nutritional value of beets while being a great addition to salads, side dishes, and appetizers!
We need to talk about beets.
I was not a fan of them in the beginning. It was so bad that I remember my first time trying them. It was at Jason’s Deli, many moons ago. I was with my health freak friends and they were like, “Oh! You have to add beets to your salad, they’re so good for you!”. I thought to myself, “Sure… If beets can make my entire salad pink then they can’t be that bad!”.
Boy, was I wrong; beets taste just like dirt.
Years have gone by since then and I would now consider myself a beet connoisseur. If I go to a cute mom & pop bakery or a hipster smoothie joint, I will initially scour the menu for anything beet flavored and go for it. One of my favorite things that include beet in the recipe is these amazing beet and ricotta cheese donuts from The Underground Cafe with DoughP Doughnutsin Asheville, NC. They were a total game changer!
I have thought about different ways to incorporate beets into my diet, and eventually, I realized one way to implement beets is to pickle them!
Cool facts about pickled beets:
Very low in fat, with less than 0.2g in each cup of slices.
Rich in dietary fiber which helps in promoting a healthy digestive system and stable blood sugar levels.
High levels of many vitamins and minerals like Vitamin A, B and C, potassium, magnesium, and iron.
Detox capabilities!
Contains both essential amino acids betaine (used to help people with depression) and tryptophan (that acts as a natural mood regulator)
There are many ways to incorporate pickled beets into your diet. My favorite way is to add them to salads. You can also add them to a bruschetta style appetizer with goat cheese and basil, breakfast eggs, or a side dish!
Now, let’s talk about how to pickle your beets. Most restaurants or recipes on Pinterest will tell you to pickle your beet or vegetable in sugar or a brine. A little bit of sugar is fine, but I try to avoid adding too much extra sugar to my diet. That is why my recipe uses a very small amount of sugar along with apple cider vinegar just to balance out the flavor. I won’t go too much into detail, as ACV already holds a solid reputation, but ACV is great for regulating blood sugar levels, can improve skin health, and reduce blood pressure. Now, to the recipe, we go!
If you try this recipe, let us know! Leave a comment, rate it, and don’t forget to tag a photo to #fromtherootsblog on Instagram. We love seeing what you come up with!
A great way to amp up up the nutritional value of beets while being a great addition to salads, side dishes, and appetizers!
INGREDIENTS
1 lb fresh beets
1/2 cup apple cider vinegar ((with the mother))
1/2 cup filtered water
1 tsp organic cane sugar
1 pint glass mason jar (wide mouth in picture)
DIRECTIONS
Wash and clean beets and add to a boiling pot of water.
Boil for up to 25 minutes or until fork tender. (Tip* use boiled beet water as a plant fertilizer!)
While beets are boiling, add water, sugar and ACV to a small pot over medium heat. Bring to a boil and simmer on low for 5 minutes. Let the mixture cool to room temperature.
Let the beets rest and then peel off the skin (taking the skin off after boiling process is much easier than when beets are fresh)
Cut into cubes or slices (Tip*place a paper towel over cutting board and wear gloves to prevent staining)
Add beets to a jar and pour the liquid mixture over until full to the rim. Allow the pickled beet mixture to cool until room temperature.
Screw on lid and transfer to the fridge! You can refrigerate for up to two weeks.
NOTES
Canning option: I will be honest and say that I have not tried canning for long-term storage so I am not sure how these would store later so I don’t recommend it.


