Sort by Category
- October 2025
- September 2025
- August 2025
- June 2025
- August 2024
- July 2024
- June 2024
- May 2024
- February 2024
- January 2024
- December 2023
- November 2023
- October 2023
- September 2023
- August 2023
- July 2023
- March 2023
- February 2023
- January 2023
- December 2022
- November 2022
- October 2022
- September 2022
- August 2022
- June 2022
- May 2022
- April 2022
- March 2022
- February 2022
- January 2022
- December 2021
- November 2021
- October 2021
- September 2021
- August 2021
- July 2021
- June 2021
- May 2021
- April 2021
- March 2021
- February 2021
- January 2021
- December 2020
- November 2020
- October 2020
- September 2020
- August 2020
- July 2020
- June 2020
- May 2020
- April 2020
- March 2020
- February 2020
- January 2020
- December 2019
- November 2019
- October 2019
- September 2019
- August 2019
- July 2019
- June 2019
- May 2019
- April 2019
- March 2019
- February 2019
- January 2019
- December 2018
- November 2018
- October 2018
- September 2018
- August 2018
- July 2018
- June 2018
- May 2018
- April 2018
- March 2018
- February 2018

10 Minute At Home Booty Workout
Even though your butt can look great in tight jeans or help to build confidence, there are so many more reasons than this! There are three major glute muscles that will be targeted in this short workout, gluteus maximas, gluteus medius and gluteus minimus. These muscles extends the hip (pulls the thigh behind you), does internal and external hip rotation, and abducts the hip (your lateral movement to the side). They are basically highly important! But for people who live a sedentary lifestyle or sit for the most part of the day, these muscles are often weak and under-worked.
By sitting, our glutes “turn off”which can lead to our hip flexors (the muscles that pull the thigh forward) get tight and can lead to injury. So with workouts like this that focuses on squatting with the addition to weights/without weights (strength/endurance), we can alleviate back pain, increase athletic performance, prevent knee pain, and improve posture! Now you know what your glutes do for you, here are four moves you can do for them!

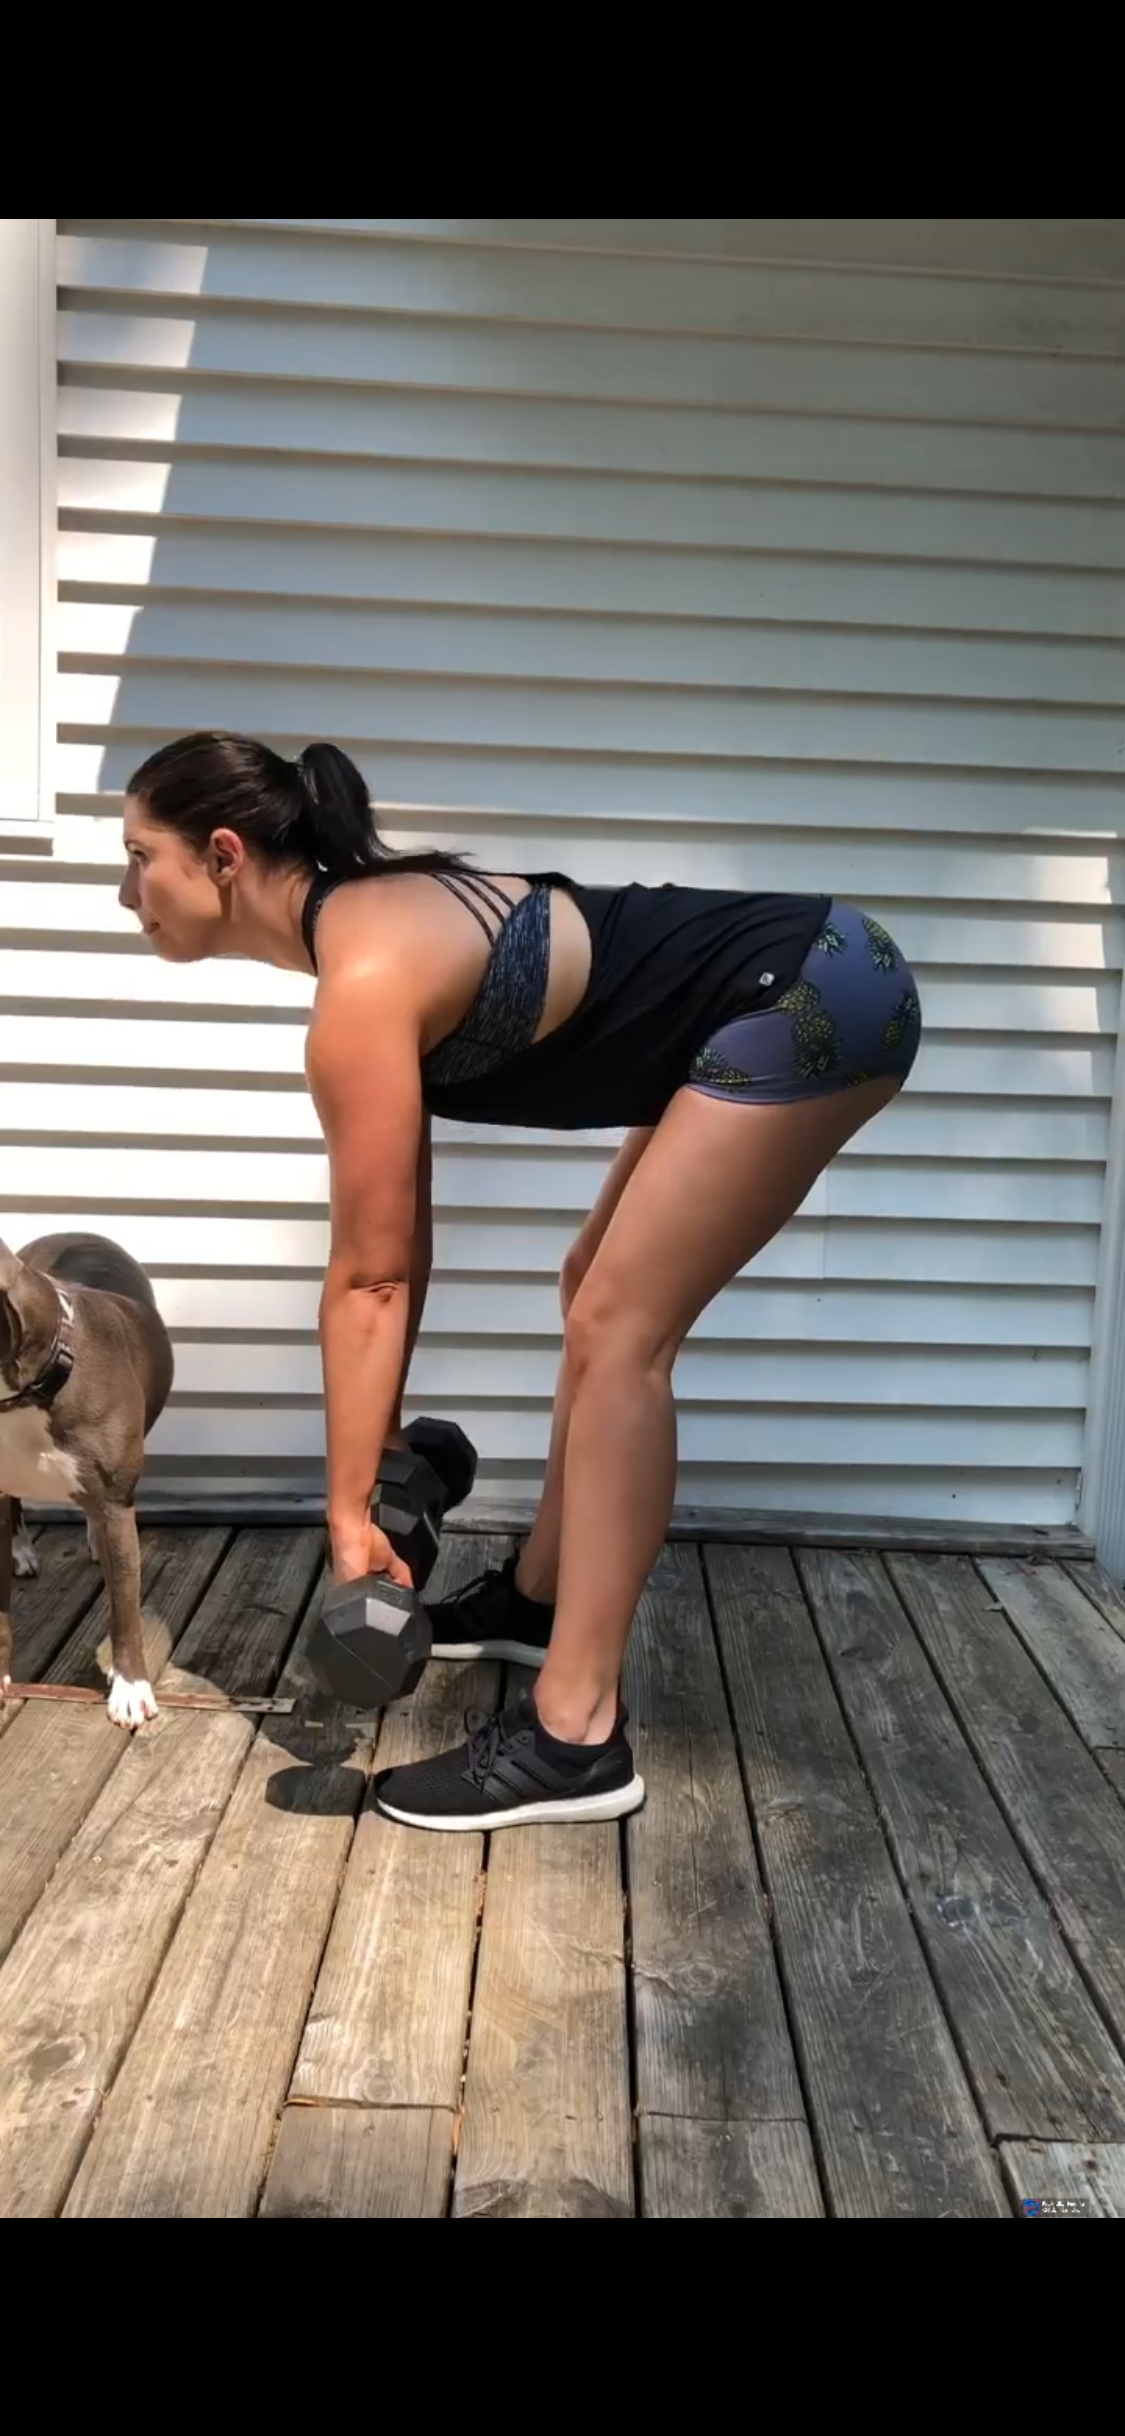
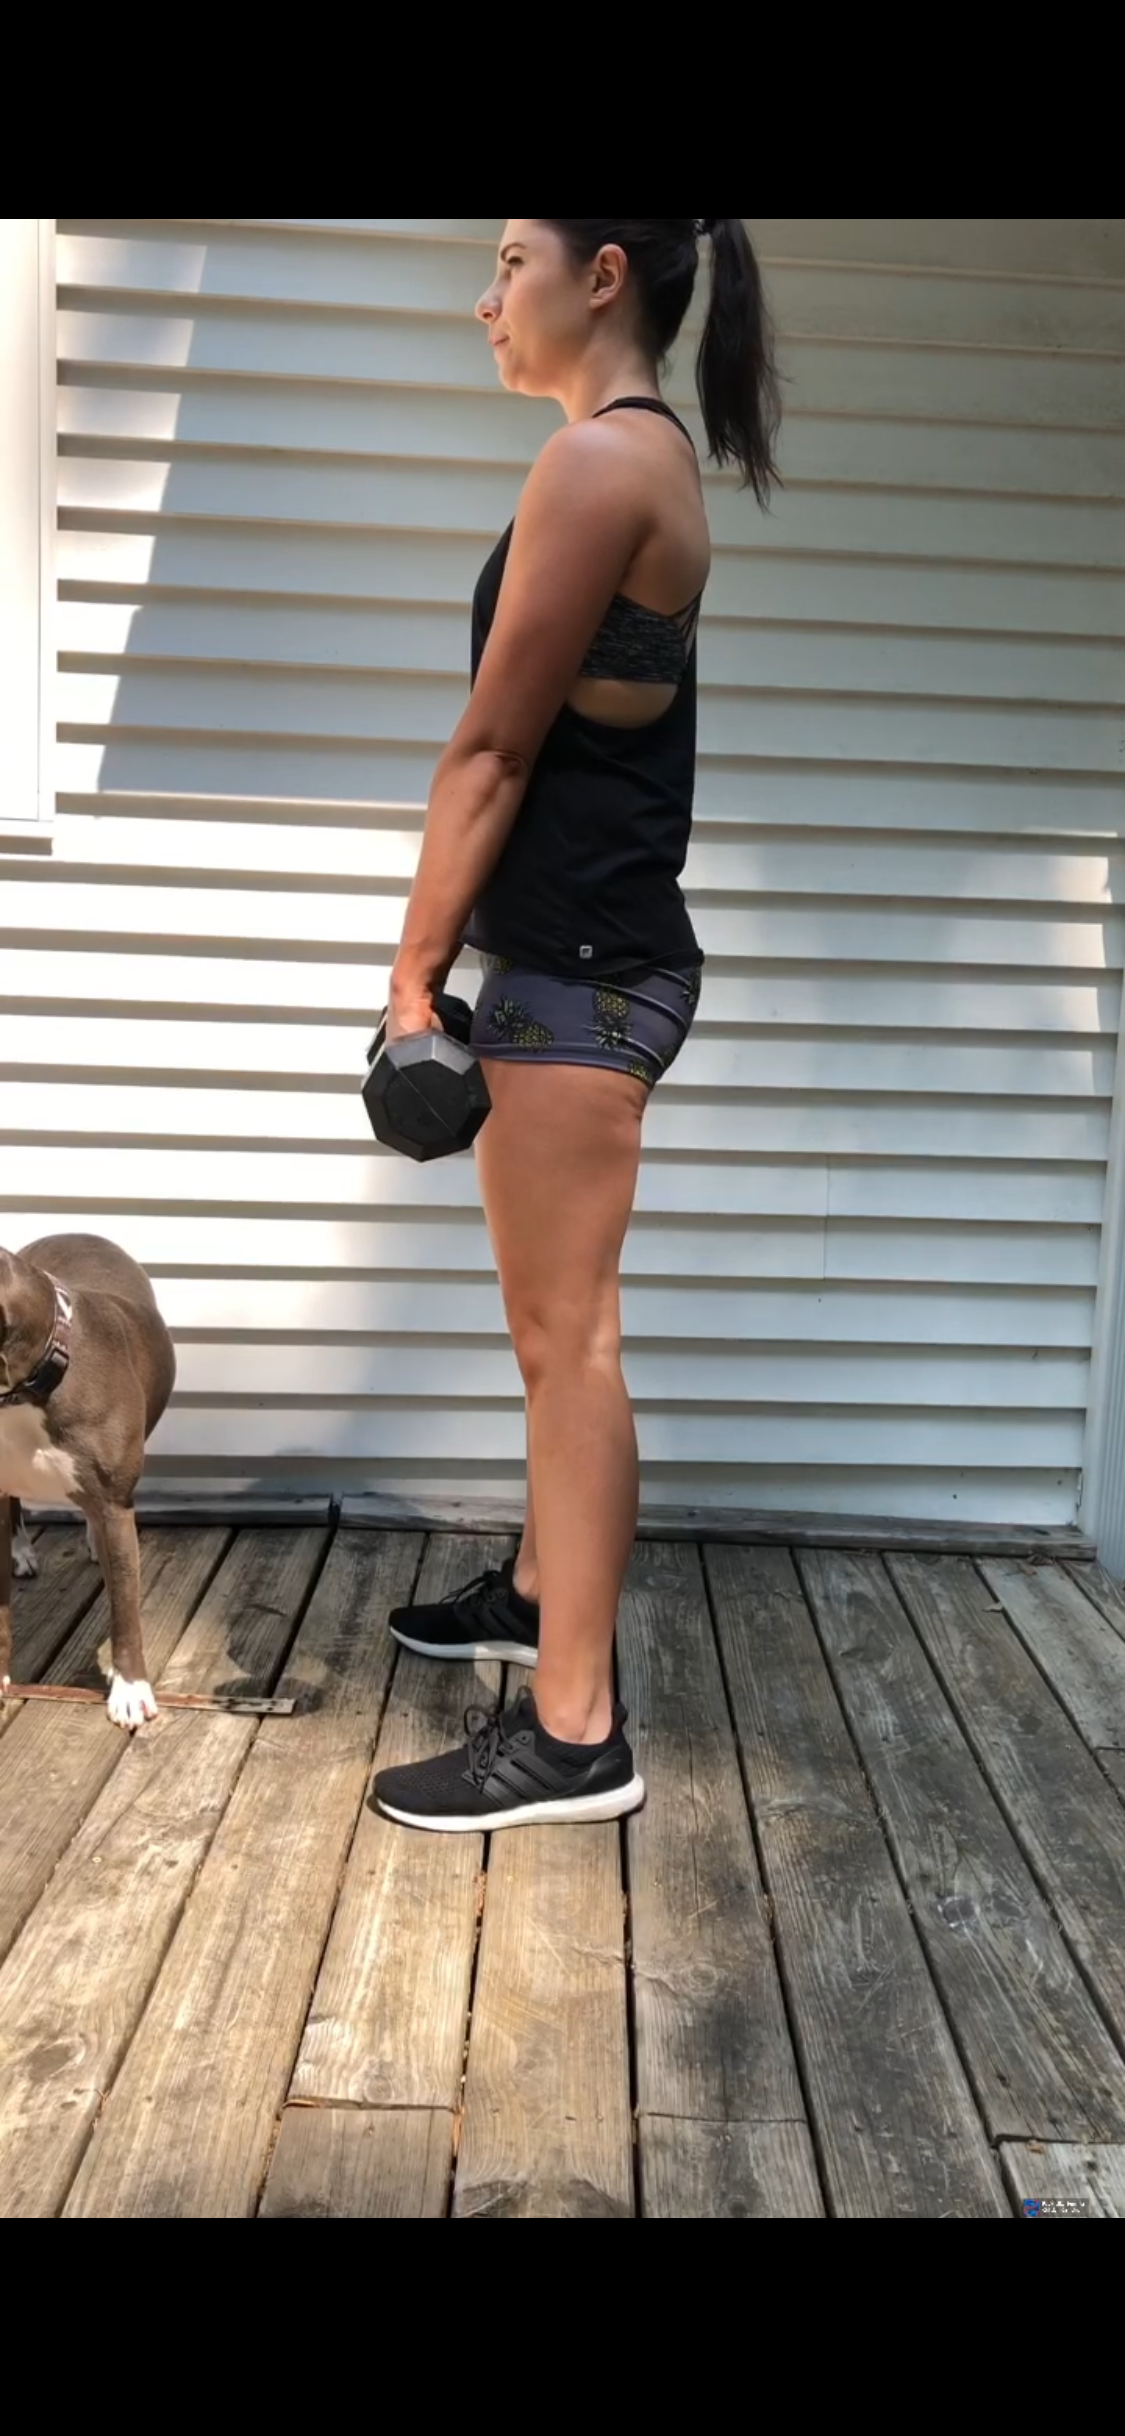
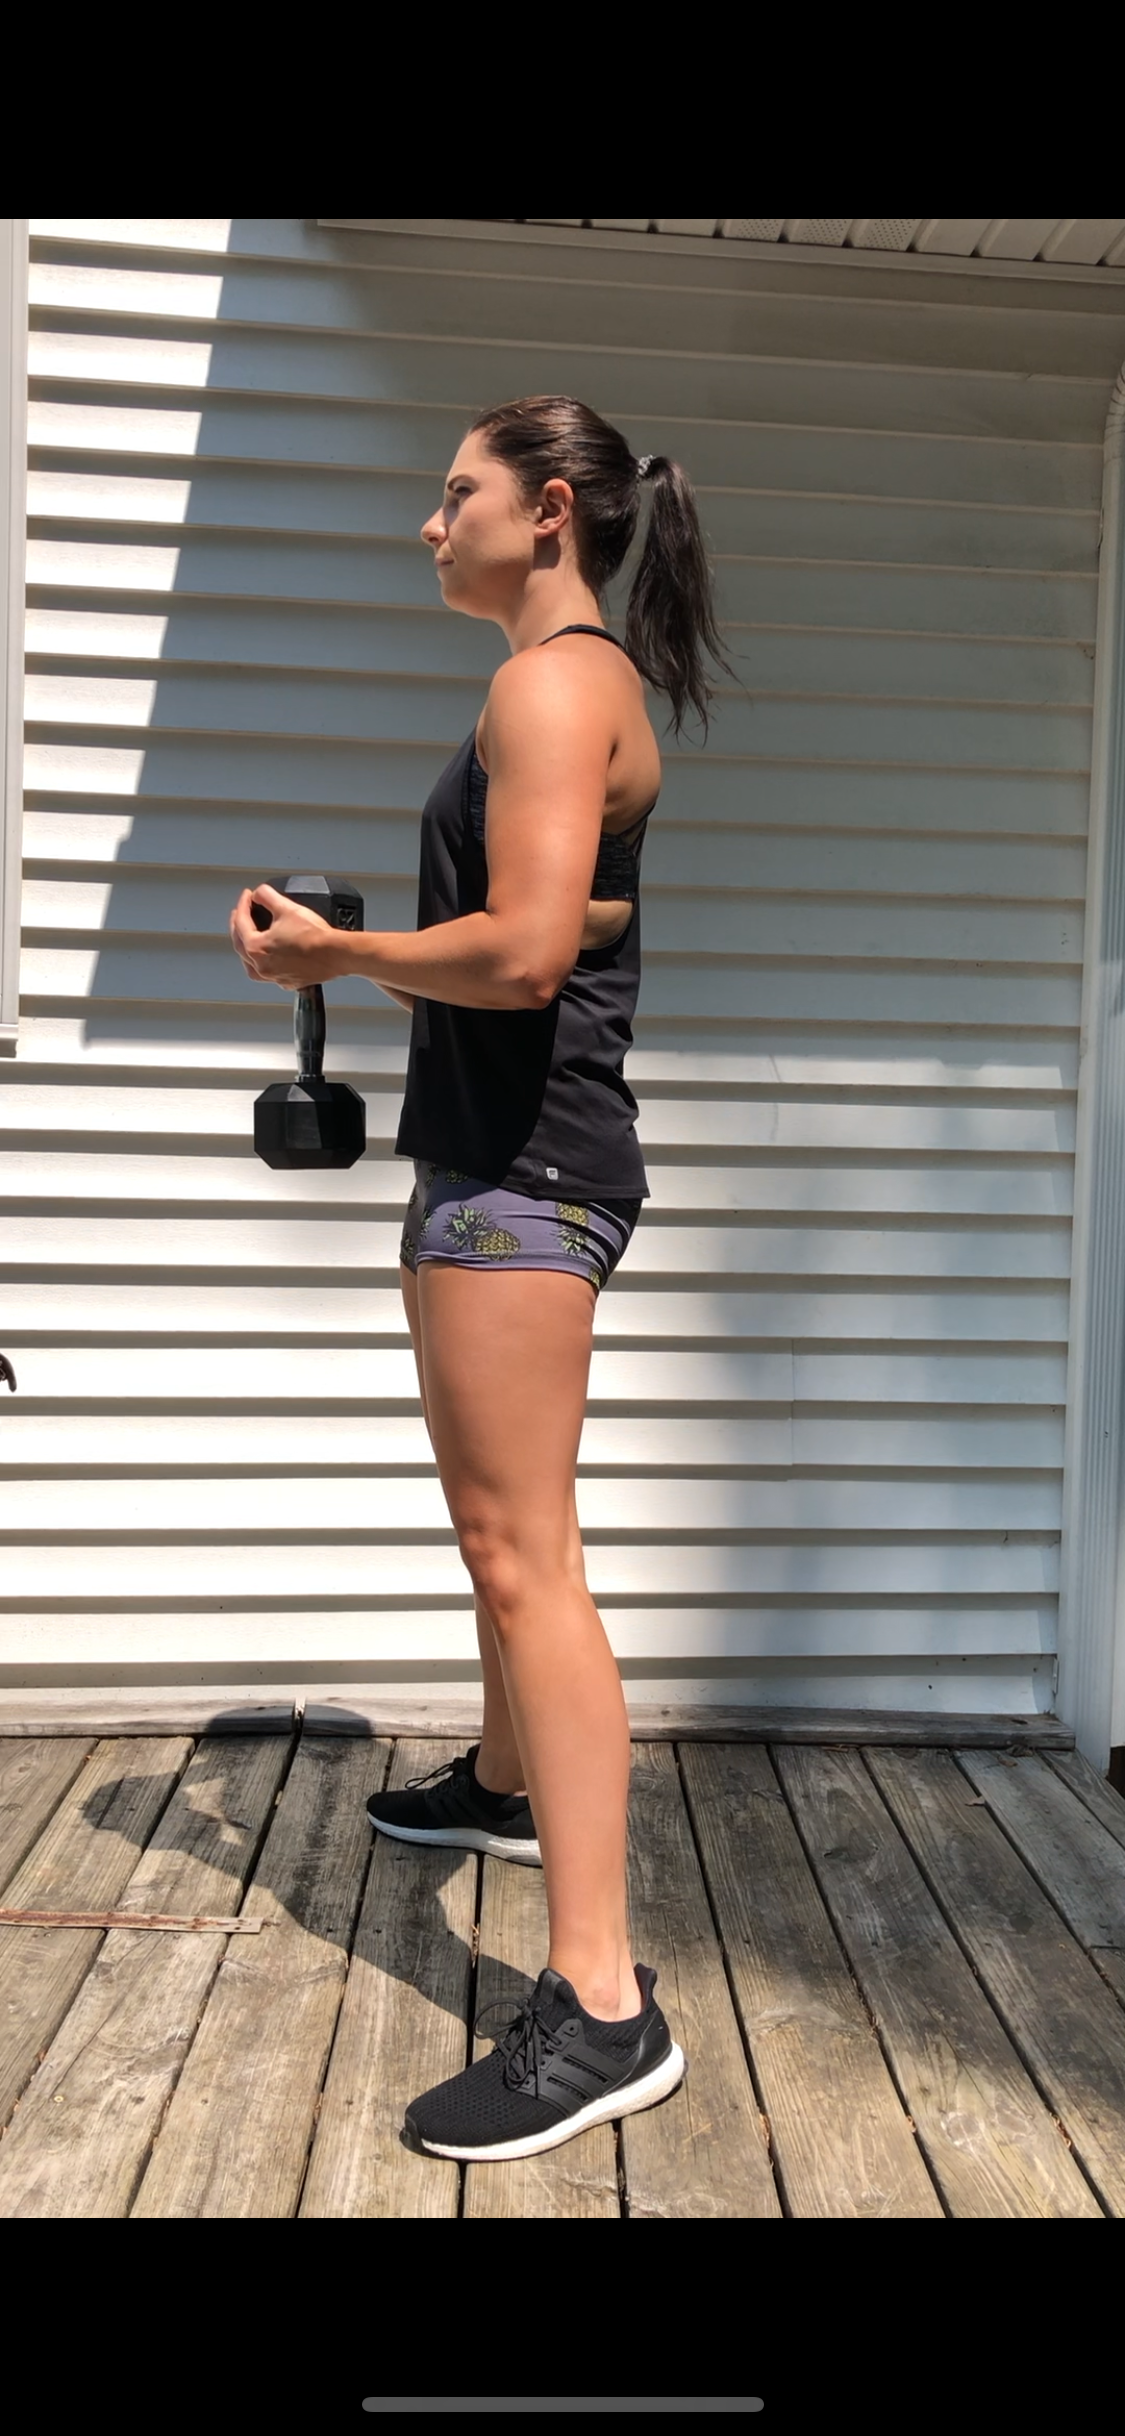
Romanian Deadlift With Weight
Stand with feet hip-width apart, soft knees, while holding dumbbells in front of hips with palms facing thighs. Keep spine in neutral position and squeezing shoulder blades, start sending the hips back. Lower dumbbells in front of shins, keeping them close to the body. Once they pass the knees, do not allow the hips to sink further. At the bottom of the movement, maintain a neutral spine and drive through heels to fully extend hips and knees, squeezing glutes at the top. *Avoid rounding the back at any point! (I used 25# dumbbells)
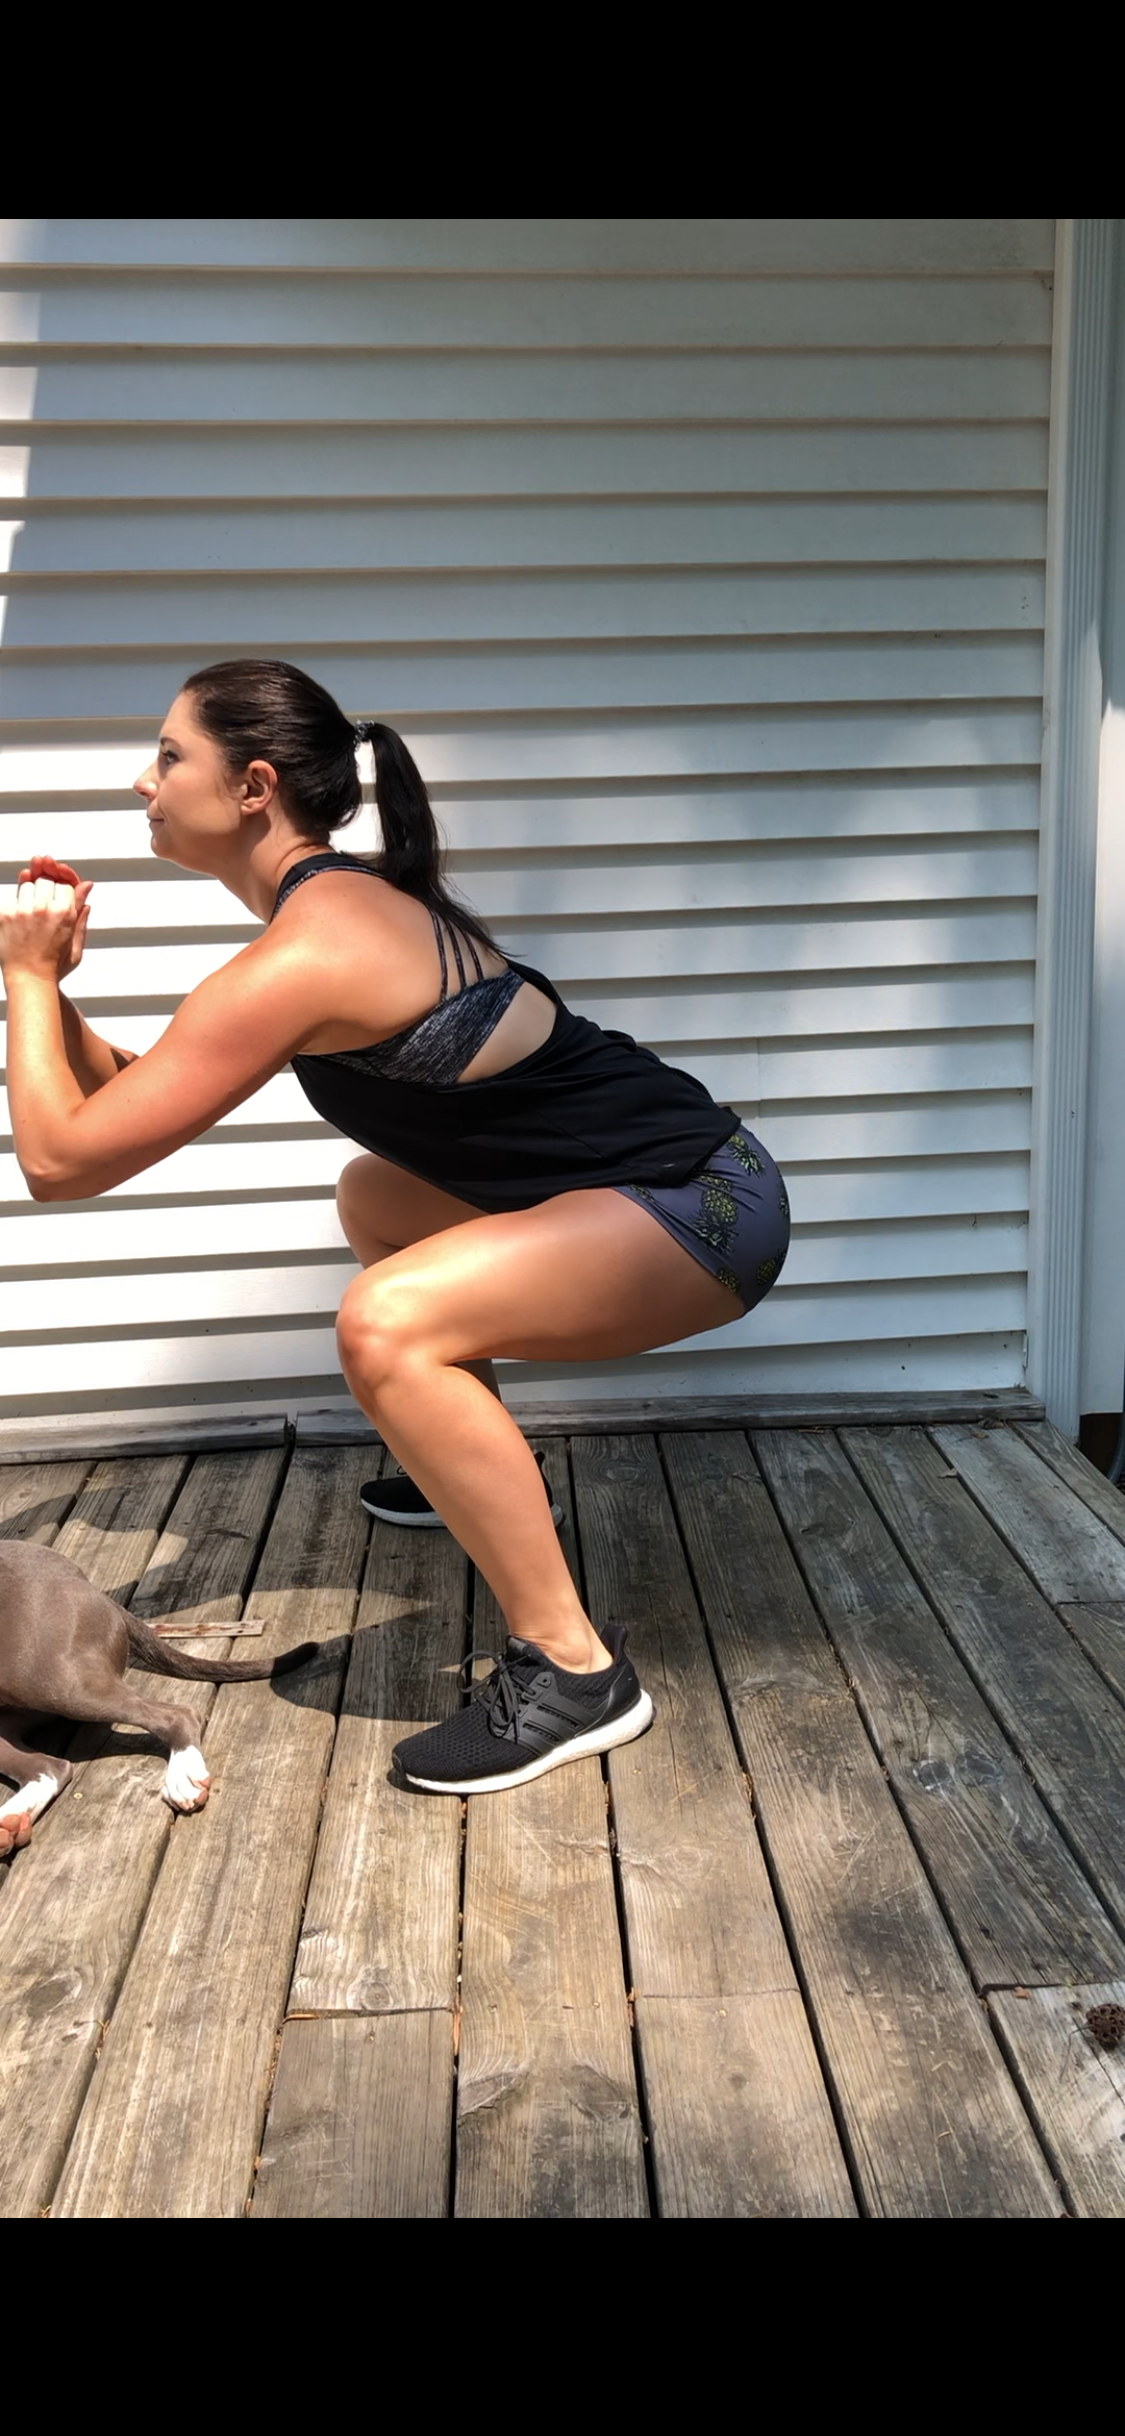
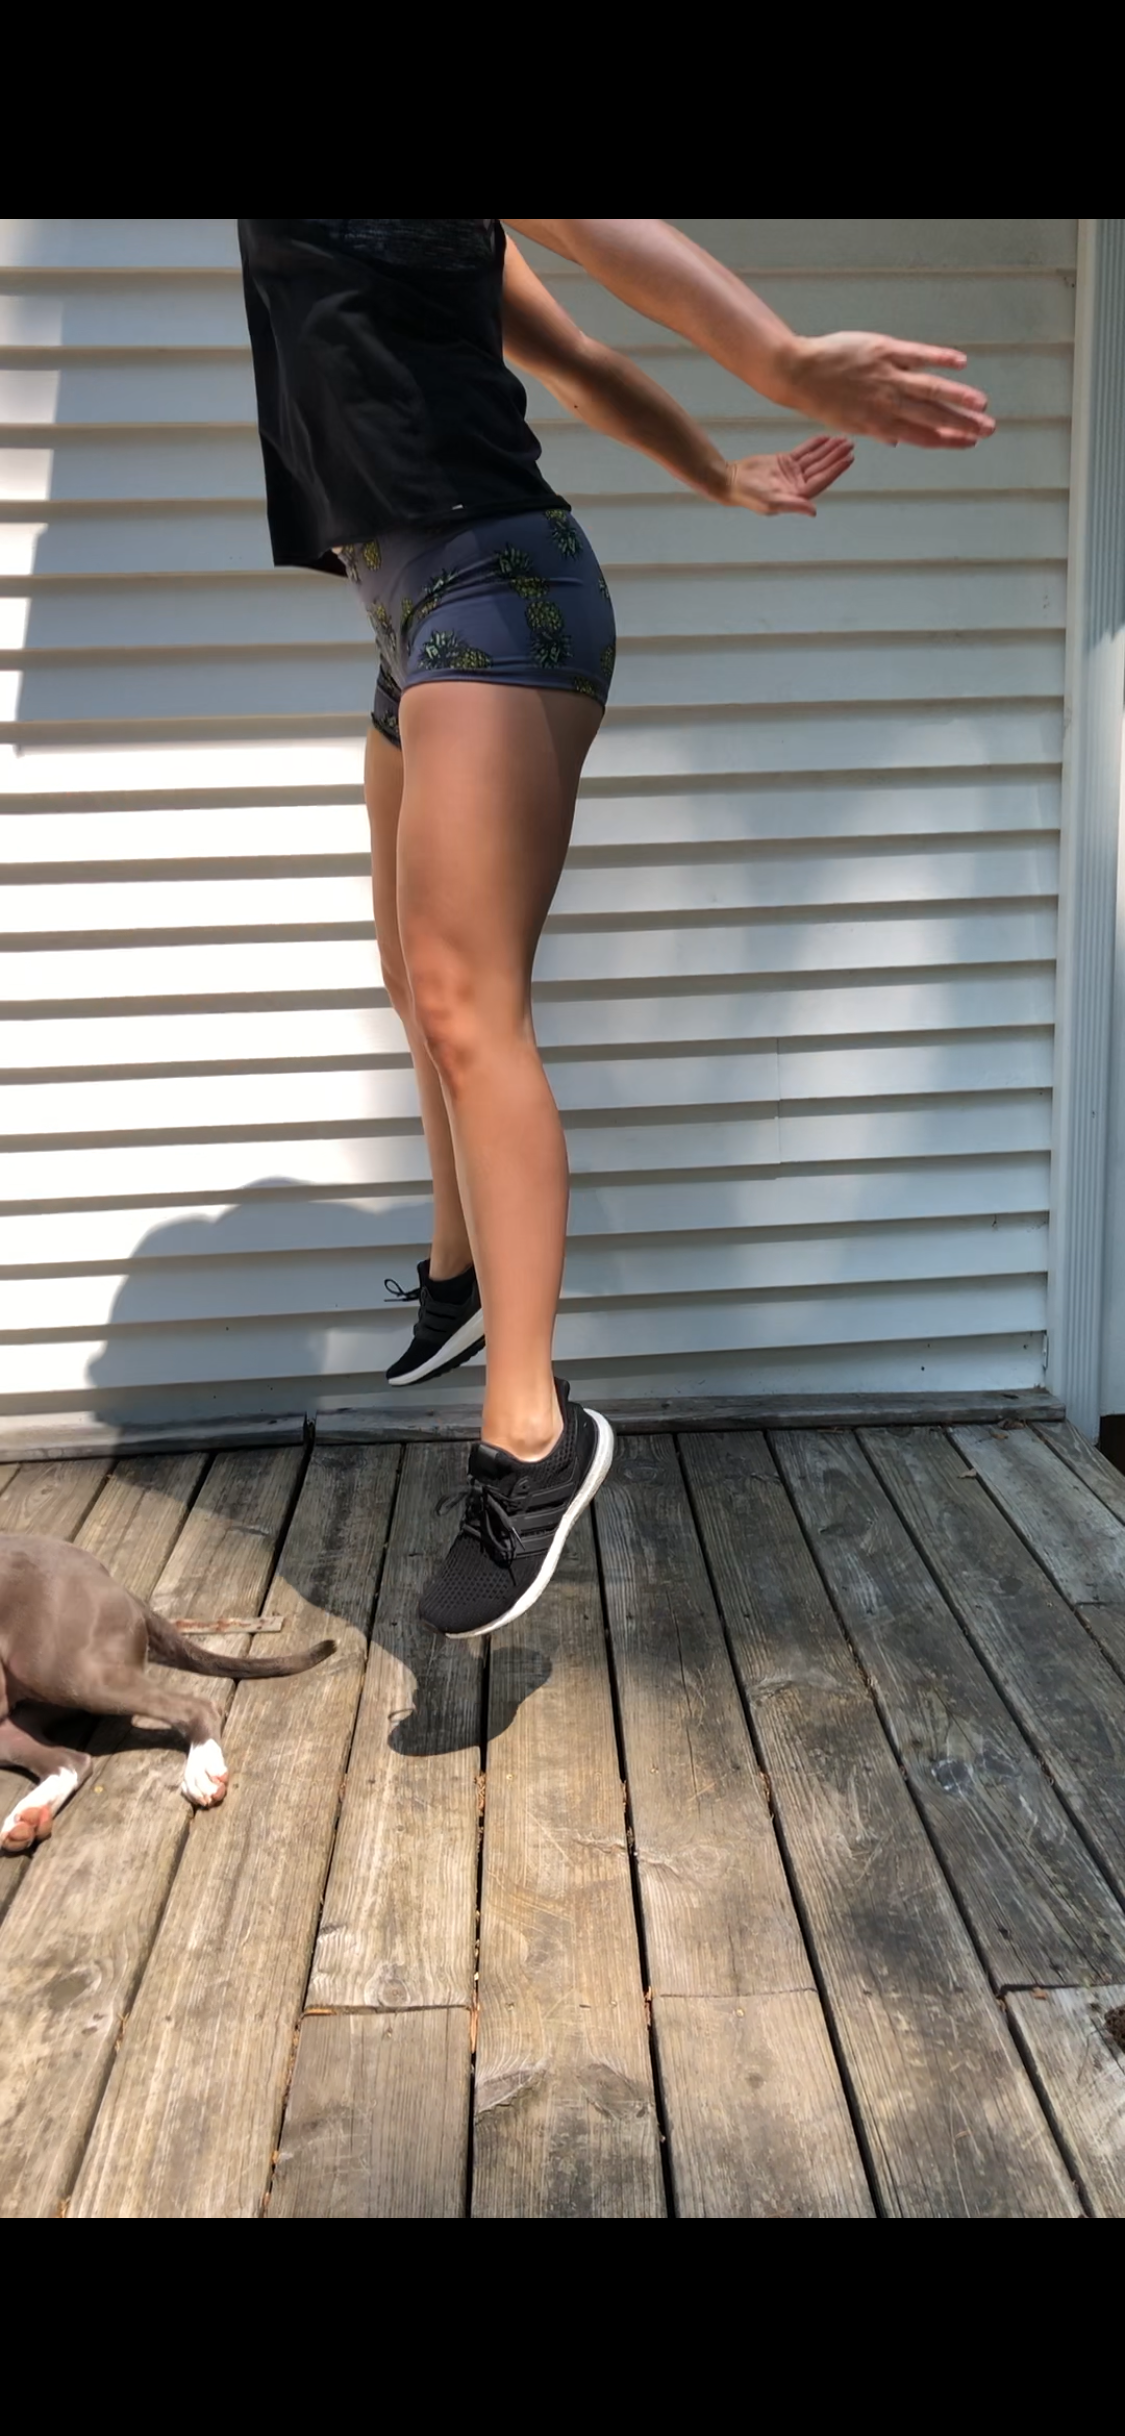
Squat Jumps
Stand with feet hip-width apart, toes turned slightly out. Squat down with your weight in your heels, proud chest, and a neutral spine. When you hit the bottom of your squat, squeeze your butt tight and drive hard through your legs and heels as you launch straight up, pelvis forward, pushing off your toes at the last moment of contact with the floor. Land softly, then use the momentum from landing to go right into your next squat.
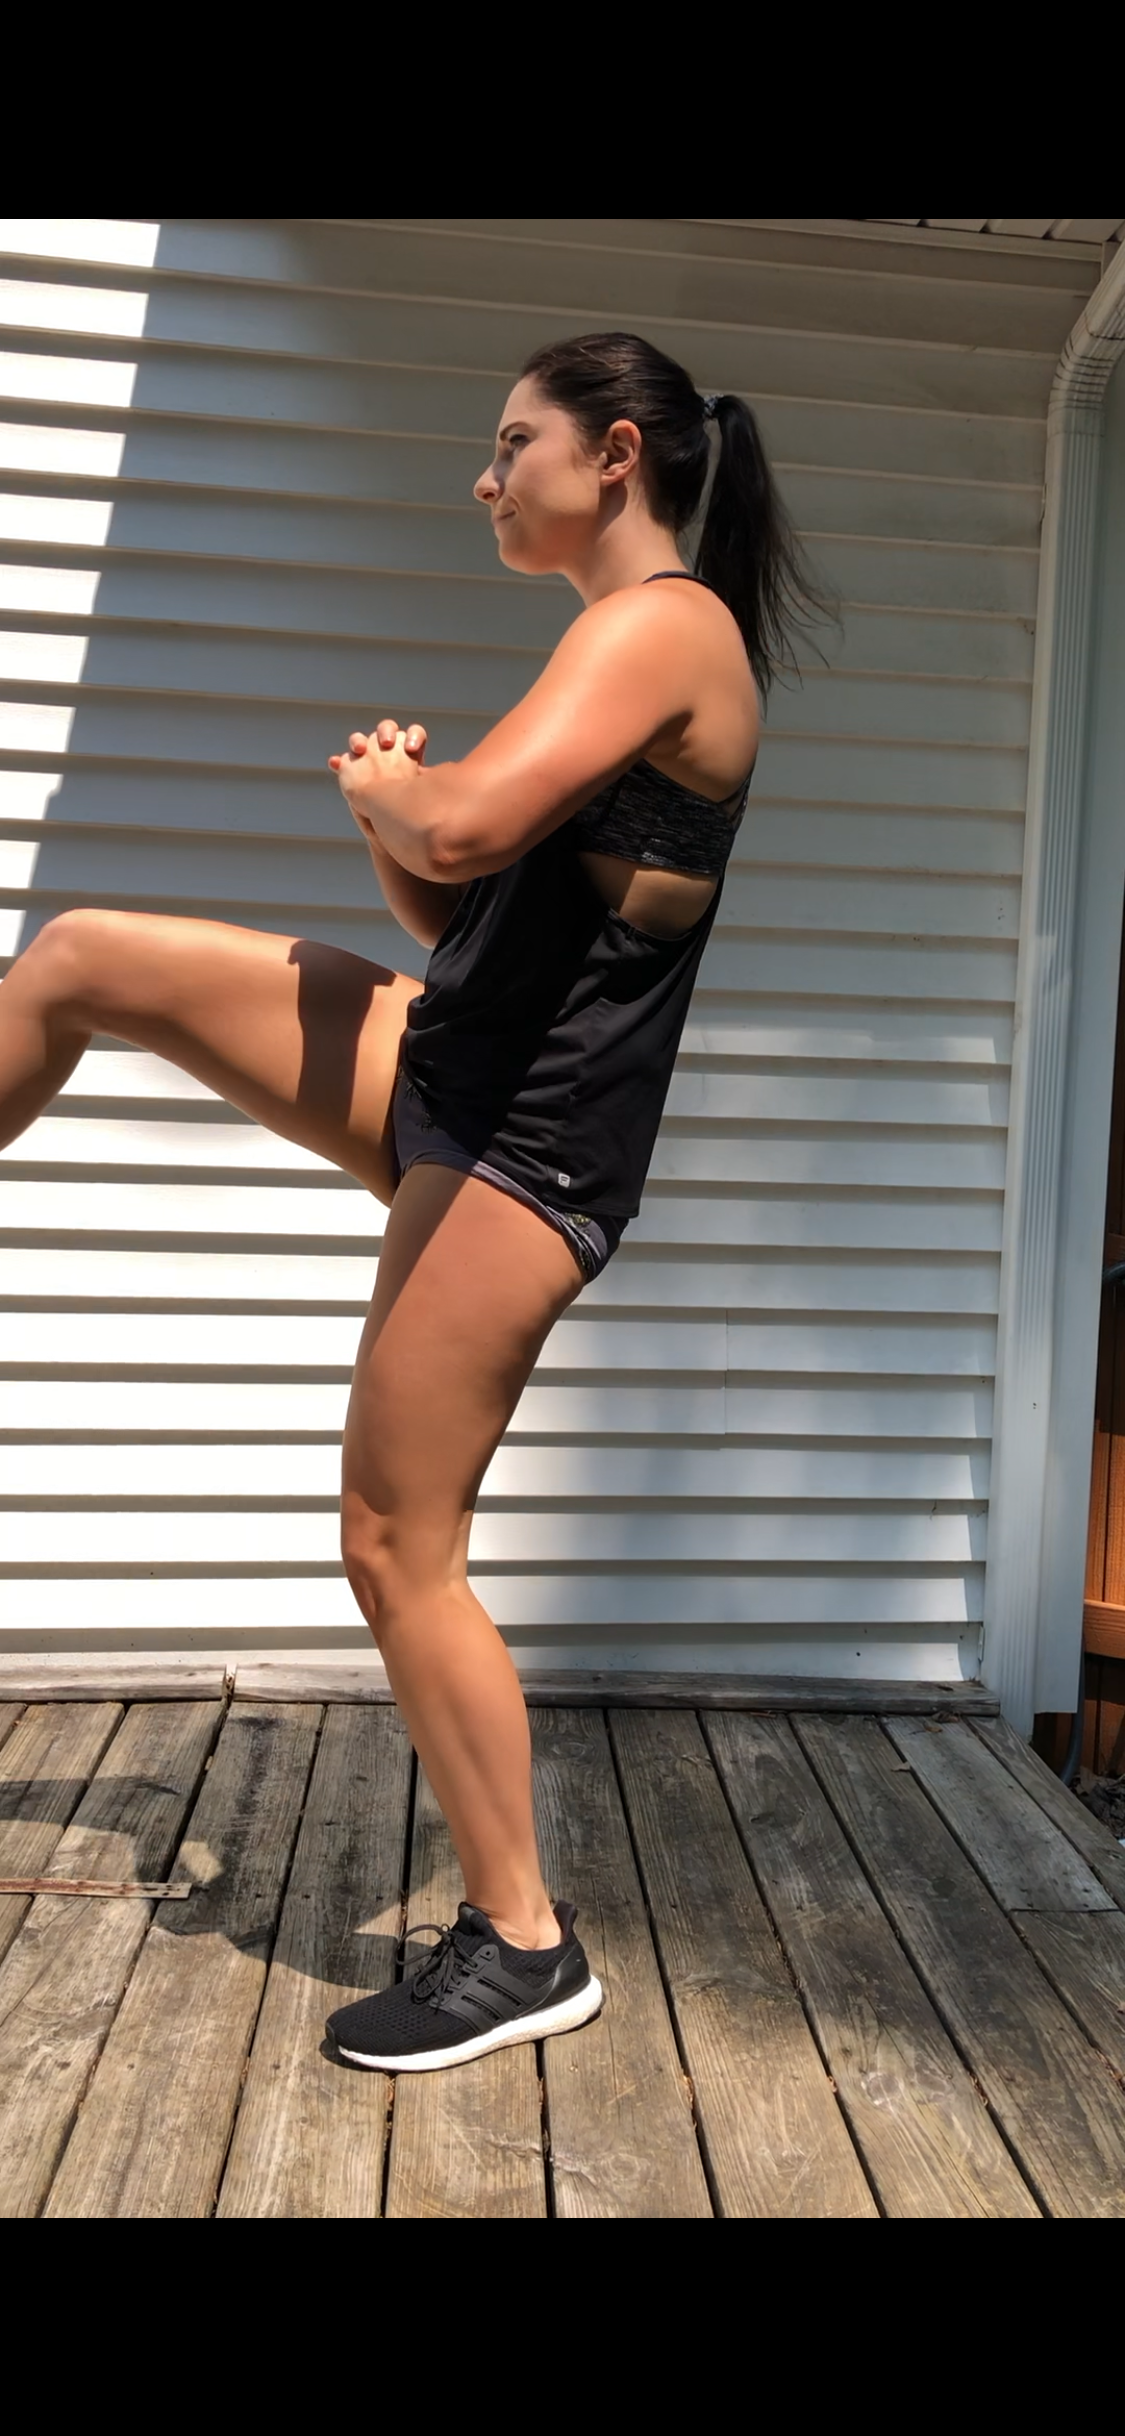
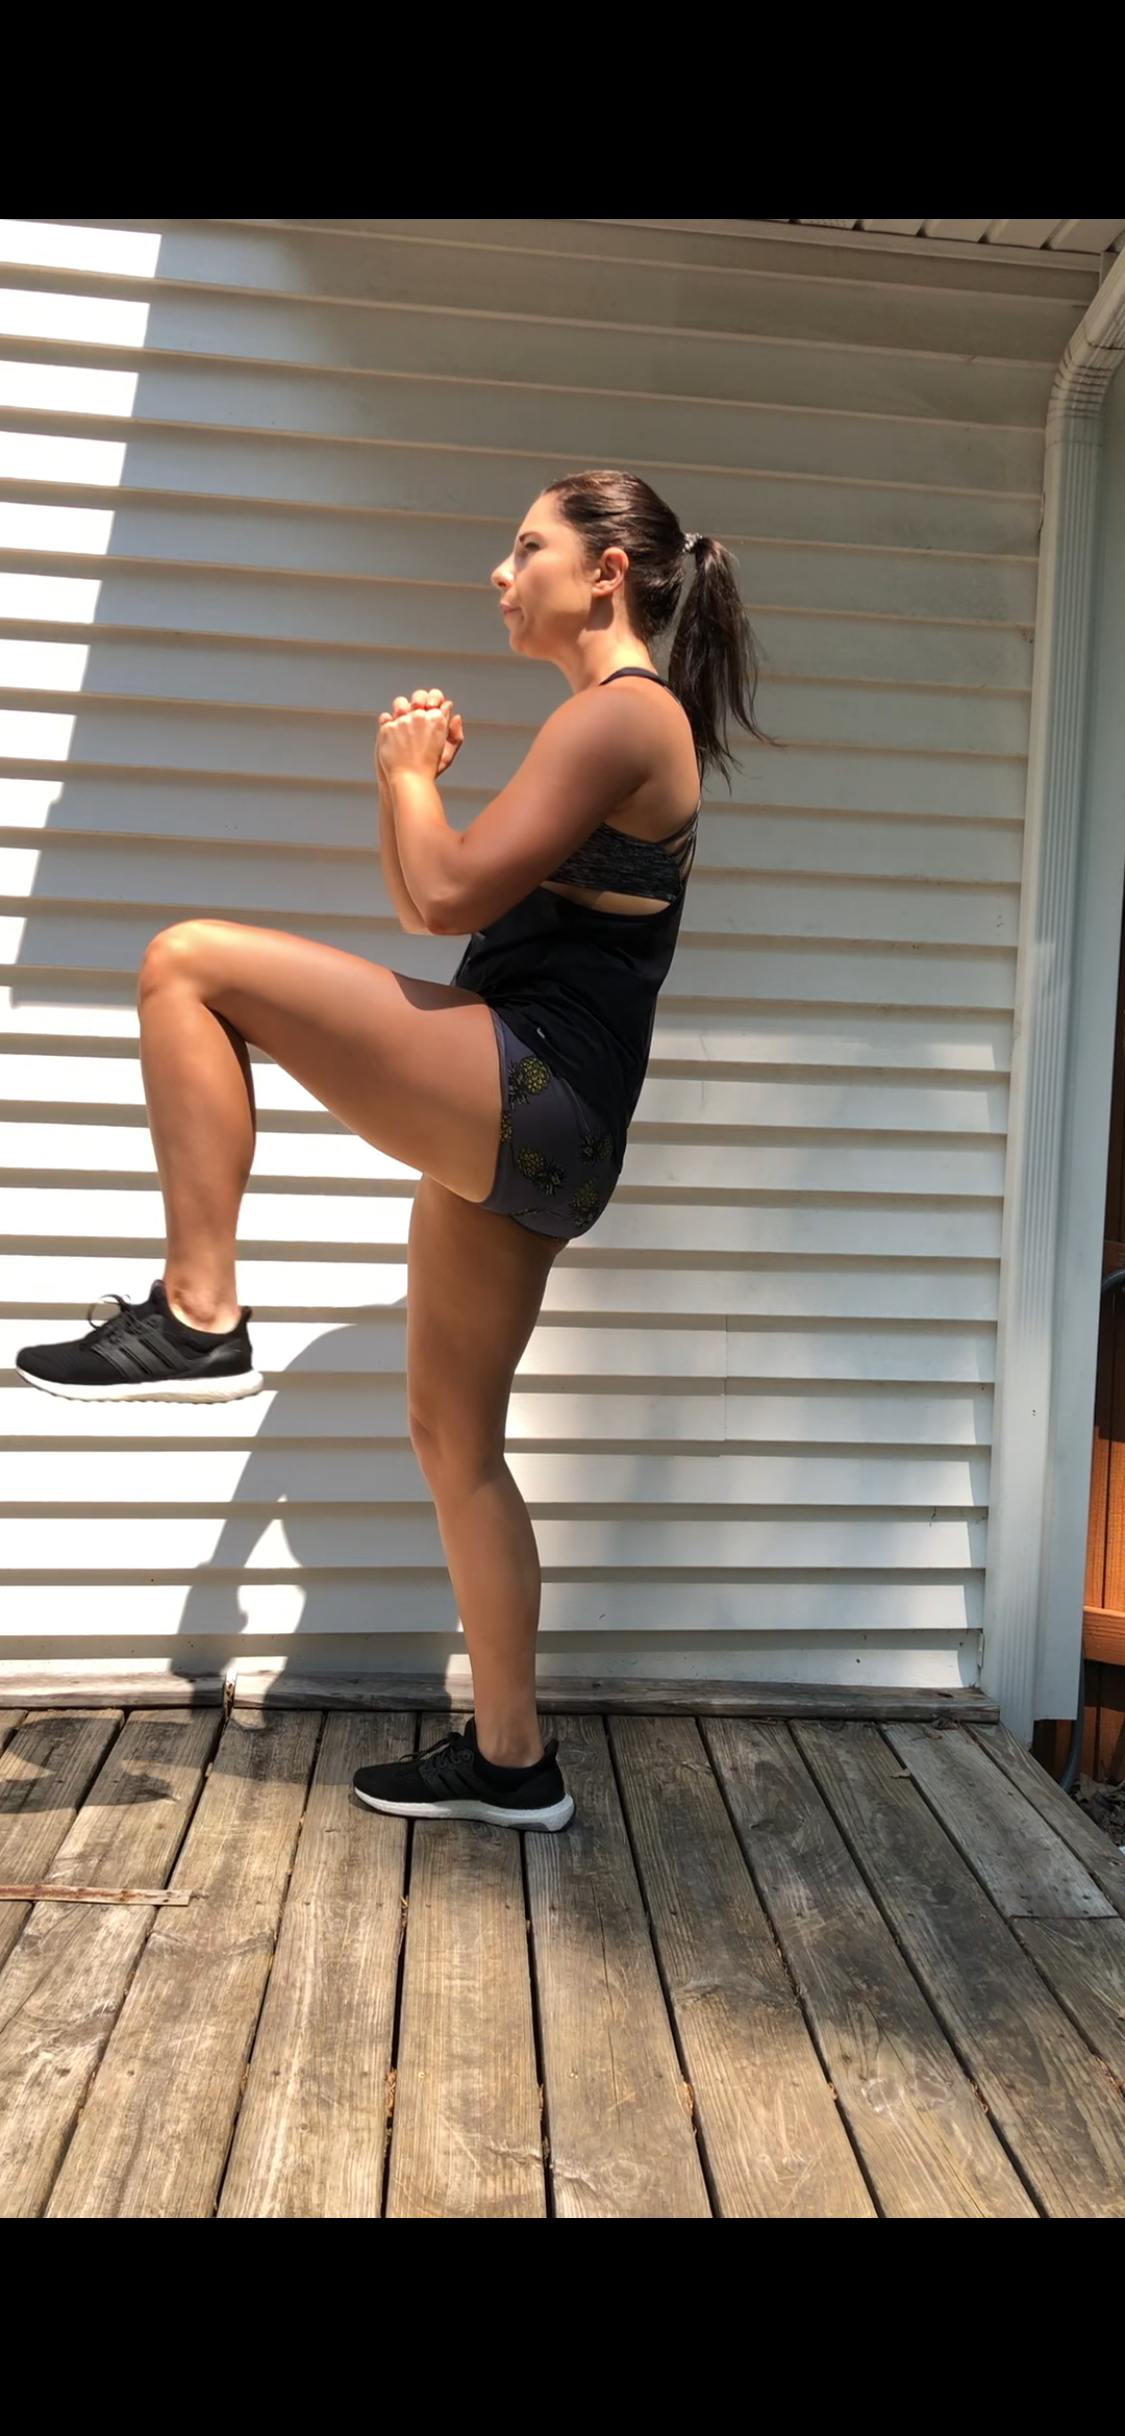
Alternating Squat Kicks
Stand with your feet shoulder-width apart, hands behind your head or held together, and elbows out to the sides. Bend your knees and sit back as far as you can. Push back to start, then kick your right leg in front of you, foot flexed. That’s one rep. Repeat, kicking with your left leg, and continue alternating.
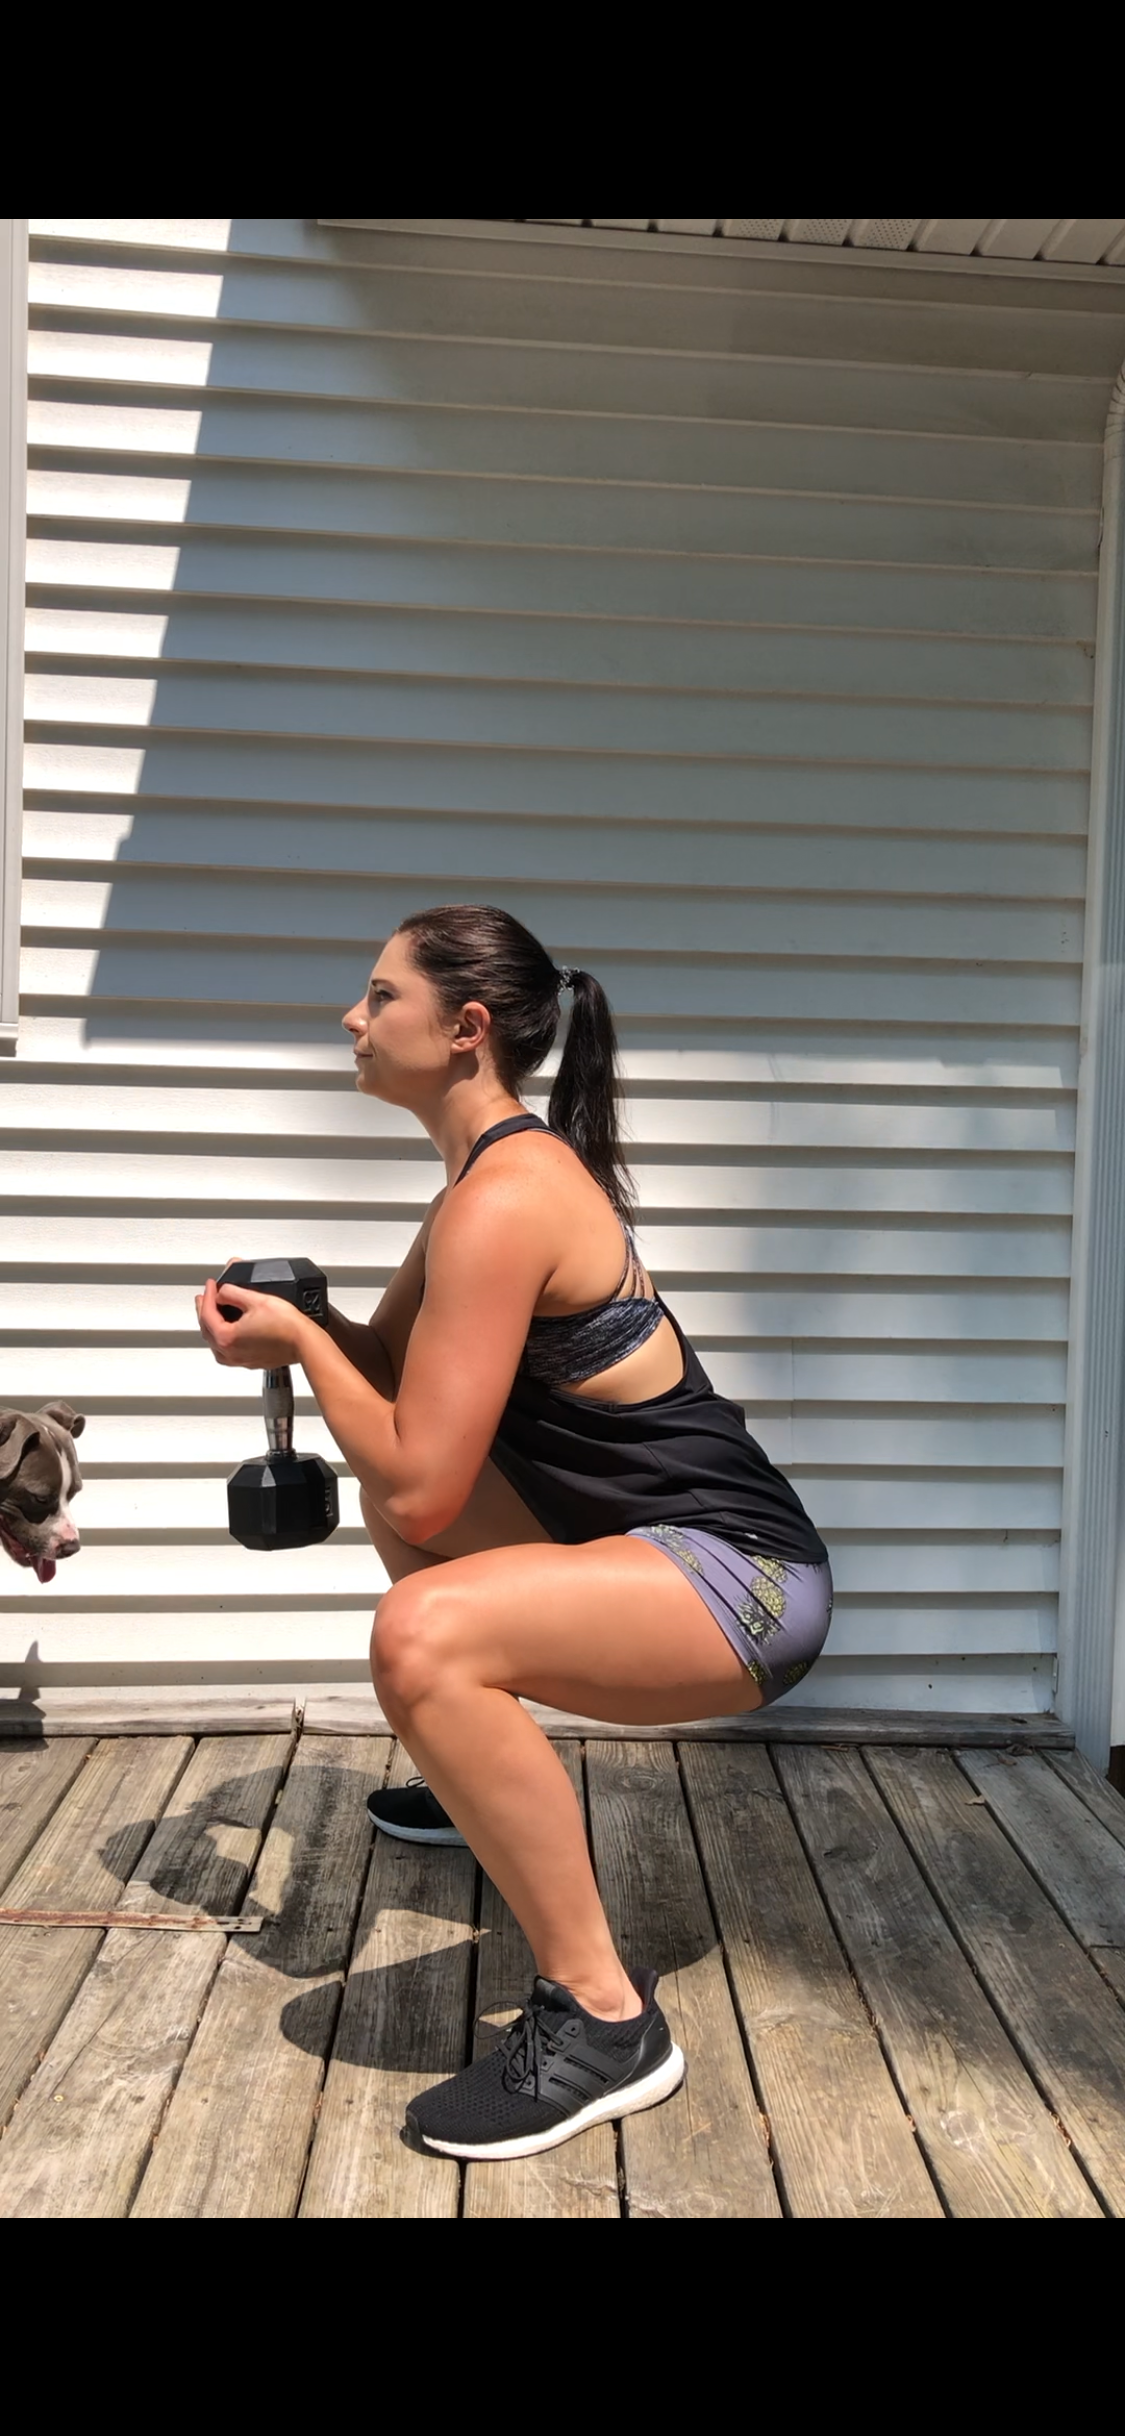
Sumo Goblet Squats With Weight
Stand with feet shoulder-width apart, toes turned out slightly. Inhale to sit hips back and lower into a squat, clasping hands in front of chest or clasping weight. Keep core engaged and neutral spine. Pause at the bottom, when hips are in line with knees or when form starts to break. Shins should be vertical and knees should be tracking over but past toes. Exhale to press into heels and outer edge of foot to stand. Squeeze glutes at the top. (I used 25# dumbbells)
If you try this workout, let us know! Leave a comment, rate it, and don’t forget to tag a photo to #fromtherootsblog on Instagram. If you ever need to see the movements in action; especially how to pulse for each movement, I have the workout videos stored on my IG!
Healthy Strawberry Brown Rice Krispie Treats
After finding out that I was sensitive to gluten, my love for rice krispie treats grew. I know that sounds bad and unhealthy, but hey, at the time, there weren’t too many gluten-free options when it came to desserts!
But within a year of only eating rice krispie treats, I felt like I was done for life. 5 years later, that’s all I crave! So, without further ado, I have made for you a healthier rice krispie treat -- but with a spin.
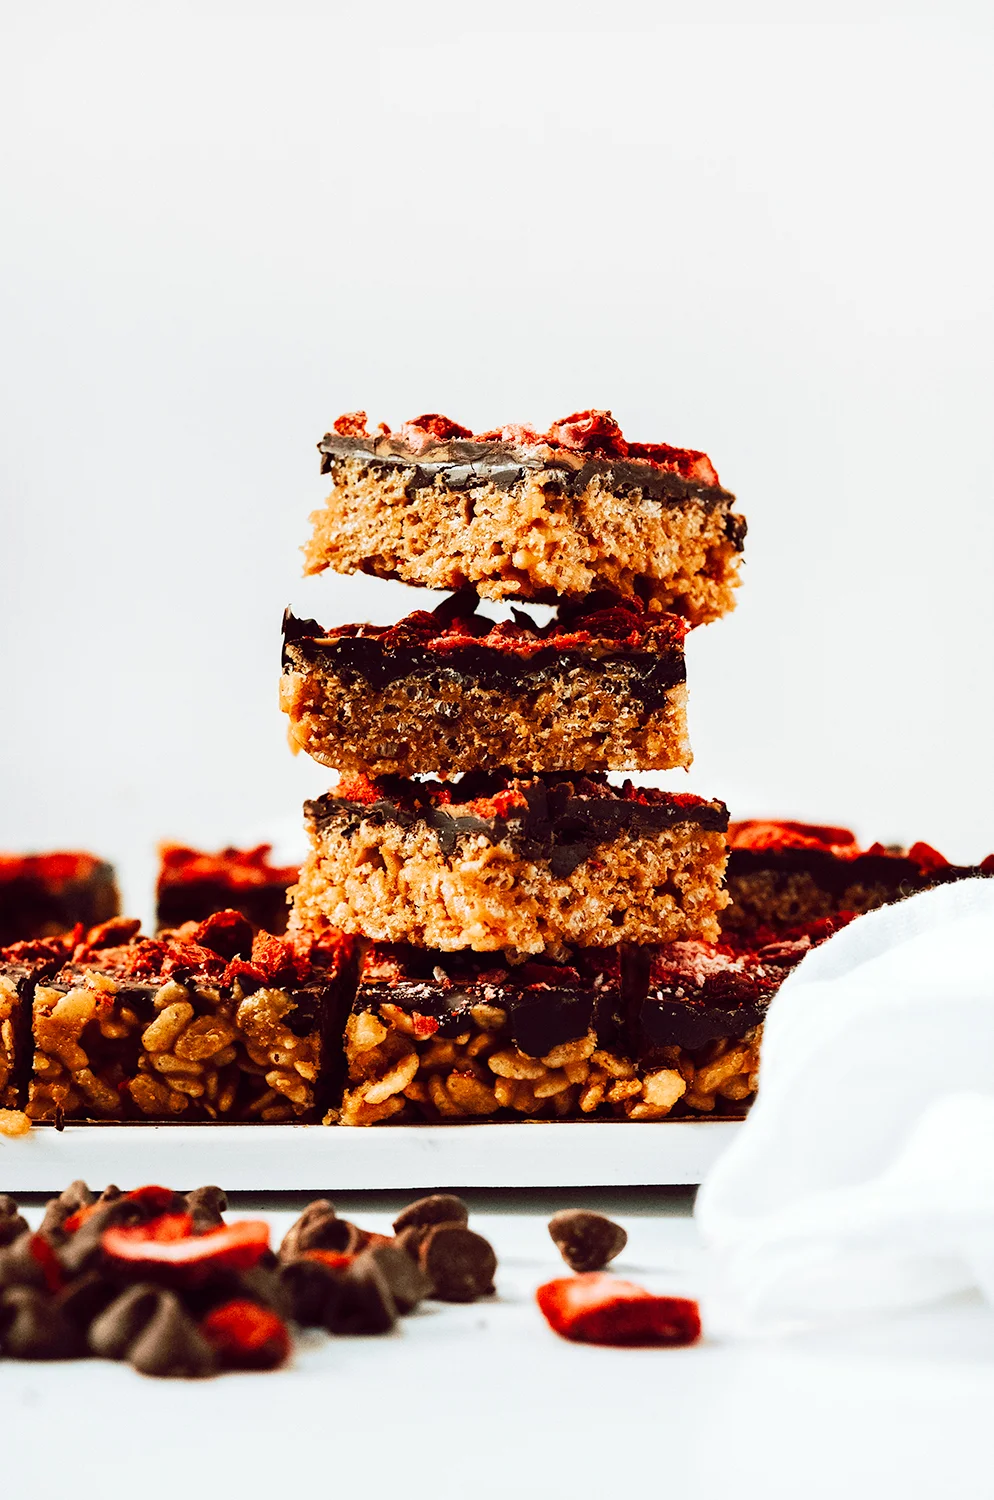
Healthy Strawberry Brown Rice Krispie Treats - Healthy play on the traditional rice krispie treat! Gluten-free, dairy-free, and naturally lower in sugar!

After finding out that I was sensitive to gluten, my love for rice krispie treats grew. I know that sounds bad and unhealthy, but hey, at the time, there weren’t too many gluten-free options when it came to desserts!
But within a year of only eating rice krispie treats, I felt like I was done for life. 5 years later, that’s all I crave! So, without further ado, I have made for you a healthier rice krispie treat -- but with a spin.

Instead of using marshmallows, I used a mixture of peanut butter, coconut oil, pure maple syrup and strawberry preserves. I just love the addition of strawberry preserves, making these rice krispie treats taste more like a PB&J or a no bake cookie!

You can also play with the toppings if you would like. My favorite way to add color and to play off the strawberry preserves is to add freeze dried strawberries, goji berries, and melted peanut butter into the dark chocolate. You could keep it classy with melted dark chocolate and sea salt flakes, or create a superfood rice krispie treat with goji berries, bee pollen, nuts and seeds, cacao nibs, and coconut flakes. The possibilities are endless!

These are great as a healthy snack and dessert as each serving size is less than 200 calories with about 10 grams of sugar per serving. The ingredients I used in predicting these numbers are listed in the notes section below.
If you try this recipe, let us know! Leave a comment, rate it, and don’t forget to tag a photo to #fromtherootsblog on Instagram. We love seeing what you come up with!
Healthy Strawberry Brown Rice Krispie Treats - Healthy play on the traditional rice krispie treat! Gluten-free, dairy-free, and naturally lower in sugar!
Makes 16 servings
Ingredients
3 cups brown rice cereal
1 cup dark chocolate
½ cup natural peanut butter
⅓ cup pure maple syrup
2 Tbsp coconut oil
Pinch of salt
1 Tbsp strawberry preserves
Toppings
Freeze dried strawberries
Goji berries
Directions
Line 8x8 pan with parchment paper. Set aside
Place a small saucepan on the stove-top over low heat. Combine peanut butter, maple syrup, coconut oil, strawberry preserves, and a pinch of salt. Mix until smooth and well combined, about 1-2 minutes. Add brown rice cereal to a medium bowl and pour peanut butter mixture over the brown rice. Mix until combined and cereal is completely coated.
Transfer rice krispie mixture to the parchment paper lined pan and press mixture down flat using a spatula to create an even surface.
In a small microwave safe bowl, add dark chocolate and 1 tbsp coconut oil (optional) and heat in 30-second increments (stirring in between) until chocolate is fully melted and smooth.
Pour chocolate mixture over krispie mixture and add toppings. You can follow the strawberry trend and add freeze dried strawberries, goji berries, and melted peanut butter or you can keep it classic with sea salt or naked. Up to you!
Place pan in the refrigerator for at least 30 minutes until bars are completely cooled and chocolate is set.
Place bars onto a cutting board and cut into 16 bars. Bars should be kept in the fridge covered for up to a week.
Notes
Ingredients I used: Erewhon organic brown rice gluten free cereal, pure maple syrup, dark chocolate, strawberry preserves.
If you would like to add more protein to these bars, add a scoop of collagen peptides to the peanut butter mixture when everything is in the saucepan heating.


Chai Spiced Sweet Potato Chocolate Chip Muffins
Growing up as a kid, we didn’t eat sweet potatoes often. The few times we did, it was usually in the form of sweet potato casseroles or sweet potato pie for Thanksgiving. Now that I’m older, I can’t get enough of them.
That’s why, regardless of the weather, I wanted to create a super cozy and comforting sweet potato muffin made with chocolate chips (because why not!?) and chai spice!
If you can’t tell from my Instagram, I use this chai spice seasoning on almost everything. Before diving into this muffin recipe, you should totally whip up this amazing chai spice seasoning if you haven’t done so already, then we can get to cooking!
Chai spiced sweet potato chocolate chip muffins - Nutrient-packed sweet potato muffins that are super moist and addictingly delicious! Gluten-free, dairy-free, and naturally low in sugar.

Growing up as a kid, we didn’t eat sweet potatoes often. The few times we did, it was usually in the form of sweet potato casseroles or sweet potato pie for Thanksgiving. Now that I’m older, I can’t get enough of them.
That’s why, regardless of the weather, I wanted to create a super cozy and comforting sweet potato muffin made with chocolate chips (because why not!?) and chai spice!

If you can’t tell from my Instagram, I use this chai spice seasoning on almost everything. Before diving into this muffin recipe, you should totally whip up this amazing chai spice seasoning if you haven’t done so already, then we can get to cooking!
Of course, if you don’t have the time to make a homemade seasoning blend, you can always use a regular chai spice blend found at a grocery store, use pumpkin spice seasoning, or simply cinnamon!

At first glance, it might seem like you need a lot of ingredients for these muffins, but if you look closer, you will see that you might have many of these ingredients already in your pantry! If you don’t have gluten-free fine oat flour then you definitely need to stock up!

If you are worried about buying an entire bag of oat flour just for a muffin recipe, then don’t fret because you can also use this oat flour for many other recipes such as my fluffy, gluten-free pancakes or raspberry almond thumbprint cookies.
If you try this recipe, let us know! Leave a comment, rate it, and don’t forget to tag a photo to #fromtherootsblog on Instagram. We love seeing what you come up with!
Chai spiced sweet potato chocolate chip muffins - Nutrient-packed sweet potato muffins that are super moist and addictingly delicious! Gluten-free, dairy-free, and naturally low in sugar.
Ingredients
Dry
2 cups gluten-free oat flour
1 cup superfine blanched almond flour
½ cup chocolate chips + plus more for topping
1 Tbsp chai spice seasoning
1 tsp baking soda
¾ tsp baking powder
½ tsp salt
Wet
1 cup sweet potato puree (from 1 sweet potato)
½ cup plant-based, unsweetened milk
¼ cup coconut oil
¼ cup pure maple syrup
2 eggs
1 tsp vanilla extract
Directions
To cook the sweet potato, peel the sweet potato and cut into small chunks. To a medium pot, add sweet potato chunks to water and boil potatoes until soft. Drain potatoes and blend in a processor, blender, or using a masher until sweet potatoes are pureed. Set aside to cool.
Preheat oven to 350 degrees and line a 12 cup muffin tin with liners and spray the inside of them with nonstick cooking spray.
In a medium bowl, whisk the dry ingredients together except the chocolate chips.
In a separate large bowl, whisk the wet ingredients until well combined, smooth and creamy. Add the dry ingredients to the wet ingredients and mix until well combined. Gently fold in ½ cup chocolate chips.
Divide batter evenly into muffin liners (about ¾ full), and top each with a few chocolate chips. Bake for 25-35 minutes or until toothpick comes out clean.
Let the muffins cool for 5 minutes and then remove and transfer muffins to a wire rack to finish cooling.
Notes
Remember - if you want this to be a true dairy-free version, use dark chocolate chips that have no milk.
If you would like to make this recipe lower in oil, you can use 2 tablespoons of oil. It will just not be as moist - more on the crumbly side but still delicious!
If you need help finding the best ingredient brands, these are what I use! Gluten-free whole grain oat flour, superfine almond flour, dairy free chocolate chips, vanilla extract
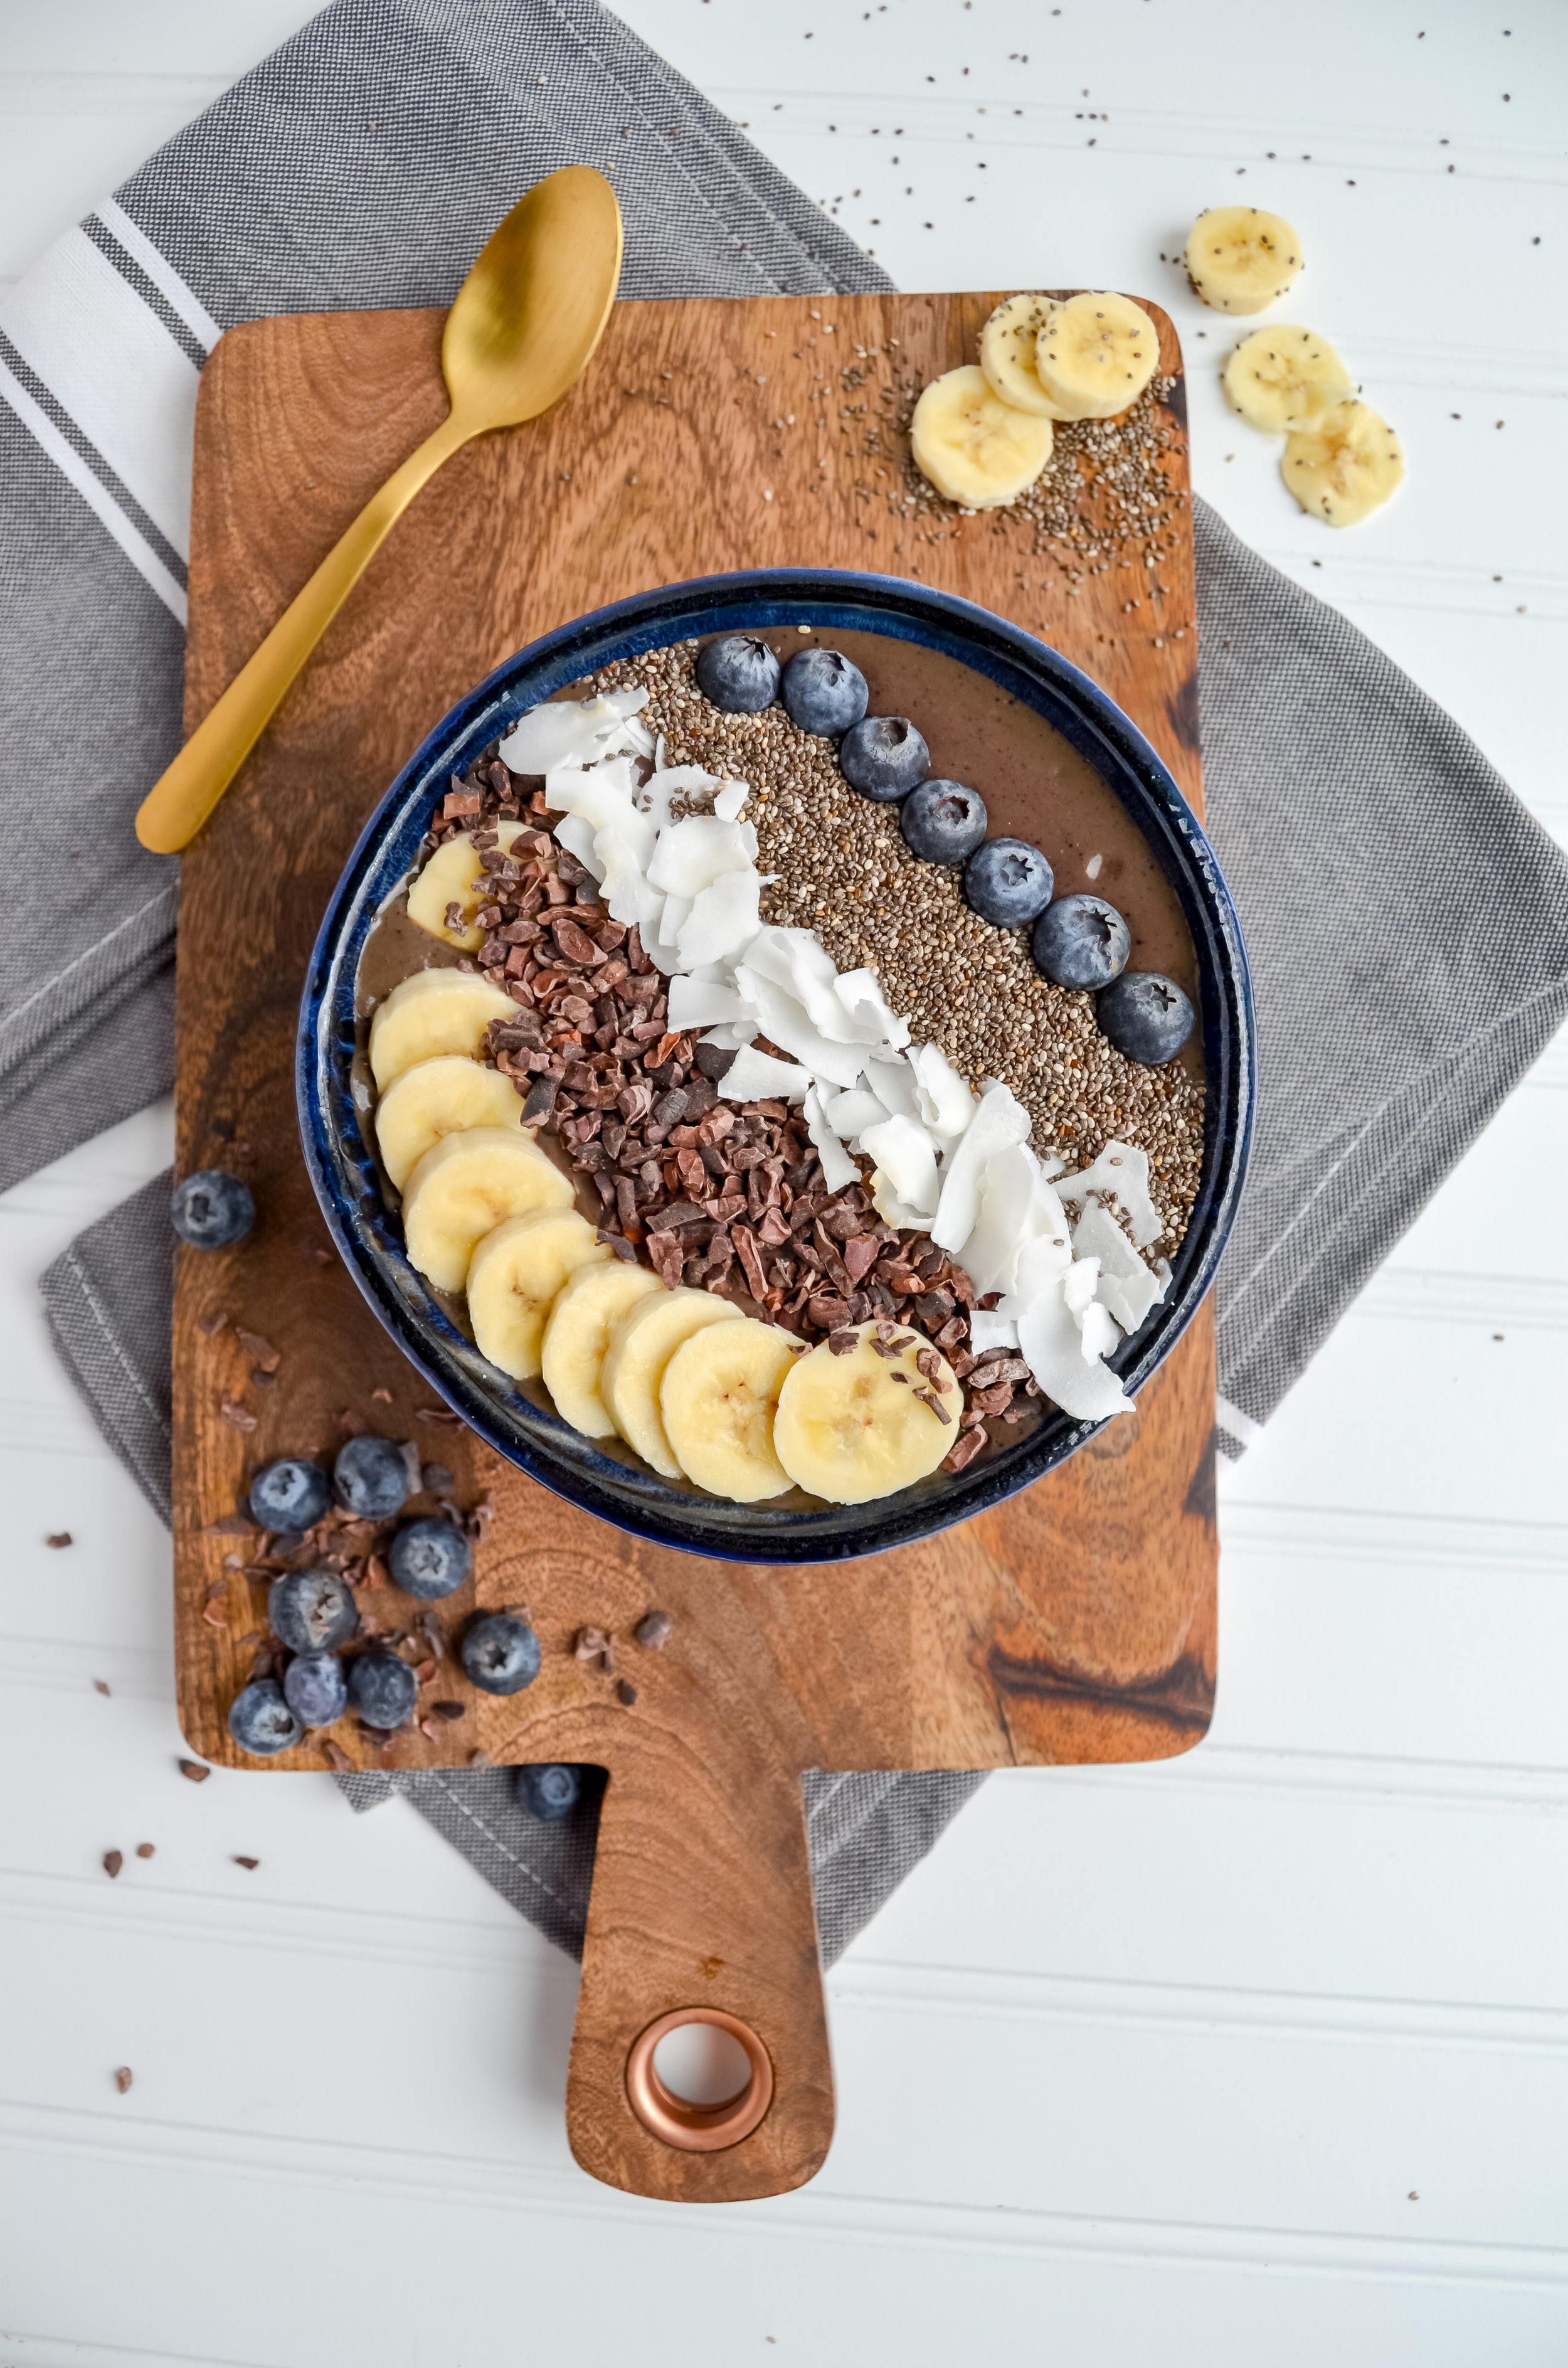
If you have leftover sweet potato puree, you can make this pumpkin pie protein smoothie - just replace pumpkin with sweet potato!


Chicken Lettuce Wraps
I tried so hard not to create a copycat PF Chang’s lettuce wrap recipe, but in the end, I have done exactly that. I know, sounds cliche and basic, but I can’t hide the truth.
This recipe has a total of just three easy steps and takes less than 30 minutes to make.
Step 1: Brown the ground chicken
Step 2: Prepare a marinade to drizzle over browned chicken and veggies.
Step 3: Make the most delicious almond butter sauce known to man.
If you are concerned with your sodium intake, I have a great alternative -- I use liquid aminos. If you are not familiar with liquid aminos, it’s a vegetable protein from soybeans.
Chicken lettuce wraps - made with an almond butter sauce that is full of flavor and lower in sodium! Gluten-free, dairy-free, and paleo friendly!

I tried so hard not to create a copycat PF Chang’s lettuce wrap recipe, but in the end, I have done exactly that. I know, sounds cliche and basic, but I can’t hide the truth.
This recipe has a total of just three easy steps and takes less than 30 minutes to make.
Step 1: Brown the ground chicken
Step 2: Prepare a marinade to drizzle over browned chicken and veggies.
Step 3: Make the most delicious almond butter sauce known to man.
If you are concerned with your sodium intake, I have a great alternative -- I use liquid aminos. If you are not familiar with liquid aminos, it’s a vegetable protein from soybeans.

If soy is an issue for you then e coconut aminos is a great substitution. Coconut aminos is a soy-free alternative to soy sauce. There are only two ingredients to this condiment: coconut tree sap and salt. It’s popular in the paleo community and significantly lower in sodium than tamari or soy sauce.

Both options are lower in sodium, just remember that coconut aminos will have a coconut undertone.

Let’s get to the recipe! Btw, this recipe is very macro friendly so if you need me to provide the macros, please let me know.
If you try this recipe, let us know! Leave a comment, rate it, and don’t forget to tag a photo to #fromtherootsblog on Instagram. We love seeing what you come up with!
Chicken lettuce wraps - made with an almond butter sauce that is full of flavor and lower in sodium! Gluten-free, dairy-free, and paleo friendly!
Ingredients
1 lb ground chicken
1 can 8 oz water chestnuts (drained)
8 oz mushrooms (sliced)
1 red bell pepper (diced)
1 white onion (diced)
Marinade
¼ cup liquid aminos (or GF/low sodium tamari or soy sauce)
1 Tbsp rice vinegar
1 Tbsp almond butter
Juice of ½ orange
3 cloves garlic (minced)
1 small knob fresh ginger (grated)
1 tsp hot chili oil
Almond butter sauce
1 Tbsp almond butter
Juice of ½ orange
1 Tbsp liquid aminos (or GF/low sodium tamari or soy sauce)
1 tsp sriracha
Other
Head of butter lettuce (or romaine)
½ cup cashews
Spring onions
Sesame seeds
Directions
In a large skillet, brown ground chicken on medium high heat for 5-10 minutes.
Set browned chicken to the side and add diced onions to the skillet. Saute onions for 2-3 minutes and then add red peppers, followed by mushrooms and chestnuts until cooked through.
While your vegetables are cooking, prepare the marinade by adding all the ingredients to a small bowl and whisk together until mixture is fully incorporated.
Lower heat to medium and transfer chicken back to the skillet. Pour marinade over the cooked chicken and veggies and cook until marinade has simmered down, coating the chicken and veggie mixture completely.
While the chicken mixture is cooking, wash and clean butter lettuce, and prepare almond butter sauce by adding all ingredients to a small bowl and whisking together until fully incorporated. Depending on how oily the almond butter is, you may need to add water to the mixture until you reach desired sauce consistency.
When you are ready to eat, spoon a small amount of the chicken mixture onto a single butter lettuce and top with the almond butter sauce, sesame seeds, cashews, and spring onions.


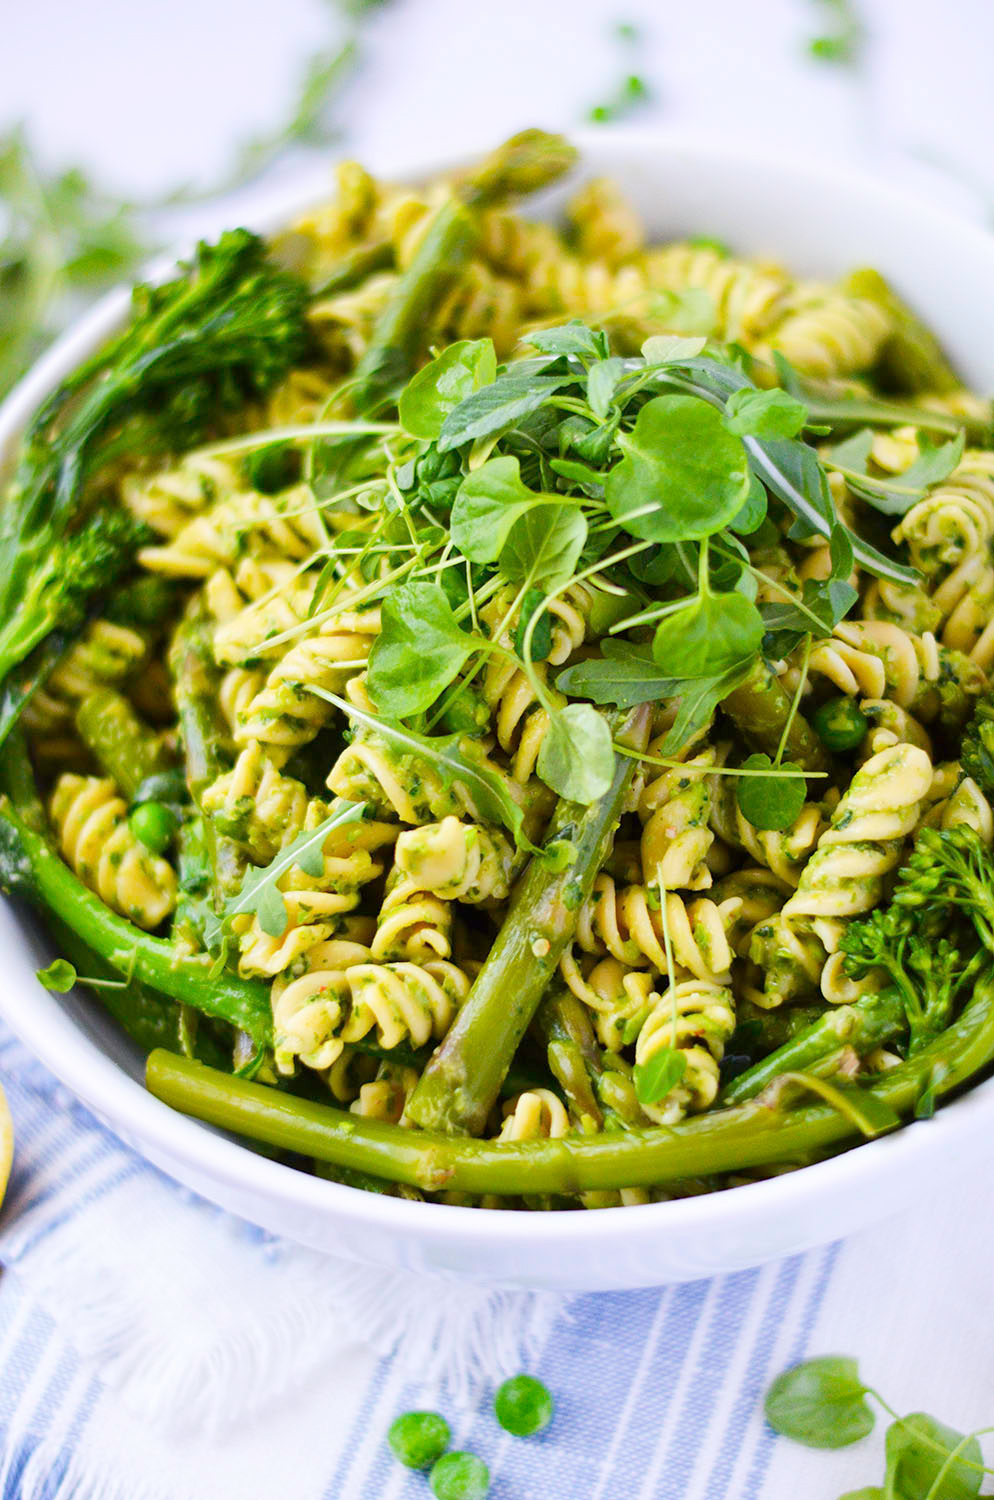
Vibrant Pea Pesto Pasta Salad
As we enter spring, I wanted to create a pasta salad that showcases the vibrant colors of green! Not only is this recipe a crowd-pleaser, it’s also highly nutritious. As you may have already guessed, pesto is the star in this dish.
Where are my pesto lovers at!? Pesto is my absolute favorite when it comes to dips, sauces, or just straight out of the bowl. Unfortunately, most restaurants or pizzarias will have pesto that contains dairy. I either bear through it and deal with the repercussions later or just bring my own, lol.
Vibrant Pea Pesto Pasta Salad - Pasta salad that is made with fresh ingredients and loads of flavor! Dairy-free, gluten-free, and vegan.

As we enter spring, I wanted to create a pasta salad that showcases the vibrant colors of green! Not only is this recipe a crowd-pleaser, it’s also highly nutritious. As you may have already guessed, pesto is the star in this dish.
Where are my pesto lovers at!? Pesto is my absolute favorite when it comes to dips, sauces, or just straight out of the bowl. Unfortunately, most restaurants or pizzarias will have pesto that contains dairy. I either bear through it and deal with the repercussions later or just bring my own, lol.

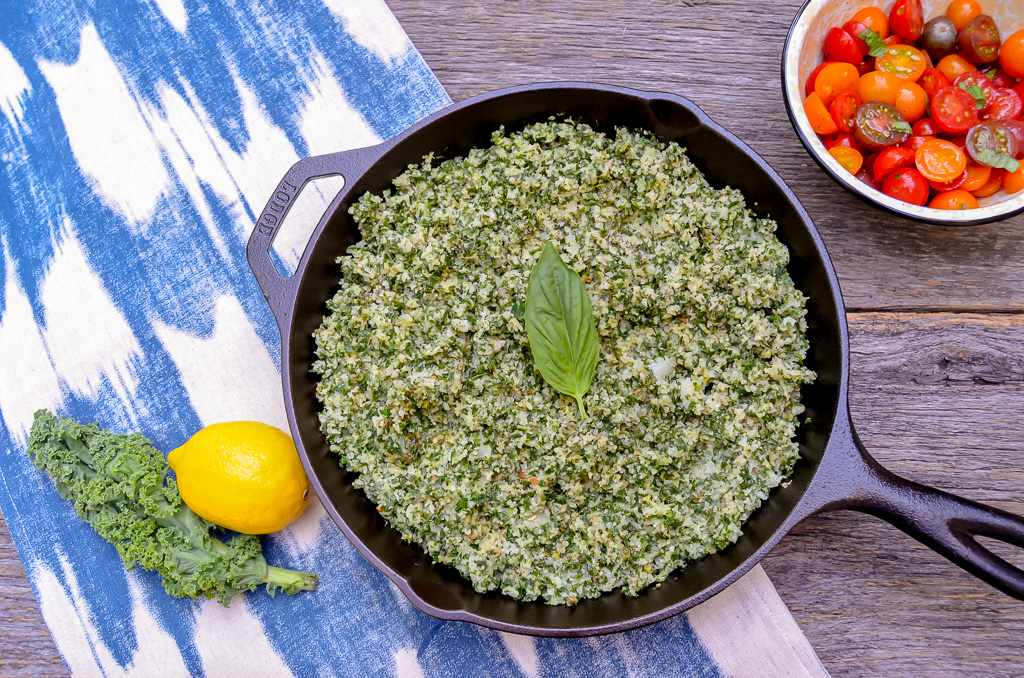
This pesto is a lot like my 5-ingredient vegan pesto but with an upgrade. The pesto used in this dish contains more greens like arugula and watercress as well as one of my favorite vegetable, peas!

Other bright and colorful green vegetables that are added to this pasta salad are asparagus and broccolini. Like most of my pasta dishes, I use Banza pasta. Banza is a great gluten-free option that also contains a higher amount of protein, fiber, and less net carbs than most traditional pastas out there.
This vibrant pea pesto pasta salad is great on its own but also perfect as a side dish for your meal preps. Add a side of grilled chicken and you’re good to go!

As a Banza ambassador, I’m excited to announce that the first person who makes this dish and provides feedback will receive coupons for free Banza pasta! To qualify for this giveaway you must:
Make this recipe!
Leave a comment below.
Post in your Instagram story or feed a picture of your finished dish and add #fromtherootsblog .

I was not financially compensated for this post. All recipes, photos, and opinions are my own.
Vibrant Pea Pesto Pasta Salad - Pasta salad that is made with fresh ingredients and loads of flavor! Dairy-free, gluten-free, and vegan.
Ingredients
½ cup frozen peas
1 bunch broccolini
1 bunch asparagus
½ lemon (juice)
1 box (8 oz) Banza pasta rotini
PEA PESTO
7-9 raw almonds
4 cloves garlic
½ cup peas (frozen)
1 cup packed fresh basil
½ cup packed watercress and arugula
⅓ cup nutritional yeast
⅓ cup EVOO
½ lemon
S&P to season
Directions
Bring a large pot of water to a boil and add a generous pinch of salt. Once boiling, add pasta and cook according to package instructions. Drain and set aside. Drizzle with oil of choice and toss to prevent noodles from sticking.
While pasta is cooking, blanch asparagus and broccolini by filling a medium saucepan halfway with lightly salted water. Bring to a boil. While the water is heating, prepare the asparagus by breaking off any tough, white bottoms and cutting the spears into 1 to 2 inch sections. Add the asparagus and broccolini to the boiling water and lower the heat slightly to maintain a simmer. Cook for about 2 minutes and drain the hot water. Add the veggies to an ice bath after to stop the cooking process. Drain and set aside.
Make pesto by adding almonds and garlic to a food processor and pulse until finely chopped. Add the rest of the ingredients except oil and blend until combine. Slowly add in the olive oil until creamy and smooth, scraping down sides as needed. If mixture is too dry, add a little water. It should be thick but pourable.
Taste and adjust flavor as needed; set aside.
Add cooked pasta, broccolini, asparagus, and peas to a mixing/serving bowl and top with pesto. Squeeze half of lemon and toss to combine. Garnish with herbs, S&P, pine nuts, or hemp seeds (optional).
Best served fresh at room temperature. Store in refrigerator for up to 4 days.


