Sort by Category
- November 2025
- October 2025
- September 2025
- August 2025
- June 2025
- August 2024
- July 2024
- June 2024
- May 2024
- February 2024
- January 2024
- December 2023
- November 2023
- October 2023
- September 2023
- August 2023
- July 2023
- March 2023
- February 2023
- January 2023
- December 2022
- November 2022
- October 2022
- September 2022
- August 2022
- June 2022
- May 2022
- April 2022
- March 2022
- February 2022
- January 2022
- December 2021
- November 2021
- October 2021
- September 2021
- August 2021
- July 2021
- June 2021
- May 2021
- April 2021
- March 2021
- February 2021
- January 2021
- December 2020
- November 2020
- October 2020
- September 2020
- August 2020
- July 2020
- June 2020
- May 2020
- April 2020
- March 2020
- February 2020
- January 2020
- December 2019
- November 2019
- October 2019
- September 2019
- August 2019
- July 2019
- June 2019
- May 2019
- April 2019
- March 2019
- February 2019
- January 2019
- December 2018
- November 2018
- October 2018
- September 2018
- August 2018
- July 2018
- June 2018
- May 2018
- April 2018
- March 2018
- February 2018
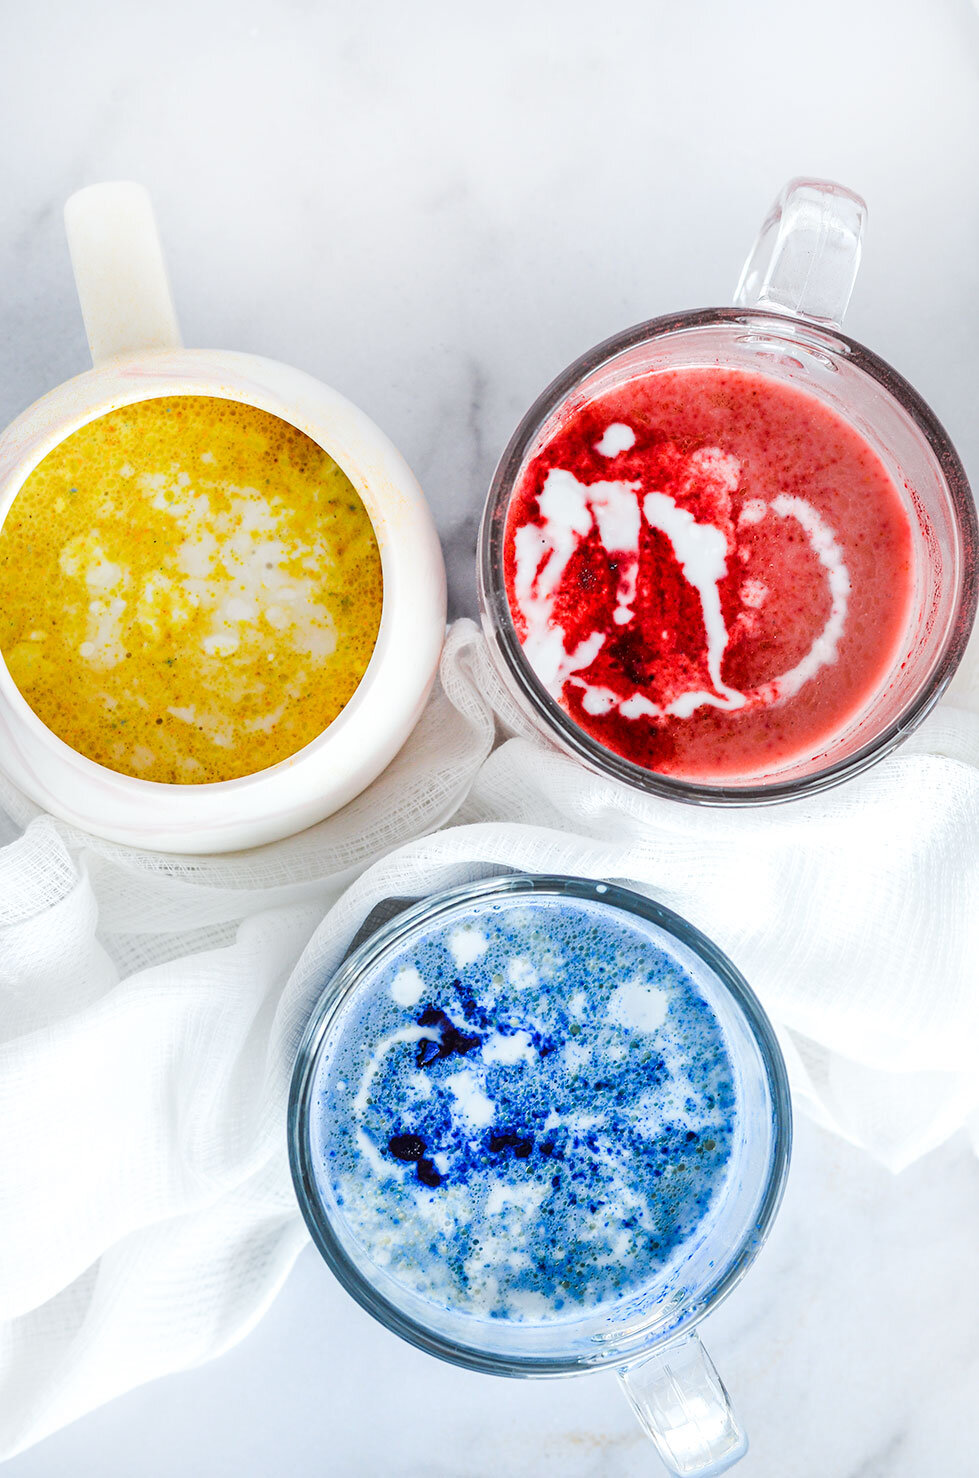
Moon Milk
Now, I want to preface by saying that these adaptogenic moon milks will not take you out like Benadryl, but it will aid in calming the mind for a blissful lull. These milk are in the business of providing that hygge to your mind if you will! ;)
Moon Milk - A natural sleep aid to put your mind and body at rest!

Now, I want to preface by saying that these adaptogenic moon milks will not take you out like Benadryl, but it will aid in calming the mind for a blissful lull. These milks are in the business of providing that hygge to your mind if you will! ;)

So you are probably wondering, how!? Well, glad you asked because we have a lot of ingredients to go over! So let’s start with the star player: adaptogens.

Adaptogens are herbs that support the body’s natural ability to deal with stress. Adaptogens are known for their unique ability to “adapt” their function according to the specific needs of the body - physical, chemical, or biological needs.


With that said, you can practically add any type of adaptogen to your moon milk depending on your taste preference. For example, adding maca to your foods like oatmeal, coffee, or yogurt bowls provide a “honeycomb” sweetness. The reason why we are not using maca in this recipe, though, is that it provides a natural alternative to caffeine and will energize you - the opposite of what we want here!
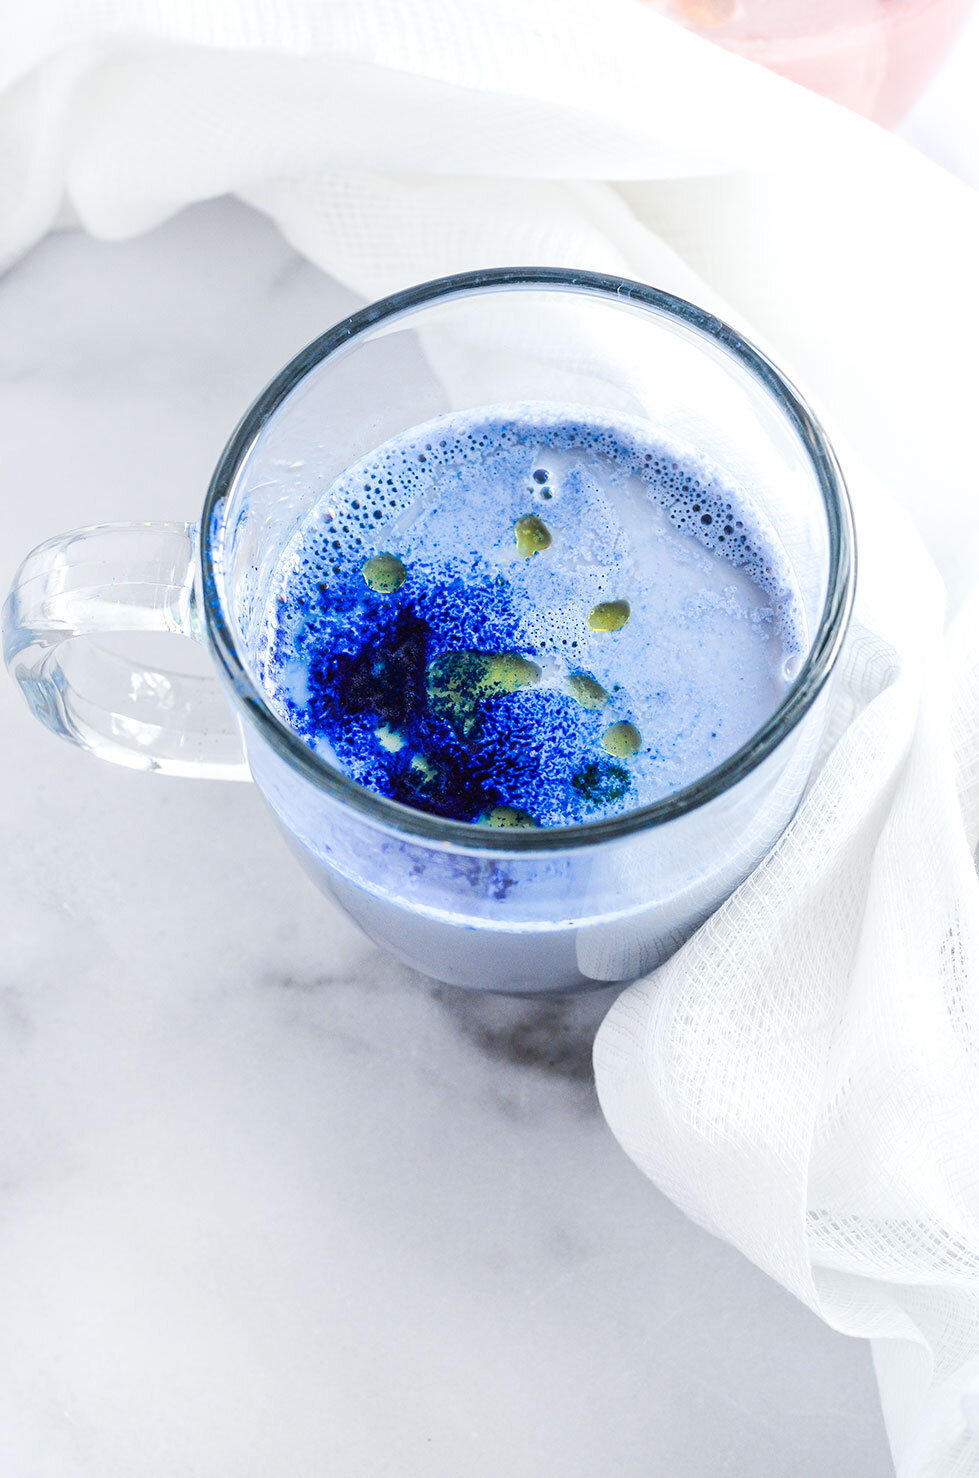
So for this milk, we are adding ashwagandha! Now if you never had ashwagandha before, be warned that it has a fairly strong bitter/earthy flavor. That’s why we are using superfood powders to mask the taste like spirulina, beetroot, blue Majik, and turmeric!
Whichever powder you choose, all four superfoods provide an abundance of nutritional value that benefits the mind, body, and spirit! Added bonus - they make your milk look pretty!

The last ingredient we will discuss is CBD oil. Now at this point in life, most people know what CBD oil is, but if you would like a refresher, here is an article to brush upon. I garnish my milk with CBD oil as an added punch when my muscles are sore that day, anxiety is high, or I am on my period.

CBD oil can be completely optional since a high quality sourced CBD oil product can be $$$. But if you are looking for a great product, I highly recommend Icaria. Specifically, I use their aphrodite oil in my milk because it provides a nutty flavor that pairs perfectly with the recipe!
If you use this link and put it in CANDACE10 at checkout, you can get $10 off your first order!
If you try this recipe, let us know! Leave a comment, rate it, and don’t forget to tag a photo to #fromtherootsblog on Instagram. We love seeing what you come up with!
Moon Milk - A natural sleep aid to put your mind and body at rest!
Ingredients
1 cup plant-based milk
1 tsp honey
1 tsp superfood powder of choice (turmeric, blue spirulina, beetroot)
½ tsp ashwagandha
CBD oil drops (optional)
1 tsp magnesium powder (optional)
1 scoop collagen (optional)
1 tsp coconut butter or canned coconut milk (optional)
Directions
Heat milk in a small saucepan on medium heat, until you reach a gentle bubble.
Add all ingredients that you would like in your milk and whisk until the mixture is smooth and creamy! Optional but you can also pour the heated mixture in a small blender or use a handheld frother to really turn the milk mixture into a latte!
Pour in your favorite cozy mug and enjoy!
Notes
Can be made ahead of time by pouring the mixture in mason jars - allow to cool to room temperature, and store in the fridge for up to 3 days.
If you are using a lot of adaptogens/add-ins, after the mixture has been heated, add to a blender and blend until nice and frothy! This also helps for all the ingredients to be fully mixed so you are not left with so much sediment at the bottom of your mug!

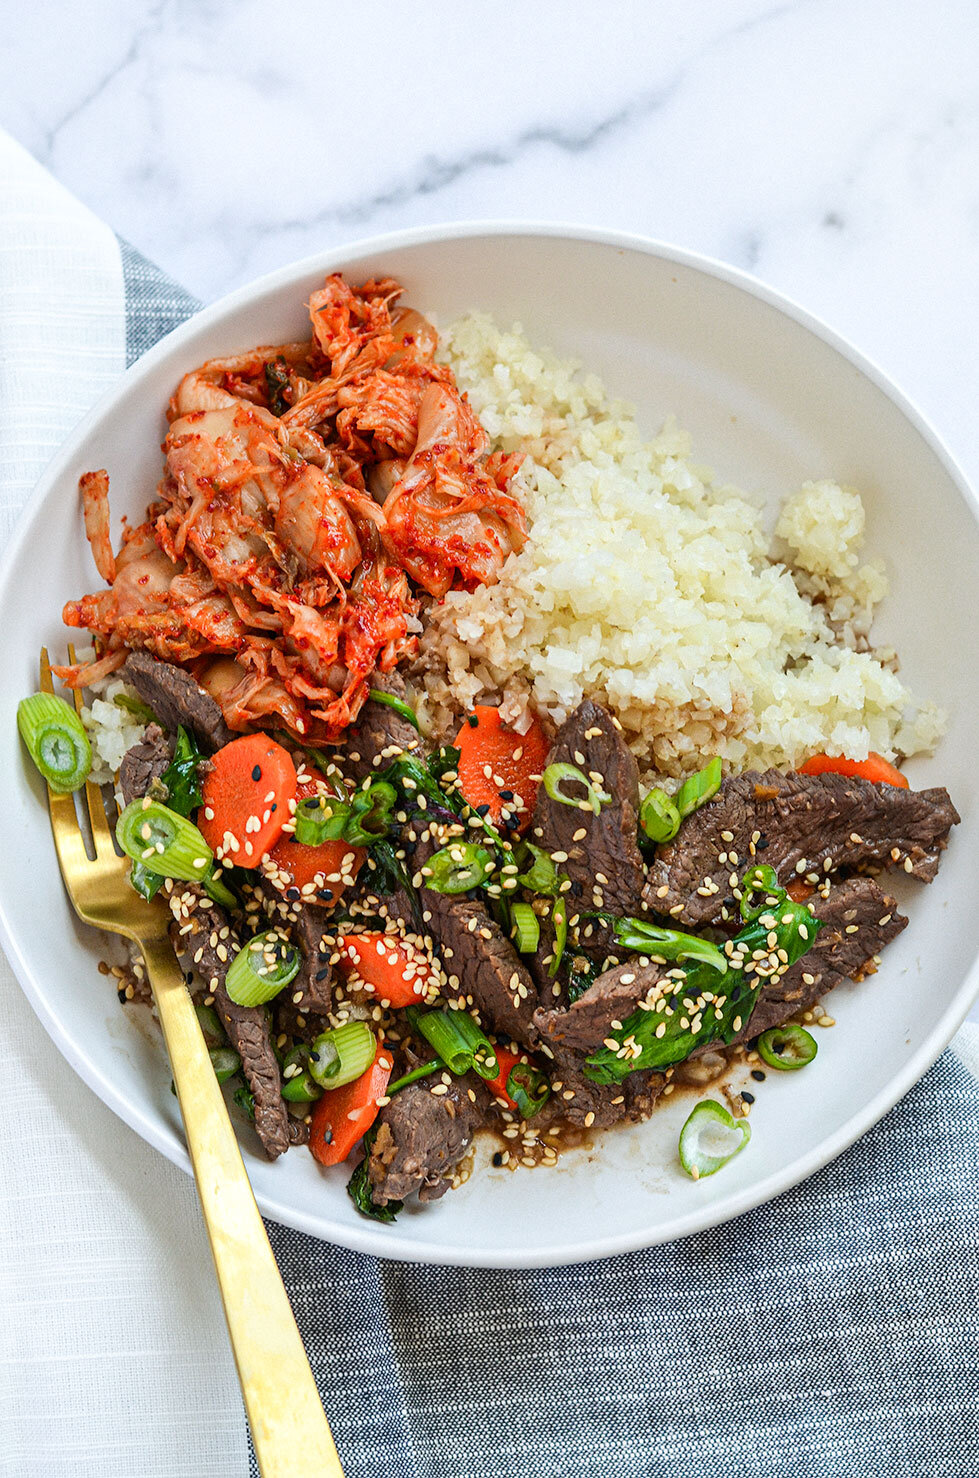
Beef Bulgogi Bowls
If you are wanting something quick and easy to make on your #sundaymealprep days, then look no further! For this recipe, you are simply creating a marinade with ingredients that most would have in their pantry and allow your protein to marinate as you assemble the add-ins for your bowl!
If you notice in the add-in ingredients, there is hardly any prep to this meal! For example, I like to use pre-washed organic spinach, this brand kimchi, and frozen cauliflower rice! That’s pretty much it!
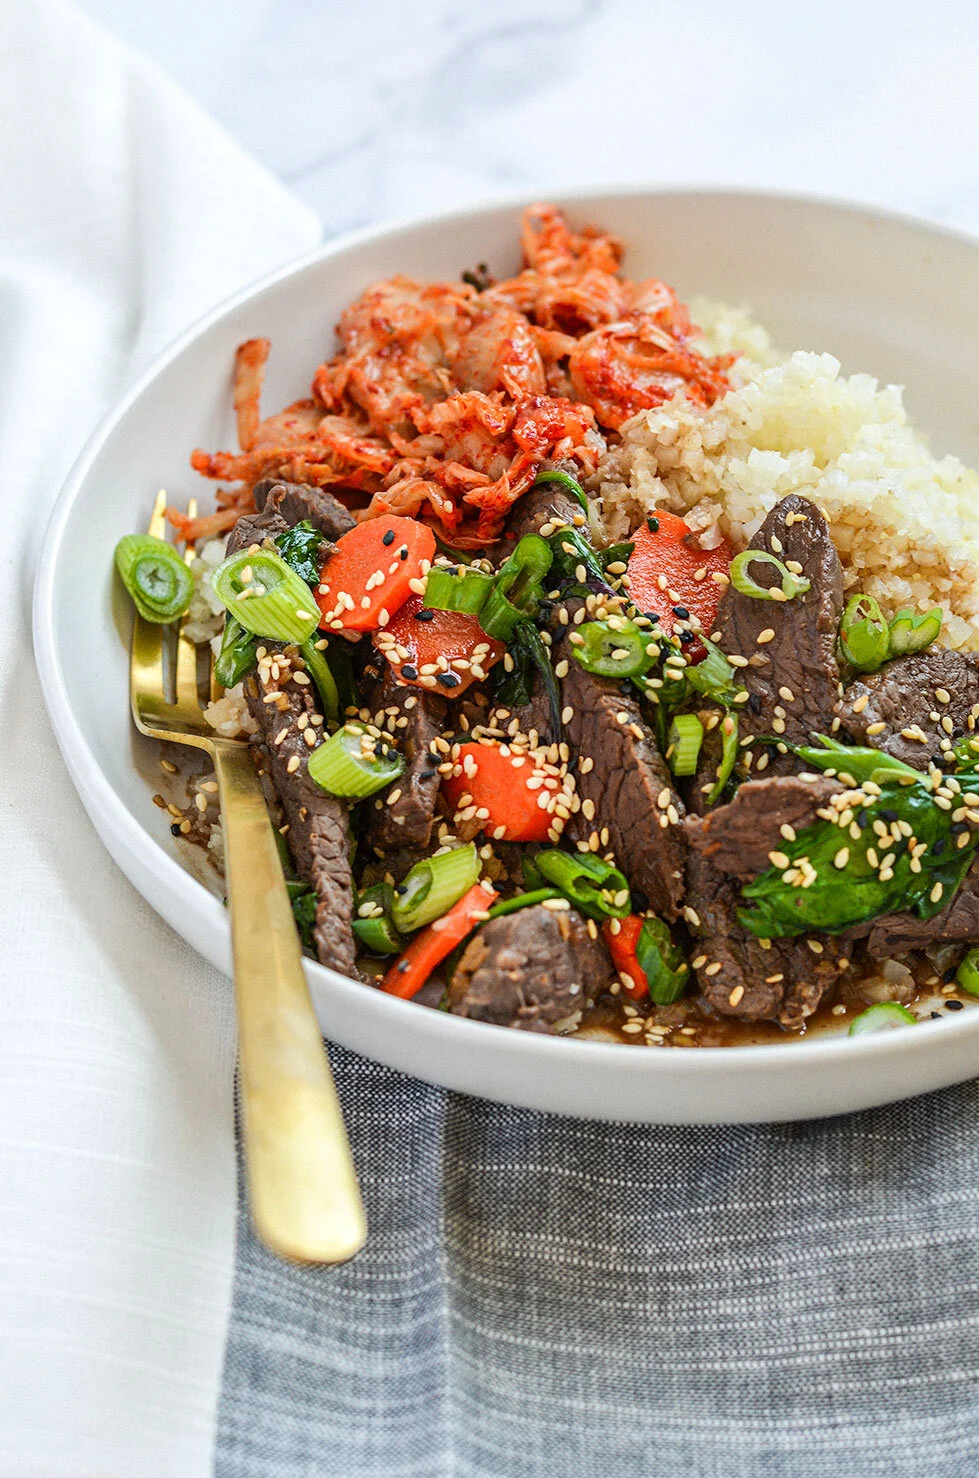
Beef Bulgogi Bowls - A simple and nutritious low carb/high protein lunch meal prep!

Originally, I created this recipe for Emily Schromm’s April edition of Empress but since most of my followers want more meal prep recipes, you are getting this recipe, too!

If you are wanting something quick and easy to make on your #sundaymealprep days, then look no further! For this recipe, you are simply creating a marinade with ingredients that most would have in their pantry and allow your protein to marinate as you assemble the add-ins for your bowl!
If you notice in the add-in ingredients, there is hardly any prep to this meal! For example, I like to use pre-washed organic spinach, this brand kimchi, and frozen cauliflower rice! That’s pretty much it!
Now, let’s get to the recipe!
If you try this recipe, let us know! Leave a comment, rate it, and don’t forget to tag a photo to #fromtherootsblog on Instagram. We love seeing what you come up with!
Beef Bulgogi Bowls - A simple and nutritious low carb/high protein lunch meal prep!
Ingredients
Marinade
1.5 lb flank steak (can sub skirt or sirloin steak)
½ pear
¼ cup coconut aminos
3 cloves garlic
1 Tbsp fresh ginger knob
1 Tbsp toasted sesame seed oil
1 tsp liquid smoke
Add-ins
2 heaping cups spinach
1 cup carrots (chopped)
For assembling the bowls
3 cups cauliflower rice
1 cup kimchi
4 fried free-range eggs
Green onions
Sesame seeds
Directions
In a blender or processor, add the pear, coconut aminos, garlic, ginger, oil, and liquid smoke. Add blended ingredients to a large bowl. *If you do not have a blender, finely chop pear, garlic, and ginger and whisk all marinade ingredients in a large bowl.
Add the sliced beef to the bowl with the marinade and toss to combine. Cover and refrigerate the beef for a minimum of two hours and up to overnight.
When you are ready to cook the steak, heat 1 Tbsp oil in a skillet over medium heat. Add the beef strips and chopped carrots into the skillet. Pour in any remaining marinade also. Cook the beef and carrots, stirring occasionally until all of the marinade juices thicken and begin to caramelize. The beef will be coated with the sauce and will absorb all of the sauce flavors.
Cook for about 10-15 minutes or once the sauce has cooked down enough so it is just coating the meat pieces and the carrots are soft. For the last five minutes, add the spinach.
Assemble the bowls: Divide the rice among four serving bowls and top it with the beef bulgogi. Top each bowl with a fried egg (optional), a portion of kimchi, and garnish with green onions and sesame seeds.
Notes
If you are strictly paleo, you can sub out the sesame seed oil for avocado oil.
This recipe is great for meal prep - if you are wanting to add an egg to your meal, simply fry an egg in the morning or boil an egg beforehand for an easier way to pack your lunch!

Tropical Papaya Chia Pudding
During the summertime, I want to eat all the tropical fruits - mango, dragon fruit, coconut, guava, pineapple, you name it!
But one of my favorite tropical fruits that I can’t seem to get enough of these days are papayas! Now, I have noticed that people don’t typically put papaya in their grocery cart. They either have no clue what to do with them or they don’t want to buy a large semi-expensive fruit and worry if they will like the taste or not. Well, I am here to give you the low down on this sweet tropical “nectar of the gods” fruit while providing my favorite go-to breakfast recipe!
Tropical Papaya Chia Pudding - A simple and nutritious breakfast escape! Meal prep, blood sugar stabilizer, and healthy fat friendly!

During the summertime, I want to eat all the tropical fruits - mango, dragon fruit, coconut, guava, pineapple, you name it!

But one of my favorite tropical fruits that I can’t seem to get enough of these days are papayas! Now, I have noticed that people don’t typically put papaya in their grocery cart. They either have no clue what to do with them or they don’t want to buy a large semi-expensive fruit and worry if they will like the taste or not. Well, I am here to give you the low down on this sweet tropical “nectar of the gods” fruit while providing my favorite go-to breakfast recipe!

Before I unpack the nutritional value, papaya - when eating ripe, is sweet and has a flavor comparable to a melon. If you pick unripe papaya, you may have little to no flavor at all.
Tip: Papaya is fully ripe when it is bright yellow so look for papayas that are mostly yellow and a little green to fully ripen at home from the grocery store! Also look for firm, smooth skin, and heavy for their size.

Now that you know how to pick ripe papayas, here are the nutrition facts:
Immune system booster as it contains an absorbent amount of vitamin C.
When eating a balanced amount, papaya has a hypoglycemic effect on the body which decreases blood glucose levels.
Plays a major role in fighting inflammation as it contains the enzyme, papain, which is a group of proteins that help regulate inflammation.
Bloating or constipation issues? The high fiber and water content help to improve digestion by reducing bloating and easing constipation while encouraging regular bowel activity.

So now that we have established that papayas are pretty amazing, let’s dive into my go-to breakfast recipe - chia pudding! Even though we know that papaya is a fruit, it still contains an adequate amount of natural sugar. So to make sure we are balancing our blood sugar for the morning, we are pairing this fruit with protein and healthy fats that come from the chia pudding mixture. You can use any chia pudding recipe as the base for this recipe, but I like to #levelup with canned coconut milk, vanilla extract, and fresh ginger! The ginger is my favorite part if you like a more Thai inspired dish but if you don’t, that’s okay! Keep it simple with just vanilla extract.

If you try this recipe, let us know! Leave a comment, rate it, and don’t forget to tag a photo to #fromtherootsblog on Instagram. We love seeing what you come up with!
Tropical Papaya Chia Pudding - A simple and nutritious breakfast escape! Meal prep, blood sugar stabilizer, and healthy fat friendly!
Ingredients
4 Tbsp chia seeds
½ cup of canned coconut milk
1 tsp vanilla extract
1 tsp freshly grated ginger (optional)
½ cup papayas (diced)
Garnish
Shredded coconut flakes, fresh lime, bee pollen, raspberries, honey
Directions
Soak the chia seeds with minced ginger (optional), vanilla, and milk for at least an hour or overnight - stirring occasionally until a gel forms. You can make your chia seed pudding thicker or thinner by reducing/adding liquid. You can also use your favorite plant-based milk for this recipe as well!
Pour the chia seed pudding into 2 serving glasses, top with diced papayas and top with the garnishes.
Store in the fridge as a leftover, enjoy chilled or at room temperature. Great for breakfast, dessert, or a snack!
Notes
Don’t have papaya? That’s okay! Use whatever tropical fruit that pairs well with ginger like mangoes, pineapple, kiwi. This recipe is very versatile and any fruit/topping combination will work as long as you have the chia pudding ratio right!
Need more protein? Add a scoop of collagen peptides to the mixture and add ¼ cup more milk to the mixture. You can also drizzle nut butter over chia pudding when ready to eat.

Curry Chicken Nachos
So earlier this week, I posted my red curry sauce on the blog. And as I discussed in that post, you can put red curry sauce on just about anything and everything! But today, I wanted to share a fun and crowd-pleasing recipe that will get your weekend starting strong - Curry Chicken Nachos!
Curry Chicken Nachos - A fun and healthy crowd-pleasing dish that is bursting with flavor and texture!

So earlier this week, I posted my red curry sauce on the blog. And as I discussed in that post, you can put red curry sauce on just about anything and everything! But today, I wanted to share a fun and crowd-pleasing recipe that will get your weekend starting strong - Curry Chicken Nachos!

These are so much fun to make and will take you less than 30 minutes to prepare. If I am cooking over a lb of chicken - Instant Pot is my friend! So if you are crunched for time and would like to make this recipe on the fly, I would highly recommend cooking the madras curry yogurt chicken in the Instant Pot.
For the curry sauce, you simply blend all ingredients into a blender, Nutri bullet, processor, or simply sub fresh ginger for ginger powder and heat in a small saucepan to thicken the sauce. That’s it!
Last but not least, salsa! Other than the sauce, it’s my favorite part! We are following the same base as most salsas except we are using Indian influenced produce like mango, cilantro, fresh ginger, and pomegranate seeds. You can also use leftover salsa to put over grilled chicken, eggs, and fish.

Every element in this dish is Indian inspired so welcome to FlavorTown! Did I just write that? :|
If you try this recipe, let us know! Leave a comment, rate it, and don’t forget to tag a photo to #fromtherootsblog on Instagram. We love seeing what you come up with!
Curry Chicken Nachos - A fun and healthy crowd-pleasing dish that is bursting with flavor and texture!
Ingredients
Madras Curry Yogurt Chicken
1 lb boneless skinless chicken breast
¼ cup unsweetened greek yogurt (or DF)
1 tsp madras curry (or regular curry powder)
¼ tsp pink Himalayan sea salt
¼ tsp turmeric
¼ tsp cayenne
Pinch of organic cane sugar
Red Curry Sauce
1 can unsweetened coconut milk
2 Tbsp red curry paste
2 Tbsp nutritional yeast
2 Tbsp curry powder
2 scoops collagen peptides (optional but helps to thicken the sauce)
2 tsp (heaping) organic white miso paste
1 Tbsp liquid aminos
1 Tbsp minced fresh ginger
1 tsp pure maple syrup
Juice of ½ lime
Mango Pomegranate Salsa
½ mango (diced)
½ tomato (diced)
¼ red onion (diced)
2 Tbsp pomegranate seeds
2 Tbsp fresh cilantro (chopped)
1tsp - 1tbsp* fresh ginger (minced) Depending on preference
¼ tsp pink Himalayan sea salt
Toppings
Lime wedges, fresh cilantro, a dollop of Greek yogurt, tortilla chips
Directions
Start by cooking the chicken: Add seasonings to yogurt until combined and coat chicken with the yogurt sauce until completely covered. Either cook in Instant Pot (meat setting; 20 min with less pressure or preferred setting), grill, or bake until chicken is cooked through. *If cooking in Instant Pot, I love adding about ¼ cup chicken bone broth and using the rack so it can keep the chicken extra juicy!
Allow the chicken to cool and then shred using two forks.
Curry Sauce: While your chicken is cooking, prepare the curry sauce by adding all ingredients to a blender or nutribullet and blend until the mixture is in a sauce form. *If you do not have a blender, you can sub fresh ginger for ginger powder so that the sauce is smooth and consistent in texture.
At this point, taste sauce and see if it needs more umami (miso paste/liquid aminos), cheesy (nutritional yeast), bitter (lime juice), spice (curry paste/powder), or salt.
Pour sauce into a small saucepan and heat on medium heat. Stir sauce until the sauce is about to boil and turn the heat off. Make sure you are constantly stirring so as to not burn the sauce.
As the sauce cools down, it will thicken. Collagen helps to thicken the sauce so if you are adding more collagen, make sure the sauce is hot enough for the collagen to blend well so that you don’t get clumps!
Salsa: While the sauce is cooling, prepare the salsa by adding all the ingredients into a small serving bowl.
You can easily double this recipe so as not to waste produce!
If you have leftover salsa - it’s great to have over grilled chicken, fish, or eggs!
Prepare the rest of the toppings, and start building your nachos!
Tortilla chips < shredded chicken < dollop of yogurt/sour cream < salsa < curry sauce < cilantro < lime juice < devour!
Notes
Products that were used in the curry sauce: coconut milk, curry paste, collagen peptides, nutritional yeast, white miso paste, curry powder, maple syrup, liquid aminos.

Red Curry Sauce
Y'all. This sauce is what dreams are made of! As an obsessive curry lover, I’m always on the prowl for a good curry recipe; whether it be from a restaurant or from a blog. Well, low behold, I found the perfect red curry sauce at this local Asian restaurant that used to be but only a block away from me! Needless to say, curry ran through my veins in those four years of living in that area!
Red Curry Sauce - A tried and true healthier version of the traditional red curry sauce. Less than 10-ingredients, gluten-free, dairy-free, keto, and paleo-friendly.

Y'all. This sauce is what dreams are made of! As an obsessive curry lover, I’m always on the prowl for a good curry recipe; whether it be from a restaurant or from a blog. Well, low behold, I found the perfect red curry sauce at this local Asian restaurant that used to be but only a block away from me! Needless to say, curry ran through my veins in those four years of living in that area!

So now that I am many...many blocks away from that restaurant, it was only a matter of time that I started to recreate the sauce. Long story short, we have arrived!
Luckily for you, this is a much healthier version but tastes just as creamy, full-bodied curry sauce that you ever laid your taste buds on! For this recipe, I used many condiments that I already had in my pantry, as I am sure you have them in yours as well.

And don’t fret if you don’t have them, I listed all the products I used for this sauce in the recipe notes below.
One condiment that transforms this umami flavor bomb sauce is using miso paste. Now, I understand that soybeans are not considered “paleo”, but most paleo eaters will choose to add this into their dishes because of the way it’s prepared.

Miso is the product of fermented soybeans, water, fermented grains (called koji), and salt. Koji, the final product of fermented rice, barley, or soy, requires the use of a fungus called Aspergillus oryzae, which activates the fermentation process. Asian cooking often requires a number of fermented products like miso, which are all fermented with koji. So that umami flavor you get when eating at an Asian restaurant will most likely have miso in it! If you would like more health facts on miso paste from a paleo perspective, here’s the link.

One thing I will note is that I created this recipe for a sponsored post for Vital Proteins. I used them for two reasons. One is that it’s a fun and creative way to incorporate collagen peptides into your meals and two, it is used as a thickening agent.
If you don’t mind having a more liquid sauce then it’s fine without using collagen peptides. But if you are a pro in the kitchen, feel free to experiment using other thickening agents like flour or arrowroot starch. I will report back if this work but for now, collagen powder is the way to go!
Feel free to use this sauce on just about anything and everything! Next week, I will be posting a chicken curry nacho recipe but in the meantime, here are some ways you can use red curry sauce: on eggs, chicken, rice, veggies, dipping sauce, condiment, pasta, marinade/sauce for a protein source, or just straight out of the bowl - possibilities are endless!

If you try this recipe, let us know! Leave a comment, rate it, and don’t forget to tag a photo to #fromtherootsblog on Instagram. We love seeing what you come up with!
Red Curry Sauce - A tried and true healthier version of the traditional red curry sauce. Less than 10-ingredients, gluten-free, dairy-free, keto, and paleo-friendly.
Ingredients
1 can unsweetened coconut milk
2 Tbsp red curry paste
2 Tbsp nutritional yeast
2 Tbsp curry powder
2 scoops collagen peptides (optional but helps to thicken sauce)
2 tsp (heaping) organic white miso paste
1 Tbsp liquid aminos
1 Tbsp minced fresh ginger
1 tsp pure maple syrup
Juice of ½ lime
Directions
Prepare the curry sauce by adding all ingredients into a blender or nutribullet and blend until the mixture is in a sauce form. *If you do not have a blender, you can sub fresh ginger for ginger powder so that the sauce is smooth and consistent in texture.
At this point, taste the sauce and see if it needs more umami (miso paste/liquid aminos), cheesy (nutritional yeast), bitter (lime juice), spice (curry paste/powder), or salt.
Pour sauce into a small saucepan and heat on medium heat. Stir sauce until the sauce is about to boil and turn the heat off. Make sure you are constantly stirring so as to not burn the sauce.
As the sauce cools down, it will thicken. Collagen helps to thicken the sauce so if you are adding more collagen, make sure the sauce is hot enough for the collagen to blend well so that you don’t get clumps!
If you are making a meal like chicken curry with rice and vegetables, heat the sauce into the cooking veggies if using a skillet to do this. If not, serve over anything and everything!
Store in an airtight container for at least two weeks in the refrigerator.
Notes:
Products that were used in the curry sauce: coconut milk, curry paste, collagen peptides, nutritional yeast, white miso paste, curry powder, maple syrup, liquid aminos.