Sort by Category
- October 2025
- September 2025
- August 2025
- June 2025
- August 2024
- July 2024
- June 2024
- May 2024
- February 2024
- January 2024
- December 2023
- November 2023
- October 2023
- September 2023
- August 2023
- July 2023
- March 2023
- February 2023
- January 2023
- December 2022
- November 2022
- October 2022
- September 2022
- August 2022
- June 2022
- May 2022
- April 2022
- March 2022
- February 2022
- January 2022
- December 2021
- November 2021
- October 2021
- September 2021
- August 2021
- July 2021
- June 2021
- May 2021
- April 2021
- March 2021
- February 2021
- January 2021
- December 2020
- November 2020
- October 2020
- September 2020
- August 2020
- July 2020
- June 2020
- May 2020
- April 2020
- March 2020
- February 2020
- January 2020
- December 2019
- November 2019
- October 2019
- September 2019
- August 2019
- July 2019
- June 2019
- May 2019
- April 2019
- March 2019
- February 2019
- January 2019
- December 2018
- November 2018
- October 2018
- September 2018
- August 2018
- July 2018
- June 2018
- May 2018
- April 2018
- March 2018
- February 2018

Spicy Thai Tofu with Crispy Coconut Spaghetti Squash Noodles
Believe it or not, I was a vegetarian for four years when I was a teenager! I know, I can’t believe it either! But when I was a vegetarian, tofu stir fry was my jam! It was something that could be made pretty fast, kept me satiated, and burst with amazing flavors.
Within those years, I thought I was being healthy because I eliminated animal proteins from my diet. What I ended up doing was going into refined carb heaven eating all the desserts, pasta, bread, processed soy products, lots of Taco Bell...
Spicy Thai Tofu with Crispy Coconut Spaghetti Squash Noodles - A plant based dish that is fun and flavorful! Great for dinner, #meatlessmonday, or for your lunch meal prep rotations.

Believe it or not, I was a vegetarian for four years when I was a teenager! I know, I can’t believe it either! But when I was a vegetarian, tofu stir fry was my jam! It was something that could be made pretty fast, kept me satiated, and burst with amazing flavors.

Within those years, I thought I was being healthy because I eliminated animal proteins from my diet. What I ended up doing was going into refined carb heaven eating all the desserts, pasta, bread, processed soy products, lots of Taco Bell...

The imbalance lead to health issues like protein sores in my mouth, skin turning a gray color, lethargy, weight gain, brain fog, acne, the list goes on!

So knowing the route I took on my vegetarian journey, you can probably tell that my go-to tofu stir fry probably wasn’t healthy. Haha, and you guessed right! I used the ramen noodles from the cheap Maruchan noodle packets and half a bottle of soy sauce. I threw in a bag of frozen oriental stir fry veggie mix and cubed tofu and that made the entire dish seem healthy in my mind.

And this is not to say that everyone who is a vegan/vegetarian is not healthy. Just like eating meat, being paleo, intuitive eating, counting macros, celery cleanse, etc, it’s all about having a diet rich in nutrient-dense, properly prepared, whole foods. That’s it. So wherever you are at in your journey with food, keep that in mind. And if you are just starting, here is a great post to help you in discovering what that looks like for you and your own personal journey.

One thing I will make a note of about this dish is that we are using organic sprouted tofu as our main protein source. In order for this meal to be properly prepared, I use organic sprouted tofu as the source of my protein. The reason that I chose sprouted over regular tofu is that the health benefits far outweigh. The sprouting process improves digestion and increases nutrient absorption. It also contains more protein and higher levels of calcium than regular tofu.
If you try this recipe, let us know! Leave a comment, rate it, and don’t forget to tag a photo to #fromtherootsblog on Instagram. We love seeing what you come up with!
Spicy Thai Tofu with Crispy Coconut Spaghetti Squash Noodles - A plant based dish that is fun and flavorful! Great for dinner, #meatlessmonday, or for your lunch meal prep rotations.
Ingredients
Coconut Noodles
1 medium spaghetti squash
½ cup unsweetened coconut milk
¼ cup toasted coconut flakes
1 Tbsp avocado oil
Marinade
14 oz organic sprouted extra firm tofu
¼ cup unsweetened coconut milk
1 Tbsp red curry paste
3 cloves garlic (minced)
1 Tbsp fresh ginger (minced)
1 Tbsp gluten-free low-sodium tamari sauce or liquid (coconut) aminos
1 Tbsp arrowroot starch
1 tsp fish sauce (*vegan fish sauce if vegan)
Peanut Sauce
2 Tbsp creamy organic peanut butter
1 Tbsp gluten-free low-sodium tamari sauce or liquid (coconut) aminos
1 Tbsp water
2 tsp chili garlic sauce
1 tsp fresh ginger (minced)
½ tsp coconut sugar
½ juice of a lime
Garnish
¼ cup unsalted peanuts, chopped cilantro, chili garlic sauce, lime wedges
Directions
Preheat the oven to 450 degrees and line a baking sheet with aluminum foil.
To make the spaghetti squash, cut the squash in half lengthwise, scoop out the seeds and lightly drizzle with oil and salt and pepper. Place squash face down on the baking sheet and roast for 35-45 minutes or until the squash peels easily away from the skin. Set aside to cool before dragging a fork across the squash to create noodles.
To make the tofu, once you are done pressing the tofu to get the excess liquid out, cut into cubes and add to a Ziploc bag. In a small bowl, add all the marinade ingredients and mix until well combined. Pour mixture into a Ziploc bag and toss tofu to coat. Let sit for at least 15-30 minutes.
While the tofu is marinating, make the peanut sauce by adding all sauce ingredients to a small bowl and whisk vigorously until ingredients are well combined. Should be smooth and creamy yet pourable.
Once the squash has cooled down and you have scraped out all the squash into noodles, transfer to a large skillet that is set on medium-high heat with about 1 Tbsp oil.
Saute in the oil for 5-10 minutes or until crispy. Add coconut milk to the noodles and cook for an additional 5-10 minutes or until most of the liquid has cooked off and you are left with crispy yet moist noodles. Take the skillet off the heat and garnish with toasted coconut flakes. Set aside.
You can either bake the tofu in the oven or cook in the same skillet you just used for the spaghetti squash noodles. I like to cook the tofu in the skillet to give it a crispy texture.
Transfer noodle mixture into a large bowl and top with the tofu. Drizzle peanut sauce over the dish or put in a small serving dish to have on the side. Garnish with toppings and enjoy with chopsticks!
Notes
Ingredients that I use: canned organic unsweetened coconut milk, tamari, soy-free version - coconut aminos, sprouted organic tofu, fish sauce, organic peanut butter, vegan fish sauce, chili garlic sauce
Meal Prep Version: divide noodle mixture and tofu into 4 containers and keep the peanut sauce/garnishes in a separate container so that you can pour over the mixture and garnish when ready to eat.
Feel free to add roasted veggies to the dish like peppers, onion, carrots, and zucchini or steamed veggies like snap peas and broccoli.
Plant-based protein alternatives: chickpeas, tempeh, beans or use chicken if you are wanting an animal based protein source.

Crispy Smashed Potatoes with Garlic Pesto
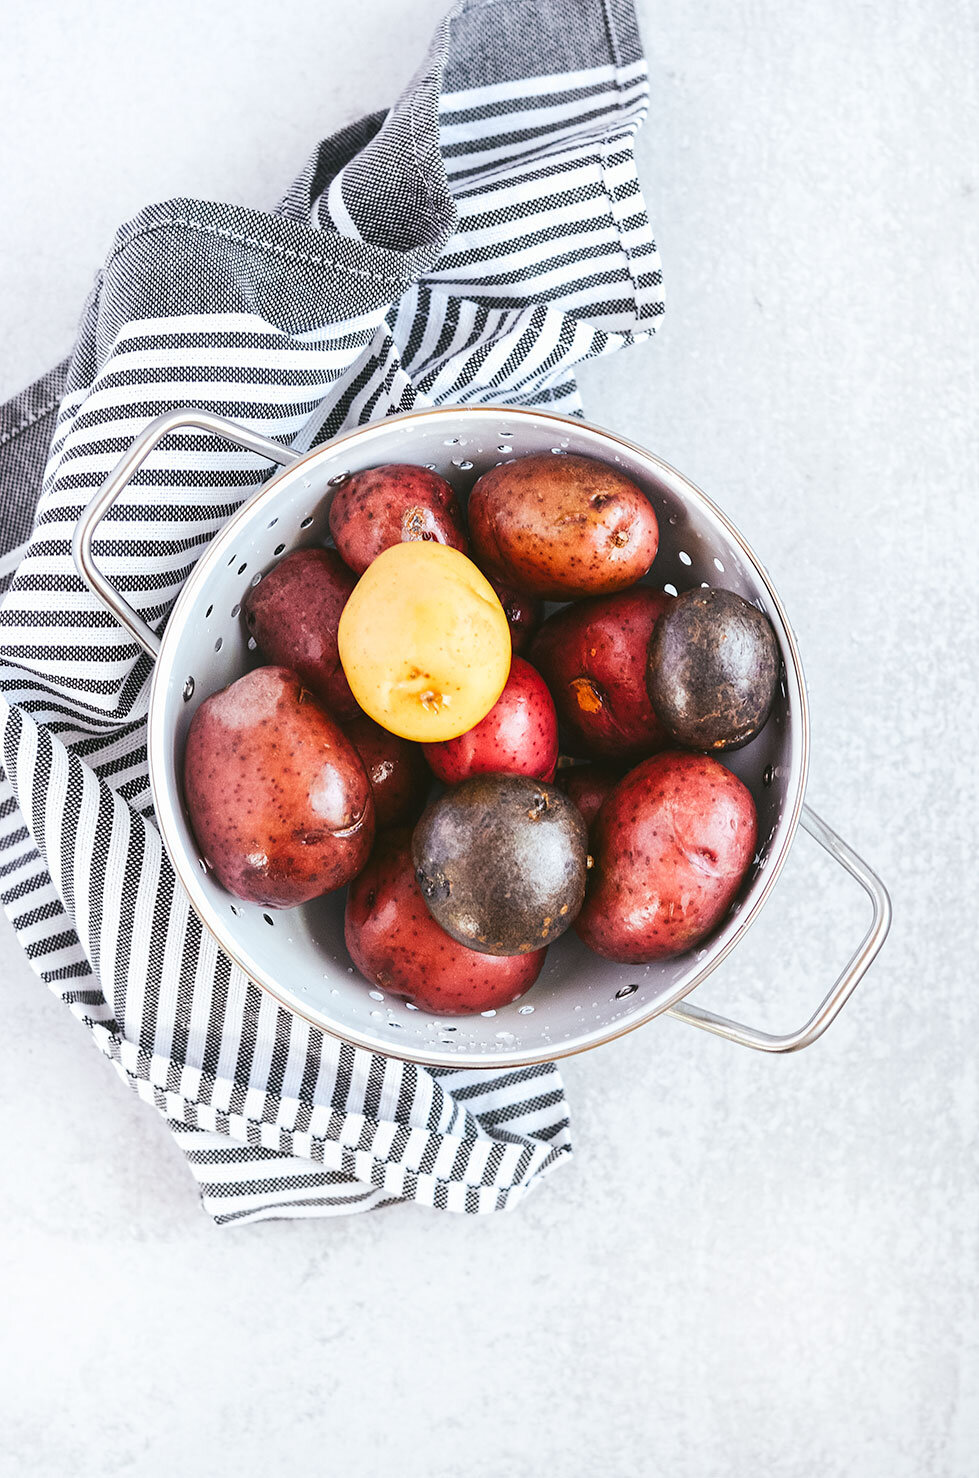
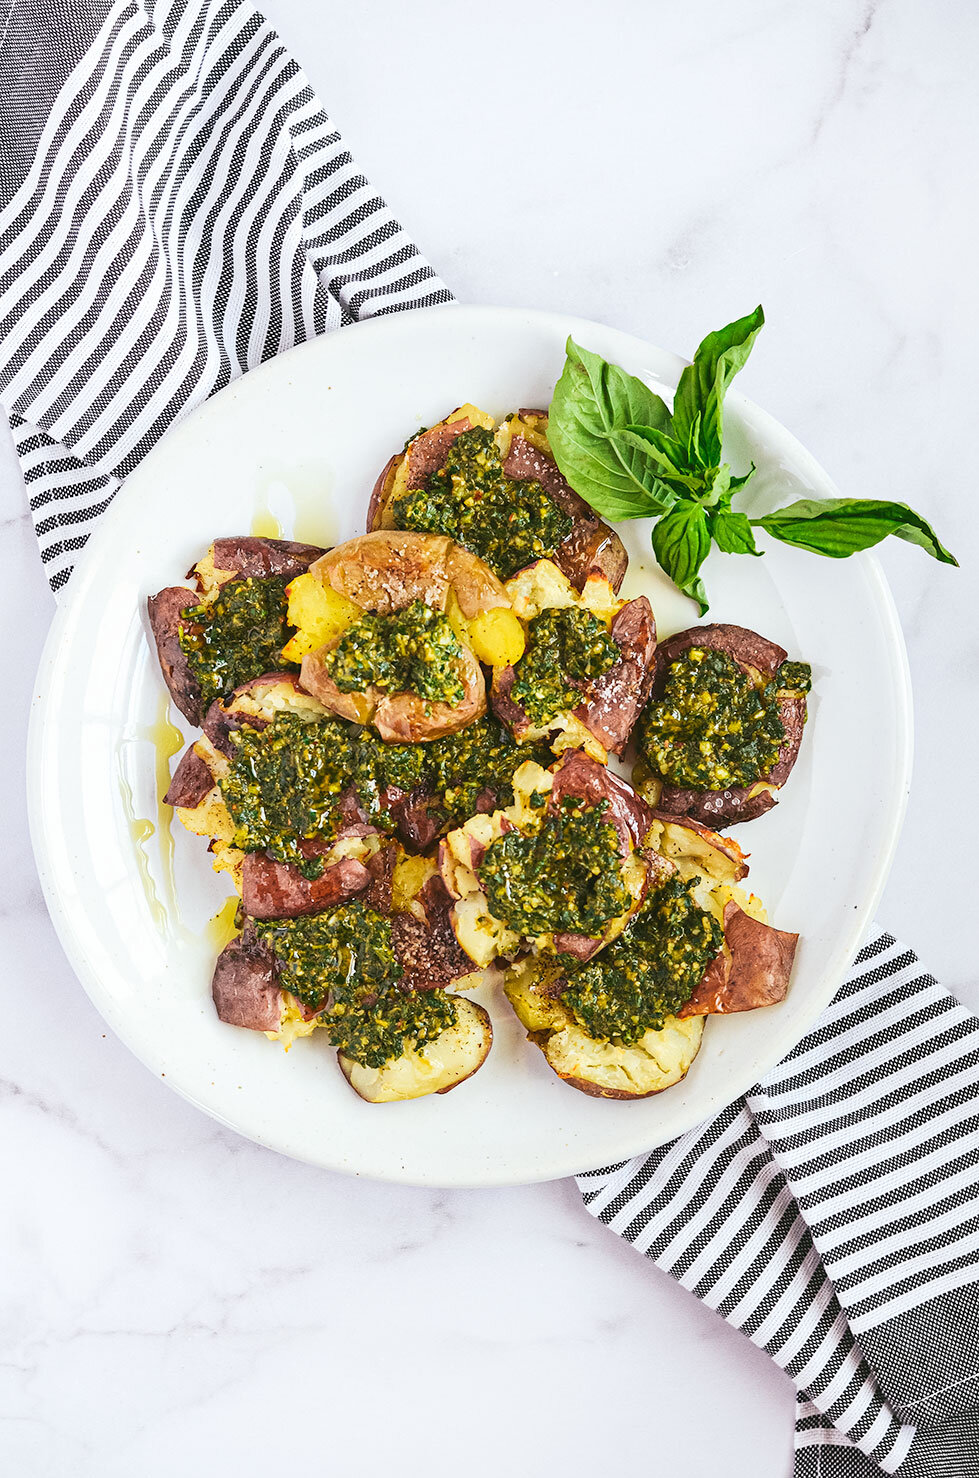
Crispy Smashed Potatoes with Garlic Pesto - The perfect go-to side dish to make for dinner or as a carb source for your weekly lunch meal prep.
I have been making smashed potatoes for years! Why? Because they are just so simple to make!
Crispy Smashed Potatoes with Garlic Pesto - The perfect go-to side dish to make for dinner or as a carb source for your weekly lunch meal prep.


I have been making smashed potatoes for years! Why? Because they are just so simple to make!
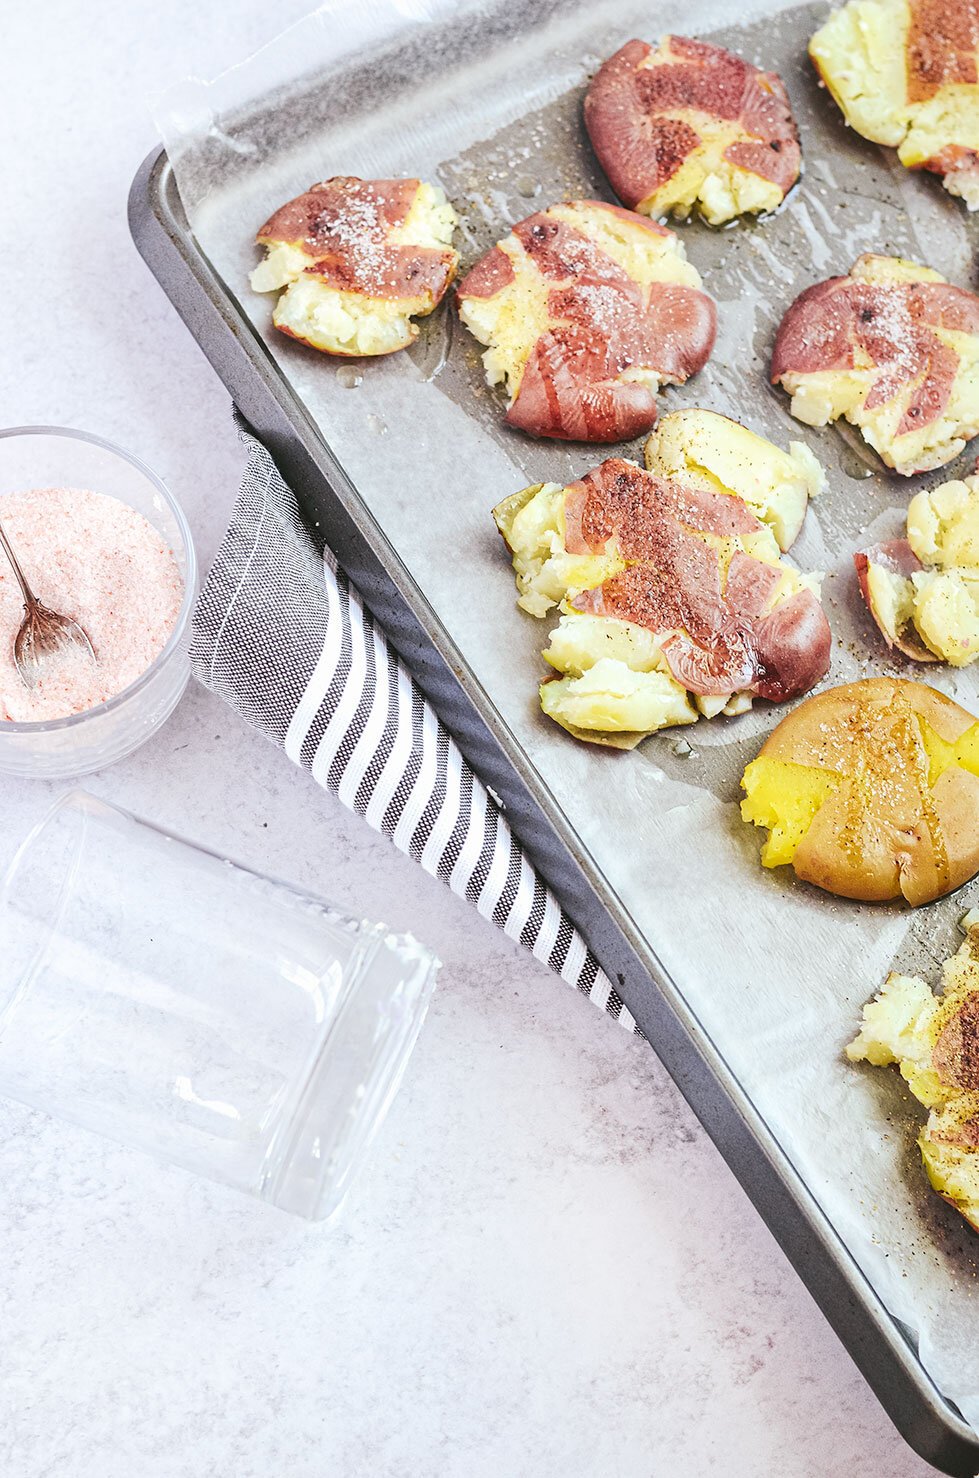
Quick little breakdown on how to prepare these bad boys:
Boil the potatoes until they are fork-tender.
Make a creamy garlicky pesto that takes less than 5 minutes to make.
Smash those bad boys with a glass cup, palm of your hand, or a saucepan.
Drizzle with oil and roast until golden brown and crispy.
Spoon that delicious sauce over the potatoes and serve!

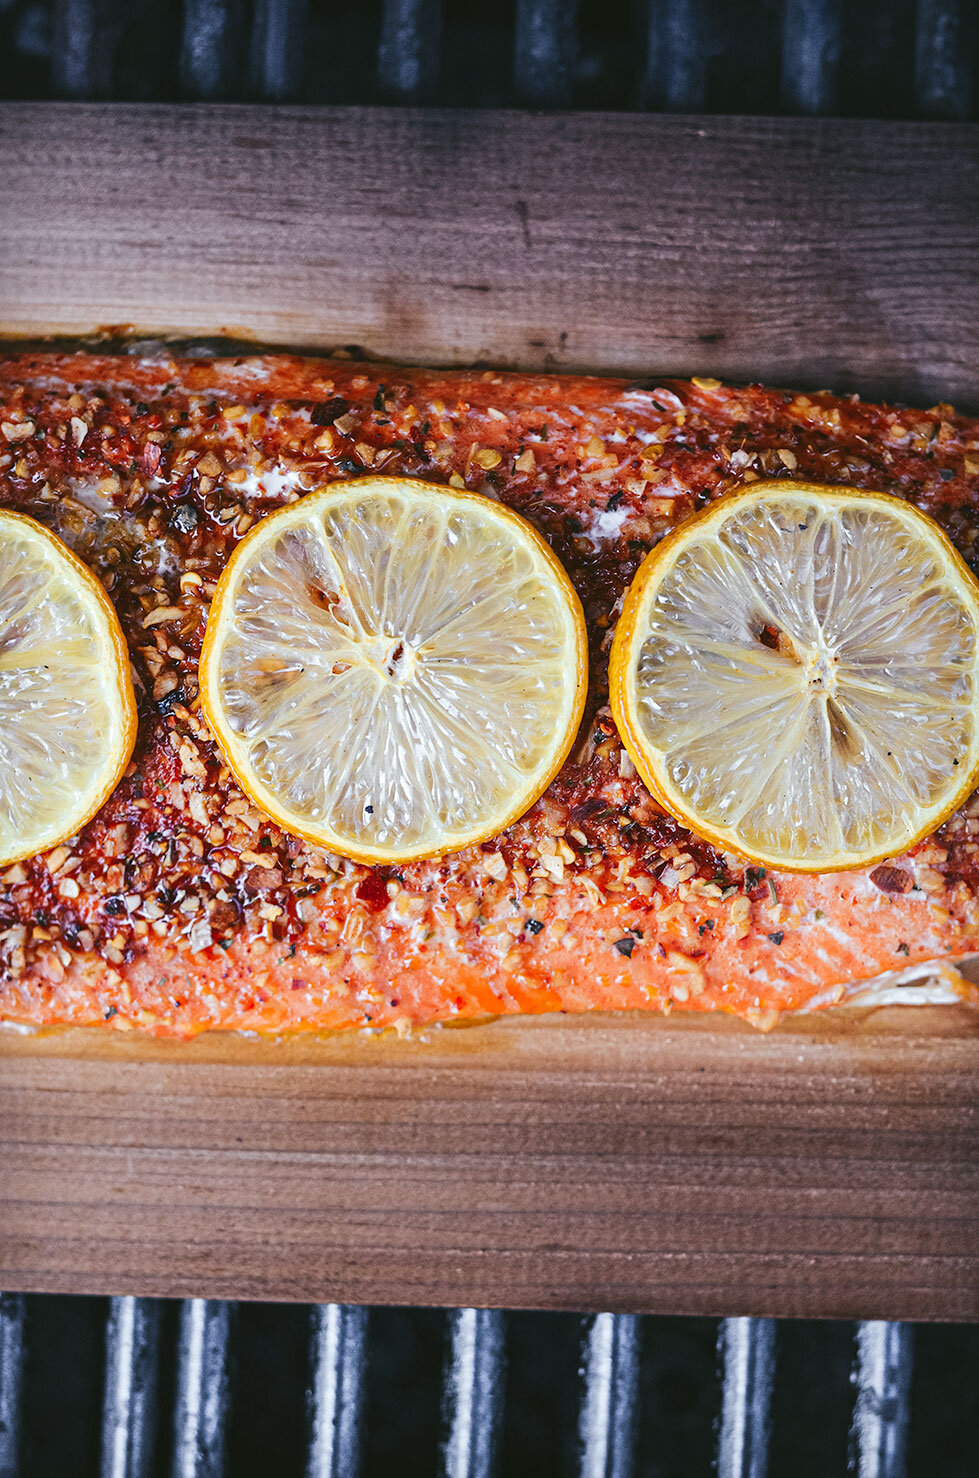
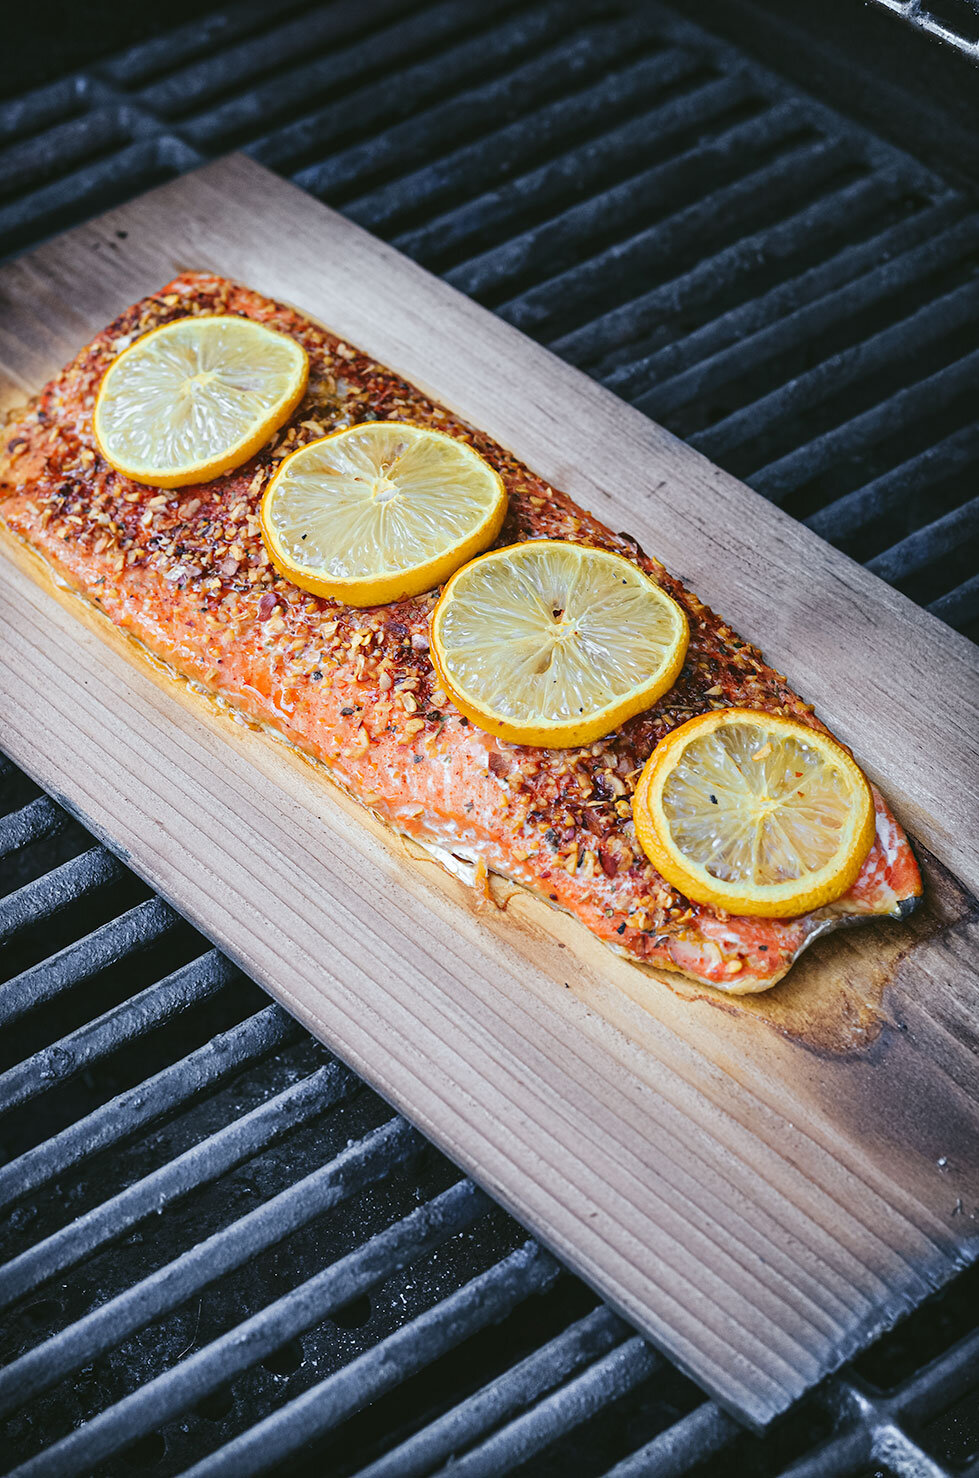
Lately, I have been digging planked salmon so for dinner this week, I paired smashed potatoes with planked salmon and a paleo caesar salad using Primal Kitchen Caesar Dressing and added fun uncured bacon bits from Epic. This would also pair well with baked hot chicken, pecan crusted spiced salmon and turkey meatballs.


If you try this recipe, let us know! Leave a comment, rate it, and don’t forget to tag a photo to #fromtherootsblog on Instagram. We love seeing what you come up with!
Crispy Smashed Potatoes with Garlic Pesto - The perfect go-to side dish to make for dinner or as a carb source for your weekly lunch meal prep.
Ingredients
Smashed Potatoes
1 lb (16 oz) baby potatoes
1-2 Tbsp olive or avocado oil
Sea salt & black pepper
Garlic Pesto
2 cups packed fresh organic basil
¼ cup nutritional yeast
5-8 raw almonds
3 large cloves garlic (peeled)
⅓ cup olive or avocado oil (oil-free version - water or veggie stock)
Healthy pinch each sea salt and black pepper
Directions
Add rinsed potatoes to a large pot with water until potatoes are fully submerged. Bring water to a boil over medium-high heat and cook for 15-20 minutes. A knife should be able to slide in and out easily.
Preheat the oven to 450 degrees. Line a baking sheet with aluminum foil or parchment paper.
While the potatoes are cooking, prepare the pesto mixture by adding almonds and garlic to a food processor and pulse until finely chopped. Add basil, nutritional yeast, salt and pepper and turn the setting on low. As the processor is on low, pour the oil through the feed tube gradually. Scrape down the sides and add more if necessary to achieve the desired sauce consistency. (Oil-free version* add water or veggie stock gradually until desired consistency)
Taste and adjust taste if necessary, adding more nutritional yeast for that cheesy flavor, salt for overall flavor, garlic for that “bite” or almonds for a nuttier flavor. Transfer to a small serving dish and set aside.
When the potatoes are soft and tender, place on the baking sheet and smash them down with the bottom of a saucepan, glass cup, or the palm of your hand. For any larger potatoes, cut in half and then smash.
Drizzle smashed potatoes with oil and generously season with salt and pepper. Roast for 20-25 minutes or until golden brown and crispy.
Spoon the pesto mixture over the potatoes and garnish with additional oil, salt and pepper if desired.

Red Velvet Cinnamon Rolls
Is your love language, baking?! Then here’s your opportunity to bake a delicious, gooey, flaky pan of red velvet cinnamon rolls for your significant other, best friend, or for yourself! The person you are baking for is gluten and/or dairy intolerant/allergic? That’s okay, I have provided swaps!
If you are short on time but still love to make homemade delicious treats, then I have provided a way to make them overnight. That way, you can throw them in the oven first thing in the morning, go back to your snuggle sesh, and be woken up by the delicious aroma of cinnamon rolls!
Red Velvet Cinnamon Rolls - Naturally beet dyed red velvet cinnamon rolls, are the ultimate addition to your slow mornings. Made from scratch, these rolls are delicious, gooey, and flaky with a sweet and thick cream cheese frosting. I have provided ways to make these gluten-free, dairy-free, and instructions on how to make them overnight.

Is your love language, baking?! Then here’s your opportunity to bake a delicious, gooey, flaky pan of red velvet cinnamon rolls for your significant other, best friend, or for yourself! The person you are baking for is gluten and/or dairy intolerant/allergic? That’s okay, I have provided swaps!

If you are short on time but still love to make homemade delicious treats, then I have provided a way to make them overnight. That way, you can throw them in the oven first thing in the morning, go back to your snuggle sesh, and be woken up by the delicious aroma of cinnamon rolls!


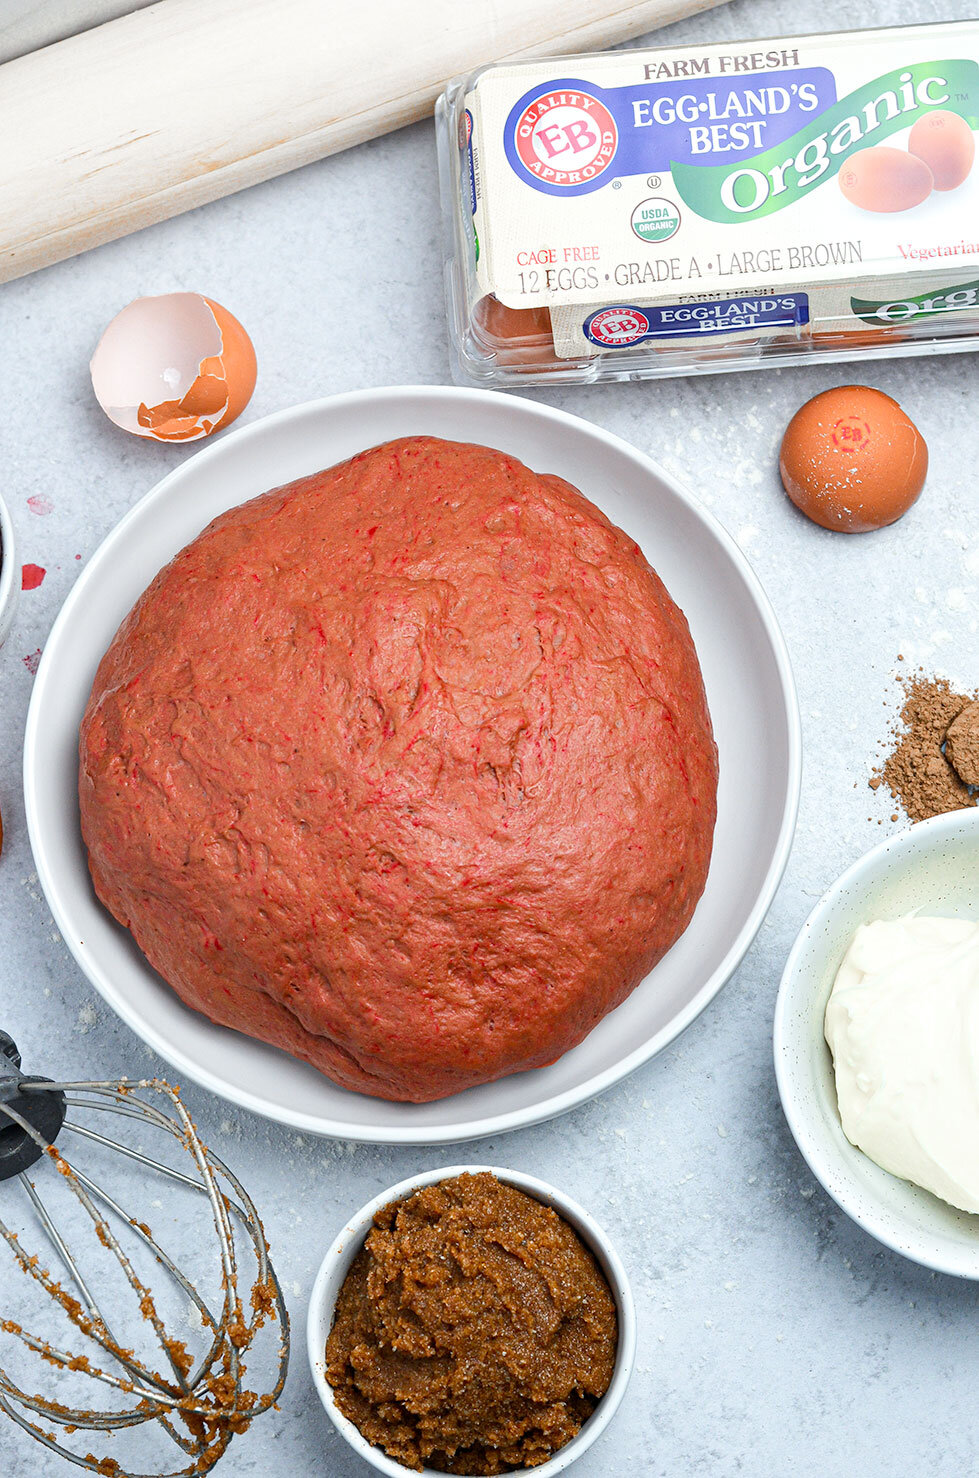
I’ve partnered with Eggland’s Best Eggs to make these cinnamon rolls. What I like about them is that Eggland’s Best Eggs are available nationwide. That way, if you don’t have access to get eggs from a local farmer, you can go to any grocery store and still benefit from getting good quality organic cage free eggs!


In order to make these red velvet, you will need chocolate like cocoa powder, vinegar, and red food coloring. Now you can use red food coloring but I wanted to turn these slightly pink since Valentine’s Day is coming up, so I used beetroot juice. I seem to always have it on hand whether I’m boiling beets to make my pickled beets or purchase Love Beets to make my beet hummus. If you decide to use the powder form, make sure you are reserving ¼ cup flour out of the normal recipe as the powder absorbs the liquid mixture causing the cinnamon rolls to be dry.

If you try this recipe, let us know! Leave a comment, rate it, and don’t forget to tag a photo to #fromtherootsblog on Instagram. We love seeing what you come up with!
Red Velvet Cinnamon Rolls - Naturally beet dyed red velvet cinnamon rolls, are the ultimate addition to your slow mornings. Made from scratch, these rolls are delicious, gooey, and flaky with a sweet and thick cream cheese frosting. I have provided ways to make these gluten-free, dairy-free, and instructions on how to make them overnight.
Ingredients
3 cups bread flour
*gluten free version in notes
1 packet (2-1/4tsp) rapid rise yeast
¾ cup warm plant-based milk (110 degrees F)
¼ cup unsalted grass-fed butter (melted & cooled) + 1 Tbsp melted butter
¼ cup organic cane sugar
3 Tbsp cocoa powder
2 Tbsp beet juice or 10-20 drops of natural red food coloring
1 tsp apple cider vinegar
1 tsp baking powder
¼ tsp salt
2 Eggland's Best organic eggs (whisked and room temperature)
Filling
¼ cup softened unsalted butter
¾ cup organic brown sugar
1 Tbsp ground cinnamon
Cream Cheese Frosting:
4-6 oz softened cream cheese or lactose-free cream cheese
¾ cup organic powdered sugar
½ tsp vanilla extract
Directions
Warm milk in a small saucepan until the temperature reaches 110 degrees F. It should feel like warm bath water. Transfer warm milk to the bowl of an electric mixture. Add sugar and sprinkle yeast on top. Let sit for 30 minutes. Add in whisked eggs, vinegar, melted and cooled butter and red food dye of choice. Mix until well combined.
In a medium bowl, combine flour, salt, baking powder, and cocoa powder. Place dough hook on the stand mixer and slowly add flour mixture to the liquid mixer on medium speed for about 4-8 minutes. Dough should form into a nice ball and be slightly sticky. If it’s too sticky (sticking to your hands or to the bottom of the mixer) add in 2 Tbsp increments of flour.
Transfer dough ball to a well-oiled bowl, cover with plastic wrap and a warm towel. Allow dough to rise for up to an hour, or until doubled in size (if doing the gluten-free version, the dough will rise only slightly). To make sure your dough is proofing nicely, you can set the bowl in the oven under the “bread proofing” option and turn the oven off once it hits 100 degrees or you can wrap your bowl around Christmas lights (that’s what I do!)
While your dough is rising, make the filling by adding softened butter, cinnamon, and brown sugar to your electric mixture or small bowl. Mix until well combined. Set cinnamon filling aside and wash out the mixer to make the frosting!
In the bowl of the electric mixer, combine softened cream cheese, powdered sugar and vanilla extract. Beat until smooth and fluffy. Set aside or leave in the mixture until you are ready to spread over cinnamon rolls.
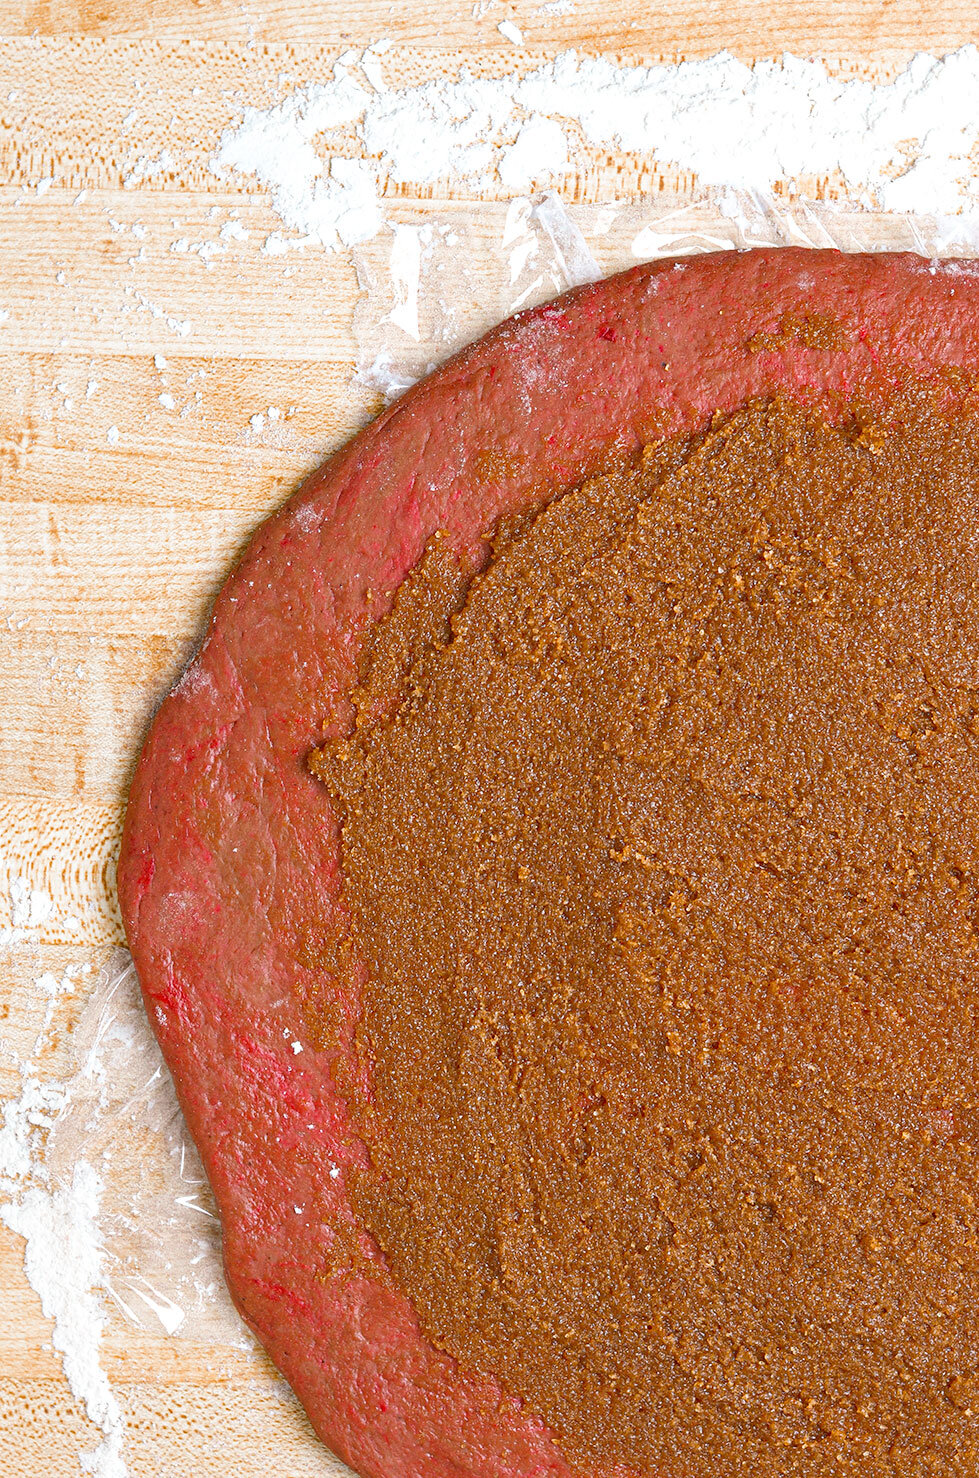
At this point, your dough has doubled in size! Get a large cutting board or large surface and sprinkle flour over the surface and place plastic wrap over it (about 14x9 inch rectangle). Add the dough in the center of the plastic wrap and sprinkle with more flour. Then top with another sheet of plastic wrap. Roll dough out into a 14x9 inch rectangle. Remove the top layer of plastic wrap and spread cinnamon filling over dough; leaving about ¼ inch margin at the far side of the dough. Tightly roll the dough lengthwise into a cylinder. (The bottom layer of plastic wrap helps to get that tight roll!) I like to carefully “smash” both ends together to make a fuller roll!
Use a serrated knife or dental floss to cut into even 9 rolls. You may want to cut about an inch off both ends of the dough since the ends will not be full of the cinnamon filling.
Place cinnamon rolls in a greased 9x9 baking pan or round 9 inch cake pan. For easier clean up, line the pan with parchment paper. Melt the tablespoon of butter and brush the tops of the rolls with melted butter. Cover with a warm towel and let rise again for 30-45 minutes.
Preheat the oven to 350 degrees. Remove the towel and bake cinnamon rolls for 20-25 minutes or until just slightly golden brown on the edges. I say slightly so the center stays gooey! Allow them to cool 5-10 minutes before frosting.
Notes
To make these gluten-free: replace bread flour with gluten-free 1 to 1 baking flour and add an additional tsp of baking powder to the dry mix. The rolls will not rise as much as the original recipe but will still taste just as good, if not better, in my opinion!
I use these brands for the lactose-free version cream cheese: Green Valley Creamy Lactose Free *my favorite and Miyoko’s Vegan Cream Cheese *Still good but more “vinegar” tasting
To make these overnight: After placing rolls into the greased pan (after the first rise), simply cover the pan with tinfoil and place in the fridge overnight. When you are ready to bake them, set the pan on the counter for at least 30-45 minutes (room temperature) before baking (this is their second rise).
If you decide to use beetroot powder instead of beet juice, decrease your flour mixture by ¼ cup and gradually add more flour if the mixture seems to be too sticky when making the dough.

Fire Cider Bone Broth
Fire cider bone broth is so easy to make, you probably have most of the ingredients in your pantry or fridge already! So during the cold winter months, you want to make sure you have this bone broth close by as a preventive measure against the cold and flu.
The basic ingredients are bone broth, apple cider vinegar, turmeric, horseradish, ginger, black peppercorns, honey, lemons, onion, garlic, cayenne pepper and jalapenos. Okay...I know what you are thinking, this combination sounds strange! Just trust me, it’s so tasty! It’s earthy, zingy, sour, heat with a touch of sweet notes that will wake your sinuses up in the best way possible!
Fire Cider Bone Broth - Combining gut health restoration with immunity goodness, this fire cider bone broth will become an established staple in your house during these cold winter months.

Fire cider bone broth is so easy to make, you probably have most of the ingredients in your pantry or fridge already! So during the cold winter months, you want to make sure you have this bone broth close by as a preventive measure against the cold and flu.
The basic ingredients are bone broth, apple cider vinegar, turmeric, horseradish, ginger, black peppercorns, honey, lemons, onion, garlic, cayenne pepper and jalapenos. Okay...I know what you are thinking, this combination sounds strange! Just trust me, it’s so tasty! It’s earthy, zingy, sour, heat with a touch of sweet notes that will wake your sinuses up in the best way possible!

But if that doesn’t convince you, maybe the health benefits per ingredient will!

Raw Apple Cider Vinegar - Raw apple cider vinegar includes “The Mother” which is the cloudy substance floating in some bottles of vinegar. The mother is believed to be rich in health-boosting natural protein, healthy bacteria (probiotics) and acetic acid. The vinegar itself is antimicrobial, improves insulin resistance and has antifungal properties.
Horseradish Root - This specific root provides that hot, pungent effect in your nose and sinuses that can sometimes be used to relieve congestion. It also releases a strong anti-inflammatory and antibiotic compound called ally isothiocyanate. Other uses include boosting the immune system, treating sinus infections, preventing UTIs and aid in digestion.
Honey - Not only does honey contain a host of health properties, like being antimicrobial, it provides the bone broth a touch of sweetness that offsets the pungent flavors. To help with allergies, you need to get local, raw honey. This will insure that the honey has the allergens native to the area you live in.
Lemons - Contain high levels of calcium, magnesium, phosphorus and vitamin C that is great for boosting the immune system. Lemons are also great as a cleanser, purifier, rejuvenator, and detoxifier, especially for the liver, as they help in fat metabolism.
Garlic - Known as the “king of herbs”! It has been used for medicinal purposes for the common cold and flu and seems to help purify the body and may have immune-enhancing properties. Garlic contains a mineral, sulfur, that promotes elimination of toxins from the blood, lymph, and body.

Bone Broth - Is one of the most beneficial foods to consume to restore gut health and therefore support immune system function and healthy inflammation response. Collagen/gelatin and the amino acids proline, glutamine, and arginine help seal these openings in the gut lining and support gut integrity.
Onions - The effects of onions is similar to, although more subtle than that of garlic. Like garlic, onions have a characteristic odor from the active sulfur bonds that release its purifying properties. For this drink in particular, the onion flavor really enhances the overall full-bodied flavor we are trying to achieve.
Peppers - The chilis and cayenne peppers contain capsaicin, with medicinal properties in cleansing the blood and stimulating the circulation. They also stimulate the gastric secretions and help digestion. The seeds surrounding the inner core of the peppers often concentrate the hot nature, so if you don’t like your food too spicy, you can take out the seeds.
Ginger - The classic digestive tonic that actually has multiple benefits for the digestive tract, including toning of the intestinal muscles, improving bile flow, helping in the digestion of fats, and lessening the risk of inflammation along the lining of the intestines. Fun fact: ginger is also a diaphoretic (causes sweating) that helps in circulation and in warming the body when we feel cold, so great during the colder winter months!
Turmeric - The much-loved anti-inflammatory spice! This plant is a member of the ginger family and shares some of its anti-inflammatory properties with that spice. Like ginger, turmeric lowers the level of messaging molecules that trigger inflammation. It also lowers levels of nitric oxide and is associated with a more favorable overall balance of immune system messaging molecules (called cytokines).
Black Pepper - Think of black pepper as turmeric’s wing man! Black pepper helps to increase the absorption and metabolization of curcumin (a curcuminoid polyphenol found in turmeric).

As you can see, these ingredients follow the same pattern in boosting the immunity while providing gut relief. You can also include other ingredients to your broth like cinnamon sticks, echinacea, rosemary, and other types of citrus fruits and peppers depending on your taste preferences.
To make the fire cider, you want to make sure that your fruit and roots are organic and properly washed. In order to get the most nutritional value from each ingredient, I would roughly chop the onions and pepper, grate the roots, zest and juice the lemon, and crush the garlic cloves. I have also included a way to make this in tonic form (no heat, long fermentation) in the Notes section.


Disclaimer: This post is not a substitute for medical advice. If you are suffering from cold or flu like symptoms or have a weakened immune system, please see your healthcare provider!
References: Haas, E. M., & Levin, B. (2006). Staying healthy with nutrition: The complete guide to diet and nutritional medicine (21st century edition ed.). Berkeley, CA: Celestial Arts.
https://www.stephgaudreau.com/how-to-make-fire-cider-tonic/
If you try this recipe, let us know! Leave a comment, rate it, and don’t forget to tag a photo to #fromtherootsblog on Instagram. We love seeing what you come up with!
Fire Cider Bone Broth - Combining gut health restoration with immunity goodness, this fire cider bone broth will become an established staple in your house during these cold winter months.
Ingredients
16 oz bone broth
1 lemon (juice & zest)
Knob of fresh ginger root (grated)
Knob of fresh horseradish root (grated)
Knob of fresh turmeric root (grated) or 1 tsp - 1Tbsp turmeric powder
1 tsp of whole black peppercorns
2 Tbsp raw apple cider vinegar
1 Tbsp raw local honey (if possible)
1 jalapeno (sliced)
3 cloves garlic (crushed)
½ small onion (chopped)
Couple dashes of cayenne pepper
Directions
Add all the ingredients to a medium saucepan on medium heat.
The broth should come to a boil, then reduce heat and simmer for 5-10 minutes. Taste and adjust flavor as needed. The broth should have the perfect amount of zing, acidity, and kick! Then turn off the heat.
Set a strainer over a medium bowl or large measuring cup to strain the liquid away from the solids. If the bone broth is too potent for you, dilute with hot water or more bone broth.
Store (strained) leftovers in the refrigerator up to 2-3 days. Reheat on the stovetop until just warm.
Notes
If there are certain ingredients that you don’t like or like more of, feel free to change the measurements to preference. *Just make sure to keep black pepper with turmeric as they work concurrently as an anti-inflammatory.
The final product will taste differently depending on what bone broth brand you use as some brands have added flavorings to their broth. To make sure you are in control of the flavoring, I would use this bone broth brand as the broth in itself is very mild tasting: Bonafide Provisions
You can also turn this recipe into a tonic! Simply replace bone broth with water and/or raw apple cider vinegar and add all ingredients (minus honey) to a large 32 oz Mason jar. Make sure you fill to the neck of the jar with vinegar. Place a small piece of wax paper underneath the lid, fit the lid on the jar tightly and place in a dark area (like a cabinet) for 30 days. Every day, make sure you invert the jar a couple times to make sure everything is mixed. After a month, strain the liquid away from the solids. Add honey and mix until dissolved. Store tonic in a bottle in the fridge.

Healthy Salmon Patties with Lemon Dill Potato Salad
Growing up as a kid, salmon patties were my jam! I loved them so much, my mother would make salmon patties, mashed potatoes, and peas as my birthday dinner meal. There just wasn’t anything that could top that meal, haha!
So in honor of my childhood favorite food, I present to you healthier, less oily, and processed salmon patties! These patties are gluten and dairy-free, paleo, and use clean ingredients that can be made in less than 30 minutes.
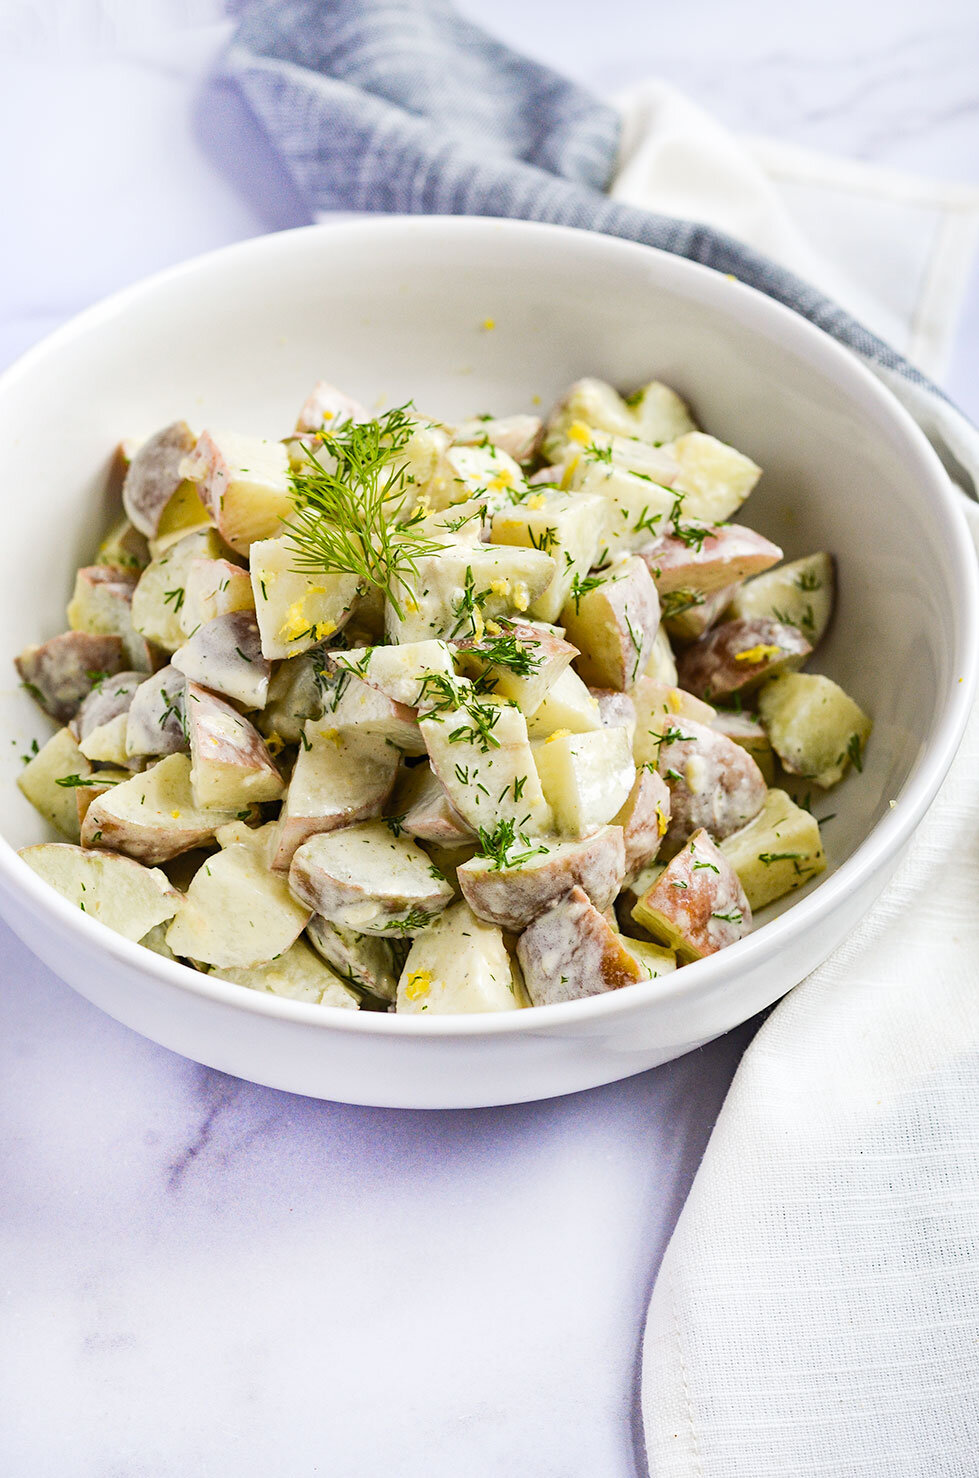
To turn this into meal prep or a full dinner recipe, I have added a simple lemon dill potato salad (dairy-free) and grilled asparagus. Just simply divide all ingredients into 3-4 servings and it’s great to store in the fridge for up to 3-5 days.
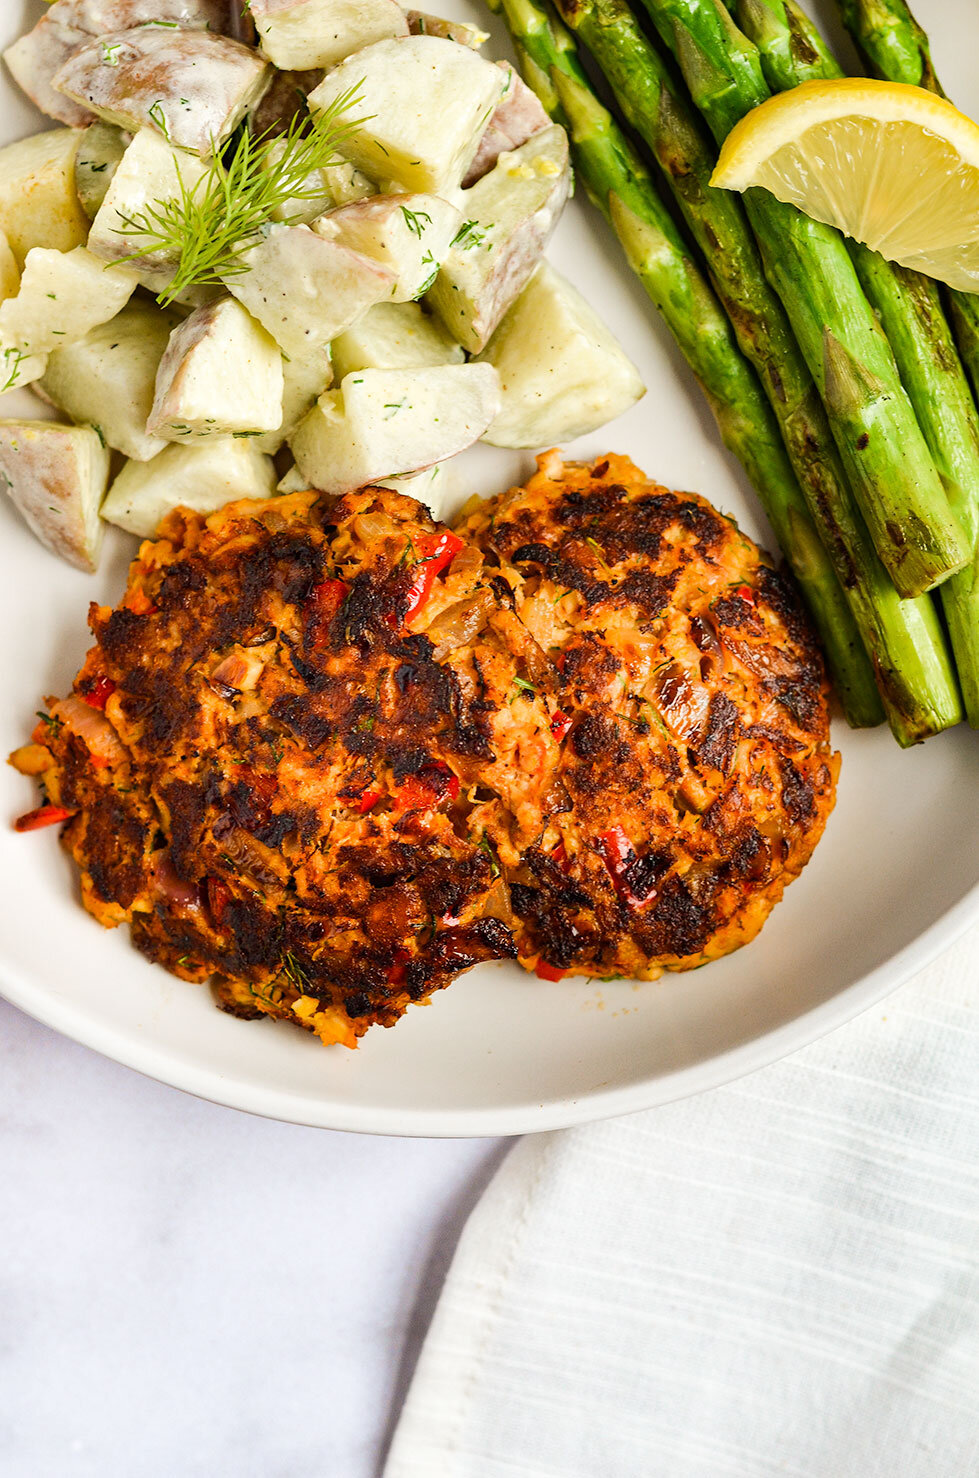
Healthy Salmon Patties with Lemon Dill Potato Salad - A healthier, less oily, and processed take on salmon patties! Patties are gluten/dairy-free and paleo and the potato salad is dairy-free - a 30-minute quick dinner meal or meal prep recipe!
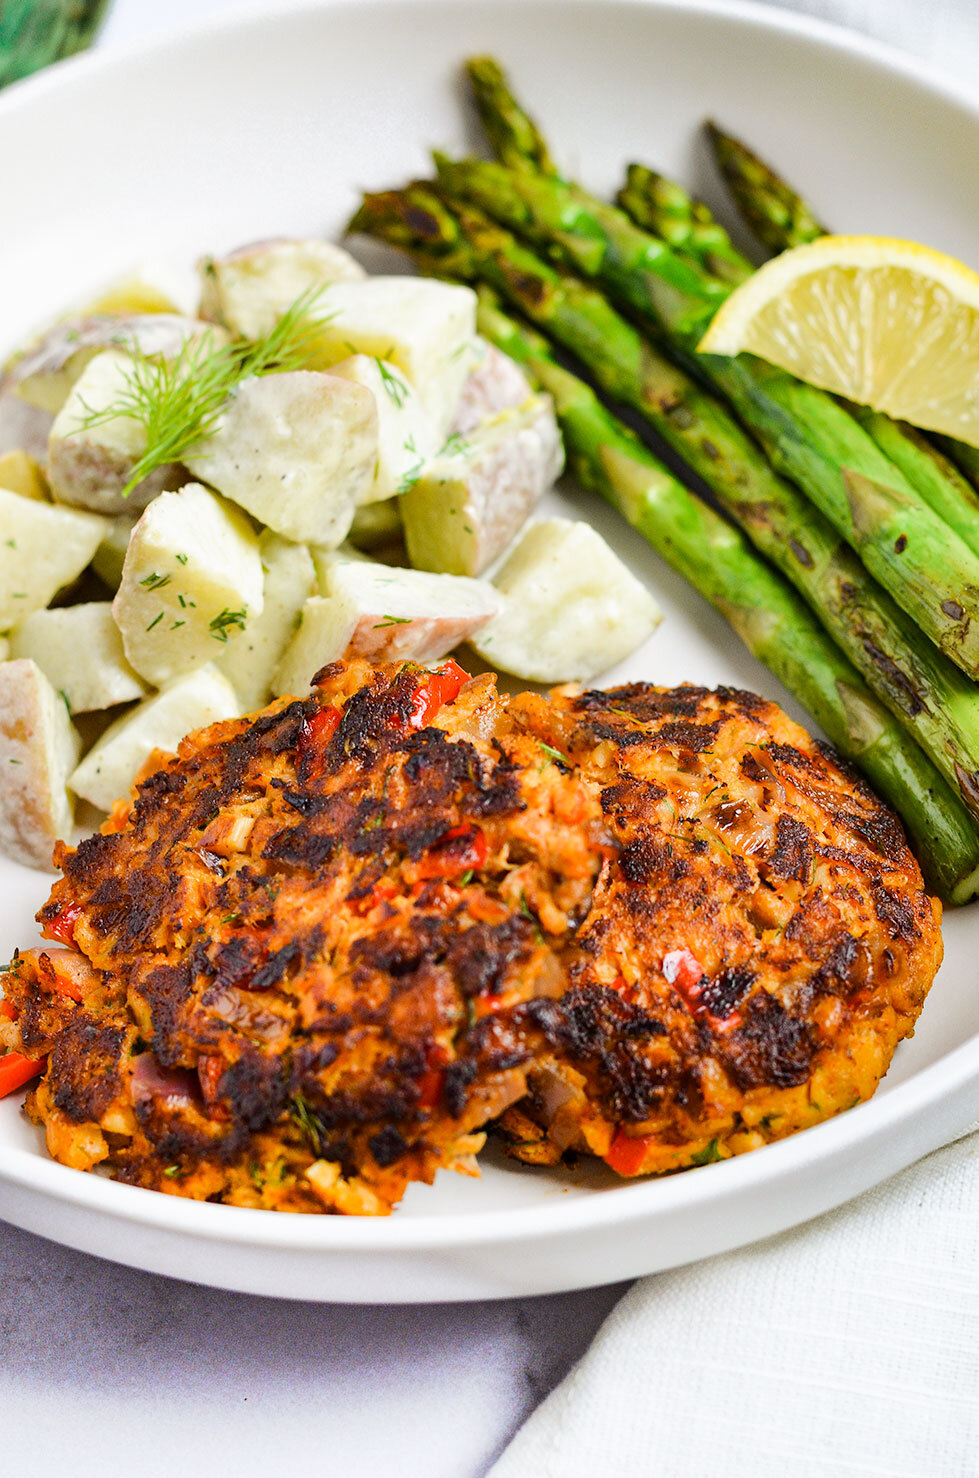
Growing up as a kid, salmon patties were my jam! I loved them so much, my mother would make salmon patties, mashed potatoes, and peas as my birthday dinner meal. There just wasn’t anything that could top that meal, haha!

So in honor of my childhood favorite food, I present to you healthier, less oily, and processed salmon patties! These patties are gluten and dairy-free, paleo, and use clean ingredients that can be made in less than 30 minutes.
To turn this into meal prep or a full dinner recipe, I have added a simple lemon dill potato salad (dairy-free) and grilled asparagus. Just simply divide all ingredients into 3-4 servings and it’s great to store in the fridge for up to 3-5 days.

To make this a quick and easy meal prep, I use canned wild salmon, specifically Wild Planet. You can also use leftover salmon if you have it as well. The ingredients are pretty simple and most likely, you will have everything in your pantry or fridge.


If you try this recipe, let us know! Leave a comment, rate it, and don’t forget to tag a photo to #fromtherootsblog on Instagram. We love seeing what you come up with!
Healthy Salmon Patties with Lemon Dill Potato Salad - A healthier, less oily, and processed take on salmon patties! Patties are gluten/dairy-free and paleo and the potato salad is dairy-free - a 30-minute quick dinner meal or meal prep recipe!
Ingredients
For the Salmon Patties
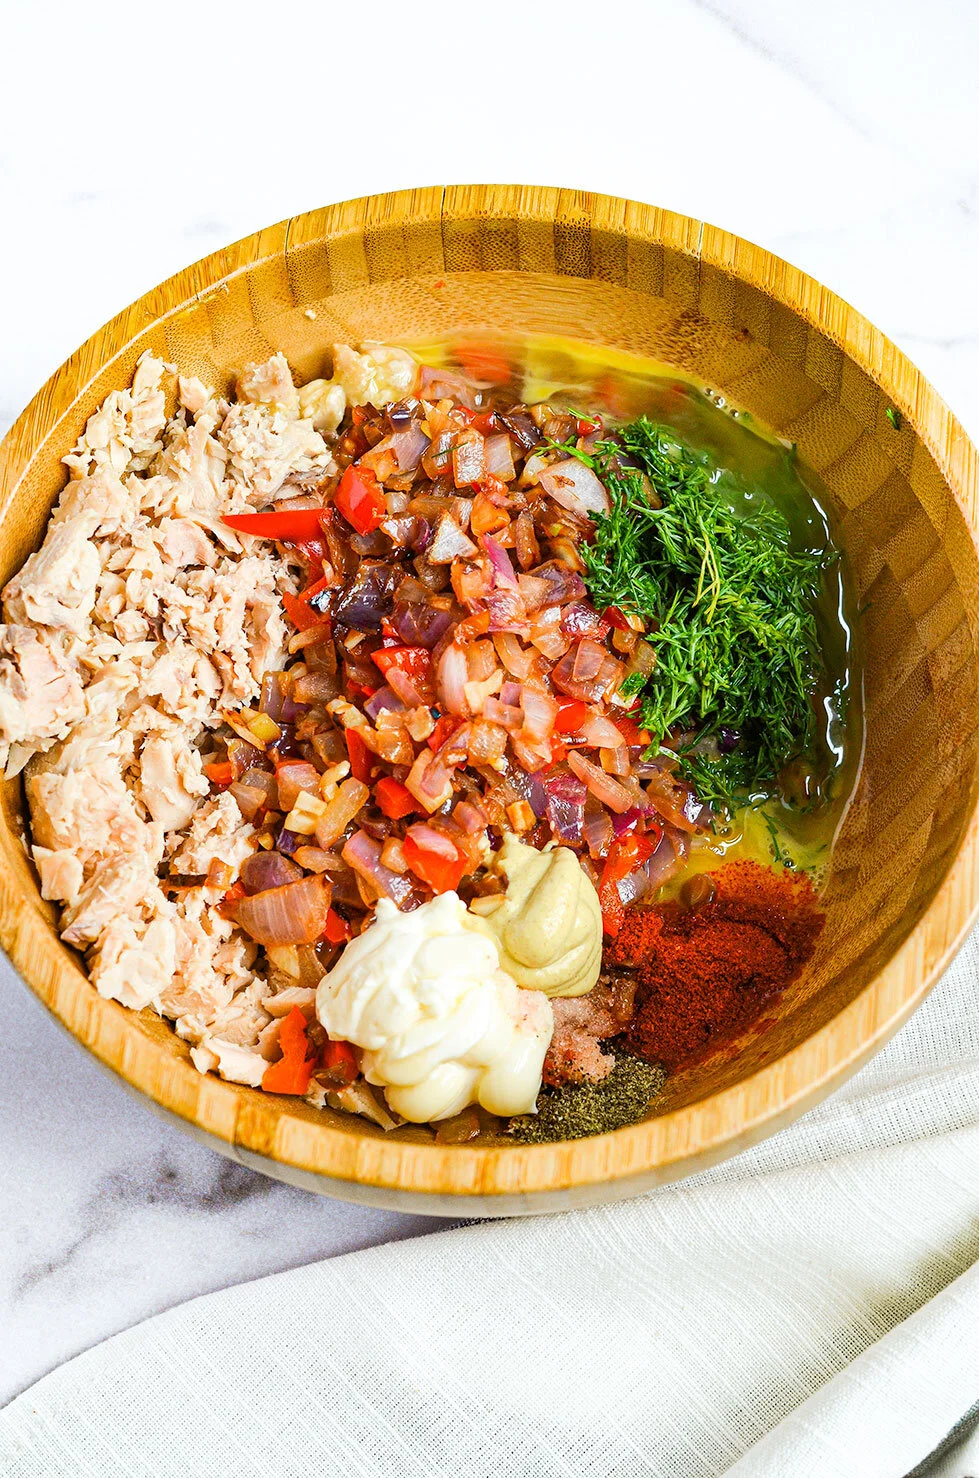
2-(6 oz) cans wild pink salmon (drained)
1 egg (beaten)
½ red onion (finely diced)
½ red bell pepper (finely diced)
4 cloves garlic (minced)
1 Tbsp mayo
2 Tbsp fresh dill
½ lemon (juice)
1 Tbsp avocado oil + more for pan-frying
1 tsp dijon mustard
1 tsp smoked paprika
¼ tsp S&P
For the lemon dill potato salad
1 bag (24 oz) unpeeled golden or tri-color baby potatoes
2 Tbsp mayo
1 Tbsp dijon mustard
1 clove garlic (minced)
1 Tbsp fresh dill
1 tsp avocado oil
½ lemon (juice)
S&P to taste
Side
Asparagus (bunch)
Directions
To make the salmon patties:
Add one Tbsp avocado oil to a medium pan and saute the onion, garlic, and red pepper for 6-8 minutes, or until soft and translucent. Remove from heat and let cool.
To a large mixing bowl, add the cooled onion mixture along with salmon, egg, mayo, dill, lemon juice, mustard, and seasonings. Combine all ingredients with your hands until well mixed.
Form the salmon mixture into small patties with your hands and place them to the side (make about 6 patties).
Heat 1-2 Tbsp avocado oil in a large pan on medium heat and cook the salmon patties for 3-4 minutes on each side. Remove the salmon patties to a paper towel-lined plate.
To make the potato salad:
Boil potatoes in salted water until soft, approx 10 minutes.
Drain and let cool.
While the potatoes are boiling, combine the rest of the ingredients in a large bowl.
Once the potatoes are done and are cooled, cut the potatoes into 2-4 pieces and mix into the bowl with the wet ingredients until all the potatoes are fully coated in the mixture.
Serve with additional salt and pepper to taste along with fresh dill and lemon zest. Serve room temperature or refrigerate until ready to serve.
To turn this into a meal/meal prep, simply add grilled asparagus as the other side. Divide patties, potato salad, and asparagus into 3-4 servings, and enjoy!
Notes
I use the following brands for tuna - Wild Planet, mayonnaise - Primal Kitchen
To make the salmon patties in the oven rather than pan-frying: line a baking sheet or spray avocado oil spray on a baking sheet and bake at 400 degrees for 10-15 minutes on each side.
If you would like to make a dipping sauce, simply mix ½ cup mayonnaise, 1 Tbsp finely chopped fresh dill, juice, and zest of half lemon and S&P together until combined and serve!