Sort by Category
- October 2025
- September 2025
- August 2025
- June 2025
- August 2024
- July 2024
- June 2024
- May 2024
- February 2024
- January 2024
- December 2023
- November 2023
- October 2023
- September 2023
- August 2023
- July 2023
- March 2023
- February 2023
- January 2023
- December 2022
- November 2022
- October 2022
- September 2022
- August 2022
- June 2022
- May 2022
- April 2022
- March 2022
- February 2022
- January 2022
- December 2021
- November 2021
- October 2021
- September 2021
- August 2021
- July 2021
- June 2021
- May 2021
- April 2021
- March 2021
- February 2021
- January 2021
- December 2020
- November 2020
- October 2020
- September 2020
- August 2020
- July 2020
- June 2020
- May 2020
- April 2020
- March 2020
- February 2020
- January 2020
- December 2019
- November 2019
- October 2019
- September 2019
- August 2019
- July 2019
- June 2019
- May 2019
- April 2019
- March 2019
- February 2019
- January 2019
- December 2018
- November 2018
- October 2018
- September 2018
- August 2018
- July 2018
- June 2018
- May 2018
- April 2018
- March 2018
- February 2018

Dark Chocolate Chip Protein Bites
In light of the team series and various competitions my CrossFit gym has been doing this past month, I thought it would be fitting to make protein bites. Although I am not competing, I do want to make sure that I have the energy and stamina to complete my workouts successfully. That is why I incorporate this recipe into my weekly meal prep so that I always have a quick go-to snack right before my workout every time.
If you are looking for a classic protein ball, then look no further! These dark chocolate chip protein bites are perfect for treating a sweet tooth, perfect as a pre-workout snack, or to cure that 3pm crash!

In light of the team series and various competitions my CrossFit gym has been doing this past month, I thought it would be fitting to make protein bites. Although I am not competing, I do want to make sure that I have the energy and stamina to complete my workouts successfully. That is why I incorporate this recipe into my weekly meal prep so that I always have a quick go-to snack right before my workout every time.

It can be so easy to purchase protein bars instead because of the convenience but most protein bars are loaded with artificial sweeteners, preservatives and can be high in calories. If it’s convenience you are looking for, these protein bites are super easy to make! Added bonus: if you do swap these out for your regular protein bars but miss the flavor, these taste just like Larabars!

These dark chocolate chip protein bites are made with plant-based ingredients that are nutrient dense and worth every little calorie. They are naturally sweetened with Medjool dates which contain potassium, magnesium, vitamin B6, and calcium to name a few.

Medjool dates are great workout fuel since they are packed with slow-burning carbs (about 66 calories and 15 grams of sugar). These carbs are in a low glycemic form which means that glucose is released into the bloodstream slower which allows for steady energy during a workout.

If you try this recipe, let us know! Leave a comment, rate it, and don’t forget to tag a photo to #fromtherootsblog on Instagram. We love seeing what you come up with!
If you are looking for a classic protein ball, then look no further! These dark chocolate chip protein bites are perfect for treating a sweet tooth, perfect as a pre-workout snack, or to cure that 3pm crash!
INGREDIENTS
2 cups GF oats
1/3 cup dark chocolate chips (vegan)
1 cup (packed) or 12 medjool dates
1 scoop vanilla protein powder
1/4 cup almond butter
2 Tbsp chia seeds
1/4 cup cold water
Couple dashes of ground cinnamon
DIRECTIONS
Soak medjool dates in warm water for 10 minutes.
To a food processor or high powered blender, add soaked dates, oats, protein powder, almond butter, chia seeds, cinnamon. While pulsing on low, slowly add the water until the mixture is evenly combined but not overly processed. (may need to use more water for desired consistency)
Transfer mixture to a bowl and add the chocolate chips. Fold in the chocolate chips until combined.
Using a cookie scoop or 1 Tbsp measuring spoon, roll into 1-inch balls.
To set, place balls onto parchment paper lined baking tray and place into the fridge or freezer for 10 minutes or eat right away! Will keep for about a week in an airtight container or you can freeze them for longer term storage.
NOTES
Makes 22-24 protein bites
*Protein is derived from plant based vanilla protein powder

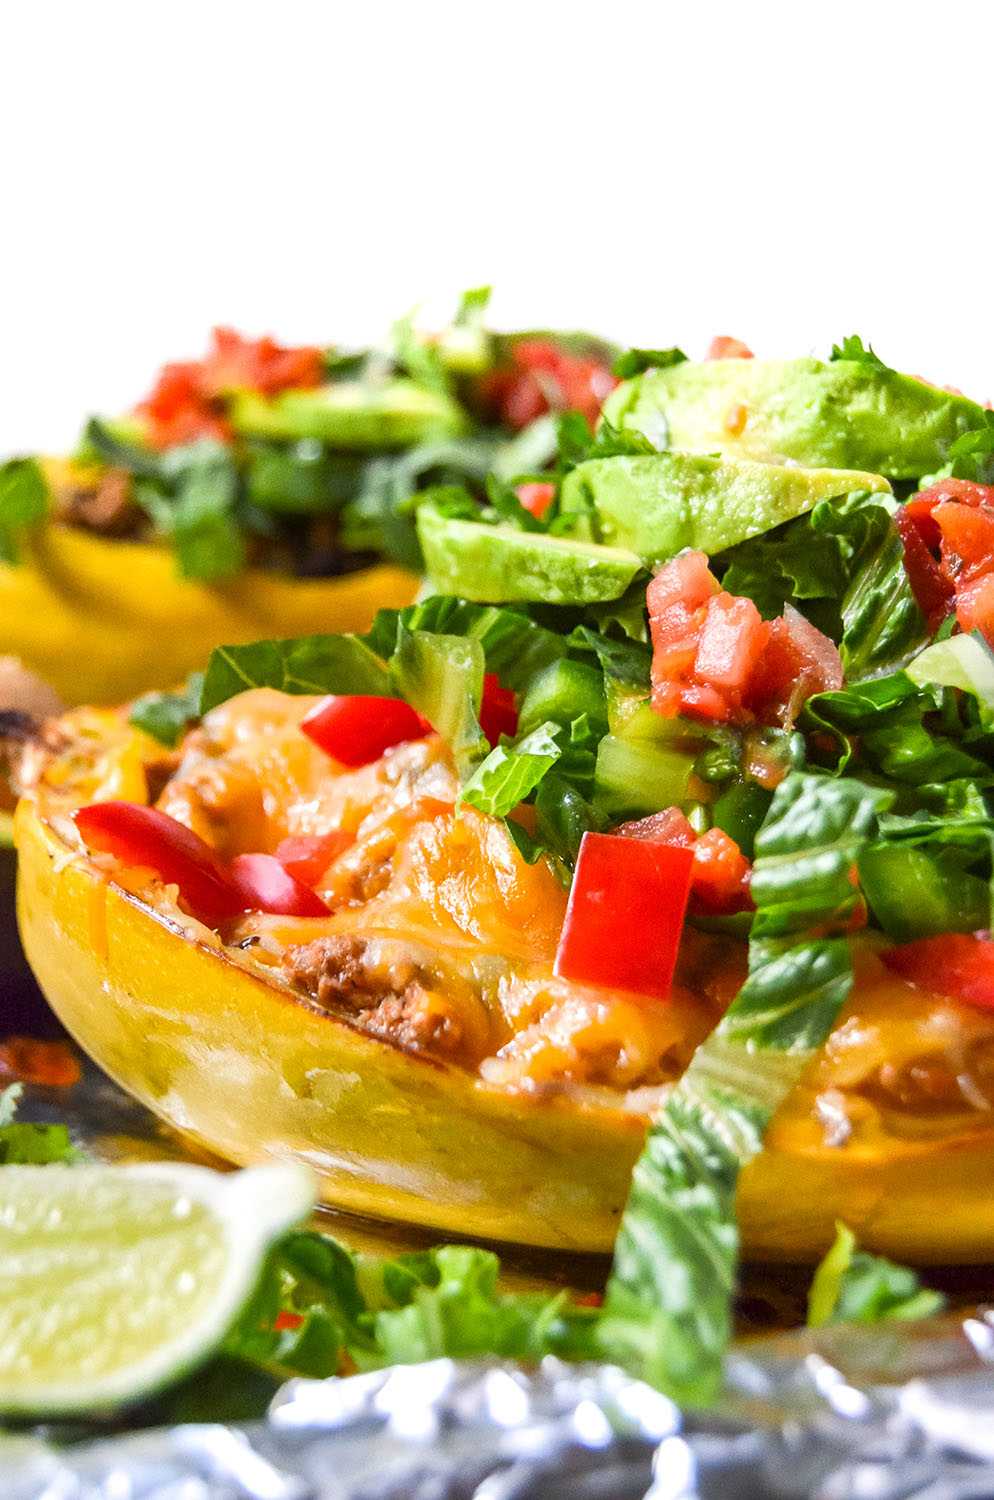
Turkey Taco Spaghetti Squash Boats
When I think of spaghetti squash, I think spaghetti = Italian, right? So, that is pretty much all I have done when cooking spaghetti squash. I have made shrimp alfredo, chicken parmesan, and the classic marinara to name a few, but it never occurred to me to use spaghetti squash in a different way. After posting a poll on my IG, it turns out many of you would like to see how spaghetti squash can be used for a Mexican inspired dish!
Turkey taco spaghetti squash boats is a great recipe to make for a guilt-free, low carb taco night. Perfect for meal preps and a hit among kids!

When I think of spaghetti squash, I think spaghetti = Italian, right? So, that is pretty much all I have done when cooking spaghetti squash. I have made shrimp alfredo, chicken parmesan, and the classic marinara to name a few, but it never occurred to me to use spaghetti squash in a different way. After posting a poll on my IG, it turns out many of you would like to see how spaghetti squash can be used for a Mexican inspired dish!

Needless to say, after experimenting I was surprised at how spaghetti squash and Mexican flavors paired so well together! My husband was hesitant at first but it was love at first bite for him -- he now asks for these squash boats every week!

Hey, if I can make this every week then I would be happy as a clam. For a #tacotuesdaynight, it has to be the easiest recipe to bake while preparing the toppings. While your spaghetti squash is cooking, you are preparing the meat mixture that goes inside the boats while prepping all the fun and healthy toppings. As soon as your boats are done baking, add all your favorite toppings and dig in! And the best thing when you’re done eating? You don’t have as many dishes to wash!!

You can make this recipe kid-friendly by omitting/using less of the spicier seasonings. Other than that, these squash boats would be great to add to your taco night! With that said, you will find that this recipe can be customized to your preference. For example, in my hubby’s boat, I added extra beans and cheese while my boat sticks to the recipe but with 5 maybe 20 dashes of hot sauce (love my spicy food)!

If you try this recipe, let us know! Leave a comment, rate it, and don’t forget to tag a photo to #fromtherootsblog on Instagram. We love seeing what you come up with!
Turkey taco spaghetti squash boats is a great recipe to make for a guilt-free, low carb taco night. Perfect for meal preps and a hit among kids!
INGREDIENTS
1 lb lean ground turkey
3 cloves garlic
2 cans low-sodium black beans ((drained/rinsed))
1 large spaghetti squash
1 cup fresh salsa or pico de gallo*
1 tsp each garlic powder, ground cumin, and chili powder
1/2 tsp each smoked paprika, cayenne pepper, and salt
1/4 tsp pepper
couple dashes of red pepper flakes
Toppings
Lime wedges, fresh salsa, pico de gallo*, romaine lettuce, cheese, avocado, cilantro, jalapenos, peppers, hot sauce
DIRECTIONS
Preheat oven to 375 degrees. Slice squash in half lengthwise and scoop out the seeds.
Drizzle halves with olive oil and season with S&P. Place squash cut side down on baking sheet and roast for 45-50 minutes. When done, use a fork to scrape out the squash flesh.
While your spaghetti squash is cooking, make the meat mixture.
Drizzle oil in a skillet on medium-high heat. Add the minced garlic to the skillet and saute for about 2 minutes or until fragrant. Add the ground turkey and cook until slightly pink, then add all of your seasonings, fresh salsa, and black beans.
Turn the heat off and set meat mixture to the side.
Transfer cooked squash flesh to the meat mixture and combine. At this point, taste mixture to see if you need to add more S&P/seasonings/hot sauce for personal preference.
Transfer squash mixture to your now scraped spaghetti squash bowls and top with optional cheese.
Bump up the oven temperature to 400 degrees and bake for an additional 5-10 minutes until your cheese is nice and bubbly or your naked boat is nice and warm.
Top with your favorite toppings and enjoy!
NOTES
Pro tip: Place the whole squash in the microwave for 5 minutes for an easier slice!
If you are using a smaller spaghetti squash, then use just 1 can black beans.
Chocolate Peanut Butter Granola and Berry Parfait
Breakfast is definitely my favorite meal of the day. The thought of breakfast literally gets me out of the bed in the morning! I leave the house early in the morning so that I can sit down at my desk at work to really enjoy it with a nice cup of coffee. I certainly do my best to find the joy in the little things!
Usually, I am more of a savory breakfast person. I prefer eggs, avocado toast or a breakfast skillet like my sweet potato hash breakfast skillet. Sometimes, though, you need to mix things up! What better way to “mix things up” than with layers of granola, berries, and yogurt?!
Chocolate peanut butter granola and berry parfaits are great for a healthy breakfast, snack, or dessert!

Breakfast is definitely my favorite meal of the day. The thought of breakfast literally gets me out of the bed in the morning! I leave the house early in the morning so that I can sit down at my desk at work to really enjoy it with a nice cup of coffee. I certainly do my best to find the joy in the little things!
Usually, I am more of a savory breakfast person. I prefer eggs, avocado toast or a breakfast skillet like my sweet potato hash breakfast skillet. Sometimes, though, you need to mix things up! What better way to “mix things up” than with layers of granola, berries, and yogurt?!


Still not convinced? Here are five reasons for you to prepare these parfaits!
With so few ingredients, you can easily incorporate them into your meal prep.
Parfaits are versatile -- switch out the ingredients depending on your mood, or season! I originally debut these on Instagram for 4th of July, hence the whole red, white, and blue theme, but you can easily make these for the fall if you do a simple switch! For example, for fall parfaits you could switch out the berries for apples and cinnamon. For the spring, use apricots with honey! The possibilities are endless.
Make these for breakfast, dessert, or as a snack. I won’t judge you if you make them for dinner, too.
They are easy to grab and take with you! Just prepare them in mason jars!
Impress your friends! Parfaits look adorable and most people don’t realize how little effort it takes to make them!

If you try this recipe, let us know! Leave a comment, rate it, and don’t forget to tag a photo to #fromtherootsblog on Instagram. We love seeing what you come up with!
Chocolate peanut butter granola and berry parfaits are great for a healthy breakfast, snack, or dessert! - GF/DF/Low sugar
INGREDIENTS
Chocolate Peanut Butter Granola
2 cups GF oats
1/4 cup sliced almonds
1/4 cup chopped pecans
1/4 cup flax seeds
1/4 cup oily peanut butter
2 Tbsp cacao powder
1-2 Tbsp pure maple syrup
Yogurt
2 cups plain greek yogurt or dairy free yogurt
1-2 Tbsp pure maple syrup or honey
Toppings
Assorted berries
DIRECTIONS
Preheat oven to 350 degrees.
Mix granola ingredients together and spread onto a sheet pan covered in parchment paper.
Bake for 15-20 minutes until crispy and the granola mix is dried out.
While the granola is cooling down, mix the sweetener into the yogurt until you reach the desired sweet taste.
In a mason jar or cup, do two layers of yogurt, granola, and berries. Enjoy!

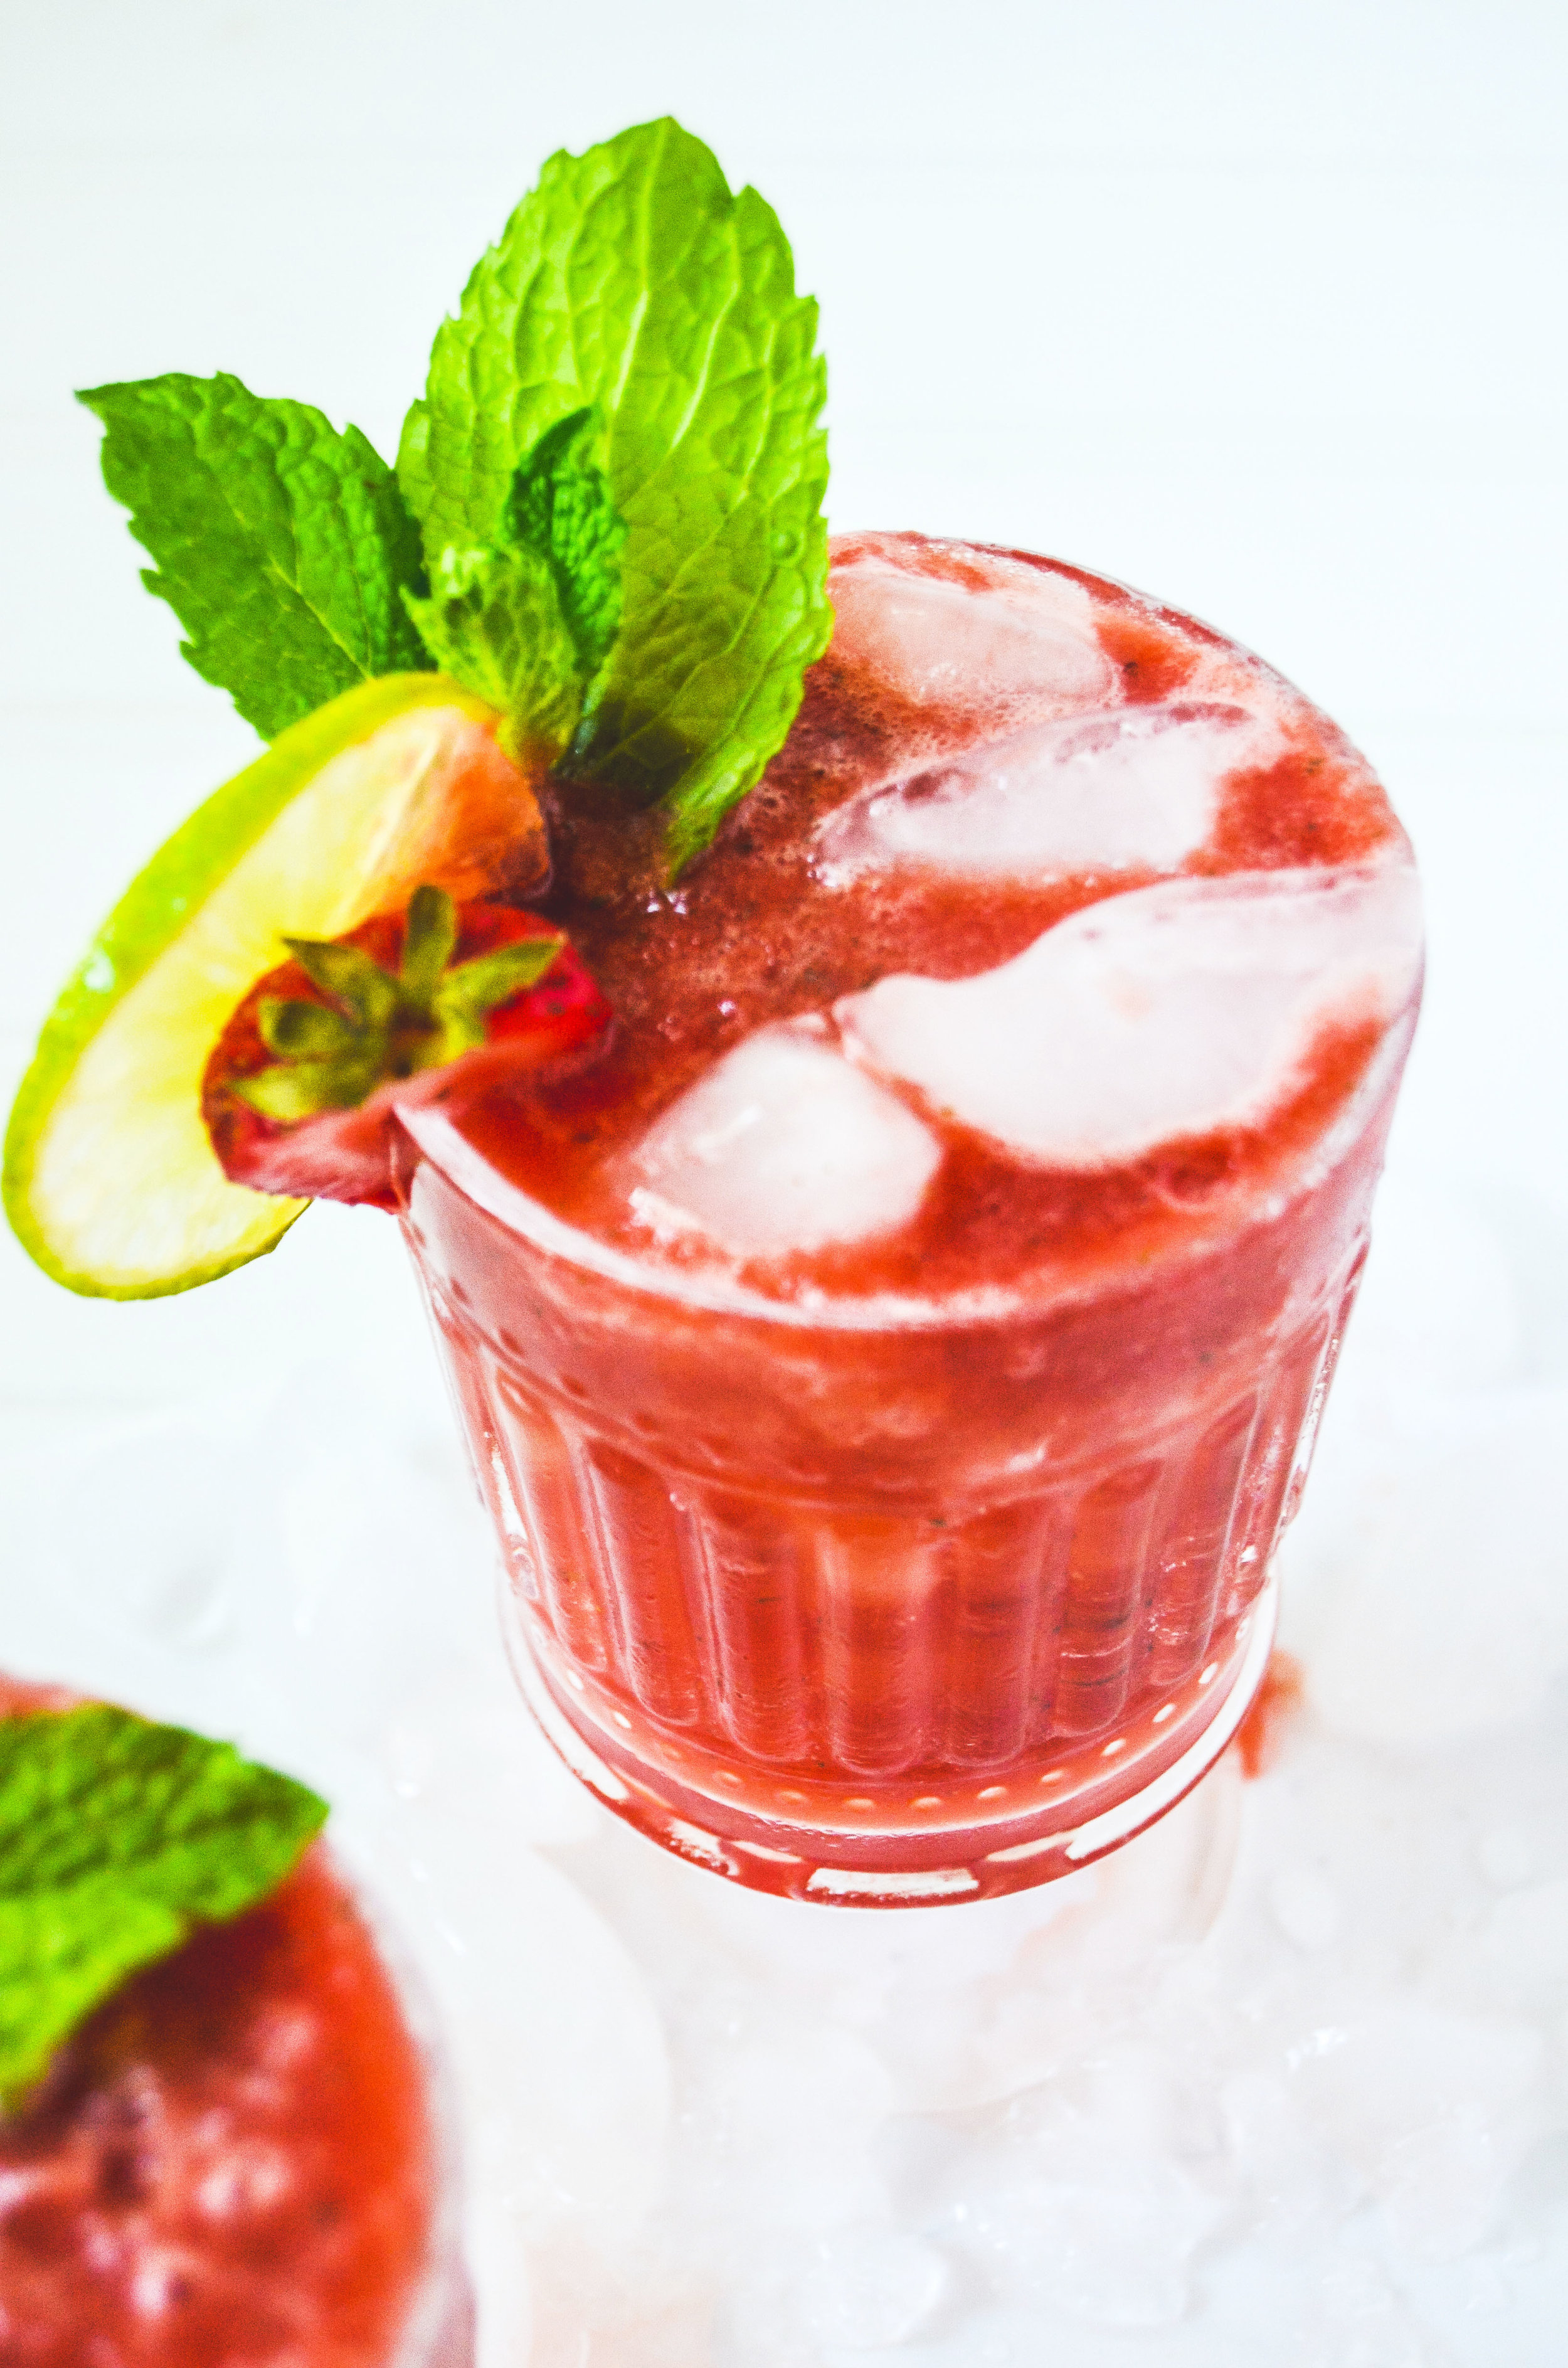
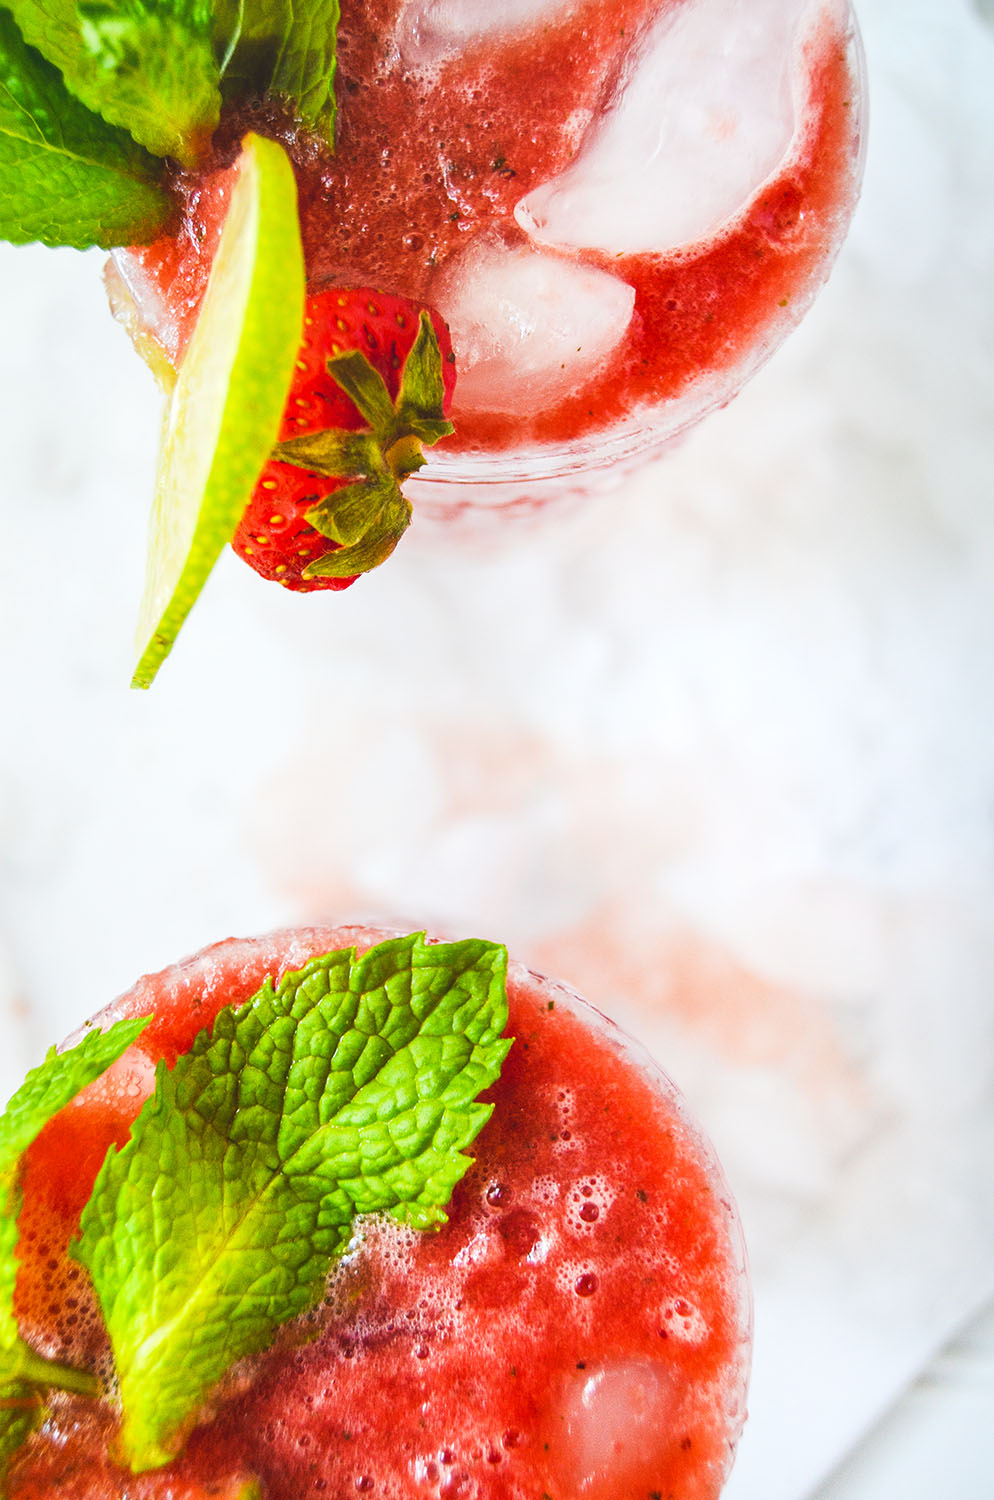
Strawberry Watermelon Mint Agua Fresca
Sadly, summer is coming to an end, which means my favorite fruit, watermelon, will no longer be in season. Well, instead of being sad about it, I’ve decided I am just going to make strawberry watermelon mint agua frescas until I can’t anymore!
Strawberry watermelon mint agua frescas are a refreshing seasonal drink that’s great on a warm, summer day!

Sadly, summer is coming to an end, which means my favorite fruit, watermelon, will no longer be in season. Well, instead of being sad about it, I’ve decided I am just going to make strawberry watermelon mint agua frescas until I can’t anymore!

Agua frescas are refreshing fruit drinks that are made simply with blended fruit, lime juice, and sometimes sweetener. It is best to use seasonal fruit so that it’s fresh and naturally more sweetened, making it unnecessary to add sugar.
What I love about agua frescas is that the juice can be unfiltered, which means more fiber and more nutrients! You do not need to add any extra sweetener unless you absolutely want to, especially if you have picked a perfectly ripe and sweet fruit! So, not only are you avoiding extra sugar, you are also getting in your vitamins with this refreshing drink!

I’ve raved about the benefits of watermelon in other blog posts (check out my watermelon salad and watermelon lime refresher recipes)! However, you can make agua frescas with just about any type of fruit like cantaloupe, cucumber, pineapple, strawberries, melon, mango or watermelon. This recipe is crazy simple and easy to follow, so feel free to mix things up depending on what you have on hand that’s ripe and in season.
If you try this recipe, let us know! Leave a comment, rate it, and don’t forget to tag a photo to #fromtherootsblog on Instagram. We love seeing what you come up with!
Strawberry watermelon mint agua frescas are a refreshing seasonal drink that’s great on a warm, summer day!
INGREDIENTS
Half of small seedless watermelon
1 cup fresh strawberries
2 large mint leaves
Juice of two limes
1-2 Tbsp sweetener (if you are using a perfectly ripe and sweetened fruit, then this is optional)
1/2 cup filtered water
DIRECTIONS
In a blender, combine all ingredients and blend until smooth. Taste, and add more lime or sweetener if necessary.
Serve immediately, over ice.
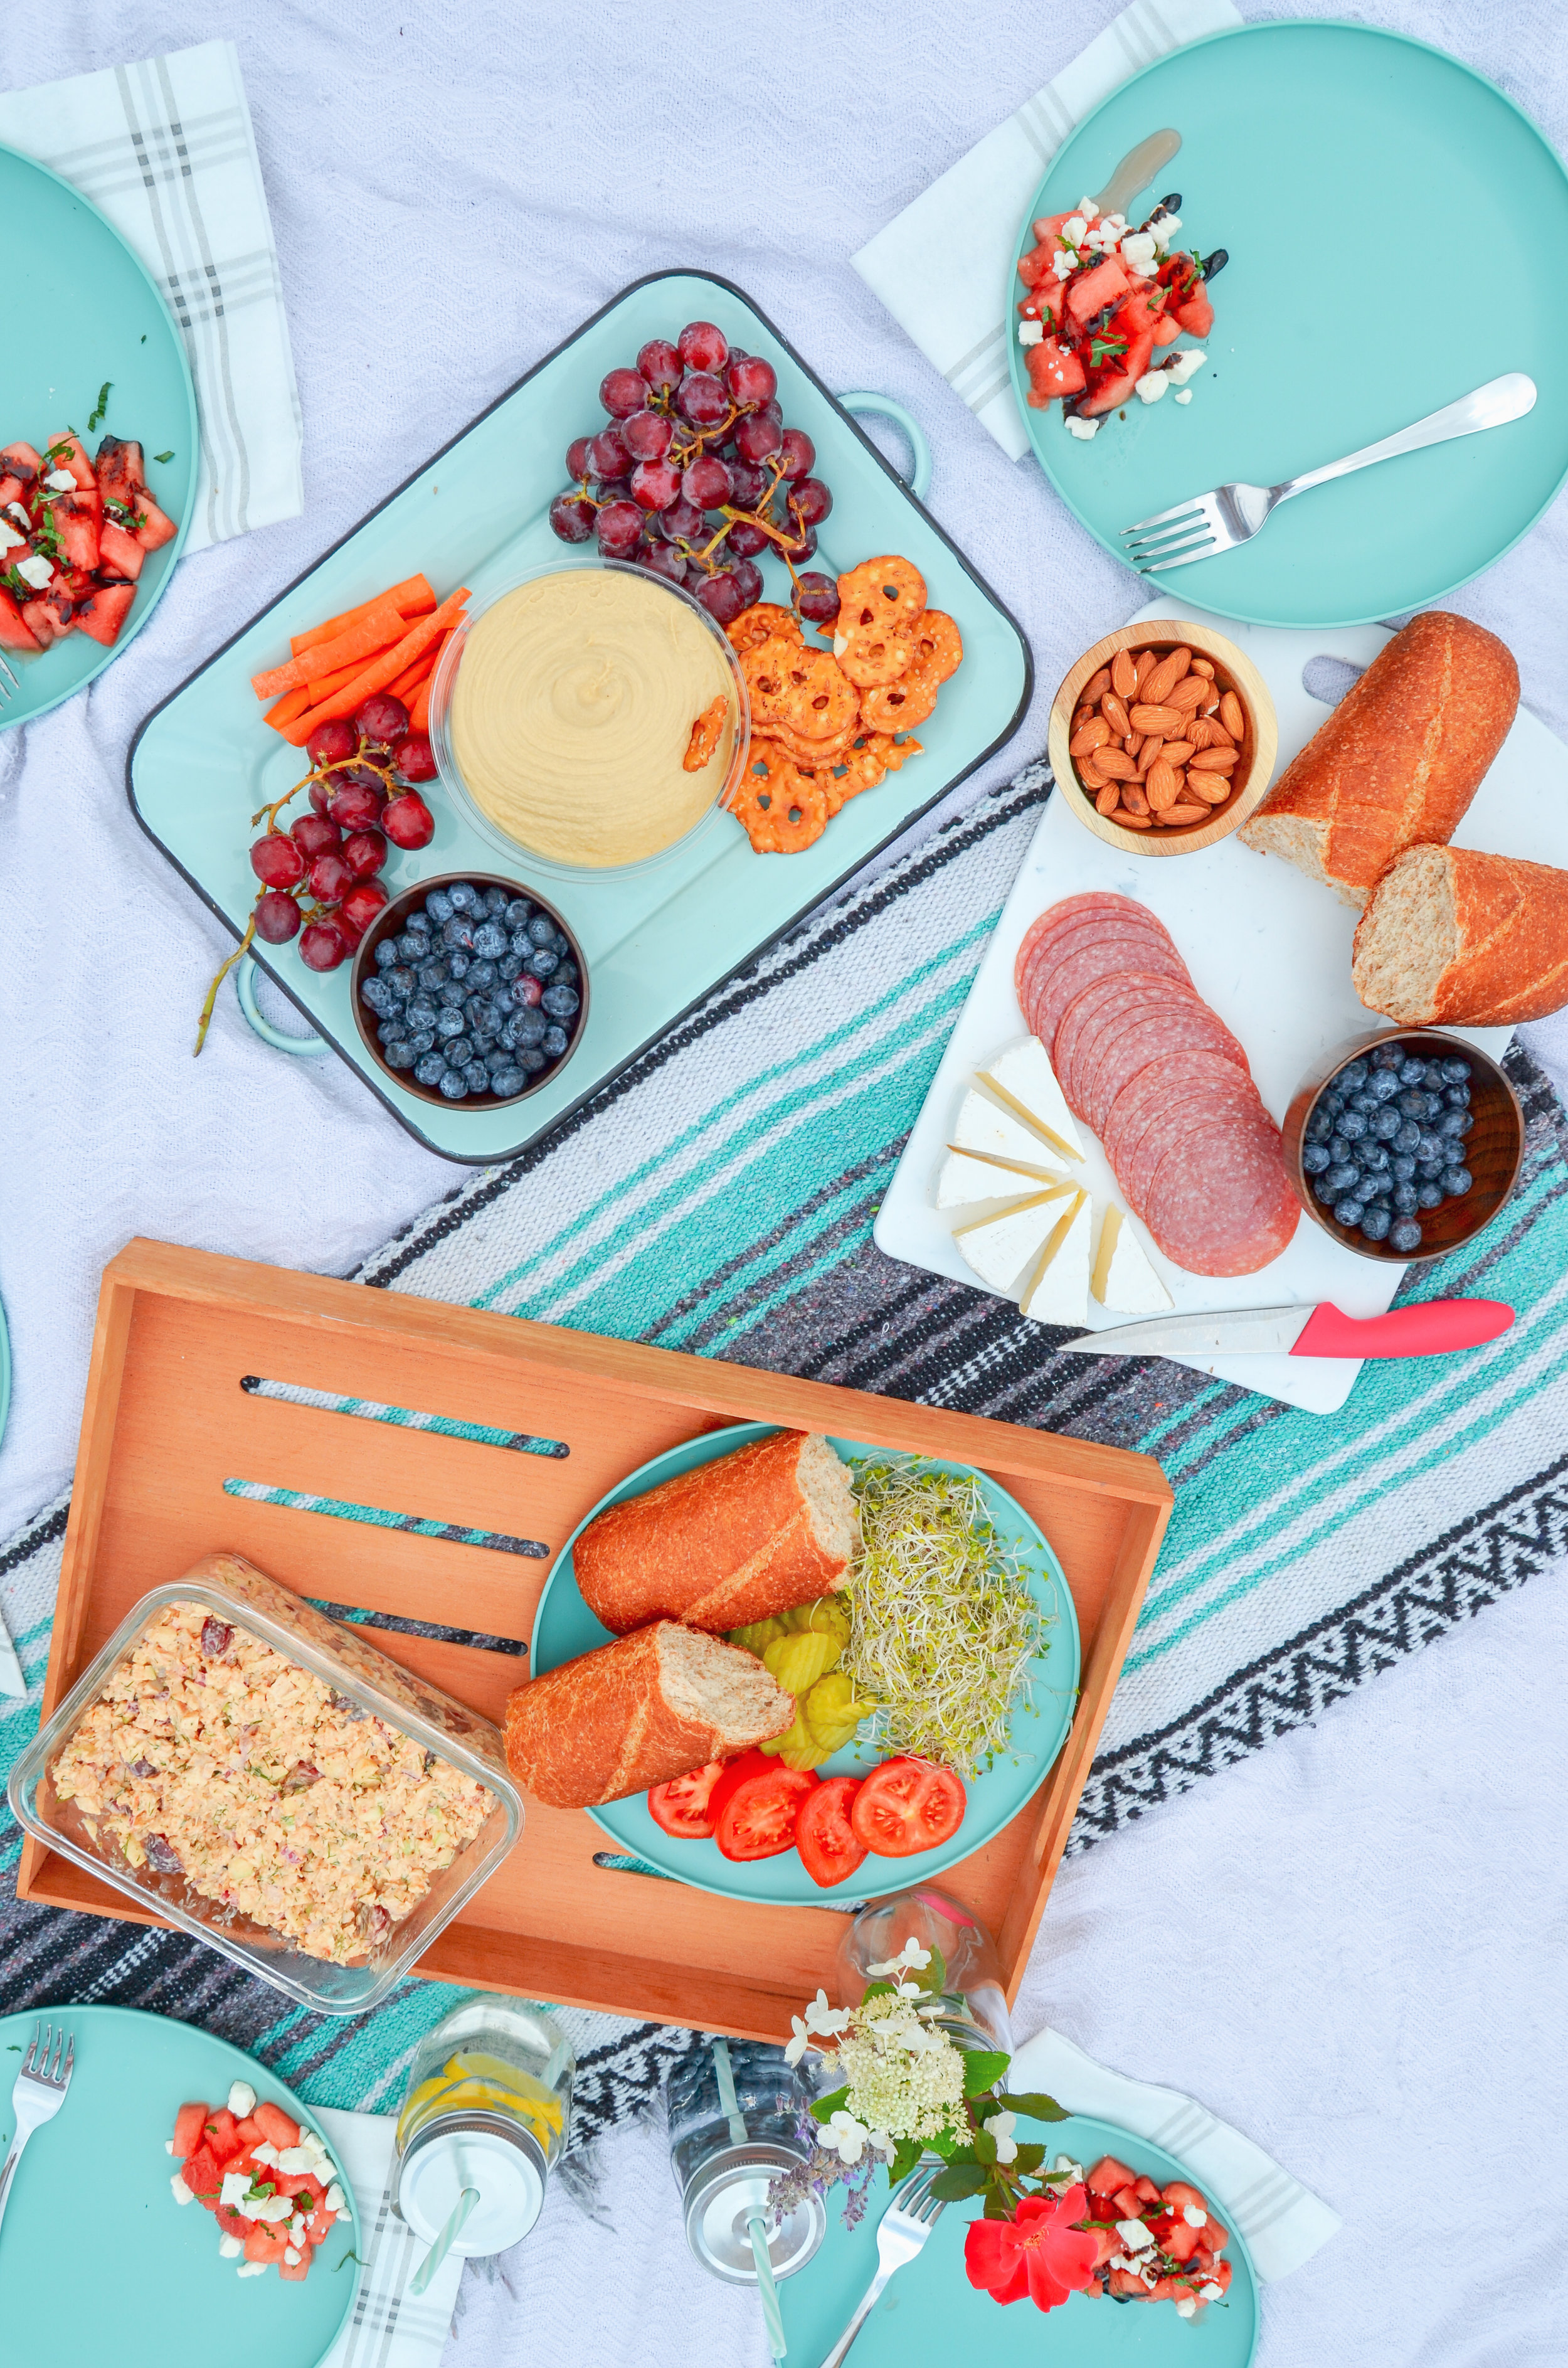
How to Create a Healthy Stress-Free Summer Picnic + Watermelon Salad
A couple of weeks ago, I hosted a summer picnic with my friends Maria, Rebecca, Kayla, and Liz before some of us separated. It was such a fun time enjoying each other's company while eating delicious food! The biggest reason why we were able to enjoy the moment before the big farewell was because it was stress-free!
Now, it seems like it can be tiresome setting a time, location, menu and actually prepping the food but I have some secrets that can make this picnic experience pretty fun and stress-free! If you are wanting to host your first summer picnic, here is what you need to know to make this as stress-free as possible:
KEEP IT SIMPLE
Insider guide on how to create a healthy stress-free summer picnic plus a watermelon salad recipe!

A couple of weeks ago, I hosted a summer picnic with my friends Maria, Rebecca, Kayla, and Liz before some of us separated. It was such a fun time enjoying each other's company while eating delicious food! The biggest reason why we were able to enjoy the moment before the big farewell was because it was stress-free!
Now, it seems like it can be tiresome setting a time, location, menu and actually prepping the food but I have some secrets that can make this picnic experience pretty fun and stress-free! If you are wanting to host your first summer picnic, here is what you need to know to make this as stress-free as possible:
KEEP IT SIMPLE
From the decorations to the menu, keep it simple, simple, simple! The summertime is the best season to host a picnic because the flowers are blooming and the grass is green - what’s great is that you don’t even have to pay for it!


Another way to keep your decorations simple is by using things you already own. By doing a quick scan around the house, I was able to scrounge up blankets, trays, plates, forks and mason jars that had a simple color scheme that reflected summer colors. So not only are you using your environment for decorations, you are also using things you already own so a win-win on the wallet!

What’s great about the summer is that it’s hot so people typically like to eat lighter, more refreshing type foods. This will make creating the menu that much easier!
SERVE YOURSELF
I could literally devote an entire page on food allergies from all five of us combined, but I will refrain. With that said, you will most likely have someone in your group with a food allergy/sensitivity. This may seem a little overwhelming as your creating the menu, but if you create simple dishes and give them the opportunity to serve themselves then it puts the pressure off of you.

A charcuterie board is a prime example. A charcuterie board mostly consist of a variety of meat and cheeses, with fruits and nuts. You can also cater to your board to your friend’s palettes. My board was kept pretty simple as I had to be sensitive to food allergies but even though one of my friends is allergic to nuts, I was able to separate the nuts by keeping them in their own bowl.


My classic healthy chicken salad is a great main dish that is simple and can be catered to preference. This chicken salad is always a hit in the office so I knew it would be great for the picnic! Again, there were allergies so I just simply omitted the carrots and sunflower seeds and kept the spices neutral and it was still a great main dish! If you have friends that are gluten-free, use lettuce to make chicken salad lettuce wraps.
HYDRATION
You can totally get away with bringing water to a summer picnic- it’s actually encouraged! The summer heat may seem like you’re melting so your guests won’t notice that you didn’t bring rosé or something fancy - they will be looking for water! To take that summer drink up a notch, why not infuse them with herbs and fruit like mint, lemon, and blueberries.

Another great way to take that water up a notch is with my newest recipe, watermelon lime refreshers! You can bring them for drinks or go a simple step further and make them into popsicles. The popsicles were the best part because by the time everyone finished stuffing faces, it was time for something sweet, light and refreshing to end a perfect picnic!

What are some ways you like to create a healthy stress-free summer picnic? Leave a comment, rate it, and don’t forget to tag your summer picnic photo to #fromtherootsblog on Instagram. We love to see your healthy and stress-free summer picnic photos!
Summery watermelon salad that is sure to be a hit at your next summer picnic!
INGREDIENTS
1/2 small seedless watermelon (cubed)
1/4 cup crumbled feta
2 Tbsp chopped fresh mint
juice of 1/2 lime
Toppings
Balsamic glaze
Directions
Combine all ingredients the day of the picnic or as your setting up the picnic and drizzle balsamic glaze as a nice touch!