Sort by Category
- May 2026
- March 2026
- December 2025
- November 2025
- October 2025
- September 2025
- August 2025
- June 2025
- August 2024
- July 2024
- June 2024
- May 2024
- February 2024
- January 2024
- December 2023
- November 2023
- October 2023
- September 2023
- August 2023
- July 2023
- March 2023
- February 2023
- January 2023
- December 2022
- November 2022
- October 2022
- September 2022
- August 2022
- June 2022
- May 2022
- April 2022
- March 2022
- February 2022
- January 2022
- December 2021
- November 2021
- October 2021
- September 2021
- August 2021
- July 2021
- June 2021
- May 2021
- April 2021
- March 2021
- February 2021
- January 2021
- December 2020
- November 2020
- October 2020
- September 2020
- August 2020
- July 2020
- June 2020
- May 2020
- April 2020
- March 2020
- February 2020
- January 2020
- December 2019
- November 2019
- October 2019
- September 2019
- August 2019
- July 2019
- June 2019
- May 2019
- April 2019
- March 2019
- February 2019
- January 2019
- December 2018
- November 2018
- October 2018
- September 2018
- August 2018
- July 2018
- June 2018
- May 2018
- April 2018
- March 2018
- February 2018

Cinnamon Apple Streusel Muffins
The story behind these bad boys was that I wanted to create a lazy version of apple pie. After all, apple pie should only be eaten if it’s homemade and preferably made by a grandmother. But if you are strapped for time and there’s not a grandma insight, well, sometimes you just have to think outside the box.
Cinnamon Apple Streusel Muffins - Bursting with fall flavors, these moist gluten-free muffins are filled with apples and cinnamon and topped with a delicious crunchy streusel. You won’t believe they are naturally lower in sugar, dairy-free, and healthy for you!

Like most of the recipes I develop, they are inspired by my morning dreams. Well, the dreams I have upon waking up and hitting the snooze button! Mainly because I am starving by the time I wake up but that’s another story!

The story behind these bad boys was that I wanted to create a lazy version of apple pie. Afterall, apple pie should only be eaten if it’s homemade and preferably made from a grandmother. But if you are strapped for time and there’s not a grandma in sight, well, sometimes you just have to think outside the box.

And that’s just what I did. These apple cinnamon streusel muffins are basically apple pies but a muffin version. Some of my taste testers actually preferred mini apple pie muffins as the name because they taste just like that!


What I also didn’t tell them is that these muffins are naturally lower in sugar and oil, gluten-free, dairy-free, paleo friendly, keto friendly, and use clean, real ingredients. After telling them what the ingredients were, they truly couldn’t believe it wasn’t an old fashioned muffin that you would get at a bakery!


So if you are wanting to trick your family and friends into eating healthy things, then try this! Haha. Not only is it fun to make a traditional baked good healthy, but these muffins are actually fun to make in general.

As illustrated in the picture, pour batter about halfway in the muffin liner followed by the “apple pie filling”, another layer of batter and top with the streusel mixture! If you are wanting to really elevate the dish and don’t mind the added sugar, then I created a maple cinnamon glaze to drizzle just before serving. These muffins are practically my new favorite!
If you try this recipe, let us know! Leave a comment, rate it, and don’t forget to tag a photo to #fromtherootsblog on Instagram. We love seeing what you come up with!
Cinnamon Apple Streusel Muffins - Bursting with fall flavors, these moist gluten-free muffins are filled with apples and cinnamon and topped with a delicious crunchy streusel. You won’t believe they are naturally lower in sugar, dairy-free, and healthy for you!
Ingredients
¼ cup + 3 Tbsp cassava flour
¼ cup GF oat flour
¼ tsp baking powder
Pinch salt
⅓ cup dairy free yogurt
3 large eggs
3 Tbsp avocado oil
2 Tbsp honey
1 tsp pure vanilla extract
Filling
1 honeycrisp apple (chopped)
1 Tbsp organic light brown sugar (optional)
2 tsp grass fed butter
1 tsp cinnamon
Pinch of salt
Streusel
¼ cup GF all purpose flour or paleo/cassava flour
2 Tbsp gluten free oats
1 Tbsp coconut sugar or light brown sugar
1 Tbsp softened ghee or coconut oil/grass fed butter
1 Tbsp sliced almonds
¼ tsp cinnamon
Drizzle
¼ cup organic powdered sugar
2 tsp pure maple syrup
¼ tsp pure vanilla extract
1-2 tsp unsweetened almond milk (optional)
Dash of cinnamon
Yields 6 muffins
Directions
Preheat the oven to 350 degrees. Line a 6-cup muffin tin with paper liners or lightly grease with avocado oil spray. Set aside.
In a medium mixing bowl, whisk together the flours, baking powder and salt. Set aside.
In a separate mixing bowl, whisk together the eggs and honey until light and fluffy, about 2 minutes. Then add the oil, yogurt, vanilla and mix until combined.
Add the liquid mixture into the flour mixture until combined. The batter should be pourable but not too runny. If it’s a little runny, add more cassava flour. Set aside.
In a small skillet, melt butter on medium heat. When the butter is starting to bubble, add chopped apples and sauté until apple pieces are soft, about 5 minutes. Add the brown sugar, cinnamon, and dash of salt and mix until fully combined and the sugar has fully melted over the apple pieces. Turn off heat immediately and set aside.
For the cinnamon streusel topping: mash together the softened ghee and sugar until combined. stir in the flour, oats, almonds, and cinnamon, then use your fingers to form thick crumbs. Set aside.
Use a cookie scooper or ¼ measuring cup to divide the batter between the prepared muffin cups. Pour batter about halfway, top with about 1 Tbsp of the apple cinnamon mixture, another scoop of the batter until ¾ to the top full and then finish with the streusel mix.
Bake at 350 degrees for 35 minutes until the muffin tops are golden and the toothpick inserted into the muffin comes out clean. Remove from the oven and allow the muffins to cool for a few minutes in the muffin tin before transferring to a cooling rack.
While the muffins are cooling, whisk together the powdered sugar, syrup, vanilla, and cinnamon. If drizzle is too thick, slowly add 1 tsp of milk to the mixture.
Drizzle glaze over the warm muffins and enjoy!
Notes
If you are wanting to make this recipe lower in sugar, I put (optional) in the filling section. For example, if you are using a sweeter apple like a honeycrisp, then the brown sugar isn’t imperative. Also, you can completely omit the drizzle part and the muffins will still be deliciously sweet!

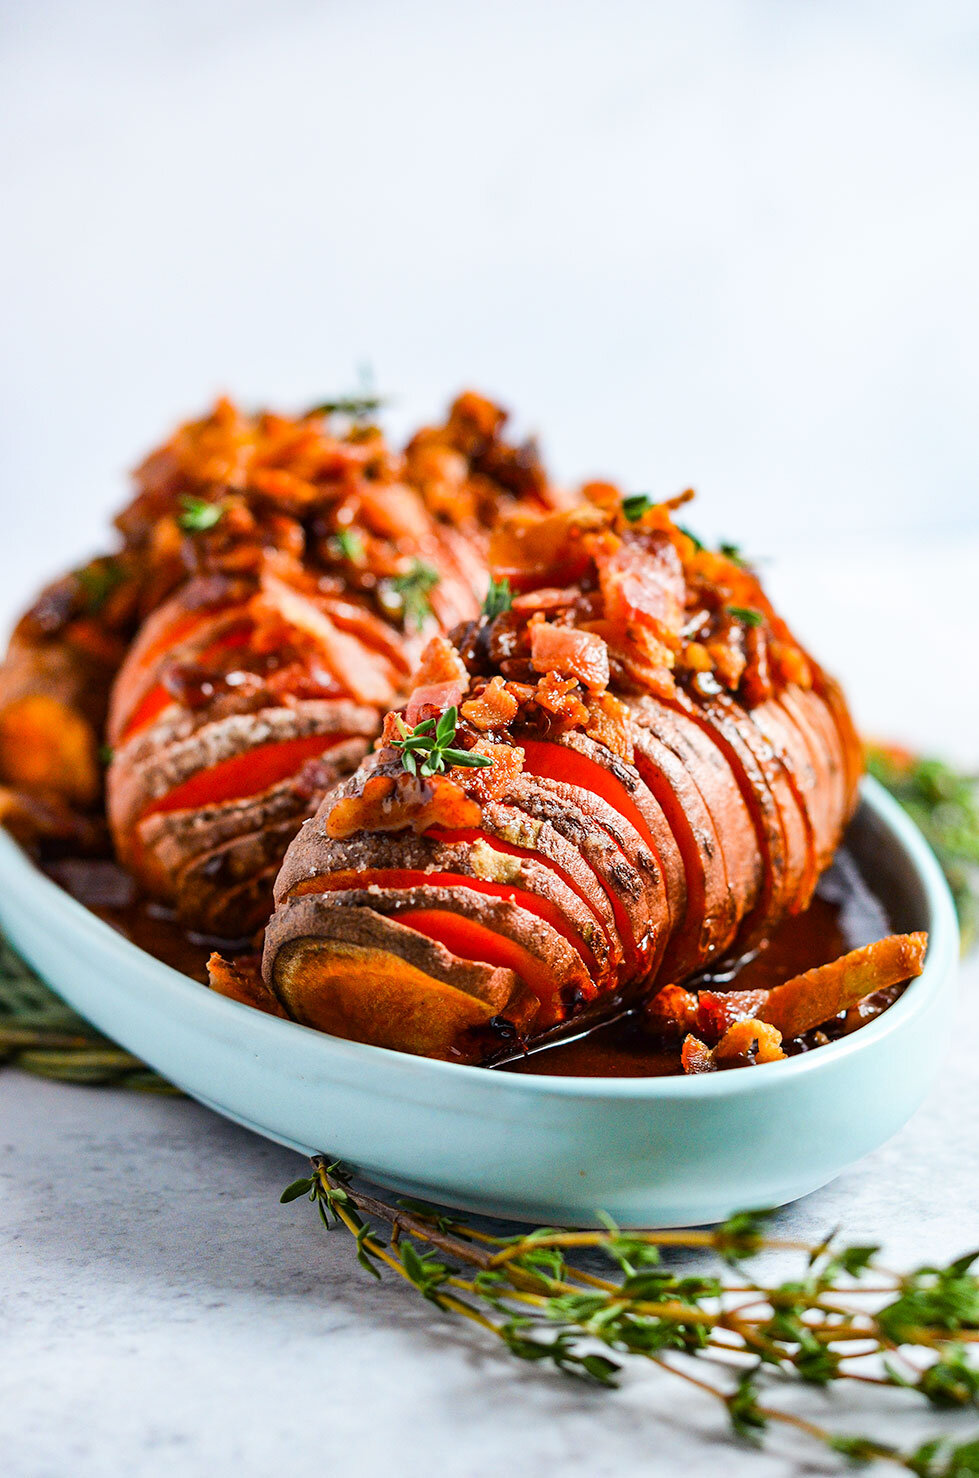
Paleo Hasselback Sweet Potatoes
As someone who doesn’t eat gluten, sweet potatoes are one of my favorite carbohydrate sources. They are great after a hard workout when you need to replenish glycogen stores and nutritionally, are among the best sources of vitamin A along with riboflavin, thiamin, and carotenoids due to their naturally orange color.
Hasselback Sweet Potatoes - Melt in your mouth, sop of buttery sweetness; you can’t tell it’s actually healthy for you! Paleo, dairy-free and gluten-free.
As someone who doesn’t eat gluten, sweet potatoes are one of my favorite carbohydrate sources. They are great after a hard workout when you need to replenish glycogen stores and nutritionally, are among the best sources of vitamin A along with riboflavin, thiamin, and carotenoids due to their naturally orange color.

Sweet potatoes nutrition versatility mirrors its versatility in our diet. They can be eaten any time during the day - paired well with most dishes from a poached egg for breakfast to adding coconut butter and cacao powder for dessert.
For this dish, it’s great for the holidays, as a side dish for dinner or implemented into lunch meal prep rotations!

As a tip, for the best Hasselback sweet potatoes, you’ll need to make deep incisions using a very sharp chef’s knife. Another thing I found was that if you place chopsticks on each side of the sweet potato and cut, it will make the best cut without going all the way through!

I would like to thank Bako Sweet for gifting me with these amazing organic California grown sweet potatoes! For more information regarding nutrition, products, and sourcing, check this link!


Now without further ado, let’s get to the recipe!


If you try this recipe, let us know! Leave a comment, rate it, and don’t forget to tag a photo to #fromtherootsblog on Instagram. We love seeing what you come up with!
Hasselback Sweet Potatoes - Melt in your mouth, sop of buttery sweetness; you can’t tell it’s actually healthy for you! Paleo, dairy-free and gluten-free.
Ingredients
4 Sweet potatoes
4 slices bacon (cooked and crumbled)
¼ cup raw pecans
2 Tbsp pure maple syrup
1 Tbsp coconut sugar
1 Tbsp grass-fed butter
1 tsp ground cinnamon
Avocado oil cooking spray
Pink Himalayan sea salt
Directions
Preheat the oven to 450 degrees. Line a sheet pan with foil, then coat the foil with cooking spray or simply use a silicone non-stick baking liner.
Place a potato on a cutting board between two chopsticks or two wooden spoons. Using a sharp chef’s knife, slice the potato into ¼ inch thick slices. (The chopsticks will prevent you from slicing all the way through the potato)
Repeat the process with the remaining potatoes. Plate the potatoes on the sheet pan. Spray potatoes with avocado oil spray and sprinkle sea salt.
Bake for 50-60 minutes until potatoes are tender, browned and tops are crispy.
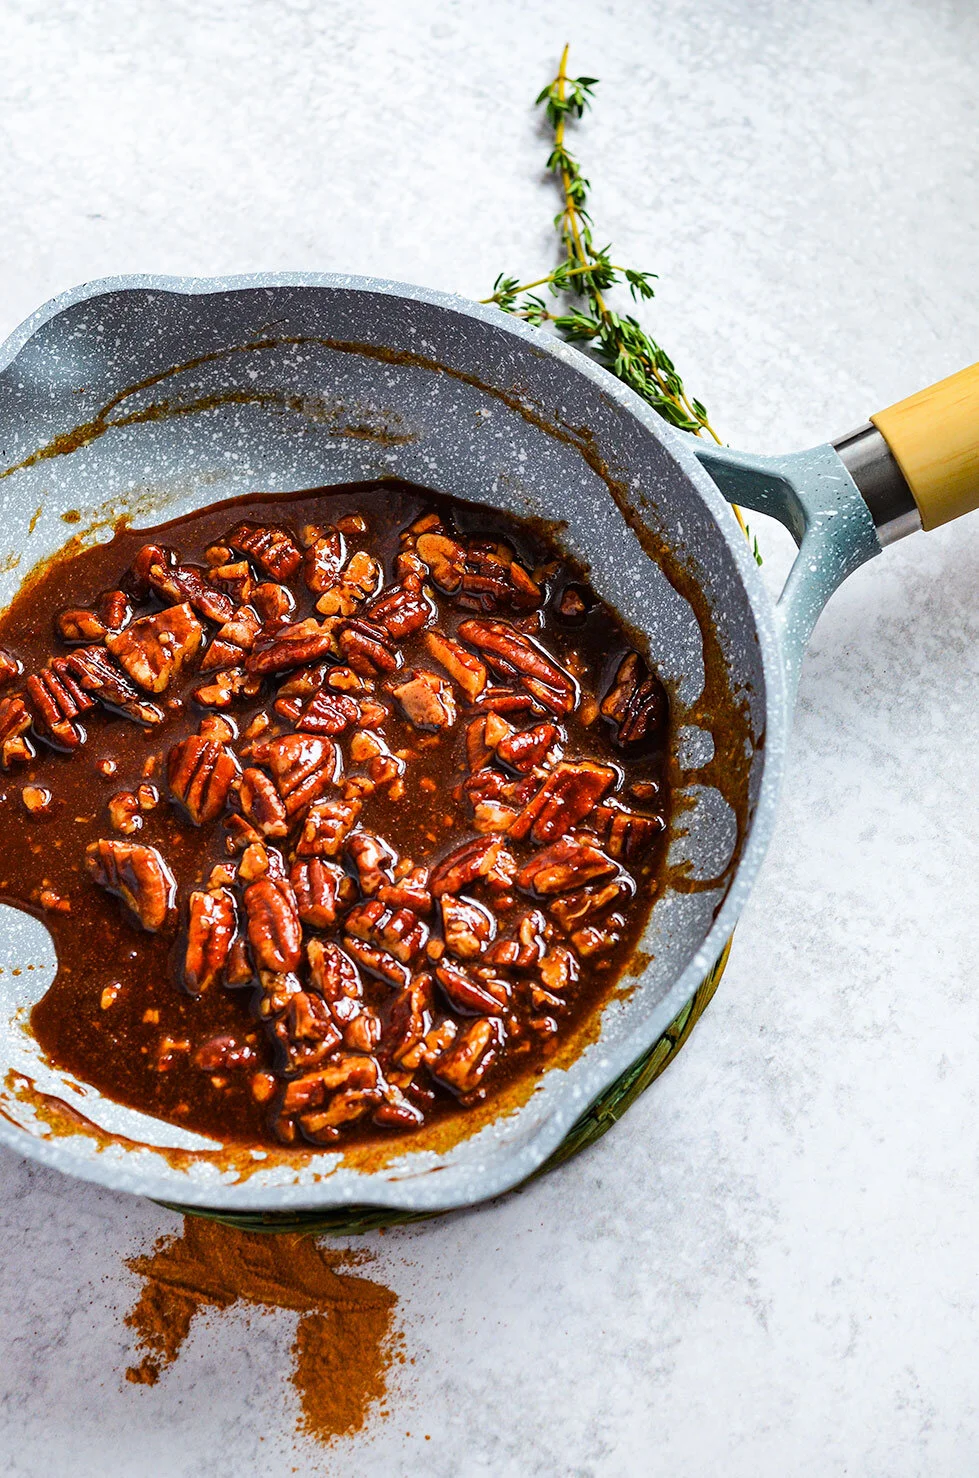
While the potatoes are cooking, melt butter in a small skillet on medium heat. Chop the pecans and add to the melted butter.
Stir for about 2-5 minutes until you get a nutty aroma. Add coconut sugar and maple syrup and stir.
As soon as the mixture starts to bubble, immediately add cinnamon to the mixture and take off the burner. Mix thoroughly until the mixture is thick but liquidy. May need to add tbsp water if the mixture is too thick. *Make sure the sugar doesn’t burn! This process is very fast.
Remove the potatoes from the oven and top each potato with pecan sugar mixture. Sprinkle the bacon and fresh thyme leaves over the top and enjoy!
Notes
Ingredients that I used that are #paleoapproved
Pederson’s Organic No Sugar Added Uncured Smoked Bacon
Primal Kitchen Avocado Oil Spray
Kerrygold Grass-fed Butter

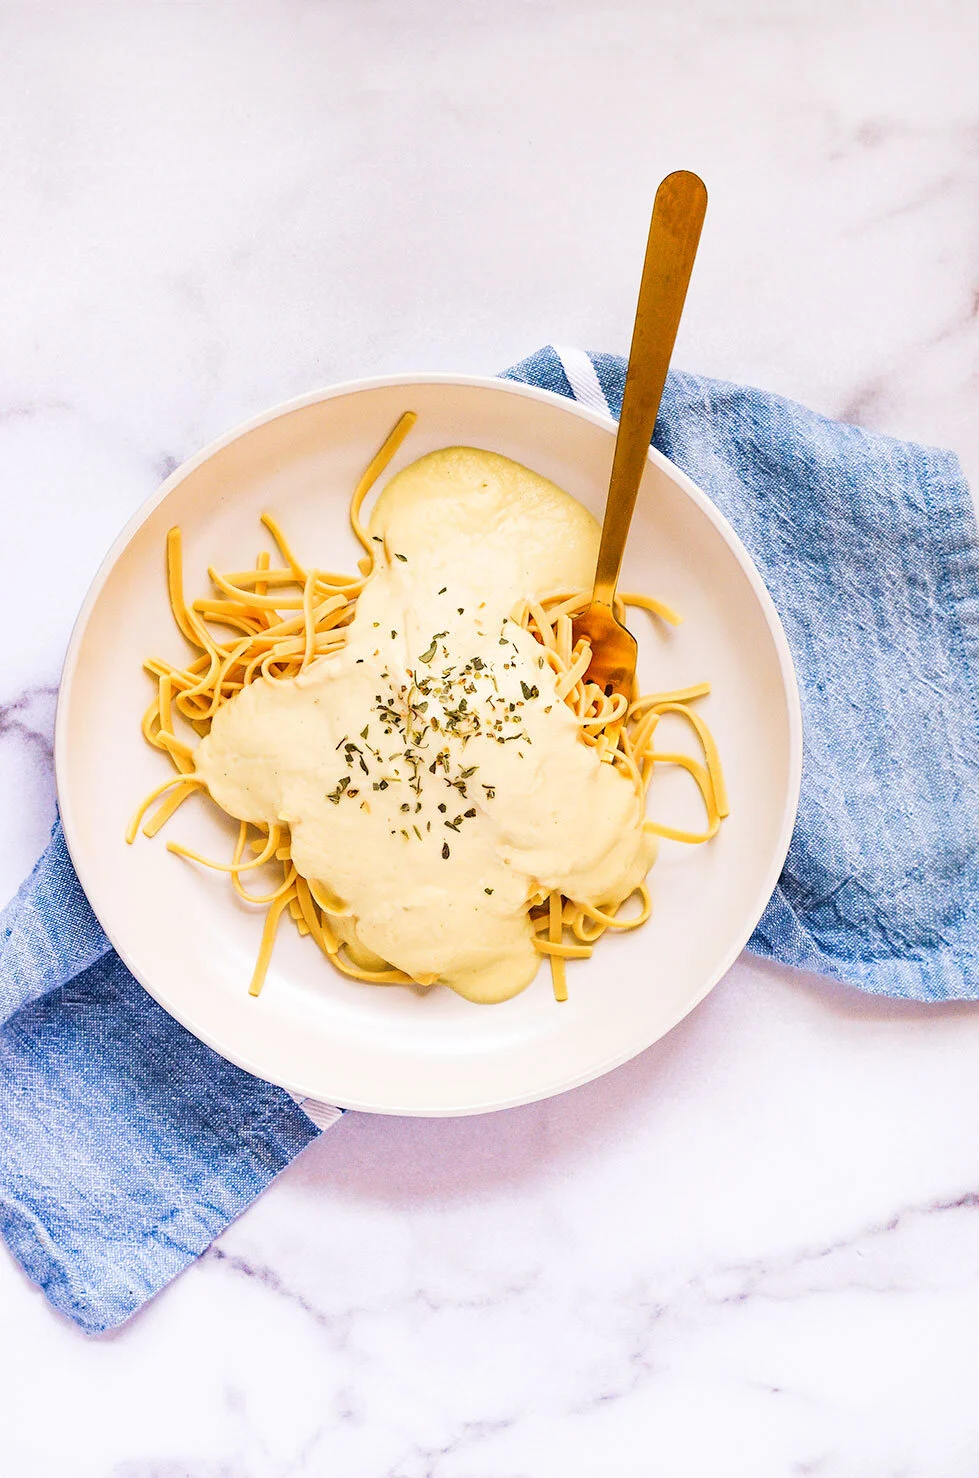
Cauliflower Alfredo Sauce
If you are looking for a dairy-free version of the traditional alfredo sauce then look no further! Made with whole food ingredients that most will have on hand. All you need is a strong blender that will create this creamy velvety sauce texture, that’s it!
Cauliflower Alfredo Sauce is a creamy dairy-free, gluten-free healthier version as compared with the original recipe.

If you are looking for a dairy-free version of the traditional alfredo sauce then look no further! Made with whole food ingredients that most will have on hand. All you need is a strong blender that will create this creamy velvety sauce texture, that’s it!

I love mixing my sauce with pasta noodles, chicken, veggies, or use as pizza sauce!

If you are looking for a more cheesier vegan or dairy-free sauce, check out my favorite spicy vegan cheese sauce recipe.


If you try this recipe, let us know! Leave a comment, rate it, and don’t forget to tag a photo to #fromtherootsblog on Instagram. We love seeing what you come up with!
Cauliflower Alfredo Sauce is a creamy dairy-free, gluten-free healthier version as compared with the original recipe.
Ingredients
3 cups (packed) boiled cauliflower
½ cup plant based milk
½ cup chicken or veggie stock
½ cup cashews (soaked and drained)
2 Tbsp nutritional yeast
4 cloves minced garlic
½ white onion
Juice of 1 lemon
1 tsp grass fed or vegan butter
1 tsp salt
¼ tsp black pepper
Directions
Bring a large pot of water to a boil. Add the cauliflower and cook for about 8-15 minutes or until cauliflower is fork tender. Reserve 1 cup of boiling water.
In a large skillet, heat butter over medium heat. Sauté minced garlic and diced onions until soft and fragrant. Season with salt and pepper.
Drain the cauliflower and transfer to a blender. Add the sautéed garlic and onions, milk, stock, cashews, nutritional yeast, and lemon juice. Blend until the sauce is smooth and creamy, about 1 minute. If the sauce looks too thick or dry, slowly add the reserved boiling water. Season with more salt and pepper for desired taste.
Serve with cooked pasta and enjoy!
Notes
Store any leftovers in an airtight container. Will last 4-5 days in the fridge.
Freezer friendly! Since there is no dairy in the mixture, you can freeze the alfredo sauce once it’s cooled down.
Use the sauce with pasta, chicken, vegetables, or even as a pizza sauce!
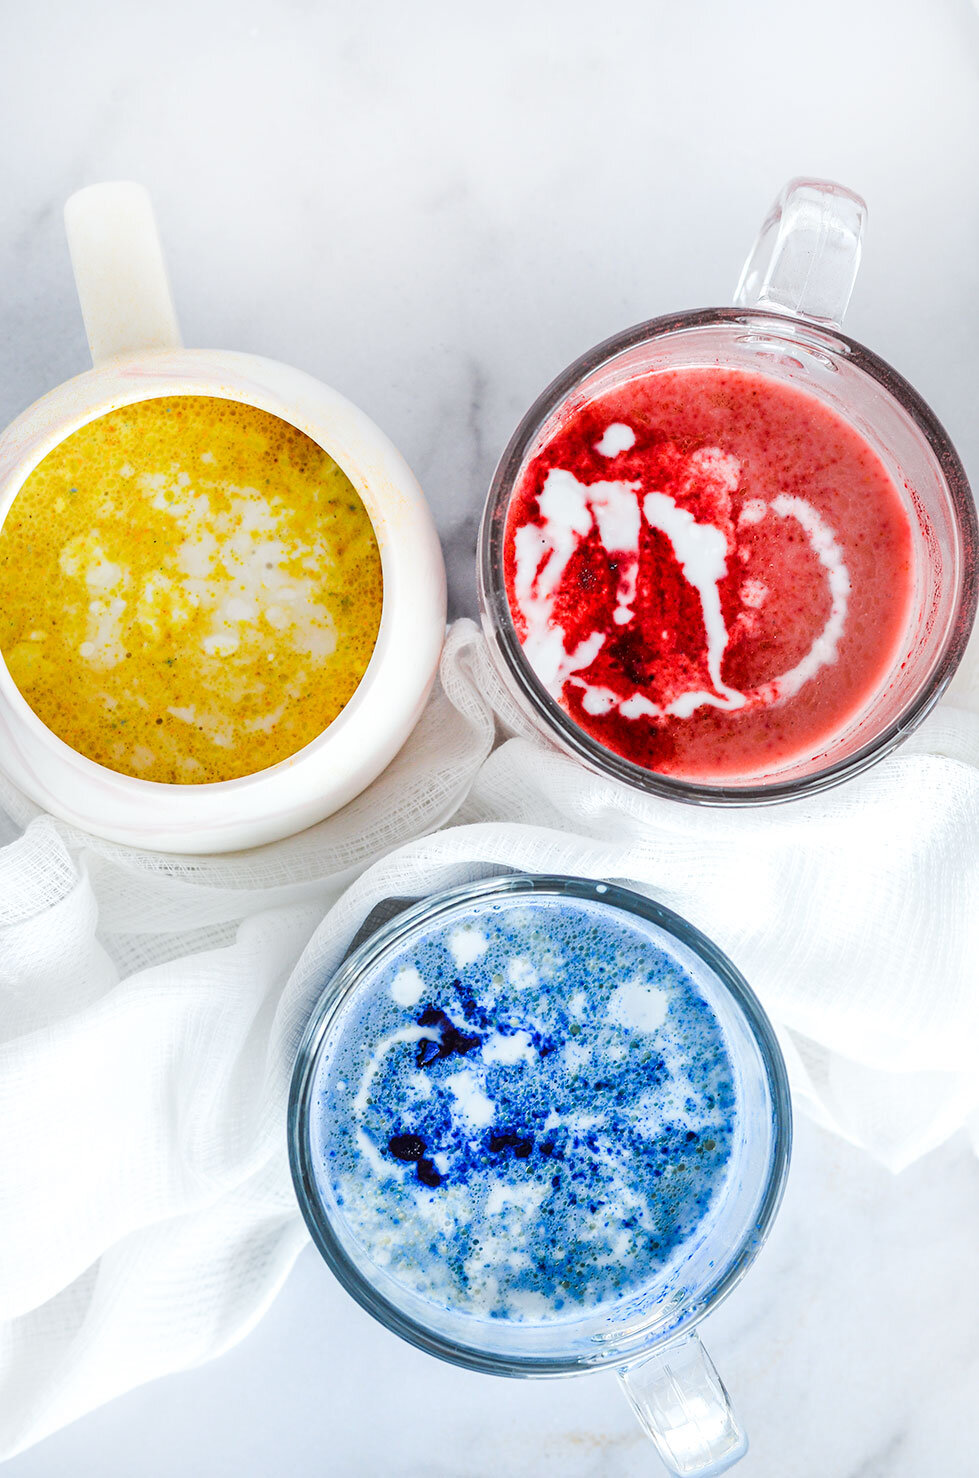
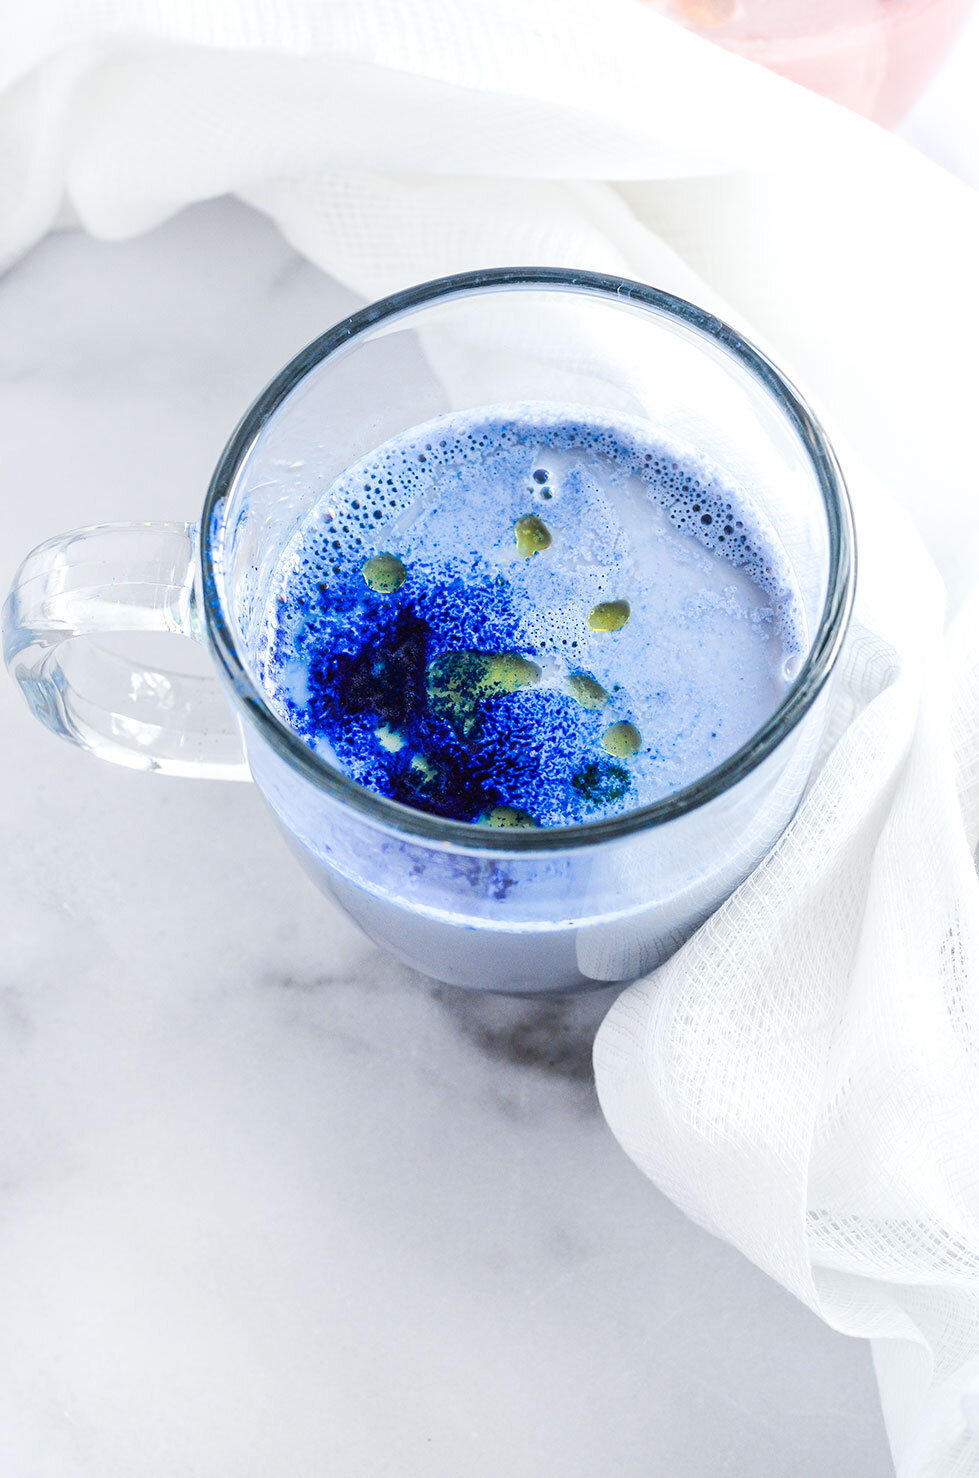
Moon Milk
Now, I want to preface by saying that these adaptogenic moon milks will not take you out like Benadryl, but it will aid in calming the mind for a blissful lull. These milk are in the business of providing that hygge to your mind if you will! ;)
Moon Milk - A natural sleep aid to put your mind and body at rest!

Now, I want to preface by saying that these adaptogenic moon milks will not take you out like Benadryl, but it will aid in calming the mind for a blissful lull. These milks are in the business of providing that hygge to your mind if you will! ;)

So you are probably wondering, how!? Well, glad you asked because we have a lot of ingredients to go over! So let’s start with the star player: adaptogens.

Adaptogens are herbs that support the body’s natural ability to deal with stress. Adaptogens are known for their unique ability to “adapt” their function according to the specific needs of the body - physical, chemical, or biological needs.


With that said, you can practically add any type of adaptogen to your moon milk depending on your taste preference. For example, adding maca to your foods like oatmeal, coffee, or yogurt bowls provide a “honeycomb” sweetness. The reason why we are not using maca in this recipe, though, is that it provides a natural alternative to caffeine and will energize you - the opposite of what we want here!
So for this milk, we are adding ashwagandha! Now if you never had ashwagandha before, be warned that it has a fairly strong bitter/earthy flavor. That’s why we are using superfood powders to mask the taste like spirulina, beetroot, blue Majik, and turmeric!
Whichever powder you choose, all four superfoods provide an abundance of nutritional value that benefits the mind, body, and spirit! Added bonus - they make your milk look pretty!

The last ingredient we will discuss is CBD oil. Now at this point in life, most people know what CBD oil is, but if you would like a refresher, here is an article to brush upon. I garnish my milk with CBD oil as an added punch when my muscles are sore that day, anxiety is high, or I am on my period.

CBD oil can be completely optional since a high quality sourced CBD oil product can be $$$. But if you are looking for a great product, I highly recommend Icaria. Specifically, I use their aphrodite oil in my milk because it provides a nutty flavor that pairs perfectly with the recipe!
If you use this link and put it in CANDACE10 at checkout, you can get $10 off your first order!
If you try this recipe, let us know! Leave a comment, rate it, and don’t forget to tag a photo to #fromtherootsblog on Instagram. We love seeing what you come up with!
Moon Milk - A natural sleep aid to put your mind and body at rest!
Ingredients
1 cup plant-based milk
1 tsp honey
1 tsp superfood powder of choice (turmeric, blue spirulina, beetroot)
½ tsp ashwagandha
CBD oil drops (optional)
1 tsp magnesium powder (optional)
1 scoop collagen (optional)
1 tsp coconut butter or canned coconut milk (optional)
Directions
Heat milk in a small saucepan on medium heat, until you reach a gentle bubble.
Add all ingredients that you would like in your milk and whisk until the mixture is smooth and creamy! Optional but you can also pour the heated mixture in a small blender or use a handheld frother to really turn the milk mixture into a latte!
Pour in your favorite cozy mug and enjoy!
Notes
Can be made ahead of time by pouring the mixture in mason jars - allow to cool to room temperature, and store in the fridge for up to 3 days.
If you are using a lot of adaptogens/add-ins, after the mixture has been heated, add to a blender and blend until nice and frothy! This also helps for all the ingredients to be fully mixed so you are not left with so much sediment at the bottom of your mug!

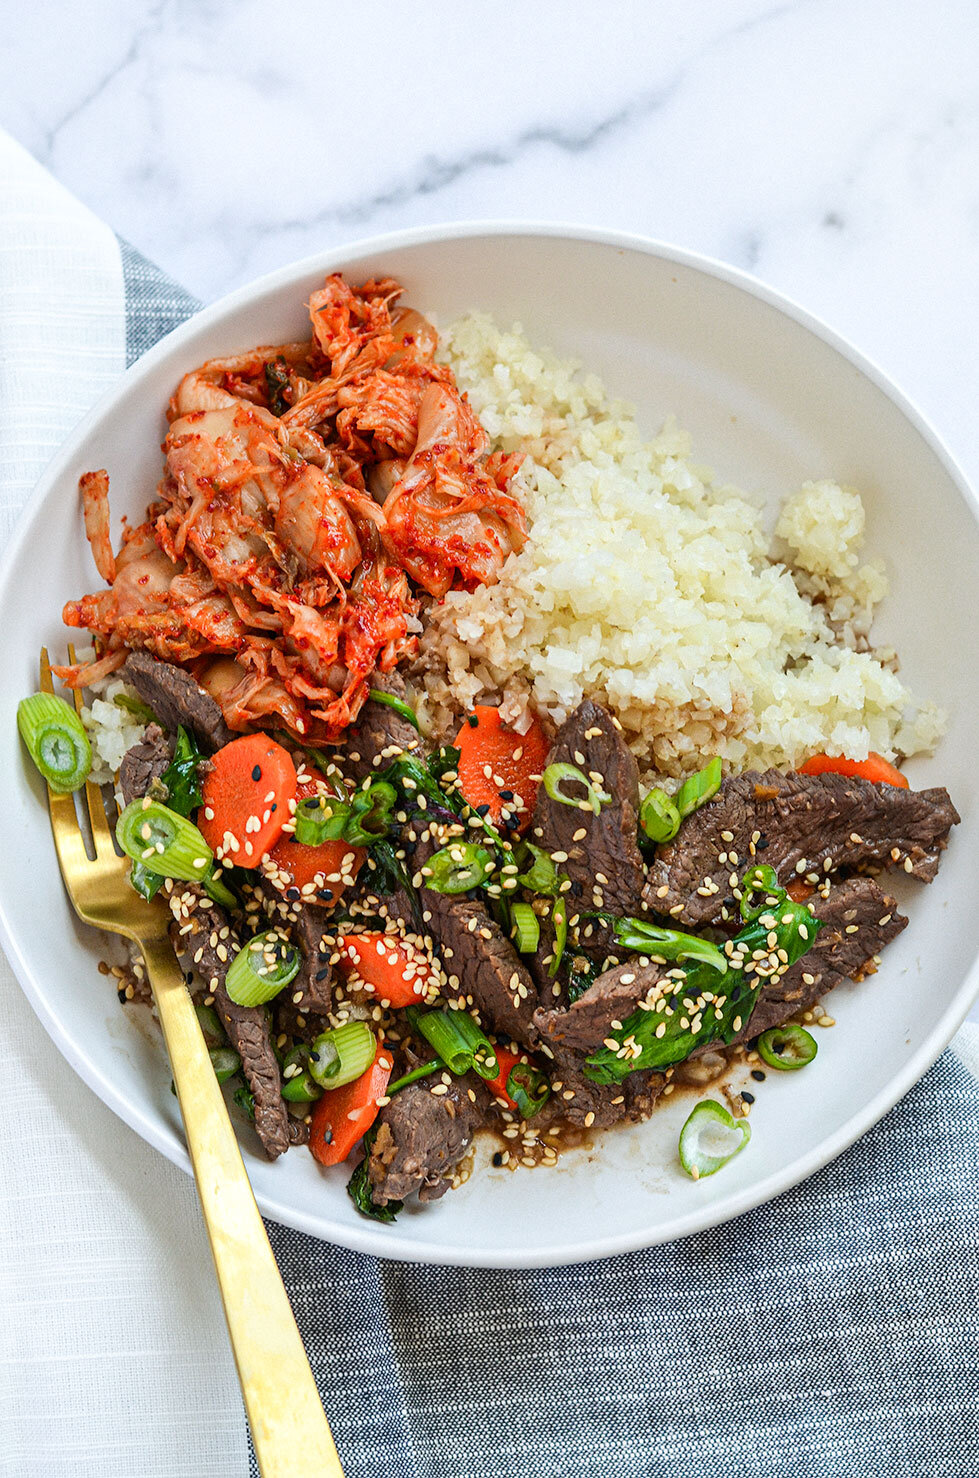
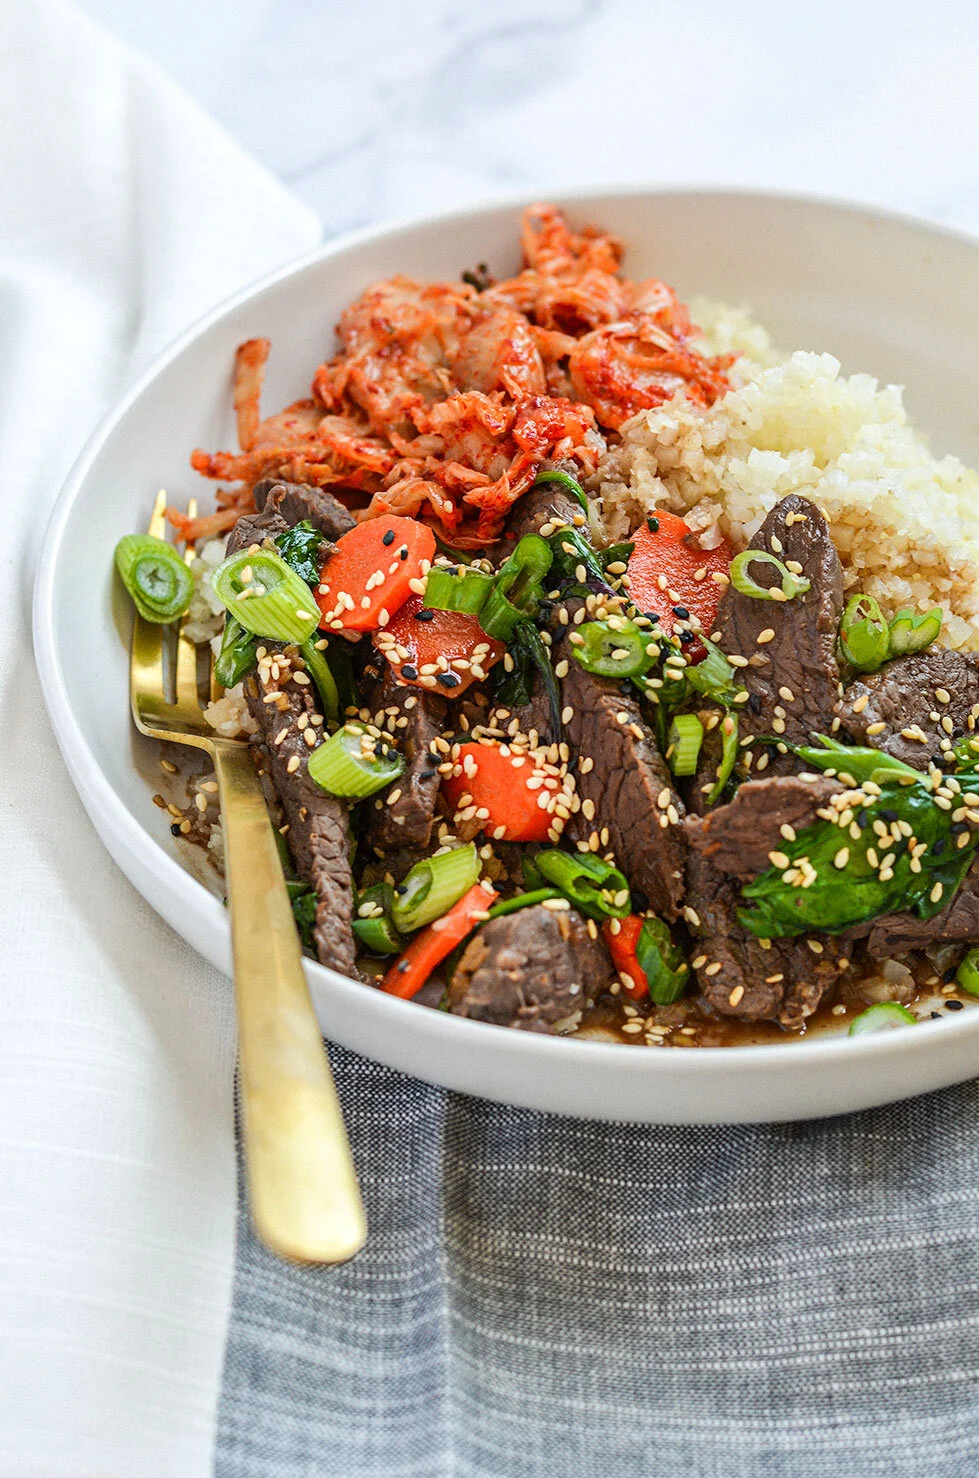
Beef Bulgogi Bowls
If you are wanting something quick and easy to make on your #sundaymealprep days, then look no further! For this recipe, you are simply creating a marinade with ingredients that most would have in their pantry and allow your protein to marinate as you assemble the add-ins for your bowl!
If you notice in the add-in ingredients, there is hardly any prep to this meal! For example, I like to use pre-washed organic spinach, this brand kimchi, and frozen cauliflower rice! That’s pretty much it!
Beef Bulgogi Bowls - A simple and nutritious low carb/high protein lunch meal prep!

Originally, I created this recipe for Emily Schromm’s April edition of Empress but since most of my followers want more meal prep recipes, you are getting this recipe, too!

If you are wanting something quick and easy to make on your #sundaymealprep days, then look no further! For this recipe, you are simply creating a marinade with ingredients that most would have in their pantry and allow your protein to marinate as you assemble the add-ins for your bowl!
If you notice in the add-in ingredients, there is hardly any prep to this meal! For example, I like to use pre-washed organic spinach, this brand kimchi, and frozen cauliflower rice! That’s pretty much it!
Now, let’s get to the recipe!
If you try this recipe, let us know! Leave a comment, rate it, and don’t forget to tag a photo to #fromtherootsblog on Instagram. We love seeing what you come up with!
Beef Bulgogi Bowls - A simple and nutritious low carb/high protein lunch meal prep!
Ingredients
Marinade
1.5 lb flank steak (can sub skirt or sirloin steak)
½ pear
¼ cup coconut aminos
3 cloves garlic
1 Tbsp fresh ginger knob
1 Tbsp toasted sesame seed oil
1 tsp liquid smoke
Add-ins
2 heaping cups spinach
1 cup carrots (chopped)
For assembling the bowls
3 cups cauliflower rice
1 cup kimchi
4 fried free-range eggs
Green onions
Sesame seeds
Directions
In a blender or processor, add the pear, coconut aminos, garlic, ginger, oil, and liquid smoke. Add blended ingredients to a large bowl. *If you do not have a blender, finely chop pear, garlic, and ginger and whisk all marinade ingredients in a large bowl.
Add the sliced beef to the bowl with the marinade and toss to combine. Cover and refrigerate the beef for a minimum of two hours and up to overnight.
When you are ready to cook the steak, heat 1 Tbsp oil in a skillet over medium heat. Add the beef strips and chopped carrots into the skillet. Pour in any remaining marinade also. Cook the beef and carrots, stirring occasionally until all of the marinade juices thicken and begin to caramelize. The beef will be coated with the sauce and will absorb all of the sauce flavors.
Cook for about 10-15 minutes or once the sauce has cooked down enough so it is just coating the meat pieces and the carrots are soft. For the last five minutes, add the spinach.
Assemble the bowls: Divide the rice among four serving bowls and top it with the beef bulgogi. Top each bowl with a fried egg (optional), a portion of kimchi, and garnish with green onions and sesame seeds.
Notes
If you are strictly paleo, you can sub out the sesame seed oil for avocado oil.
This recipe is great for meal prep - if you are wanting to add an egg to your meal, simply fry an egg in the morning or boil an egg beforehand for an easier way to pack your lunch!